Transcripts
1. Introduction: I welcome to this course on pattern design using F. Any designer on the iPad patterns are a great way to express your personal creativity as a designer, because you can use a lot of the other things that you designed to create patterns. So a lot of the icons that you design or different images or shapes that you create you can use to create fun and exciting patterns. And so it's a great way for you to express your personal creativity in this course, we're going to be learning the basics of pattern design will learn how to use the tools inside of affinity designer on the iPad to create a repeatable pattern. So that's a pattern that tiles across the space that's given. So you see these in a lot of things, like textiles, different types of fabrics, you know, shirts, tablecloths, rugs, backgrounds am anything that you might want something to be able to repeat infinitely. Use a tile pattern for and so that's what we're going to be learning. In this course, there are not a ton of tools that need to go into it, and this isn't an intro course for affinity designer. So if you feel like you need kind of a base level knowledge in the tools and if Indian designer, you want to go ahead and check out my intro course to offending designer on the iPad, where we learn how to create icons that will also help you create some artwork that you can use in your patterns later. So if you need to go ahead and pause this course and go check that one out first. But if you already have a basic comfortable understanding of a famed designer on the iPad, then it's time to go ahead and dive in and get started with creating patterns before we get started. I do want to give a shout out to Von Kleczka of lynda dot com, who first taught me how to create repeatable patterns. And to Liz Kohler Brown, who created video that showed me how to create patterns on offending designer. At first, I didn't think that we were really going to be able to create patterns and opinion designer because there is no pattern tool like there was an adobe illustrator. But then I watched this video from Liz, and I really found out that yeah, we still could create patterns, repeatable patterns just by doing a little tweaks, which I'll show you how to do in this course. So let's go ahead. Let's dive in and start learning how to create repeatable patterns in a famed designer on the iPad. In the next video, I'll talk about the product for this course.
2. Project: we owe you Guessed it. The project for this course is to create a pattern in if in designer on the iPad, and then upload your swatch of that pattern to the project section. For this course, you should follow along with me as I go through the course and do each step along with me. But for your own pattern, then at the end of the course, you have a PNG file that is, do swatch of your pattern, and you can upload that PNG file to the project section for your classmates to see. You know, research has shown that you learn a lot more by doing then just by listening and watching. And so it's really important that you do follow along and that you create a pattern while we go through this course. Then you're able toe, upload it and show it to us and get feedback, and that will really enhance your learning. So please do take the time. Very few people in school share actually take the time to complete and upload their projects, and as a result, they learned, but they don't learn as much as they could, so please do take the time to actually complete the project in this course so that you can implement the things that we've talked about. Now. You only need to upload one pattern to the project section for this course, but you can upload as many patterns as you like. We'll look at several different types of patterns, and you might choose to do a few different patterns to practice your new skills. That's fine. You can upload all of them to your project, and we would love to see them. In addition to uploading your own project, it's great if there are some other projects already in the project gallery. If you give a little feedback to the other students in the course on what you think of their projects, feedback is one of the primary ways that we learn and improve as designers. So let's go ahead and get started. Follow along with me and do your project
3. Setting Up the Pattern Document : Ah, okay. The first thing that we need to do here is create the new document. And so you can see I've been working on some patterns here already. So I have a number of pattern documents that I've been working on throughout this ruling. Go ahead and we're just going create a new document so that you can see how to do it. From the beginning, I'm gonna hit the plus icon in the top right corner of the screen and then I'm going, Go ahead. And I'm just going to hit new document which will open up the new document options. We'll go ahead and where you are going to choose that this is actually for print because it likely will be printed on something. Although you can use patterns in digital space, this is probably gonna be printed on some kind of product or something will go over at the end, how to upload it to you, A website where you can get it printed on products. And so then we're going to change this to pixels here because that will make it easiest to design the repeating pattern as pixels on when we don't have to think about like the inches and dimensions and stuff. It doesn't really matter, since its vector art ruin. Go ahead and we're going to make this a 2000 by a 2000. And then the orientation doesn't matter because it's going to be square. Which is the easiest way to create a repeating pattern is as a square pattern. So that's what we're going to in this class. And then we want tap, create art board at the bottom so that we get a new art board because we will need to our boards in order to see our pattern repeating. We're going click. OK, now we've made our new art board here, and we're just using the 2000 by 2000 because that's what Liz Color Brown recommends when she creates patterns and now we need to create another are poured. So if we come up to our document menu, which looks like a little paper in the top left, were once used art boards just about halfway down. Now we want to insert a new art board so well, top insert art board and we get another one. It's the same size, but of course we don't want to be the same size. So we're going to open up the transform studio on our right, and we're going to tap on our dimensions to change this to B double. So I'm going tap on the 2000 pixel with, and I wouldn't change that to 4000 and then I'm going to up on the height. I'm going to change that to 4000. There we go. So we're going to use the art board one to design the pattern and art board to is where we will preview the pattern. And in the next video, we'll continue talking about Sam the document by setting up art.
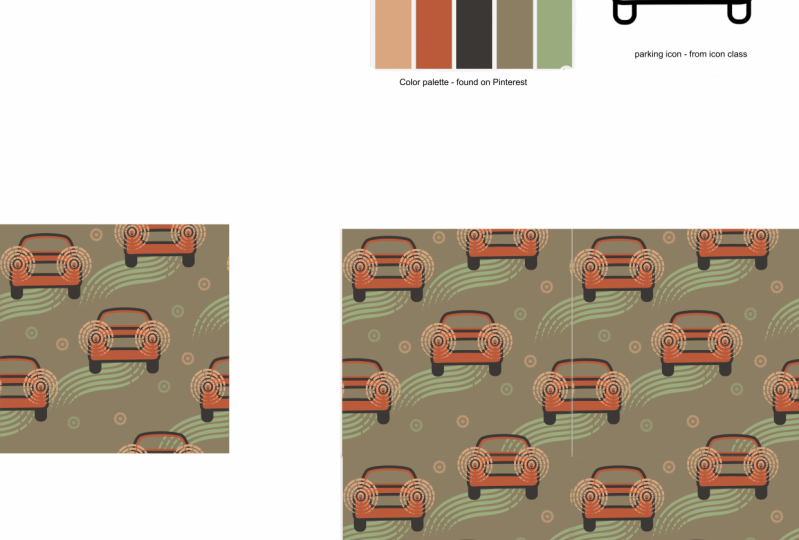
4. Making a Color Palette: killer is really important pattern design because so much of what a pattern is trying to convey is portrayed by its color. And there's a lot of about a pattern that's meant to grab attention and color helps with that, or to be really subtle, such as if you're designing the pattern for wallpaper or carpet or something like that that's supposed to kind of melt into the background. It was really important to choose proper color. And if you've ever seen the same pattern repeated in different types of color palettes, then you know that it can really change the mood of the pattern overall. So we want to select a nice color palette for our 100. So I've just gone to color dot adobe dot com, and from here I'm just going to go ahead and find a color palette that I like. There's lots of ways to do this. You can use three different options along the side to change what type of color palette you're getting, and you can drag the bubbles around to change it. There's lots of different ways that you could do this, but I really just like to use to explore Tab and see what other people have already made since. We're going for a very vintage feel my search retro and see what I get. You can search whatever kind of a feel you're going for. And there's a lot of different types of options that you get here. Let's go ahead and look at these. You tap on them to see them larger. Do you like this one? Quite a bit. So what I'm gonna do is I'm going Go ahead and screenshot that you can screenshot on the iPad different ways to pin in which iPad you have. But one of the easiest ways is to just use the apple pencil so you can just go down to one of the bottom corners of your screen and then dragged up to the center of the screen. And that will take a screenshot and want you into markup mode. So that's probably the easiest way to do it. If you have an ample pencil, all I want to do here is crop down to just the just the colors. Here, get rid of the tools here for a second one crop down to that, then we'll go ahead and drop this and she's safe to files. I'll just save that on my iPad. I'll just call it retro colors. Save it will take a moment to say. And then once it saved, we can go ahead and hit, done and delete the screenshot. And now that we're back in designer, we can go ahead and bring that image in. So we're just go up to three document menu and shoes. Place image. Choose import from Cloud because that's the way to get to the file system. Go to locations on my iPad and choose retro colors. Then we'll say drag to place your image. Just drag this out here on the side. Now we have our colors, and this will make it easy to make a new color palette using the eyedropper tool. But let's go ahead and go to our colors. Studio top right corner on the color dot will open up the color studio, and we're going go to swatches down at the bottom, and then we can make a new palette. So we're just going to go to our menu in the top right corner of the studio, and we're going to choose add application palette if you add an application pellet that will let you use this color palette anyplace within this application, even different documents. So first we'll click. Add application palette. It's currently unnamed, so let's tap on the menu again and choose rename palette, and we'll call this bright retro. Now we want to get each of these colors so grabbing the eyedropper tool next to the dot We'll just drag over, did the 1st 1 then tap on the circle to add it to the fill them from the menu. Choose, add current fill two pallet. We just repeat that for each color. And just like that, we have a nice ups. We missed the other one. Let's get the other one again now and somehow we got to blues. So just hold down on that light blue and hit Delete says, Are you sure? And will say yes. And so now we have five colors in our palate that we can use to you create our pattern, and this will help us to create something that looks really nice together so you can add as many colored pounces you want. And if this palette doesn't work once we've created a pattern We can always add another color palette later. So that's it for this video on setting up the color palette in the next video, we're going talk about creating the artwork that you will use in your pants.
5. Adding the Artwork: thin this video we're going talk about. Bring your artwork into your pattern, creating document so that you can make your pattern. You need to have actually created your artwork somewhere. Depend what your pattern is going to be like. You can if you are just doing simple shapes like polka dots or stripes. You could just create your artwork right there in the pattern. But if your artwork is going to be more complicated than that, then you want to go ahead and create your artwork. In a separate document, I'm going to be using this artwork of a van and a small camper trailer to create my pattern . I've already created thes elsewhere. I created these in assembly on my iPad, and I actually have a video showing how to make this camper trailer on my YouTube channel and so you can check that out as well if you won't learn how to create this exact camper trailer. But the really important thing is that you create the artwork that you want, and I, of course, also have courses here on school share that teach you how to use assembly or affinity designer to create icons that you can then also use in your pattern artwork. So I brought these out as an SPG, and you can also find free S Fiji's online. Just make sure that you abide by copyright law. If you're using someone else's artwork, you can open SV G's up in if in any designer. Or you could just create the's in a feigned designer to begin with, and then you don't have to go through the SVG process. But using SVG is is not hard. And then, once you have your document in a famed designer, whether you made it here or whether you brought it in, you can just copy it by holding down on it and hitting copy when we pop back out and will go into our pattern document. And they were just going to hold down and fresh paste. And so it's really easy to get your artwork into here so that you can use it in your pattern. And, of course, you can have full control over it to resize it. If you hold down a finger on the screen, it will resize in proportion. We're just going to bring in that. I'm just going put it off here to the side for now so that we can work with it later on. We'll go get the van as well. Pulled down on it. Hit copy like here, hold down and hit paste. Don't resize that one proportionately Take it off, and then if we tap on these, we can actually come to our color and we don't want to stroke. So I'll just swipe upon the stroke there, and then you can see we can go swatches. Jews are Phil, and we can re color it. The orange begins like this guy. Take away stroke, bring up his fill and Rick alerted the blue. So that's how you can easily re color the artwork. So make sure that you go ahead and either make some artwork or get smart work that you've already made or go ahead and down. Let's mess veggies that you can get the copyright license for, and then we can go ahead and we can start making the pattern. So in the next video, we're going talk about how symbols work in a famed designer so that we can use it to shi'ar pattern preview
6. Setting Up the Repeat Board: Now we're ready to go ahead and make our symbol so that we can see the repeat. We're going design our pattern over here in art board one as a square, and everything that goes off the edge will come back on the opposite edge to create a repeating pattern that might sound a little confusion right now, but it will all make sense as we go along. For right now, what we need to do is create a symbol that will repeat four times on art board, too. And then we'll be able to see how the pattern repeats. Go ahead and grab my rectangle tool, and I'm just going to create a rectangle the same size as my art board. Okay, let's go ahead and let's change its color in the color studio to our light blue. For now, then we're going to make this a symbol. Symbols are repeatable elements in a famed designer that you've created, and so when you need to make something multiple times, you make it a symbol, and then you can just use that symbol over and over again without need to repeat the creation process or duplicate that object. So we're gonna goto our symbol studio, which looks like a little wheel over here in the middle of our studios and under our menu. When choose, add symbol from selection and that will create a new symbol for us. And then we're going, Go ahead and we're going to click on that and shoes insert. Then we can move into position. Just snap it into place on the corners of our board, too inserted again. So then, once we have all four of these, we can see that they are symbols that are connected. So first, I'm just going to grab this fan and pull it down here. You see, nothing happens to these symbols, and that's because the van is not yet part of this symbol. So if we open up our layers panel, we can see that the van is actually sitting above the symbol. We just need to grab that layer and drag it into the other layer, and then you can see it appears on each one, so that symbol is just a repeat of the square on our board one. And when we change one, we change them off so we can then move it around and that's how it changes. That's how symbols work and how they're connected in the next few. We're going talk about laying out the pattern so that the symbols match up and it just becomes a seamless pattern.
7. Laying Out the Pattern: Oh, okay. So in this video, we're going go ahead and lay out the pattern in our pattern block on our board One. So the first thing that I want to do is actually move art board to just over a little bit so that I have space around our board one to make my pattern because they do have to extend off the side in order to repeat. So we're going ahead to go to our layers, select our port to, and we're just going to move it over a little bit, hold down a finger to keep it in line. Now we will go back to our port one, and we're going to start laying out our pattern. So the idea here is that anything that extends off of an edge needs to come back in an equal amount on the other edge. I'm going put the van in the middle, not my symbol, the layers panel, and select my van. And then I'm just going to use my snap guides to position it exactly in the middle. And I'm going grab my camper, but in my camper. And remember, it needs to be inside the symbol to actually appear. Drag it on top of the symbol, and then let's make sure that it's sized close to the same as the van it is. So that's great. And then at what I'm going to is I'm going to place this camper on all of the four Cardinal direction. So north, east, south and west, extending halfway on each. Okay, so let's drag it up here, and we want to line up in the center and holding down two fingers on this screen. We'll go ahead and drag it down in one finger to keep it in line. We'll drag it right there. And if we pan over, you can see that repeat starting to take shape. So now let's go ahead and grab the camper again and hold down two fingers to duplicated, and we'll drag it right in here. Now, as you go along designing, you might find that things are getting a little bit too close together and you have to work that out. So this man and this camper really closer together than I want. But I'm going. Go ahead and duplicate the camper one more time and just see how that looks okay and I think the problem is that everything is just too close together. And then there's the's big open spaces in the middle, so I'm actually going to see if I can just fill those in with the van on the four corners, and we do this in exactly the same way. Grab the van, duplicate it, and we're just putting it on each corner, using our snapping to use just the top corner of the van. Do you want it to be exact so that you don't have seems in your pattern? Well visible? Seems there will obviously be seems in your pattern, but you don't want there to be visible seams. Okay, and sometimes you can see when you're zoomed out. Affinity kind of has some artifact ing between its lines, so sometimes you'll see like a white line. They're in the middle, but when you zoom in, you'll see that that is gone. Now what's going on here in the middle is things were not quite overlapping correctly, so let's figure out what's going on with that. There we go and what's not correctly lined up. Okay, so now that they're all correctly lined up, you can see We have this seamless repeating pattern, and that's how you make it. Let's go ahead now, and let's take a look at our colors and see which colors are going to be best from our color palette. I think part of the Bram is we're just lacking contrast that were the right kind of contrast between the yellow and the light blue when it goes like my rectangle, go back to my colors to my swatches and went used the dark blue on the right. See what that looks like Now we're lacking some contrast between the camper. Let's try the red on the campers. I like how that looks a lot better. So you want to think about your colors. Think about how their contrast ing so that your pattern looks good and you might try different colors. If you don't like the palette that you chose at the beginning, you can only to make a new palette. Try out some different things and you might even find that you have multiple color patterns that you like. But that's it for actually creating the pattern. It's actually a fairly simple process. Once you know what's going on, and in the next video we're going talk about exporting our patterns. Watch
8. Exporting the Pattern: Now that we've completed our repeating pattern, exporting it is a fairly simple process here in a famed designer. We're actually going to just go up to our document menu, and we're going to choose export. It's just the third option down, and we get a bunch of different file type options here. We just want to go ahead and choose PNG, because that tends to be the best file type for uploading to online stores or fabric printers. So let's go ahead. Choose PNG, and you can see that our dimensions are strange, and that is because it's trying to export our whole document, including our chest board. So let's go ahead and under area on the right hand side. Let's choose under our ports. Let's choose our board one. Then it goes back to 2000 by 2000 pixels, which is just what we want Now, if you are uploading to a site that requires a smaller file than that, you can go ahead and make it smaller here. It's square in its vector, so as long as you leave that lock on in the middle between the dimensions, you can make it smaller. You could make it 1500 it will be fine. But we want to upload a higher resolution. And as you can see at the bottom, this file type is pretty small. It's only 85 kilobytes here because it's just very simple factor artwork in a PNG file format. So now that we have that, we'll go ahead and we'll just hit. Okay, then we can save it where we want on our iPad. Currently, I don't have any external storage attached to my iPad, so I'm just going to choose on my iPad and I'm going to choose the for any designer so that it's easy for me to find later than all tap on where it says entitled and I'll give it a name and I'll just call this camping pattern then and then I'll hit safe. Get back out of that Now. If we go to our files, my iPad famed designer there we have our camping pattern, so that's how you go about exporting your artwork. In the next video, we'll talk about uploading that artwork to a site where you could sew it
9. Uploading the Pattern: a lot, right? So here we are. We've gone to read bubble dot com, and this is where we're going to upload our artwork. Well, this is where I'm going to upload my artwork. Anyway, I like to use this site to you so patterns and stickers. And so that's what I'm going to use or lots of other sites where you could upload your pattern. You could also upload them to like a fabric printing site and print out fabric that you could make something with. There's lots of things that you can do with your patterns after you've made them. I'm going to go ahead and I'm going to upload this one. So this is Theo Van Travel Shop, and I'm gonna say, Add new work. We're here, we're going choose to upload, and we're going to choose brows so that we can get to our file finally saved on my iPad in a frame designer. Now it's gonna upload generally doesn't take too long to upload a small file like this. Then we can go ahead, entitle it. I'll just call mine retro van pattern, go to tags and if you click on the I hear you can see that tags help you find work, so you want to use different types. So I'll put camper and fan camper man pattern, and there's a lot of you could add a bunch more, and then you can write a description, and then you have a bunch of different products. Red bubble will automatically enable some products for you, and it just uses your artwork by default on its own. We want to disable ones that aren't good for a pattern, and what we're looking for is to actually make thes a pattern. So let's go try like on this shower curtain here. We'll go ahead and will enable that. Then we'll edit it. And right here we're going to choose to pattern and the pattern. We want its regular grid, because if we offset it, then are objects won't line up right. So we're going choose regular grid and then we're going to say apply changes. Then we can see that we have this pattern repeating in the shower current, and we just use the shower curtain here because that's an easy place to see it so on. Disable the things that are really just for one artwork and enable the ones that can use a pattern. So on this pillow here, which used to repeat and it will just go around the whole edge of it, and we can lower the size if we wanted to. But I kind of like it at the 100% there. So for a pattern, all disabled, most of the products because they just aren't that useful for it. But there are a bunch of products that are good for a pattern, and so those are the ones that you want to go ahead and enable, and when you're all done, just go down to the bottom. We select. This is digital art. Say that it is not mature, you be optimized. And then we say that we have the rights because we created it. Course if you didn't use your own vector artwork. If you somebody else's, you might not have the right, so make sure that before you start selling something, you have the rights to do it and then save work. Then read. Bubble is going to go ahead and process that, and that's how you upload it to a site for selling. It's fairly simple process the Internet has made a lot of these things super easy to Dio. That's pretty much the end of this class. If you would go ahead and upload your patterns, watch that PNG to the class projects area. Then we'll be able to see each other's patterns and that that will be a lot of fun and we can all learn together. I'll include a couple more videos here showing how to do a few different types of patterns just so you have some more examples. But thank you so much for watching. It's been a lot of fun teaching this course, and I hope that you will go ahead and upload your project. And if you want to learn more about affinity designer or the other funny programs, I do have other courses here on skill share that can teach you that. Thanks for watching
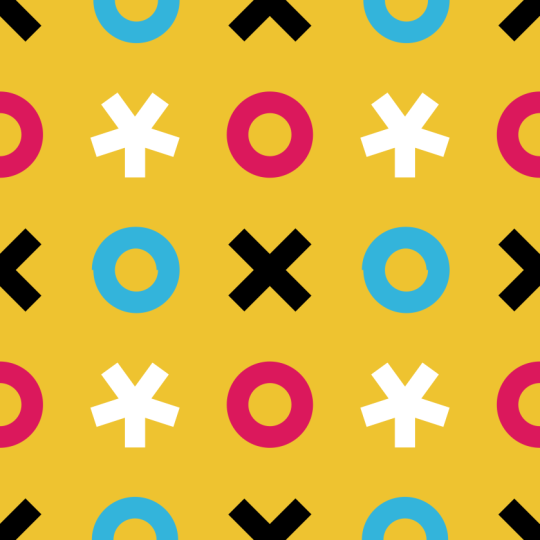
10. Bonus Video: Star Pattern: Oh, OK. In this video, we're just going to real quickly go through the whole process again of creating a pattern swatch in a famed designer. So this is video is going to show us everything that we've done before, but we're just going go through it a lot more quickly. So we're just going go make a new document. The new document and change this to print picks US 2000 by 2000. Create art board. Okay. Okay. Now go ahead and we will create another our port. Go transform studio and change its size. Well, look, our dimensions change this one size to 4000. Have a rectangle to Then we'll go to our symbols panel. Add symbol from selection. We'll go ahead and build it. So in order to build this one, I'm going to do what I called thestreet pattern, which is one object in the middle. And then we're objects around the site. And since we call it the star pattern, I'm just going use a star for this one straight out of star. Holding down one finger keeps in proportion. We can adjust our radius. Let's change our color swatches. Stick with our same color palette here. We gotta move him inside the symbol. Okay, Him to the corner. Let's change this color. Read for now. Duplicate him over. Okay. And that is a really simple, really easy star pattern. Let's go ahead and change or background color as well to try the yellow. That gives us a very ah circus e kind of a feel there with those colors in that pattern. And so that's how we would create the start pattern. Pretty simple way to go about doing that.
11. Bonus Video: Geometric Pattern: thin this video. I'm just going to show you one more time of me just making a pattern out of geometric shapes. But I don't want to make you listen to me go through the whole thing all over again because I'm sure you're basically getting the idea by now. But I'll just time lapse this video so that you can watch me go through this process. That's just a really simple way that you could go about making, you know, a geometric pattern like this with diamonds. Pretty simple. You did see me doing some re sizing there in the transform panel. Whenever you're doing something that's kind of striped like this rather than that kind of star pattern where we have different artwork in the different corners and the middle of the thing, you want to make sure that you've got the size matching mathematically so that you get exact amount. So I set in the transform panel. I would set them to be 500 by 250 so that I would get exactly the right amount. As I went across and made thes kind of argyle type stripes here. I hope that you've enjoyed this course, and I hope that if you have enjoyed it, that you take the time to give it a rating here, because that does help others to find it and helps others to learn more about affinity. Designer and please remember to upload your patterns, watches to the project section for this course so that we can all see them. Thanks so much for watching, and I'll see you in the next course.
 Ben Nielsen, Good design is the beginning of learning