Transcripts
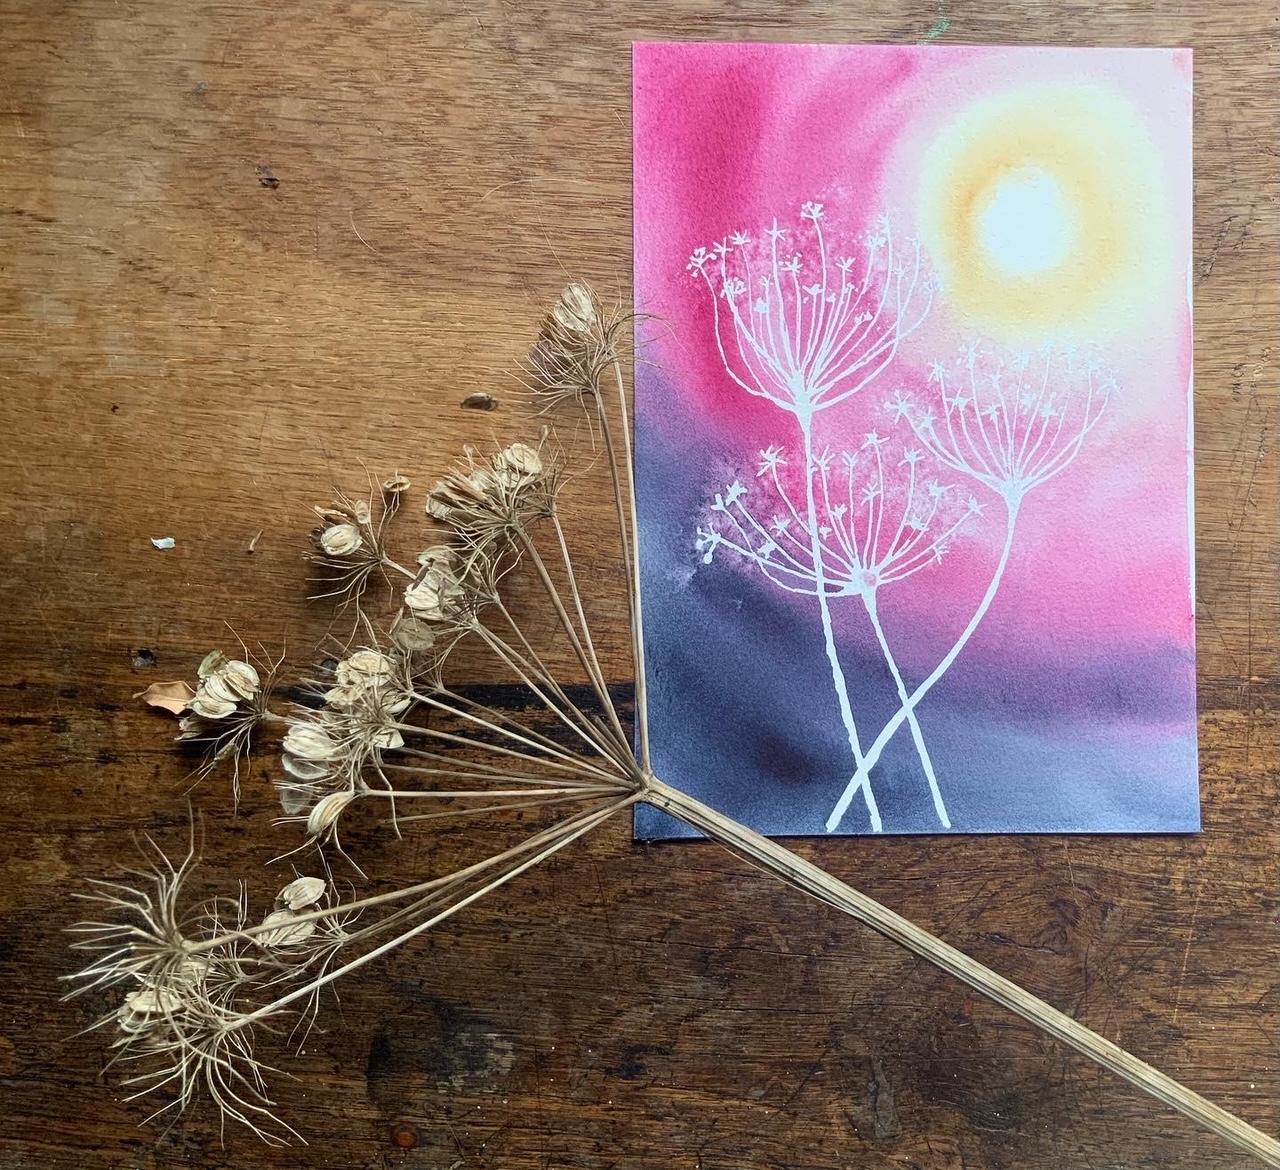
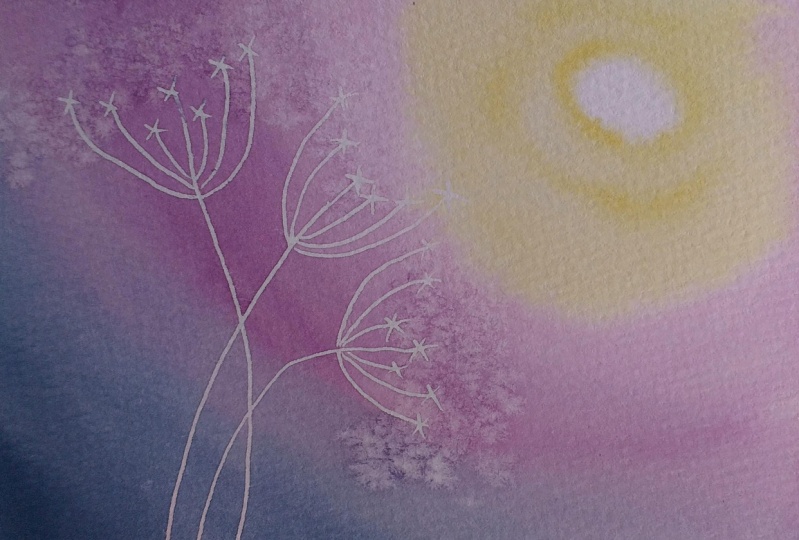
1. Sunset Seed Heads in Watercolour: Isn't this beautiful? Reminds me of sparkly fireworks. This is the seed head from a plant called kale parsley, which is a bigger version of Queen Anne's lace. We have lots growing around here at the moment. And I was really inspired by seeing them covered in Frost a few days ago. And I wanted to paint one. So I did painted this. I used three elements, three colors, and three basic watercolor techniques. And I'd like to show you how you can create a painting like this one. Hello. My name is Vicki Jeffrey. I'm also known as crumbles watercolors. I live in the northwest of England with my family. We're all creative and we love to collaborate together. I recently rediscovered the joy of watercolors and they have become a passion. I studied art and textiles up to degree level and have always painted and drawn. In this class, I'm going to show you how to use salt to make texture and pattern. I'm going to show you how to use a mapping pen to create crisp masking fluid lines. And I'm going to show you the wet on wet technique to create a glowing sunset for your frosty Queen Anne's lace seed heads. Stand against. These techniques are basic, really simple, and lots of fun. But if you master them and practice them, you'll really up your game with your watercolors. Join me in the first lesson and we'll have a look to see what materials you'll need.
2. Class Project: Welcome to the costs you'll project for this class will be to paint three Queen Anne's lace seed heads like these on this glowing sunset background. We're going to use three simple watercolor techniques for texture and patent and line. We're only going to use three colors. And we're going to find out what the magic of three for a composition is. I suggest that because we will have to be patient and allow for things to dry in certain stages. Watch all the steps for the class is in one go, and then follow along at your own pace afterwards. When you've completed the project, if he would take a photograph and puppets up in the projects, it would be wonderful to see what your seed heads look like and share everybody's beautiful, inspiring paintings. Thank you. See you in the next lesson.
3. Supplies: For this project, you will need a watercolor block or some paper taped down. I'm using this, which is a 100 percent cotton, two parts of clean water, a pallet or a plate, some tissue or a bit of cloth for cleaning your brushes. A mapping pen, a large brush. This is a size 12 pointed round, yellow ocher, ultramarine, violet and indigo watercolors or something that you've got this near that you really love using salt masking fluid. And a little time.
4. Rule of Odds: So y three, y is three, our magical number. Three is known to be aesthetically pleasing in a composition, and there's a reason for that. It's also known as the rule of odds. And I'm going to just show you a little thing to explain how it works for us. Outnumbers are more aesthetically pleasing, not just three, but three is the main one that's used in art, architecture, landscape gardening with designers and with us artists. So here we have two sets of spots. This one has an even number four spots, and this one has our magic. Number three. What our brain does when we're looking at these is it tries to make sense of what it's seeing and it likes pairs. So it will pair up the spots. And when it's done that, it's got nowhere to go. So you tend to then focus on the middle and lose interest in what you're looking at. That would be the same if the spots where the four corners or in a line, your brain would still try to make pairs with them. But with an odd number, your brain makes a pair and then realize is this one spare? So it makes another pair. But there's still one spare. So your eye is continuously moving around the image. And that gives you more interest and more focus on painting or the composition that you are looking at. So this is the rule of odds and odd numbers. As I said, give us a more aesthetically pleasing image. And that's why I have three Queen Anne's lace heads on this painting. Join me in the next lesson, where we'll draw out our seed heads. Before we then get to slosh some beautiful color paints around.
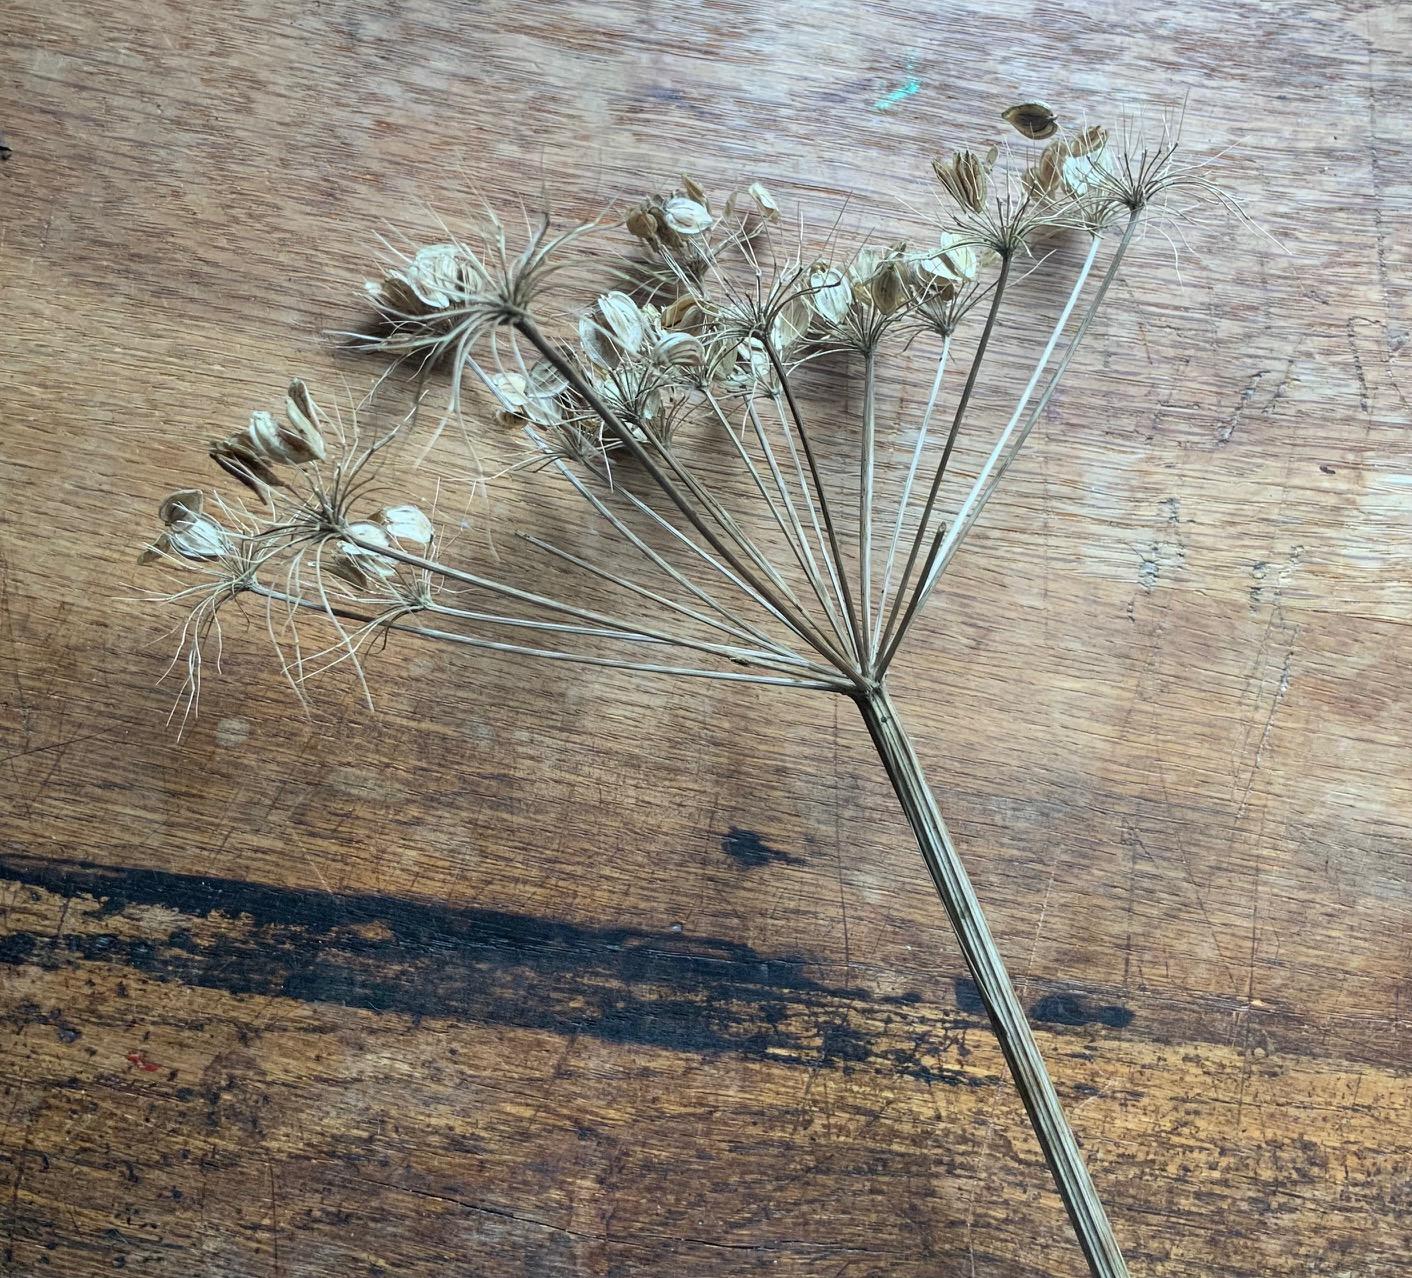
5. Masking our seed heads: Let's get stuck in to creating our seed heads. This is a real one. It's dried. I picked it on a walk down our lane. I absolutely loved the seed heads. They remind me of fireworks. And you've got a sturdy main stem with an explosion of smaller stems. And then I repeat of that sort of almost fractal. And with these seed heads at the end. And this one's lost a lot of its seeds now. But as you can see, there are some seats still clinging to the tiny, tiny little hair-like stems up here. These are what we're going to recreate, but in a simplified form on our paper. I'm going to use a mapping pen because I want nice, clear, fine lines. This is, I've found, is that the best tool for creating those lines? You have two blades that are adjustable with this little wheel here to make them open up for thicker lines or close and write down for really fine, delicate lines. You can use a paint brush if you don't have one of these. But I would recommend that you don't use one of your best watercolor brushes. The latex within the masking fluid will clog up your bristles and it would be very difficult to clean. Also, remember, it's a really good idea if it's new paper to you to test on a scrap piece with your masking fluid because not all paper react well with masking fluid. And you can find when you start to remove it, they will actually lift the surface and rip your papers are due do test. I've been victim to that before, overconfident with myself and ended up ruining a painting and having to start again. Okay, so mapping pen and I'm using colored masking fluid that, so that it's nice and easy for you to see where I'm drawing my line. I've got my blade set to quite fine at the moment. So I'm just gonna open them up. And we're going to start by drawing our three main stems in. It's a good idea to remember that we're going to have a son up here, so we don't want to go too far apart page. And I'm free hand drawing my, my seed heads. If you're not feeling so confident, fine, get the pencil and plan and then work over the top with your masking fluid. I will put some reference photos in the reference section for you to give you an idea and help you guide with the drawing. But I quite like the free hand application of the masking fluid. My first stem is going to go towards the middle, a nice curving up. Make it a little bit longer. There we go. My second one, I'm going to overlap them and make this one a little bit straighter, need a bit more fluid than them going up. And then my third one, I'm going to have Dan here, again, overlapping and curving. Now, need to make my blades a little bit smaller and closer together, sorry. And we go, and now we'll get finer lines. I'm going to do a mixture of curved and straight lines. These ones are going to be quite long. Days will appear to be nearer to us on the seed head. And then I'm going to do some smaller ones that are shorter in-between. They look like they're behind. Our main seed heads. Might just do a little broken one that had a little bit of interest. Next seed head. Just got some splatters there from the mapping pen. I'm going to leave them. I think that might look quite nice. A I could if I didn't want them, just wait till it's dry and then remove them. And I quite like the idea of having those. And we go. And then our last seed head is going over here to the side. Now I'm going to make my blades even closer because I want to add the little details at the ends of these fine stems. Now this is quite random. You don't have to be super accurate. Just add a few dots and dashes and lines. And it will give the impression of where the seeds are and the tiny stems. And when these dry, when we add our salt on top of this, it will help to create the illusion, the pattern of all the seed heads. I can little firework make that one a little bit. Spike here. We will have to wait for this to dry. Shouldn't take too long, long as it's not too thick. These thicker areas at the base of the seed head may take a little while. And I should think only about 10, maybe 15 minutes. That's plenty of time to go and put the Catalan. We'll do a quick check. My seed heads are just touching here. That will matter. The Queen Anne's lace. But there are some other members of the same family. They're called unbelief. And because they had the flower heads look like umbrellas. And the, we have some locally that have got much more humble names than Queen Anne's lace, like cow parsley or hawk weed. The very similar plants, some of them, the giant hawk weed is absolutely enormous. And I've got a feeling they're quite poisonous. But these are just pretty all right. I'm done here. Going to let this dry. Join me in the next class and we'll mix up some paints ready and start creating our wonderfully dramatic three color sunset.
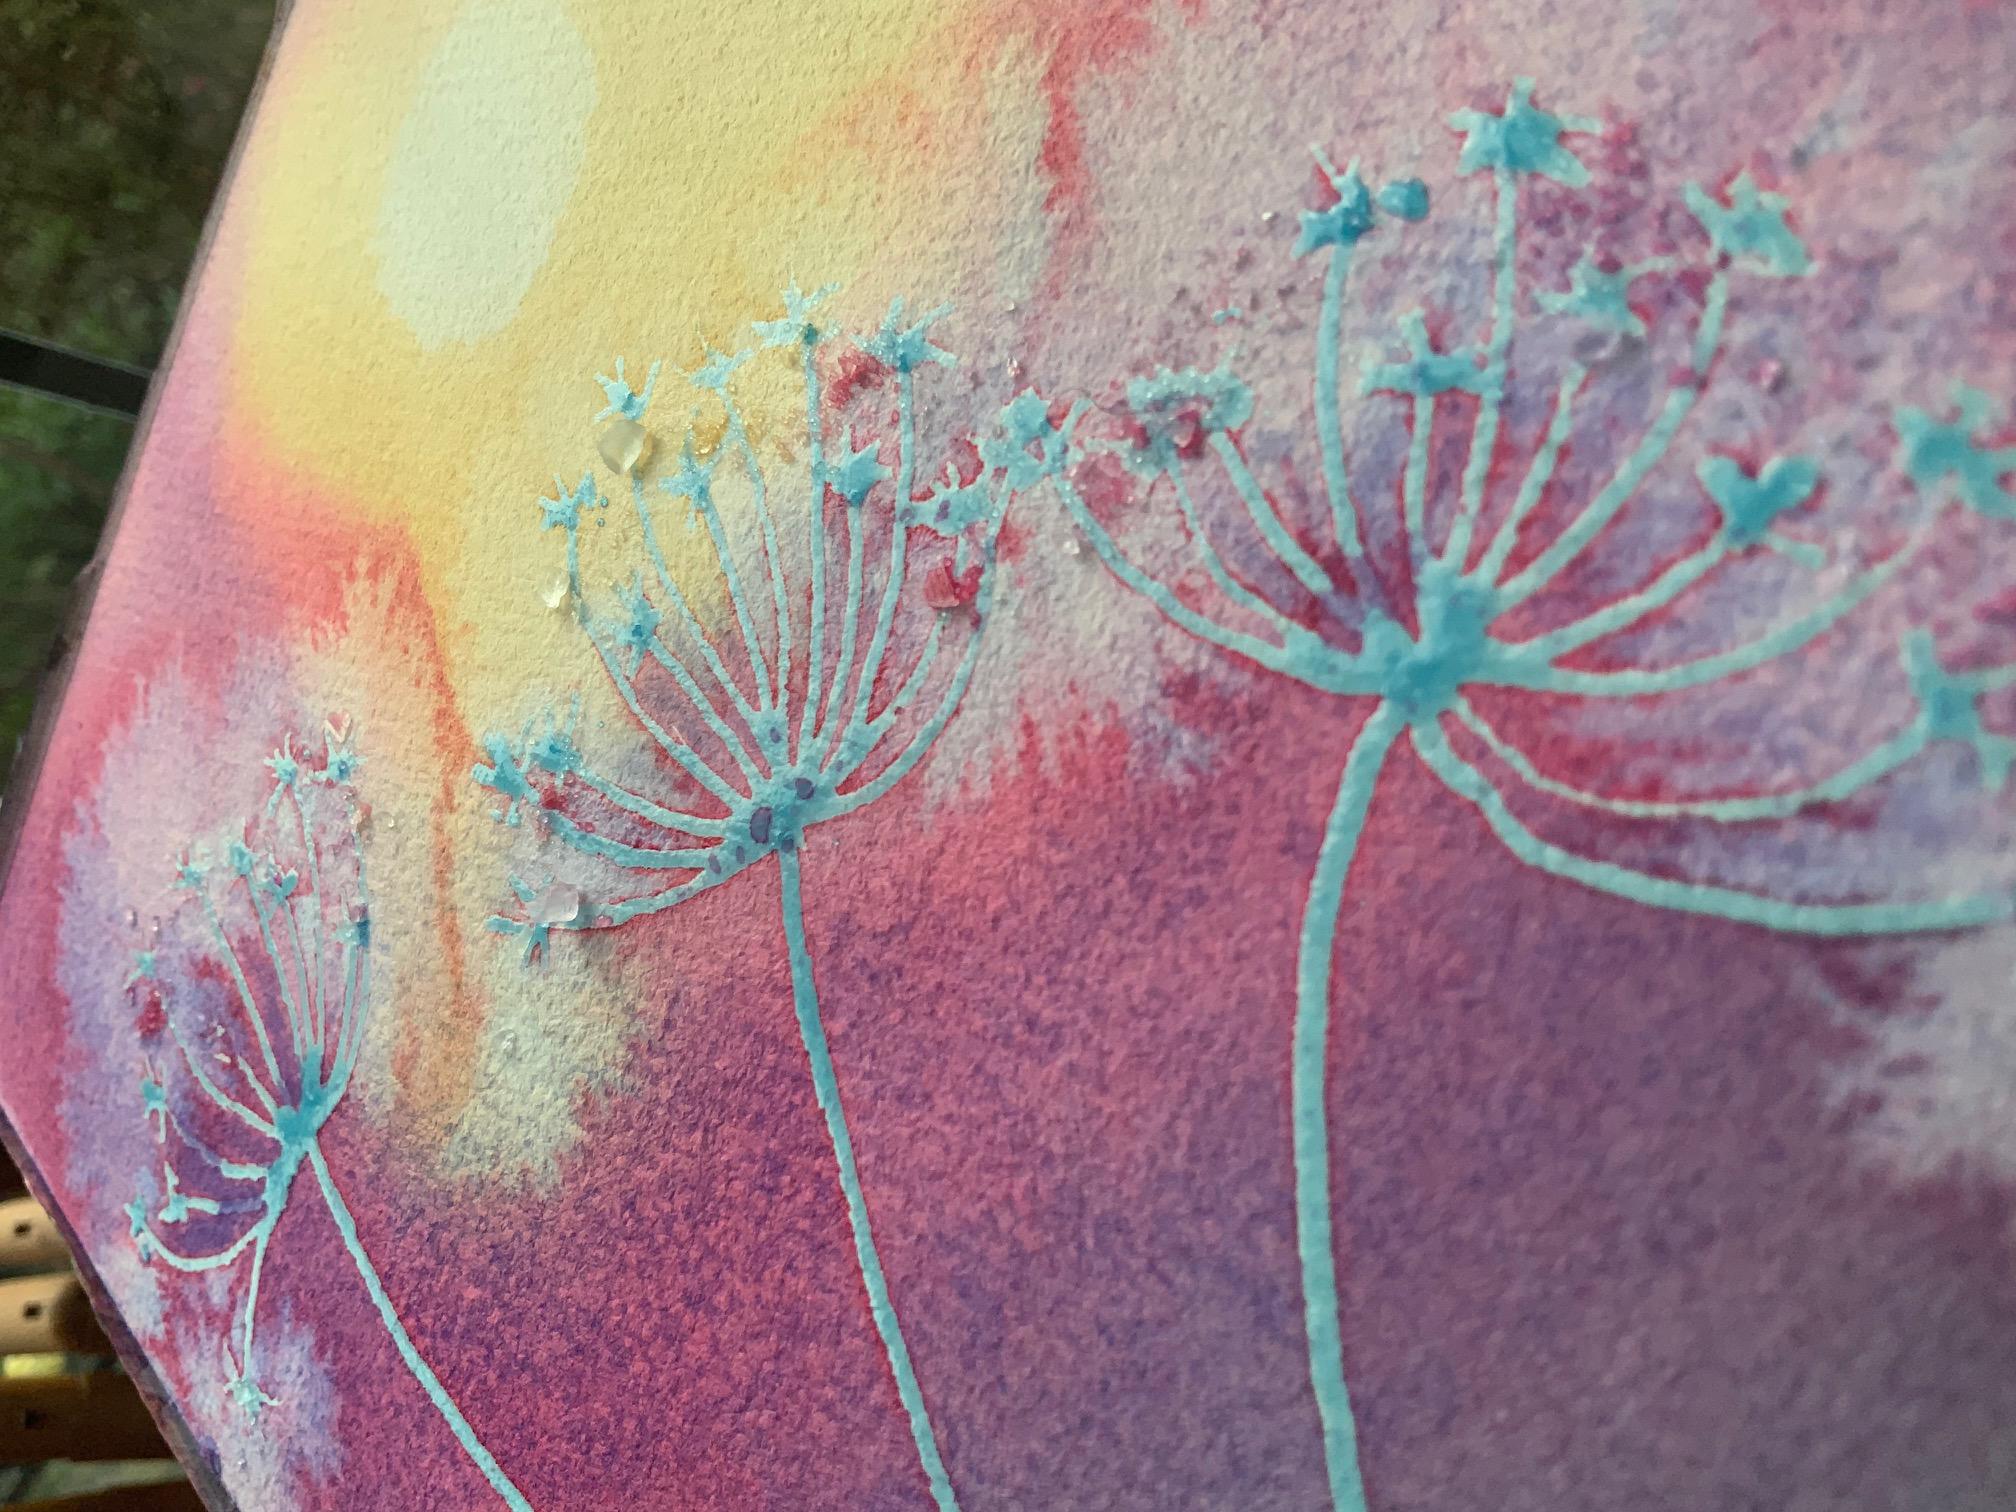
6. Sunset background: Time for some color. Before we actually start mixing our paints and getting ready to paint. I just thought I'd show you these little experiments I did. When I was working my way through the stages of this class. I used for different types of paper with this paint, which is the rows of ultra marine. And I used a mixture of table and rock salt just to see how differently the paper reacted with salt and the paint. And as you can see, all four of them are quite different. They're all beautiful in their own right. And this is one of the wonderful things about watercolors, especially with using techniques like salt. It's unpredictable and it's exciting because of that. So we've got this one up here, which is a 100 percent cellulose paper and cheap part does paper. As you can see, you've got some lovely little starburst and it has had an effect. In contrast, this is a mold made a 100 percent cotton paper. And that's had a really dramatic effect, really blended together into a huge, robust. And this line that I made along the edge here as this very, very wide in comparison to the other one. Just move these up slightly. And these two, again are different. This is a mixture of cellulose and cotton. I think it's 25 percent cotton and 75 percent cellulose. More like the cellulose, it's had a good effect. And these little starburst are actually like little clusters of flowers in their own right. And this one is a 100 percent cotton recycled paper from cotton rag. And as you can see, it's had a much more delicate effect. It's done. The big star burst again, like the other 100 percent cotton, but it's much softer in its dispersal. So this just shows us that whatever we use, we are going to get an exciting and experimental reaction with our salt. So don't worry if you don't have expensive or fancy paper. Whatever you've got, we will get some fantastic results. Here is my paper with the now dry masking fluid. What I'm going to do first because we need to work reasonably quickly with the wet on wet and the salt. I'm going to mix up some paint first into little puddles. If you've got pans, what I recommend is you activate them well with some water first and then transfer a small puddle of paint into your palette. That way, you're not having to wait to mix up your colors. Don't need huge amounts of paint because this isn't a particularly big painting. There's my indigo. This one is the rows of ultramarine. Don't worry if you don't have this. Remember, you can use a purple or red or anything that you've got. A favorite color will be fine. And then yellow ocher, again, the same with this. If you've got a nice warm yellow ocher, cadmium yellow, whatever that will do. And of course, if you using your own color choices and will make your painting more uniquely yours, right? So, um, add generous amount of water to each pan on my palette. Then I'm going to mix up these puddles. Make sure it's all mixed in. Clean the brush off, well, go into my Dirty pot. Freshwater on that, make sure it's clean and do a hero's welcome marine. There we go. Do like a bit of purple. That's lovely. And my dirty popped solutioning. Sure, it's clean and it won't matter too much with the indigo. And we are with a indicator. Now I'll paint is ready. Make sure my brush is clean. Now I'm going to do a light wash of clean water all over the paper. And what we want is to make sure we've got an even coverage that you can still see the texture of the paper. This is cold press paper, so it's got medium texture through the water that is not sopping wet, but it is wet. And that will help. As we add. Our pigments to get them to make nice gradual flow into each other. So my son is going to be up here. Let's draw gentle circle. You get a bit stronger. I lost my circle a little bit in the middle and so I'm just going to use clean water. A little bit of the color I had. There we go, that's better. Now has some Roosevelt marine. I'm using the same circular motion that I used to make the sun blending it in a little bit darker pigment so that our darkest area is going to be diagonally opposite to our lightest area. Just a little bit. I'm going to put the darkest color, the darkest tone, the indigo round here, blended in a metal there. And it's more common here at the bottom. Now while this is still reasonably wet, this is when we need to add our salt. The trick with the salt is that your paper is really wet because then the salt will dissolve very quickly and you will lose the sort of sparkly effect, but it also fits too dry, then you won't get, it won't dissolve at all and you won't get any effect. What will be happening is that the salt will push the pigment as it dissolves. It pushes the pigment away from where it is. Unlike forms that little starburst, don't put too much on, don't think you need huge amount for this effect. Just a little bit. Where the starboard style at the end of each seed head. Now for the magic to happen, we do need to be patient. This does have to dry, at least for a certain amount of time on its own. And that will be dependent on where you are, your environment, where you are at the moment. If it's very warm and humid, This will take a while to dry. If it's very hot and dry, it will dry very quickly. So under here where I'm filming under the lights, it'll probably dry quite quickly. So here we go. Got a little bit of a, a bleed from the sun going on here. Sorry. And it's disappeared a little bit more here. So what I'm going to do is I'm just going to use a little bit of my paper towel and blot gently in the middle there where the sun in a circular motion where the sun would be lifted it I just a little bit more, but I'm don't mind this quite a bit here. The salt will have an effect on that anyway, so we'll see what happens. Okay? This is going to take a while to dry, gone, put the Catalan, have a little walk, do a chore, and come back and join me in the next session, we'll have the big reveal and see how beautiful our painting has become. I've just brought the painting from my painting desk in the filming booth over to the window here to see if it is completely dry. And I can see the salt crystals, but I can see it's not actually dry yet, so I'm going to have to be patient and wait a little bit longer. As you can see, Ali, who is supervising here in the studio today, approves of my painting too. I'm really pleased with how dramatic it's locking and excited to get going on revealing it to you.
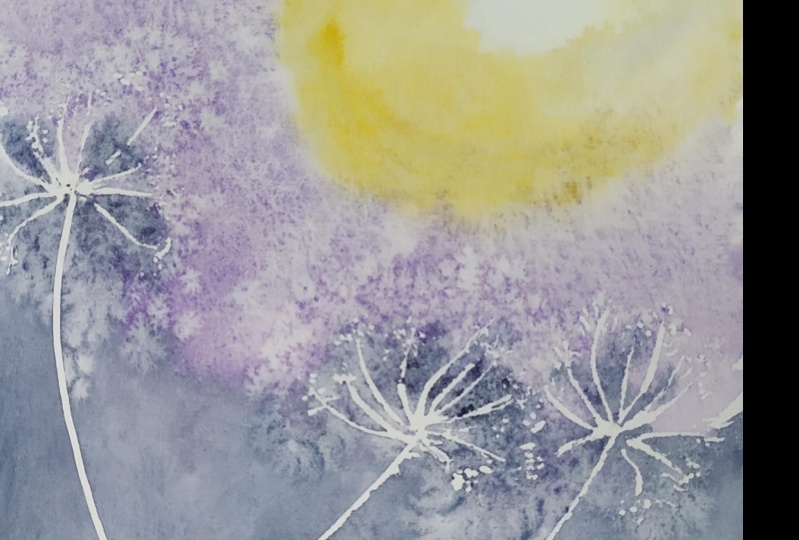
7. The reveal : Time for the reveal. Everything's dried. It's taken quite considerable time here. It's cool, November weather, so we were patient and we let it do its own thing. And it's hard as you can see, the salt has had a really dramatic effect. Wonderfully fluffy dispersal there. It much more so than on this one that I did earlier as a practice. On this one where I used quinacridone magenta. You can see it's hardly made any difference at all with the salt is. So I'm offer big dramatic effect. So this is lovely. I'm really pleased. For now we need to brush off any excess salt and start taking off the masking fluid. I'm just going to use my fingers gently. If you do this and it's not completely dry, you can end up smudging your paints. So it's always a good idea to make sure it's properly, properly dry. Clean that up later. Now this bit very satisfying. I'm going to use my fingers. You can use a pencil eraser to lift the masking fluid. But as I'm literally just going to be lifting this off, it's fine to use my fingers with leaves on the bottom of the stem. And notice that this time my indigo isn't as dark down here as it is on some of my others, but that's fine. There we go. Oh, yes. See if we can do to get in on this one. And that's the majority of that one. This one. And then this one. These simple techniques of wet-on-wet washes, using salt to create patterns and textures and masking fluid to maintain whites and actually form a drawing within your painting. They can be applied to all sorts of subjects. You could, especially with the way this is gone, you could paint dandelions, poppy seed heads, trees, grasses. All would give you a lovely, luminous image. Like this. Enjoy yourself, let your imagination run wild and apply our techniques to your own paintings. So there we have it. I am very pleased with this. It's gone all over with the yellow. We've got these beautiful, beautiful river floods almost of dispersion from the salt. And I've got a lovely glowing sunset. I thought you might like to see some of my practice pieces. I did several before I decided on which colors I was going to be using. And I also played around a little bit with whether to have three seed heads or more or less. On this one. Looks verify working. This one I decided to add some salt in the background. Had a little play with some foliage. But I felt it was too. This one. Here we had some foliage and I painted some foliage as well in the background behind the masking fluid. Tried at the trio in the middle there. This one, this one had a very similar effect with the salt, as you can see. Minimal foliage and maybe a little bit of salt in the background. Again, just playing with the colors, trying to get it right. The position of the sun, the positioning of the paint where whether to have more of a sweep with the indigo or have it just as like a foreground and at the bottom here. Now this was very first one. And the salt didn't work at all. So I ended up testing out using a little bit of sponge to put some white goulash on instead. This one with just two seed heads and some foliage. Much darker colors with the paint on this one. This one where I tried for seed heads, smaller, more delicate foliage. And then this one, which was the one we saw at the very beginning of the class, kept it really simple, really strong. And like I said before, the salt didn't have as much of an effect, but you still get a very dramatic painting. I hope you've enjoyed this class. Join me in a moment for some final thoughts. Thank you.
8. Final Thoughts: Thank you for joining me in this class. I hope you enjoyed it as much as I did. It was really great to experiment with paper and salt and colors and learn all about the rule of odds. These simple, basic techniques can be used for all sorts of things and we'll really up your watercolor practice. You could paint daisies, grasses, trees, whatever, ignites your imagination. Enjoy it and learn. I hope you'll join me in my next class, where I will be teaching you how to create some festive greetings cards with ivy leaves using several different techniques. You have time. Why not take a snap of your own painting, pop it up in the projects for all of us to appreciate. I'd love to see what you create. Thank you for joining me.
 Victoria Jeffery, Artist and teacher