Transcripts
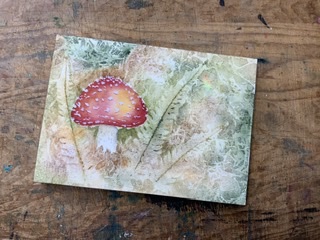
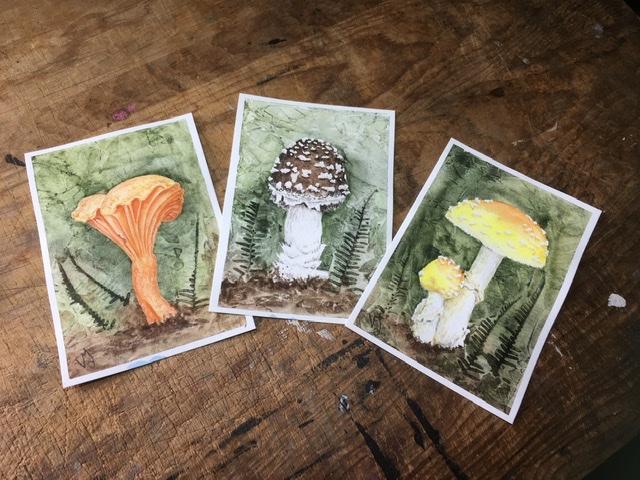
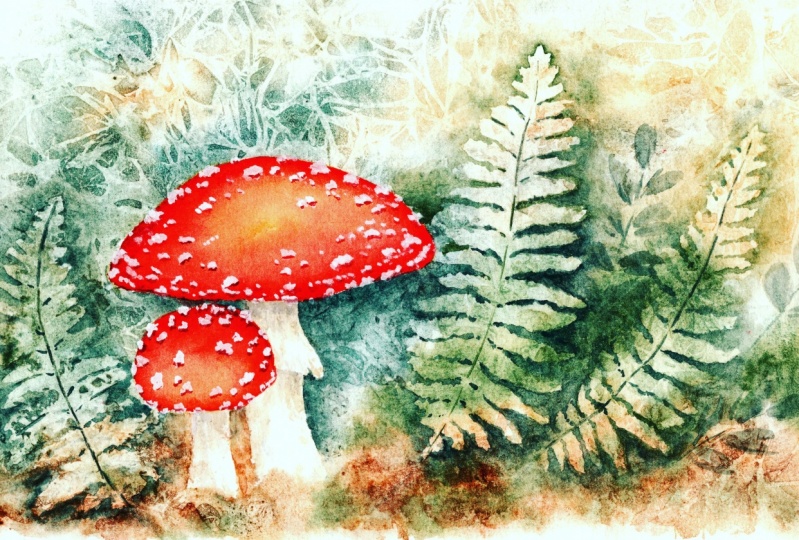
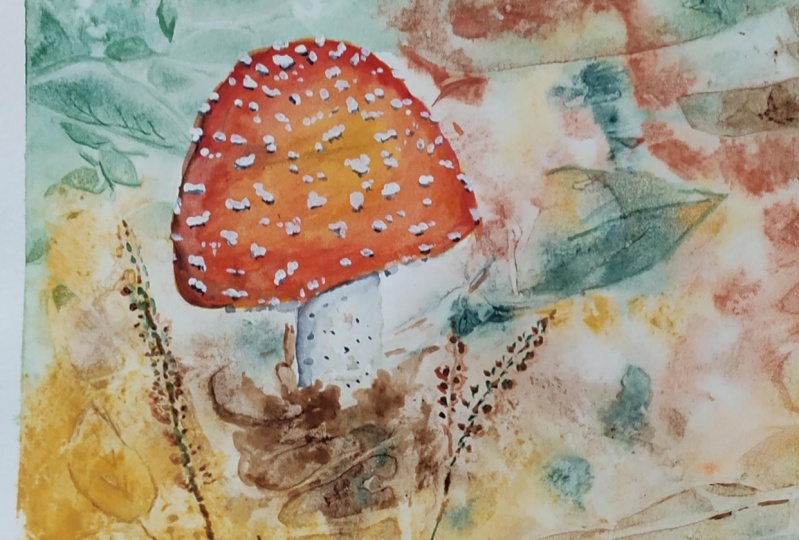
1. Introduction: Would you like to take your textured watercolor backgrounds a little bit further, do something a little bit more detailed and interesting with them. I recently rediscovered the joy of watercolors, and they have become a passion. I studied art and textiles up to degree level and have always painted and drawn. Hello, my name is Vicki Jeffrey. I'm also known as crumbles watercolors. I live in the northwest of England with my family. We're all creative and we love to collaborate together. Join me in this class and I'll show you how to create a woodland background for a toast or painting like this. This is a nominator, much scarier or fly agaric towed store. And we'll use ferns and salt and cling film to create this wonderfully textured background. It does take a little time and we will have to be patient and wait for some layers to dry. But it's worth it. And I'm sure you'll enjoy every moment. This class is suitable for any level B you experienced or a beginner, come and join me and we'll make some mushroom magic.
2. Supplies: So let's have a look at what materials we're going to use to create our magical mushrooms with textured backgrounds. The actual painting. We're going to use these colors for the towed store. I've got some white designer gouache because it's opaque and it will make the spots nice and easily for us. We have Buff Titanium, new gamboge, scarlet lake, and a tiny little touch of Payne's gray. For our background, I'm going to use an olive green and an undersea green, yellow YMCA and GSI January, which is a brown ocher. Don't have to have these exact colors. As long as you've got some nice or terminal and earthy greens and brands, those would be wonderful. Yellows and reds, again, for creating your total cap. And a creamy color like the buff titanium will be fine. I'm using a watercolor block because we'll need our paper stretched. It's going to be taking quite a lot of water and we don't want it to buckle. You can use a block like this one. This is a 100 percent cotton. It's not professional quality, but it's still very good and sturdy and it's 300 grams per square meter. Or you can get your paper and tape it down onto your tabletop or onto a board as long as it's secured and it won't buckle, that will be fine. We're going to use ferns. I've got some little bits of fern here from the garden. If you haven't got ferns, any leaf that you can use from the garden, as long as it's got texture to it. And the backs of these are very textured. And that will help give us some definition when we lay them on the paper against the paint. I've got a little bit of salt here in my Daesh. This is a mixture of table salt and coarse rocks old. I have some masking fluid. My two pots of water, one for cleaning and one for refreshing. Three brushes here, we've got a size 48 and 12, and they're all pointed rounds. I do have this little ball here which is a triple 0 for some fine details at the end. But if you've got a nicely pointed brush, you might not need to worry about that. To use with my masking fluid. I have a thing called a mapping pen. I'll talk you talk to you about that later when we look at actually starting masking a pencil, some cling film. This is a piece I've used several times. And once I'm done with it, I wipe it down, let it dry and keep it to one side so that I'm not wasting plastic. I have a cloth for cleaning my brush on my palette, which I will be putting some small dots of my paints on in a moment. So these are our supplies. You don't need to rush out and buy anything special. Use what you have and I'm sure it will be amazing. Join me in a moment. But drawing and masking.
3. Sketching out your toadstool: Here we are. We're going to start drawing up our toadstools, ready for painting. Now, we're going to keep this one really simple. I have used up splash to find a reference photo which are royalty-free of a young, I'm Anita Miss Korea, also known as flying characterized store. I decided to do a young one where the cap is still closed, not open, showing all the gills and things is that would make it a much more complex drawing. And we want to keep this nice and simple and enjoy making textures and patterns and have successful paintings. Feel free to draw any stage of the mushroom you like. If you fancy having a go at painting the gills, or maybe even a little group of toadstools, find a photo that inspires you and draw that one. I'm going to freehand draw my total onto the paper. And I'm going to do it very lightly. You need to keep your pencil lines as light as possible because you want to avoid making dark marks, leaving groups in the paper. Or, and also, if you do need to use an eraser to remove any marks, you have to be very gentle with it because an eraser can actually damage the surface of your paper. So I'm just going to make a little total cap in him and give him a little bit of a stem. Now I've done that much darker than I would normally do. And that's so that you can see what I've drawn. I haven't done the edge here at the base of the stem because I'm actually going to keep that ragged with my masking fluid. So it looks like the toad stall is sat in amongst the undergrowth and the leaves and the detritus on the floor of the forest.
4. Masked mushroom!: Okay, now we get to do some masking. I'm using this masking fluid which has been dyed blue. That's so that you can see it clearly on your white paper. Masking fluid comes in, white, which is just off white, the natural color of the latex. I've seen pink versions. You can add a little tiny bit of your own coloring to it. If you have a white one that you feel more comfortable with seeing where you're placing it. And you can also get masking fluid in pens that you can apply directly. I'm also going to be using my mapping pen. These are really useful for working with your masking fluid because they don't clog up. We have metal nib which has two blades and a gap in-between and this little wheel here. So we can adjust how wide the gap is at the end for fine lines or broad lines. I use these because masking fluid will just very bad for your paint brushes. I would suggest if you haven't got one of these and you need to use a brush, use an old paintbrush that you're not too worried about. The bristles getting damaged. The masking fluid will clog the bristles and it's very difficult to get out or there is an alternative. I haven't tried it, but I have been told recently by a friend. But you can dip your brush into a solution of dish detergents, washing up liquid and water. Before you use the masking fluid, dry it off just a little and that should help protect the bristles. I haven't tested it yet, but I think I will give it a go. So I'm going to dip my mapping pen into the masking fluid and get some on the tip. I'm going to go all the way around the camp of mitosis do. And I'm going to make them mine quite broad. The reason I'm doing this is because we're using several different types of materials to make the texture. One of which is the cling film. And that can be a little unpredictable as to where your paint will end up. If it was only using the salt to make texture in the background. I probably wouldn't bother with this part of the process. Another thing I should say is it's very important that before you start actually working on your paper to test the masking fluid on a spare piece. I have actually spent quite some time on it and not tested the masking paradigm first, only to find that when it came to peeling it off, it actually removed great chunks of the surface of the paper, which I was not a happy bunny about. It's usually fine with a 100 percent cotton paper, but it's always best to check before you start. So as you can see down here, I'm just going to do a ragged edge so that it looks a bit like where they might be leaves for soil around the base of the toadstools stem. And I've given it a nice, generous line all the way round. This will take five or 10 minutes to dry depending on her thickly you've applied it. Also, there are environmental factors to bear in mind. It depends on your, whether your home, how humid or how hot or dry it is, and also what paper you're using that will make a difference as to how quickly your masking fluid will dry? I usually would think around about 510 minutes.
5. Lets create a textured woodland Background.: Texture time. We've waited and the masking fluid is nicely dry. And now we can start applying our paints and our textures to create our interesting background for our towed store, I'm going to activate my paints first. It's very warm here at the moment, so everything's drawing very quickly. This could be an actor advantage with the background. So I've put some paints out and I'm just going to add some water to them to make sure they're ready to go when I need them. Just a couple of drops on each one should be fine. And it won't matter if they blend into each other because we're going to blend them on the paper anyway. You could make premix these up in a pilot, make little puddles of them. Or if you're using pans, make sure you what them first before you want them. Because it'll give you more time with actually getting your textures applied while the paint is still wet on your paper. Now using my clean water, I'm going to completely cover the background area of my paper. Sorry about the clanging layer on the top until I've got a nice layer. This is so that our pigments can move around nicely on the paper and we won't get any harsh hard lines. Making shorter just ran the edges of the towed store to a little corner there. And we just should have a nice sheen. Still see the texture of the paper. And there we go. That looks great. Now I'm going to start adding my paints. This is the graphite genuine from Daniel Smith, which is actually a brown ocher. And it's very dynamic. As you can see. The pigment will rush around in that water and make peaceful ground quality for us. And a little bit of that, clean my brush. I'm going to add some yellow ocher. Just repeat a brightness. Doesn't matter. 3d way you put these colors is spread them Rand. And by the time we've added all textures, and it'll give us a really good forest floor effect. This is my olive green, spreading it around. And then finally we've got this undersea green, which is a Daniel Smith's special. And it's actually got several pigments in it, which when you apply salt and things to them, it will split. And you can get some wonderful effects. And being around my toadstools, darkness behind it to really make our post or standout. It's looking a bit green, fun and liking. So I'm going to add a bit more of the yellow Erica up here. The TFLite over there. Yeah. I've got plenty of paint on and it's still nice and wet. Okay. Aneesh to go into my own age, they're actually do nicely. Now what I'm going to sprinkle a little bit of salt here and they're not going to use very much because they cling film has such a dramatic effect. You probably may overtake the salt. Now I'm going to place my phones on one's place them with the back onto the paint because that's the most textured surface of my of the leaf. And that way, gently press it then hopefully these will have a good effect. And it's unpredictable. These don't always work. And I can show you how we can rescue that if they don't have too much of an effect when we come to doing the final painting. But hopefully the cling film will hold them in place. Just move that pedestal part of the way. There we go. And this one's laying nice and flat. So is this one, but this one's a little bit prominent. So I'm hoping when I put the cling film in plastic wrap over, it will actually press it into the paper a bit more. I've used this piece of clean film several times and just wipe it down after I've used it. And Keep reusing it so that we're not making too much plastic waste and scrunching it up a bit and laying it on. And then I'm going to press it gently down onto my paper. Try not to move the leaves. As you can see, where the plastic is actually touching the paint. And you've got creases and wrinkles, you end up with little cell-like structures that where the paint pulls in the creases. Now, I'm looking at this and I'm thinking this leaf might need a little bit of extra help. This is going to take probably half an hour to an hour to be dry enough for us to work with. This depends very much on where you are, your environments, as I said earlier, if it's humid or if it's very hot, will make a huge difference to how quickly this will dry. What we need is it for it to be dry enough that the paint stops moving at least when we lift the cling film. So I'm going to give this about half an hour. And then what I'm gonna do is I'm going to come in, pick up the corner and p. And if the paint down here in the corner doesn't move, then I know I can gently lift it off and we can give it a quick blast with a heat tool or hairdryer, and we'll be ready to start painting our toadstools. So here we go. Let's see what we've got. Still damp in places. So I might have to dry that off a little. But as you can see, the paint isn't actually moving. As I'm lifting the cling film or plastic wrapper way. And we've got some wonderful textures going on now. Very pleased with how that's looking. Let's take it off gently. There we go. Let's see if our firms have worked. I said before, these are sometimes very unpredictable. Sometimes you get some really bold patterns and other times you just get a vague outline. Fingers crossed. We've got a good one. Let's have a look under this one. A little bit. We can see the central vein and some of the side leaves, but we can work with that. That's fine. Try the next one. This was one I was actually worried about it because it was sticking up. Again. Same sort of thing. Can work with that. High hopes for you. Last one, Come on. Let's hope you've done a good job. Not really. A little bit towards the top and a stray piece of salt. There we go. All right. I'm going to give this a very quick blast with a hair dryer. You don't see that just to make sure that these couple of little areas that is still wet or dry it off nicely. Then you can join me in the next lesson and we will tackle the towed store.
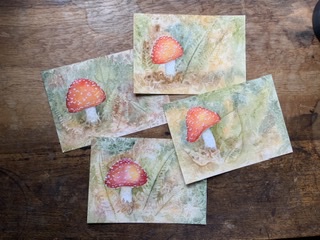
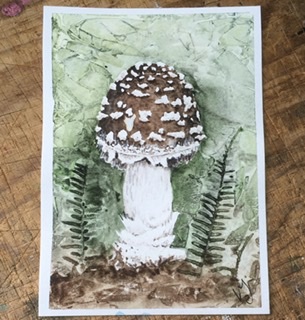
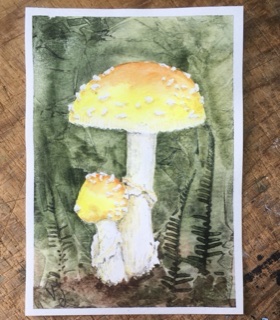
6. Fungi Fun: Are you ready for some funky fun? Right, time to tackle the store. So we'll dry and ready to go. I've got my paints laid out. We've got the new gamboge, the scarlet lake, tiny bit of buff titanium. I've got my white gosh. And a tiny bit of Payne's gray. We won't, we'll need barely any datasets. Very strong pigment. I'm just going to put some water on my paints to keep them wet and ready for going. And then we'll remove the masking fluid and get ready to paint our toad stool. Remember that if you're working with pans, that it's a good idea to give them a little spritz with water before you start so that you're ready to go and not having to work too hard getting your paints wet, ready for painting. Now, I'm just going to use my finger to remove the masking fluid. Some people use an eraser to do it. I don't really I think that's mostly because they're worried about getting oils from your skin onto the paper. I'm not really bothered about up to this one. Now, in finishing touches will sort out at a rescue that are ferns haven't worked very well this time. It's not problem. I have had such varying results. The many times that I've used this method, I have been wondering whether it's an idea that to come back in with one of the firms and actually put water color paint directly onto the back of the firm and then print it on and see if that works. Could be another type of texture created. That's I'm not going to do that on this occasion. I'm going to show you my little trick for how I rescue friends when they don't work very well. There we go. There's our store. Will pristine, ready to go. To begin with, we're going to give our total cap a nice glow. We've been referring to my reference photo. It's not a flat color. Obviously, we have shaping where the color is darker on the cap, but there are patches of the cap that are almost yellow. So I'm going to paint my whole cap with new gamboge, just a light warm yellow. You could, if you wanted at this point before you start painting at your spots using masking fluid? Obviously, you'd have to wait for those to dry. And they would be the white would then be created by the white of the paper. I quite like adding mine on afterwards with the opaque. Gosh. You could also use something like bleed proof white or think there's some Winsor Newton do calligraphy and white calligraphy ink which is very opaque to perhaps try that we give. And that should drive reasonably quickly because of how warm it is here. One and waiting for it to dry. I'm just going to add a little bit of definition to the bottom here. And then we can tackle the stem. Getting a bit of my brown ocher, the GFP genuine. I'm just going to enhance some of these little buttons that were made by the plastic wrap. It looks quite dry to me. Okay. Now, the Buff Titanium, which is a pale beige, we're going to add some shape to the stem down the sides into the crux at the bottom there. And I'm going to add a bit more water and blend it in. And we want it to be darker where it's in shadow under the cap. I had a bit more paint there. We'll come back and do a second layer on this. Once it's dried and add some texture to the stem as well. Now, I think my cap is pretty much dry, so I'm going to start adding some of the scarlet lake. I'm using this size eight because it's got a good It has a good point on it. We get plenty of coverage nice and quickly. I'm going around the outside edge. And in plenty of dark paint near the bottom. Leaving a little bit of yellow showing through. Touch more water so that there's less pigment. So let that are yellow, shine through that. And we give that a moment or two to dry. And we'll come back and put some more on to make it a little bit darker, and then we'll add our spots. Okay, that's tried nicely. Now we're going to add a little bit more color and put some texture and shape more shading on the stem. I'm going to do that bit first, motifs my Payne's gray, It's a very strong pigment. So you only need a tiny touch. It will make a huge difference if you're not careful. So a little bit of Payne's gray, nice, large mantle water, small amount of pigment. And I'm going to come in under the edge of the cap here and form shadow and come down the side slightly here. I'm referring to my reference photo. Just bit of water on my brush. And I'm going to run it along the edge of that to soften the edge of the shadow. Now I'm going to do some little speckles on the stem because they actually have. I can see texture from my reference photo. Just a little bit of that. Maybe a little bit down here where the undergrowth leaves and they mulch that's on the woodland floor, would be casting shadows on my toadstools stem. There we go. That looks good to me. So that's how stem that will dry very quickly, is very little paint there and very little water. The cap to me, it looks like it needs a little bit more darkening around some of the edges. You could use a darker tone, dread, like an alizarin crimson. Or what we can do is we can add a tiny bit of Payne's gray to our scarlet lake, which is what I'm going to do. And because they Payne's gray is actually slightly bluey, it'll make the red cooler. I'm just going to come along the edge here with this just a little bit. And again with the edge of the brush, I'm just going to run along some clean water just along the edge of that to soften the gradation. And I'm going to put a little bit along the bottom here where the cap curls under. Now notice there's some middle yellow edges. Oops, where the cap has broken away from the stem, where there's some little yellowy bits. So I'm going to leave those and clean brush and water just to soften those edges. And we can now give that a moment or two to dry. And we can add our spots. One, I'm waiting for that to dry. I'm just noticing here where my shadow is. We could perhaps do with a little bit more speckling for the stem because it looks a bit flat. So I'm just going to come in with some very small, very weak Payne's gray and add a couple of there we go. That's better. Now I said I'm using the white goulash, which is very opaque watercolor to add my spots. And referring to my reference photo. They are actually quite raised things. So I'm going to add some around the edges. And I'm not going to be super fussy about following my photograph exactly. But I can see there are more clustered around the top of the cap where it hasn't yet expanded. And then they open out and they almost seem to form slight lines as we go down. So I'm going to Try and capture the feel of the spots. I'm using my size four pointed round. Some of these spots actually protrude and will stand proud of the edge of the camp. So we can go over the edge like that to use a point and do some tiny ones. And another big one there. Some of them seem to run into each other where they haven't moved upon yet was the CAPM. The CAPM expands, they will be further apart. Just enjoy yourself with this bit. It's great fun adding the sponsor. In the next lesson. Just finishing touches. I will show you have you can enhance these funds and add just a little bit of extra detail and make them stand out. Using negative painting, which is something we explored in the salty butterflies lessons. And I will also be making a class about very simple negative painting techniques very soon. Run that seems to have a little cluster. There we go. And one is along the bottom. I can see just underneath on the edge where I think the cap has broken away from the stem. There are some shady looking spots that are just underneath the capsule. I'm going to add a tiny bit of Payne's gray to my white and just add a couple of my needed a little bit more green. Let's try that out there. As if they're underneath. On the other side. Here we go. Now, at the moment, we've just got little white spot speckle is all over the place. Now as they've dry. What we did then going to do is we're going to add a little bit of shadow underneath them to make them look more three-dimensional. And for this, I'm just going to use my scarlet lake. Neat, quite, quite thick and don't need to add anything else to it. And because they are quite tiny and we need to get up really close, I'm going to use my very small triple 0 brush just under the edge. You don't have to do this on every single spot. Most effective under the larger ones. And it just looks about the casting a little bit of a shadow. Because they're standing proud of the camp. I've painted all sorts of different toadstools using this method. I've done pump the caps, the parasol, meadow blew it. You can apply the same techniques to any toad stool you fancy. And you can alter the background colors to suit the toad stool that you've chosen. And perhaps even if you get interested in psychology, the study of toadstools, you might try and recreate the background of where they actually do grow, whether it's a woodland or meadow or a particularly like logs to grow and maybe get what Mr. These shadows here on the paler yellow part, I'm just going to add a little bit of water to soften them down a bit because they're a bit bold against the yellow. Just softening them slightly with the brush. That's better. I think that's all finished. In the next lesson, which will be finishing touches.
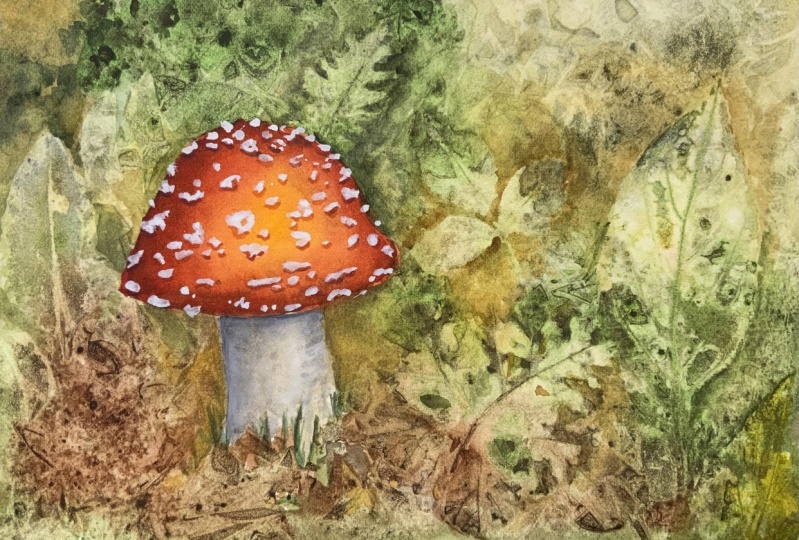
7. Ferny Finishing Touches: Welcome to finishing touches. What we need to do is create the illusion of our phones or leaves. If you have leaves and they didn't make a good impression on your painting. What I did with this one was I used negative painting technique where using what information I could actually see from the print already, I indicated where the fronts of the leaves were. I haven't done every single one. I've just used a little bit of artistic license to make them pop forward from the background. This, how are we going to do it? As you can see, we've got almost go sleep box where the edges of the fronts were and I know it was bad like that. So what I'm going to do is keep having a look at my my phones to give me an idea of what needs to be done. I'm going to use watery undersea green and I'm going to just indicate where the funds would be. So I can see there's a line there and line there and a line there. So I'm going to go around the edges as if there was some leaves there. And then with a little bit of clean water, just blurred out. Come down here a little bit. And I get wider as you go further down the plant. Again with clean water and just blur that I had. Now here, I've got this is more yellow ocher, then the undersea green. So that's what I'm going to use a little bit of that. Again, I can see these lines. So we'll just come in and make some clean water and blow them through to go. Because you've got a reasonably strong tip on this one. I'm going to carry on up there. And then use a little bit of the olive green near the tip. Just to give this a little bit more definition, I'd like some Dan here. So I can see a couple of very vague lines, but I can see them on this side more. So I'm going to use olive green again. And we'll come in. And here you can see it. We look like we have most of a phone appearing here. A little bit of work on this side of this one. The undersea green again, negative painting is really useful. In our watercolors. Use it for retaining whites, will pay the colors. We also use it for making things into the foreground. And we need a little bit down here. I think. This one is where the GFR olive green there. So we need to get a little bit more definition. On this one. You'll actually see some of the phones quite strongly. That the pigment, because it's very granulating, made little clusters but not kept its shape very well. Just clean water. Be careful at the edge of the toadstools. And there we have it. I think that's finished. So we have painted Magical Mushroom with a textured background as if it's popping up through the undergrowth and it woodland. I hope you've enjoyed this lesson and we'll share your projects with me. It would be fantastic to see what sorts of toadstools you decide to paint. And I hope you'll share them for everyone to enjoy and be inspired by. Thank you for joining me in this lesson.
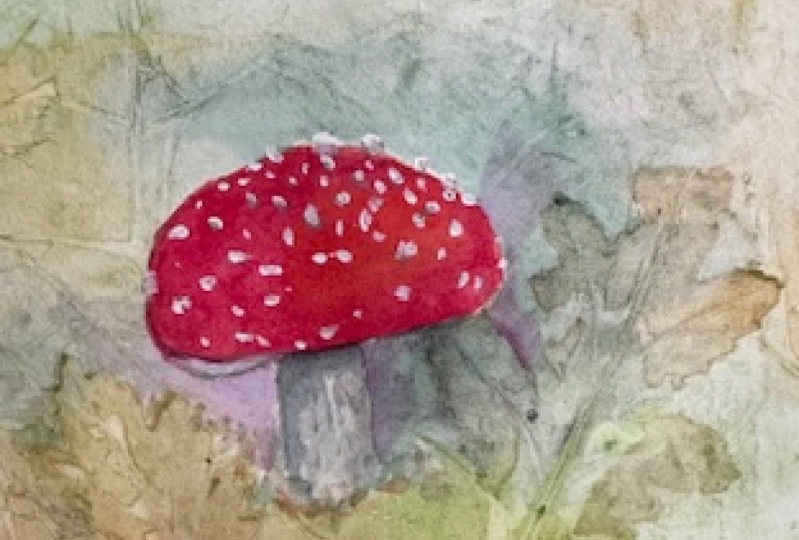
8. Final Thoughts: Thank you for joining me in this class. I hope you've enjoyed it. And I've learned to use all sorts of different textures to make your paintings come to life. I've used this method to paint many different toast or paintings, and each one has been so much fun. When you finished your painting, it would be fantastic if you would take a photo and pop it up in the projects below. It's always so lovely to see what everyone creates and very inspiring. I hope you will join me in my next class, where I will take you through the steps to paint some sand and seashells like these. Thank you.
 Victoria Jeffery, Artist and teacher