Transcripts
1. Introduction: Hello, there. There are many uses for an old toothbrush, which is a good thing because it stops them going into landfill or even washing up on a beach somewhere. I'm going to show you how you can create a beach using an old toothbrush. Hello. My name is Vicki Jeffrey. I'm also known as crumbles watercolors. I live in the northwest of England with my family. We're all creative and we love to collaborate together. I recently rediscovered the joy of watercolors and they have become a passion. I studied art and textiles up to degree level and have always painted and drawn. This class is suitable for all levels, beginners and experienced painters alike. And it's a little bit messy. So if the sun shining, you might want to take your painting outside. That's what I did. Together. We'll experiment with sponges, tissues, salt brushes, and your toothbrush to discover the best way to depict some sand for a painting. And then we'll combine that with some seashells to create a summary. Beach painting like this one. Come and join me for these lessons. And we'll have some summary fun.
2. What you will need: Let's go through what supplies we're going to need for this class. Watercolor paper. I'm using a block which is a 100 percent cotton. You don't have to do that. You can have taped down paper onto a board, some masking tape to parts of clean water. Some salt, masking fluid, natural sponge, kitchen sponge, some tissue, a toothbrush, a fan brush, and T2 pointed rounds, a large and a medium, a palette, and some cloth or tissue to clean your brushes on. A selection of sandy colored water colors. I'll go through these properly in resources. A pencil, a little bit of blue tack, some shell templates and paints for your mussel shells. I used ultramarine blue and Payne's gray. Don't worry, if you don't have exactly these things, just use what you have. And I'm sure your paintings will come out beautifully. Come and join me in the first lesson.
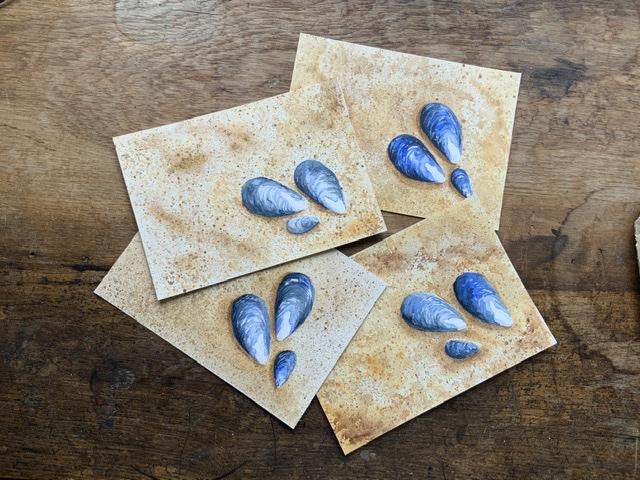
3. Testing, Testing!: Sun comes in many different colors and different textures. Here are a few that we've collected from some of our favorite beaches in different parts of the world to this black one was from the Canary Islands and the island of 10 Arif. And it was amazing to see swaths of just jet-black sand on the beach. This very pale one. The sort of classic BCCI golden sand was from the West Coast of France. And these two much more textured and deeper colored sands were from beaches in Devon in the UK. And it just shows how much variation there are. I know there used to be. I think it was a Victorian fashion for making paintings and little bottles and jars with collections of different colored sand into showcase the variety of colors you can get. We're going to try and create something between this very pale, fine sand and this textured stand with our watercolors. And the reason I've chosen those is because they form a really nice contrast to the blues of our mussel shells. I've gridded up my paper so that we can test out the different methods for creating sandy textures. We've got our ingredients that we looked at in supplies, salt and spongy tissue and an old toothbrush. Some of this is going to be quite messy and hopefully we'll get some really pretty sandy effects with our watercolors. I've got my colors laid out here on my palette. I'm just going to activate them, get them nice and wet because we only need quite a lot of water with them. I'm only using one brush because we're not doing anything with any fine details. We've got yellow ocher, GFR, genuine, which is a brown ocher, raw umber, burnt amber, and buff titanium. And over here, this is a very orangey paint called Luna earth. Right? The first one we're going to do is with the natural sponge. If you haven't got one of these, you don't really need to go out and buy one. They can be quite expensive. What I've done is I've taken a piece of kitchen sponge and I've picked holes in it to give it a random surface. We'll see how they compare to each other when we test them. We're going to use this 1 first. I'm going to put a loose base layer. My my subtitle way there of buff titanium and a little bit of yellow ocher just randomly on this square. And these are quite watery because we're going to be building up layers and they will dry, paler than they appear when they're wet. So while that one's just drawing off a little, I'm going to repeat the same process for this square. This one we'll be using the dried-up tissue. Now paints a sloshing together a bit over here. I need to move my palette slightly, stop them running. It doesn't really matter because we're going to be mixing and blending our colors anyway. But I just want a big murky puddle down here in my buff titanium. And we go to take the end of my natural sponge and pick up some pigment with it and dab it on. And let that dry a little. And we work on this one. Is might still be a little bit wet, but we'll see I don't want it too large an area. But if scrunched it up, so there's lots of creases and wrinkles. Same again, pick up some pigment and random doublings. What's happening with this is the tissue is actually lifting some of the other color while depositing the new one. So we've got those two, leave those to dry for a little bit. And now I'm going to start with our salt. I'm using very fine table salt for this because I didn't want the reactions of the salt in the paint to be too strong, too bold. I don't want huge bursts of Dispersion. I want, what I want is the little speckles bursts. And I'm also using my paint in much more concentrated. I've got a lot more pigment in my on my brush. And I'm using darker colors. So this is the GSI to the brown ocher, and that was the yellow ocher. And I'm going to add some buff titanium in there too. There we go. All right. Got my salt in an old ways. The shell sprinkled a little bit. Here we go, as you know, is using salt as we've looked at in previous classes. That will take a little while to develop. And I will leave that one where it is. Now. In this one, we're going to test the kitchen sponge. Back to the Buff Titanium metal bits of GSI and a little bit of yellow ocher just randomly around and give that a moment to settle. While that settling, I'm going to put a base layer on these two, which we're going to use our toothbrush and our fan brush on. We won't actually be doing the splattering with the toothbrush and the fan brush in here. There's lots of delicate equipment in this painting area where the microphones and cameras, etc.. And it can be very, very messy. When you're spattering with a toothbrush and or fan brush. I actually had in a workshop, a watercolor workshop where I was attending. The gentleman on the opposite side of the table from me was splashing his paints so vigorously that it actually painted my painting. And the lady next to me with bright purple, which thankfully didn't spoil our paintings, but it was a bit of a surprise. So we'll be taking our splashing and splatter rings somewhere a little bit safer if you can't go outside or have a clean area. I would suggest putting some newspaper on the floor or making a mosque all the way round your paper with old newspapers and things, right? Let's try this button. I think that's working quite nicely. Look at that, that's good. Now salt is slowly developing there. I can see some small speckle starting to come. These two can dry before we start splattering on them. And the natural sponge and the tissue paper have got nice textures. We can build that up with a second layer. I think I'm going to do that and that they have dried slightly. So we'll go back to our natural sponge. And I'm going to add some slightly darker parts using the raw. Remember we've got here. And I'm going to add a little bit of something, a little bit redder with the band amber. Not all over, just here in there. There we go. And I'm going to do the same with the tissue. And it nicely scrunched up. You could use kitchen roll, kitchen paper for this. And as long as it's some sort of absorbent paper, it will give you some texture. Try changing that a little bit at some of the Rhonda. Quite a fine grain to it, which is nice. And a little bit more yellow ocher. Just keep building it up to create a depth of texture and color. There we go. All right, come outside with me and we'll have a go at splashing and sputtering. Here we are in the garden. I've setup on the table to protect the precious gear in the booth and to protect the other samples. I've made a paper mask. It's just at our piece of newspaper, way down with some Seychelles. With this first one, we'll use the toothbrush. This is an old toothbrush. It's a bit stained. But that won't matter. The neck with a toothbrush is not to get too much paint on it because you'll end up getting big blobs. What you don't want, our big particles of paint landing on your paper. You want them to be reasonably fine. So I'm getting just a little bit of paint. Now using my finger, I'm going to stroke the bristles. I'm going to point it at an angle, the brush, dragging my finger through the bristles to form the splatter. There we go. That's our first bit. Now I'm going to just chop and change through the different colors and build up the layers. The speckles are very tiny and they will dry very quickly. Now this is the fine brush I'm going to use. It's got quite stiff bristles and there are two different ways we can work with it. I'm going to do both as I paint on here, loaded up with paint. Now I'm going to use my finger and I can beat the brush against it and knock the paint off there. That's one way of using it. We can also use it like we did with the toothbrush and just stroke the bristles. Okay. Back in the booth. This is all dried and we've got our six different experiments. So let's take the tape off and have a look at what we've actually got and see where we're going to go with this big reveal. I will actually be using these experiments to make greetings cards with, I'm going to slice them up. And a little bit of planning work. Let's try this way. Maybe draw some shells or starfish or little fishes and map them onto white cards. And they make nice little gifts. Here we go. Okay, I'm back. Sorry about that little pause there. I used my trusty old hairdryer to warm the tape and it lifted off fine everywhere. I've done got a little tiny flap here that I didn't know whether you can see that where the paper is lifted slightly, that should just glue down. I should be fine with that. That's a good tip. If your tape is sticking to firmly to your paper and liable to damage the surface, use something to warm it, a heat tool or hairdryer and slowly lifted as you warming it. So what I've just done. Okay. So we have our natural sponge now, a tissue paper, salt, our trashed kitchen sponge. And we had toothbrush and fan brush. And they've all made really lovely textures. I rather like the very delicate texture of the salt, which has made tiny little marks. It's not too strong and they're not too many big bursts where the dispersion happened. The spattering from both of the toothbrush. Am the the fine brush look lovely? I think we could put many more layers on top of this. This is just a couple of layers of color. You could really build on new speckles, omitted a little bit of time to dry and then build more. And what I think I'm going to do for our painting is I'm going to use a combination. I'm going to use a little bit of sponging, either the natural sponge or the kitchen sponge. And then when that's dry, I'm actually going to splatter over the top to create a really multi-layered depth of Sandy anus. So that will be our class project. Join me in the next lesson and we'll have a look at creating a beautiful sandy background and painting our mussel shells.
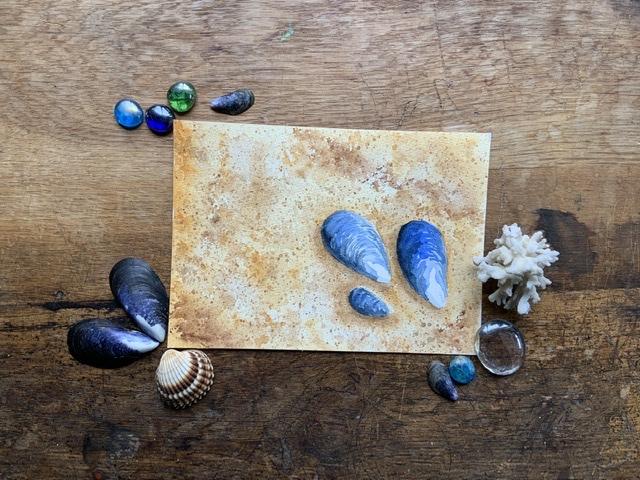
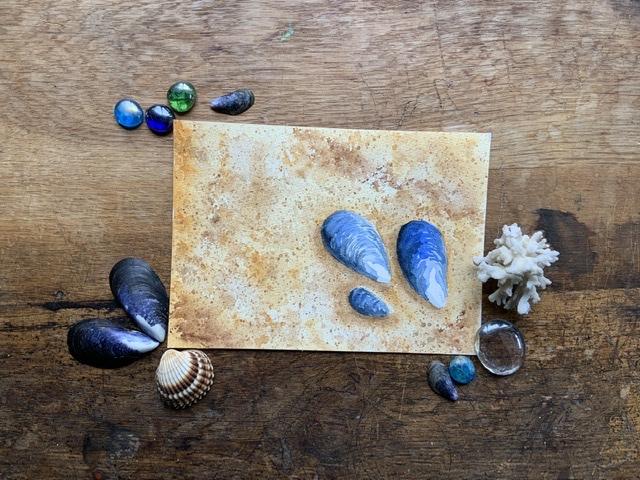
4. Splashing Out: Class Project time, lovely stuff. We've done our experiments and we concluded that our best way to create our sand will be to use a combination of background paint, sponge, and then splattering with either the toothbrush or the fan brush. So we need to get up paying per ready and prepared by chose the muscles partially because they were blue. That was a good contrast to the sandy colors. But also because there are really simple shape. They're slightly squished, raindrop shape. And I've made these little templates using some scrap card and just roughly drawn a vague muscle shape and cut them out. And I've done 32 that would have maybe been joined together. And then a little third one to go alongside. And the nice thing about making the template is you can play with your composition. Decide where I want them on my paper, and play around with how best it looks. There's a thing about the aesthetics of, of objects in a painting and often, odd numbers are more appealing than even number. So we'll stick with three. You can maybe do five, or you could just do one. Picked the simple shape of the muscles for everybody to try with this class project. But if you more confident as you got better drawing skills, perhaps you might like to try a different sorts of shall we, the coco shells, they spiral you ones that look like unicorn horns for, don't know what they're actually called, but they are more complex to draw. The other thing about these shells as well is if you used these on your sandy background, you'd create a more monochrome style painting which would be very interesting to explore. I might actually have a go at that and make an extra little project to go in the projects for this class with that. So let's have a look where we are going to put our muscles. Going to have them down in this corner. And I'm going to have them close together. Maybe that's a little bit too close to the edge. There. There we go. Yes, I think that's just about right. Now I've decided on my position. I'm going to very lightly outline these with my pencil just so that I know exactly where they're going to be. You can probably noticed these templates are actually already speckled from where I've done my practice runs of previous paintings. Now, I'll probably make these lines a little bit darker than I would normally. That's just so that it's clear on the camera for you to see where I'm drawing them. I would advise keeping it as pale as you can manage for yourselves. Here we go. I'm just going to take those off for a moment. There we are. Now. We're going to put our initial washes on and create some shadows to really make our shells look like this. Sitting on the sand. Going to wet my paper all over with just a light wash of clean water. We were actually wondering about whether you're allowed to collect shells and things on the beach anymore. I guess in some places might not be aligned. Most of these that I have been in my little collection for years and years and years, and might not even be allowed to take sand off the beach. I don't know. If if if you go in search of sand and shells, just check out locally whether you are actually allowed to do it. All right, so I've got a nice general layer there. Good, Shane, I can still see the texture of my paper and papers already starting to absorb the water. I'm going to activate my paints by putting a few drops of water on them ready to go. And our base layer is going to be a combination of the buff titanium, the yellow ocher, and the brown ocher, which is the GSI genuine. And I'm just going to generally slosh it around. Keep it nice and random so that it looks natural. Remember this will dry paler. So if it looks a little bit on the dark side, that's not a problem. And we will be adding several lanes over the top of this. Now what I'm going to do is I'm going to use the JSR January and the brown ocher. And I'm going to loosely put in some shadows. I'm going to imagine that my sunlight and my light source is coming from this direction. So the shadows from my shells will be on this side. And because the paper is wet, pigment is dispersing and that will give our shadows are soft edge. We'll probably need, once we've finished painting the shells, you'll probably need to come in and just add a little bit more definition to the shadows. There we go. That's just a bit further up there, I think. And put some extra little dips and dabs here in there. While a silver paint on my brush. And I think I'm going to add a little bit more rounded tops of the shells where there's very little pigment on the paper. Now we just need to be patient and give that a few minutes to dry before we come back in and use our sponge to create our next level of texture. If you're impatient, you can always give it a quick blast with your hair dryer or heat tool and carry on straight away. Our initial layer of background is dry. I am particularly pleased with how this is looking. The brown ocher, the GSI genuine has separated out nicely. You can see the granulation here. So it's already looking slightly Sandy for our shadows. This is great stuff. I've got a couple of little bits here where I'm went over the edge of my pencil line. That doesn't matter because we're going to be using Payne's gray that will cover that nicely when we actually paint our shell. So I'm not bothered about that at all. But I do want to do is preserve the rest of the whites of my shells. So you could use masking fluid. There is a large area and you would have to cover the whole shell to protect it from spattering. So what I've decided to do instead is use my templates. And a little bit of, we call it blue tack here in the UK, tacky stuff. And I'm just going to put a couple of little spots on and position my shell templates over the top. Stop and that will stop it moving. And we go while we're doing our work with the sponge and then with the spattering. I this would also be a really good option. If you've tested your paper and you find that it doesn't like masking fluid. Masking fluid damages the surface when you tried to take it off. So this will be a good option for other other projects, maybe where you need to cover a large area. There we go. Now all in place. I've got my paints are all night, isn't nicely wet and I'm going to use my natural sponge. It's still got paint on it slightly from earlier. So I've just wet it to loosen that up. And I'm going to use that color. I'm going to dab hearing. They're going directly over my templates. And it gets a little bit more yellow ocher on there. And think I'm going to do is use a little bit of the red burnt umber. Just create a couple of little patches where the darker granules of sand of accumulated. And we give I think we have a little bit more. Yes. Why not? Let's have a little piece of the really dark, which is the row number and there's very little pigment left essentially should put more Painter. There we go. Now we just need to wait for that to dry. Or as we did before. You can give it a quick whiz over with a hairdryer and heat tool name. I'm going to take it outside to protect our lovely filming equipment from all the sputtering with my toothbrush and fan brush. See you in the garden. Here we are back outside. The weather is being kind to us today. I'm going to use the fine brush. And with my raw umber, I'm going to add my first layer of speckles. Remember, the more paint on your brush, the larger the speckles, but these will get finer and finer the longer you tap away. Some red tones. Now, using my burnt sienna, I'm just going to keep adding layer upon layer speckles until I'm happy with the texture and the look of the sand. You keep doing the same. You'll know when you're ready and you've finished painting. Now we're done. I'm going to head back into the booth and film the next lesson. Come and join me.
5. Painting Mussel Shells: Welcome to the last lesson in this salty, Sandy, spectrally watercolor class, right? We're back indoors as you can see. And paper has dried nicely. And I've got a nice clean desk and no splattered equipment. So let's reveal our shells and have a look at painting them. Make sure we get rid of the blue tack. Here we go. Blue tech shouldn't damage your paper. I've never had any problems with it. There we go. All right. We're going to use two colors for our shelves. And we're going to leave white spaces for where it is white, we'll just have the color of the paper shining through. We've got I'm Payne's gray and ultra marine blue. And then the dark parts might just use a tiny little bit of the background colors. For some of these little Branemark around the edges. We'll see how it goes with the painting. Thing to remember while we're painting is that this shell started off being very tiny down here and gradually got bigger and bigger and bigger. And you can see the curved lines where the shell increased its size. And what we're going to do is use our brush in the same sort of line to create these monks using a size 4. I'm going to show you this. Yes, that's right. Got two sides, four brushes here. And as you can see, that both very different in size, the actual size of the bristles. And that's because it's a manufacturing thing that both classed as pointed rounds. This one is a Winsor and Newton, and this one is silver brush black velvet. So don't just look at the numbers when you're choosing your brushes. Be careful and have a look at the actual sizes of the bristles. So we're going to start with this one, Winsor Newton brush. I'm going to mix up a fairly weak amount of my ultramarine. And I'm going to start down here. And keeping the shell to look at. I'm going to outline this little wiggly part here. I'm going to paint my brush and I'm going to soften it with the clean water and spread the paint around a little bit more up here where it's darker and cover the whole shell. That's our under layer. And that'll sort of patch just there as well. Going to do all three shells in the same way. Leaving the white patch it or clean water to soften those edges. And then we can paint the rest of the shadow. If you haven't got real shells to hand to use for your reference. There's plenty of resources online for photographs that you can use to give you a guide of where the patents and marks are. And the smaller shells have a pale hatch at the bottom, but not a strong white bit. So I'm going to do my pale wash of blue all over. Because I've done the base on all three. This first one should be almost dry, which is what we want yet. So I can now come back to working on this one and work my way across. Now Payne's gray is very strong pigment. So when you mixing it up, be cautious to start with. You can always go darker, but it'll be harder to make it lighter. So we need to be careful. I'm going to add those curvy lines now to my shell. We'll start on this side. Keeping it nice and loose. Natural-looking. A few on this side seem to stretch down further here. And we give. Now to help with your, the three-dimensional look, I'm going to make it a little bit darker while it's still wet. Adding it in near the edge here. This is also where the shell would be in shadow. If you remember, when we did our very first background layer, we added the shadows on this side of the shells because the light source is coming from this side. Just going to darken up my blue, my ultramarine blue up here. And that'll again using the curving shape of the growth of the muscle cell itself. And we go, we'll leave that one to dry and we'll add a little bit more to it in a minute. I'm going to add a little bit more of the Payne's gray onto the top end of this shell to darken it down and it'll Let's do the next shell. Keeping it. We start with following the growth lines, like before. Darken it down again on this side where it's in shadow, like we did with the other one. I'm going to add a little bit more bloom and to let it dry. And let's add some Payne's gray to this one. You could really make these paintings very uniquely your own. You could add a little bit of seaweed or a starfish. The possibilities are endless. Really. Be really nice and make it look like a little rock pool painting. It back, put some of that blue and a little bit more of the blue in here. Now one of the things I've noticed, because we've now added so much color to our shells. The shadows that we initially put in on our very first layers are definitely not strong enough. So once our shells a dried, I am going to come back in and increase the intensity a little bit on our shadows. And that will make the shells really pop and look three-dimensional. From the page. Here we go. I'm just going to add a very, very weak amount of Payne's gray at the edge of the white here, where it will also be in shadow. Just to help with a three-dimensional look. Now, give that a moment to dry. And then we'll come in and increase our shadows. So I've just given these a few minutes to dry so that when not going to interfere with the painting of the shells. And I'm just going to do is turn my paper slightly. I'm going to use some of the leftover paint from doing the background. This is raw umber. And where we've got the darkest part of the shell, whether it's casting a shadow. I'm going to come in and add a little bit of extra shadow, tapering it near the tip there and a bit wider here. And then with a little bit of clean water, just gently soften the edge again. And I'm going to repeat that process for the other two shells. Excuse me. And as you can see, that's already made a big difference to the shells. Look like they're actually resting on the sand. We have it. Three mussel shells on the texture sandy background. I hope you've enjoyed this class and that you'll take photos of any paintings you make, pop them up in the projects. And it would be lovely to see what you create. It's always very inspiring to see all the work that's done with little idea is like this. I hope that using textures and patterns like this with your watercolors will inspire you to create paintings of your own and build your confidence into having fun with what you're doing. Thank you.
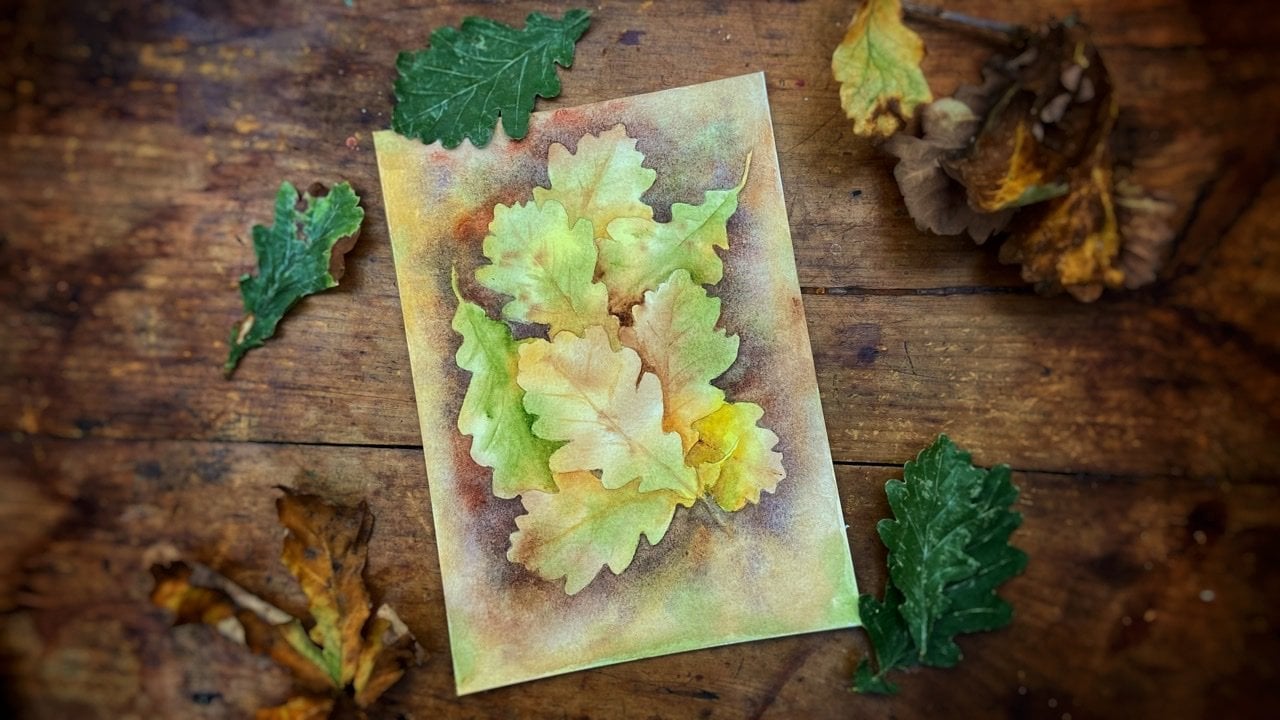
6. Final Thoughts: Thank you for doing this class with me. I hope you've had a wonderful time sputtering and splashing paint around and haven't made too much mess. I think it would be lovely to see your paintings. So take a snap, post them in the projects so we can all share and enjoy them. Coming soon. We have another class where I will show you how to paint autumn leaves like these, using negative painting. I hope you'll join me. Thank you.
 Victoria Jeffery, Artist and teacher