Transcripts
1. Intro: everyone. My name is David Shop, and I'm a photographer. From what? This class is the first class in a three part series on how to take an image that's based off of a concept. Inspiration could come from your favorite book, a movie or even better yet, just creating something straight up from your imagination. Over the past 10 years, I photographed everything from portraiture, toe landscape, food. But storytelling photography has always been my favorite. What I love about it is being able to fully immerse yourself in ah, holder world. Tell people the story. This class is aimed at both beginners to intermediate level and really anyone that's interested in exploring this style, I'll be sharing my approach to both the brainstorming and planning of the photo shoot. When shooting this genre, I can't stress how important it is to plan ahead of time. It's so frustrating when you have this awesome idea. You go out to your shoot and nothing works out the way that you thought I wouldn't your hat . By the end of this class, you'll have the foundational knowledge of techniques to get those creative juices flowing to dream of that concept. Also be sharing with you different things that you need to think about and plan for when it comes to your subject. The lighting and mood and the location you sure to click the follow button belong so that your updated when Part two and part three of my Siri's release, which will be about going on the actual shoot, as well as how I personally do my editing. So let's get started.
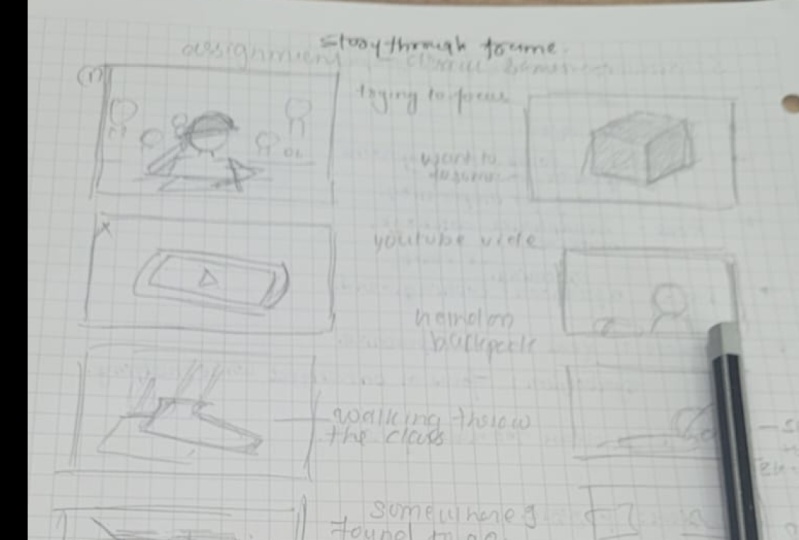
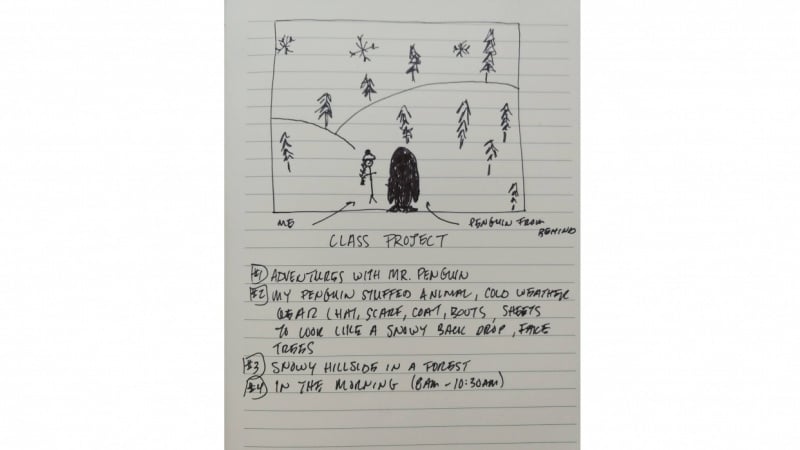
2. Your Project: before we get into the details, we're going to talk about your class project. And the reason I want to talk about this first is so that as we go through the class, you're able to start drafting those ideas. And don't worry about having all the details figured out. These exercises I'm going to share are going to help guide you along the way for your project. First, I want you to write down your theme or subject examples. Could be daydreaming exploring another planet. It could be showcasing a social issue you want to speak about, Really? The sky's the limit. Second list any props you may want to use This could be, say, a ladder. Ah, suitcase, A boat, anything you want to incorporate into your story. Also, if you're using a person as a subject, I suggest writing down their outfit. Now you may be like, Okay, why do I need to write everything down? Well, two things. As you start thinking about your props, this helps you think about why you're using them. What's the purpose and how does it hide back to the image? This helps you create a stronger image because you define why it needs to be there. Personally. I find it that it helps me to expand on my idea more as I'm analyzing exactly why I'm putting each piece into the image, as well as making me more aware if I need to take something out because it doesn't add value. Third, write down the location you're going to use now. This doesn't have to be a specific place. It can say Be a field or a forest or even a room in your house. Fourth, what time of day do you need to shoot here? Think about the mood and the lighting of the image you want to create. Once you have your general idea, I want you to sketch it out. Here's an example of what I've done in the past for this photo. Now, as you can see, this is basically a stick for your drawing. And honestly, I generally make stick figure drawings when sketching my scene. If you're a skilled drawer, I would definitely recommend creating a detailed sketch of your vision. But even if you aren't so skilled in the drawing department like me, don't worry. Even a simple sketch will enhance your photo shoot. Be sure to post your project below and ask whatever questions you have along the way so I can give you some help.
3. Brainstorming Techniques: Now let's talk about brainstorming. Inspiration comes in different forms for different people. An inspiration also comes in waves. Things to remember. Don't try to force it and don't feel like if you have no idea is popping into your head that you can't do this. Creativity is a muscle on, even if you don't have a lot to begin with. It's something that you can grow as you flex it. As you're working out your create a muscle, you'll find ideas coming to you more naturally over time for me. Sometimes I could just be driving in the car and all the sudden I have an idea pop into my head. Other times I have to sit down and really think hard about what I want to be showcasing and what kind of story I want to tell before any ideas come to mind. Also, don't be afraid to expand your horizon of where you might find your inspiration
4. Finding Your Concept: when I'm sitting down and trying to come up with a concept here. Some of the questions I asked myself, What's the purpose? Or, in other words, why do I want to create an image? Is it to immerse myself and the audience into another world or place? If so, is it a real place or fictional? Maybe you want to do a story telling Siris on travel, or you want to be in the world of, say, your favorite movie. Oh, also asked myself, Is it to tell a story about something that's meaningful to me? Is it to tell a story about something that speaks toe life? Maybe something that I've been experiencing or someone else that I know? And I want to kind of showcase that in photography form. These can be good starting points to determine what it is that you even want to create. Sometimes when I'm stuck, there's an exercise that I like to dio. I pick an object and try to think of several things I could do with it that tells a story, and then I write down ideas. Maybe it's something like an airplane or a lamp. Try to think of symbolism and ways that you can let the photo guide people to what it is that you're trying to tell through the story without being too blatant about it. This will help your brain start connecting dots between objects and ideas and stories until it just starts to naturally form now. Personally, I wasn't very good at this When I first started and it was on Leah's. I started flexing that muscle and doing different exercises to help my brain start thinking in this way that it became more natural over time. Here's a really simple example from when I was first starting out in photography I had picked a lamp is my subject, and I spent time thinking about any kind of symbolism that I could tie to the lamp. As they stared at it around in our living room, I started to think about the cord and being plugged in or being unplugged and how that relates to people, and it gave me the idea for this image. Now you'll notice there's no lamp in this photo. It was purely the source of my inspiration. So when you do this exercise, even though you're picking a subject or object to focus on. You could just use it as a piece of it. Don't limit yourself to have time to find a way to incorporate the whole object into the idea.
5. Developing the Idea: let's move to developing and expanding on your idea. To make it even more interesting, I'm going to go over a simple example. This is a self portrait I took when I was just starting out in photography several years ago, and at that time I had been really worn out with work and school, and I wanted to convey a snapshot of where I was in life at that moment, and the idea of running on empty came to mind. So I thought about what's relatable to a big audience, and what came to mind was an office worker, and so I decided to dress up in business clothes. Next, I tried to think it was simple way to show that I was exhausted not only by my facial expression, but by something else in the image that also pointed to this fact. As I was driving home one day, I looked down with the gas gauge, and this idea came into my mind to show the image of a gas gauge on a coffee mug. It's simple, but it's a clear message, and it goes beyond just a photo of a tired looking person to convey what I was trying to tell through that story. So when you're thinking about expanding, not an idea, think about what's relatable to the audience and what would they understand? Second, tried to not be completely obvious. Find ways to make your viewers connect the dots and not just have it all spelled out in one part of the photo. Think of it as having layers to the photo. People love looking at something and finding hidden pieces that high back to the main piece of the image. So what can you add to a photo to help tie things together? Remember that people don't like it when everything is 100% spelled out for them. It's too easy. So check out this photo. No. Where do I say in it that she's dreaming? But the fact that she is floating on a pillow suggest that she is not in our world and possibly a dream like state and number three. What can you take out? Is there anything that's distracting sometimes is strongest Photos are the simplest photos with the least amount of distraction. So after you determine what adds value to your photo, spend some time thinking about Is there anything your photo has in it that's distracting or creating clutter?
6. Planning The Photoshoot: when it comes to planning Bia's detailed as you can. This helps you anticipate any potential challenges ahead of time so you can troubleshoot before even going out on your photo shoot. Let's look at the things to think about when it comes to planning for a location and determining how you want to light your scene before we dive into talking about color theory and going over your equipment.
7. Finding Your Location: Now there are two ways that I go about planning locations. When I have an idea for a shoot, I try to think of all the places I know, whether or not they necessarily fit my idea. This especially helps in cases that I don't have a location. I want accessible and need to get creative in finding a place for the shoot. Things I asked myself when picking a location are first. Does this place fit with the mood of my concept? For example, if you haven't upbeat concept, you're not going to go do a photo shoot down a dark alley. Second, I think about if there are any distracting elements at the location. Third, do the colors work here? If you haven't done so already, that's it. Just learning about color theory as it's an excellent way to bring your photos to a whole new level. And lastly, what does the light look like here throughout the day?
8. Lighting Your Scene: Let's talk about lighting like with all other photos. It's the most important element to bring your idea of the life. When determining the time of day to shoot, I think about the mood of the scene I want to portray. For example, in this case, I wanted to be a little more moody, so we went in with an overcast day and then second. You should also factor in the color of light as well. For example, you may want to shoot in early morning for cooler colors or early evening for golden colors from the sunsetting. If you want to do something more light and energetic, think about shooting with blue skies or with a brightly colored background. If you've never shot at at certain location, it could be a good idea to do some test shots on it prior day to see if the light works with your vision.
9. Color Theory: I'm going to go over a few color theory basics for you to consider. I encourage you to spend time really developing your ability to use color in your images. Color theory talks about three primary colors. Red, blue and yellow. Secondary colors are green, orange and purple, and these are formed by mixing primary colors. You can also have a tertiary colors, which are created by mixing primary and secondary. Our warm colors red, orange and yellow generally give the feeling of energy, warmth and passion. And then we have our cool colors blue, green and purple, which could be seen as calming, soothing or dark and mysterious. It's important to think about your target audience when determining your colors, as each culture places different value on different colors. For example, read in many Asian cultures is associated with happiness and good luck. While in South Africa, red could be a color of sacrifice or loss yellow. In Japan, it may be associated with courage, while in Germany it may be associated with envy or jealousy. So consider culture when choosing your colors and really think about who your audience is and where they from color Harmony is about finding balance and aesthetically pleasing color combinations. There are many different color schemes that you can use, such as complementary colors. These air colors directly opposite each other on the color wheel. Then there are analogue its colors that sit side by side on the color wheel. Try addict colors are three colors that are evenly spaced out on a color wheel that form a triangle. There are a lot of websites and books that you can look at color palettes. I use an app called the Color harmonizer to get ideas of different colors to pair together .
10. Sketching It Out: the next step is just sketched out. Now this doesn't have to be anything crazy. Sometimes I'll do something as simple as a stick figure drawing the key things you want in your sketch are you want to do a sketch. That's from the angle that you want to shoot at to put it on a visible plane, where you can start seeing what may work in what may not work. And then I generally do a second sketch as well, and this is to sketch the layout of the scene. I generally do this on the lay flat view, and here I put the camera any lighting or props in the layout as well, so I can start to visualize where pieces should go, and this also helps you deal with any trouble spots in your design before going out and doing the shoot. If you haven't done so before, Ott suggests searching online for lighting diagrams. You confined a number of free websites that allows you to build one, or you can simply do it by hand. Here's an example of one. You have your subject. Let's say an off camera light or reflector. Over here, you have a few props here and here. Having a visual representation will help you when you're thinking about lighting the scene , where to place your camera. It may also help you see things you may need a change when it comes to you with the placement of your subject and any props.
11. Gathering Your Equipment: so we're almost ready to go out on our shoot. Next, I'm going to create a list of everything I need to bring. So my camera, Ah, couple lenses, my speed light as well as my radio poppers tripod light stand. And I'd also suggest bringing things like gaffer tape, maybe a towel, extra batteries, extra memory cards and depending on your photo, you need may need to bring things like a ladder or some stools just kind of really think What are the things that you may need? And honestly, I kind of go for a little bit more overkill. I generally bring a little bit more than I need, but it's also better to come over it prepared that not prepared enough.
12. Final Thoughts: Now that you've seen my process, I hope this helps you as you go about creating your next story telling image. If you have any questions, please don't hesitate to post below in the community section. Don't forget to post your class project, and I can't wait to see what you guys come up with. And if you want to see more, be sure to click the follow budget so that your updated as soon as the second and third part of my Siri's air released about going on the actual shoot as well as how I do my added in Thanks so much for watching my skill share class. So you guys next time.
 David S., Photographer