Transcripts
1. Introduction: Good. I want I'm sworn Marshall. Welcome to our class on Heikki portraits. Kid I. As I said before the intro, This class is about high key portraits. Hockey is a genre in photography where we have predominantly launched a tones in our image. Tag can be various different degrees of hierarchy in an image. But most of the terms tend to be lighter. We tend to shoot against light colored backgrounds. We tend to use lighter colored subjects for the sort of shots. It's not an overexposed image. It's an image that still well exposed. It still has a full range of tones from bright white down to dark black. Hiking, which tends to be recognized by a wider range of midterm ones. With a low-key image, we tend to have brighter areas and darker areas with very little in-between. With a high key image, we have a full range of tones from pure white through to dark black. And it tends to be a brighter, more cheerful, happy sort of an image. It tends to be less dramatic. It can be very flattering for a portrait. But we can use hiking in a number of different ways. We can use Heikki for still lies, for landscapes. We can use it for product photos. We can use it for lots of different things. We can shoot Heikki indoors or outdoors, depending on the situation, we can shoot in a number of different ways to give us those high tones, those light tones throughout our image. In this class, you will learn how to shoot Heikki images. You'll see a model shoot in the studio where I'm using high key lighting, amazing broader background. So I'm using Lada colored subjects. So it produces that really brought larger tone in the image. You also see many of my Heikki images that I've taken over the years, both indoors and outdoors. It's possible to shoot high K images pretty much anywhere. You just need enough like you just need enough exposure. You just need to recognize a Heikki situation or prepare and plan to produce your Heikki image, will teach you all of that in this class. So come along and join us and learned about Heikki.
2. Lighting and exposure control: Thank you for joining us in this class. Now the two critical things, or two of the most critical things when we shoot a high key image is our exposure and their lighting. When we're launching a high key image and goal is to produce as little shadow as possible. So ideally, we want a large light source. We want a light source that wraps around their subject that doesn't produce harsh shadows. We want a light source that's going to come directly on the front of our subject. Now these are generalizations, but this will get you a better quality result. We do Heikki. When we're shooting in the studio, we would use a large soft box. We would bounce light off walls and ceilings. We would place their light as close to frontal onto our subject as possible. Even when I'm shooting high k, I'll often get in front of the light source so that it wraps around me and launch my subject with his little shadow as possible. We need to be careful about our exposure as well. Our exposure in a high key image is just as critical as it would be with any other type of photography. We need to make sure that we're not blowing up a whites were not overexposing our white areas because we have a lot of them there. Now, white areas in an image. The most critical ones, because if we lose those white areas, they're lost forever. We can't get them back. Often shadows we can probably pull up a little bit later on in post-production. But whites AS something is critical, we want to make sure we get detail in Air Watch if we want them there. Now we don't always want detail in their backgrounds. We might want that background to be pure white, which is fine. But we do need to be careful that if we override our background, we're talking about studio shots here. If we overload how background, then we tend to get flair back towards the camera, that bright background will flare into our lens and reduce the quality of our image. It will give us flay spots in some situations, it will also give us a veil of, of brightness over every image that tends to reduce their contrast and makes her image look a bit flat and less interesting. So when we lightning owl Heikki image, we need to make sure that they're Watson blown it. Now often when I'm shooting a high key portrait, my subject is closer to me than the background, so I need to be doubly careful that I don't blow out the whites on their clothing so that those whites are over white often are will position my subject closer to the background, but they still a little bit in front of it. So the light on them is going to be a bit brighter than it is on that background. So I need to be careful. The other thing is we need to make sure that we do have a good solid black in lot of cases when I'm shooting portraits because that's what I do most often. The darkest part of the image is the pupil in my subjects, I, when I look at my histogram, my histogram is a little bit unusual because it shows me most of my tones towards the brighter end of mass-scale. And you could look at that and think, well, that's a really overexposed image. It's not particularly because often if I do have that really dark black pupil in the eye, there is just a small line of dark or ride up to the black end of my histogram that shows me that I do have that full range of tones. It's just that my tones are predominately lie to a predominantly white, but I do have that dark area there. So your histogram is going to look a bit unusual, will show you an example of a Heikki histogram here. You can see that most of the tones down the right-hand of the histogram, which is the brightest part of the histogram. We haven't gone off the end because we haven't lost any of those tones. But we still have a small amount of detail along the bottom of that histogram graph. That takes us right down to the darker end. So that's a well exposed image. The ideal situation with a histogram is for us to fill up that bottom line. And if we can do that, whether it's with high peaks and a bulk of histogram or it's just a small law and across the bottom, it doesn't matter. It's still tells us we've got a full range of tones. Now if you're unsure about sure. Exposure, if you're unsure about how your camera records a good exposure, you could underexposure image slightly and pull it back up. In post-production. It's not the ideal situation because you will degrade the quality of your image slightly. But sometimes it's a better option because if you lose those watch, if you ever exposed, then you're in trouble. So possibly just underexpose it a little bit and pull it up a little bit in post production.
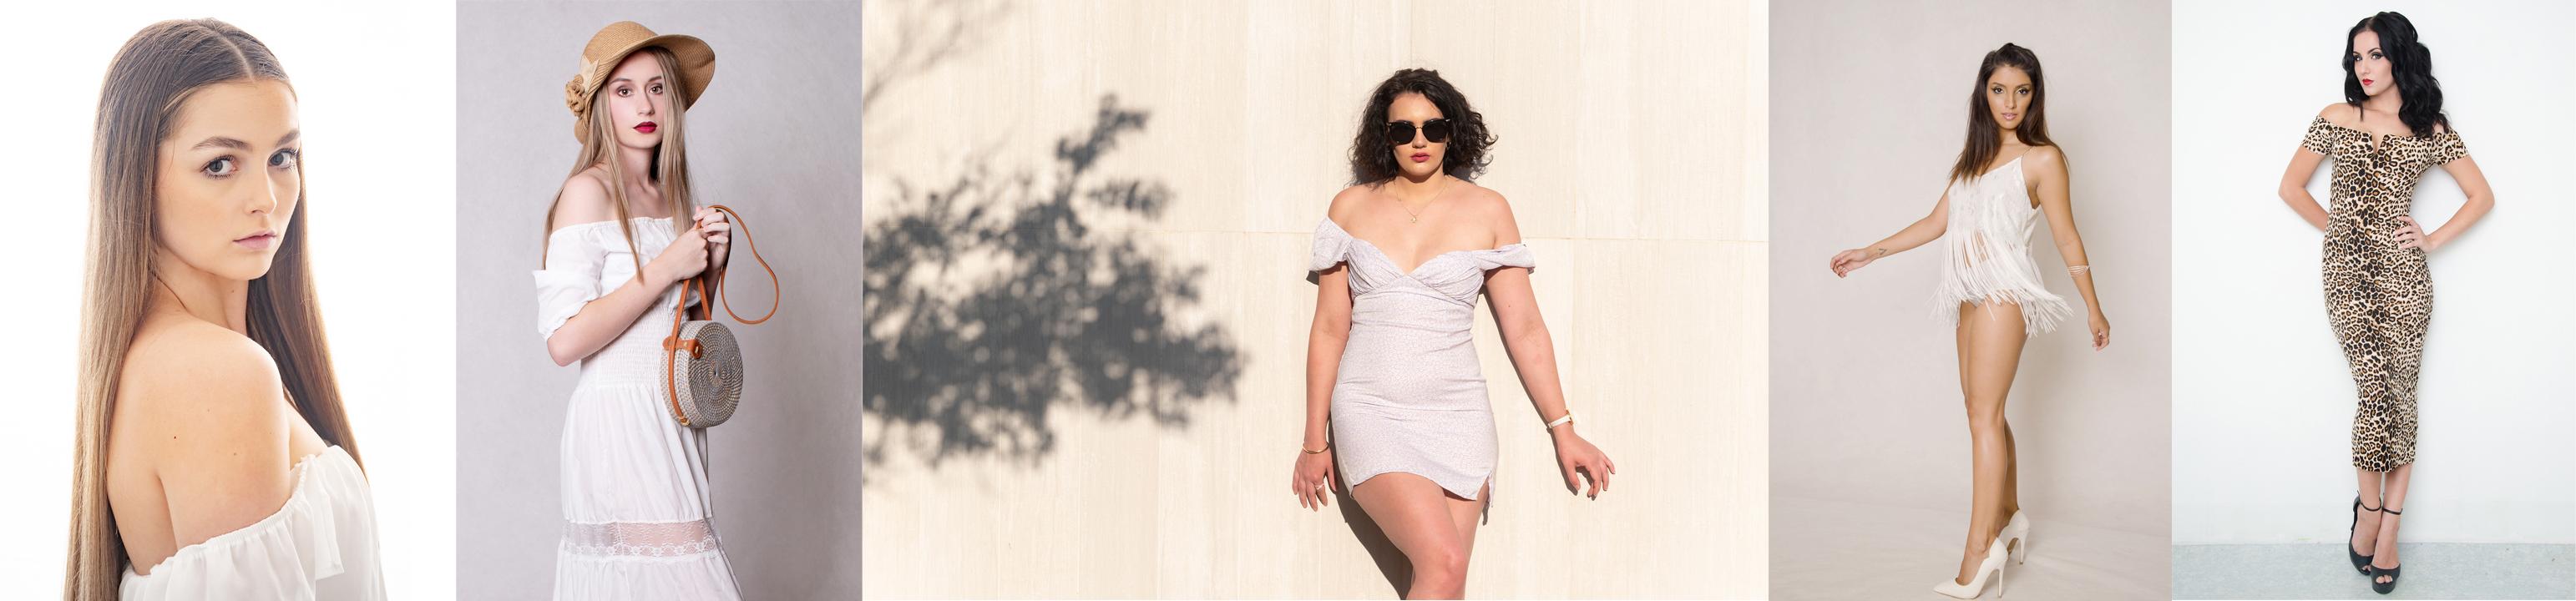
3. Shooting Indoors or Outdoors: If you're shooting hockey images outdoors, then a cloudy day is an ideal situation because you've got a large lot source there that's spreading the light all around, trying to find a white wall or some light background. If you're lucky enough to be shooting in the snow, You've got to what background they are. Perfect white background for a high key image. If you've got, if you're shooting hockey portrait, take your subject out there with logic colored clothing. And that's going to give you that really bright white Heikki image with predominantly larger turns. If you don't have access to a large light source indoors, you can simply bounce them off a wall. If you have a flash, you can aim your light at a white wall. That white wall will reflect a large soft light source back onto your subject. So it's quite simple to do it. If you know a little bit about lighting, then you can create lighting situations wherever you want. And the control of light is one of the most important things to us as photographers. As we'd loci photography, Heikki photography can be different things to different people. Some people might prefer a very bright image. Other people prefer just a little bit darker image, but with high k, predominantly lighter tones as the way to go. So have a look at this video of our studio shoot with Cassidy. You'll see the results that we get. You see the lighting that we use and the situations that she's in. So it gives us that high k background. You'll notice that most of the time she's close to the background so that we don't have that discrepancy between the light on her and the light on the background. It gives us those bright white turns, those lighter turns. You'll see Cassidy has a number of different outfits, lighter colors, white colors, so that it blends in well with this Heikki effect. You'll notice his skin tone is brighter in lot of the shots simply because we used that large light source that brightens up her skin tones and gives us the brighter, lighter, more upbeat sort of an image. So have a look at the video, and I'll see you in the conclusion.
4. Shoot with one speedlight: So we're in the studio today, whereas shooting some high k portraits. We've got Cassidy is a model today, you'll meet her in a little while. When we're shooting Heikki, we're talking about predominately launched a tones in the image. So we need to be a little bit more careful with their lighting. We use tend to use large lot sources frontally lit because you want to eliminate shadows as much as possible. There are a few different loading scenarios you can use with Heikki. But the one we're going to start off with is we're using a large soft box directly frontal onto our model. And we've also got to smaller soft boxes, Latino background. We've got a white background here. But if we didn't, if we didn't let that background, then it's going to disappear into greatness. It's going to dock and down because it will be further away from Cassidy. And we all know the inverse square law. The further away something is from the light source, the darker it will get. So we need to independently Latino background because Cassidy is going to be a little bit further forward of that. So we'll get in to a few shots and see how we go. Now, what we're doing here with their locking, we've got, as I said, we've got to soft boxes on the background to lighten up that white background, we need to be careful the settings of those lots because you don't want to overload our background. If we overlooked it, then we're going to get a little bit of flair coming back into a shot. So we need to launch it enough so that it's white. But no being over what, if you know what I mean? So if we liked it too much, we're going to get some flair and it's going to degrade the quality of our image. Once we've gotta have Becker and lights all set to be white, we put L a lot on our model, have frontal lot and we just adjust it up and down to get the light on Cassidy, the y that we want to. And once their balance is right, we should be fine. Another thing to remember too, is to position your background lot so that they're not going to lighten Cassidy at all. Because if we've got those light that light coming in from the side loading her from the side. It's going to interrupt their lighting setup. So we need to keep her in line with those lights so that that launched just logging a background and not a modal. Okay. Really to go, we've got Cassidy haha, sitting patiently, ready to shoot. So I'm going to do a test shot here to start with. And there we go. That looks great. Now what I'm aiming for is I'm aiming for detailing the whites in Casodex clothing. I wanted to get that plane what background? But again, if I overlap it, Cassidy, I'm gonna lose detail in her clothing. So I want to keep the integrity of the fabric and the patent of the clothing without overloading it. Ok. So who did the same thing, Cassidy. Just turn your face this way a little bit more. Yep. That's it. Okay. Here we go. Lovely. Can we turn you in the opposite way, please? See one foot forward, one foot back. Yeah. Right here we go. Lovely. Maybe sit on the front of the stool and just put that handout at the back. So you buddy is little bit Beck? Yeah, that's it. Ok. You go. Lovely. And can you push the hair backoffice side? Still little bit of hey, just resting on here. Yeah, that's it. Ok. Here we go. Okay, terrific. Now we've changed our models posts. We're going to do some standup shots because Cassidy is in the same spot that she was before. The lighting still going to be fine. We're going to get at what that ground and air lot subject. So she did a couple of these stand-ups shots with various different poses. Okay. Cosine, lovely, just looking straight at the camera. Right. And returning shoulders remain that way for me. Yeah. It's it. Turn your face back to this shoulder. Maybe look over towards the corner there. Yeah, that's it. Okay. Great. That was terrific. All right. So we'll change our setup now and we'll go to a different background.
5. Shoot with two small softboxes: Now because we're shooting hiking studio, we've got a lot of what surfaces in here. We've got white ceiling, We've got all what wolves, we've got a light colored carpet. And that's going to help us with their high K effect because it's going to be bouncing lot all over the place. And it helps us to get that overall soft lighting onto our subject. When we're shooting loci, it's a little bit of a problem because we have a lot of light bouncing around, but we need to take care of that when we're shooting that style of image. Also when we're shooting, when we're checking our histogram, which is a great way to check your exposure when you're doing these sort of things, your histogram is going to look a bit odd. Most of your histogram is going to be towards the right-hand end because we're doing a lot of light tones in our image. So when you look at your histogram is going to look a bit different to how you would normally expect it to be. But as long as it's not going off the end of a histogram, as long as you'll highlight alert isn't showing too much highlights, too much burned out highlights. You should be fine. We want to make sure that all of these white tones are contained within the dynamic range of your camera so that we can work on them later on if we need to, or we can use our image Australia camera. Ok, so we've changed their lighting set up here. We've moved to a white wall that we have in the studio. And I'm using two smaller soft boxes, the ones I used to lock the background for the last shot. I'm using them side-by-side and I'm shooting between them so that it gives me even light on either side of the camera, very flattering frontal light. And it will light up all of those areas that we don't want the shadows because in Heikki, we're trying to avoid shadows as much as we can, and that's why we tend to light from the front. So we'll do a couple of shots of Cassidy here, and I'll show you the results. Okay. Lovely Cassin. He just loved that. Just focus. Okay. Here we go. Terrific. Maybe move one hand around the front a little bit more. Yep. Great. Well, I'm just gonna get down low and do a full length shot. Just look out over my head a little bit. Yes. Again, terrific. All right. Now I'm just going to zoom in a little bit closer to steal horizontal shot here. Just turn your face a little bit to the side this way. Yep. That's it. Focus. Lovely. 21st a little bit more. Yep. Okay. That's great. Right now, can you move your shoulders? Are Antonio body around to the left? To my left, your right? Yeah. Okay. Chin down just a little looking straight at me and say, great. Thank Coursera in Kenya. Okay. All right, that's terrific. Thanks Cassidy. And now in this setup where we're doing a similar sort of thing was shooting Cassie against a lot of colored background. But I'm using my speed light, just a single speed light to lie to her. I'm bouncing it off the ceiling so that it gives us that nice soft light is going to be fairly frontal onto Cassidy so that we don't get too many shadows. So this is the same sort of thing that we've been doing, but you can achieve it just with a $100 paid light. We'll do a few shots and we'll show you. Okay. All right. Just focusing, Cassidy. Okay, lovely. Here we go. Perfect. Yep. Turn that facial literature. So idea. Oops, got away from my flesh to charge. Okay, that's good. Maybe a couple of hands up above your head if you can. Yeah. That's it. You just drop it Chindia and a little. Yeah. Okay. Alright. Terrific. Yeah, that's lovely. Just gonna zoom in a little bit closer to your face here. We get a fledgling. Nope. Okay. We go. Okay. Here we go. Okay. That's great. All right. We might just turn you around to the side a little bit so you can look at me. I VE shoulder. Do that yet. Yeah. That's it. Good to me. What a shot. Okay. So that's great with those ones. We're just gonna do one last set will get you to change that fit again, please. And we'll do some shots over against this background.
6. Shoot with a large octobox: All right, now the last set we're going to do for our hockey shoot today with Cassidy is we're using this this window setting. We've got a few little bits of furniture and things in there. Mostly light tones, mostly whites. And we've got Cassidy in a lottery outfit again. So we're going to launch her with the large soft box. You'll notice that it's tilted back a little bit because I want to take advantage of lighting the ceiling and the walls as well to try and get enough light in there to fill in all those shadows to make it look as Heikki as I possibly can. I've taken a test shot to make sure that my highlights aren't burned out. And we're going to expose Cassidy similar to how the background is, because she's back close to the background. If she was moved further forward from that background, we would have a discrepancy between the light on her and the light in the background. So he wouldn't be able to get those tones as scrunched in as we possibly can with a high key. When we're doing Heikki, The purpose of the exercise is to keep the tonal range as narrow as possible. So we want to keep the Watson the lights as Todd as we possibly can. We don't wanna have any discrepancy with their shadows and highlights. So we'll do a couple of shots here of Kasey and we'll show you the results. Okay, great. Cassidy, up nice and tall, were doing full length shots here. So I'm just going to focus on your face. Here we go. Nice exposure. That's great. One thing I need to be conscious of when I'm shooting vertical lines is that I'm not shooting to too much Deion on Cassidy or too much up at her because those lines are going to converge one way or the other. Ideally, I want to get in the middle so that I can hold my camera vertical, the back of my camera's vertical. So those lines are going to be straight up and down. It saves me a bit of time in post. Okay. Lovely. Keep that saints up there. Yeah, that's great. Okay. Terrific. And just look into the mirror so you can see me if you can. Yeah, that's it. That's good. Just gonna do a horizontal shorter than it. Focus again. Okay, here we go. Leveling. Okay, just turn your eyes to make cosine here. Seeing. Great. Just maybe put your thumbs in your pockets for me. Yeah. It's but chin down just a little. Yeah. Okay. Here we go. Can you push over here over the back? Yeah. Good. Focus. Here we get. And a couple of smiling shots for a month. That's a wonderful OK. I'd say a couple of but I made one. Yeah. That's okay. Alright. So that finishes up air hockey shoot Cassidy, she's been a fantastic model. We've got some terrific shots today. And you've seen them as we go on through this lesson. I'll see you in the next class.
7. Project and Conclusion: Your project for this class is to produce a high key image. It can be a portrait, it can be a landscape. It can be still live for a product shop. Whatever you want to do, simply an image with predominantly lighter tones. Think about the lighting. Try to use a large light source, a soft light source so that it wraps around your subject and doesn't produce too many harsh shadows. Think about your exposure. Think about not blowing out those whites. Keeping the lighter turns there, but not overexposing to get rid of those white turns, we don't want to lose them. Try some variations. Don't be afraid to fail. Don't be afraid to try something. If it's not going to work, it won't work. It just means that you've learned something. Try it again next time in a modified way and you'll come up with a new result. So upload your project, give us some indication about what you did, how you did it. Ask any questions you might have. Post some questions in the discussion section. I'll get back to you as soon as I can with the answers to your questions. Give me a bit of feedback about what's your thought about this class or other classes will always try to improve. Every time we produce a class, we want to get better and better all the time. I'm passionate about photography and I'm passionate about teaching. So thank you for taking this class. I'm sure you've learned a lot about Heikki photography, whether it be portraits or any other genre of photography. I encourage you to give it a go and edit to your repertoire. The more techniques we know, the more possibilities we have, and the more fun we have. So I look forward to seeing you in the next class.
 Warren Marshall, Passionate Photographer