Transcripts
1. INTRODUCTION: Have you ever marveled at
the photos that seem to defy reality images where
the same person or subject appears
multiple times, as if they've been
magically multiplied. Well, you're about
to learn the secret behind creating
those captivating, marvelous images right here. Hello, and welcome to Mastering self and subject
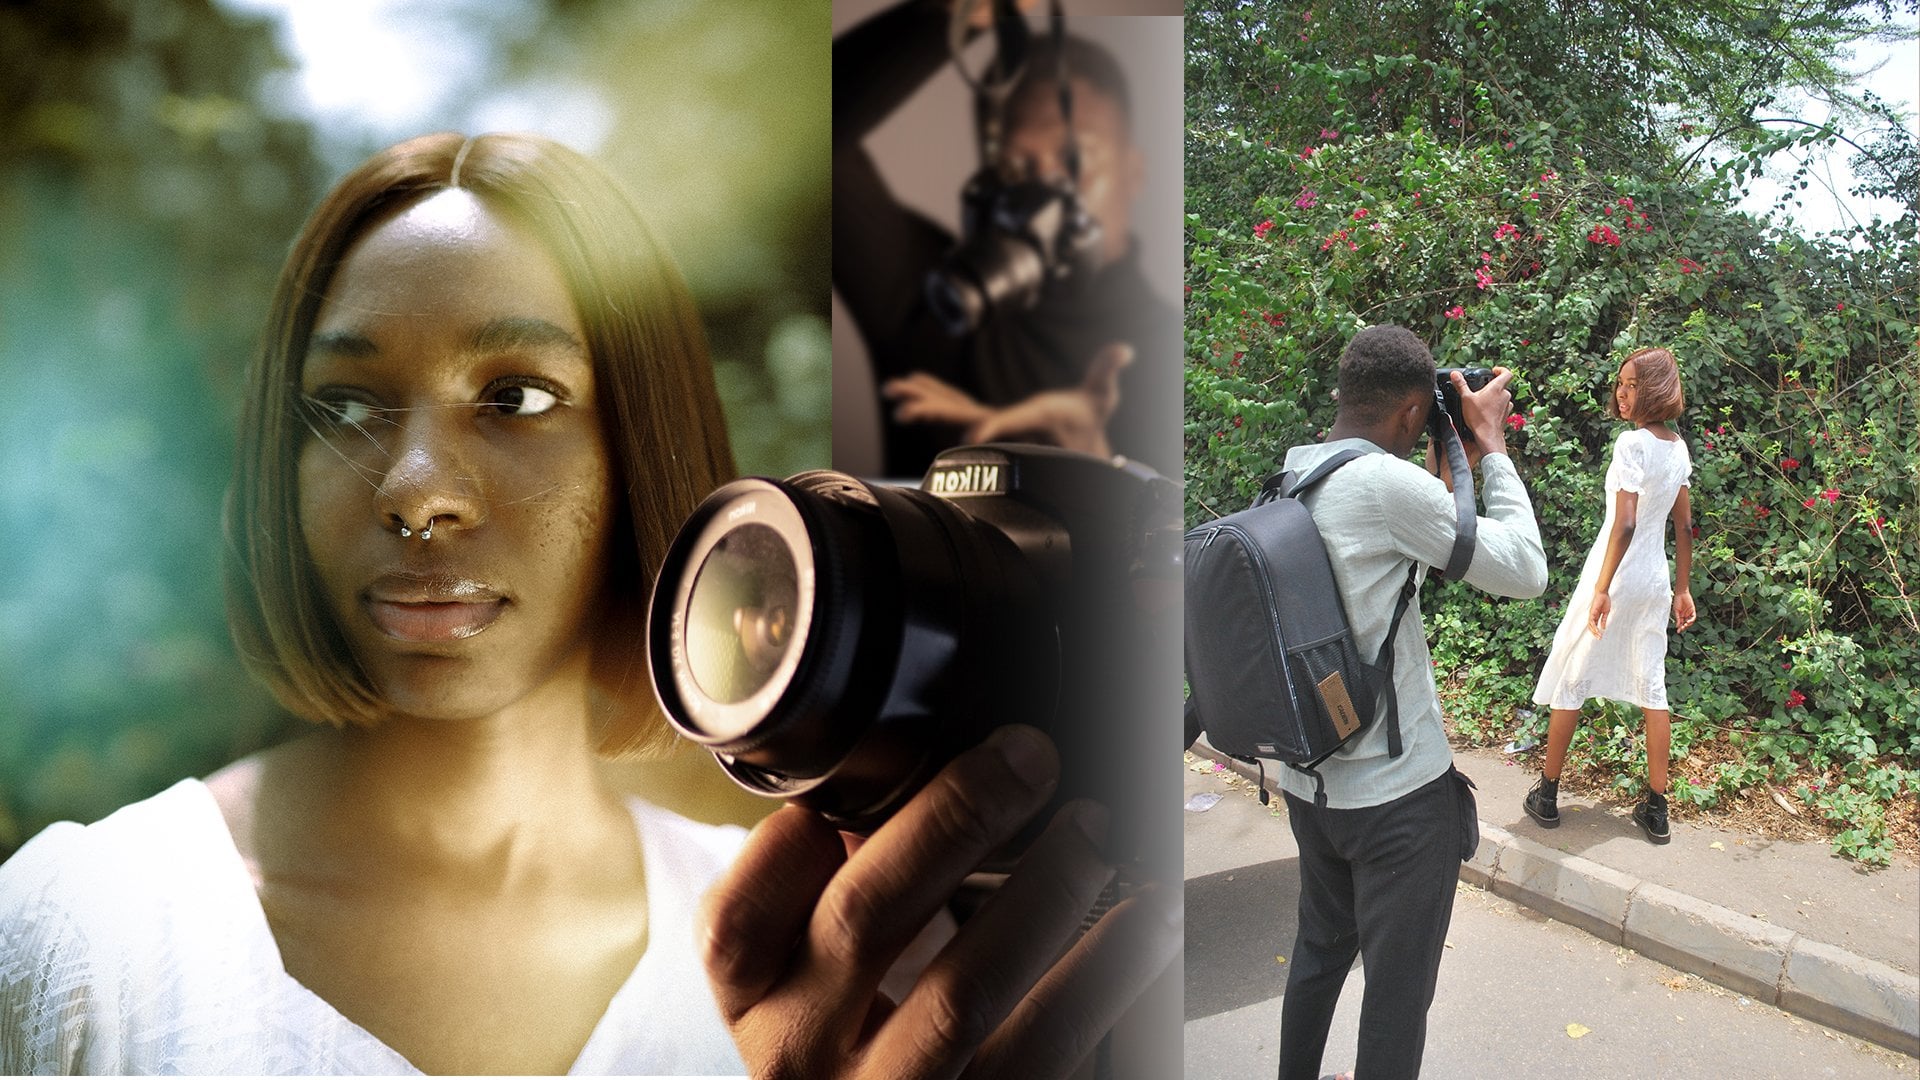
cloning in Photoshop. I'm Apoa Moody, a self
taught photographer who has had the privilege of turning
a passion, a profession. I'm also honored to serve as
an Adobe Express ambassador, an Adobe rising star, and a skill Htop teacher. Today, I'm thrilled to be your guide on this
creative chine. Whether you're an
aspiring photographer with a passion for creativity or a season pro looking to add some intrigue
to your portfolio. This course is
designed for you will delve deep into each
step of the process. You'll learn how to capture source images that are
perfect for cloning, master the art of
cloning itself, and then bring your
clones together to create a stunning visual narrative using simple but yet
effective editing techniques. You'll be surprised
at how you can easily blend your images
into one frame. But that's not all. We'll also explore the art
of color grading, adding that extra touch of magic that can truly
elevate your images. And for this, we'll be using adobe Ltrum as a self
taught photographer. I understand the journey
you're embarking on. In fact, my clone photos have been featured
on platforms like Open A Drawing attention and admiration from
fellow creatives. Today, I'm not just
your instructor. I'm here to share my experience, my knowledge, and the things I've learned over
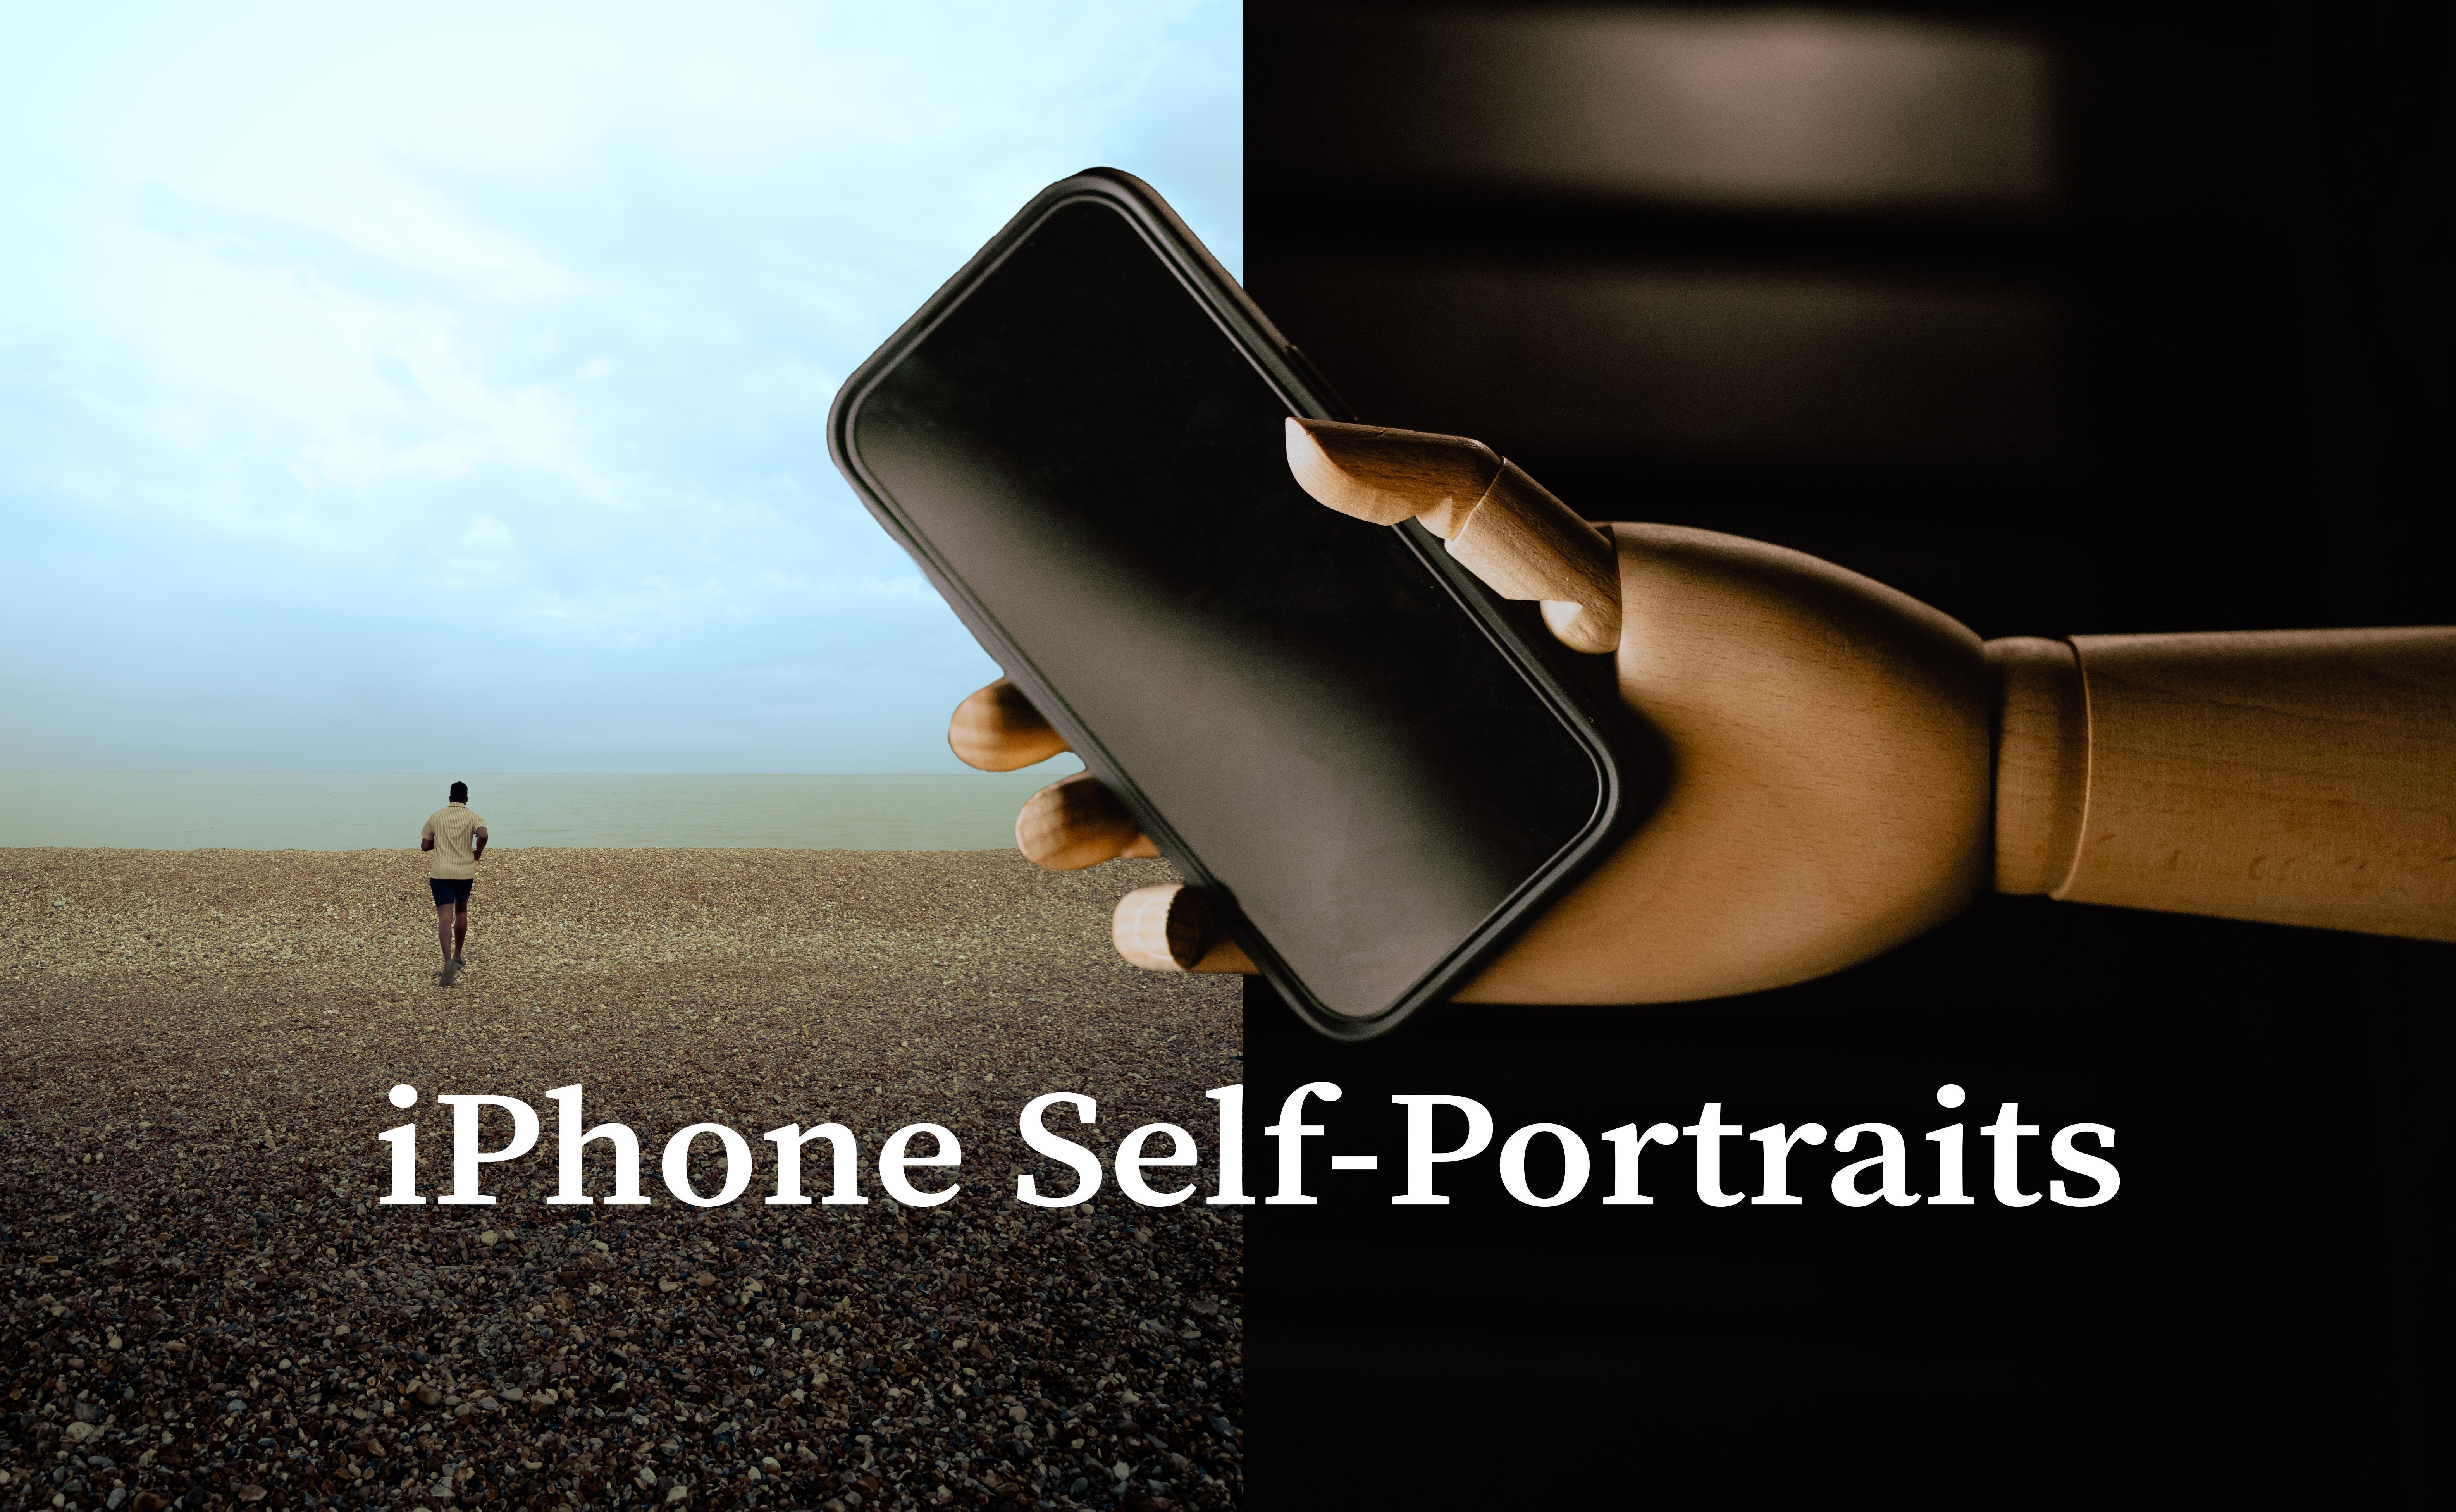
the past few years. Remember, you do not need
expensive gear to get started. You can use your
trustworthy smartphone, a digital camera, or even a drone to capture the
shot we'll be working with. And of course, having
the right tools makes the work easier. You will need a tripod and the Photoshop software on either your phone
or your laptop. By the end of this
class, you'll have the ability to create your
own unique visual stories. Whether you're
shooting yourself, your subjects or objects, you'll be amazed
at the reactions your creations will get. Trust me, I've been
there, so are you ready? Let's roll up our sleeves, kick up our cameras, and get ready to dive
into the world of clones.
2. CLASS ORIENTATION: Hello and a warm
welcome to this class. I'm your teacher, Boca Mode, and I'm really excited
to join me here today. Before we get started, I
want to make sure you have everything you need to make
the most out of this course. Throughout this course, we'll be covering everything you need to know to master the art
of cloning in Photoshop. From capturing source
images and editing clones, to crafting stunning
compositions and adding the perfect
touch of color grading. Let's get started by talking about what you'll
need for this class. To fully participate
in this course, you'll need a few key tools. A smartphone, a digital camera, or even a drone will work perfectly for
capturing your images. A tripod will ensure
stability and having the Photoshop software
on your computer or the mobile app version is
essential for editing process. But what I've got
some fantastic news. If you're unable to shoot or create images for any reason, don't worry, I've
got you covered. I'll provide sample
photos that you can use to practice your editing
skills alongside. So no matter your circumstance, you can fully participate
and excel in this course. Now let's talk about
your class project. Your task is a
captivating cloned image featuring two to three clones
in a well composed scene. You'll also apply
professional color grading to enhance the visual
impact of your composition. Here's the breakdown
of the steps you'll take to
complete your class. Project Number one,
location scouting. Find a suitable location with good lighting and an
interesting backdrop. Number two, capturing
source images. Use your chosen device and tripod to capture
shots for cloning. Number three,
editing and cloning, employ the techniques
you'll learn to seamlessly
duplicate subjects. Number four, compositing
an arrangement, arrange the clones in a
visually appealing composition. Number five, color
grading enhance the mood of your image with professional color
grading techniques. Number six, share your project. Create a project on skillshare. Put your images on
there and give us a brief description of
your creative process. Encourage you to
get creative and let your imaginations run wild. Feel free to experiment
with poses, angles, and color schemes to make your
projects truly stand out. And remember whether
you're working with images that you create yourself or the ones
I provided for you. The aim is to create something that is visually
compelling and appealing. So let's get started. I'm here to guide you in
every step of the way, and I can't wait to see the
beautiful images you create. Get ready to reveal
your creativity, embrace your inner artist, and embark on an amazing
creative journey. Let's dive in.
3. FINDING INSPIRATION: Hello, wonderful learners. I'm Abel Moody, your guide, and today we'll be talking about finding inspiration and
concept development. Before we jump right into
the technical aspect, let's take a moment
to understand why cloning is such a
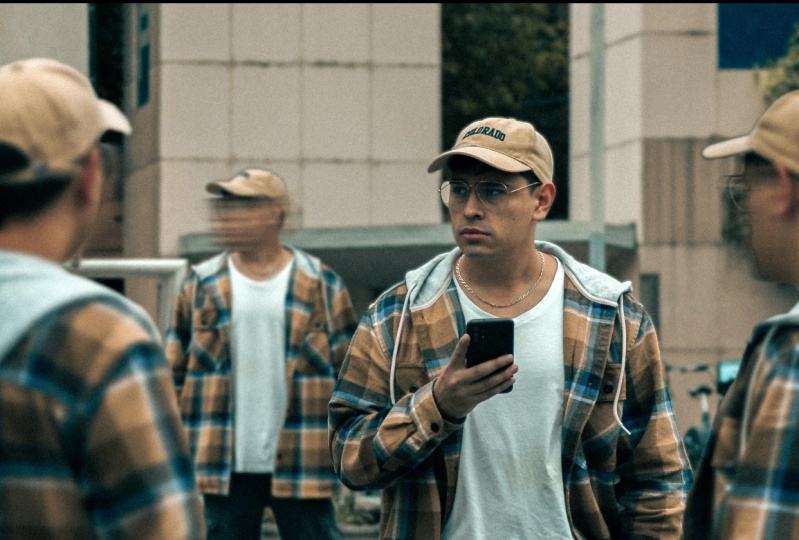
unique technique. Cloning isn't just about
replicating subjects, it's about crafting stories, evoking emotions,
and transporting viewers into a world where
imagination knows no about. Just take a look at
the stunning examples from fellow artists who have harnessed the power
of cloning to create images that are
nothing short of magical. They've woven narratives
that intrigue, inspire, and invite us to
think beyond the ordinary. So where do you find inspiration for your own cloned creations? One fantastic source
is Pinterest. It's a treasure trove
of ideas, concepts, and visual references that
can spark your imagination. Here's an example of a Pinterest
board I've put together. As you can see,
it's brimming with common concepts that you
can integrate cloning into. Remember, inspiration can be gotten from anywhere
from movies, books, everything,
your everyday life. The key thing is
to think outside the box and imagine
how the cloning can add an extra layer of intrigue or uniqueness
to that scene. Now let's talk
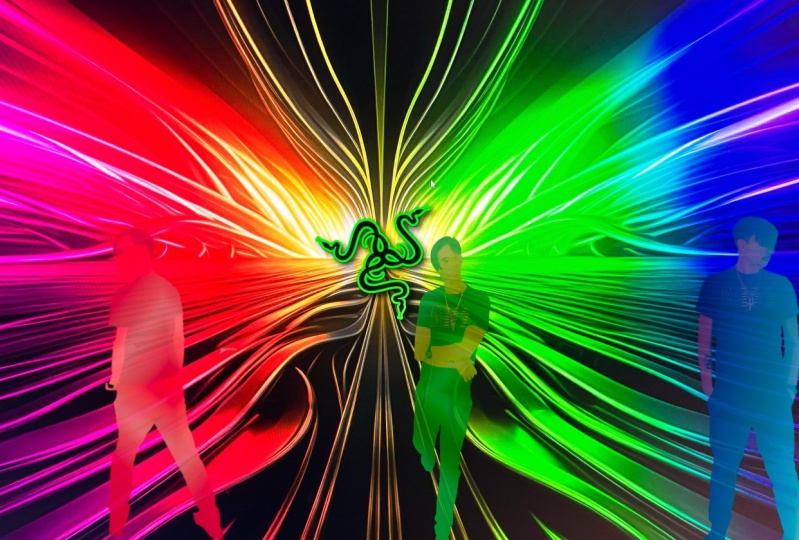
about brainstorming and developing concepts. Say you're drawn to the idea
of a dreamy dance party. Picture yourself in a
lush garden surrounded by graceful clones twirling
to imaginary music. This concept could
infuse a sense of wonder and mystery
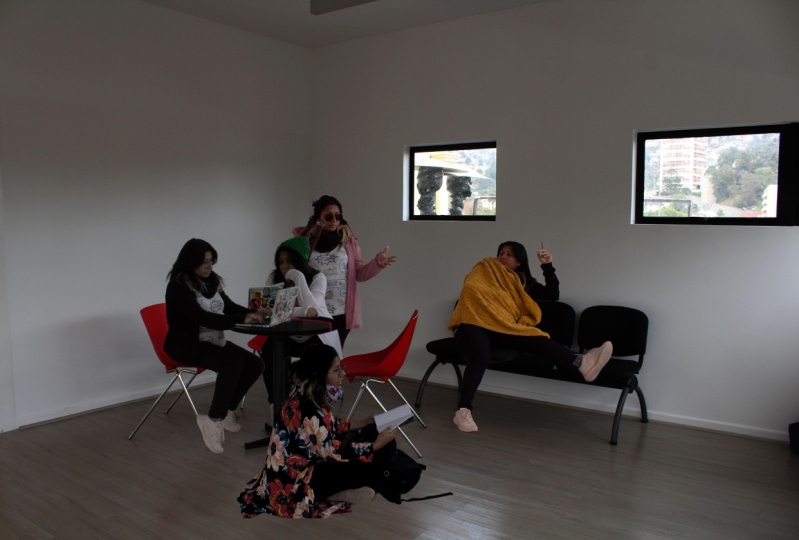
into your photograph. Next, consider the importance
of suitable locations. Imagine you're fascinated by the concept of time
travelers gathering. Think about places that
evoke different errors. An old library, a classic cafe, or even a retro park. The location sets a stage
for your narrative. As we move forward, I encourage
you to explore interest, let your creativity flow, and try and integrate
your clones into the most common concepts. Remember, it's about crafting a visual story that resonates
with you and your audience. Congratulations on
completing this lesson. You are now armed
with inspiration and concepts to follow
your creative ideas. In the next class,
we'll dive into the practical aspect of
creating these images. Get ready to bring
your ideas to life.
4. SHOOTING: Hello, creative Learners. Today we are diving
into camera settings, Trippod, set up postures, and the power of shutter speed. These elements play a
crucial role in capturing the perfect shots for cloning and also in your
editing process. First things first, let's
talk about the tripod. It's your trusted companion for stability and consistency
in your shots. A stable camera and shows that your clones are
aligned perfectly, creating a believable
composition. No tripod, don't
worry. And here's why. A couple of years
ago I set out to create photos without a tripod. I had to get a few stones to get my camera to the level
I needed it to be. I focused on my bag. I set the time out to 10 seconds because I did not have
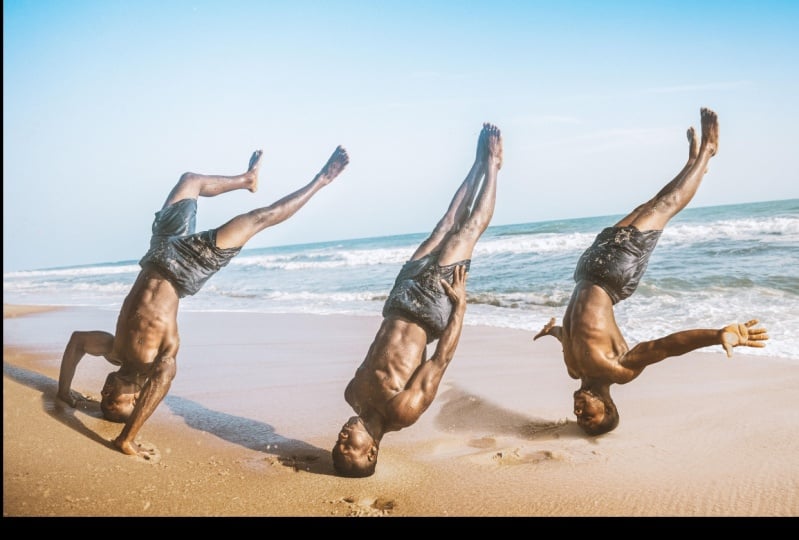
a remote for my camera. Now let's focus
on shutter speed. The setting determines how long your camera center
is exposed to light. A slow shutter speed
captures movement blow, which can be enhanced creatively to making editing clones easier. Take a look at this image. The slower shutter speed has
enhanced the movement blow, making it easier to blend and edit clones seamlessly
into the scene. Shutter speed can
be a secret weapon, especially when it
comes to conveying motion or dynamic energy
into your composition. When capturing
images for cloning, consider using a slower, shorter speed to capture
your motion in a unique way. Moving on to posing
and positioning. These are critical aspects
for successful cloning. When positioning
yourself or subjects, think about the interactions
you want between the clones. Maintain consistent lighting and distance to ensure a
convinced and final result. Remember, capturing a series of short is essential
for seamless editing. Shoot multiple frames with slight variations in
poses and expressions. This will provide
you with options during the editing process. For instance, if you're capturing
an image like this one, having multiple shots to
choose from allows you to select the best expression
and positions for each clone. As we wrap up this lesson, keep in mind that
all these points are tools in your creative arsenal. They'll empower you
to capture clone worthy images that tell a
visually compelling story. Congratulations on
completing this lesson. In the next class,
we'll explore editing, specifically cutting out
subjects for cloning. Get ready to bring
your images to life.
5. EDITING SELECTIONS: Hello fellow creators. Today we're going to explore
how to import your images to Photoshop and begin enhancing
it for the cloning process. Let's start by discussing some
basic editing techniques. Here's how you can
import your images. First of all, you
have Photoshop here, and then you pick out your selected photos and
you dump them in Photoshop. It's going to open a software, a mini software
called Camera Row, where you can adjust like your white balance settings
and a couple of other things. So you hold or hit command
or control to select all the portions so that
you're adjusting a few things. It's adjusting all the images you want to have cloned as well. Here. I'm just going
to reduce my exposure. Increase my highlights. Yeah, I think this is beautiful. I'll also increase my
shadows just a little bit and then reduce my blacks. Normally, I toggle around this both on Litrm
and on Photoshop. But here we have your saturation
panel. Your hue panel. I normally go to the hue
panel and make my yellows a little bit more orangish then also with the
greens as well. I do that, sometimes I
do it the opposite way. But oh, okay, I think I like
it the opposite way today. We're just going to
leave that there. And then my saturation's a
little bit too saturated, so I'm just going to bring
that down a little bit more. Yeah, perfect.
Then the luminant. I'm just going to
increase my greens. The luminance of the greens and some of the yellow as well. So note that I have all
the images selected. It's going to affect all
the images exactly what you see is what you see in like all the images I want to clone. This is important
because you need to have a consistent level of
colors in all the images. You need to clone so
that no image seems out of place when you are
compiling them together. Now the next step is making sure all of them are selected. You click open and it puts it in Photoshop
in different tabs. So yeah, that's about it. Next we're going to
enhance the image quality. This step, which is adjusting
your levels and curves, is not necessarily
an important step when it comes to color grading, it's just something you can
do as well in Photoshop, you do this when you're done compiling all your
clones together. You can simply go
to this point here. You click on it and
you see levels, you see curves as well. What I do is I click on levels, I go to Reds and I just
pull this a little bit in. And this a little bit into. I do the same with greens,
it's quite consistent. Nothing special
about it for now. But you can just use these
steps to get this tone going. You can also experiment
to know what you want, and I leave it like
this and then put it in litrum to further
color grade the image. But this is just the levels and you have the curves as well, which you can, you can
play around with the reds. You can crush your reds.
You can crush your shadows. You can bring them down. Yeah, just different
things you can do with the curves and the
levels panel as well. But this is not necessarily something you need
to do on Photoshop. You can also like just carry your full color grading
process to litrum. I'm just going to delete
this too, right here. Now let's talk about the part of precise cloning selections. Photoshop offers various
selection tools like magic wand, quick selection, and pencil. These tools help you
isolate your subject effectively for clean
and precise selections. The pencil is my favorite. It allows you to create
parts around your subject, resulting in smooth
and refined edges. Creating clean selections is key to achieving smooth cloning. As you can see here, we're
about to connect the dots. When you're done with your
pencil, this is what you do. Just click on your
starting point and then it finishes up. You just zoom out
and right click. And you tap on Make
Selection automatically. It selects what you've
been selecting. Yeah, that's for the pencil. Now we will use the
object selection to. To select our subject, you press command D to get
rid of your selection. And then we go all the way here. You can click the
quick selection. You can click the
object selection. I think I prefer the object selection as well
to the quick selection. As you can see already,
the object selection is already mapping out places that it automatically thinks
we want to select out. You have the background,
which is here, and then I click on the ground, and it's like selecting
just the ground. I click on the subject and it selects the subject which is, well, a more stress
free than the pencil. Yeah, Yeah, a lot more
stress free than the pencil. We left click on what
it's suggesting. We're just going to
left click on what it's suggesting and we have
it do the work for us. The next step is I go
to the quick selection, while the object selection
selection is selected. And then zoom in a bit just
to find in a few things, we're just going to brush over the points we think
should be selected. If you're using a
Windows laptop, you can just click to minus, basically the things you
don't want selected. Just looking at a few things. Looking at all the
edges to make sure everything is well put. Yeah, I think we can
zoom in to be further, to make sure see places like our head to just make sure
everything is selected well. This is the, I think
only stressful part with the object selection tool, which is you have to make sure like a few
things are selected. You have to do the fine
tuning yourself as well. Just clean up a few
things basically. Yeah, so I think this is good. The next step for the
object selection tool, which I use because
I still don't mind the extra work which is making sure the clone
is blended perfectly. I go to select up here, and I go to modify. And I go to expand, I expand it around
ten pixels sometimes, and then I expand it around
20 pixels sometimes. Depending on depending
on what frame, or rather what resolution
I shot at You. Click Okay. I didn't notice
any change per se, so I think I need to go higher, which is I need to go
higher to like 20. Now I saw a change. Yeah, 20
might seem to be too much, but I think it's
perfectly fine as well. This is why I expand it to, this is how I move it
to my primary photo, which I'm cloning on, basically. Congratulations on completing this editing
and selection lesson. In the next class, we'll take the selections and make
them clone. See you there.
6. COMPOSING SELECTIONS: Hello, Creative Minds.
In this lesson, we're going to explore the
creative process of bringing all our selections into one composite and
making a cloned image. Arranging and positioning
your clones within a composition is like setting the stage for a
captivating story. Think about the interactions
between the clones. The gazes poses and movements to create
a dynamic narrative. To arrange and position
your clones, you need to, first of all, arrange and
position your clones. And to do that, you have
your selections here, like we did in the last lesson. And you click on the
move tool right here. And you click and hold down on the selected tab,
which pulls it out. We now press Command or Control and hold it and dump
it on the photo. We want to be our primary photo. The next thing is holding
command or control. You can slide it
across and position it as you want it to be positioned. This is relatively nice. We now do the same thing for the other photo
that we're adding to be our cloned photo as well. We go through the whole
selection process to get like the photo selected, our objects selected and
our subjects selected. And we do the whole process of modifying it, expanding it. We're going to do 20
pixels, which is perfect. And then we're going
to also move it, make sure it's selected. On the move tool, we're going
to pull that tab out and we're going to hold command or control and drag it
onto that please. Now you have a photo
that looks like this. Transforming and
scaling your clones is a very powerful tool. This allows you to
adjust the sizes and angles for a natural
and realistic look. Remember, consistency is key. Make sure the lighting
and the shadows are all equal in all the images. Here's another thing. When it comes to composing
your cloned image. You can easily resize by
holding onto the layer that you want to resize and
pressing command or control to give sort
of perspective. You assume that if this clone is a little bit
further towards the camera, it's going to appear
a little bit bigger. It helps the eyes
actually balance like a cloned image without it
looking foreign or alien. And then you can click Enter, and then if it's
going to be behind, you can make it a little bit
smaller and it's perfect. I think I'm going to put
this one here behind. So I'm just going to make
it a little bit smaller. Something like, this is perfect. And then I'm just going
to track it across here. This is beautiful. Okay. No, I think this is perfect
as it is at the front. So I'm just going
to make it bigger. A little bit bigger actually. Yeah. And pull it out perfect. I'm thinking of putting
this one behind, so I'll just make
it a little bit smaller and pull her like
this a little bit here. This is perfect layer masks. Now this is how layer
masks work basically. So having your layer selected, this is layer one, which
is this layer here. Remember we did
something that sort of expanded our selection, which means it picked out like the extra outline from that
background to this one. So we're trying to get rid
of that at the moment. Which you can see
right here over like her shoulders and
all around her. So we're just going to
click on that layer and then we're going to
click on layer mask. It's going to bring this white, um, this white border thing. We're going to make
sure our paint brush is selected and make sure
our paint is on black. This means you're
just going to paint over that layer basically. But it's not going to
paint with the color, it's just going to paint
out the selection. The next thing we're going
to do is just adjust the size of our brush. We're just going to make
it a little bit nice. Yeah, this is perfect.
And then we're going to make sure our
capacity is set at 100. Sometimes you can
actually set this at T just so that it
blends perfectly, so I think we're going to
actually use AT as well here. And then you can brush over, you can see how it's
just like brushing over gently a bowl,
like the subject. Yeah, I guess this is
actually how it works. This is how the layer
mask tool works. This is just like
perfect your selection. Basically, I prefer this method to just allowing the AI tool
just select randomly for me. I prefer doing this
because I can easily look at every single
pixel I want out or in, and I can undo
something as well. So as I touch the hair here, I can easily just go right here, tap white and paint
back over the hair, and then tap black and just reduce my brush just to make sure I get
that selection in. So you can actually be very detailed with this by
zooming a lot more. And just like making sure your brush is a
little bit, maybe smaller. And just doing this,
layer masks and opacity play a crucial role in blending your clones
seamlessly into the scene. By carefully painting
on the layer mask, you can reveal and hide parts of your clones to achieve a
believable integration. Fintining the composition is the last step in creating
a captivating image. The next step after this
is going to be your level. The theme we talked
about earlier, which is which is the
levels and the curves. This is, it helps you just
blend everything together. You can just do do that
just in case you have like clones that you go
from another picture or when the sun was
a different angle. You can easily just
like put that in and use levels to just make
everything look the same. Kind of congratulations on mastering the art
of transforming, arranging and blending clones. In the next lesson, we'll
take our compositions to the next level through color
grading. See you there.
7. COLOR GRADING: Hello, Creative Explorers. Today we're going to talk about color grading and how that can affect your creativity and
the outcome of your photo. We're going to discuss on
how colors can amplify your stories and also explore the techniques I use
in color grading. Color grading, a technique commonly used in film
and photography, allows you to control
the colors in your image to create a specific
mood or atmosphere. In our case, it's
about enhancing the story we're trying to tell with our clones to
color grade this image. Like my previous classes, I've mentioned the tools
and litum that you can play around with to just find
your style color grade. So I'm just going to see playing around with
things as well. So we have the exposure tab. I think it looks really beautiful when the
exposure is down. Let me check my contrast. I'm kind of conflicted
about the contrast because it looks nice when the contrast is a little bit up. And then it also looks nice
when the contrast is down. So I think I'm just
going to leave it down. And then we're just
going to increase our highlight a little bit. And then decrease our shadows. Or increase our shadows. Oh my goodness, I'm conflicted. Okay, so I think we're
increasing our shadows. That's a must. And then maybe we'll just just increase our
contrasts a little bit. The next thing is the blocks. I think with our
shadows increased. I'm just going to, this is
the beauty in color grading, and I'm happy I get
to do this with you. In trying out new things, you discover new things. Or rather in trying
out different things. You discover new things, you discover what you like,
what you don't like. Normally, I would
put my blocks down, but I just tried
sliding this up, and I really love how it looks. That's how color grading
is, basically, for me, testing our new things with a previous knowledge
of how they work. So I think I'll increase
the contrast a little bit, with my blacks
doing that as well. This looks beautiful. Next we have the curves. Well, in color grading, I use this sort of last, but let me just see
how this works. I don't think I want
to crush my blocks. So I'm just going
to do this a little bit and bring this down. Well, I want to definitely
crush my whites, so I'm just going to
bring this down as well. Okay, That's all for the curves. For me, the next step
is the temperature. I'm just going to
make it a little bit. I think I'm leaving
that there now. For now, I'm going to increase my vibrant and
reduce my saturation. Okay, now we're here. I think for this
I'm just going to reduce my luminant
because that's his skin. And increase my
temperature a little bit. The yellows, I want to
see what they affect. So I think I'm just going to reduce the yellows
all in all and increase the luminant of the
yellows, the greens however. Okay, that's good. Okay, so
I'm just going to reduce the saturation a
little bit and make it a little bit yellowish. Okay, that's perfect. The next thing now is
the color grading tab. I'm just going to
avoid the point color because I don't we Okay, let me quickly cover this. We're going to select a color
in the photo and I think this is the perfect color and then we're just going
to mess around with it. This is a new feature,
a Llrom'st Impressive. Because you can actually get a particular color and adjust what you want
with that color. So I'm just going to and
increase the luminus, reduce the saturation, and note how it actually just
picks just that color. It's really impressive.
The next thing I'm going to do is
my color grading. I normally like to add some meat tons, some
warm meat tons. So I'm just going to do this. Here's a tip I have
for color grading. You take this to the
maximum and then you just like hover it around
to see what you like. If this looks nice to you, then you now start
reducing it to a little bit to when
it seems realistic. The same thing with the shadows. You just move it around and see what looks nice. This
looks really good. This looks perfect. So I'm just going to reduce
this a little bit up to here. And now it's looking to warm, so I think I want to
add highlights and make it then blue and
this looks perfect. I might also reduce my meat tons or just take them here
and see what that does. This looks good, this
looks really good. Next we have blending. You're just going to
slide this across and look at what you like. Basically, I think I
like this because it removes a little
bit of that warmth. And then I'm just going to shift my pants towards
here a little bit. Okay, so now we're going
to go to the effects. Basically, I'm going to move
around with the vignette and then feather it out a little bit so that it doesn't really
affect our subject. And then the green,
green is actually a very interesting part
of my editing process. Um, you can choose
to add grain and then some roughness and
then maybe some size, and then it just gives
a lovely perspective. And especially in cloning, because here's the secrets, grain can cover up some little little
editing mistakes you might have made when you
were selecting your clones. Grain is a perfect way or a perfect friend for you
when editing clones, the next thing I
would do is yeah, just basically the next thing
I will do is go to my crop. And I just like
playing around it, seeing what they look like
when you shift things. And this looks in, this
also looks interesting. I think I'll just leave
it in the original ratio. I would go to my mask and then just pick my
radial mask as well. And just put this like this. I would select the negative
and click on the subjects. It's going to select all my
three subjects, which it has. And then I'll just increase
this a little bit. Red. I think I will increase
the contrast because I want to reduce my haze. Yeah. Then my blacks as well. I think I will just
reduce my exposure. This is perfect. Yeah.
So there you go. This is the before,
and this is the after. With the color grading person, congratulations on discovering the transformative
world of color grading. In the upcoming class, we'll wrap up the
journey with tips, tricks and insight
on how to keep honing your skills when
creating cloned images. I can't wait to see you there.
8. CONCLUSION: Hello my friends and
imaginative creators. We've reached the final
chapter of this journey. My name is Apl Mode, and I'm very excited that you've joined me on this journey trip. As we reflect on the incredible
lessons we've covered, I want to take a
moment to highlight the key things and incite
we've had trough this lesson. These things will guide
you on your journey to crafting captivating,
cloned images. From exploring the
potential of cloning, to finding inspiration
from fellow artists, perfecting your camera settings, to editing, to shooting, to color grading as well, and also to selecting your
clones from your images. Every lesson has been crafted to improve your skills as a
seasoned photographer. Remember, the art of cloning isn't just about
creating duplicate. It's about weaving
stories that resonate spark curiosity and transport the viewers to a new dimension. Your imagination
is the fold that will propel your
creativity forward. As you embark on your
creative journey in creating cloned images. I encourage you to use your uniqueness and
finding your own path through the tips and tricks and inspiration that has been shared
throughout this class. What's more important
is what you can tell and the story you can tell through your mind
and your creativity. Uniqueness? Yeah. Use the
techniques you've learnt to craft images that reflect
your style and your omission. Throughout this
course, I've shared every single thing I know about cloning in the hopes that it would ignite a passion and
ignite a fire within you. Use these tools and go and
create amazing images. As you move forward,
remember that creativity knows no bounds. Let your imagination so your
journey doesn't end here. It's just the beginning of
a journey of acceptance. You've accepted
the artist within you and I can't wait to see it. So please remember to share your images as
projects with us. Describe your
creative process and show us the beautiful things
you've created as well. You will get positive feedback,
I'm very sure of that. And also get to see
your classmates and see what they had in mind to when creating cloned images. I can't wait to
see what you would create using cloned images. Thank you so much for being
a part of this class. I will be creating more
classes on photography and different techniques
you can use to master photography as well. I've also created some
amazing classes in the past on mobile photography and
portrait photography. Feel free to check them out. I can't wait to
see you in one of my other classes. Take care.
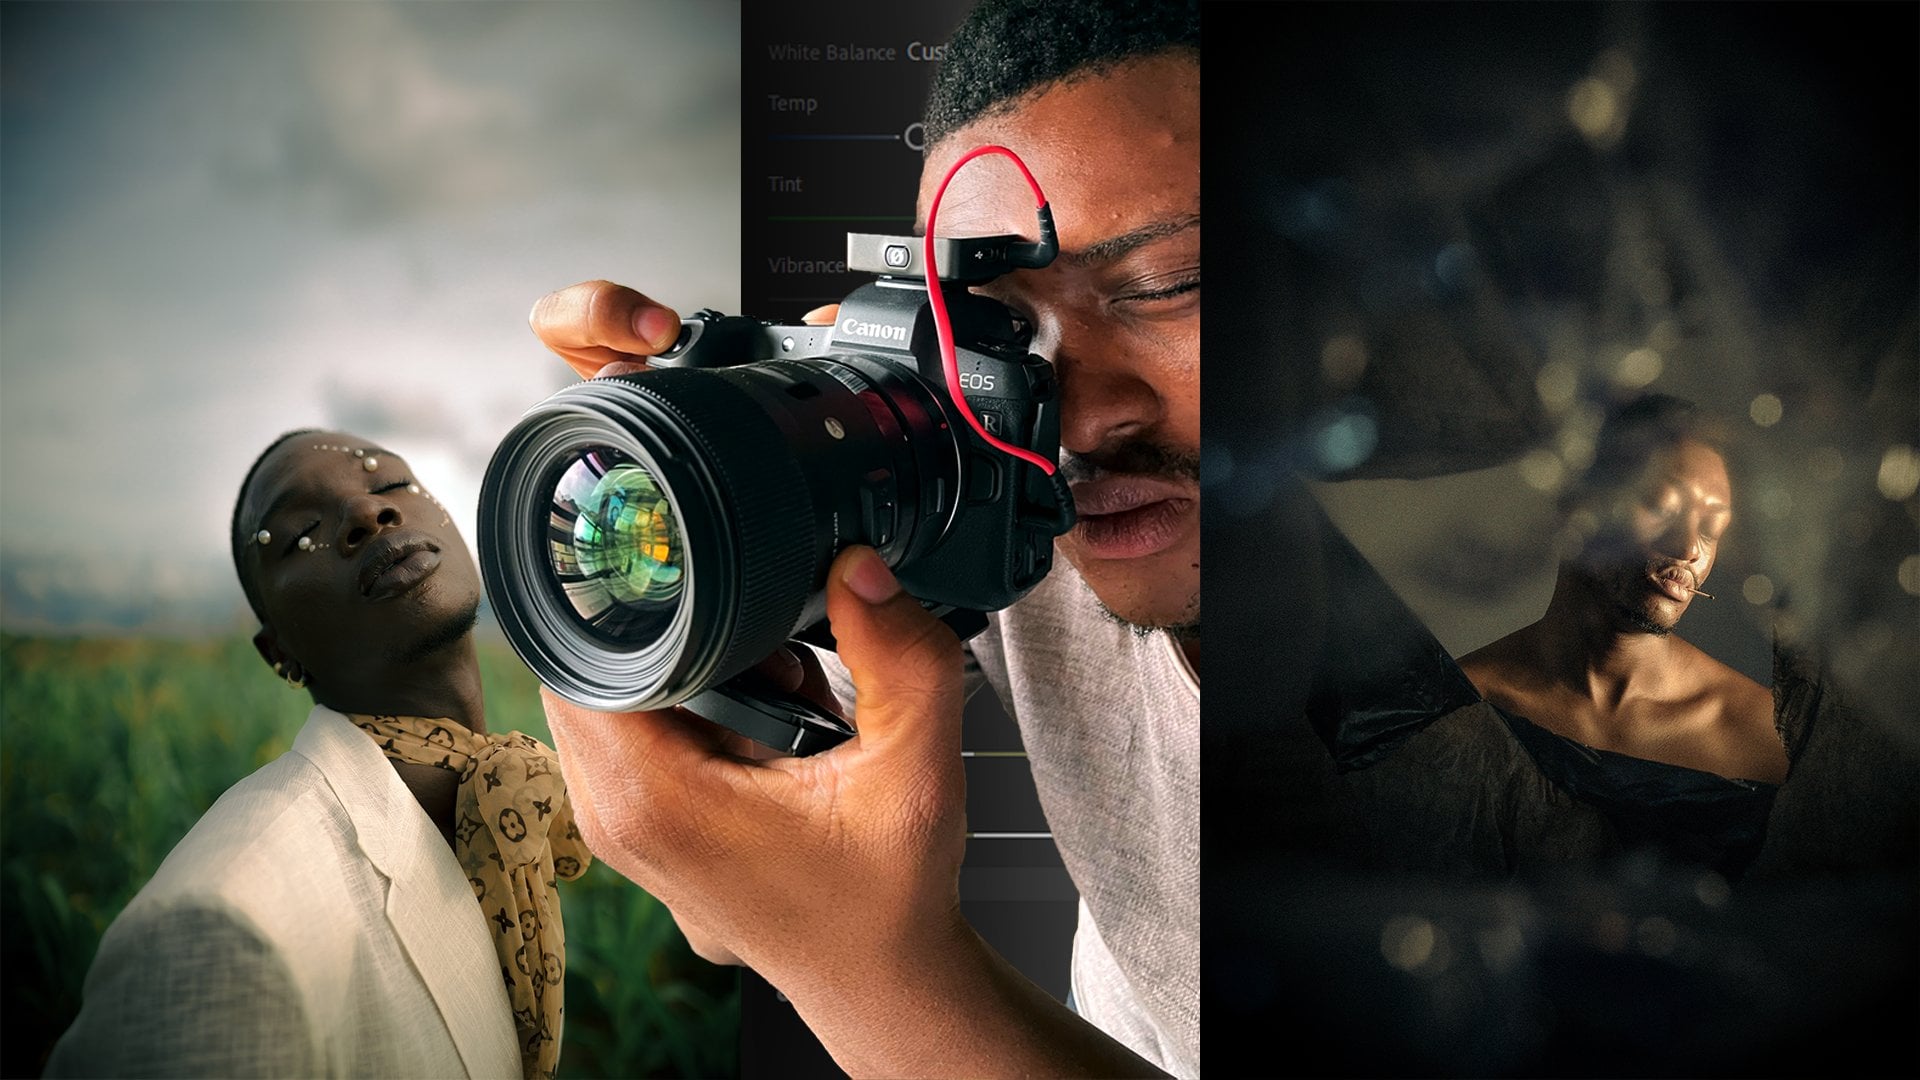
 Ebuka Mordi, Nigerian portrait & fashion photographer