Transcripts
1. Introduction: [MUSIC] There's no
such thing as feelings a rough texture of paper, holding a pencil or
brushing my hands. Art has been part of my
life since I was a child. I have been involved with
so many different mediums, from watercolors, aquarelles, to textile design
and also animation. I'm really fond of the
traditional technique. My name is Alexandra
Gabor and I'm a professional art
teacher and artists. I have written my
masterpieces in the topic of traditional techniques
of animation and also won a price
with one of my creation. I have become an art teacher
so that I can continue exploring all the
different techniques and mediums and to be able to
share this knowledge and my passion and love for art with people from
all around the world. In this class, we
are going to create a simple cutout animation like the one you have seen at the
beginning of this video. Cutout animations are
usually made from colored paper but we're
going to level this up in this class and
we're going to create a watercolor illustration and animated with a
stop-motion technique. The class is perfect
for those who love to experiment and can create
a simple illustration. For artists who will love to
add something exciting and different to their portfolio
or social media or website. The class is also
appropriate for those who have no clue how
animation works, even if we are talking about
digital or traditional. With this class, you will understand the
basics of animation, how movement and planning
works, story-boarding, character design, and the whole process from
start to finish. This can be also applied in digital animation because
it works similarly, even though it's
process is sometimes easier but everything starts with the traditional techniques. Animation evolved from
drawing and it is always great to revisit
what the old masters did. I also put together
a PDF file with a step-by-step guide to
ensure your success. If you are ready for
our next project, hit enroll and let's
get started [MUSIC].
2. Supplies and Character Design: You will need your
watercolor illustration. We are going to discuss
it in a minute. But I would love to mention the supplies we're going
to use in this class. I'm going to create my
watercolor illustration on a 300 grams watercolor
paper so that it is thick enough to be durable
during this process. You are going to need your
creative tools that you usually use, like watercolors, watercolor pencils, micron pen, other thing you are
comfortable using. You will need scissors because
we're going to cut it off. I'm going to use a simple
nail scissor to do that. Then you will need Play-doh
or a removable adhesive pads. You will see in a
minute what for. You will need a camera to
shoot with or your smartphone. You will need a tripod
or something you can hold the camera still. A laptop or a PC to put
the pictures together. Everything starts with
character design. We need to design the whole
scene, the background, the elements, and the elements
that are going to move. Cutout animation basically
means that we are going to move pieces around and capture every moment
without camera. We need a surface to work on, the surface that we can
move our pieces easily on. In cutout animations, usually, the backgrounds are put
behind a working surface, for example, gloves, but now we want to
focus rather on the movement and the
character itself. So we are going to eliminate
the background and berg simply on a
blank sheet of paper, or cardboard, or your table. So let's get back
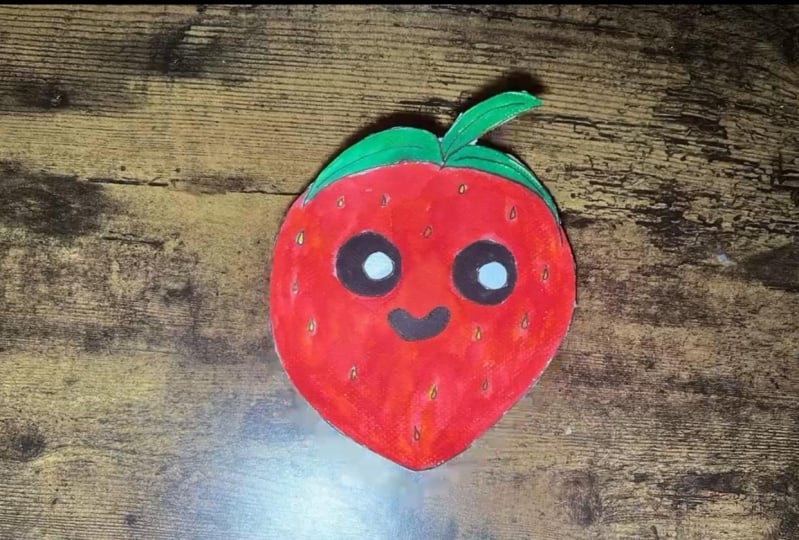
to our character. Let it be an animal. For some reason I have an ox
in my mind with folk motifs. So I will just catch
him and paint him. I'm really into black bubbles so I thought he could
blow them or something. I also want the
Skillshare lettering to appear or come from
the bubbles burst. We will come back to
this after we plan the scene and we're
familiar with the details and
the pieces we need to move so that we can
create our puppet. Your task now is to come up with a simple illustration with one other thing that we'll move. So I had to berg bubbles. You now can come up
with, for example, if you want to create
a fox, you can, for example, choose leaves to be the other thing that will
move around the fox. Or if you want to
animate a bird, you can think of
music styles that will fly around the bird itself. So something like that. You can find a list
of supplies in the step-by-step guide PDF I've included in the
resources section.
3. Storyboard: Storyboard. Now, we need
to think about the theme. I thought he would
enter in the left, coming to the middle, do a blowing movement below these black bubbles
above his head. These bubbles will burst
into the skillshare ladders. This is my storyboard basically. As you can see, I have created
different frames that are actually called keyframes,
or key actions. They are basically
different positions. My puppet will arrive too.
Here's the first one. When he enters the
position he arrives to. Then the position
of the hat changes. He looks up and down, makes a blowing movement. Then he blows. Now I know that I will need
to make his hat separate. Because of the
blogging movement, his neck separate, then his
legs and tail separate. I really lost of bubbles. Skillshare has 10 letters, so I will need to
make 10 big bubbles. Let's say eight smaller bubbles. I want to keep it simple. I will need only the
Skillshare letters. But why will that ox do
while the latter is burst? He will look at us, and blink. I will need to draw his
head from the front, and at least two
positions of his eyes, closed eyes and open eyes. That's all. It's going to be just like 10 seconds
of animation. But there will be a lot of work, but you will see. What you need to
do now is to plan your little scene of
simple movements. It will be enough if your character just walks
through the picture, let's say the fox and
the leaves, for example, just fall from the sky. Just keep it simple. Take a look on the
storyboard example template, as you can find in the
resources section.
4. Create Your Puppet: Now we are back at
the character design. As you can see I've already
created the pieces. Here is my folk ox. I was working on a 300
gram watercolor paper because these
pieces need to be a really durable
during the process, so you need thick paper. It is an option to cover the illustration
and the pieces with a transparent tape so that
they are more easily movable. There's also an option
to use colored paper, cut out pieces of
colored paper to layer the illustration or
use silhouettes. In one of my equations I used black colored paper to create
a silhouette animation, but I thought this would
be more interesting, so let's just stick with the
watercolor illustration. I have drawn and painted
the illustration. What I did is that I drawn
this round borders on the pieces I wanted to move and then cut them off from the illustration
with the scissors. It is good to draw your whole illustration a
little bit bigger so that it is easier to cut off and then move around because it
is always better to work with bigger elements and
then make them smaller in a digital process than do the illustration small
and then make it bigger. We need to create a
puppet in order to make the animation
process easier. Now that I know which
pieces I will move, the legs, the head, the tail, and the neck, I cut them off from
the illustration. I have joined this
round border so that these elements are
easier to move around. Like they can do this
smooth movement. We need to stick these
pieces onto something. We are actually creating joints, these pieces move around so we can connect
them permanently. There is an option of gluing
them together so that they are movable or we can sew them on to create
these joints and we can move the pieces around. But what I love to use
is this removable, adhesive pads or Play-Doh. I haven't tried Play-Doh yet but I think they would work well. It gives me flexibility so I can remove and exchange pieces. For example, I need this
head to be from the front. I can just take off
its head [LAUGHTER] and put this here and
I have a front head. I also created this from
position of the head separately. I created this closed
eyes because it is always easier to just
add the eyes on. With simple removing the
eyes and putting them back, we can create the
blinking effect. What I wanted to say, what I did with this that I
copied the whole shape of the body and traced it
again to have these joints, and I glued them
together so that I have these levels or layers of this illustration on which I
can just put these pieces. That's really a full puppet. Now you really can
see what I'm doing, I'm tracing the main
shape of the body, and then remove
the pieces and add these rounded shapes around
the pieces to create the joints onto
which I will be able to put the pieces with the
removable adhesive pad, and then I will do the whole
neck separately to have a different joint for the head onto which
I can attach it. I'm tracing the whole neck. Then just add this
joint up here. After I have cut
everything I'm placing the shape of the body onto
this extended shape of the body and cut off everything
that's too too or uneven. Then I'm just getting a piece of the adhesive pad and I'm
gluing them together. Now I'm going to add these
pads on to the joints, for example here for
the leg and just simply place the leg to its place. Now I can easily move it around. I'm again tearing a piece
of this adhesive pad, placing it to the joint and
adding the piece of this leg. Now we're going to do the neck. I'm taking the neck to
this whole neck joint, placing it onto the joint of the neck and to have
everything on an even level, I'm going to cut
off the shape of the neck joint from this
extended neck joint, if that makes sense. As you can see now, I'm placing this
extension to this neck. I'm cutting off everything
that is not even like this. Now I have the neck piece. I hope that makes sense to you. This way the neck
will be able to move around and a joint will
affect the movement itself. Only thing is left to add
one more piece for the head. But hope it is not doing
too big movements, but it is just enough
for this animation, and this is how
it's going to blow. This is how the whole moves. Yes, and I'm placing this tail. Now it is moving nicely and
the whole puppet moves, so his legs are moving. One leg, two leg, and then the neck and the head. That's all. This is my puppet. Here's my little puppet. [LAUGHTER] That's now that you know what pieces you
are going to move in your illustration to go through this process of creating
the illustration, cutting it off, and
creating these joints. For the detailed description
of this process, just check out the PDF I have prepared for you in
the resources section.
5. Animation: Did you know that
the first season of South Park was created
with this method? Amazing. Now you know that amazing things can be
done with this technique. It is actually the
easiest way of animating a drawing
because you don't need to redraw the whole with every
change in the position. However, cutout
animation happens directly under the camera. The animator needs to be experienced to create
smooth movement. But it will never
be that smooth, and that's what gives character to this
type of animation. This type of animation is rather intuitive because you
plan the keyframes, but there's no point in
planning every frame. The character gets from
one position to the other by the intuition
of the animator. I already mentioned frames. Frames are actually
photos in this case, but they refer to the frames or little windows on
the celluloid film. Frames per second referring to the number of frames
you see in a second. The higher the number, the better the quality
of the movement is. That animations can run on
12 or 15 frames per second. Hand drawn cartoons are usually run on 24 frames per second, but they are also
usually doubled, which means, but they
have 12 drawings. If they double they have
24 frames per second, if that makes sense. Videos drawn on 50 or
60 frames per second. In this case, we're going to go forward 12 frames per second, and we are going to double it. We will end up with
24 frames per second. Now let's get to the
animation itself. This is my setup. I'm using a simple white
cardboard sticked to the desk. I use a tripod Nikon J2 camera. I also have a lamp here, but if you have
good natural light, you don't need it. This is how I'm going to
move my puppet around. When animating, you
can use a clip, but I'm using my own hands because it feels
more natural to me. Basically, you need to try the whole scene out
with the movement. To get the feeling of it all and to have a sense of planning
the whole movement. Because you need
to pay attention, to move everything then capture who I'm
moving then capture. You need to be aware of the movement because
while you're capturing, you might forget what
movement will come. This is what comes
with experience. Don't be discouraged. If the first try
doesn't work out, maybe it will
afford a fifth try. You need to start
moving your puppet and just capture every
movement it takes. You need to be mindful of that more things are moving
at the same time. When my ox rise into the scene, I only see his nose and then
I start to see his legs. Then I need to be mindful to move or at the back leg as well, and when the tail arrives,
it moves as well. [LAUGHTER] It is
really complex thing. Also when he blows the
bubbles, his tails moves. When the bubble is
bursting, do the letters, I want the letters to have this little wipe brands.
They are moving. Also in the initial
stages when the puppet arrives into the scene, you might need to use your hand to focus your camera
on the paper. But when the puppet
is in the middle, you will not need to do that. These initial stages are
a bit harder to focus on. While animating don't think about the frames
per second thing. We can always adjust things later in the digital
while they're in process. What you need to focus
on is to capture every movement and to pay
attention to what really, everything you need to move. Now your task is to set the
scene for yourself and try out this thing by
keeping in mind the keyframes you have
written into your storyboard. Then just go forward and create your first stop
motion animation. Now watch the speedup clip
of me animating. [MUSIC]
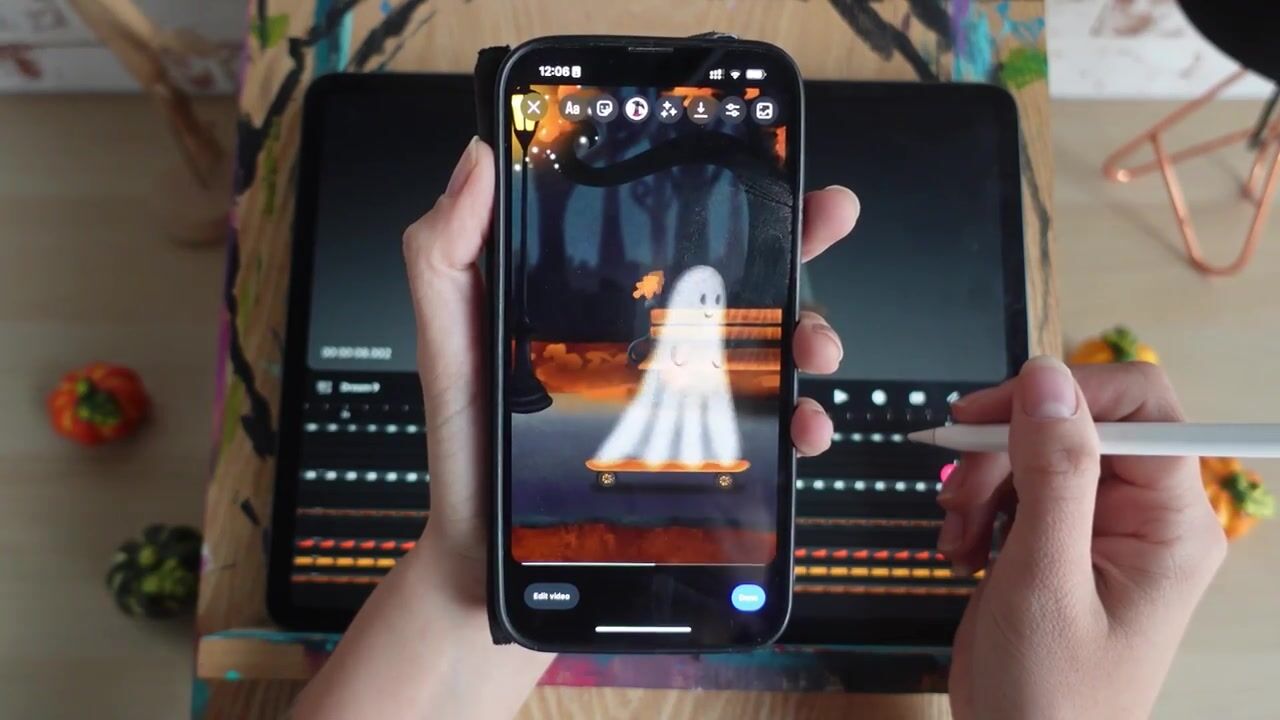
6. Putting It All Together: Now I will show you how to put your final pieces
together in your computer. What you need to do is to import the pictures from your camera to your computer and create a separate folder for the
pictures you have chosen. Now I have everything
in one place. If I watch it like this, I have everything upside down because that's how
I had my camera. I'm going to do all the
editing at the end, but what I will do is
to hit "Command A" or "Control A" to select all, and here is an
option to duplicate. By this, you will have
every picture twice, and it will be just helpful to balance something in
your animation so for example let's say I want this
end picture to be longer. I can do that while editing the animation itself,
but I can again, just duplicate and duplicate
what I think I need. Now I'm actually satisfied
how this turned out, so now you need to open any
video editing software. I'm going to use Wondershare
Filmora but you can do it in iMovie or Windows Movie Maker or anything you have
on your computer. Now I'm going to
create a new folder and name it stop-motion ox, and just import all the
media from this folder here, so I need to find
it, what was that? This was it. Hit
"Command A" and I'm just going to import the
media into the program. I have 135 images which
means I shot 67 images. Now I have selected all images and I'm just going to hit it onto the timeline
of this program. You can download the
trial version of Wondershare Filmora it is a
really great video editor. I love it, but I'm sure you can do this with any other program, for example, iMovie or
Windows Movie Maker, as I said before. There are some programs
available also for mobile phones, for example, there is the app stop-motion, in which you can
set the frame rate inside the app so you don't
need to manually do that. It's a great program
and it is fairly cheap. If you decide to use
your phone to do this, I definitely do recommend
to get that app. Now I have all of the images on my timeline in the order
I want it. This time. You can just go over it
and then just check if everything is going as you want. Now, you can double-click
on the first one, and start its duration
on that five and 0.2, and click, "Apply duration
to all" and hit "OK". We have our 10 seconds
let's just play it. Great. I really like it. Now what I'm going to do is
to export it creating video. Choose the destination,
Skillshare ox. I'm just going to
check this size. You can see that there
are more options here. Here you can choose devices,
YouTube, Facebook, etc. Here you can choose
the frame rate, and I'm just going to use 24 frames per second and create. Now what I'm going to do
is to import this video. I'm just going to clear the
timeline and hit "Import", find the file you
have just created, and I have it here. Now I can drag it onto the
timeline again, double-click, and now I can turn it to the
direction I need it to be. I can also play a
little bit so I can set the brightness
and contrast. Actually here is another
one's setting option, so I can add filters, or I don't know Harry
Potter filters, but I will set it to none. I can play with the colors, so I'm going to put
the exposure up, and the brightness up, and the contrast up. Just play with the
settings a bit. I'm just going to play it again. Here is my ox coming in blowing bubbles and Skillshare
appears blinking, placing the A back
and blinking again. This is the time I can make adjustments and I'm just going to crop it a little bit
because as you can see, I can see these things here. I'm going to crop
it a little bit. I hit "OK" I like how it
looks but at the end, I will like a second blink. I'm just going to cut it, copy and just paste it. I think it's amazing. You can play with the settings. You can add filters. For example, I like this
one, this old film. I like that, so
you can play with these things and then
just export it again, edit it as you wish, and then you have your final
animation, and that's all. Isn't that amazing? [MUSIC]
7. Final Thoughts: [MUSIC] I hope you enjoyed
this class and that you are motivated to try out
this amazing technique. If you have any questions, feel free to reach out to me
either here on Skillshare. Don't forget to follow me. Also, you can find me
online by the name The Artmother on
Instagram and Facebook, and you can follow
me there as well. I really enjoyed
making this class. I hope you enjoyed it as well. Please give me a review. I would really love to
hear your feedback, and I can't wait to
see what you create. See you in my other
classes, happy creating. For the project of this class, you can create free things. Create a simple storyboard with a description of the
scene and the movements. The second is to
create a puppet from your watercolor illustration
with moving pieces. You can also create
a stop-motion animation with these two. You can choose to do
any from this list, but the best would
be to do them all.
 The Artmother, Professional Art Teacher and Artist