Transcripts
1. Introduction: You ever wanted to bring
your illustrations to life to make them move, tell the story or
leap of the screen? With procreate dreams, and
now with Procreate dreams, too, animation is easier and more accessible
than ever before. Hi, my name is Alexandra,
AKD art mother. I'm an artist, illustrator,
and online educator. My background in
animation goes deep as I focus my master
thesis on this topic, and I was beyond excited
when Procreate announced Procreate dreams as a powerful yet user
friendly animation tool. The Procreate dreams to update came with a complete revamp. So I went ahead and updated this whole class to
the new version. After spending time exploring
the new interface, tools, and workflows, I can confidently say that this update
is a game changer. Create dreams to make the
creative process feel faster, clearer and makes animation really accessible
even for beginners. I created this class specifically with
illustrators in mind because animation can be overwhelming and
overly technical. And in a world where
short format video dominates almost every platform, adding even subtle movement
to your illustrations can unlock a whole new level
of potential for your art. Create dreams to offer
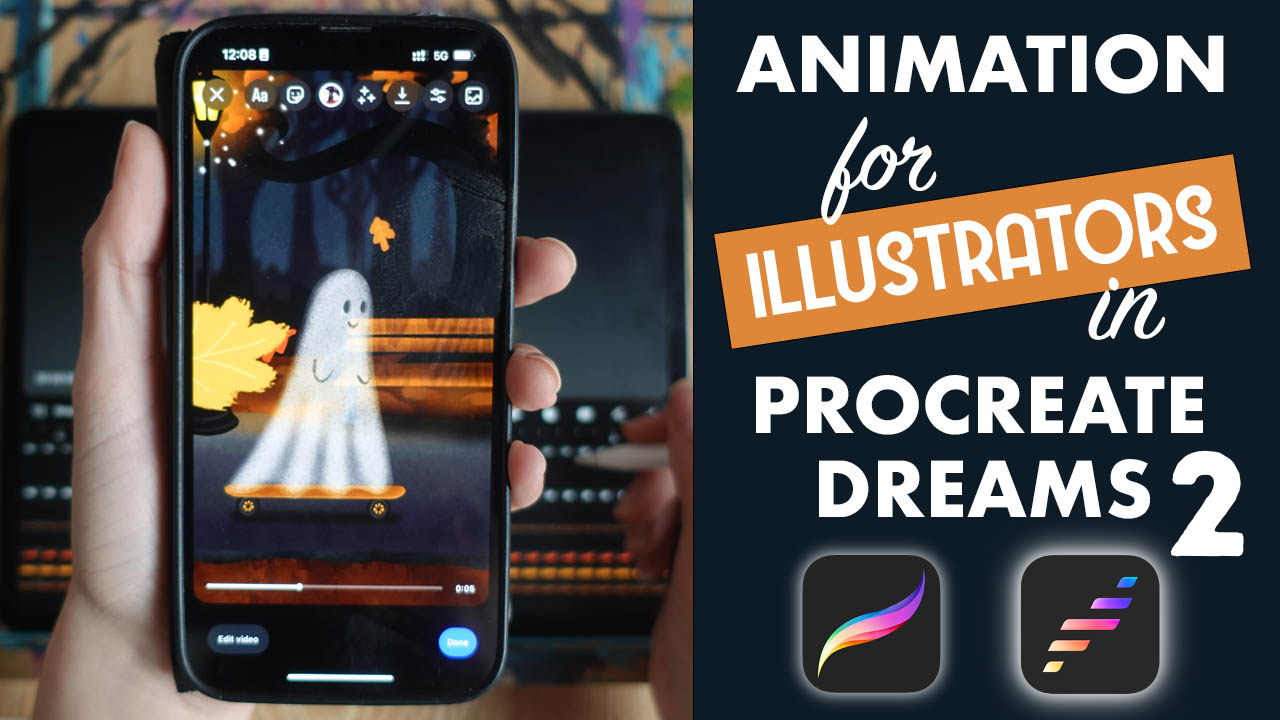
several ways to animate. And in this class, we are
going to explore them all by creating a fun scene of a ghost skateboarding
through the park. Yes, I love spooky season. Along the way, you will learn the most important
animation techniques like key framing,
layering motion, performing motion, flip book, and we are also
going to directly paint inside Procreate
dreams, too. You'll also learn
how to properly prepare your illustrations
for animation. I'll guide you through creating all visual elements
in Procreate, always keeping
animation in mind. And if you jump right
into animating, Noveries, all illustrations will be available for you
in the resources. By the end of this
class, you will have your own animated
piece ready to share. So grab your iPad,
open, procreate, and procreate dreams, too, and let's unlock the magic
of animation together. I can't wait to see what you
create. See you in class.
2. About The Class: And. Welcome to the class. I'm
so happy that you are here. In this video, I'm going to talk about the
class structure, the class resources,
and the class project. But first, let me just repeat. Procreate has just released Procreate dreams to a
complete revamp of the app. This class has
been fully updated to match the new
version and workflow. Okay? So this is the time
when I want to remind you to download Procreate dreams or
update your existing app. If you are a returning
student to this class, or you have used Procreate
dreams before don't vary. The core animation
principles stayed the same, even if the interface evolved. Okay? So your knowledge
is still relevant. I will guide you
step by step through all changes inside
Procreate dreams, too. If you are completely
new to animation, I want to ensure you no
prior experience is needed. This class is designed with illustrators and
beginners in mind. We will focus on practical
and creative animation rather than technical overload. So even as the app
continues to evolve, the animation skills
you will learn will remain transferable
and relevant. So back to the class structure. The class is divided
into two main parts. In the first part, we
are going to illustrate all the elements that we
need for the animation. We are going to
illustrate a background, ghost and a skateboard. All open to your
creative interpretation. Will be more elements moving
in the final animation, but we are going to take care of them right inside
Procreate dreams too. So for the first part,
you will need Procreate. I will guide you
through a step by step illustration process
that is easy to follow. And if you'd rather skip the illustration phase and
jump right into animating, all the elements that we are
going to illustrate will be available for you
in the resources. In the second part, we'll bring all our illustrated elements to life in Procreate dreams too. We'll start with a
quick introduction to the interface and then learn all the animation
techniques as we go. Going to animate all elements
a little bit differently. So you will learn a wide
variety of animation skills. Let's talk about
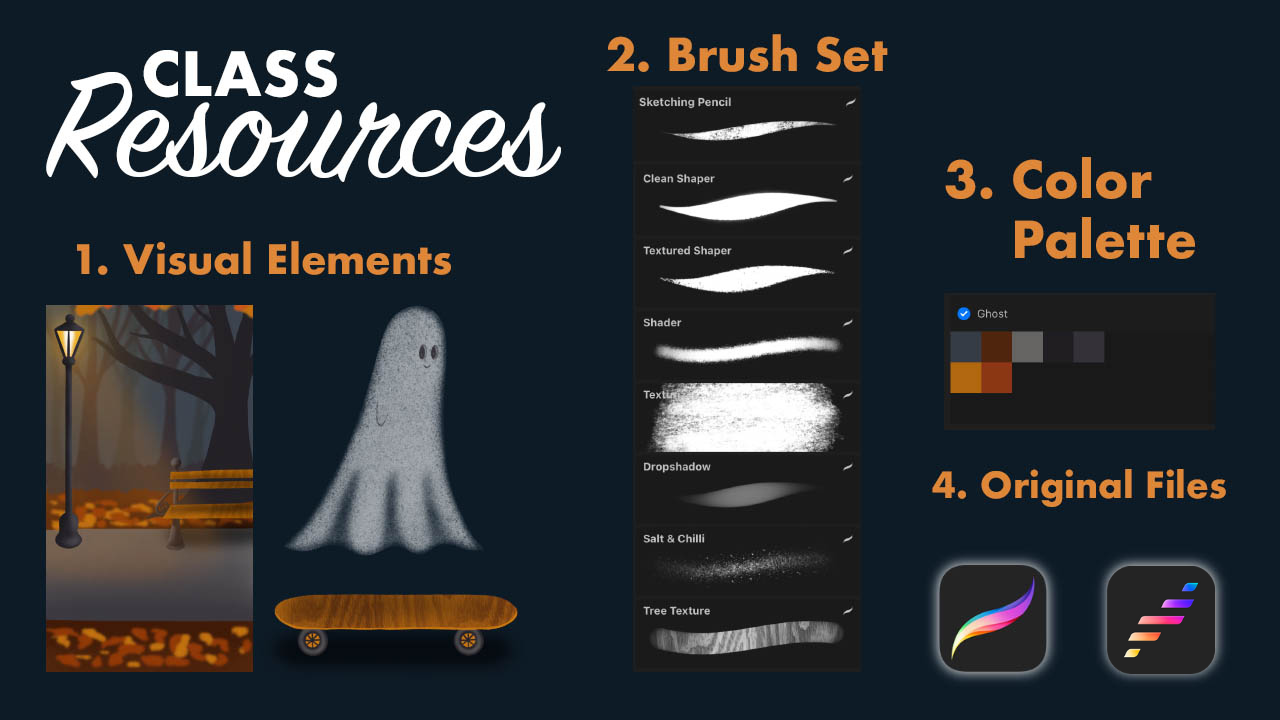
class resources. In the class resources, you will find all the visual
elements that you will need for the animation
with all original files, even procreate files. Okay? For the smooth import from Procreate to
Procreate dreams too, you will get also my Procreate dreams to original
file for reference. So if you miss something, you can just check
how it is in my file. Okay? You will also get a brush set and the color palette. Let's talk about
the class project. The project for this class
is to illustrate and animate a ghost skateboarding
through the park. Now, again, you have
artistic freedom for your very own creative
interpretation of this topic. You can create any background, any character, and any
object that has wheels. But obviously, you need to
create something similar so that the animation
techniques are applicable to those
elements. Okay? When you are ready
with your masterpiece, don't forget to upload it
to the project gallery. At the end of this class, I
will show you how to export your animation also in a way so that you can put it into
your class project. Also love to encourage
returning students to update their animation and re
draw it or re animate it, and then share that in
the class project too, and maybe describe
your experiences. What is better in
Procreate Dreams too, and how did you feel
during the process? It is always so good
to read about it. Okay, so now the first step
is to download the resources, download or upgrade to Procreate dreams to open procreate and
procreate Dreams too. And yeah, let's get started.
3. Illustrating The Background: Hello and welcome to the class. I'm so happy that you are here. Let me just show you
what you will need. At first, you will Procreate in the first part of the class, we are going to create three
different illustrations. Let me just show
you what are those. So at first, we are going
to create a background. I will show you how to create
this exact background, but you are totally free
to create whatever scene in which your ghost will
just float through. And you can change everything in this
illustration as you wish, but you can follow me
as well step by step to know how to create
a scene like this. Then we are going
to need a ghost. I will also show you how to
create a ghost like this, but you are again, totally free to create whatever
shape you like. And lastly, I will show you how to create this skateboard. There are specific things
that you need to keep in mind when you are creating a
skateboard and animating it. So I recommend you to follow
me again step by step, or again, everything will
be provided for you if you don't want to draw and
just animate those things. Then you can skip
this part, right? So in the first video, we are going to create
the background. This will be a bit more
challenging because there are lots of things
that are going on here. So there will be separate videos for those not to overwhelm you. So let's just start with the basic composition
of the background. As you can see, let's
just analyze it. There are three parts
to this illustration, there is the background, which is like blurred, right? Then there is a middle ground
where things are happening, and there is a foreground where there is nothing
happening because we don't want to take away the focus from actually
the animation. So let's just start, go to the gallery, and let's create a new canvas. Now, for this, as we are
illustrating for social media, we are going to keep
this dimension, and that is you can find it
here the 19 21,080 pixels. It is going to come
out as landscape, but you can just flip it. The basic composition of this is the following. I
have a new layer. I will choose the
sketching pencil and approximately divide
the canvas to halfs. You don't need to be 100%
precise with this. Like this. This is approximately the half, is it? Let me see. Yes, and manually, when
you are moving furniture and measuring girl
stuff. But right. So I have approximately
the half of it, and then I will use the
third of this half. I will approximately
divide this into thirds, and this lower third is
going to be my foreground, and this is going to
be my middle ground. This is really just for
an approximate division. You can change it as you wish as intuitively it feels
right for you. Now I will lower the opacity of these lines and create
another layer below. Now, I have some
colors selected here, but again, feel free to use
whatever colors you like. We need color for
the background. I thought this gray would
look good for the background, so I will just choose the
clean shaper and fill it in. Then I will create another
layer for the road. It will be a lighter gray, so I will choose this color. I will fill it in. This
basically my middle ground. I will create another layer on top and I have this brown here, and this will be my foreground, but as well, we are going
to add that ground. I will add a little
bit here as well, taking away from this road. Now you can set the
width of this road. Okay. These dome need to be like really edgy and straight
lines and shapes, okay? Let it be a bit organic. All right, so now we
have the division. Let's just start
adding the elements. So in the next video,
we are going to create the bench. See you there.
4. Illustrating The Bench: All right, so we have approximately the division
of the background, and I want to start with
adding the elements, and we are going to
actually create a sketch. So I will create another layer, choose black and
sketching pencil. And there are two elements actually three that
we are going to add. We have the tree,
we have the bench, and we have the lamp. So these are the
three illustrations that we are going to create. Let me just start
with the bench. You are free to do
whatever bench. I'm not going to put
the hole in it so that it's already space
into the outwork. You know, your imagination will fill the other
part of the bench. So what does the bench have? At first, it has this leg that is going
to be not on the ground, but rather on the road, right? It will be something like this. And it will have one wooden thing
where people sit. This thing will continue. I will add the
thing for the back. Let me finish up this part. I will make it bigger so that
you can see what I'm doing. This is really like roughly, you can put so much more
effort into this, okay? I just don't want to take away the focus from the
animation part, and I don't want to
overcomplicate this. It is totally up to you how much effort you
are going to put into this and it will be
like this dingy, you know. For the arms. Like this,
something like this. Okay. You can also do,
like, two of these. Um Thanks, it is not one big. Okay. I will add
the lamp as well. The lamp is also going to
have this bottom thing. You can use reference
images if you wish for drawing a street lamp. I am going from my imagination. It has something
that it stands on. I will adjust it in a second. It has this thing. Okay. And the top looks
something like this. There will be light in it. These lamps can be
very, very decorative. So again, feel free to
spend time with it, and I will just randomly
on another layer, just draw the tree. I want a big branch coming here. Like this, you can
really keep it rough. Now that we have this sketch
of these three elements, let's just get into
illustrating them. Let's start with the bench. I will create a layer
below these sketches and lower their opacity. Here. Okay. I will use
my clean shaper, and I will choose a
color for the bench. I really much like
this ochre color, so I will just put it here, and I will just fill in
at first the wooden part. Okay. I will alpha log this
and add texture. And what I'm going
to use for texture is a brush that you
will have included. It is the tree
texture right here. I will choose a darker brown
color and basically just go through it and apply this wooden texture.
It looks pretty nice. You can go even darker if you wish to make it even
more like wooden. But I like it this
light. All right. I will create
another layer below. Choose a dark gray, and the clean shaper. Okay, so cool. Now, let's shade it.
I will off lock this. Choose a lighter gray,
choose the shader. And as the lamp is here, there is going to
be a light source. This part is going
to be a bit lighter. I will add just some
things here like this. Well lighten this
thing up as well. I will maybe make it
smaller and this edge it's going to be a bit
lighter. Like this. I will add a bit of light here, and I can even go so much darker and just add some shadow
on the other side. I will go almost black. These inner parts. I think it looks super cool. I've got some darkness
below this bench as well. How I'm going to
shade this part? It is going to be amazing. I will create another layer
over this, this wood. I will choose black and
actually the drop shadow brush. I will select the bench, hit select and go to
the layer above it. I will just layer some shadows. Like this. That's too much. Let me do it like this. I will add some here as well. This way, I'm shading the texture as well with a
transparent layer of shadows. I love this technique. So much. Okay. Oops, that's much. Let's do it like this. Maybe to the bottom. Now I'm going to
Gachmbl adjustments, Gashmbl and just Gauchenblur
the shadow a bit. Like this. I love how this looks like. We will add some more
light a bit later. Maybe I will add a little bit of drop shadow below the bench, so I will create
a layer below and just add shadow below the bench. Below this thing as well. And again, I will
just caution blur it. Okay. So now we have the bench. Let's go into the next video
and do the street lamp.
5. Illustrating The Street Lamp: All right, so let's continue
and create the street lamp. I am going to use this dark
gray for this one, as well. I will create another layer, and let me just fill
in the base shape. Oh, yeah, use the clean shaper. H. All right. And what
I'm going to do is the exact same thing that
I did with this part. I'm going to palock this shape, choose a lighter gray, choose to shade or brush
and lighten one side. I will focus the light into the middle so at
this street light, I will add the light
to this other side. Okay? I will choose an even lighter gray
to add more like reflections here and again, go almost black to
the other part and just add more contrast. Cool. Now let's add the light. I will create a layer below it. Choose maybe this yellow, but let's go a bit lighter
and more yellowish like this. I will fill it in with
the clean shaper. What I'm going to do
is to duplicate it and hit Gashenblur and it
will lighten it up. If I want even more, I will duplicate this one and maybe gash and blur it
a bit more like this. You can duplicate
anytime you need to lighten things up even more. You can create
even bigger Light, you can just make it
bigger. Can you see that? I will illuminate a bigger
part from the image. What I love to do is to add a bit of white into the middle. Again, I created another layer. I will add a bit of white into the middle and gash and blur
that as well like this. It will really look as if it was a light lighting, doing its job. See you in the next video where we are going to add the tree.
6. Illustrating The Trees: It So cool. It is coming together. So just create the tree. I will create another layer. Choose. Again, this dark gray. This is going to be the
base for everything. I still have the clean shaper and make sure that this
layer is behind the bench. So I will just hold
down and take it back. And I will just paint a tree. You don't need to go into
too much detail, okay? As you can see this tree is
a bit different style than the one that I've done in
the previous illustration. It is again up to you what kind of trees
you like to draw. Just enjoy the process.
That's the point. Okay. Super cool. Let's just add the trees
at the background. I will create
another layer below. I will turn up the
sketch that I have here. Cool. Now we are going to
use some perspective rules. We are going to apply the rule that things that
are closer to us are darker and more saturated than things
that are further away. We are going to
create two levels of trees here in the background. At first, we are going to create some bushes. Let's just do that. I have this layer here. I will choose a bit
lighter gray and just basically add
some bushes like this. This will be blurred, so don't worry about it. How does that look like? And I will create
two trees. One here. And some branches like this. And one here. Okay. Cool. I will create another layer behind. Choose an even lighter gray, but try to find a gray that is not this gray,
but still darker. Let's see. I will choose
the background color, try to find a gray
that is a bit darker. I will add a tree here
and maybe one here. Okay. Maybe one here. All right. We are
going to create the illusion of space
also with the blurring. The trees that are further
away will be blurred more. I will go to adjustments, Gaston blur and blur them. But so they can be
stillthnT layer is going to be also blurred. I hit adjustments Guston blur
and blur them just a bit. Not that much. Walla,
can you see that? We have so much space there. So cool. Now we have the trees. In the next video we
are going to finish up the ground and then
move on to the ghost.
7. Illustrating The Background - Finish It Up : Let's just finish up
the background and add some shadows to the middle
ground and some textures. Now I'm going to
choose the layer of the road. Yeah, here it is. I will keep this dark gray, and I will choose a
shader, make it bigger. I will make the
road like darker at this front and get it lighter at the back
because there's a slit. This will create the fact that this light is illuminating
the road as well. You can go in and it adds already a little
bit of texture as well. I'll just add something
to the ground too. I will choose a darker brown, go to the ground
layer, Alpha lock it. I will just add a little bit
of variation to the ground, bit of lightness and darkness. And what I miss
is the leaves and actually this foliage that is on the ground
when it is autumn. I'm going to choose
the texture shaper, and this ochre color and
create a layer about the ground and actually just add some blobs of
color to the ground. Also here to the foreground. And I will choose a
reddish color as well, maybe darker one
and add that in. And I will again, caution
blurt. Like this. So cool. It added some variation
to the ground. You can add some other details
to the scene if you wish. I will maybe make the
bench a bit bigger, so I will just select
these two parts, hit select and make it bigger. With the shadow as well. Yeah. Okay. It's really cool. I would also love to add
some leaves to the top. I will choose this ocher
and I will really just add some blobs as if it
was like these leaves, you know, going
into the image just a bit to know that there
are still leaves up here. Okay, I will also gash and blur these
just a little bit so that they are not that
direct. All right. And let's play with
light a little bit more. So what I want to do now
is to create a new layer, choose this yellow color
and the drop shadow brush, and try to make it
big and try to add a bit of light around this
lamp to the ground as well. To the bench as well to add this illumination and I will gash and
blur this as well. Everything is gash and blurred. This lightened the scene up, and I think that's
all for the scene. Now let's move on to the ghost. I'll see you in
the next video and let's illustrate a
cute ghost together.
8. Illustrating The Ghost: All right. In this lesson, we are going to
create the ghost. What I want from you
now is to create another canvas with
the same dimensions, 1920 and 1080 pixels. Okay. So as a ghost is white. I want to at first, change the background
color to gray. I will create a new layer, choose black and the sketching pencil and sketch out the ghost. Now, you can look
online for inspiration, how to illustrate a ghost. I will go from my intuition. So I will just draw
a ghost shape, but keep in mind he
will be skateboarding. So kind of this shape
would work best so that these cloth or
whatever is this, um goes into this direction
if that makes sense. I will create a shape
for the head and make the cloth go back
and I will connect these two lines
with these waves. Maybe I will go more
to the same length. I will have basically two waves. This will give me,
let me show you here to our three waves. I can shade a little bit between these waves and it will give
me the effect of that cloth. I will have two now or you can have three.
Let's have three. I will erase. One, two, three. Cool. I will add some eyes. Again, feel free to
create whatever eyes, and I will just note the hints. You can add some character
design props he can have glasses or I don't
know, a baseball hat. That would look
cool or sunglasses. That will look cool. Yeah. So let your creativity
flow and make it fun. But at first, I will
just fill in the shape, so I will lower its
opacity of the sketch, create another layer below it, choose white, and clean, shaper, and just
fill in the shape. Okay. And now let's
add the texture. So I added a brush
called salt and chili. It is actually created
from real salt and chili. This is from my spicy brush sat. And this is what we are going to actually use as an eraser. This is going to
add our texture, but in a way that it
will be transparent. So I'm going to choose
that as my eraser brush. I will lower the
opacity of this ghost. This will make it
actually transparent. And I will choose my eraser and go through
the hole and make it big. Go through the hole, a ghost really lightly to add a little bit
of grain into it. Okay. I will make the brush smaller
and I will go through the edges of the ghost and this will make
it more flowing. Because we are not
adding actually texture, but erasing texture
from the ghost, and it will make him
more transparent. I will erase around its edges. Everywhere. Maybe make it even smaller and
go more hard on the edges, it is not that defined shape. It will really add such an interesting
effect to this ghost. I love to try new techniques, and I just discovered
it isn't so fun. All right. Okay. Now I will make it a bit bigger and where these
waves are inward, I will add a little bit of
shadow, this triangular shape. This will really make it
look like it is clothed. Can you see that?
It looks so fun. I will erase a bit
from the middle. I will turn off the sketch so that you can see what
we have done here, and I think this
looks super amazing. Let's just add those
eyes and the heads. I will create another layer. Choose this darker
gray and just with a sketching pencil and
add just the eyes. Let me see if that looks good. I will maybe place them
higher. Like this. Make the smile like this and
note those hints slightly. You don't need to add any
special, um, features. Now you can add
the props that you wish, maybe the sunglasses. I will maybe erase this hand. He needs just one hand. The
other is on the other side. You can add sunglasses, you can add the cap, you
can add whatever. I will. I have the eraser as
the salen peppers. I will change it to
the sketching pencil. What I'm going to do
now is to make it a bit smaller, erase from it. At this part of the eye, I will just draw this line here. Lower its opacity and actually make this part lighter
as if it was a hole. Can you see that or understand
what I mean by that? If I draw this thing here, it will look as if
it was holes in it, and that will be the eyes. This will add more
interest into it. I love to add it this way. We have our ghost. I will
merge these two layers so that I can export that later. Now let's move on
to the next video and create this skateboard. So
9. Illustrating The Skateboard: Okay, we are almost done. We already have the background. We have the ghost, and let's
create the skateboard. So what I'm going
to do is to create another canvas, the
same dimension. I will again, change
the background color to gray so that I can see
better what I'm doing. Now I'm going to use a
little hub from Procreate. I will go to the range button, Canvas, and I will turn
on the drawing guide. This will help me to create good shape for the skateboard. I'm going to choose
this ocher color and the clean shaper to create
the shape of the board. It is, it doesn't matter where you are drawing
this on your canvas. I'm going to kind of
Draw a long ellipse. If you need to count
the squares for you to have a better
understanding of the size. Now don't look at the shape,
I will adjust it a bit. I am using count two squares from here,
two squares from here. This is going to be the
end of the skateboard. Oops. And I'm going to continue that shape
like this. Whoo. I will adjust it a
bit in a second. But basically, this is going to be the main shape
of this skateboard. This will add a little
bit of this frideffect, not exactly a side view of it. Now I'm going to use
my eraser to adjust the shape to make it
more like, perfect. Okay, cool. Now I'm going to alpha
lock this layer and choose a darker brown and add the tree
texture to it as well. I added the tree texture
as a brush here. I'm going to add
exact same shadows as I did with the bench. I will create another
layer on top, choose the drop shadow brush, choose black, and add hopes
I will make it bigger. Add shadow. Even bige. And I will make it
a clipping musk, this layer of the shadow. I will add shadow to the
inner part of the skateboard. There is that in it. I will leave this
outside part lighter. I will gosh and blur
this, uh shadow. Actually, I will choose
this sketching pencil and this ocher and to
this lower part, I will just add a line. This will note the side
of the skateboard. All right, so let's
just create the wheels. I will create another
layer below the board. Jot this dark, very dark
gray and the clean shaper. And I will create one
wheel and I will use these four squares for
defining the wheel. I will create a circle. I will hold down and click at this menu that
pops up and hit circle, and it will create
a circle for me, I will just fill it with color. I will make sure I don't
have any pixels left. And as it was a textured brush, it left some kind of unwanted
shapes around the circle. So now I have a circle. This is going to be my wheel. Now I will choose
this ocher color and create a circle
inside of it. I will choose this
dark gray again, create another circle
to the middle and then connect it with
the outside part. Okay. Really cool. Now I will choose the shader. Choose the light gray, make this shader small, I will I said smaller. I will just add some shadows
into the kind inner part. I will make it even smaller. I will add this light
into the outer part of this wheel and I think
it looks pretty cool. And what I'm going to
do is to duplicate it. Now we have two wheels. I will make it like
place it here. I will place this
first one here. I have snapping turned on, so I will be able to
see some guidelines. You can make a smaller
wheels as well. So if you want, you can just
make them a bit smaller. Like this. So cool, leave them
on separate layers. What I'm going to do now
is to merge the layers of the board so I will merge down. I have one board. I will
duplicate this board, go to the lower one, place
it below everything. I will hit select, choose black, and I will fill layer. Now I will select and
place it below the board. I will alpha lock
this layer and I will gash and ler it like this. I will lower it opacity and bom, I have a drop shadow below it. So with this skateboard, we will need frettings. We will need the board itself, the two wheels, and
the drop shadow. And we are going to
animate those separately, so we need all
elements separately. Okay, so we are done with
the illustration part. I'm so excited. Let's just
see what we have created. So now we have a
background with a road. We illustrated the
trees at the back. We illustrated some leaves, the lamp and the bench. Then this is let me add this. This is a flat image. There are no separate elements
that we are going to use. We are going to
export this as it is. I will just show it to you
in the animation part. Then we have the ghost
as a separate element, and then we have the
skateboard with the board, the two wheels, and
the drop shadow. All right. So cool. See you in the next lesson
where we are going to go through Procreate
Dreams to basics. See you there. And
10. Intro to Procreate Dreams: He Alright, so welcome
to the second part of this class where we
are going to animate and you are going to be
introduced to Procreate dreams. Now, you are watching
the updated class, so we are going to go through Procreate
dreams to now, right? So again, a little reminder. If you haven't yet downloaded
or updated your app, do so right now. Also, if you are here only
for the animation part, make sure to download
the illustrated elements from the resources so that you have something to work with. Alright. So you have downloaded and
updated Procreate Dreams too, and let's just open it. Okay. So right now we are
Procreate Dreams too, and we just entered
the theater, okay? Some parts of this app
are called differently, but it makes so much
more sense than before. Okay, so in the theater, you have your movies. And basically your files. If you had Procreate dreams before and you had
some movies there, you will have this
little icon here, 1.0. That means that that file is still in the first version
of Procreate Dreams. If you click on it,
it will convert. So you will not lose your
previous movies, right? So here you can hit Select
and create a new folder, delete and duplicate files. You can, you know, just
slide through them. If you click a movie, it
will open pretty easy. If you want to
create a new movie, you need to click
this plus button. It will open the dimensions that are like default set
here that you can open. So we have wide screen, we have ultra white screen, social, square and screen size, and we are going
to go for social. So please go and create a new movie that is
in this dimensu. Now, previously it was, I think, drawing and empty. If I'm right, now it
is flipbook and empty. These little buttons here. It basically means in what
function will the canvas open. But basically, you will be
able to set it anyways. So I would just go
for the empty one, okay? So click empty. And now we have a new movie. Okay, so let's just
explore the interface now. Let me just at first, show you that here we have
the theater button. So if you want to
return to theater, just click that button. It is pretty cool. They changed it. It is more
user friendly, I would say. Okay, let's just talk
about this part. So, here is the canvas, and it is called
the stage, okay? Everything outside of
it is the backstage. It is really like if you are in a concert,
just imagine it. You have, you know, the stage, and there are things also
happening in the backstage. It is a little bit
different than in procreate, because in procreate, everything that is
outside the canvas is cut and unalive, okay? But here, things are alive in the backstage
as well, okay? It is really important because
when you're animating, you just need to, you know,
go out of the screen. It makes pretty
much sense, okay? Here, down here, you
can see the timeline. And as you can see, I'm
already using gestures. We will get to that in a second. But here is the timeline, okay? And it is kind of
similar to the stage. So as you can see,
here is this part. Okay. And this means the timeline or the time of the
actual animation. Everything outside of it
is backstage timeline. Okay? So you can place clips
outside of this live area, and it will not count into the animation, if
that makes sense. But we'll get to
that a bit later. Down here, you have three modes, compose mode, perform
mode, and keyframe. Now, these two are
animation modes, and this is the compose mode, which basically means
that in this mode, you are not doing anything
to the animation, but you are actually
placing the elements, you know, resizing them and
doing things like that. Okay? Here, if you click that, this is the selection tool. So if you are selecting, we cannot select
anything right now, but I will show it to you later. If you have this active, you are selecting
elements in the timeline. You can turn that off. And here you have the movie settings. So here is the project
settings, okay, down here. Here's the stage timeline,
share and preferences. And in the project settings, you can set the frames per
second and the duration. So I have 10 seconds duration. If you don't have that,
please now click on it. I said, click on it, and write ten or select
these 10 seconds. Okay. And the frames
per second means how many images you
have in 1 second. The more images you have, the smoother the animation. 24 is kind of a industry
standard for smooth movement. If you have less, you will have kind of robotic movement, okay? So, set it to 24 and 10 seconds. Let's talk about gestures. I have my two fingers. It is pretty similar
to procreate. So I can zoom in on the canvas and zoom out
with my two fingers, the same on the timeline. Okay? With my two fingers, if I do this, just pen, okay? I can just place things around, also in the timeline. Okay. And also, I have a
two fingertap undo and a free fingertapR doo, you will see it in action
a little bit later. Okay. So let's just
do something in here. Alright? Let's import the
background illustration. And one mode is to
save the image, in procreate and add it as a new photo into
Procreate dreams. And we're going to do
it like that right now. We can dragon drop elements also from Procreate to procreate dreams because these
two applications work like magic together, okay? But let's just do it in a traditional way so that
you see how that works. Okay. So I will click on my
little background image, hit the wrench button,
share, save as a PNG. And save image. Okay. Now, if I go back
to Per Create dreams, hit the plus sign here. Okay? As you can see, with this plus sign, you
can add some new things. You can add a flipbook, you can add drawing, text, and a new track, and we are going to explore
that a little bit later. Now let's add a photo. Okay. I imported it
into the timeline. Can you see that? This is as
if it was one layer, right? And it jumped to
the perform mode. So let's just go back
to the compose mode. If I'm clicking
here on the stage, I can change its size and
place it. Can you see that? I can place it outside the
stage and into the stage, and I'm just going
to make it fit the stage because
it is going to be the background and
we are not going to do anything with
it, basically. It is going to be
below everything. Okay. So now I have it placed. You need to make sure that this little image
fills the duration. So it might, um, come like this. So as you can see, I'm
choosing this play had another little element. If I'm going through
the timeline, the image is there and
then it disappears. So it needs to feel duration. How to do that. So,
select the element. You can hold down at the edge and I don't know if
you can see that. I can do it with
my Apple pencil. There's a little
arrow that appears, and now you can
feel the duration. You can even extend it. So I'm holding down at the edge, and it fills the duration. But you can just hold
down and open a menu. Okay? So if you hold down
your finger on an element, not just your finger, even
the Apple Puzzil, okay? It opens the menu. You can set several things here like
blending mode, mask. You can name your layer, et cetera, but here
is the filteration. And if you click
that, it will just fill in the set active timeline. Okay? That's
important right now. Okay. So now we have our track, and we can place it, okay? Onto different tracks. I am placing it into layers and actually creating new tracks every time I'm placing
it below and below. And now it is at the bottom. And let's just start animating and see the animation
modes in action. So so in the next video, where we are going to
animate this skateboard.
11. Animating The Skateboard: All right, so let's
get to animating. In this video, we are going
to animate the skateboard. Okay. So I already shown you
how to import elements in a traditional way so
that you export it in Procreate and import
it via this menu. But let me show you how to
drag and drop from Procreate because these two apps
work together as magic, and it is pretty useful, okay? So if you go to Procreate and let's just
open our skateboard, and let's open the layers. To drag and drop a layer, you need to hold down a layer
and open procreate dreams. As you can see, I'm still
holding down this layer. I can navigate here
in this timeline, and I will just place
it to the beginning. Okay. And it is important as
if it was in a new layer, as if it was a new
layer and procreate. Okay? I need to make
sure at first that every element that I'm
placing in this animation, it has to fill the duration. So again, I will
manipulate and move around the layers by
holding them down. I will place it to
the beginning of the timeline and again, hold down and fill the duration. And with pinching, you can make the timeline fit the screen. So it is here, as you can see, we are in the compose mode, and we can in the
compose mode again, choose a size for
the skateboard. I will just place it onto
the road right now. Okay. Now let me show you
what happens when you are importing several
layers together. I will select all
three layers of the two wheels and
the drop shadow. I will hold it down, go
back to Procreate dreams, and I will place it
to a layer below. As you can see,
all three elements imported into one single track, and I need them to be
on separate tracks. Because if they are like this, if I'm playing the
animation, let me show you. One element just appears, it disappears, et cetera. It doesn't make any sense. Let's just arrange it. I will just click
on the first wheel, place it to this track. Click on the second
one, place it here, and click on the little drop
shadow and place it below. I will click everyone and fill duration with each
little element. Now it is fully filled. Can you see that
in the timeline? Now let's arrange them, so I will go with the first
little wheel and place it below and put together
the little skateboard. I will make the skateboard
a bit bigger like this and arrange the wheels Good. Okay, let me show you how to group elements
because we want to animate the whole skateboard and not just the
individual elements. So to make it make
sense, and you will see, we are going to use
the multi select tool with a multi select tool, I will draw through
the elements that I want to select or the tracks. As you can see, I didn't
draw through the background. So it selected these tracks. If I go through it
again, it will deselect. So I will just
select, hold down, and again we have another
menu and hit group. Now it places this whole
group into one single track, and as you can see,
it is a group, I hit the arrow and it opens up the individual elements that I can animate
separately as well. So this is the grouping. I need to deselect the
multi select tool and I can just adjust the wheels
individually within that group. Okay? Okay. Now if I close the group, I can just place it all
around together, resize it. I will make it a bit smaller. Let's just start
animating. Okay? So I will place the skateboard to the
beginning of the road. As you can see, this part
is in the backstage, and this part is in the
active stage part. Okay? Only this part of the skateboard will be
seen in the animation. Now. Let me show you key
framing because that is the most basic
animation technique that we are going to use. So I will place my playhead to the
beginning of this group, and I'll just enter key
framing mode. Okay? As you can see, this little
play head just changed. If I go to perform, it has this little
record button here. If I'm at the key framing, it has this action button here. So I will make it as
close as possible. So if I hit this action button, a menu opens up. We move and filter. With filter, you can apply different filters to the track, but now we are going
to click Move. You have different things
here like move and scale, warp and distort, and I'm
going to hit move and scale. And what happened here? Just take a look at it here. This is a key frame, and it added another
track below the track, and it is called motion track. Okay? So this is where the emotion is recorded
and added to the track. So what does this keyframe do? It remembers the position you
have your image at, okay? So this keyframe that appeared here affects the whole group. Okay? Now let's just
add the final position. So if I pinch and
fit the screen, I will go to the end
with my little play hat, and I will place my little
element to the final position, and it created a keyframe. As you can see it already,
let's just play it. Broker dreams will
automatically create the movement between
two keyframes. And what if I don't know place
playhead here and I don't know moved the little
skateboard there. I would have keyframe there,
it would look like this. It would go there to that keyframe and go do
or to this end position. But we don't want
that. W two type undo, we can just undo this keyframe in the beginning in the middle. We want an initial keyframe and the final keyframe and
we can start the easing. So easing is basically how
this movement goes, okay? So if it is linear, or it is going
quicker, et cetera, and the way we can do that is
to hit to the motion track. Can you see that? I'm holding
down the motion track, and it opens up the menu
of set all easings. Okay? If I click there,
I can set linear. So the movement will
be like linear. Is in and is out
and is in and out. Okay? We want it to
be linear, okay? But this is a very nice way to add a little bit of
variation to the movement. Okay, so we have the
moving skateboard. This is the first
animation we did here. And now we are going
to set wheel rotation. Okay. So let's just go to the
first little wheel. Okay? So again, our playhad
is on this wheel, and here is this action
button, I will click. I will hit move, and I again add another motion
track, only to the wheel. Okay? At the end, I will just place another one. We want scale. Now we have two keyframes, one here and one here. I will click on the
first keyframe. And it opens up the
Men scale menu. As you can see, there are different
things you can set, but here is the most
important one, rotate. Now, if a wheel rotates, it makes 360 degrees. We need to add a
multiplication of that here. How many times will basically from this key frame
to the end key frame, how many times will it rotate? The easiest will be to set it to 3,600 and you can set
plus and minus as well. If it is rotating as
the clock, or reverse. Let's just see that if the
plus, how does it look like? Can you see that? It is moving. Well, okay. So let's see at
the beginning till the end, it will rotate ten times. As it is going. If I would say, I don't know, 36,000, it would
rotate very quickly. It has to make 1,000 rotations from the first
keyframe till the final one. But it is good enough right now. Let's do the same exact
thing to the back wheel. So what I did, let's
repeat the process. I clicked Move Move and scale. I went to the end of
the timeline and just hit move Movement scale
to place keyframes. I go to D. Key frame, hit it. Right, 3,600. And now let's play it. Okay. Now, as you can see,
both wheels are turning. How cool it is. Wow. I love it. Alright, so, this is the bottom where you can
play your animation. And yeah, I think it
looks pretty cool. Let's just do a little
very quick recap what we did in this animation. Okay? So we learned about key framing. If you are in a keyframe mode, you have an action play hat. We learned how to import with
dragon drop from Procreate, how to arrange different layers, how it imports from Procreate if you're bringing in
several layers. We learned that you need to fill duration if you want
that element to appear throughout
the whole timeline or throughout the
whole animation. We grouped elements. We resize them in
different ways. And then we learned key framing, so we added one keyframe to the whole group at the
beginning of the timeline. Set a final position and
added another keyframe. We set the easing
of the movement, and then we made two
wheels rotating by again adding one keyframe to the beginning
of the timeline, one keyframe to the
end of the timeline, and then set rotation to
the multiplication of 360 degrees so that the wheel rotates ten
times during 10 seconds. I think this is so exciting. See in the next
video where we are going to animate
the little ghost.
12. Animating The Ghost: All right, so in this video, we are going to
animate the ghost. But let's just first close up this group so that we are
a bit more organized, and let's just be in the
compose mode, right? So, we are going to impose our ghost the same way with the dragon
drop from Procreate. So let's go and select the little ghost to go to
procreate dreams to import. What we need to do again is to place it to the
beginning of the timeline, hold down and fill duration. Okay. Now, I will select the ghost
and make it a bit smaller. And fit the size of the
skateboard and I will already place it here onto the skateboard to its
initial position, okay? So the animation technique
that we are going to use in this part is the perform mode. With the perform mode, we are basically
recording the movement that we are making
with that element. So let me just show you.
I will hit perform. This button just changed
to record button. And as you can see, here is the perform indicator
that means that anything that I'm
doing right now with the ghost will be recorded. Let me just show you. I'm
just moving it around. I'm making big movements so that you can see what happens. Okay. Can you see that?
What happened here? Here is the whole motion
track full of key frames. So it automatically created key frames from the
movements that I made. And let me just play, as you can see it. Okay, let me show the whole. The movement isn't
that nice, right? So this is a little bit play and um you know,
trial and error. I will just go back and delete this track with the
two fingertpUndo. And now I will sometimes I
need to do this several times, so I need to, you know, pay attention how
I'm moving the ghost around. So basically what I need to do is to follow the
skateboard, basically, and add a little bit of this floating movement to the ghost because he's actually floating on
the skateboard, okay? So let's just try it. Make sure that the playhead
is at the beginning, okay? Okay, I stopped. So if you stop, the
play head stops. Let's see how it
looks like, Okay? It looks a little bit better. But not perfect. To help you with this
little movement thing, there is a modification called motion filtering that you can open when you click
on the perform bottom, and I have set it
at the 77 person, but let me just show you
if you have it zero. W zero motion filtering, it will pick up every movement
you make with your hand. So it will be very not
smooth the movement. It will pick up everything.
Let me show you. It will really be like, you know, not very floating. And if I study to 100%, it will be kind of
too smooth, I think. Let me just try it. So it will smoothen out these
little little movements that my hand makes. Okay. Can you see that? It made just five key frames.
It doesn't look good. Okay, so let's set the motion
filtering to 71 person, probably, and just make yourself a little space here where you can
just move around. I don't to stop when
I'm performing. I would rather do the
motion several times. But it just 10 seconds. Let's just try. Have the playhead at the
beginning and see what we can do. Let's play it. Cool. Okay. I love it. It can stay. Now, let
me show you something. We can layer motion. That means that there will be more motion tracks
collecting data from the distortion or the
manipulation with the element. So if I'm clicking here, I'm at the perform mode. If I'm clicking here, I can
add key frames as well. So I hit move and I hit arb. As you can see, it created
another motion track. Below and I created these nodes. I have the motion track here. The playhead on this track. I have these notes I can warp this little element to add
an extra floating effect. I will just grab this node and I will just move it around
as it floats around. This will add this extra motion. Can you see we have
two motion tracks here? Let's play it. Added this little. Can you see that? So cool. Okay, so this is what
layering motion is, and you can do so many things.
But let's just move on. We already have the
animated little ghosty. Let's go back to compose mode. And we have this little
animated ghost in the park, and let's just add
some extra elements. In the next video, we
are going to animate some light bucks and I will
show you the flipbook. See you there. Okay
13. Animating The Lightbugs: All right, so welcome to
this video where we are going to explore the
flip book that is again, completely reamped
in Procreate Dreams, too, and it is really, really like a dream for anyone who struggled
with animation before. It is really well made, okay? So let me show you how you
can create a new flip book. So I will create another layer, and here you have the flip book. And it opens up basically
a painting mode. But you have a flip book
here that you can play, and you can see here
are little frames. You have 24 here, but that is 1 second. Okay? So we have 24 frames per
second set for this animation, and we have 10 seconds
of this animation, which means how many
frames or yeah, frames we have together, 240. So this might sound
a little like a lot. But what we are going to do
is a very simple animation. And let's just have a glimpse on the little tools that
we have here, okay? It is pretty much
again, revamped. So we have settings here. Okay, so let me just
explain what onion skin is. So onion skin is when you are drawing through
these little frames, it is very useful to see
what you have drawn before. Okay, so that you know where
to draw the next motion at. So flip book is basically, oh, let me just start, okay? So, here are the little brushes. There are so many
new brushes here, and what I love is the luminance
brush and the light pen, and I will just choose
a little yellow color. And yeah, if I'm drawing,
can you see that? I already have one
little frame here, and if I'm drawing,
it stays there. So if I want to go to
the next movement, can you see that this little
one turned to purple? And if I went to the settings, the purple was here as well. So this means that the
previous little drawing that I made will turn purple so that I can see what
I've drawn before. So if I'm in the second frame, I can paint it here, and let me just show you
what we are going to do so that it all
makes sense too. Here is the third one. So we are drawing
light box, okay? So flying around here. Okay. If I'm playing this, can you see that it is moving? Dim, bit dim, d, d. It is really cool and really
simple and really easy. Okay? So this is basically
what we are going to do. We are going to make free
light bugs flying all around, and I will show you some other settings that you can have. Let's just take a look at
the little settings up here. So we have filters so we can change the hue
saturation brightness, so we can play around
a lot with Um, you know, colors and things. This was missing in
Procreate Dreams one and it's so cool
that they added it here. Now, our little light
bug will stay the same, but it is so cool
to have it, okay? We can gosh and blur. This is so useful. And yeah, these
filters are amazing. I can't wait to play
with them next time. But we can also select. And as you can see, we
have a free hand selection to rectangle Ellipse, color fill, et cetera. So this menu was really
missing from here. And also, we have
a transform tool. So now we can transform our little elements
that we are drawing here. So basically, the flip book is several canvases that
you are drawing on. And it is so cool that as
you are, you know, drawing, you can see the animation
playing at the background, so you can plan around
your little animation. But we are going
to do this really simply and beginner
friendly, okay? So I don't want to
overcomplicate it for you. You have the um well
known tools up here. So we have the brushes, you can smudge erase. And we have also layers here. I think probably at every
little little canvas, you have layers separately so that you can do more
complex drawings. That is really cool. And we
have so many color options. We have to disc the classic, the hominy, the value,
and the palettes. Just as we have in Procreate. And you can create your
new palette, as well. So it is really, really,
really revamped, and I just can't
emphasize enough how what possibilities this
gives us to creatives. Okay. Well, let's just get back to our little light bugs
and make it easy. So have the brush. You can see. You don't need to plan the
movement very much, okay? So if you are doing
this flip book thing, it is really good to kind
of plan the movement. That you are drawing then. But right now, this
light box can just, you know, go around
in different shapes. So let's just have
fun with that. It is really beginner
friendly and it is really good to get used
to how this all works. So I will speed this up
so that is not that oops. Not that boring for you. And yeah, just click
and click and throw. Hm. Oh, yeah, what I wanted to say that
if you are drawing smaller and smaller dots and
then get bigger and bigger, creates the effect that it
gets closer and further away. And as you can see, now
that I ended the 24, I need to click this plus sign. And, yeah. Okay, so 240 little
drawings or dots. It already hurts my arms, but let's just see
what I've done. Okay. Let's go. Okay, let's see it, right? I guess let's play it. Oh, wow. It looks so cool. Oh, my God. It's so fun. Can you see that? Wow. I love what it looks like. Now, we are not
going to rest, okay? We are going to
create another layer within the flip book that is also a new feature in
Procreate Dreams, too. So if you hit this okay, not the plus sign,
but this sign, it will create another track. So you can add another drawing. So we are going to do
the exact same process again to make these two
little bucks play around. And don't worry. We
are not going to draw other ones right now. So let's just play again, okay. Whoa. Okay. I just play. Wow. It looks so cute. Okay. Alright. Super amazing. Now let's see what we can do. So if I'm hitting flip book, I can hit finish drawing
to return to the stage. And as you can see, it is here. So both of these little
light bugs are here. Okay? Now, if I hold down
the flip book layer, I can hit Convert
flip book to tracks, and this will take my two flip book layers
and put them into a group. It will create a
book, a group, okay? And here are all the little
drawing separately so that you can actually move them around if you need so.
I will show you something. I will hit the multi select tool and select this whole track, with everything with
this one as well. Okay? So I have all
little drawings selected. If I hold down, I can
group so this way, all these little
flip book images will be in one
group in one track, and it will be helpful if
I want to duplicate it. Because we don't want
to draw another one, so I will just hold down and I will just hit
Duplicate and it will duplicate this whole track with the little flip
book things here. But right now, I can
just select this group. And in the compose mode I am, I can rotate it and
place it somewhere else. So it will take its whole
motion with itself, okay? So it will have a different
motion as the other one. Can you see that? So I added. I duplicated this one up here and it now has a variation as I moved it to a different
side and rotated it, okay? I hope that makes sense. So we have free
little light bugs here floating around
with our little ghost. So let me just do a little recap of what we have done here, okay? So, we created a new flip book. We have drawn two
little light bugs in 240 little drawings because
we have 24 frames per second, and we have a ten
second video, right, and that makes us
240 little frames. We filled all of them with a little light bug
in a random motion. Then we exited the
flip book menu. We clicked on the flip book
and converted it to tracks, which gave us a group. And in that group, we had the layers two layers
of the drawings. We converted one into a
single track by grouping. We duplicated that group, and in the compose mode, we placed it to a
different place and rotated the whole
drawing with the motion, and it gave us a
little variation, and we didn't need to
redraw a third little bug. So we have now three. And it looks super
magical. Okay. I hope this gave you, you know, a little creative boost because you can
do amazing things with just a few clicks
in Procreate Dreams, too, and it is just magical. And in the next video, we are going to actually draw
in Procreate Dreams, too. So let's just draw and
animate leaves, and, yeah, see you in
the next video. So
14. Animating The Leaves: If it All right, so let's just
animate some leaves. We are going to try out drawing and painting in
Procreate Dreams too, and we are going to animate
with the perform mode again. And yeah, at first, let's just close this
group so that we are a little bit organized. All right. So to create a new drawing, hit the plus button
and hit the drawing, and it will enter
the drawing mode. It is similar to the flip book, but we don't have the
flip book right here. Okay? So we are going
to draw a, um leaf. And for the color, you can choose whatever
color you wish, but you can also use
the color picker. So let me just show you. I will just hold down my
finger here and I will just pick up this color
and I can just use it. I will use a little bit
lighter one. Choose a brush. What I love is in the drawing
brush set the Blackburn. It is so nice textured brush. But you can choose
different one. You can just play around. I will just use this
Blackburn and let me just draw a very simple leaf like this and I will choose a lighter color and choose
a sketching pencil. I brush side, it will
be aprocriate pencil. I will just draw a little
bit of this middle. I will animate this
leaf with perform. I will hit drawing
and finish drawing. And as you can see, it placed the drawing into a new track. I will make sure that it
fits the whole timeline. It does. All right. All right, so we
have the leaf here. I will make it a
little bit smaller, and I want it to fall
down in the background. With this falling
down motion, okay? I want this leaf to actually
fall behind the ghost. So I will just hold
down the layer and place it behind the ghost. We will animate it
with perform and we are going to again layer motion. I will just hit perform and at the beginning of this
little at the track of the leaf and make sure
to have a steady hand. And I will make it
fall like this. Let's see how it looks like. Okay. You can do several takes again, okay, if it doesn't
work out for you. And I will want to move, not just like this, but I want to have this
little swing emotion to it. So if you have this little leaf selected and you click on it, you can see these nodes, right? If you hit on the node, you can just change
the size of it. We don't want to play with that. We want to rotate it. So if you click it, you can see this little quarter circle
thing and you can Okay, I can see what I'm doing. But let me just check, okay? Okay. So let me see. Okay. I need to play with it. I want this sleeve to fall like this and then take a
turn and then like this. Let's try to make it. Like this, and turn. Okay, and turn again and turn. Wow. Okay, and it derived. So let's see. Okay. Cool. So fun. Let's just repeat this
process with another leaf. Hit plus and hit drawing. Now I'm going to choose a
little bit of reddish color. Choose the black
brush again and draw another leaf. Like this. Choose a lighter color and the appropriate pencil and
just add a middle like this. Again, drawing, finish drawing, and I will just make it a bit smaller in the compose mode. Okay a little bit smaller. I will again make it fit the whole timeline and
take the play head to the beginning and
actually I will place its bit to the side here, and it will also
fall down similarly. I will hit per foam and Okay. Okay. Okay. This is too
quick. Let's try again. Okay. And let's do
the same exact thing. I will click the node,
click this thing. Okay, let's play it. So cool. Let's do a third one. The third leaf will be in the front and we'll go
through the whole animation. Click the plus button
and hit drawing. Okay, let's make a big leaf. So I'm going to use this color, this ocher color again, make the brush a bit bigger, use the black burn again, and I will try to make
a nicely shaped leaf. Okay, that's cool. Uh, let's choose a lighter
version of the color, choose the procreate
pencil and add Okay. Add this a little. Things here. Cool. Hit finish drawing as this is going to be in
front of everything, make it to the top, place
it to the top, and again, make sure that it is filling the duration of the
whole timeline. That is, now I'm in
the compose mode, we are going to work
from the backstage now. Let me show you what
we're going to do. We need 10 seconds to go from
this part down here, okay? So let's just try it. Make the play head to the
beginning, go to perform. We have the perform indicator, and Okay, let's see. I didn't exit it. So I will try to exit. I will place a
little bit higher. So I'm at the perform mode and I have 10
seconds to rip down. Okay? Cool. I always do the
exact same thing. Play with this anchor
or this movement. Okay. Cool. Wow. So dynamic. It looks so good. It works so much better
than before, to be honest. I love it. So many things happening, right? I can imagine a
nice spooky music that actually we can
add here as well, but I suggest now to add it online when you are
sharing your Ofick. So yeah, let's just move
on to the next video. We are going to show you how to export your animation.
See you there. So
15. Export Your Animation: Alright, so I hope that you love the animation
as much as I do. In this video, I'm going
to show you how to export your animation and actually
upload it to a class project. And there is an amazing new
feature in Procreate Dreams, too, and that is
that you can export your animations as
animated gifts. And that is so cool. So thank you Procreate for
adding this because it was pretty troublesome before
to create animated gifts. But right now it is pretty easy. So if you click the
movie settings, and the share menu, you can export the
movie as a video, so it can be an Epi foe. Animated gif frames as images. The current frame,
you can create a Procreate Dreams file and
you have advanced Export. So let me just try the
animated gift at first. So it exports pretty quickly, and I will show you why. And, you can just hit Save Image and it will save
it to your camera role. So it is pretty nice, but the quality
is not that good. But you have a possibility to export it in higher quality. So if you go to Advanced Export, you can choose the
format up here. It can be a video and
it can be a gift, choose the gift and you
can choose the resolution. In default, it is set to 480 P. It is enough if you go, I think for the thousand 80
and you don't need four K, you can set the playback so it can be a
loop, a ping pong, and, these two and you can set a transparent
background that is pretty cool. Actually, I think that looks
pretty good right now. And I will just share it, and it will render it
a little bit longer, and the file will be
a little bit bigger. Depending on your purposes, you can just play around
with these settings, okay? Alright, so you can
just hit Save Image and it will again be on
your camera roll. Looks so good. So this animation should look really good when
sharing on social media, on your stories or as a post. But let me just show
you how to export it to be able to upload it
to your class project. So when you are
on Skillshare and you are submitting
your class project, you need to keep
in mind that it is 8 megabytes that you can
upload here, okay, as a gift. So very, very low resolution version is going to be that you are
going to upload here. Okay? It is enough for me to see how you nailed the motion. Um, make sure to add a title
to your class project, add a little
description so that I know what your experience
was during the class. It is really so
fun to read them. And don't forget to
add a thumbnail to your class project that is actually showing in
the project gallery. Maybe export a frame, you know, or create a
screenshot and, you know, crop it and place it there as your thumbnail
so that we can see a glance at your
illustration and animation. Or you can export
the illustration from Procreate as well. Well, let me just show
you how you can make a, low resolution one here. If you go to resolution, you can hit Custom and
you can just hit 300 and also turn off the dithering because it may add
some extra megabytes. Hit Share right now
and hit Save Image. Can you see that? It
is pretty simplified, but it looks still good. If you go to the class project and hit this
one and hit photo library, it is a ploding and we
have your gift right here. All right, so I hope that
you had fun in this class. See you in the last video, and let's wrap it all up.
16. Final Thoughts: Congratulations. You did it. I'm so proud of you for
sticking till the end. I'm sure you have a
mind going animation, and I can't wait to see it. So make sure to upload it
to the Project Gallery. Okay, so let's just do a little recap on what you
have learned in this class. In this class, you
have learned how to illustrate with
animation in mind and how to prepare your visuals for creating
an animated scene. You have learned the basics of Procreate Dreams, too,
learned keyframing, layering motion,
performing motion, the flip book, and you also painted right in
Procreate Dreams too. This was so much fun, right? Make sure to leave a
review to the class. It is so important to me to
know what you think about it. Also, stay up to date by
following me on social media, on Instagram and Facebook, and also here on Skillshare. I'm so much looking forward to see you in my other
classes as well. It was a pleasure
to have you here. I wish you all the best
and happy creating.
 The Artmother, Professional Art Teacher and Artist