Transcripts
1. Introduction: Hi, I'm Tortor. I'm a stop-motion animator with over 12 years experience in bringing things to life through animation. In this class, you're going to learn how to animate two objects colliding to become another object. I'm going to take you through the process from setting up your scene to rig removal and exporting your final finished film. This class is suitable for anybody with a basic understanding of stop-motion animation. You're going to need some capture software, a camera, and Photoshop for the rig removal too. Once you've finished, you'll have a magical animation like this one. You ready? Let's learn.
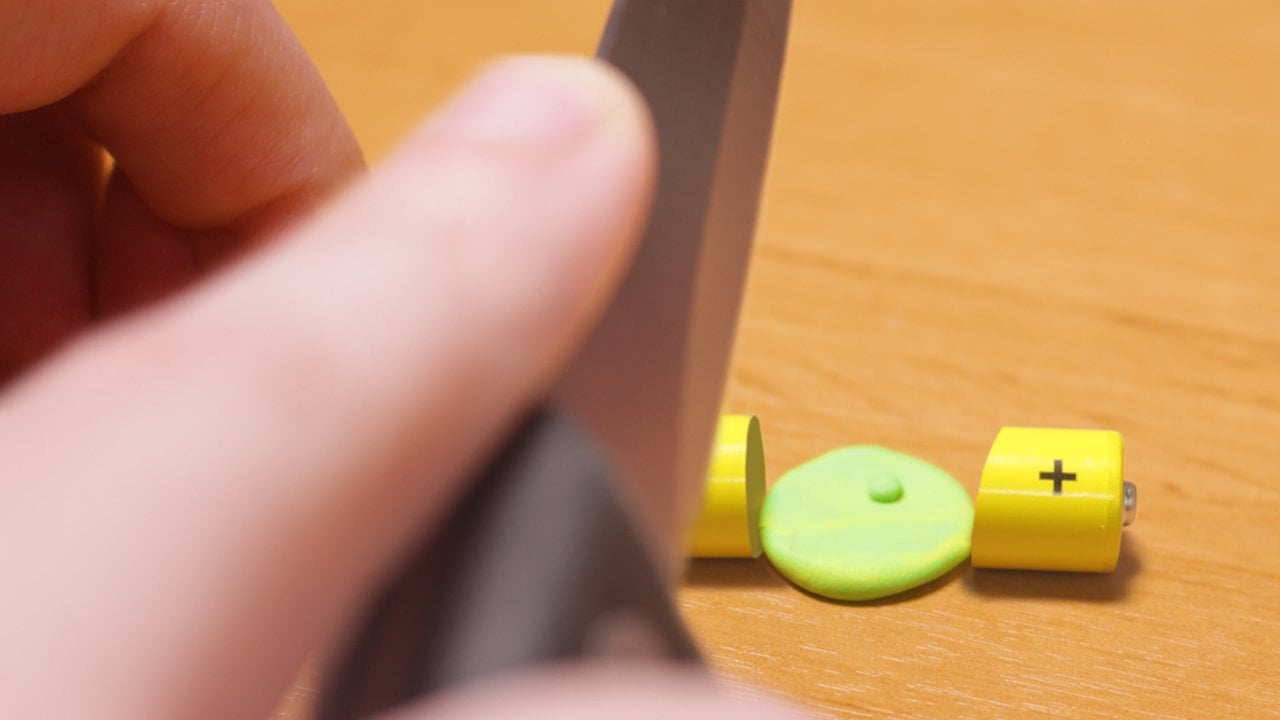
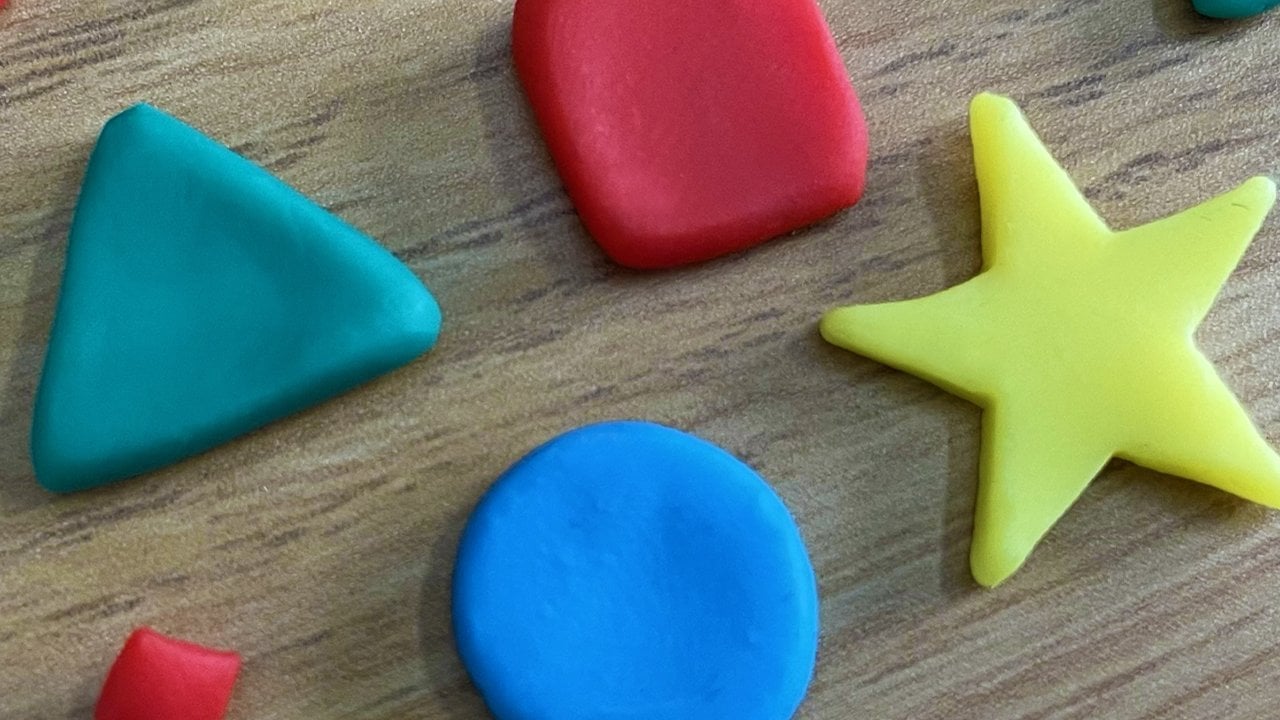
2. Choose Your Objects: Especially you are going to have to find your objects, the things that you want to collide. Now, I've got several suggestions for this. You could use things like batteries that come in different sizes of the same object. Small batteries come up together and become a bigger battery or you could use something that comes in different colors. I have these colored dice which I'm going to be using to show you how to do this and if you're looking at color theory, blue and yellow, when they're mixed together, become green. I'm going to animate these two colors colliding in the form of dice to become a green dice. But if you don't have anything like this, you can use like say batteries, matchboxes, toilet rolls, kitchen rolls, wherever you have that you can make in two different sizes or any objects that you want to come together to become a different objects. When you have decided what you want to animate, don't fear to take a picture of it and share it in the project window to allow us know what you're animating, and you can build up a little bit of anticipation and excitement before you finish your final animation.
3. Get Comfortable: A really important and often overlooked part of stop-motion animation is to be comfortable when you're animating. Make sure that the table that you're animating on or the surface that you've chosen is of a good height. You don't want to be hunching over and feeling uncomfortable or stretching around your camera. This can take a toll on your body and you'll find that your knee start aching, your neck starts aching and it's not pleasant. Make sure that things are comfortable for you and try and stretch your legs a little bit. Don't stand on one spot for too long because again your knees can seize up and that's not pleasant.
4. Clean Plate: Now before you start animating, you need to shoot a clean plate. What do I mean by that? A clean plate is simply a image of your environment without your purpose or your objects in there. This is what we're going to use later on, in rig removal, which I will show you in another lesson.
5. Moving Your Objects: Now we're on to the actual animation itself, colliding objects together. By now, you should have chosen your objects, and hopefully you've posted a picture down in the project window as well. For this example, I'm going to be using dice. I have a blue dice and I have a yellow dice. To start with, you want your movements to be really smooth. You're making these objects get closer and closer together, but you want to ease into that movement. So the distance that you're moving the dice or wherever your object is to begin with, is going to be really small, but with every move, you make that distance slightly bigger. You're going to be moving the objects a little bit more per picture. I've decided to put a little bit of a spin on one of my dice as well. If you're feeling confident, you can do stuff like that and make the animation a little bit more dynamic. As your objects are getting very close together, they are almost touching, at the point where your objects are almost about to collide, you might want to exaggerate that collision by them coming up in the air. When things become airborne in stop motion animation, you need to use a rig. That's what I'm going to be talking about in the next lesson.
6. Rigging: The rigging in stop motion animation doesn't have to be complicated. A really easy and cheap solution is to just use a piece of Plasticine or a piece of Blu Tack to raise up your objects. I'm using Plasticine in this case and as you can see, I've just got a little blob of Plasticine and that is going beneath my object to raise it up. Now we don't have to worry about this yet because we will remove this later on using that clean plate that we took earlier. I'll explain how to do that in another lesson. But for now, this is how you can raise up objects really simply. Now in animation studios, they might use other things like wire or even proper rigging, which is often like a metal arm that's made out of rods and you can move it to hold your object up. This also has to be removed in post-production and I often find that when you're just learning, painting out a piece of Plasticine is a lot easier and less complex. Now we're going to see how to do that in the next lesson.
7. Rig Removal: So we want to rig removal now and we're in Photoshop and what I like to do is split my screen, so you've got two images side-by-side, and I pull that clean plate, the empty environment across on the top of an image that I want to edit. Then I create a layer from the background on the background image and I just put the clean plate underneath the image that I want to erase the Plasticine from. You've got the image that you're going to erase out on top. Now you want to go to your eraser and you want to use a software eraser brush, so soft edge, and you literally just want to paint out this clay. You want to make sure that you paint out all of the shadow entirely, I feel like this is the best way to control results, and then you will just be painting the shadows back in frame-by-frame as you edit your images. Now I must say there is a little bit of skill involved in this part of the process and you will get better with practice. It's something where if you already have experience in Photoshop, but that will really help. But like I say, it's not too complicated, the tricky part is always painting a shadows back in, because you can make that look good on a still image. But when you start pulling still images next to each other to create the animation, there's got to be some consistency in that shadow, and that shadow has got to be moving in a natural way, and that can be a little bit challenging, but I'll talk you through how I do it in a minute. Now you can see I've made my eraser a little bit smaller and this is for going around the object itself to get a really in the edge, it's good to have a small sized erasers tool for that part, and then you can increase the size again to remove the rest of the image that you don't want to be there. I've got top tip actually, when you're using the eraser tool to erase around your object, if you click down to start erasing, hold down shift before you click again, it will create a straight line and I find that when you're going around the object. If you're doing shift click, it saves you a lot of time, that's a really nice little trick. If you didn't know that already, this part of the process can be a little bit time-consuming. I prefer to do it this way because I feel like I have more control. Other people will use this selection tools to remove sections of the image. You can choose to use whatever method you feel works best for you. This is the method that I like and I actually find it quite therapeutic. When I'm doing stuff like this, I often have a podcast on or an audio book. I feel like I'm actually using that time efficiently, I'm actually doing something else as well as editing images. Editing images in this way can be quite therapeutic as well, so it's not all bad. Now that we've removed all of the shadow that we don't want on our image, we are going to paint in a new shadow. To do this, I get a dark gray color, I make a new layer, and I put that layer between the clean plate and the layer that we've just been erasing from, so this shadow is going to definitely sit underneath the object, and I use a dark gray color, I just get a paintbrush tool again with a soft edge, and I just try and place that shadow where I think it should be bearing in mind the object is currently in the air. The shadow isn't going to be touching the object, so there's going to be a little bit of distance between it, and because we've got the shadow on a new layer, we'll be able to subtly adjust where that shadows sits if we need to later on down the line. Now I've got this soft edge brush, I've created a shadow, and obviously shadows on opaque like that. I'm dropping down the opacity to 40 percentage and then I'm going up to filter and selecting a Gaussian blur just to give it a little bit more feathering on the edges and make it a little less solid. Now I'm going to show you how to do this again on a different image, because like I say, doing shadows in rig removal can be challenging. Here we have a slightly different position object. This object is slightly touching the floor, and that means that the shadow is going to be touching the object as well. You can see I've got a chunk of Plasticine I want to remove in the back end, but the front end of the object is already on the floor. Now I would suggest, don't be tempted to leave in that shadow that is not obstructed by Plasticine. The shadow at the front looked okay, if you want to get a good result, you go get rid of that as well and repaint the whole shadow back in, because otherwise things just won't look consistent, trust me. We're going to use exactly the same technique. We've got an eraser tool here with a soft edge, I used a smaller one going round the edge of the object, and we're getting rid of all of that shadow, and then we're going to paint the shadow back in completely afterwards. Now when you are erasing the shadow, you want to look at that clean plate that's showing through and you want to make sure that you don't get any harsh lines of color difference. Because if you see that the color isn't exactly the same, that is more shattered that you need to erase. We shot the clean plate and the animation in the same list environment, so that means that the images should look exactly the same, you know if there's a dark patch the shadow that needs to go. Now again, I've gone in with the paintbrush tool with a dark gray color, made a new layer, put that underneath the objects, and I'm doing a line that's very close to the object. In fact, this shadow, I'm going to build up with multiple layers because it's a bit more challenging the shadow, they can see out the end of the battery there's little bit there that I haven't actually a raised and it's overhanging the shadow. I'm going get rid of that now because that ruins the illusion. If anything like that happens, just go back onto your top layer and take it out with the eraser tool, and then again on the shadow, dropping it down to a 40 percent opacity and putting on a Gaussian blur. Now as you probably saw before we start editing this picture, the shadow looks a lot darker than that because the battery now has contact with the surface. I'm going go in with a slightly darker gray. We're getting really close to black in color now, and I'm making my paint brush tool a lot smaller, and I'm going to do a line right next to the battery. This is adding in that dark shadow, a really dark line of shadow which really makes the object seem as if it's close to the surface of the table which it was, and because the back end of the battery was raised up, the width of the shadow is wider that. I'm going to diagonally draw lines from the front-end of the battery to the back to increase the width of the shadow there. Again, dropping down the opacity and putting on a Gaussian blur too, and this was each piece of shadow that I drew was on a different layer. Now to save these images, you want to save as these images in my case, it all come from my capture software, you want to make sure you keep the same number that it says in the filename so that you don't lose track of where they are, and you want to then save these as brand new jpegs. Slightly change the file name but keep the number there, so you know the order that the image is go in. I saved the jpegs at maximum qualities, so let's just show you that again. I'm keeping the filename structure, the number at the back, but changing the name slightly so that it doesn't overwrite the existing picture. In the next lesson, we're going to pull these images into the edit.
8. SFX and The Edit: Now we're in the edit, I'm in Premier Pro CS6. That's the version I'm using and I am importing my matchbox image sequence. I've gone to media browser, we've got a new sequence ready, select the images, and pull them in like that. First of all, you want to take all those images and drop them on the timeline, I've got an image here from another composition where the scale is correct for the frame size, so I've copied the attributes of that frame and I'm just going to paste that onto all this matchbox once to get them the right size for the frame, because still images are often a lot bigger than you need for 1920 by 1080. Now the next thing we want to do is change the duration of the images, so we are going to select them all. We're going to take the box that says ripple edit, which means it will reduce the spacing between the images when the duration is changed, and we're going to drop that duration down to two frames, which will make this animation play at 12 frames per second. I'm just going to render my work area so we can watch that back and you can see how it plays back. You can see that it looks nice, the timing looks correct. I'm quite happy with that, so I'm just going to pull out that last image to last a few more frames just to hold on the matchbox at the end, and the last thing we need to do now is add some sound effects to really bring this animation to life. Sound is really important to animation. Sound accounts for about 50 percent of the experience. Whenever you watch something, you want to see it and hear it. I'm going to show you a little bit of my process in adding sound effects. If you double-click on an audio file, it will pop up into the source window and you can set an in and out point, and then if you click on the waveform tool, you'll be able to drag that straight down onto your timeline. Now there are all things that you can do with audio to make it sync better with your animation. You can change the speed at which an audio plays so you can make it last longer or last less time, and sometimes that is enough to get something to sync up and sound better with the visuals. You can also adjust the volume of specific sound effects. You can right-click go to audio again and you can decrease or increase the number to make that sound louder or softer. Layering up sound is really important as well. In this animation, we've got three matchboxes moving. The sliding sound that I've used for the matchbox, I've duplicated twice more, and I have layered up three different slide sounds to give a more realistic audio for that specific point in the animation. Now, there's also the impact of all of the smaller matchboxes hitting to become the larger matchbox. I have got an impact sound, which is like a thud, and you want to get that at the right point. You want to get that just as the picture changes. As the picture changes to one big matchbox, you get the noise of the thud and you can pull the timeline out, zoom in so that you can see more clearly where this is. Now, matchboxes also are full of matchsticks, and so I wanted to add a clutter sound as well, so I went to find a sound effect that would work for that. A site that I use often for finding my sound effects is freesound.org. I've been using this site for over 10 years now, and it's really good. You can download the sound effects and use them for free, check the attribution in the description of every sound effect, but most of these are free to use and are royalty free sounds. I found a third sound on that which I liked, which was a matchbox rattle sound, and I just wanted to add that to give this added layer of dimension to the impact of that matchbox hitting the floor at the end of the animation. That was a really quick overview of how to add sound effects, like I say, if you like, any of the ones that I have used in this animation, they are available to download in the project window, and now we're going to move on to exporting your final film from your editing software.
9. Exporting: Now the only thing left to do is export your finished animation. In Premiere, I go to "File", "Export Media", and I select "H.264", which is a compression for exporting video and I make sure that my settings are set to 1920 by 1080, so we're on HD and the frame rate, I change to 24 frames per second because that works for the animation and the frame rate that we're using. Then I also tick the box, "Use Maximum Render Quality", to make sure that things are rendered at the highest possible quality. I always go to the end of the timeline before I export to just check because sometimes you get a black frame at the end, which can look unprofessional. If that is the case, I just pull it back a frame to make sure that that doesn't export with the finished film. Then I literally just click Export and as you can see, this is a really nice small file size. It's a really short animation, is only seven megabytes big. This is perfect for uploading onto social media or wherever you want to put it.
10. Final Thoughts: Slow motion animation has always seemed like magic to me. Being able to bring life to an inanimate object is something pretty special. I hope you've enjoyed giving it a go yourself. I can't wait to see what you've created in the project window and do let me know if you want any help or advice. That's what I'm here for. I've got plenty more ideas for classes to come. Do make sure that you're following my channel to be the first to know about them when they go live. Thank you so much for taking my class and keep animating.
 Tortor Smith, Animator, Director, Artist