Transcripts
1. Welcome!: All arts and crafts,
no matter how advanced are rooted
in simple techniques, Fashion Design is no different. A whole world of
possibility opens to you once you learn
a few basic skills. Hi, my name is Amy
Plante and I'm a multi passionate
creative specializing in Art Design and textiles. While I do have a formal
degree and Fashion Design, I believe this field should
be accessible to everyone. The fashion industry is a whole is very harmful to the planet. So the more people
who feel empowered to make men are modify their
clothes themselves, the more sustainable
fashion will be. This class starts with a
basic bought shirt pattern, which will transform into three different silhouettes by creating three fabulous
sleeve designs. The techniques I'll show you are simple and fundamental to pattern drafting yet will have a high impact
on your design. I was inspired to create
this class after visiting a luxury clothing
store in London and seeing designer shirts
and blouses up close. Many of the design
details I saw can be achieved with basic techniques like pleating and gathering, both of which you'll
learn in this class. In addition to these
sewing techniques, you'll also learn how to read and modify a
clothing pattern. How to draft three different
sleeve silhouettes, How to sew and set sleeves, and how to take what
you've learned and apply it to lots of
different projects. This class is at an
intermediate level, which means you
should be comfortable using a sewing machine and have a basic understanding of
cutting and sewing fabric. However, it's okay if you've
never sewn clothing before. By the end of this class, you'll have the
confidence to design, draft and sew your way
to a whole new wardrobe. So tap into your inner
fashion designer and come sew with me
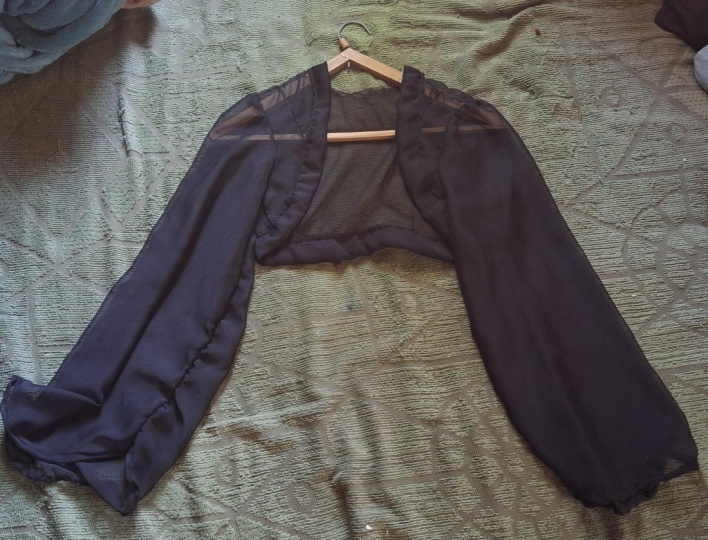
2. Class Project: Class Project. For this class, you'll sew a shirt with sleeves that you've customized yourself. I'll show you three different
designs for you to choose, or you can try all three. I recommend trying
out your patterns on an inexpensive cotton fabric
like muslin or calico. You feel free to experiment
and make mistakes. Once you're happy
with your pattern, you can cut it in the fabric you want your shirt to
be made out of. Don't forget to take a picture of your shirt and upload it to the Project Gallery to inspire other students for
my demonstration, I'm using the Berta brand
Shirt Pattern number 6849, which is a simple and classic
button down shirt Design. You can choose
whatever long-sleeved shirt design you'd like, but keep these things
in mind so you get the best results
from this class. You're bought shirt pattern
should be designed for woven fabrics, not
knitted fabrics. The sleeve pattern you
start with should be basic with no extra design
details other than a cuff to help you out of
Creative list in the PDF guide that
accompanies this class of different patterns
from different brands that I think would work
well for this project. If you need further advice, please reach out to me in
the discussion section and I'll be happy to help. The size of basic shirt pattern. You'll also need a couple
of pattern drafting tools. The first is a clear ruler. I use this tool all the time and can't imagine
drafting without it. Since you can see
the lines you've previously drew beneath it, you can make quick
adjustments to your patterns and add seam
allowance in a flash. Since my clear ruler
only goes to 18 ", I also like to have a longer
ruler to hand as well, at least 24 " or more. You'll also need a special
pattern drafting ruler called a French curve. These come in a couple
of different styles, but overall have a
spiraling curve shape. If you have the option, I highly recommend choosing one with measurements
along the edge, as this comes in very handy
when drafting sleeves. You'll also find it helpful to have a measuring
tape as you'll want to be able to measure yourself and the Garment to
get the right fit. The final tool that you'll
need is an L square, which is important
for maintaining symmetry and balance
in your design. The other materials
you'll need are a roll of tracing paper, a
mechanical pencil, clear tape, and
any materials list on the back of your pattern, which may include fabric
buttons and interfacing. You'll likely need more fabric than is suggested
on your pattern because the sleeves we will be Drafting will be
bigger patterns. A lot will depend on the size of the sleeve pattern
you start with, but I'll give my fabric yardage recommendations in
the next lesson. So let's get to it
and go over how to read and use a commercial
sewing pattern
3. Anatomy of a Sewing Pattern: Anatomy of a Sewing Pattern. Although most sewing
patterns that are available for purchase
are designed to be accessible to the
casual homes or they can seem a little chaotic if you've never worked
with them before. Learning to read commercial
sewing patterns will be helpful to you as you
begin to draft your own. Every brand of sewing pattern
will be slightly different. So I'm going to focus on
terminology and what to keep an eye out for as you unfold
your pattern before you, even by your pattern, you'll want to make sure
it will fit you. Most patterns are graded
for different sizes, so one packet usually contains one Pattern Design
in a range of sizes. On the back of the pattern, you'll usually find
a size chart with measurements to help you
determine your size. It's important to know
that these sizes and measurements vary
across pattern brands. And the number size
that corresponds with your measurements
may differ from the clothing size
you buy in stores. If the measurement
chart isn't on the back of the pattern search, the name of the Pattern brand
and the phrase size chart. It's likely on their website, the Berta Pattern
I'm working with did not have this info on
the back of the pattern. However, I was easily able to find it through a web search. Find your pattern
size by finding the closest number to your chest and waist measurements
on the chart. Since this is a Shirt Pattern, Hit measurements likely
won't be a factor. It's likely that you won't have a perfect match for your size. So it's better to err on the pattern being
a little too large then too small because you
can always take in the seams. If your trust is 38 "
but your waist is 28 ", go with the size that best accommodates the
larger measurement. You'll also find that
patterns come in specialty ranges like
petite plus and tall. So keep an eye out
for those as well. In addition to sizing the
back of the pattern also has important information about
what materials you'll need and how much you'll need
to complete the project. If you're sewing pattern has different versions
of the design, these will usually be shown as simple technical
drawings and labeled, for example, a, B, and C. Pay attention to
which design you've chosen because the materials
and instructions will differ from
the other designs. To start with, the
pattern may recommend which types of fabrics work
well with this pattern. Next, you'll see a
chart that indicates how much fabric yardage
you'll need for the design you've
chosen and your size. The numbers on the left refer to fabric widths because the way you lay out your patterns for cutting in the subsequent
yardage you need will vary depending on the width
of the fabric you're using. These are just estimates and your fabric width may
not be on this chart. So it's always best to round up the amount of fabric you
buy so you don't run out. The Sleeve variations
I'll show you in the upcoming lessons
have large patterns. So the amount of fabric
you'll need will likely be a little higher than what
the pattern recommends. If you can wait until you have completed your
patterns and lay out each piece to estimate more accurately how much
fabric you'll need. If you want to buy your
fabric ahead of time. However, I would recommend rounding up at least
three-quarters of a yard for the bishop and Balloon sleeves and a yard for the
Pleated Bishop sleeve. You also may see the
yardage recommendations labeled with or without nap with the width
nap designation usually requiring more fabric. This is because fabric
such as velvet or corduroy needs to have all the patterns facing
the same direction, which limits the kind of Creative puzzling
together you can do. I recommend you stay away from these kinds of fabrics
for this project, as well as plants are
stripes that require more careful pattern layout if you're beginning
to sewing clothing. If your project
needs interfacing or notions such as buttons, you'll also find
these indicated on the back of the pattern
with all that said, we're finally ready to open the packet and look at
the pattern itself. Inside, you'll find a
set of instructions in the folded up clothing patterns printed on thin tissue paper. The patterns will be
numbered in labeled to correspond with
the instructions. Though it may not be marked
as a separate line on the pattern seam
allowance is included in. You'll need to make note of this measurement for when we're drafting the sleeves and
when it comes time to sew. In my case, this pattern uses five eighths inch
seam allowance. Carefully read the instructions to determine which patterns you need to cut out depending on the design variation
you're making. Notice that each pattern has multiple cut lines depending
on the size you've chosen. You may find it
less confusing to trace the cut line
that corresponds with your size and colored pencil to prevent you from
cutting the wrong line. Make note of the green line, which will tell you how to place the pattern on your
fabric before cutting. If a pattern is caught
on the Strait of grain, this green line
should be parallel to either the warp or
weft of your fabric. Finally, it take a close look at the patterns and
note any notches, button holes, or other markings as these will need to be
transferred to your fabric. Once you're patterns
are cut out, use a dry iron on the lowest setting to remove
any creases and wrinkles. Believe it or not, even
a small crease can cause problems when you
go to cut your fabric. For this class, we're
only going to be modifying the Sleeve
portion of the shirt. It's a good idea to trace the
original sleeve pattern to make a copy of it so that
if you make any mistakes, you won't have damaged
the original pattern. Double-check that you've
transferred the green line, any notches, markings,
and pattern notes. If you're pattern doesn't have a single or double notches to indicate the front and back
of the Sleeve add your own. Typically the front
side is shorter and indicated with
a single notch, while the backside is longer and indicated with a double notch. This may not be necessary
for your particular pattern, but I find it very
helpful when it comes time to set the Sleeve. We're going to be
drafting our own cuff, but make note of a width
of the cuff pattern piece, this particular pattern
pieces cut on the fold. That means I should measure
half of the width of this piece and subtract the
seam allowance from one side. If this middle
line was cut line, I would need to subtract
the seam allowance from both sides to get the width
of my final sewn cuff. So I'm going to record
this cuff width as 2 ". I'll explain what to do with this number in the next lesson, Follow your patterns
instructions to complete the body of the shirt and
leaves asleep until last, as I'll show you how to sew and set them in upcoming lessons. We've covered a lot
in this lesson. So let's recap the
important points of working with
commercial patterns. Carefully read the
pattern size chart to determine the
best fit for you. Use the information on the
back of the pattern to know how much fabric to buy and what kinds of notions you need. Pay attention to the
numbers, letters, and labels on your
pattern pieces to determine which you'll
need for your project. Use a colored pencil to mark
the cut lines for your size. Before cutting out the patterns, use an iron on the
lowest setting to remove all wrinkles increases
from your patterns. Trace the sleeve pattern
for this project carefully transferring
all markings and labels, make note of the width of the cuff pattern piece
minus any seam allowance. Now that you have a
better understanding of clothing patterns, Let's draft our first
sleeve, The Bishop
4. Sleeve #1: The Bishop: Sleeve number one, The Bishop. The first sleeve
we're going to draft together is called
a bishop sleeve. This is a design that is
more narrow at the top and gradually gets wider until it's gathered into a
cuff at the bottom. The bishop sleeves
can be subtle or dramatic depending on the
look you're going for. First off, we're going to modify the original
sleeve pattern to create a base for
all three patterns we're making in this course. Think of this as
the mother Pattern. There are two
modifications we're going to make to the length
of our sleeve pattern. One for fit and one to
accommodate our new cuff width. If you need, use the template and the PDF guide to
follow along with these measurements and formulas to get just the right fit. You'll first want to measure your arm length from your
shoulder tip to your wrist. If you're doing this by herself, tape will be your friend. Record this measurement. Now measure the length of
the sleeve pattern and subtract the seam allowance from the top and bottom
of this pattern, since this will not
affect the length, wants the sleeve is sewn at this number to the cuff with the recorded in the previous lesson. This is the length of your
slave will be once its own. Compare this number
two, your arm length. If you're happy with that fit, you don't need to make
any fit adjustments. If you'd like to change
the sleeve length to fit your arm better, make note of whether
you need to increase or decrease the length
and by how much? In my case, I'd like the final sleeve length
to be 1 " longer. So plus one is my
length modification. Now when you to calculate any adjustments for the new
cuff, we're going to draft. This new cuff will be 1 " wide. Use this formula to
determine the difference in Kf width between the original pattern and our new pattern. Original cuff with -1 " equals
your cuff modification. If your original
cuff width is 1 ", you don't need to make any length adjustments to the Sleeve for cuff modification -2 ". So I'll need to add 1 " to my sleeve lengths to
accommodate this new cuff. Now add the length modification to your cuff modification. This is the total number you'll need to add to your
sleeve pattern length. If this number is negative, you'll need to shorten your
sleeve pattern length, trace the original pattern
up to the elbow line. If you're pattern doesn't have this marking measure from your shoulder tip
to your elbow on your own arm and draw a
line this distance away from the top of the pattern perpendicular to the green line. This elbow line is
where we'll adjust the length mark from this line, the cuff with distance plus or minus any adjustments you
want to make to the length. If you're subtracting
from the length, mark this amount
above the elbow line, draw a line parallel to the elbow line that
intersects this mark. Now slide the original
pattern up or down. So the elbow line meets
the line you just drew, retake and continue tracing
the rest of the pattern. True the lines around the
elbow to make them smooth. Chewing means adjusting lines of the pattern to
be smoother and to better fit the
original pattern pieces they will be sewn into. Before removing the
original pattern. Carefully transfer all markings and notes onto your
trace to pattern. The original sleeve
Design I'm working with has an opening with a
button closure at the cuff, but I'm going to ignore this
for our sleeve designs. We now have a basic sleeve
pattern tailored to fit that we'll use to base
our three sleeve designs off of label this pattern tailored basic sleeve and trace one or two additional copies
of it for upcoming lessons. Now we're ready to start
drafting the bishop sleeve. On your sleeve pattern, draw bicep line from one corner of the underarm
point to the other, using a square to keep the line perpendicular to the green line. Measure the line and
divide it into fourths, square lines up and down
from each quarter marking, then extend the lines up and down to the full
length of the Sleeve. These lines should
be parallel to each other and the green line. We're going to use a
method called slash and spread to add
fullness to the sleeve. Cut the vertical
lines you drew from the bottom up-to but
not including the top. Leave just a little bit of paper connected at the shoulder. It's okay if you
accidentally cut all the way through and
separate the pieces, you'll just need to make
sure that ends touch when he spread the
panels in the next step, anchor one of the
center panels to the table by taping it in place. Move one of the panels next to it by holding the
connected point with one hand and moving the opposite end with
your other hand. Decide how much volume you want. You'll likely have to
experiment a bit until you get the pattern exactly
how you want it to, to 3 " will give you subtle volume four to 5
" will be more dramatic. I'm going to spread my
pattern pieces 5 " apart. If you go over 5 ", I recommend dividing
your pattern into more sections and distributing
the spread between them. When you've got
the bottom panel, the distance you want,
tape it in place. Move each panel as you
did the first one, making sure each of the
spaces at the bottom is the same length and
the points at the top of the pattern are
still connected or touching tape the panels as
you go to keep them in place? When you're finished,
the overall shape of your pattern piece
should look like a bell, wider on the bottom
than the top. The more dramatic
the bell-shape, the more dramatic the volume on your sleeve trace the outline of your pattern at this point, remembering to transfer
all markings and labels. Keep your slashed
pattern as we can reuse this for the
next sleeve design. From the base of the patterns
sections, mark out 2 ". This will allow the
fabric to blouse over the cuff and
create a nice drape. Truth the bottom by using your French curve ruler to create a gradually curving line. Passing through the
lines you just made. Double-check your
sightseeing measurements to make sure they'll match up and make small adjustments to their length if necessary. Measure the length of
the Sleeve him and add notches at each
quarter section. This will help us later when gathering the fabric
into the cuff. Finish your pattern by
labeling it Bishop sleeve. Next we're going
to draft the cuff. Measure Your around the
hand measurement with your fingers together
as if you are putting on asleep at three-quarters of an inch to this measurement
for ease and record, draw a rectangle that
is the length of the measurement you just
recorded in 1 " in width. On one of the long edges mark
three notches that divide the length into fourths
along the other lung edge, right cut to unfold as seam allowance along
the other three edges. The seam allowance should match the seam allowance on the
rest of your Pattern. Write the name of the pattern
and Bishop sleeve cuff. Now we're ready to cut and sew our sleeve with your fabric folded salvage to salvage
layer sleeve pattern on top, making sure the grain is
parallel to the fabric edge. Place the cuff piece along the fabric fold where you
indicated on your Pattern. Cut out your pattern pieces, remembering to cut short slits
at your pattern notches. These notches should not go
past your seam allowance. Pin the Sleeve sides
together first. And so if you're finishing your
themes such as with surging are binding.
Do that now. Full your cuff with
the short ends together and sew that side. Remember to in your seams as
you go for a crisp finish, folded seam allowance to the
wrong side of the fabric along one side of your
cuff and iron in place. You can mark out the
seam allowance and pencil or chalk if you need to. Now increase your
stitch length to the longest setting
on your machine. And so basting stitch around
the hammer of your sleeve, an eighth of an inch away
from your seam allowance. My seam allowance is
five-eighths inch, so I'm sewing a half
inch away from the edge. Don't backstitch for this part. You can also so this
basting stitch by hand as a running
stitch, if you prefer, with the Sleeve turned
right-side out, gather the basting
stitches by tugging on the to thread
tails on the outside. Our goal is to evenly
distribute the gathers and shrink the same so it will
nicely fit into the cuff. Once you've gathered
the fabric a bit, pin the non folded edge of
your cuff to the Sleeve with the right side of the cuff facing the inside of the Sleeve. Matching the two
seems you sewed. Along with the three notches that you clipped in each piece. Gather the basting
stitches as needed and pin as you go carefully. So this same, taking your
time to make sure you aren't catching any fabric
underneath your two layers. After I saw a seem like this, I always inspect it to see if the fabric has bunched
up underneath. In this case, it has, but I'll show you an
easy way to correct this mistake without
redoing the whole theme. Use a seam Ripper to unpick the stitches that are
holding the fabric crease. There's no need to rip
out the entire seem. Just unpick enough to remove the crease and flatten
out the fabric. Now sew over this gap, making sure to overlap
with the ends of your stitch line at
the beginning and end. And of course back stitching
when you start and finish. Now the seam is corrected
and you didn't have to undo all your work in the same as best you can without
creasing the gathers and trim the seam allowance by
about half to reduce bulk. Since you've cut the
cuff on the fold, you should have a
visible fold line, but you can iron one
in now if you need to fold up the cuff
to hide the same, you just sewed, making sure the fold just barely
covers the stitch line. Pin the cuff in place and top stitch close
to the fold line. If you don't like the
look of top stitching, you can also slip
stitch the same by hand for an invisible finish. The sleeve is
finished and ready to be set into the shirt arm holes. Turn the shirt body inside out
and insert the Sleeve into the arm holes so that the right sides are
facing each other. Make sure the side of the sleeve with a single notch is facing the front of the shirt and the double notch is
facing the back. Pin the Sleeve starting with
the important points like sightseeing to side seam and center cap notch
to shoulder seam. Match up the edges starting with the underarms in working
your way up to the cap. Some shirt patterns will have 0s built into the capital
of the Sleeve. This means that the seams
won't perfectly match up. If this is the case, clip a little into the
arm hole at the top so you can stretch the fabric
to fit the Sleeve better. Only do this around
the shoulder of the arm hole as this is where the E should
be distributed. When you've got everything
pin to your liking. So unfinished, this
seems as you did before. Don't get discouraged if you have trouble sleeves setting, this often takes practice and is the most challenging
part of Sewing a Shirt. We've completed
our first sleeve. Before we move on,
Let's go over some of the tips for drafting
a bishop sleeve. Start with a trace
sleeve pattern that has been modified
to your arm length. Evenly divide the Sleeve into
panels and cut up to you, but not including the
top of the pattern. Spread the panels at
the base creating a bell-shape while keeping the tops of the
panels connected. Retrace the pattern
and add a lower curved him to create a
nice blessing effect. Now let's build on what
you've learned to draft a pattern for something
more dramatic. The Balloon sleeve
5. Sleeve #2: The Balloon: Sleeve number two, The Balloon. Now that you've learned a
slash and spread method, I'm going to show you another
way to use it to create even more drama with a
voluminous Balloon sleeve. If you've saved the pattern
piece with a slash panels, you can use that
for this pattern. Otherwise follow the steps in the previous lesson to divide your pattern into four panels. For this pattern, we're going
to separate the panels from each other completely like
what The Bishop sleeve, we're going to spread the
bottoms of the panels to create volume around
the hem of the sleeve. But this time we're also
going to spread the tops of the panels to create volume
at the top of the Sleeve, tape, a center panel in
place as you did before. Working with an adjacent panel, use a square edge to move the top point 1 " away
from the other point. Holding this end of the panel
in place with one hand, pivot the bottom point to be four more inches away from the
bottom of the other panel. Do this with each of the panels, making sure they're evenly spaced and aligned
and tape in place. Trace the outline
of the pattern, remembering to
transfer any notches, labels, and the green line. You'll notice that the top of the pattern has become jagged. We can fix this by using our French curve to true
the shape of the cap. Try to line up the ruler by
matching the types of curves. For example, using the
gentle curves side of the ruler along a gentle
curve of the cap. Mark notches on each side of the cap to show where
the spread is contained. Mark two notches on the back of the cap and one
notch on the front. If you have previous
arm whole notches, erase these to avoid confusion. True the ham with the French
curve as you did before. Adding 2 " to the bottom
for a blessing effect. Add notches along the
ham halfway between each gap or equidistant
into fourths. Label this pattern
piece Balloon sleeve. We'll be reusing the
cuff pattern you made in the previous lesson
for the Sleeve. This sleeve is sewn much in the same way as
the bishop sleeve. Layout and cut your patterns as you did in the previous lesson. Follow all the same steps
to sew the side seam, gathered the ham,
and attach the cuff. Now let's prepare the cat
before we set the sleeve. So a line of basting stitches and eighth of an inch in from your seam allowance
starting from the front and Archie made and stopping
at the to back notches. Carefully pull the thread
together the fabric, making sure not to
pull too much from one side and completely
pull the thread out. If you're fabric is slippery, you can keep the thread
in place by inserting a pin at each end of your
stitch line and wrapping the thread tails around them to secure justice we
did with the hem. We're aiming together the cap enough so it will line up with the arm hole with the body
of the shirt inside-out, insert the Sleeve
into the arm hole, as in the previous lesson, match up the underarm seems and the center cap notch with the shoulder seam
and pin it in place. Pin the underarm
seems together up to the notches you made where
the gathering starts. Adjust the gathers evenly to fit the cap into the arm
hole and pin in place. So the arm hole and finished
the same to your liking. The Balloon sleeve
is now complete. So let's recap the steps for pattern drafting this design. Repeat the process for
dividing the Sleeve into four panels as you did
with the bishop sleeve. Separate the panels and spread
them so they're spaced 1 " apart at the top and 4
" apart at the base. Trace and use a French curve
to true the cap and hem of the Sleeve adding 2 " at
the bottom for browsing. Reuse the cuff from
the bishop sleeve for the Balloon sleeve. Next, we'll get a
little more advanced by drafting the Pleated
Bishop sleeve.
6. Sleeve #3: The Pleated Bishop: Sleeve number three,
The Pleated Bishop. The Pleated Bishop sleeve is a variation of the
first sleeve we made, but this time the
volume at the bottom is created by the
addition of pleats, will create pleads
that are inserted into the top section
of the sleeve and then release them towards
the bottom to create the billowing look that is characteristic of
a Bishop sleeve. This sleeve is a little more
advanced than the other two, but I urge you to give
it a try as pleating is a great skill to have in
your arsenal as a sewer. Start with a tailored basic
sleeve pattern you made dropped bicep line from one corner of the
underarm to the other. The bicep line should be
perpendicular to the green line. Mark 4 " down from the bicep line on either
side of the pattern and connect these two
points to create a line parallel to the
one you just drew. Cutting along this
line to separate the pattern into two pieces. Trace the cat portion onto a
new piece of tracing paper, including the green
line and notches. Extend the line at the
base of the cap out from the pattern edge one-quarter
inch on either side. What we're doing here is
adding 0s to the pattern. This the same. We're all the
plates will be sewn into, which adds bulk in this area. So by adding a bit of ease, the same will fit the
arm more comfortably. True the sides of the
Sleeve by connecting the underarm point to
the points of ease. Since we created a cut
line into the pattern, we need to add seam
allowance here. At the same allowance, that is the same for all
your other pattern pieces. For me is five-eighths
inch square of the corners on each side. Cut out the cat pattern
piece and label it pleated bishop
sleeve cap, cut two. Now let's reshape the bottom of our sleeve pattern before
adding the pleats, trace the bottom piece onto
a fresh sheet of paper, remembering to transfer
the green line, extending the cut line
as you did before, a quarter of an
inch past the edge of the pattern on both sides, redraw the sides of
the pattern to connect the new line to the corners
at the base of the sleeve. Seam allowance to the cut line, squaring off the corners. Cut out this pattern
piece and set it aside. Now we're going to add pleats to the bottom half of the pattern. If you were just adding
a couple of plates, you could do this via the
slash and spread method. But I want to have most
of the pattern be pleats. So I'm going to show you
another way that I think makes the math involved
easier to understand. For all your math averse types, take a deep breath and
let's get into it. A pleat is essentially just
a fold created in a Z shape. The first thing you
need to decide is how deep you want
your pleats to be. In this lesson, I'll be
demonstrating half-inch please. So my pleat depths
is a half-inch. When you make a half-inch fold the fabric hidden by the pleat, otherwise known as
the plate underlay, is double the length
of the pleat. So, so far, a half-inch plate
is using an inch of fabric, but there's one more
element to the plea, and that's a visual space
between the plates. This can be any
length you'd like. However, if you want a classic
even look to your pleats, this length will be the same
length as the pleat depths, in my case, half-inch. So the total fabric for one pleat will be
one-and-a-half inches. An easier way to
understand this is to physically fold pleats
into your Pattern. Start with a long length
of tracing paper, at least 3 ft or more, and a few inches wider than the length of your
bottom sleeve pattern. You can find the
exact lengthy need by dividing the width of
your sleeve by half-inch, then multiplying that
by one-and-a-half. However, I like to
just wing it and err on the side of
extra long paper. Draw a line that
spans the width of your paper, straight
up and down, a couple of inches from the edge with your ruler
and the same spot, score this line with something
hard with a softened edge. I'm using a plastic
knitting needle, but a bone folder
would be ideal. You just want to create
an impression along the line without
tearing the paper. This will make it
easier to fold later. Now, draw a line an inch
away from the first one, making sure it's parallel. This measurement is
our pleat underlay. Draw another line,
this time a half inch away and score this line as
you did with the first-line. This is the distance
between our folds. Your next line will
be an inch away. Continue this pattern
down the length of the paper scoring every time you draw the
half inch width line. When you're done, fold
the paper where you made the score lines and bring the full to meet the
next drawn line. Played the entire
paper this way, taping down the plates to keep them in place as necessary. Try to be precise
with your folding as this will turn into
your sleeve pattern. When the entire paper
is Pleated and taped. Way your bottom sleeve
pattern underneath, keeping the pleats parallel
with the green line and evenly distributed along
the top of the pattern Ideally you want
to avoid pleats in the same and underarm
area to avoid extra bulk. So I like to have my
pleats start and stop one-and-a-half to 2
" from the corners. If you've created
too many plates, you can always unfold some before continuing
to the next step. Way or tape your patterns
in place and trace the bottom sleeve pattern
shape onto your Pleated paper, making sure you have some
excess paper at the bottom. While the police are
still taped together, cut the pattern along
the sides and top, but leave the bottom
uncut for now. Unfold the police to reveal
your new sleeve pattern and iron flat at the
center of the Pattern Make a five-inch line
perpendicular to the pleats and 2 " below
the original Hamline you traced mark 1 " down from each corner
of the Sleeve him and connect these points to
the center line you drew, creating a gently sloping curve. As one last step, measure the length of the ham
and divide it into fourths. Adding a notch at each division. Cut along the Him and
label your pattern piece, pleated bishop sleeves, bottom. We have three components to
the Sleeve, the cap piece, the bottom piece, and the cuff from the previous two sleeves. Arrange your pattern pieces
on the Strait of grain of the fabric and cut out
as you did before. When you cut up the
bottom sleeve piece, cut a short notch at each
of the pleat lines along the top of the pattern that will be sewn into the sleeve cap. Before we sew the
Sleeve together, we're going to iron the
pleats into the fabric. It's helpful if you
have a piece of thin cardboard with a square
edge to guide your pleats. Mark a line a half
inch away from the long edge of the cardboard. Working from the top edge of the bottom sleeve
piece make a fold. At the first Nazi made, use the cardboard
guide lining up the top edge with the
edge of the fabric. Bring the full to meet the half-inch mark on
the cardboard iron, The Pleated a few inches
down from the edge, removing the cardboard
if you prefer. If you are in the cardboard, be careful in handling
it as it will get hot. The length of your plate is up to your personal preference, but you'll want to leave
the bottom half of the pattern flat to give the
Sleeve volume at the hem. Don't worry about the pleat
links being exactly the same either as a varied effect tends to look better
with this design. Continue pleating
the fabric using the cardboard guide as you did before and pending as you go. Pay attention to the direction of your pleats as you want to iron the police of
your second sleeve in the opposite direction. This mirrored effect tends
to look better with pleats. When you finished the pleats, stitch them in
place an eighth of an inch smaller than
your seam allowance. Pin your sleeve cap to
your sleeve bottom. And so iron opened the same
and finish if desired. I'm continuing with
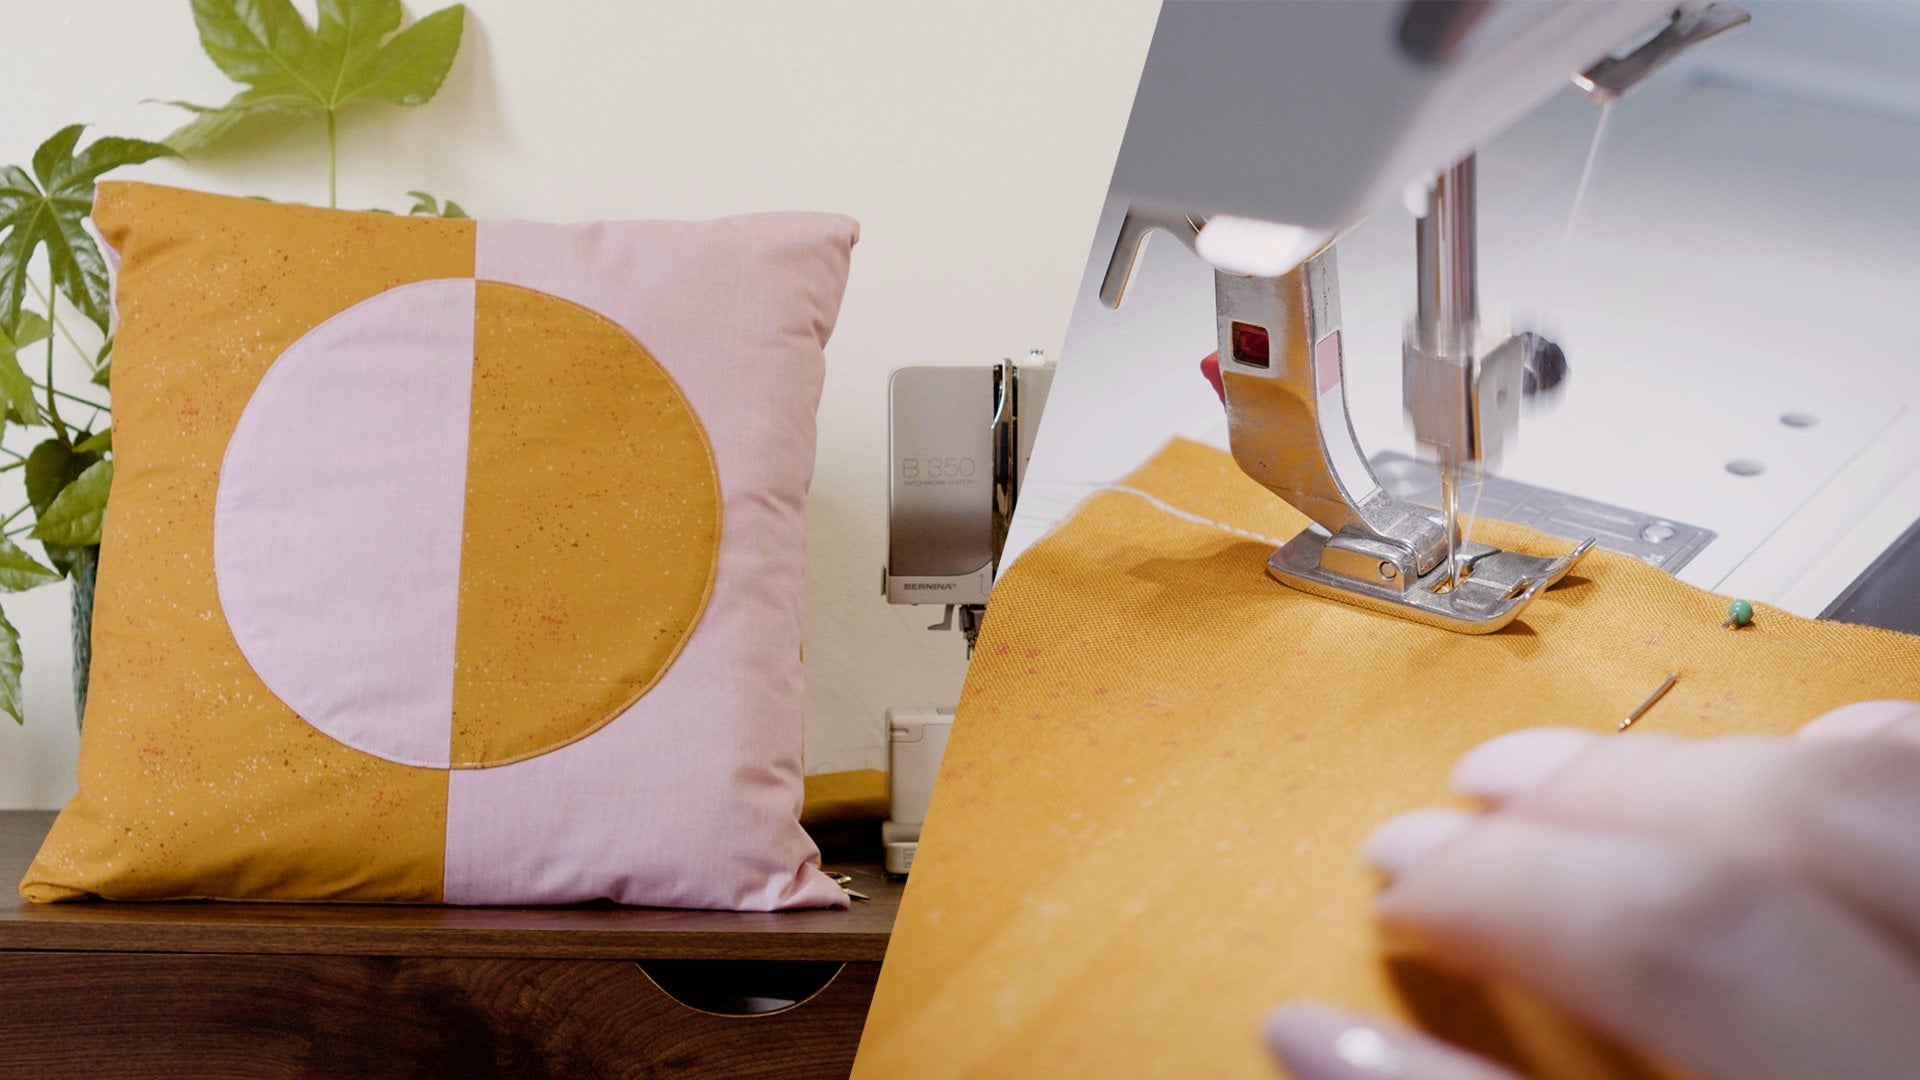
my mock French seams, but binding with bias tape or searching is a good option here. If you're interested
in learning how to sew mock fringe Teams, you can find that lesson
in my previous class, one pillow seven sewing
machines skills, pin and sell the side
seams of the sleeve, making sure the same
you just so it lines up with itself and finishing
the same to your liking, increase your stitch length. And so a basic stitch along
the hem of your sleeve, an eighth of an inch in
from your seam allowance, as you did with the
previous two sleeves. Turn the Sleeve
right-side out and pull the two thread tails
to form gathers. So an iron the cuff as you did before and match the
notches on the cuff to the notches on the sleeve with the right side of the cuff facing the inside of the Sleeve, securing with pins, distribute that gathers
evenly along the cuff, pulling the threads as needed. So the cuff to the Sleeve iron, the seam allowance
of the cuff over and fold over to the
front of the Sleeve, pin and place and top stitch. Use the same process from the bishop sleeve lesson to set your sleeve into your shirt. Here we have a finished
pleated bishop sleeves shirt. Let's quickly go
over the tips for drafting this type of pattern. From the basic sleeve pattern, make a line 4 " down from the bicep line and separate
the pattern into two pieces. Seam allowance to each pattern
piece where you cut them, create pleats and a piece of tracing paper and trace over
your bottom sleeve piece. Extend the ham for browsing. There you have it three
different sleeves created from the
same basic pattern. Don't forget to record your
process and post pictures in the Project Gallery
so we can see all your creativity
and be inspired. If you have any questions, please reach out
in the discussion section and I'll
be happy to help. Next, I'll offer some tips on designing patterns on your own.
7. Designing on Your Own: Designing on your own. Now that you've
had some practice drafting your own
clothing patterns, you're probably itching to get creative with your own signs. Working from a commercial
pattern is just one way to learn about design details
and Clothing Construction. Another way is by deconstructing
an article of clothing. We all have that Garment inner closet that's seen better days, but we just can't
bear to part with it. Using a seam Ripper
carefully open up this seems to reveal the individual pieces
that make up the Garment. You'll learn so much
about Pattern Shapes and Construction
when you do this. Once you take everything apart, you can use each piece
as a pattern to cut from fabric and reconstruct
into a brand new Garment. No matter how you approach
Pattern Drafting, there are some
important elements you should always keep in your practice and
you can remember them by the acronym style. The first is seam allowance. Make sure you're
being consistent with your seam allowance on
all your pattern pieces. It's good practice to visibly mark the
seamless so you can be sure you've added it on every side that will
be sewn into another. The next thing to remember
is to true your lines. There's nothing worse
than spending a lot of time on a Pattern Only to go to sew it and
find the names don't match up or your curve as wonky. Take the time to
smooth and measure edges before you
finish your pattern. Another important thing
to keep in mind is yardage as a pattern draft. Or you'll want to think of how these pieces will
fit together on the fabric and how they can be laid out in an efficient way. Could you fit everything in one-and-a-half yards
instead of two. If you shaved an inch off
the width of a pant leg. Take these things into
consideration as you Design. Labels are crucial
and pattern drafting, that includes the name
of the pattern, notches, green line, and
anything else and informs the construction
of the piece. I've certainly misplaced
pattern pieces in my time, and it's so helpful when
everything is labeled properly to keep each design
organized and together. When it comes to
labels, more-is-better. Finally, factor in
ease when you draft. This is something you
may get a better handle on with practice as you
learn how you like, you're close to fit
and hang on you. But it's important to always
add ease into your patterns. Commercial patterns
have 0s already built-in, but when you add it, bulky design details as we did with the pleats and the
third sleeve design, it's important to consider
how they will affect the fit. Clothes don't need
to be practical, but they do need to be wearable. Keep these lessons
and you're sewing box and start designing
8. Beyond the Sleeve: Congratulations on
completing this course. I hope you've had been exploring the world of pattern-making. Over the course of these
lessons, we covered, the tools and materials you
need is a pattern drafter. How to read a
commercial pattern. How to add fullness to a pattern using the slash
and spread method. How to draft pleats, how to set and so asleep. And what things to pay attention to as you pattern
draft on your own. With these skills
under your belt, you're ready to take Pattern
Drafting beyond the Sleeve. Here are few prompts to
inspire your next project. Try the pattern separating
method I showed you in the Pleated Bishop
sleeve lesson on a shirt pattern to create
interesting style lines, use the slash and spread
method to add gathers and fullness to a simple
A-line skirt pattern. Practice here pleading
skills by creating a fully pleated skirt or by adding a Pleated panel to
the front of a blouse. Find a Garment with
a design detail you like at a thrift store, deconstruct it and replicate
it in a different fabric. If I can leave you
with one thing, it's to be free with your experiments and
pattern drafting. Sometimes the dramatic
looking pattern translates to something far more subtle
when it's sewn together. You can only learn
that by trying it out and not being
afraid to fail. Thank you so much for
taking this course. Remember to post photos
of your projects to the Project Gallery and please leave a review
of this class. Not only does it help me improve your learning experience, it also helps your
fellow students know if the class
is right for them. If you post your projects
on Instagram or TikTok, be sure to tag me at Art dot, which underscores so
I can cheer you on. As always, keep in touch
and how be Sewing?
 Amy Plante, Multi-Passionate Creative