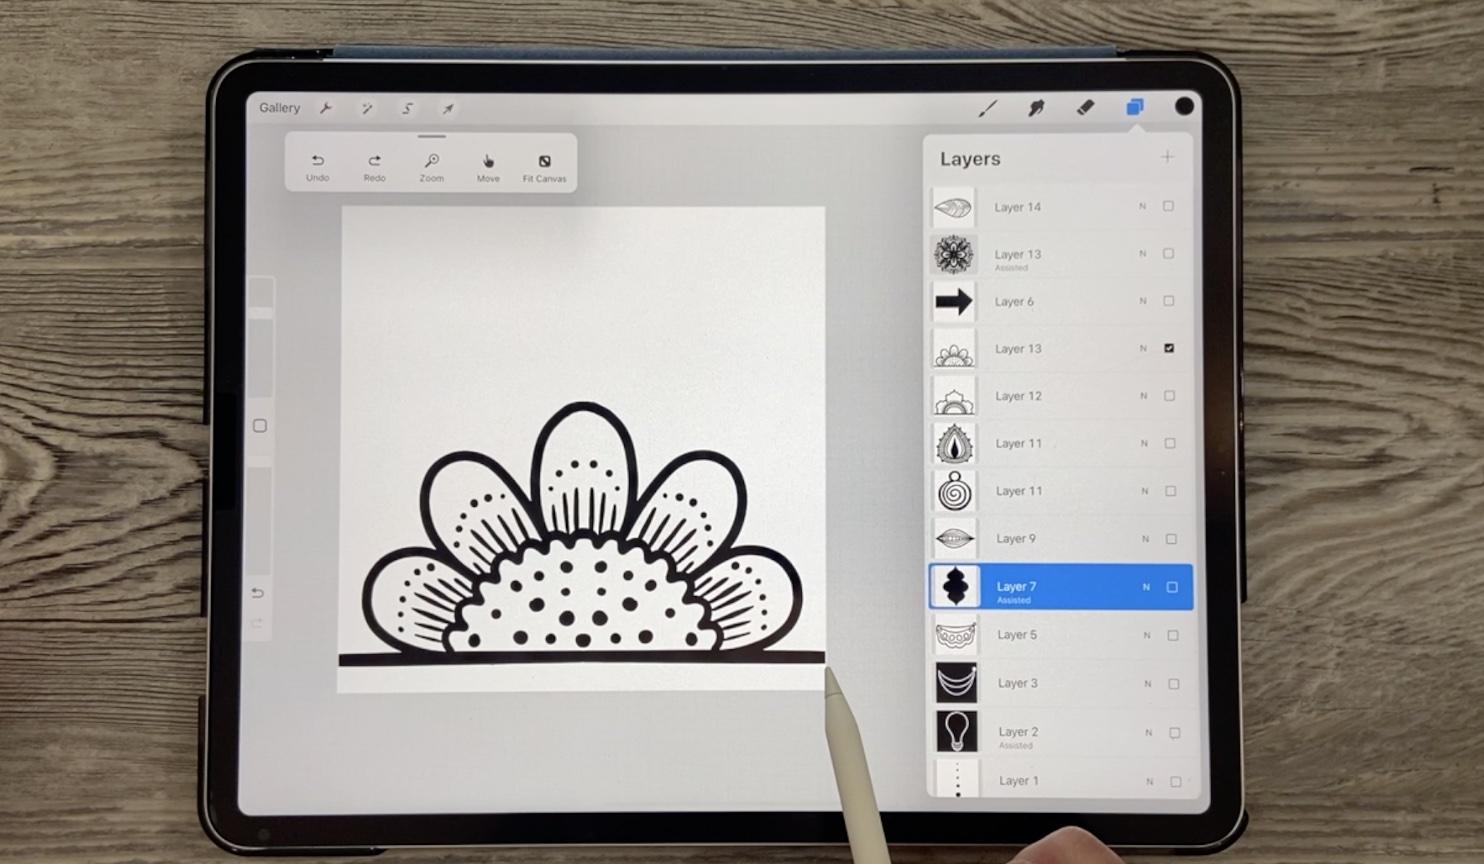
Transcripts
1. Intro to Specialty Brush Creation in Procreate: Hi guys and welcome. My name is Dolores now script and I'm coming to you from sunny, Manitoba, Canada. So today's class I'm bringing you is about creating whose specialty brushes? I know I've been on brushes for quite a long time here. But I was recently creating brush sets to sell in my Creative Market shop and on my website. And as I was creating the full sets, I realized that I was lacking in a few things. So I had to kinda put my thinking cap on to figure out ways to deal with the particular issues. So this class today, we'll feature the resolution is some of those issues. A lot of my projects end up being because of some kind of special need that I have. So this one was no difference. In this class. We're going to be creating brushes, light outline brushes, scatter brushes, dual brushes, texture brushes, and a couple of specialty surprise ones I'm going to throw in there along the way. You're going to learn some stuff in this class that you've never seen before in any of my other classes, believe me, a lot of it was new to me. So I'm really hoping that this information is going to be helpful for you. Now I want to encourage you if you haven't done so already, to hit that follow button up there. That way you'll be informed of anybody who classes as soon as I post them for any of you that purchased through my Black Friday sale, you know that those of you who were on my mailing lists were in the know, my website. Mailing list is a good way to keep ahead of it all because people on my mailing list there get any advanced sales that I have going on. I also want to say thank you to all of you who have left such lovely reviews. And for those of you who have been posting in my classes, I love seeing those projects or just keep them coming. So are you ready to get started today? All right. Let's get into it.
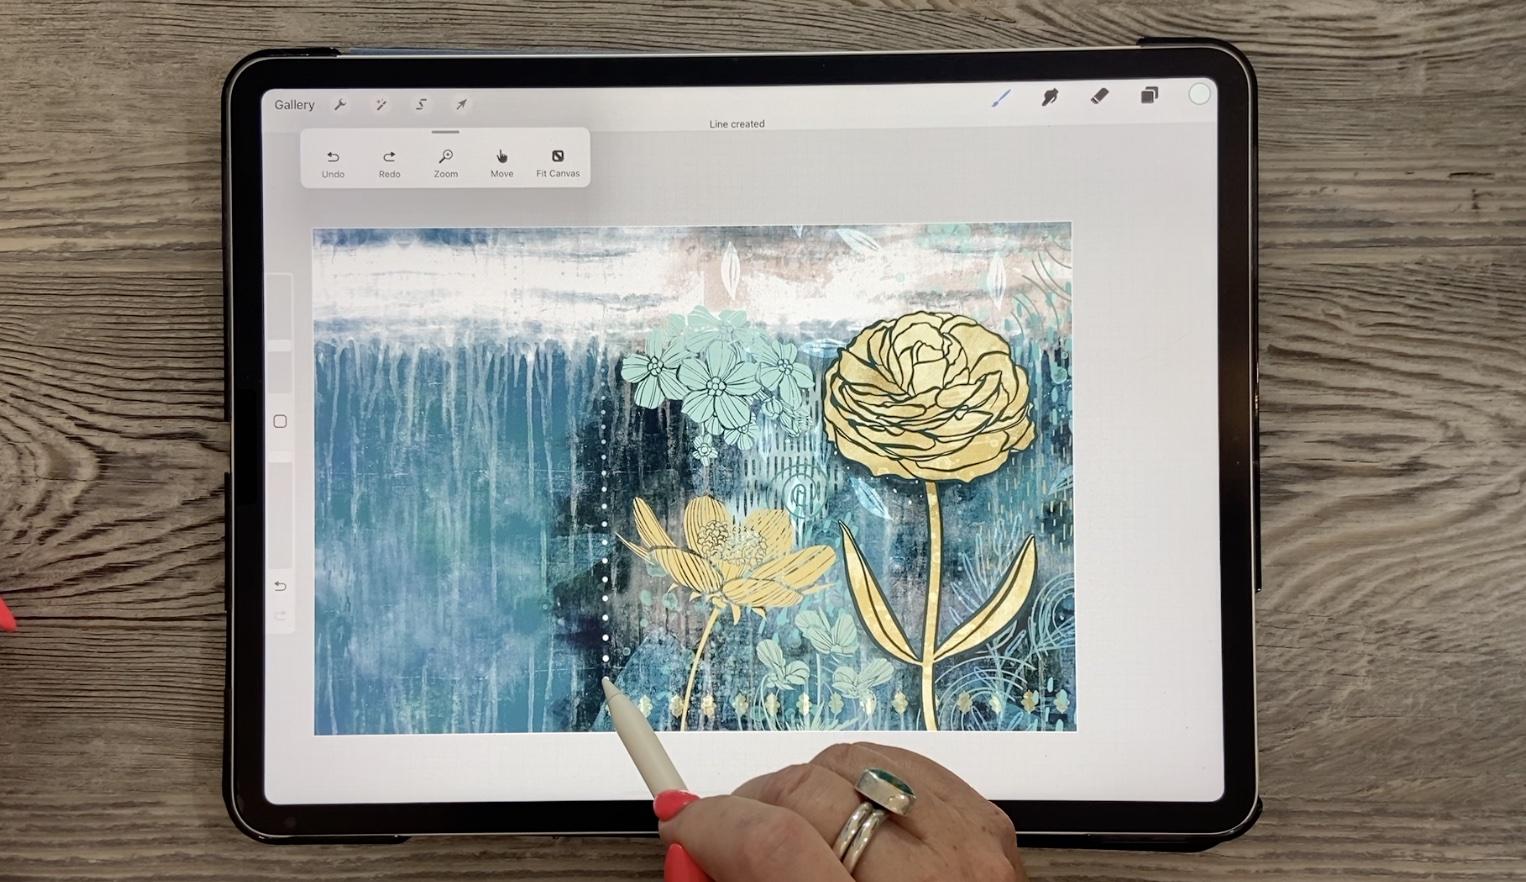
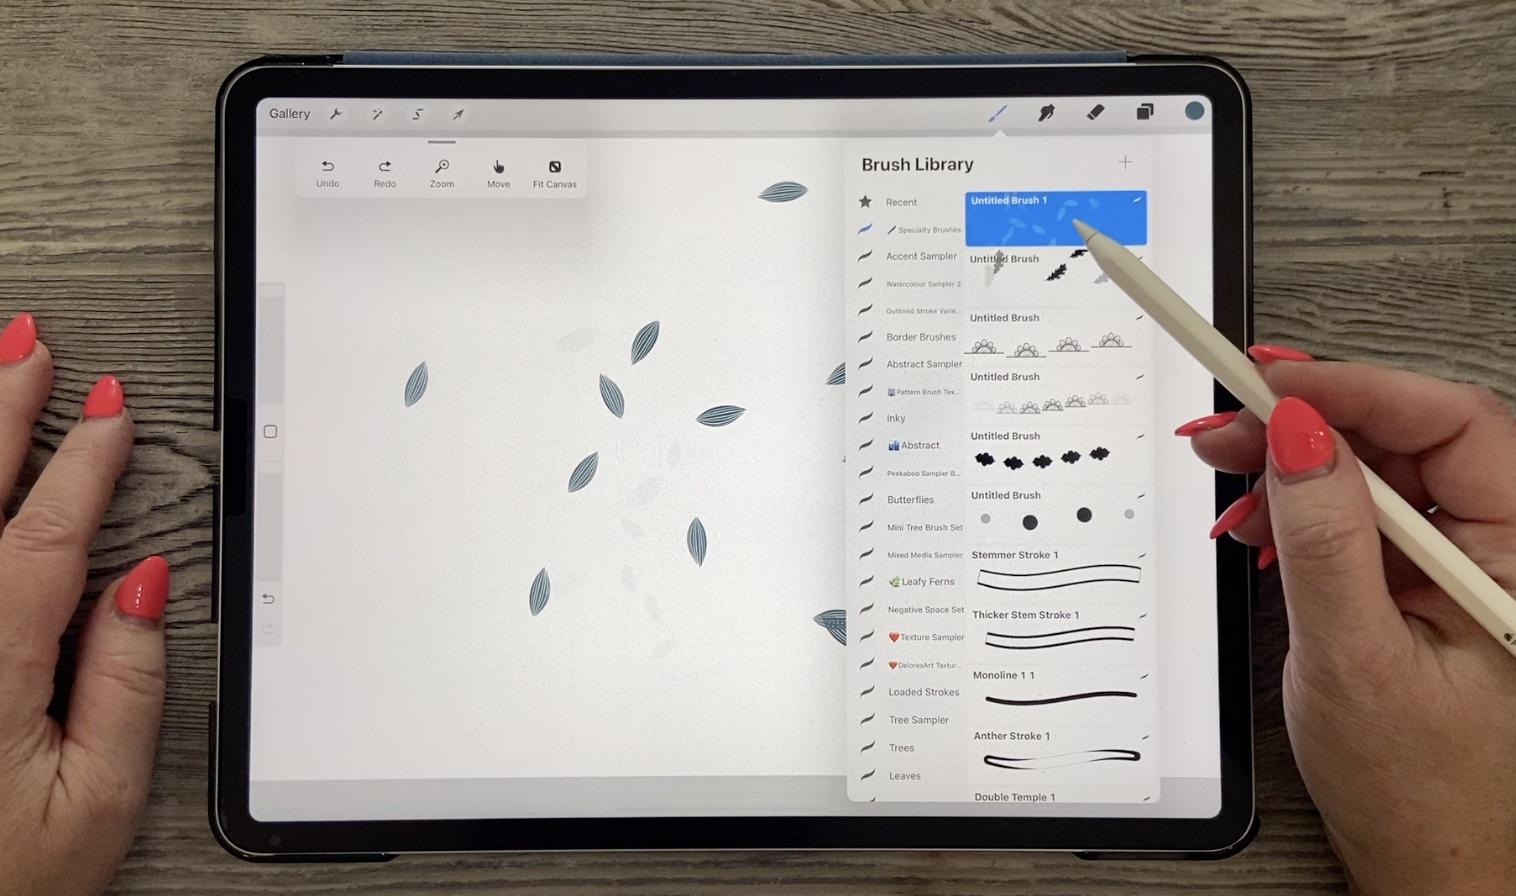
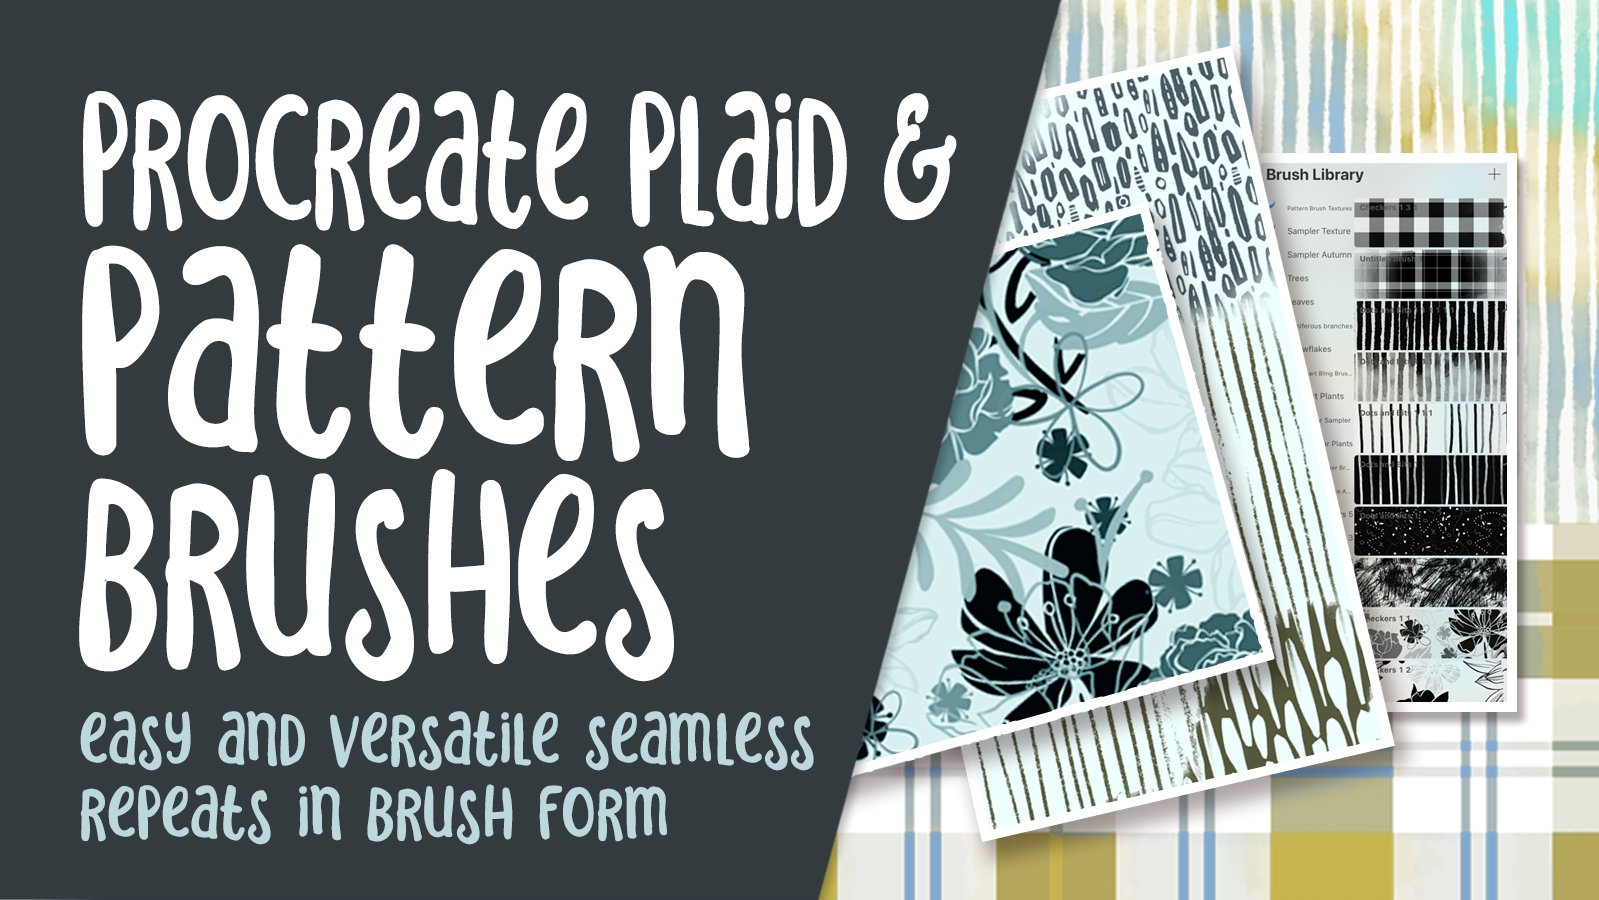
2. Variable Dots Brush: Hi guys, welcome to lesson 1. We're going to start out with the easiest brush ever were given to you. A variable thoughts brush. And it is much easier than it sounds. Let's get started. So for today's class, I'm going to be showing you six different or beliefs. It might be more but six different types of specialty brushes that I've created and use on a regular basis. I wanted to touch on these brushes because they're very useful to me and I'm sure that you'll find them really useful too. So amongst the different things that I'm going to be showing you, our stem brushes here, which are made with a dual brush and then texture ball, I call it, I don't know if you can see it there, but it's just kind of a ball of Marx. And I use that one quite frequently. It's here as well. And then in the corner I'm going to be reviewing with you how to make a border brush. And I think I've touched on that before, but I wanted to talk to you about a couple of different variables that we can do with that brush. One of them is a scatter brush, which is what you see here with these little leaves everywhere. And then I've got a couple of other really cool ones that I'm going to show you. And I'm going to probably start with the easiest one I think so one that I want to work with today and let's go into a new documents, will go into just a 12 by 8. I think that will be plenty big enough for what we're doing here. And the first one I'm gonna do is this space dot-dot borders. So these are some of the specialty brushes I'm going to cover today. Now, the variable dots here are the ones that I want to talk to you about because I do use these quite a lot. You can see variations in the opacity and we can also do variants that vary in size so that the dots get bigger and smaller. So that brush, I'll show you here. That would be something like this one here. And you can see here that as I put more and more pressure on it or release my pressure, not only does it change in opacity, but it also changes in sizes. But let's take a look at why those brushes work the way they do. Basically to start a brush like this, you can just add a new brush. And the basic brush that comes up in the studio is perfectly fine for this, what we need to do here is just increase the spacing. And as I increase this, you can see that the spacing between the dots and that dot is basically the single stamp. But you can see that as I enlarge or increase the spacing, I get a line of dots, which is exactly what I want. Now this one is already kind of variable, so we can work with that. This is a great way to learn how to use this brush studio. So that's why I'm starting with the simplest one, because I want to just kinda go over and it's only going to be a couple of settings that we have to change here. But amongst the things that we want to change, jitter that would make it move around on the past. So the spacing is not even and that may be something that you would like to have. I'm not putting any fall off on that now. Fall off would be feeding off at the end. And I don't want that for this particular demonstration. But what I'm gonna do is go into the Apple Pencil. And here we're going to make some changes. So I was to have this rate at 0, all the dots on that line would be solid. So you can see that if you changed here, you can get light to dark. Let's just go and test that brush and color, how that would look. Now that's a pretty big dots. So let's go down a bit in size. So you can see that it does vary from light to dark as I put more and more pressure on it. The other thing would be to go in here and also affect the size. So as soon as I make an adjustment here, you can see that as I put more pressure on it, the dot will get bigger. So that's a really neat effect to have an I use these dots on tons of my artwork. You've probably seen it in the background of many different pieces. And so what I would do is maybe use it for just going to add a new layer here is just to have kinda detail in the background that almost looks like, I don't know, like dropping rain or somebody not sure what you would call it or what you would say. But I'm going to go a little bit lighter. So you can see this a little bit better. Now you can see that if I hold my stylist down, I can also affect the straightness of the line. So it makes it into a solid straight line. And can you see that as I pull still keeping the pressure on my stylus, also increase the space between the dots. So I actually use this one a lot to just add a little bit of filler in the background. I know I just feel like it's almost like adding a little bit of jewelry. So that's one of the things that I use on a regular basis. So I wanted to show you that brush real quick and I know that's a really easy one. So that's something that you can go and make in five seconds. So that's the one I wanted to start with. And yeah, that covers this one. And I think we can move on to the next lesson. In the next lesson, we're going to work with this sort of system. What we'll be doing is going in and changing the shape here. And that's how we're going to create a brush like this. Alright? Okay, so I'll see you in that next lesson.
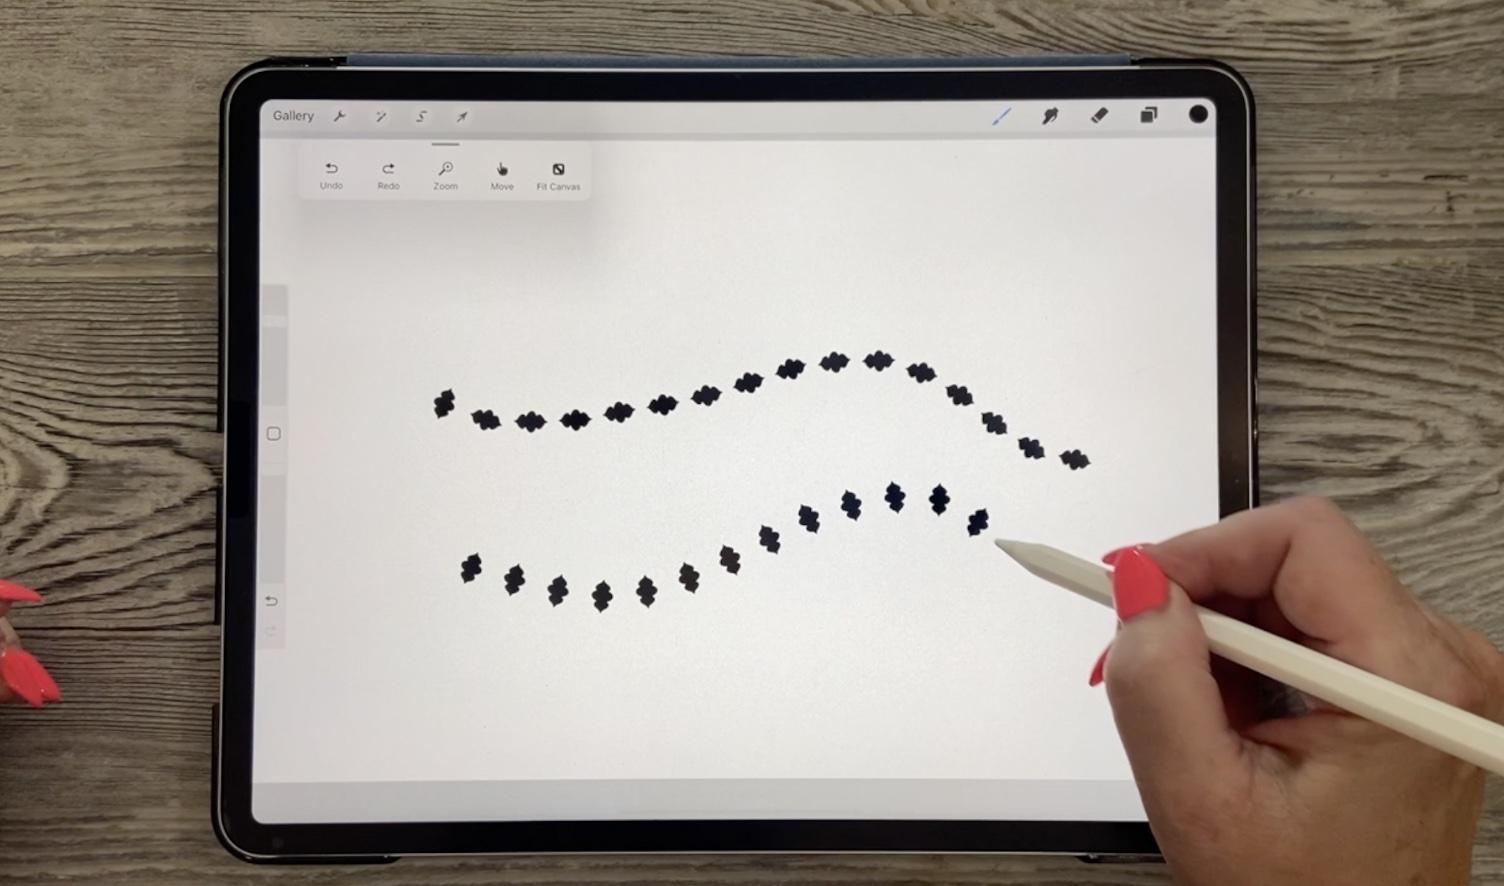
3. Customization and Settings: Hi guys, welcome to Lesson 2. In Lesson 2 here we're going to expand on what you just learned in the first lesson. And we're going to add some really original motifs to make a full bore your brush. Let's get started. So for this next lesson, I'm going to show you how to make a border brush in almost exactly the same way as we just did except we're going to change the shape. So I've got this document with whole bunch of different motifs that I experimented with. Elif, an arrow. I've made all of these into brushes and I think they were in one of my sets that I listed on Creative Market and the last couple of weeks, That's one of the things that I did to get ready for Black Friday. And I was so surprised at how many of you bought my brushes and I thank you so much for doing so. So let's experiment with this one here. So I'm going to copy the layer. So you can see here that I've got the motif, but it also has a solid white layer. So usually when I'm making these brushes, I'll draw the motif and then I'll add a layer and then pinch the two of them together. So now some of these already see as reversed out, so they've already been inverted. But this will be just fine because we can also inverted in the program if need be writing the brush studio. So I'm going to swipe copy and then we'll go into the brush studio and let's make a new brush here again, we're going to start here at the top, add a brush. And the only thing we wanna do here is alter this. Sheets are gonna go import and we're going to paste. Now I've got the, I got the leaf because I was not on the right layer. How many times have you done that? And I have done it many times, too numerous to mention. Okay, so now you can see here how because of the spacing, it just looks like a solid brush. But if I were to completely and this is one of those that I would have had to go in to the shape and invert it so that it would come out just as a leaf. And you can see that that replaced the round dot that was there in the first place. So let's do that again. We're going to go Shape Edit, Import. We're going to paste this one. I call it double tempo for lack of a better idea. And yes, we're going to hit Done. And then you'll see here that little temple brush has been created. So let's go back into our other document that we were playing around with there and let's just paint that one down. So that works. It's a border, no doubt. And we can go in here and adjust the spacing if we wanted to have a really tight border. But the one thing that I would want different from these dot brushes is to have this one follow the stroke so that it tips and turns with the stroke as I draw it. So I would go into the settings here and I'm going to set that rotation to the very top. And you see when you flip it into the top here, it says Follow Stroke, and that's exactly what we want now, I am going to space that out a little bit more. And in this case, I don't want that opacity to be affected with my pressure on my Apple Pencil. So let's check this one out and see how it looks. So that works. But the only thing is, you notice here that Let's just clear this layer. You'll notice that it actually sideways, it's not vertical. So one of the things I would do here, and I did not know this for a long time. But you can go into the shape editor and you can actually flip that sheet. Let's hit Done here. And it's really deceiving, isn't it? Because when you looked at the brush there, now that we've turned it here in the drawing pad, it looks like what this looks like, but now that I've switched it, and I guess it's because I have that shape flipped. And now it works perfectly as a border brush. So I've done a lot of borders and there are a few things to know. Those are a couple of things there that I was just explaining and that was the direction. The other thing that a ball is that when you create something like this press here, you notice how I've extended the line that makes the base of this. That is something that you'll have to experiment with if you're creating borders with this brush. So let's try this one here. We're going to copy this. We're going to go and add a new brush. We're going to go into Shape, Edit, Import, Paste, That's got to be reversed. So there you go. And this is one that will not really work when it's on a path because of that straight line. So it won't work as far as the rotation like I just did with the other brush. So that is currently set at 0, which is what I want. And I go into the spacing here. Notice you have to hit done here by the way. So now with the spacing, you can see we've got to get it in fairly tight. So let's go into my other documents. And with this one, it's that system that I did show you where you hold your stylist down and that is how you adjust the spacing and make the line straight. So you need to straight neck. Let's meet here so you can see it better. You need to tighten up the spacing in order for the border to look continuous. So keep that in mind as you are creating these stamps. And what you could do is in a case like that, if you wanted more space between the actual motifs, I would suggest that you duplicate it, and it's nice to have both. So definitely experiments. And let's go a little bit smaller here. I am going to put my snapping on so that I can get that perfectly centered. Let's hide this other one. I'm going to just use the rectangular marquee here to fill longer border. So let's just go here too. Fill and let's cut some of that off actually. Now did you notice here in my layers palette that now my white area in the background is missing because I reduced it down. So I would make a new layer here, fill it with white, and pinch these two together, and let's go ahead and copy it. Go into the brush. Now you can keep that one at a new one. Go into Shape, Edit, Import, paste, two-finger tap to get it in. It's reversed out form. Let's go to my gosh, I forgot again, hit done twice. There is very important. And less space this out. I'm going to clear the drawing pad so I can test it here and I think tighten that up a little bit. We know that we can still adjust the spacing here. So let's make that pretty teal color large. Now we have a little bit more space between the motifs. Let's go to the other documents so I can compare. So you can see that my motif is small, even though I've got this set at full size. So this is a case where you would go into the properties for that brush and then just increase the size here. You're still going to be able to adjust it here. And the one thing I forgot to change was the Apple pencil. We don't want the opacity to change, but there we've created a lovely little brush, basically the same technique. The only difference is you don't change the rotation here in shape. So don't change that, keep that at 0. Go into the Apple Pencil. It makes sure that the opacity is also set right to the very bottom. And then play around with your spacing and you're sizing until you've got the brush, right. Okay, so that ends Lesson 2, and I will see you in Lesson 3. In lesson 3, we're going to do another variation on this theme. We're going to create a scatter brush. Now if you've been an Illustrator user, you know how it works. And that's what we're gonna do in the next lesson. I'm going to talk about that and how we can create that really easily. I'll see you there.
4. Creating a Scatter Brush: Hi guys, welcome to lesson 3. So if you've been an Illustrator user in the past, you've heard of scatter brushes. I always really loved the look of the scatter brush. So that's what we're gonna do in this class. We're going to do the procreate version of a scatter brush. Let's get started. I'm going to clear off this layer and we're going to work with a variation of this, basically the basic brush. So you can add a brush and we're going to work with this. We might as well, it works perfectly fine. So let's just space this out right now. And I'm going to go into shape and Edit, Import. And I'm going to paste a leaf that I have, that I have drawn this as part of one of my staff leaf brushes set and this will work perfectly. It's just a silhouette of a leaf. And I've already gotten reverse forums, so I can just hit Done here. And you can see that my leaf is Now basically a border. So that works fine if you want to use it just as a straight border, personally, I think that looks horrible. But you could use it that way if you really wanted to, you, there might be a user a reason to do that, but you can see that if I tried to toss the leaves around, it doesn't really work. Unless I was to perhaps stamp, make a new layer is down, rotate and you can see how tedious that would be. So let's just delete this and clear this one. And what I wanna do here is go into the brush and you probably guessed it, but rotation is one of the things that we're going to work with here. So let's start with that. Now. I don't want it to be just, It's still a straight brush that follows the stroke. What I actually want is for it to kinda scatter around. So remember we talked about that the system learns to brushes that you can create an illustrator called scatter brush. And you can see here that that's a little bit more rounded now. So it's tossing the leaves, but it's still not as random as I would like. So in this case what I would do is go into the stroke path and I would also hit Jitter here. So what this does is you can see it replaces the central spine that would be running through these and really pushes them away from that line. So it's literally scattering them all over the place. So let's take a look at how that would look if we were using it in a document. So you can see that that just puts it everywhere. And that's really cool if you're using it for the artwork like I had, you just wanted it a little bit in the background. The other really neat thing is that if you stamp this, it does stamp it in a different direction each time. So it's doing whatever we just told it to do, which was to scatter it and to rotate it. So that's a really neat thing with using this technique to create a brush back, scatters the shape off the central line. I've used this technique for a lot of different brushes. And that being said, let's go and take a look at one of my documents for leaves and see what else we can come up with. So here's another one that might be kind of fun. So let's take this leaf and copy it. And let's just duplicate that one if we like the settings. So let's try that. So we're going to just duplicate. And this is a really great efficiency trick for you to learn, is once you do have the settings on a brush perfectly in the way that you like them than you thought brushes a basis for other brushes as well. So let's click on that one, going to Shape, Edit, Import, Paste. And I didn't copy the right one. Hang on. And must not have been on the right layer and I wasn't. So this is that layer. Check that before I do this, I look like a goof ball when I'm demonstrating something and it doesn't work. Chilled paste, two-finger tap to put it in reverse, hit Done. And that works great for that as well. So let's make some adjustments here on the scatter and the rotation. And this is another thing that we can play around with is the count. So that would be the amount of motifs that are repeated. We can also make some changes here with the way the rotation and the behavior of the shape is going. So these all have different meetings. I did look that asthma as moves up at 1 to find out what it meant. Basically, I just go by my instinct. If I look at it kind of like what I'm thinking, then I keep it that way so you can see the difference if you do stamp and then you go back and you try each of those individually. And I kinda like the randomized, you can reduce the amount of motifs that are being drawn. And remember that you can scatter the shape as well. You can also go back here and make adjustments to things like the spacing and the jitter. So you've got a couple of different methods to make that leaf appear differently than the other one that we did. And also, I like adding the fall off in this case and going to the Apple Pencil and varying some of the other like size. You can see here that there's going to be small leaves and there's going to be bigger leaves. You can adjust the flow. Those are the main ones that I would do or that I would recommend that you do for this type of scatter brush. The other thing you can experiment with at some point is some of these different settings for how they render. So you could have them a really light, bland, bland that'll work really nicely for overlapping. Or you can have it really intense, which makes it an almost full opacity everywhere. And then you can play with the wet mix and also experiment with that a little bit. So with all of these different brushes as recording through them, I'm going to be showing you different things that you can do. This stop applies to all brushes and it is worth experimenting with. I would suggest that if you're going to experiment with it, that you duplicate a brush that you already have and make sure that it's going to work for you so that, that original one always remains intact. So we can see that there's going to be some changes that we'd have to do here. I'm going to clear this layer and mythical little bit bigger. So this one works great as the spacing they're going to have there. And you can see I'm getting some kind of transparency here on some of the leaves. Perhaps that's not what I would want. I would maybe go in and put back into the Apple pencil and maybe set this just halfway, reduce the size a little bit. I'm going to go into the Properties and I'm going to make this a little bit bigger. Remember, we had reduced it down on the previous brush and we just copy the settings. I'm going to also remove that fall off a little bit and reduce the jitter a little bit here and also scattering a little bit. And I'll actually now like that scatter, I'm going to leave it as as it is there and I'm just going to hit Done. And now we've got a gigantically, so there we might want to reduce it down. And you can see that as I'm painting it on, it is scattering. So this could make a really, really pretty background for something if you don't like the settings, very easy to change. Like I said, duplicate the brush if you're somewhat close to what you like and then go in and make the adjustments. Let's reduce this scatter and reduce this count. And you'll see, maybe we'll do like the randomize the best, but let's try this as well. Yeah, I like the randomized better, but otherwise I like the sizing and I do like that scattering effect that is creating. So there's a couple of things you can do with basically the same thing as a border brush, but you're just making some adjustments to make it work like a scatter brush instead. All right, So I'll meet you in the next lesson. And in the next lesson we're going to create something that I call the texture ball. All right, I'll see you there.
5. Making Texture Brushes: Hi guys, welcome to Lesson 4. In this lesson we're going to do texture ball, and that's just a little quick motif that I use often in the backgrounds of my artwork. I'm going to be showing you my use of it. And that we're gonna do a full repeat pattern brush. Let's get started with this brush here that we're going to create this when I call texture ball, I've got a couple of these that I use a lot. And so I thought I'd quickly show you how to create that. Now you don't need to do it in a round format like this. That's the way I'm going to show it to you because I don't want to do a bunch of fitting of the pattern. I may be able to show you that later on, but let's just take a look at how it would be if we had something textured in the very middle. So if you go to a blank layer here and you can use any sort of brush. I have in my arsenal of brushes here, some lineup cut brushes that I've created. And what I like about these is they have a really squarish sort of a shape to them. I'm going to use this one actually. We're going to go into black. And when I created this brush, you can see that it's created as if you were cutting with a line o tool to cut into the linoleum, you would use the tool to kinda gouge it out. That's exactly what the tool is called as the AHA gouge. And that's the look that I was trying to achieve. But basically we're using this in a different way anyway. So we're going to just kind of start from the middle and we're going to just do a series of dots. So I'm going to do this one a little bit different than the other ones because I know that this is something that I could use. So I want it to be different just to have a little bit of variation. So if I pulled sideways, I get a kind of a thinner line and depending on how I put the pressure, I get sort of different shapes and they're really random. And that's exactly what he wants. I want it to look quite random. I don't want any of the lines to be going in the same direction. What I use this for is to add a textural interests to my artwork. And you've probably seen that a lot when you've looked at the kind of artwork that I create. So this one is somewhat of a ball. We could put a couple more in here. So this pressure itself was created just with a really squarish shape. We'll go into the shape here, you'll see, and that's just one that's here in the Procreate library. I've got the shape drawn that'll be adequate for my demonstration. Now, it's on just a transparent background. So let's add a new background here. Double-click in this area to get the white. And now we've got the white layer and the black layer. We're going to pinch those two together. And so that's quite different from that original texture ball. I'm going to copy it. Let's go back to that specialty brushes. And I'm going to add a new brush and go into the shape and its import. He's two-finger tap to get it in reverse, it done. And you can see that this would actually be useful for creating a brush that has really a rough bristle look. But that's not what we want today. So we're going to take this probably almost all the way to the top. And it's more like a texture square that I've created. But this is really, I find very, very useful to me. So I'm going to just increase the size here. I am going to be only using this as a stamp. So it doesn't matter as far as the jitter and the scattering and all that because I am not going to be using it in the same way as those border brushes. I guess I could if I wanted to, I could run a line of them and then adjust. But usually how I use it is just one singular stamp. So for something like, Let's just go to an artwork here. Artwork that I created for this new brush set that I have. So I'm going to just hide that. But let's say here in the background I want to add a little bit more texture. I would add a layer, select a color and I'm just tapping to get the color that I want. So I've changed color. I just do a single tap. I don't tap and hold. I used to have to tap and hold and now I just do a single tap which I like a lot better. So now I could stamp that in. That adds some really nice textural interests to my piece. I could even go quite small and go into one of the flowers itself. So let's go into this one here. And this one set an alpha lock on it. And I could actually go in and use that. So let's just go at slight tone lighter. But you can see that I could add some real interests to my motifs. So that's another super-useful little brush. Now I think we do have time that I can show you quickly how to do a full repeat of this so that we could have it as a solid fill. I really like that in this new version of Procreate, we can have our recent brushes up here so I can grab that lineup cut blunt from here. And let's just add kind of trying to fill this area. Remember that this is a white background and I know that we're going to have some spaces here along the edge. So in order to do the repeat, what I would do is duplicate this, sort of got four copies of it. I mean, they go into my Canvas settings, turn on the drawing guide, go into Edit for that drawing guide and we're going to bring it to the biggest. It could possibly be in the grid size. I'm going to hit Done. Let's go back into that because I just I just Drawing Guide to white, but I want it to be darker so you can see it here. And what we're gonna do here is set the magnetics and snapping on. And then we're going to move each of these into a corner and it snaps quite nicely onto that central line. So you can see here that you'll soon really be able to see that big gap that would be formed in our brush if we didn't fill in this space here. So these for now can be pinched together. And here, even in this little preview, you can really see that white scrape along here. So I'm going to take the brush, same settings as before. And now we're going to add a bunch to fill in the spaces there that this is a full repeating pattern for there'll be no gaps there. And now we can make a really great textural brush just using this pattern repeats. So this is a perfect repeat. This could be used in any way that you use your repeat, you could easily make fabric or anything else with this. So just think about that. You could be actually drawing little motifs here and have had a perfect pattern when you're done. We know it's got the white background already because that's how we created it. So we're going to swipe triple Copy, go into our specialty brushes. We're going to add to shape, leave this shaped the way it is. And we're going to go into the grain this time. We're going to Edit, Import, Paste and reversing it out. And I'm not sure, I may have had a little eraser line there and I think it's going to be fine. We're going to hit Done. And now you can see that we've created a brush that we can use as a filler brush. Let me just open another document here. So let's say this one here. I had used this document to put his one of my screenshots for this particular brush set. I think this was line art, flowers seven. And I was using this slide here to talk about texture. So that's a perfect place to actually drop this texture in there. So let's just sample a color and it will little bit later than that, a new layer. And you can see how fun that would be to use for texturing so we can go into Properties and make the brush bigger. You notice that when I'm making the brush bigger, it doesn't change the grain. So if I wanted to make the grain bigger or smaller, I would have to go into this grain and this is why you need a full repeat. You don't want to have really visible lines. I mean, even as it is here, if I go really small, I do kinda see a visible line there. So I probably put some lines in too thick when I was doing that seem, but it actually is very forgiving when you're using it in the way that I use it. So you can see that could be also a very useful brush. So in this lesson, we've created two for the price of one. Alright, so we're gonna get into a slightly more difficult brush in the next lesson. So maybe we should take a little coffee break here, and I will be there.
6. Specialty Repeat Leaf Brush: Hi guys, welcome to lesson 5. So this is one of those really special brushes that I was telling you about. I'm sure you're going to put your own spin on it and come up with something really exciting. Let's get started. So I hope I didn't scare you when I set this one up a little bit more difficult. The only difficulty here I guess, is in visualizing how this is going to look when it is in use. So let's give this one a test run. I've got it here in my specialty brushes sad. And this is how it works. So what it does is draws a series, I guess what you'd call leaves. And if you were to add a stem to that, so let's go to just a monoline brush and add a stem. You would have kind of an instant plant. So that's what I was trying to accomplish here. So really, the only difficulty is in initially visualizing how that would look. So you've seen this one. Why don't we make a new one? And for this one, let's do something just really leaf shapes. So I'm going to use this as a guide, but I'm just going to lighten and reduce the opacity. And then on this guide, I'm going to have to change this to white in order for that reduced opacity to have any impact. And pretty much what I'm trying to do is draw the same leaf on both sides. You can experiment with that and see what works for you. But what we can do here is also used Drawing Assist. So let's go into the Canvas and we're going to go into the drawing guide and edit it. So here what we're gonna do is just a vertical reflection basically. And that's all we have to mark here. We're going to hit done. And I just hit that white again for that guide. Let's just a little too close. I guess I just keep hitting it. So we're gonna go back to this and let's make it just a little bit thicker so that we can see it when we get back to the main document. Okay, so here we are. And as far as drawing leaf, I think it's best if you have a bit of a stem here. Let's make sure we're on the right layer and a monoline works fine. I also like using my tapered pen pressure brush. And we're just going to start from the center here. Let's make sure that we've got Drawing Assist on here. I was on this layer when I was setting it. So that's why it says Assisted here, but now it's fine. It'll be assisted on this layer as well. So let's just actually start with the leaves. So let's just draw the quick leaf, fill it with black, and we could switch to just call it my Posca paint marker. But pretty much what it is is a monoline. And for that list, swoop down from here and go into the center. And we've created the little stem that would connect. So I'm a really bad angle here, so I'm not drawing it nice and straight, but here we go, a little bit of correction there and we need a white background here. So let's add a layer below, and we're going to merge these two together. We're going to copy it and we can actually take the brush that I did use. So let's go to that. That's in the specialty brushes. We could use this, I'm going to be giving you this set, so you can use this as a master as well. And we're going to duplicate it. And then we're going to into Shape Edit, Import and Paste, Copy, Edit Import and paste k. Now I've had this happened more than once with this new version of Procreate has never happened to me before otherwise, but I am on the right layer here. You can see I'm copying would copy that. We know it did coffee when I go into Shape, Edit, Import, and pace. And that's like I said happened to me before, so I'm not sure what the deal is there. We can get around that. And what I have done in the past is just exported. So go to share here, share it as a Git or save it as a JPEG. I'm going to save it to my files. I'll put it in this leaves folder, which is in my custom brush sets. And let's just call it, actually call it leave to you to say, I don't get confused. And I'm going to say Save. And so the way I'm going to get around it is by going into here and editing. I'm going to try that paste one more time and see it doesn't work. So I'm going to import the file. Custom brush sets. It equal to leave and leave two is here, so I can import it. That works. Sometimes it works, sometimes it doesn't, and more often than not, it doesn't work, but there's the odd time where this happens. So I just wanted to warn you about that two finger tap and I get my reversed out image and I can hit Done here. You see my little leaf has changed and it looks like it's going to work just fine. What we can do too is play with the spacing. If we'd like. This would be a great way to draw firm. And let's just test this out. Let's go into that documents. Make sure we're on the right one. And that worked out just fine. And use our monoline to make a stem. We could make that brush bigger and bigger stem. And you can see that will work, which is great for drawing a set of leaves. This way you can get a lot of variety because you're adjusting things like the spacing and the size. And remember that you can also just use that brush to stamp. So you can just get your single leaf if you'd like. Grab your monoline and you've created a nice little plant-based. So that's just another quick one. I know I probably scared you by saying it is the hard one, but the hard one is actually next. So in the next lesson what we're gonna do is a dual brush. All right, so I'll see you there.
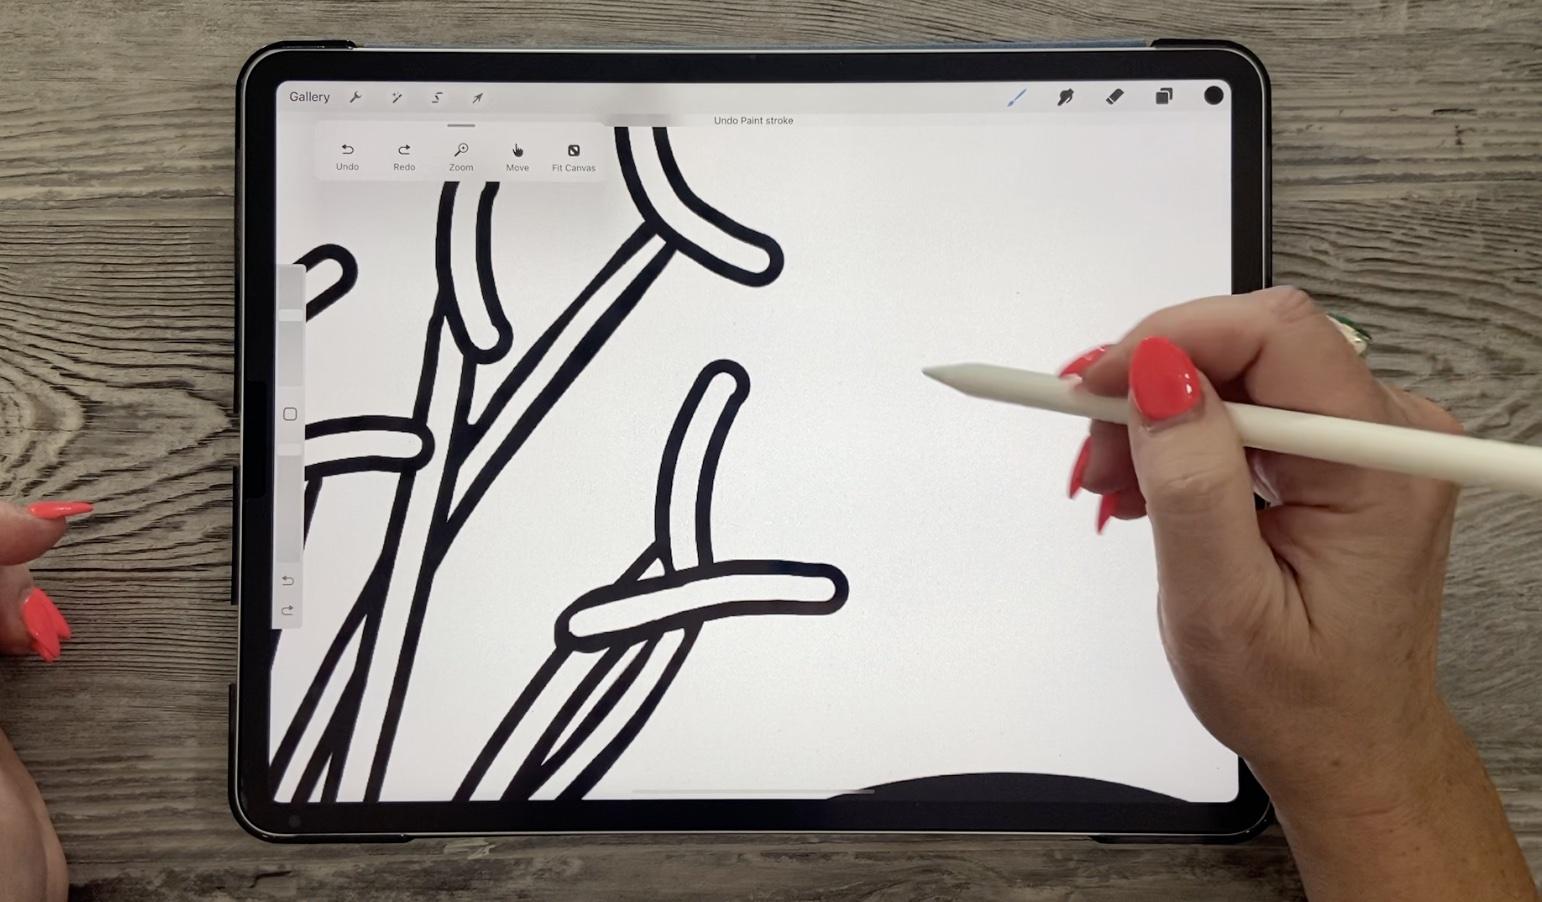
7. Making a Custom Dual Brush: Hi guys, welcome to lesson 6. So I've saved the best for last. Yes, this is a little bit more difficult than some of the other ones that we've been creating. But I think you're going to find that it's really satisfying to create this sort of a brush. Let's get started. I wanted to show you what prompted me to develop this last type of brush. And I'm going to teach you how to make today. And that's what I consider a dual brush. So you can see here in the brush studio, but I've actually got two brushes combined. So let's just unpack this for a sec that you can get the idea of how I did this. So I'm going to uncombined them just so I can show you. So the two that I combined are right here, this main stroke is actually just a thick monoline. So I'm not going to change any settings here because I've got it exactly how I need it. But the other one is just a tapered pen pressure brush. And what I would do here is to select both of them. So the first one you select will be the one that's the top one in the brush studio. So you want to select the one that you want on the underneath. So I know it's a little bit confusing, but you're looking at drawing a base brush and then on top of it you're putting another brush. And then that little space that's left between the two is what creates the outline stroke. We would select both of them and then we would hit Combine. And now when we go in, we see those two brushes there, okay? And then depending on how you've made your settings, you're going to get a variety of different looks. So if I were to use just to monoline brushes, it would be completely different than using one with a taper. And now I'll show you why I decided to do the inside as a taper. So my issue was that when I was doing these and these are called anthers, believe it or not. So that's why I've called that the anther stroke. Let's just take a look at reference image that I have here. So I'm going to go into Canvas. I'm going to go into reference, and I'm going to import an image from my pictures. I don't know what's happening with my iPad today. Here we go. And you can see here that the whole thing is called the stamen k. So the two parts that make it complete are the filament and the anther. So what I'm doing with these dual stroke brushes, I'm creating these two parts to finish off my flower. And one of the things I didn't like was that when I did the monoline, I found that they were just a little bit too consistent. So I found that creating it this way with the second brush, a little bit different in shape and size, I was able to create an anther that looked a little bit more realistic in my opinion. So it had a little bit of a variety as far as the thickness and so on. So I've used this now quite a few times to that part of the flower complete. So I want to walk you through the actual creation of the brush itself. So let's go in and do it with a mono line. So let's take this mono line here and we will enlarge it so that it's a nice thick line. Hey, so I'm enlarging the maximum and the minimum size here to make it nice and large, I'm going to duplicate that. This will be my bottom. This is going to be the top. So what I need to do here is to go in and make it smaller. I'm going to choose this 1 first and then this 1 second. And I'm going to hit Combine. And the default is for the combined mode to be normal. But what we need is actually difference here. So we're going to put it on difference. And let's just take a look now. And you can see I've created a fillable brushstroke. That's a nice outline for that one, even though I made it sound complicated with actually super easy to do, right? So when you happen combined, you can still go in here and make adjustments. So one of the things that you could do is work on the thickness. So you could go back into properties and make that top one a little bit bigger so that will increase the thickness. You can make adjustments as well on things like the stroke, spacing and jitter and so on. If you wanted to have a line that was a little bit textured of probably a little bit too much. So let's go down a little bit and you can watch what's happening right here in the brush studio as you're doing it. And so we could do the same thing with this one. We could make it just a tiny little bit tutored. And then now when we draw and respected her on that one, now we don't have such a perfect line. So depending on the kind of art that you're producing, that may be more the look that you need. Let's bring that back a little bit. So that's a nice hand done looking line. Generally what I do with the stabilization. So the streamline, all the settings here, I make them identical for both of the brushes so that there isn't a problem with them overlapping in a weird way. I'll show you what happens if change, this will actually see what happens here and get that strange overlap on some of those now, I mean, that might be something that you want, so that's something you can keep in mind. But in general, I like to keep the settings the same, so I should have made a duplicate of that so that I wouldn't have to go back now and change it. But I would have to look at these settings and have them the same on this brush 7717, I can just write them in 11 and you can see that that's fixed it up quite well. I should go and check those two as well, but I'm happy with that. So that just goes to show you how you can create that brush just using the mono line. Now, I'm going to duplicate this. And then I'm going to uncombined them. So to uncombined, you go to the brush studio and here you tap on your secondary brush and you do uncombined. I'm gonna get rid of this model line here and I am going to find my tapered pen pressure brush. This is nothing I really like about this recent tab here is that you can swipe to the left and you can hint Find, and then it takes your right to your actual original brush. So I'm going to duplicate, I see it's duplicated here already, so I'm going to grab this one and put it into my specialty brushes. I'm going to put it below that mono line. And now let's combine these two instead. And that'll give you sort of what I have here with his anthro stroke. So always select the base 1 first and then the second one, hit Combine, go in and make sure you change this to difference, okay, it's already there. You can see that at the moment, that inner line isn't exactly what we would need for making stems, et cetera. So depending on your use of it, you're going to want to go in and go into the properties and increase the size of that inner stroke. But the nice thing about this one now is that we get a bit of a variety on the thicknesses of that black outlines. So here we could go, I'm going to put less of a jitter on it so that it's not quite so rough. And you can see here what it's done. So depending on how much pressure you put on and depending on what your settings are here in the Apple pencil under the pressure, you can see that the size I have here is being controlled by the amount of pressure that I put on. So I'm putting no pressure on and that's what I get when I do put pressure on and release. So I'm pressing hard and then I'm pressing saw. You can see here I'm getting a variety in that thickness. So that's something you can decide whether or not you want the Apple pencil to control that wise or you want to put it back to 0. I kind of like the variety that it gives me. So that's something to keep in mind. So we've created a bunch of different strokes here and a bunch of different ways to use it. I just wanted to show you real quick tube that I've made, one where I created my own shapes. I'll show you them in a minute. So what I've done is I've got a nice solid shape source. So I went into edit the imported this solid square for the initial underneath. And then for this one, I made the stroke a little bit smaller. So here are the two. This was the solid and then this is the one with the oxides cutoff. Okay, so those were the two that I imported to make about stroke. And the reason I wanted that was for stems and I wanted them to just have a blunt end. So depending on the shape of that n-bit that you want, you're going to construct your brush differently. So for me, this is exactly what I wanted. So then I was able to turn off my guides here. So I was able to use it to create that stem. So basically I just pulled the line. I did it on a separate layer from the flower so that I could erase a little bit of it off. And then I'm going to show you also how I use the, one of the other dual brushes that I created. So this is very much like that one I just showed you. Instead of having the taper Over the mono line, I have to taper so one paper is just bigger than the other. And with that, I'm able to create leaf shapes just depending on the amount of pressure that I use. So you'll have some fun experimenting with these. I'm going to give you all of these so that you can check it out. But what I would do first stem like this, that's just going to cut that one off and let's go through the whole process. So we're going to use the stem or the thicker one I think is the one I use. I'm going to go onto a new layer, pull us down the way I want it. Use the eraser to erase any part of it that has overlapped. And of course I would have to go in and fix that. Then I would go in with this variable brush and make my own use. So I'm starting with it small, so I am getting very little pressure on it and then I'm pressing harder to get the inside bit. So it takes a little bit of practice, no doubt. But you can do this also on its own layer. You're going to get a lot faster at it as you do a few more. But again, because it's on a separate layer, you're going to be able to go in and do things like erase. So I'm going to erase a little bit here and move this one over. And I'm going to erase a little bit at the end there. And I could use any one of these to create a little bit of stem connecting a leaf if I didn't want it directly on the stem, you have to experiment with which brush works the best and you can develop your brushes so that they always work based on the sizes that you like to use. So that's on its own separate layer. Now, I can erase what I don't need. And the same thing with anything like that. So you may have to go in and do a little tiny bit of clean up. But honestly with the kind of artwork that I do, like those flowers I was showing you little things like this are not important. It just works. Really it does. So you don't have to be sweating the small details. Then I would go in and add any other details I want. And one of the things that's new also in Procreate, you may have noticed is that you can now save our brush size. So if you have a common brush size that you use, so I'm going to do is hit that plus sign and it'll be preset there for you. So I find them mainly using the two middle ones here hanging on the size of document that I'm using. But these are the two sizes that I use for most of my flowers and leaves in my latest brush sets. There you have it. We could go in and clean this little guy up, combine all of these. So all of these four. And now if I was to use the automatic selection, invert it, make a new layer. I could fill that layer and that would fill the flower. And then don't forget, now's the time to add all that fun detail with some of those brush sets. Let's put an alpha lock on here. And we'll go into my textures. And let's grab a couple of these. We're going to go just a little bit darker maybe. So I'm just adding flex in here about my pressure shaders here. And I can go in just a little bit darker to add a little bit of shading here in there, wherever you'd naturally find shadows. We can actually change the color of our line as well. So that's alpha lock that. And let's go with a nice deep teal, or let's do something completely different lens to a brown, fill the layer. That's pretty heavily light pad or we could go and continue putting texture onto our slope flower. It could be an alternate color or you can stick with kind of the same palette that you have. Me. Look how fun that is. I mean, we could create a great image in so much less time that it makes it really satisfying to work on these, give me 10 more minutes and I would have a complete background here for you too. I'm going to go into my texture sampler, grab a background, add a layer, and imagine all the things you could do here with just things like additional layers and blending modes. And some of those fun textures and borders that you now know how to create and add some of that. So there's a lot more work, but I can really see myself creating a full layout here without having put in too much. Adding a few more flowers would probably make it really pretty course. You would have to work at it. But with all those little things that you learn today, you can really pull off a layout like this really quickly. So I guess that's it for today's class. And I'll meet you in the last lesson, which is going to be our wrap up. I'll see you there.
8. Conclusion and Wrap: Well, you learned a lot about brushes today. I'm so glad you stuck it out to the end. And I hope you have a bunch of new brushes to add to your collection. As I was saying, brushes can be a really lucrative way of adding a little bit of extra income. You'd be surprised how much money you can make selling your assets. I really found that over the years as I build out my catalogs of assets, I'm able to make a little bit of a steady income from them. And especially during times of the year like Black Friday, when you can offer a big sale. The other amazing thing about creating all these brushes is that it makes your work even easier. So you can produce artwork for POD or for whatever purposes. And you've got all those pressures that you can use over and over again. It's always a great investment of time to create brush sets. Now if you didn't do so at the beginning of the class and you like my teaching, you'd like by class, make sure you get that follow button up there. That way you'll get informed anytime I post a new class or any other news that I've put out there. I know I kind of blasted you guys with all of this Black Friday stuff from the last week or two. But I don't do that very often. As you well know. Oh, I'm definitely going to be planning a little bit ahead next year and try not to cram it all into a one or two week period, especially when you throw in a five-day holiday with your sisters? Oh, my I definitely had a lot of work cut out for me when I returned home. If you know what food for the soul is food for the soul. Take it whenever you can get it. Now if you want to check out my shop on Creative Markets, please do so. And I would also encourage you to check out my website at shop dot, star, dot ca, and add yourself to my mailing list. My artists resources, there are more extensive than those I haven't Creative Market. And I tend to give better prices on my own website. That's just a little tip for you. If you have a chance check out my shops. Why? Because one is that docile.com. I have one hearing Canada at art of wear. And of course, check me out on Society 6 as well. Thank you so much for attending and I guess I will see you next time. Bye for now.
 Delores Naskrent, Creative Explorer