Transcripts
1. Welcome to the class: As the last leaves
of autumn fall, the first frost starts to paint the world in a delicate
shade of white. In this enchanting season
of quiet and stillness, the wild animals of the forest once
seamlessly blended with their surroundings now
contrasting vividly in pure, untamed snow of the
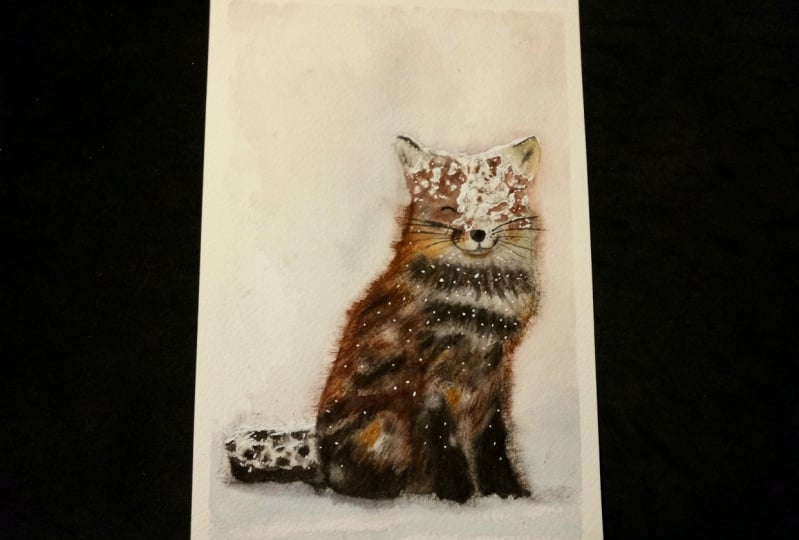
frosty landscape. Hello, my name is Evgenia. And today we will be painting a captivating red fox covered
with the speckles of snow. Throughout this class, we
will paint the red fox with its fluffy fur contrasting with the white of
snow around it. We will capture not only the
physical beauty of the fox, but also the spirit of nature
in the heart of winter. In the class, I will
show you how to adjust and turn the mistakes
into possibilities. I've been professional
artists for many years, focusing exclusively
on watercolors. I've always been captivated
by the magic of this medium. I started to paint when I
was a child, but as I grew, I had no idea how to improve or how to create
effect that I wanted. I didn't know any of the
techniques or how to use them. Now I've taken part in exhibitions and been
fortunate enough to win rewards from such highly
regarded organizations as International
Watercolor Society, HelvetArt; Light, Space, Time. Art Show International
and Royal Talens. Watercolor can
be challenging to manage for those who
start to use this medium. Which is why it's my intention
to help you to enjoy watercolors and to learn
it in an easy and fun way. In the step by step lessons, you can see the hand
and brush movements clearly from different
points of view. We will explore versatile and fundamental watercolor
techniques that you can use in all your
paintings and sketches. Also, we will discuss the
materials that will enhance your watercolor experience and will help you to enjoy
the process greatly. If you find this class too
easy or too difficult, you can choose from
my different classes available for learning
varied watercolor skills. The approach of my classes is
to start with an easy wash. As we proceed with the
painting step by step, we will add more details
completing the artwork. If you have any struggles or
difficulties along the way, you can start a discussion and I will read and respond
to all your questions. Remember to hit
the follow button next to the class title, just below the video. By doing so, you'll stay updated and be
among the first to receive updates on my upcoming classes and
exclusive giveaways. Also, you can see my latest
free watercolor tips and tutorials by following me
on Instagram and YouTube. Are you ready to start this
creative journey together? Join the class and let's bring your artistic
vision to life.
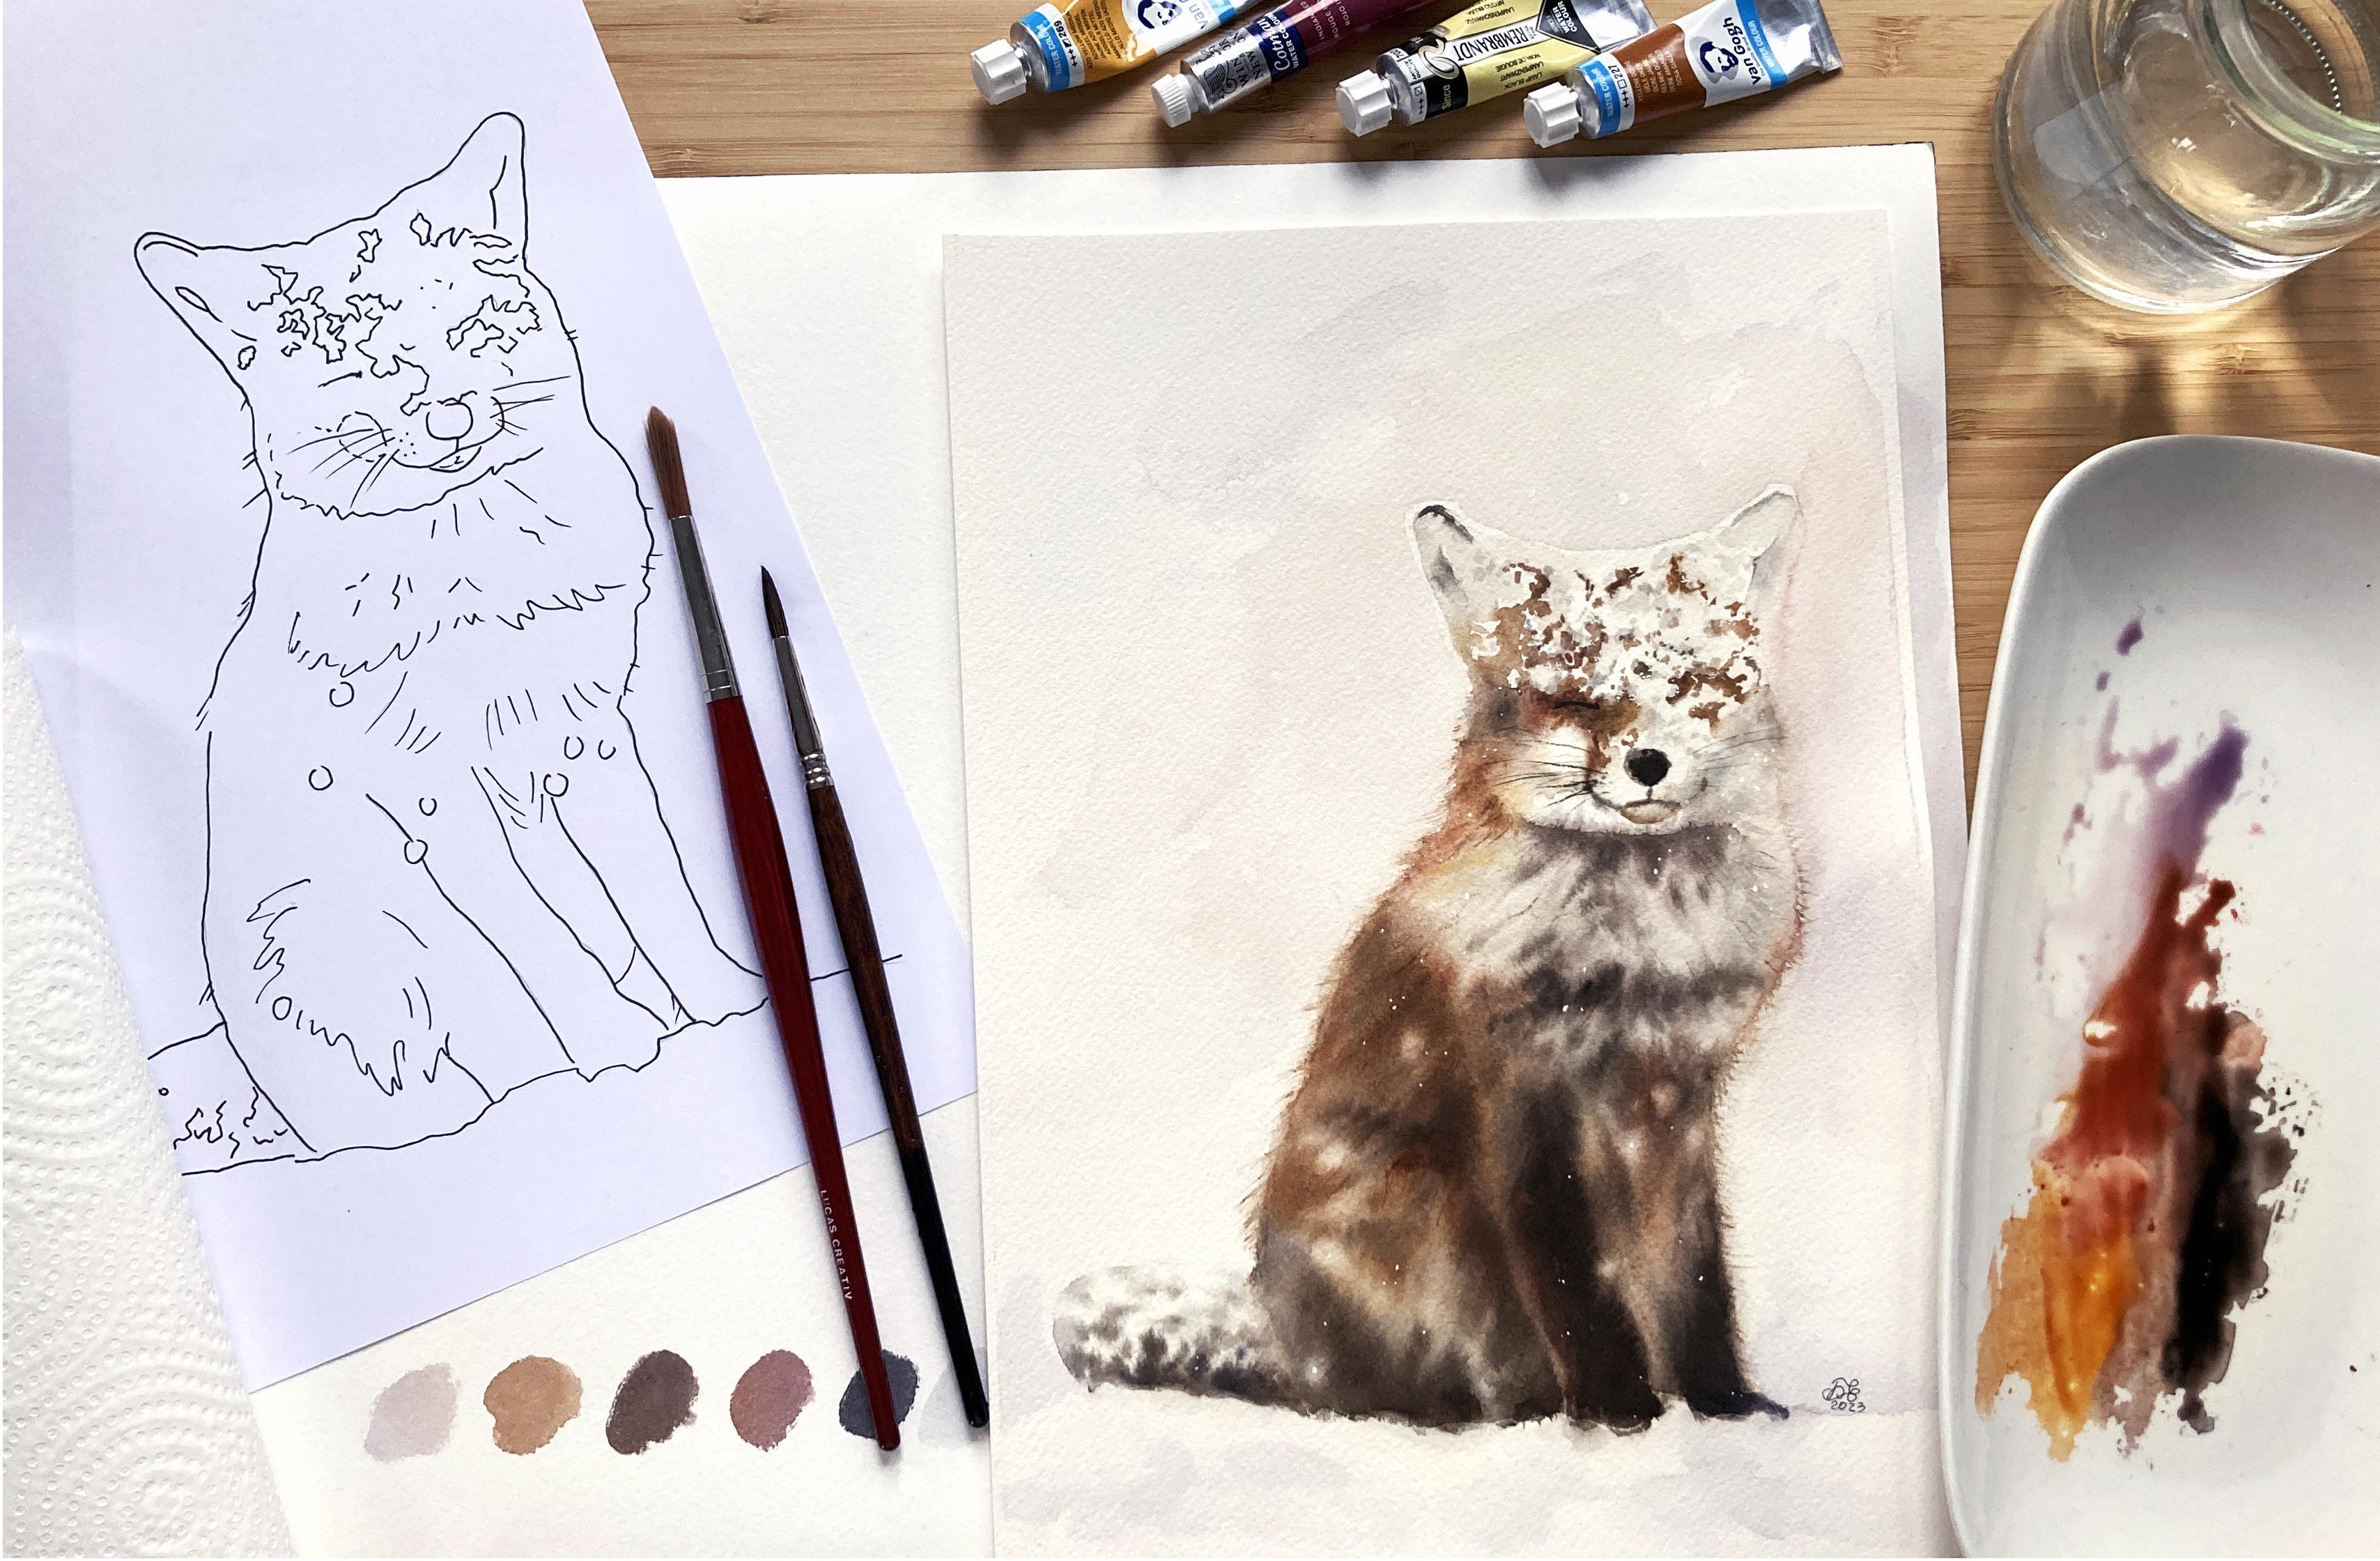
2. Your project: Before we begin with the class, I want to thank you
for joining me today. Your project will be creating
a snow covered Red Fox. In the resource section, you'll discover my
completed painting as a helpful reference, along with pencil drawing
that you can trace. You have the freedom to
select your own fox to paint or to closely follow
my painting as a guide. Additionally, you'll find a reference photo
and a selection of other images that can serve as inspiration for your
very own fox painting. It's a great pleasure for me to give my students feedback. After you put so much effort in your artwork,
why not share it? You can do it by taking a photo of your painting
and share it in the Student Project Gallery under the Project
and Resources Tab. I'd love to hear all about
your painting process. If you had any
difficulties or what was the most enjoyable part
of the painting process. Upload your artwork by
clicking 'Submit Project' in The Project and Resources tab. Upload a cover image. It can be your artwork photo, but it will be cropped. No worries. You can
upload a full photo further. Share your thoughts about the class and
your painting process. Under the field where you write, you can find three small icons. Click on the first one 'image', and upload your artwork. You can see your photo
appearing under your text. Scroll to the top and click on the button "publish"
to share your project. If you have any struggles or
questions during the class, please start a discussion and I will be sure to
answer your questions. I highly encourage you
to explore the work of your fellow students
in the student project gallery. Viewing other creations
can be truly inspiring. Also to receive support can
be incredibly reassuring. Therefore, please
consider engaging by liking and leaving comments
on each other's projects. Join me in the next lesson to explore watercolor materials.
3. Materials that enhance your painting experience: Let's discuss general
watercolor materials and how they can enhance your
watercolor painting experience. We'll begin with the drawing. I recommend using a
soft pencil as such, allows for easy erasure of pencil lines later
in the process. Having both a regular eraser and a kneaded eraser is valuable. The kneaded eraser in particular, plays a crucial role in softening the lines before
you start painting. This preparation
makes it simpler to erase the lines once your
painting is complete. For watercolor paper,
I recommend opting for thick paper with a
weight of 300 GSM. While the best paper is
typically 100% cotton. It's worth noting that
there are variations, even within this category, based on different brands. The ideal approach is
to experiment with various paper types and select the one that
suits your preferences. It's important to know
that you don't always need to use 100% cotton paper. Occasionally, it's enjoyable
to experiment and learn on acid free paper made from cellulose or a blend of
cellulose and cotton. This choice can be budget
friendly while still providing you with
the opportunity to explore various techniques. However, even in this case, I recommend choosing thick
paper with a weight of 300 GSM to ensure a sturdy surface for your
watercolor endeavors. To transfer a line drawing
that you find in the resources tab, you can use an
artist's graphite paper. It's important to use wax free graphite paper
specifically as using carbon transfer paper
is not suitable for transferring a drawing
to watercolor paper. If you are interested
in exploring three alternative methods for transferring a pencil drawing
onto watercolor paper, I invite you to check
out my other class, 'Dreamy Landscape in Watercolor, Mastering Wet Techniques For beginners'. I stretch my paper using 'graphic
stretching art-board'. To secure the paper, I use an artist's tape, for more details on the
various tape types for stretching the paper. You can refer to my other class, 'Clear, transparent water
with shells and starfish, Mastering drawing
with water technique'. Let's move to the
watercolor supplies, starting with brushes. I personally prefer using synthetic brushes
because they are vegan. I appreciate the idea
of not harming animals. Generally, it's
often believed that the highest quality
watercolor brushes are made from
squirrel or sable hair. They are resilient and hold water and paint
exceptionally well. However, modern high
quality synthetic brushes have nearly identical
capabilities to natural hair brushes. For example, Escoda
offers a series of synthetic brushes
called versatile, that possess the same qualities as natural Kolinsky
sable brushes. Davinci brushes have
the Colineo series. Isabey offers a beautiful Isaqua series. In the exercise lesson, you'll learn more about specific brushes I
use in this class. Ideally, you should
have two water jars, one for washing your brush, and the other for
obtaining clean water for wetting your brushes, paper or watercolors. However, I must confess that I sometimes use just one jar for convenience, so I can
concentrate on the process without worrying about
which jar my brush goes into. Nevertheless, I always
make it a point to change my water regularly to prevent
mudding my color mixes. You can use either
watercolor cakes or tubes for your painting. There are various watercolor
brands available, and they offer
both student grade and professional
grade watercolors. Your choice between the two depends on your specific
needs and budget. If you are just starting with watercolors or working
on practice pieces, student grade paints can be a cost effective option. For the colors used
in this class, you can refer to the
color palette lesson. To paint watercolors with ease it's a good idea to keep several paper tissues or a
cotton cloth within reach. They're very useful for
dabbing your brush or paper as needed and for thoroughly
drying your brush. If you want to truly enjoy your watercolor
painting experience, I recommend using a
ceramic mixing palette. It can also be ceramic plate. Plastic, or metal palettes tend to disrupt the smooth
laying of watercolor strokes, causing the paint to form
separate drops and pulls. A ceramic surface is ideal
for watercolor painting. Using a ceramic mixing palette will enhance your
watercolor experience. The mixing process feels exceptionally smooth
and creamy on ceramic. A natural or a synthetic sponge is essential for
making adjustments to correct small mistakes
in your painting. Additionally, for some artworks, you may require masking
fluid, a white gel pen, or a fine acrylic
marker or white gouache to add small details that can significantly
enhance your piece. A spray bottle is also
useful for evenly wetting your paint without
creating water pools on it. Now that you've gained insights into general watercolor materials, let's move on to
the next lessons. In the upcoming lesson, you'll learn about the specific color palette used
to paint the fox. And you'll also engage in a few watercolor exercises to help you feel more at ease and
boost your confidence.
4. Color Palette and Color Mixes : In this short lesson, we'll explore the colors and color combinations that you
can use to paint the fox. Let's begin by creating color swatches to showcase the limited color
palette for this class. The first one is
yellow ochre, a warm, earthy yellow. Indian red, one of my personal favorites and a highly versatile color. If you don't have Indian
red in your palette, you can mix it from basic colors. To achieve
a hue resembling Indian red blend burnt umber and alizarin crimson in
varying proportions, adjust the ratio to attain the warmth and
intensity you desire. Burnt sienna, a warm,
reddish brown color. Lamp black, a deep black hue. Payne's gray, another
valuable color. To mimic Payne's gray combine lamp
black and ultramarine in varying proportions. Adjusting the ratio to achieve
your preferred intensity. Alizarin crimson, a
vibrant rose-red that is a staple in most color
palettes. As an alternative you can also use rose
color or madder lake. Azo yellow deep, a yellow shade that
tends towards orange. If this particular yellow
isn't in your palette, you can substitute it
with an orange color. These colors form the foundation of our limited color
palette for this course allowing you to create the charming fox with
depth and character. You can access all
the color mixes and color swatches in the
Project and Resources tab. It's a helpful practice
to place the basic colors alongside your color mixes to remember them in the future. A mix of Azo yellow deep, and burn sienna produces
a warm, earthy hue. Combining burnt sienna and Indian red yields
a rich autumn like earthy shade. To create a
deep reddish brown blend lamp black and indian red. When you mix yellow
ochre and lamp black, you get a greenish brown color that complements our
other color blends. For painting the fur, you can dilute this color with water
to achieve lighter tints. The mix of Alizarin
crimson and lamp black has a slightly different
appearance compared to the mix you get from Alizarin
crimson and Pines gray. The latter has a cool,
bluish undertone. You can also dilute this mix with water to create
a light tint. Having these combinations nearby will make it easier for you to replicate the colors when needed and create a harmonious
palette for your painting.
5. Exercises to boost your confidence: When you first delve into the world of
watercolor painting, it can indeed feel
a bit overwhelming. To boost your confidence, I highly recommend keeping
a dedicated sketchbook where you can practice various techniques and
color combinations. Let's make four brief exercises to look closer on
the techniques we will use to paint the fox.
To create the fur outline a fan brush is an
excellent choice. If you don't have a
fan brush on hand, you can use a very
fine brush or even experiment with other brushes
from your collection. It's crucial that the
brushes are completely dry. Begin by sketching two
circles with a pencil, then wet the first
circle inside the lines. Pass over it with a
wet brush several times to ensure the paper is thoroughly moist
within the circle, select a color of your choice. For this demonstration,
I'm using burned sienna. Apply the color along
the edges of the circle. Now take a dry brush, and using gentle movements, pull the wet color
into the dry area, creating a texture
reminiscent of fur. Brush in various directions
to enhance the realism. If you don't have a fan brush, you can use a very fine brush to paint some hair like strokes, although it may not offer
the same playful effect. Feel free to experiment with different dry brushes to observe which results
you find most appealing. This process will help
you to get a sense of which brush types work best
for your preferred style. Now let's move on
to the next circle. Wet the second circle entirely. Prepare various colors
on your palette, such as indian red, burnt sienna, and
black. Playfully mix them to create a range of different colors.
For this exercise, apply the colors
to the wet circle without overly blending
them on the paper. Simply add the color
strokes randomly, allowing them to mingle with one another without
producing harsh lines. Allow the circle to dry. In the meantime, if you'd like, you can further practice the dry brush technique
to achieve a hair like texture by pulling the
wet color into the dry areas. Now grab a fresh sheet of paper
and draw two more circles For the second circle sketch weavy uneven shapes. Wet the first circle thoroughly until the paper is
saturated with water. Use black or payne's gray, color to make several
strokes within the circle. Observe how beautifully
the watercolor flows on the wet paper. Add a few dots as well. Take a fine dry brush and gently pull the black paint in
different directions. This technique is
truly captivating. With a dry brush you can delicately adjust
the strokes on wet paper. Feel free to experiment
a bit more until you feel comfortable and
confident with the process. Now let's focus on
the other circle. In this exercise,
we'll be painting an imaginary snow patches using wet water colors on dry paper. Lay down different colors
alongside each other, allowing them to overlap slightly and fill the
areas around the shapes. This exercise is an excellent
opportunity to master your brush control and learn how to preserve the white paper to enhance the appearance
of the shapes. Create a series of dots along the edges to make them look
more ragged and realistic. Once you are satisfied
with your work, allow the circle to dry. You can speed up
the drying process by using a hair dryer. Next, let's work on
softening the harsh edges. Wet your brush and gently rub
it along the edges, then blot with a tissue. Continue this process to address other harsh edges until you feel confident in applying
this valuable technique. This method allows you to
infuse an artistic touch into your works and create
softer, more blended shapes. To add the finishing touch to
our imaginary snow patches, let's incorporate some texture. Snow is seldom
completely uniform, often featuring
subtle gray shadows. Take a bit of gray or black on your palette and
using a wet brush, create a very light gray. Add some dots to
introduce the texture, completing the illusion
of a textured snow patch. With a couple of easy exercises we have learned a lot already. We have learned to create hair like texture for
the fur outline. Created the fur using wet paper. Created fur with
fuzzy snow in it. Well done! Now we can start
patting the fox and have fun watching this
cute snowy animal come to life under our brush.
6. Get started - preparing the paper to paint: Before we begin painting, it's essential to soften
the pencil lines, ensuring a smoother transition from the drawing to
the painted work. Our first step is to
define the first outline. To achieve a realistic texture
we will employ a fun brush, which will add depth
and detail to the fur. We will paint the
fur outline only on the body of the
fox on two sides. Wet a generously sized
soft round brush thoroughly. Now let's focus on wetting
the body of the fox within the outlines. it's crucial to use an ample amount of water to thoroughly
saturate the paper. Apply water with deliberate
strokes covering just the body of the fox and
the lower part of the head. In this close up video, you can see it
clearly. Keep the tail and the upper part of the
head dry for the time being.
7. Fur - step 1, painting the fluffy outline: Begin by mixing Indian red, burnt sienna, and
a touch of black. Using gentle strokes, apply the color to the wet
section of the first edge, similar to the
technique practiced in our earlier exercise
with the circular shape. With a completely dry brush, carefully guide the wet watercolor
into the dry area. Keep your brush movements
light and gentle, varying the direction to
achieve a lifelike texture. If you find the color on the
paper appears too faint, replenish it from your palette. Remember to use minimal water
while mixing and picking up colors to maintain a higher pigment to water
ratio on your brush. If you're uncertain about this, refer to my class "Snow in watercolor. Create a magical
winter scene." where I provide a detailed explanation of the pigment to water ratio. Notice how the
color blends softly with the paper without
leaving harsh lines. For now, leave it as it is and focus on the
outlining the fur. Let's repeat the process
on the other side, gently brush the color, allow it to spread, and then pull the pigment
into the dry areas following the early technique. The paws of the fox have
an almost black appearance, so let's add some
black along the edges. And once again, carefully pull the pigment to create a
delicate, fluffy texture.
8. Fur - step 2, painting the fur: Allow the first layer to dry
completely. During this time, let's closely examine
the reference photo. Here I mistakenly used brown instead of gray to adjust it. The paper must be entirely
dry for correction. To do this, moisten
a natural sponge, wring it out, and gently
wrap off the paint. Keep in mind that this
works best on thick paper. Thinner paper may get damaged. It's advisable to do this
correction only once in a specific area as repeated
rubbing can harm the paper. While this method won't
entirely remove the paint, it can have a significant
effect in some areas. In this lesson, we will
focus on painting the fur, and I'll provide tips on
how to correct mistakes. Next, moisten the fox's body. Have a reference photo, or my completed reference
painting nearby for color comparison. With a wet brush take a bit of black
and try it on your palette to ensure it
is a light tint of gray. Add gray color to the cheek. Use a dry brush to pull
hair like texture from the wet pigment mix, burn sienna and azo yellow deep
and apply it on the wet surface in
the corner under the chin. Proceed with gray
to color the fur In short strokes. If the gray mixes in the process with
a bit of yellowish brown, it gives more to the variety of the fur tints. Mix some Payne's gray and Indian red, and add this darker color under the chin and a few
color dots in various places. Because the paper is wet, the colors will
blend seamlessly. Just like in our
exercise lesson. Now take a dry, fine round brush and pull the dark color in
different directions. Follow this by applying various brownish colors to
the still wet body surface. Utilize different shades and mixes from our color
palette lesson. Since the surface is wet, the colors will blend smoothly creating an effect of uneven, fluffy fur without harsh lines. The best approach for achieving
a lifelike illusion of a fox's fur in watercolor is to employ
the wet on wet technique. This method allows for a
seamless blend of colors, creating a soft and
natural appearance without any harsh lines. When painting fur it is crucial to incorporate
various shades of brown to capture the richness and complexity of the fox's coat. To further enhance the realism and texture of the fox's fur, employ dry brushes
to delicately pull the pigment and diffuse the darker shades into
the lighter background. This technique is
instrumental in creating a natural and
seamless fur appearance, where the colors melt
together harmoniously. Mixing different
shades of brown, such as Indian
red, burnt sienna, and perhaps a touch
of yellow help to replicate the warm earthy
tones found in fox's fur. Introduce some black
into a palette as well as it will help create the necessary
contrast and depth, especially in areas
like the fox's paws. The combination of these
colors will result in a fur texture with captivating
variations and depth. With a dry brush softly blend some of the strokes to give them a more
fur like appearance. While capturing the
essence of the fox's fur don't hesitate to
use rich dark tones, particularly in areas
like the fox's paws. This will create a
striking contrast and emphasize the fox's
distinct features. Feel free to compare the colors
with a reference picture, and add deeper tones on still wet paper in areas such as shadows
behind the paws. Use a dry brush
regularly to transform some strokes into lines
enhancing the fur texture. When working on
refining your painting, you may find it necessary to lift or adjust certain
areas of color. To achieve this,
use a wet brush that you've carefully
squeezed with the tissue, ensuring it's damp but
not excessively wet. Gently brush this damp
brush on the wet colored surface to observe
the color lifting, creating subtle highlights
or variations in the fur. The contrast of black
paws looks satisfying. I proceed with
adding more color to the fur and diffuse some of
my strokes with a dry brush. If you notice that some of
the colors on wet surface have become lighter as the paper absorbed the water, don't worry. If the paper is still damp, you can easily add more
situated color on top of it. The colors will
continue to blend seamlessly on the
still wet paper. This is what makes painting
on wet paper so enjoyable. You have ample time to adjust your painting
before it dries. Let's add more depth to the darker regions by
introducing additional layers of black pigment refining and modifying the brush
strokes using a dry brush. If your brush becomes soiled, opt for a new dry one. Be mindful that moistening your brush can result in lifting color from the damp surface instead of softly
adjusting the strokes. That's why it's
advantageous to have several dry brushes readily available before
starting to paint. Add more intense
colors to the body. Utilize a fresh, dry brush
to adjust the strokes, crafting a texture
reminiscent of fur. The technique for rendering fur on wet paper involves
a sequence of actions. Step one, apply color stains. Step two, finetune and disperse the strokes using an
entirely dry brush. Introduce a touch of
yellowish hue to add vibrancy. Using a damp brush that I've squeezed with a paper tissue, I lift some color along
the paw and in the fur. I also create lifted
circular shapes in the fur to represent
falling snowflakes. These snowflakes should
appear slightly out of focus, but add life and
variation to the subject. Once you're satisfied
with the result, allow your paper
to dry completely. After lifting the color, dub your brush on a tissue to remove excess of
moisture and pigment. This process can be repeated as needed in various
areas of the fur. Each time you lift the color, you'll notice how it results in distinct shapes and tonal
variations within the fur, adding depth and dimension
to your painting. These unique shapes and
textures contribute to the natural look of the fox's fur and bring
your artwork to life. In many cases, using
a hair dryer to speed up the drying
process can be helpful.
9. Fox's head - step 1, painting a snowy background: In this concise lesson, we'll start with the fox head. I'm about to introduce you to a different technique
for adjusting dry paint. First, clean your brush
and then use it while it's still damp to
delicately stroke the paper. If it begins to feel too dry, simply re-wet the brush
and continue stroking. This method allows you to
gently lighten the paint without removing it entirely
as we've seen before. You also have the
option of using a moist sponge to
lift dry paint. Notice how the paint has
considerably lightened. Let's give the outline
a subtle touch by gently stroking a wet
brush along its edges. This imparts a distinctive
artistic effect. Proceed with a
gentle dissolving of the dry paint using
a moist brush, and then dab the area
with the tissue. Remember, don't
exert too much force as watercolor brushes are typically designed to handle the delicate and fluid nature
of watercolor painting. Alternatively, you can designate a separate brush for
these adjustments, like an old filbert brush that
I use here in the lesson. Now we're going to wet
the fox's head and apply a diluted shade of
Payne's gray or black. Keep it quite light. We'll add dapples of
color to the wet surface, creating an uneven snow effect. While remembering that
snow isn't purely white, it possesses subtle
shadows as well. Let's introduce a
bit more gray into the mix following this step. Allow the paper to
dry completely. If you'd like to
speed up the process, you can use a hair dryer
for the task.
10. Fox's head - step 2, completing the head: In this lesson, we're going to witness our fox spring to life. We'll start with a classic
water color technique known as wet and dry, where we take a color and
apply it to the dry paper. Begin by adding a subtle streak
of light gray on the ear. Then take a diluted watery
mix of yellow ochre and black and apply it, making sure it touches the edge of
the gray stroke. You'll notice these colors seamlessly merge
into each other. Now as you follow the
contours of the ear, use short strokes and damples to create a delicate
raggish texture. To add depth and detail, place a drop of gray just
inside the ear hole. Allow the watercolor
to work its magic as the color slowly
spreads and flows, enhancing the ear's realism. Now using a mixture
of Indian red, black, and burnt sienna let's fill in the gaps between
the snow on the fox's fur. Apply this with a series
of short strokes, dots to ensure that the outlines are irregular
and somewhat ragged. To soften the edges, clean your brush and with a damp point stroke along the edge of
the previous stroke, clean your brush again and gently blend the edge
of the brown color. Use a light gray to paint the mouth. With the tip of your brush create a line just
under the nose. Then blend the color gently
by brushing the edges with a clean damp brush For the cheek - we will work
on it while it's wet. Start by brushing the
area with a wet brush, then pick up some of the brown mixture to
paint the cheek's outline. Quickly brush the rest of the left side
with a wet brush. Add a touch of black to
this area under the cheek. Under the cheek use a pale yellow to
paint. And with a wet brush moist the right side, adding some gray color for
a subtle stain in the fur. To further enhance
the fox's fur color between the snow patches. Apply yellowish gray on the ear and blend
it with your brush. Add some dark gray to the ear's edge and
within the ear hole. After each stroke,
clean the brush, dab it on its tissue, and soften the edges of
the previous strokes. Painting between the
snow lines using different shades will contribute to a more realistic
fur appearance. Let's introduce some light gray to create shadows on the snow. Since pure white is rare, make a few adjustments and paint some additional brown between the snow patches for
a more natural look. For a subtle accent on the ear, apply a fleeting touch of dark gray color. Color the nose black, and feel free
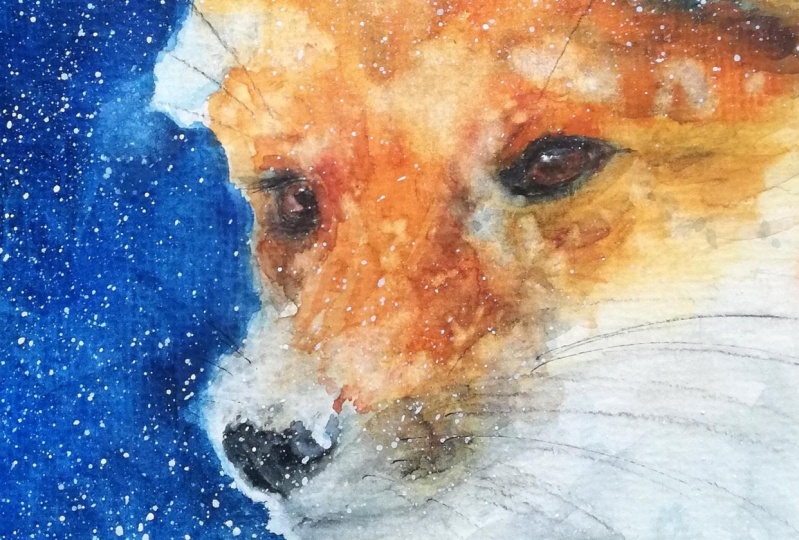
to add more black if you find it too light. For the eye - paint the
squinted look using black. Next, it's time to
paint the whiskers. For this delicate task, a very fine hair
thin brush is ideal. I prefer using a rigger brush, but you can achieve it with
a fine round brush as well. Try to execute this in
one smooth movement. If you are not
entirely comfortable, practice making a series
of quick strokes on a spare piece of paper before proceeding
with your painting. Should you ever need
to remove a stroke, simply clean the
brush and gently rub over the pigment
to dissolve it. Then blot the area
dry with a tissue. With just a couple of strokes, add light brown along
the mouth edge. Use a clean brush to spread
and blend the color. And consider adding
a bit more darkness to the edges for
depth and definition.
11. Fox's tail: The fox is nearly
complete, and I must say we've done an excellent job with the fluffy
fur and the head. Now let's focus on the tail. Begin by wetting the tail
and mixing some light gray. Start by adding some
scattered gray stains into the wet area. It will add more texture and natural appearance
to the snowy tail, as snow is seldom pure white. You may notice that
the transition line between the body and the
tail appears a bit abrupt. To soften it, we should
remove some of the dry paint. If you don't have a dedicated
old brush for corrections, you can use a damp sponge as an alternative. With a
rich black pigment start by coloring the
lower edge of the tail, allowing the watercolor to flow freely. Add a few scattered
dots of black. It's essential to use
minimal water while picking up your paint
to maintain vibrancy. Next, take a dry brush and
gently pull the pigment in various directions to create glimpses of black fur
picking through the snow, just like we practiced
in previous exercises. Did you happen to notice
an outlined stain? It appeared after we
removed dry paint, but forgot to blot the
area dry with the tissue. No need to worry. We can rectify this by
gently adjusting it with a damp brush and properly blotting it dry with
the tissue this time.
12. Build up the volume and value - intermadiate level: If you already have
some experience with watercolors or are eager to further experiment and
expand your skills, this lesson is
tailor made for you. We'll focus on building up the volume of the fox by adding an additional layer with darker colors. To begin
moisten the body of the fox with a wet brush. You can use a flat brush or a soft,
light round brush. It's essential to moisten the
body as the head already exhibits a good balance in
terms of dark and light areas- what we refer to as a value. We'll start with the chin. Apply a mixture of Indian red and black just below
the chin's edge. Then using a dry fan brush, pull the pigment to create
a ragged line of fur. Add more dark accents within
the fur on the breast. Employ a dry round brush to blend these strokes
into the background, similar to what we did with the tail. For the lower
part of the breast use a brownish black shade. Use a series of short strokes to add darker
accents to the fur. Repeatedly employ a
dry brush to refine the strokes and achieve
texture resembling fur. The paws are notably
dark, almost black. If you notice that your paper needs more moisture
at this stage, it's entirely safe to
do so since the paper doesn't contain any color
yet from this layer. Working on top of the existing layer
always brings a sense of satisfaction as it adds more volume and details
making the painting alive. Let's intensify the shadows with a bit more Indian,
red and black. The strokes on damp
paper will have soft edges and will add
more definition to the fur. Apply the darker
color to replicate the shadows observed in
your reference photo. More black for the paws. Some Indian red
and black mixture to intensify the
shadows on the body. Focus on the back paw coloring it black to
accentuate the light fur. Apply your brush strokes in various directions for
texture and depth. Take a moment to
soften the edges, creating a seamless
transition between colors. For added depth
add some streaks of Indian red in the fur, under the chin. If your
paper is already dry at this point, apply fleeting touches on the
fur with a dry brush, taking care to toch
the paper very lightly. To complete the scene lift some paint here and there
to represent falling snow adding that final touch of
winter magic to your artwork. Just clean your brush, dab it on a tissue, and touch the wet paper surface to take some pigment away.
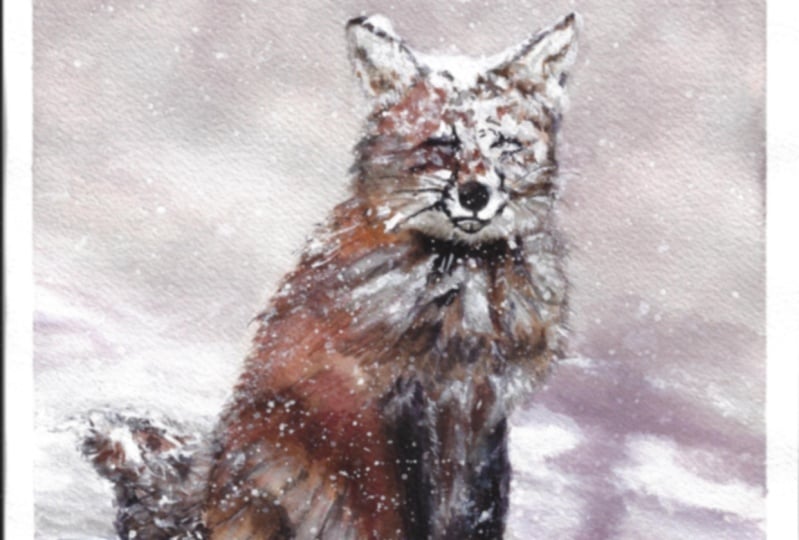
13. Bbackground - add an atmosphere to your painting: Adding a background
is an optional step. However, adding a background can introduce a whole new
atmosphere to your artwork. Mix some alizarin crimson
with a touch of Payne's gray or black, and add more water to dilute
it. For a warmer tone add a tiny drop of brown to the mix. With a
large round brush follow the outline of the fox. Pause, rinse your brush and blend the color into
the white background. You can also
introduce more Payne's gray to the watery mix. As you move above the fox's head, allow your brush
to gradually dry out and gently stroke
it on the paper. This technique adds a touch of artistic imperfection
to your strokes. Periodically moisten your
brush and soften the edges of the previous strokes to blend the pigment into the
white background. To add depth, use a bit of ultramarine to
create some strokes in the snow beneath the fox. Finally, create a gentle light
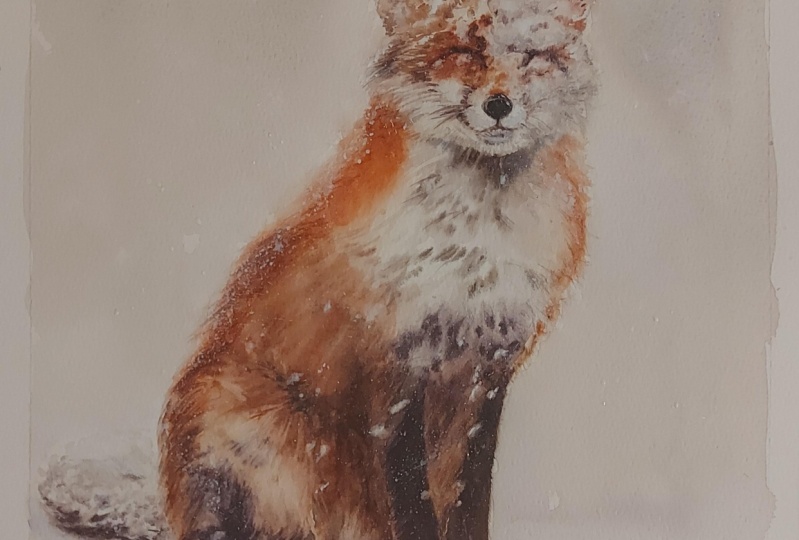
shadow behind the snow to make the foreground stand out and complete the background. If you prefer to keep your fox against a
white background, you can move on to
the next lesson for those finishing touches that
will elevate your painting.
14. Finishing touches - enhance your artwork: We'll start by gently rubbing the paper to eliminate
any pencil lines. Next, let's soften the
stark edges of the snow. If you don't have a dedicated
old brush for this, a piece of sponge
works just as well. Softening the lines lends a more natural and captivating appearance
to your artwork. With a fine brush, I prefer using a rigger brush, pick up some brownish
color from your palette and paint delicate hair sporadically
in the fox's fur. These intricate details
provide definition, creating a striking
contrast with a soft, blurred background. And
surface focal points elevating your painting to a higher level and showcasing
your attention to detail. Repeat this process
with gray color. As an optional step, consider using a
white gel pen or a white acrylic marker to add scattered white dots
resembling falling snow. You may also opt for
white gouache to sprinkle some snow flakes within the fur. For an added touch of
realism, once more, let's soften the bolt
lines of the snow on the fox head. After
dissolving some pigment, gently blot it dry
with a tissue. In this series of
close up videos, you can observe the brush
movements in detail. To complete the piece
add tiny gray dots along the lower edge of the
snow, simulating shadows. It's almost ready. Just apply some white
flakes to the edges of the snow lumps to create
a more jagged outline, adding that finishing
touch to your artwork.
15. Concluding - in a nutshell: I'm glad to have you back. Let's conclude our watercolor
class after putting so much effort and creativity to bring the snowy
red fox to life. We've not only painted a fox, but we've learned to convey
its velvety coat with intricate techniques and master the art of rendering
snow in its fur. Through every brush,
we've uncovered the secrets of expressing
texture and depth, making the fox's fur look
irresistibly fluffy. We've also mastered the
subtle techniques of painting snow on fur. That added a touch of
enchantment to our artistry. We've embraced the significance
of small adjustments, realizing that they can transform a good piece
into a masterpiece. These lessons have not
only honed our skills, but have fostered
patience and precision. Remember those
early exercises on fundamentals of
watercolor techniques. They strengthened
our confidence, left the groundwork for this
beautiful fox portrait and will serve
as the foundation for your future
endeavors in the medium. Watercolor, like
nature itself, is a wondrous realm filled
with endless possibilities. And I hope our time together has kindled the flame of
creativity within you. I hope to see your artwork after you put so much
hard work in it. And I love to hear all about
your painting process. If you had any
difficulties or what was the most enjoyable part
of the painting process, share your artwork in the
Student Project gallery by clicking on 'Submit Project' under the 'Project and Resources'. Every piece of art, no matter the level, represents time, effort,
and personal expression. But most importantly, it's a part of your
artistic journey. It's a visual record of
your growth as an artist. If you have any questions, I'm happy to respond and to help, just post your thoughts
in a discussion thread. If you prefer to share your artwork on
Instagram, please tag me @magical.watercolor. I would love to see your painting! Skillshare would also love to see the
artworks of my students. Please tag them as well @skillshare. Remember to hit
the follow button next to the class title, just below the video. By doing so, you'll stay
updated and be the first to know when I introduce a new
class or announce a giveaway. Thank you so much
for being part of this watercolor class and I look forward to witnessing the beauty you'll continue to create. If you enjoy the class, I would be really grateful for
getting your review on it. I hope you have
learned and discovered something more about this
magical painting medium. And feel inspired to paint and experiment with watercolors. Goodbye for now and
happy painting!
 Evgenia Cordie, Professional Watercolor Artist, Belgium