Transcripts
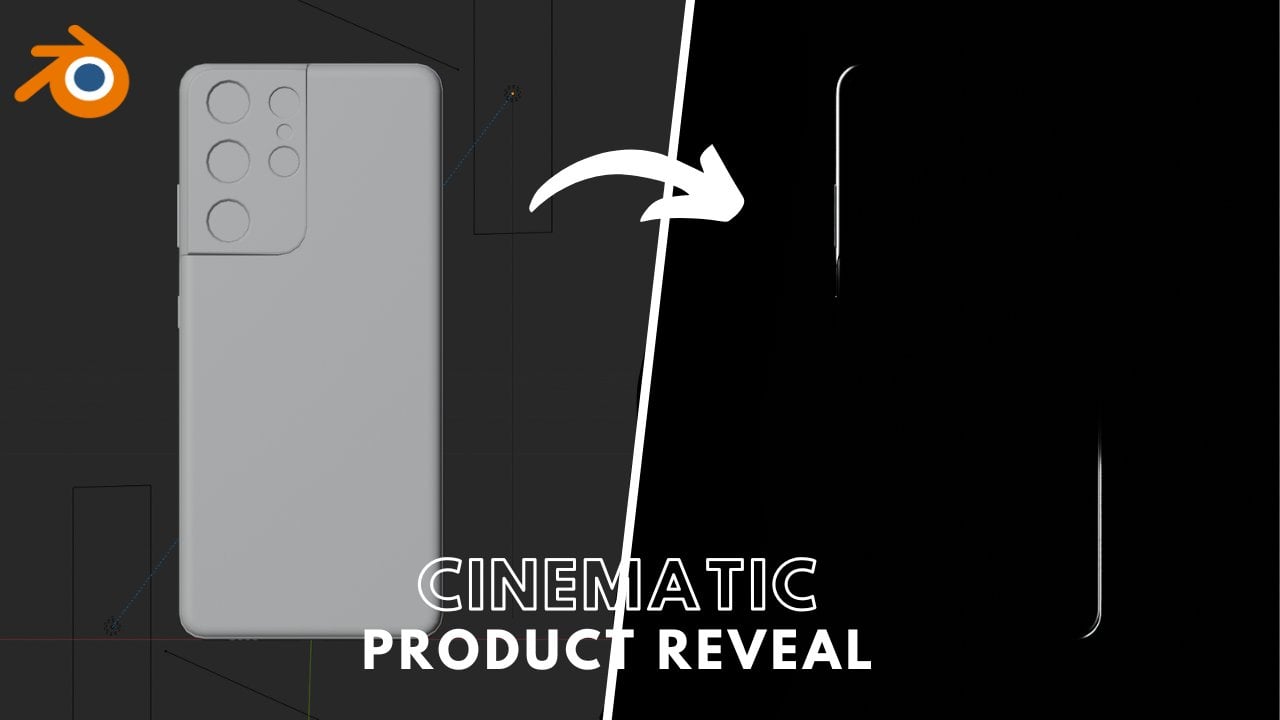
1. Introduction: Welcome to the new series of smooth transition
Animation in Blender. I'm your instructor
Nihiam Patel, and I'm excited to guide you through this comprehensive
Pi episode journey. We'll be exploring
the art of creating smooth transition
animation using blender, a powerful and free three
D creation software. From setting a
blender kit addon to mastering transition
animation fundamentals, adding environmental texture and composting
with DavinsRsolve. We will core all of it. Throughout this class, we'll
work on a project together, and by the end of
the episode five, you will have a complete
and polished animation to showcase your new skills, whether you are a beginner
or an experienced animator. This class is designed
to help you improve your skills and take your
animation to the next level. Let's get started on this exciting journey and create some amazing
animation together, leash your creativity and make some amazing animation
magic happen. So comment down below
if you like this class, and do not forget to submit
your class project and feel free to ask any doubts in the
comment section. Thank you.
2. Downloading and Installing Blenderkit Addon: Okay. So welcome to
the first episode. In this episode, I'm
going to show you how to download and install
Blender kit add on. So first, what I'm going to
do is just go to the browser. You can choose any browser. Now, just search your
blender kit download and just go into the
first link over here. Now, you have to just
download this blender kit. After downloading it,
just go to the blender, go to edit and preferences. In the preferences, you have to go into the
add on section, and in the add ons, just
click on this Install button. Now, choose the
Zip file where you have downloaded the
Blender kit add on, and I downloaded it in the download section and just simply click
on Install add on, and just make sure you have tick mark this little
box over here, which says blender
online asset library. Now just close this and this little pop up box
will appear over here. So Blender kit
basically provides you free three D
models, materials, add ons and brushes to create beautiful TD atworq and
three D visualization. In this square button over here, you can find a bunch
of models over here. In this little surfer, you can find a bunch of
materials over here. This is the end of
the first episode, meet you in the next episode.
3. Animating The Scene: First press A to select all and then press
x to delete it. Now, just search play station in the blender
kit addon search bar. Simply search your play
station and hit Enter. After searching it, you can just simply select this dual
sense controller PS five. Now, what I'm going to do is just select this bottom plate over here and press X
and then delete it. Now to perfectly align this
controller to the front view. What I'm going to do is just
select this empty and press R x 90 so that it gets perfectly aligned
to the front view. Now, just press numbered one
to go into the front view. Now, just press and just
go to the item node. Now I'm going to increase
the size of the controller. Press and increase the size. I think this is perfect.
I'm scaling it around 2.4. Yeah. Now this is perfect. Now what I'm going to
do is add a camera. Press shift and just
select your camera. Just go to the camera
data properties and just change the focal
length to around 35 MM. Now, what I'm going
to do is just scale the size of the
camera by pressing. So I'm scaling it
around 0.256. Okay. Now, what I'm going to do is just go into the side
by pressing num pet. Now, I'm going to change
the location of the camera. So I'm changing the y
location of the camera. So just simply type
here -0.7 meters. Press numbed zero to go
into the camera view. Now, what I'm going to
do now is just go into this side view by pressing num I'm going to add
some empties here. Press shift and just
select here empty sphere, the empty section and
just scale it according to the size of the
controller like this. Oh. Yeah, I think
this is perfect. Now, just duplicate this
empty by pressing Shift D and press click so that get aligned into that
particular location. Now press G sad move it upwards over here
and scale a little bit. Decrease the size
of the top empty. Now just press control
A and apply the scale. Now, what I'm going to
do is select the upper empty and rename
it to empty mean. Like this. Now, you have to
select this bottom empty and just rename this
empty to empty camera. Now I'm going to make
a new collection. And what I'm going to
do is just select all the empty main and our empty camera and just move it to the new
collection over here, which we have made it. Now, what I'm going to do is select this bottom
empty and then shift select this top empty over here and press Control P. And set parent to object so that if you move this
top empty over here, your bottom empty
will also move. Now, what I'm going to do is just select this
camera and then select this bottom empty over here and press control P
and set parent to object. So if you select this top empty and move
this empty over here, all of the object in the collection will
move because that is the main empty which we have parented to all other objects. Now, what I'm going to
do is save this file. So I'm saving it in my D drive and create a new folder
and just rename it. So I'm going to rename it
to play station like this. Just go into that
folder, and again, create a new folder and just simply type here
short one because this is our short one in the
whole animation and save the blend file and rename this blend file to short
one again and just save it. Now, just open the
new blender file over here and press A and then
press x to delete it. Now, for our second shot, I'm going to search here
again, the playstation. We are going to import
our playstation from this blender kit addon to simply type here playstation. You can select this playstation. So now, what I'm going to do
is just go to the front view and get align to the front view. So press R d 90 so that it get perfectly
aligned to the front view. Now, what I'm going to do now is Just go to our previous shot, which, which is our shot one. So first select this
top empty over here. Then shifts this first select top empty and then
shifts like this bottom empty. And then shifts select this
camera over here and right click and copy objects and
just go to the shot over here. Now, make a new collection over here and make sure that
collection two is selected, or new collection is selected. Then right click and
just past the objects. So that these three items
get copied into a new shot. Now just press numbed zero
to go into the camera view. Now, just select
this empty and scale it according to the
size of the empty. Now just press S to
scale it like this. Yeah. And Brest said so that it gets perfectly
aligned to the camera. Okay, I'm again
scaling it like this. And Brest said. Yeah. So now I think this
is perfectly aligned. Now, what I'm going
to do now is Now, what I'm going to
do now is just open another new file
of the blender and just press A and then press x to delete press and then
press x to delete it. Now, I'm going to import an FBX file of the
playstation box, which I will provide you
in the project resources. To the file and to import
and select your FBX. So this FBX file, I will provide you in
the project resources, so just simply import it. Now, what I'm going to do is just line this box
to the front to you. So I think it is
already aligned. So first, we need to copy these empty objects
into that file. So again, press right li and just copy objects and just
go to this new blend file, and first create
your new collection, select it, and then
paste objects. Now, what I'm going
to do is just select the box over here, and then first select
this box and then shift select this handle over here. What I'm going to do is press control and set parent
object, keep transform. Now just press num ped zero
to go into the camera view. Now align this box by pressing sad and
press S to scale it. I'm again scaling it. Press now box is
perfectly aligned. I'm scaling a little bit
downwards like this. So yeah, I think this
is perfectly align. Now, what I'm going to do is just move on to the
first shot over here. Now, we are going
to eimate our shot. So first select the camera. Over here, and
bring this timeline forward and just set the
end frame to 150 frames. Now, right click on the location of the camera
and set a single key frame. Now, just go to the last frame. And what I'm going
to do is just change the location to
negative 0.5 meters, and again, inside single frame. Now, what I'm going to do is just select the bottom
empty over here. You have to select
this bottom empty over here and just move
on to first frame. Now I'm going to change
the x rotation value to around I think -30. This will be perfect.
Insert single key frame. Now, just go to the
last key frame, and I'm going to change the x rotation value to around
five degrees and again, insert a single key frame so
that it will look like this. Yeah camera moment will look
like this at the first. So now, what I'm going to do is just select this
top empty over here. So now we are going to
animate this top empty. So select this top empty. Now, go into the First
frame or first key frame. You can say that and change
the shared rotation value to around negative 30 degree
and insert single key frame. Now I'm going to move on to the one twentyeth keyframe and change the shared rotation
to be around I think, just go into the
camera view bysing numbered zero and change it to around 20 degree and
insert single keyframe. Okay. Now, just go into
the last key frame, which is our 150 key
frame, and again, change the set rotation
to be around 10. Yeah. Okay. So yeah, 110 will be fine
and insert single keyframe. First, I'm going to
explain the graphs, how it works in
this small video. This is an example of an basiograph which we are
going to use in our animation. So this is a curve
of the Bassia graph. If I explain you,
so at this point, at this point to this point, our animation transition will be slow as it is getting slower, and then at this point
it is getting faster. So for an example, if you climb the
hill, at the first, it will be slower
because you have to climb the hill and
at the end point, speed will become faster. So that's how the normal
basiar graph works. And another graph,
which is mostly used in blender is the
normal linear graph. So So this is the bezier graph which we
have which I've shown you. This is the example
of genargraph. So in linear graph from this point to let
me mark up for you. From this point to
the last point, your whole animation will be at the s same and
constant speed. It will be linear. There will be no speed changes in this graph. So that's why it is
called the linear graph. So this graph, we are not normally using in
the transition animation. So we are going to
use the beso graph. So this will be a so
graph in our animation. So I'm going to
explain you this. So let me mark up for you. So at this point, which, turn on the marker, at this point, to
around this point, our animation speed will
be a little bit slower. As you can see, it is little bit climbing climbing the mountain. Just see with an
example of a mountain, we are climbing this
at a low speed, and at this point, at a sudden speed, a speed changes to reach
to the upper point. So you can see that there is a sudden
change in this graph. So from this to the last point, our speed of the animation or you can say speed of
the transition will become super fast so that our
animation will look cooler. Because of this
speed transition. That's why this is called
a transition animation. So we have to go to
the graph editor. Just go to this graph
editor over here. Now, what I'm going to
do is hit normalize. Basically, normalize, find the minimum and maximum
values of single channel, then map the values to
range of zero and one. So what I'm going to do is
just go into the frame 120. Now, what I'm going to do is just select please
node over here. You can say keyframe and press C and then press x and just move to the last frame or just parallel align it
with the last keyframe. Now, what I'm going
to do now is again, go to the timeline by
pressing Control tab. Control tab is the
shortcut to switch into the graph editor
and the timeline. Now, what I'm going to do is just select this
two key frame, and you have to move them
five frames forward, suppress K and just move
them five frame forwards. The one tie frame will be
shifted to the one 25th frame. And the last keyframe, which is 150 frame will
become one 55th keyframe. Now just go into the shot two. Now, we are going to
animate the shot. So what I'm going to
do is just select this top empty or here plus n
and just go to the item. Now, just drag this timeline and just again set the
frame to 158 key frame. Now, what I'm going to do is just change the
set rotation value of the top empty to negative
90 degrees. Like this. So our animation is going to
appear from the side view of the playstation and just
insert single keyframe. Now, just go to the 38
keyframe and change the set rotation to be
around zero degree, and again, insert a
single keyframe here. Now, just go to the camera view. Our starting of the shot
will will look like this. Now, what I'm going to
do now is just Okay. Play with the graph again. So just press control
tab over here. And what I'm going
to do is just hit the normalize and move
to the 38 keyframe, select this node or handle
over here and just press g x and move until
the first frame. Drag this until it get
perfectly aligned to the rod keyframe or first
keyframe, you can say that. Now, what I'm going to do is just switch to the timeline
by pressing control tab. Now, select the two keyframe
and drag them or move them five frames backward
In the previous shot, we have moved the
five frames forward, you have to track them five
frames backward in this shot. Okay. So you can see there. Now, what I'm going
to do is just select the camera and in the
location of the camera. So yeah, before before animating the select the camera and just go to the
first key frame. Now I'm going to insert a keyframe single key
frame on the location. Now, just go to the
one 50th key frame and change the location of the camera to be around negative 0.6 and insert
a single keyframe. Okay. Now, what I'm going to do is just select
this bottom empty over here. And after selecting
this bottom empty, just move to the 128
keyframe and change the. After selecting
this bottom empty, go to the 128 key frame. And just insert a
single key frame in the x rotation value. Now, what I'm going to do is just move on to
the last keyframe, which is the 158 keyframe. Select the bottom
empty and go to the 158 keyframe and change
the x rotation to be around negative 90 degrees and just
insert single keyframe. Over here. Now, just go
to the camera view. Yeah. I just looking perfect. Now, what I'm going to do now is just select this
bottom empty here. Now, what I'm going to do now is Again, play with
the graph values, press control tab to switch
to the graph editor. Now at the 128 keyframe, select this handle over here, this right handle
here and press gn x, and just perfectly align it with the last keyframe
here like this. Adjust it according to
your view like this. Yeah. I think this
is now perfect. Okay. Now, just press control
tab and go into the timeline view and
select this two key frame. Now we have to move them five frame forward by pressing G. Now, what I'm going
to do is just select this top empty over here, and we're going to animate this, go into the 128 key frame, and you have to change
the rotation value of y of the z axis to 30 degree and just insert a single
keyframe here like this. Now, what I'm going to do is just select this top
empty over here. And go to the 25th keyframe. Now, what I'm going
to do is just switch on to graph editor
by pressing Control tab. Now, select this 25th keyframe, press right click
and just change the handle type to
autocla basically, handle type creates
a smooth curve, which only change
direction at keyframes. Now, what I'm going
to do is just select this handlebar ar plus g x, and drag it to the
minus key frame. The last keyframe where it gets perfectly parallel aligned
with this keyframe, which I'm showing you. So again, moving it
by pressing G. Yeah. So I think now is
perfectly aligned. So now, what I'm going to do is just go into the camera
view by pressing ump zero. And it is looking perfect. So you can just
play the animation and cross check it
whether it looks perfect. So yeah, I think it
is looking perfect. So now we are going
to the third shot, which is our
playstation box shot. So what I'm going
to do now is just select bottom empty or ear
and drag the timeline. Now, set the end
frame to 150 frame. Now, just select this
bottom empty here, what I'm going to do
now is just move onto the 38 keyframe and just press N and
select this item node. Now, what I'm going to do
is select this bom empty or here and change
the x rotation to 15 degrees and
insert single keyframe. Now, again, select that
bottom empty or here. Now, just move to
the first keyframe. Now, what I'm going
to do is just go into the camera view by
pressing Numpad zero. Now, change the x rotation
value to be around like 105 degrees or
something like that. Yeah, 105 degrees and just
insert a single keyframe here. Now, what I'm going to do
is just select the camera and just change the i location to be around
negative 0.6 meters. Yeah. Insert a
equal k frame here. Now, what I'm going
to do is just select this bottom
empty over here. And what I'm going to
do is select this two keyframe and just press control tab to go into
the graph editor, hit the normalized button. Now, what I'm going
to do is just go into the 38th keyframe. Now, select this handle
this left handle and make it align with the upper keyframe
by pressing g x. We have to drag that handle and see that it get perfectly aligned with the first keyframe. Yeah. Now press again, control tab to go into
the timeline view. Now, what I'm going to do
is select this water empty. Select the two key frame, and I'm going to make this
keyframe five frames backward. So you can drag it
by pressing G. Now, what I'm going to do is just select this top empty over here, which is our empty mean. Now, just go to
the first keyframe here and change the
rotation value to be around Negative 60 degree and
insert a single key frame. Yeah. Now, what I'm going to do is just move on to
the last keyframe, which is our 158 key frame. Now again, go to the
camera view by pressing number at zero and change the y rotation to be around 30 degrees and
insert single key frame. Yeah. So what I'm going
to do now is select the camera and just move onto the last keyframe and
I'm going to change the y location value to be
around negative 1.3 meters. Yeah. Is perfect and just
insert a single keyframe. Yeah. So go to the graph editor
by pressing control tab. After moving into
the graph editor, you have to select this
128 keyframe handle, select this right
handle over here and press G x and perfectly align it with the
last keyframe like this. Yeah. I think it is perfectly aged or aligned with
the last keyframe. Now we have to
select this last two keyframes and make them five frames forward by
pressing G dragging it. M. So now, go to the first shot. So we have already saved the first shot. No
need to save it. Now go to our second shot. So this shot needs to be saved. So I'm going to the
file and just saves I'm saving it on my D drive where it's a splay
station folder, creating a new folder, and I'm renaming it to shot two. Shot two. Just go in to that folder and rename brand file
to shot two again. And just simply save it. Now, just go to the third shot. And this shot also
needs to be saved. Just go to file and go to save again go to the folder that you have made
for the animation. Just create a new folder from here and rename
it to shot three. Just select that folder. And again, rename
this brand file to shot three and
simply save it. So our animation part is over. In the next episode, I'm going to teach you how
to render this all shots and how to add
HDRI. Thank you.
4. HDRI Enhancement, Render and Output Settings: So in this episode, I'm going to teach you how to add DRI or you can say
environmental lecture to all the shots and what will be the best render
and output settings. So first, we are
going to add HDRI. What I'm going to
do is just go to the world properties and select
this yellow dot or here. Now, just select the
environment texture and just open it. I will provide the
environmental texture in the project resources, so no need to worry about that. So our environmental
texture is added. So to So now we are moving to the
second shot in which I'm going to add HDRI, select this over here and
the select environmental texture and again open the
environmental texture, which I have provided you in the project resources
to add the same DRI. I'm again repeating the
process in the third shot, open the same DRI. Select it. Okay. Now, just go to the
render settings over here and just make sure your cycle engine selected and select the device
to GPU compute. If your device or your laptop or PC have CPU and
not having GPU. You can simply select CPU, but I will prefer you to select GPU for faster
rendering process. Now, just set the upper sample that is board sample
to 50 and the render samples to around 300 and make sure that both
the noise are enabled. So the number of
sample depends upon your particular laptop or PC. If you have a low PC, you can just simply set
the sample value to be around 100 samples or
something like that. But if you are having
the high and PC, you can just set it to 300. But I will prefer
you to set it to 300 for the better results. So you can go into the render view
so you can simply see that our
controller is looking. Now to fix this background HDRI which we can completely
see with your naked eye. So we want our background
to be transparent. What I'm going to
do is just go to the rendered properties and just go to the film
section over here. And make sure you have
enabled this transparent. So if you enable this
transparent mode, you can simply see that you
can only see the object and all the background around the object is
become transparent. We are going to render
the transparent images and going to compost it
in the Davins results. So I'm enabling this
transparent feature on. So now, just move on
to our second shot. Which is our placation shot. Again, I'm going to
same process here. Just make sure you
have cycle engine selected and make sure your device is selected
to GPU compute. I'm setting this Vput sample to 50 and this render
sample to 300. Now again, do the same
process in short, so to short and
select cycle engine and make sure GPU compute
device is selected. Set the put sample to 50
and render samples to be around 300 and make sure You have unabled
a transparent option. So if you just go
to the render view, you can see this
problem over here where our box is looking
like a pink shade. To fix that, what I'm going to do is select this box over here. Now, what I'm going to do is just go to the
shading menu over here. In this heading menu, what I'm going to do is remove
this PNG first, so just select cross
mark and just open it. And I will provide
you the image, which is the unwrapped
image of the PS box. Simply select it. I will provide you in the
project description. After selecting it,
you can simply see that our box is now
looking perfectly good. So, you can just cross check it. Again, go to shot
two where I have forgotten to turn on this
transparent mode on. Just simply select
this transparent mode. Now if you go to
the rendered view, you can simply see that our PS is looking completely good. You can see that.
Yeah. So again, switch out to the layout
in all the scenes so that there will be very fast
process in the rendering. So make sure you have enabled layout view
in all three shots. So what I'm going to do is just before rendering
our animation, we are going to set the output. So what I'm going to do is just go to the output
section over here. So yeah. So in this
output section, you have to create a
new folder where we are going to see our
rendered images. So I'm again, going to the same folder which
we have created. So I've created the
place station folder. So just go to the short one, and here I'm going to
create a new folder which says short one rendered images. Yeah. So short one
rendered images. So this is the folder where my all rendered images
is going to be saved. So make sure you have file
format as PNG selected. So make sure you have PNG
as file format selected. So because we are going
to render it in images and then going to compost
it using the Davin resolve. Now, just go to the
second shot over here. Now, again, we are going to
the output section over here. Now, select the output folder. Just go to that specific
folder which you have made. I'm just going
into the shot two, and here I'm going to
create new folder, which I'm going to name it
as shot two rendered images. Yeah. Selected and just accept it and make sure you have
PNG as file format selected. Now, just go to their
shot over here. Now again, go to the output
properties over here. Now again, select the folder. Now, just go to that
playstation folder and going to the short and
just create a new folder, which is and rename it as short rendered images and select that folder
and accept it. Now you can move on
to the first shot. So our shot is ready to render. So just go into the camera view in all shot by pressing numped
zero like this. I'm again going to the third
shot and press numped zero. So just move on to
the first shot, select render and the
select render animation. Okay. So it will take a
couple of time to render it. So the same process you have
to do in all three shots. So make sure after after completing the render
of shot one animation, you can then move on to shot two animation and
render it like this. Because you have to
render it one by one, because it takes
so much pressure and load on our
device or laptop. So I'm going to
the third shot and just hit again,
render animation. So all renders are completed. So we are going to convert these rendered
images into the MP four using Davin resolve, which is a very beautiful
video editing software. So in the next episode, I'm going to show you
how to download and install Davin
resolve. Thank you.
5. Downloading and Installing the DaVinci Resolve Software: So in this video, I'm
going to show you how to download and install
the Diamonds resolve. So open any browser. So just simply search
Davin resolve. Now, just go to the
second website, which is Black Magic design. So go to that website
and scroll down. So we are going to download the Davin resolve free version. So just simply
select free version. There is also a paid version, but we are going to
use the free version. So simply click on the
free download now version. Now, what I'm going to
do now is we are going to select or download this
Davin C resolve 18.6. So you can download it whether you have macOS or
Windows or you have Linux. Depends upon your device, depends upon your laptop or PC. So mine is windows. So I'm going to select the windows option and make sure you are downloading
Dawn C resolve 18.6 or So just simply select windows or whichever you have
operating system. Now, you have to fill up
the necessary details. And after filling it up, you have to register
and download it. So I already I've
already downloaded it. So just go into this
select this folder, which you have downloaded it
and you have to extract it. So after extracting it, our folder will look like this, which says Daven
resolve 18.6 windows. Just simply go into that folder and you have
to double click on that. Now, it says extracting, so it will take some time to extract this application folder. So yeah, after extracting it, make sure you have tick mark
these three check boxes. So make sure you have selected
this design control panel, Black Magic row player
and Avni resolve 18.6. After ticking mark the
three check boxes, you have to select
the install option. So just hit the
install option to install these three
softwares, click on Install. So it will take some
time to install it. So just wait here. So after installing, you
have to select next here, and just select here I accept t terms and agreements
and the sit next. Now, choose a specific folder where you want to install
the Davins resolve. So I'm going to select your drive where I'm going to
install the Davin resolve. So select the specific folder. Now, just click next
and install it. So it will take
some couple of time to install the Davins resolve. Okay. So our version or
setup is now installed. So just click on Finish Option. Installation complete. It says, click Okay. Now, if you search
your Davin Sisol, you can just simply
open the app. In the next episode, I'm going to teach you how
to compost your animation or how to change the sequence
into the MP four. I'm also going to teach you how to set the background color, and what will be the output
settings for our project. So meet you in the next episode.
6. Composting with DaVinci Resolve: Okay. So after opening
the damns resolve, select here new project. Now, just rename it. So I'm going to rename
it as the final video. So simply type here final video. Yeah, and press create to
create a new project file. So just go to the
media pull over here. So now, what I'm going
to do is just select these three dots on
the top over here and change the frame
display mode to s ones so that our images
can appear in ss. Now in the left side, just
select the drive where you selected or saved folder. So go to the playstation folder, and just go to short one and just go to short
one rendered images. Before selecting it, just go to the file and just go to project settings over here and change the timeline framed to
30 frame per second. Do this step before
importing the images. Just select this and just to simply drag this in the media pool over
here like this. Okay. Now again, do
the same process. Just go to short
two and just drag the shot two over the bottom
here in the media pole. Now again, just go
to the short three and select this and drag it
to the bottom pull over here. Now, go to the edit section over here where we
are going to edit it select the first
PNG sequence. Select the first
PNG sequence and drag it in the
timeline like this. Yeah. Now, what I'm going
to do is now select the second sequence and just drag it over here
like this beside T first, and again, select the thir shot and drag it on the
timeline like this. Now, to change the
background color, just select your effects. You can just simply see that
on the top bar over here, you can see the effects,
code to effect. In the toolbox, you are going
to yeah in the toolbox, just select the generators. In the generators,
if you scroll down, select the solid color over here and just drag it on
the timeline like this. Yeah. So yeah, the solid
color is the upper layer. So our animation layer needs
to be the upper layer and the solid color layer needs
to be downward layer so that we can properly
see our animation. So I'm going to drag
it upward like this. So move the three
shot upwards and move the solid color layer downwards and just adjust it like
this by dragging it. Just simply drag it like
this and make sure you have arrange the
solid color layer on the bottom of the animation. You can extend this like this. Make sure you extend it till
the animation is over to change the color of the solid color or you can
say the background color. What I'm going to do is just select the solid
color. Like this. You have to select
the solid color and just go to the
inspector button over here. In the inspector
in the generator, you can select this
color option over here and you can set the color. So I'm going to pick the
screen color and just going to select the
top of the box color. Just simply drag it down and
I'm I'm again selecting it. Yeah. Yeah, simply drag
it upwards over here. I want to give you
some dark blue type. Yeah, this is
perfect. So just hit. So yeah, background
color is perfectly set. So now to render this, what I'm going to do is just go to the deliver option over here. So in the deliver option, so these things needs
to be done properly. So change or rename
the file name. So I'm going to rename the
file name to final video. Yeah. And just select
the location where you want your final
animation to be rendered. This will not take much time
as the blender had taken. So no need to worry about that. I'm just going to save it
in the playstation folder. Now, make sure you've
selected MP four format. Because we are going to convert the PNG sequences into MP
four and make sure you have resolution selected
as 1920 to 1080 and framed as 30
frames per second. So just add to render
Q at the right side, you can just simply
see that job one of our render and just
select render all. So, after a few seconds, our animation will be rendered. So this is the end
of the episode. I hope you like my class and make sure to
submit the project. You can make this
transition animation of any three products you want. So I will be happy if you
submit your class project, if you have any doubts, just feel free to
ask. Thank you.
 Nityam Patel