Transcripts
1. Trailer: Hi, I'm Marin. Water maker was
photography and I started, it was literally vine
during the pandemic. However, here I'm your teacher. I created those class
for all of you. Modern makers would love to share your handmade
items online. Needed a little help
with photography. You will learn
everything you need to know about light,
perspective, composition. We will work through your house and find the best
places to shoot. I look at all your items and decide what
feels best for you. There are several lessons that will help you with
troubleshooting. What did you and
looks too boring. What do you do and
look through chaotic? What is Carolyn checklist? Before you take your shot? By the end of this class, you will feel confident and
inspire tissue due on next. I cannot wait to get started. Let's get started and
see you in class.
2. Class Project: Welcome to the class. I'm super happy you
decided to watch this one. Thank you. Alright, for your class project, I want you to capture
your own mix. I'm super excited to
see what do you do. Share them in the class project
gallery, make a project. Tell us a bit about
what went well, what you would like
to improve next time. I happily give you some feedback and some tips how to improve. Another thing I would
love to see from you, if share the love spreads. I think we grow as a community
sharing was carrying and especially giving
constructive feedback to other students will help
you train your own eye. That's really important
part of the process. Alright, let's get started
with the first lesson.
3. Introduction To Photography Genres: So when I started
with photography, I go find a cloud like this, piece together, all kinds of information from other
fields of photography. And in this lesson, I wanted to give you a
brief introduction into the genres that are
helpful for his Maker is also present you with
opportunities to find inspirational
sources outside of the maker community. Let's have a look. In this class, we will
focus on lifestyle. Photography is all about
capturing your everyday life, your stories, the people in it. And you often see families
in front or also inside their homes photographs
where you have this daily activities like
making a cup of coffee, but also baking a cake,
things like that. I personally love
this quiet moments that feel for the pet owner. Very extraordinary,
calm and peaceful. I believe that we as makers love this kind of photographs
and we crave for it. It's about taking your time
for yourself, for your hobby, having a look at a magazine, but also knitting or sewing, crocheting or whatever you do. So this is what I want
to teach you today. And I believe this kind of genre is really important
to learn and look at as a maker because it
will help you to tell your own story and capture those extra ordinary moments
of your everyday life. And I believe making
your own clothes, or generally making and
crafting a personal journey. And it's not only about
finishing an item. Another genre that might be important for you is
product photography. The first thing that
always comes to mind, product on a white background. And we know this from
our online stores and also from print catalogs
and things like that. Nevertheless, those
pictures are also allowed, especially on
platforms like Etsy. You can have a
textured background. You can have some prompts
that elevates the pig to explain about
what it's all about. So this is probably made of
natural ingredients only. And that's kind of what
they wanted to tell you with those stress with grains. Of course, you can also show the product in its
natural environment, like this bike need on a wall, or even show it in action. What I want to point
out is that as long as you cite this product
photography category, you always see the logo
of the company and all the things that are
necessary to be able to sell the product because
that is what it's all about. This genre is
important to look at. If you are maker who wants to sell their own items,
doesn't matter. It's your handmade items
or the patterns for it. It's markers or Shaw curves are also your hand
dyed fibers or Yan's great genre for you to
learn from other creators. Earn money was taking photos for big brands and
things like that. Fashion photography is kind
of obvious nevertheless, let me say this too. It's not that different
to product photography, just this products
are all closes, so you will still have the white backgrounds
often enough it's a bit more extra ligand because fashion likes
to be extravagant. But the most
important thing about fashion photography is that you, as a potential buyer, once you see how
the closest fit on a body and how they actually
would fit on your body too. So you will see pictures like that where the
clauses are modeled. One thing I want to
point out here is that the model is usually
don't look into the camera. And if I can turn into arrogant
boy, facial expression. And that's because the brand
wants to say the closest. They don't want you
to connect with the model and become friends. They want you to buy
the closed sets. However, new kid on the block. And it's those fashion bloggers and influencers and will have different role inside the
fashion photography years older because they
want you to connect. They want to become
your best friend and tell you what they like to wear and earn their money with
those recommendations. So here you see pictures
that are, again, a lot like classic
lifestyle photography. They take you on
a box with city, show you their kids and their surroundings,
how they live. I believe fashion photography can be very beneficial for us may curious to learn
how to quotes, because often enough we don't know how to say it in
front of the camera, where to put our hands, all those kind of things. And those people do
that professionally, it's probably do have a look at and learn from them
how the opposite is portrayed photography
or the best-case scenario. And then you don't remember
the people were wearing. It's not about the closes. It's about the people and
whatever they where she just elevate their character and
make it a bit more authentic. It can be minimalistic portrait, I like this probably
made in the studio, but also done outside. And often enough
it's about beauty, but it's also about
character and telling a hardship
personal story. As always, if you
do this at home, tell story about
your everyday life like your partner made a
more or less funny joke, you end up in lifestyle
photography again, what I photography
is great for makers because every now and then you should on
your social media, but also on your
website, blog, whatever, whatever you do, wherever
you would like to show up. Having meet the
maker, post, again, introduce yourself, will help you to connect
with your audience. And for this, It's great
to have authentic portray. Alright, so in this
lesson you learned about the different
photography genres that are helpful and can work for you as an inspirational sites. The next lesson, I'm
going to give you some tips how to get started. Let's jump over there.
4. How To Get Started: Let's talk about
how to get started because I know it's the
hardest thing in my mind. There's three ways to
get the ball rolling. The first one is
creating a mood board. And I will show you in
a moment whether it's the second one is
pick one picture, make it your master
and really copy it. You will learn a lot. And I know there are
discussions about this cow saying if you
should approach this, but quite honestly,
as a beginner, it is important to
get stored somewhere. And I think it's a very
legit way to do it. One that gives you a bit of security that you will end
up with a good picture. There's cern we're
in is really brief one that is learning all the basics which you
will do in this class. That playing and experimenting,
see what happens. Kept your word you like
whatever you choose, whatever way you pick. They all good. Let's have a look
at a mood board. This is a mood board. It's a collection of
photos in my case, but you could also
sample colors, textures, materials, Whatever helps you to
form a visual idea. What I want you to look for is a general and wipe on
this mood board. Some pictures I more
moody and calming, and others are a bit more
inspiring or uplifting. Those kind of qualities
to look for and decide what you want
to create on your own. Try to investigate the light. What kind of a light
helps to create? What kind of atmosphere? E.g. their picture
in the middle is probably the darkest
picture of all of them. And for me that one
feels a bit moody, but also go with into a
mysterious direction. Why the one in the right corner, the lower one, stack of magazines with a coffee
mug on top of it. That's a classic moody picture. And this picture, the light is clearly coming
from the right side. You can see it in the
highlights and the shadows. Have a look at the calories. Are we talking
about neutrophils? Are there contrasts like the complimentary contrasts of the yellow and purple yarn? Or is it more harmonious like yellow and green which
are next to each other? What do you want to work with? Do you want to make
your colors pop? Or I'm looking for neutral,
soothing, atmosphere. Think about the story. For me. All of these
pictures can tell. It's Sunday, there's time
for myself, time to craft, time to get inspired, read a book, but also
some rounds or rows. However, they're
different items. Some of them are
hands on like this, the theories and the
knitting needles and others. More about this
Sunday atmosphere. The finished knit and
the reading glasses, coffee mug, the book,
things like that. I think it's also important to understand that a
system can be built by just some items
and be very minimal. Like the purple
yarn cake on them, small coffee table with
knitting needles in it and some beautiful
small flowers. Or they seems I'm more packed like the ones where the
coffee mark dried flowers, but candles and magazines
and all kinds of things. Last but not least point of all this pictures we're
looking from above some more clear fled lays some
eye as if you walk to these scenes and look
a bit on the floor. All of these scenes close up. Some have a bit of
a peekaboo effect, like the green yarn
from wall and the gang, but also the other urine with a teacup and it others
don't have that effect. But still, it feels like you
could grab that coffee mug. Alright, I hope that helps you
to understand what to look for and find the
pictures for yourself. To get inspired and decide on a visual idea for your
food you're shooting. Is the idea of a moodboard is a bit too
much for you at the moment. Don't worry, just
pick one picture you really like and
start by copying it. I hope this example shows you that your personal items will already give
it a twist to it. So don't worry too
much about it. Just get started, learn from it and the next time
it will get easier. I can promise you. Alright, I hope this
lesson gave you a good idea how to get started. Just take 11 way. Let's head over to
the next lesson where we will have a
walk around my home. But you always to you and
find a good place to shoot.
5. Find Your Magical Place: I want to say one thing at the beginning of this
lesson, and that is, in my experience, maker
is generally shy. People don't like
to be the center of the attention and have really high time to get
in front of the camera. So I would highly recommend to find a good
place at home. Star. They are shooting with the
stuff you already have. Fine. You are magical place. The one way you can feel at
ease can relax where you have your time for your
family if you have one, no husband, no
kids, no partners. Note, pads are
sometimes really cool. Darkness, just lying there. Some points. We will talk about what's necessary to get great pictures. But a few of the
most important thing is for you to feel
good in this place. Let's have worked in my fled and see what places I like to use. And give you an idea. What do you could look
for it at your own home? First of all, I want to
apologize for the bumpy ride. I wanted to do a live
walk-through our flat, but I know I have some
kind of shaky hands, so it's really bumpy. You will see me issued
in three rooms. You already know this one. It's our bedroom with my little home office
in the corner. When the sun rises, it hits this room first. Quite honestly, it's
great to work in here. But taking pictures
is a challenge. As you can see, I can only build up scenes on
the bed, does not matter. Wiggle room around it. And it's a bit too far
away from the window. I'm also super happy
was blue warm? I prefer to have a more
neutral environment. Also, this blue is
still on the K side, but why it would be better? Coming up next is our kitchen. And usually I get amazing light in here from mornings to midday. But as you can see today is a really rainy and dark day and a half to put on the lights
to shoot this movie. However, I hope this
explains to you why It's necessary to shut down those artificial lights and only shoot with natural light. One thing you really
need to accept is that you probably have
to move your furniture. I'll do the same. That table always needs to
be closer to the window. So let's move it. My personal magical place in this flat is our living room. It's where I craft and relax and where the light comes in a bit later in the day. I do have these curtains
to control the light. First layer, It's more like bit transparent or translucent. And the second one is
a whole lot thicker, is still it's white and
both are very helpful. I also love that yellow
chair and the dark wall. You probably have seen
that as a background. I definitely use this
coffee table a lot. And just like as in the kitchen, it has to move closer
to the window too. All right. Let's sum it up for you. I want you to ask these
questions yourself. First one is, where
can you relax at home? I still believe it's
very important. Which room has a big window and maybe already Cretans in
place to control the light. But obviously, you could put
those on a little later. If you now have a room in mind. Is that if neutral surrounding, put one picture here in just to give you an idea of
a worst-case scenario, would be really good if your room is more
on the neutral side because every color that surrounds your scene
will reflect on it. Last but not least, if you now have room in mind, take note when the light hits place will help you a
lot to plan your shootings. Also maybe kick out your family or whoever
is going to dystopian. So I hope you found
your magical place. Now it's time to gather
some things together. You can actually
shoot and learn how to style in an authentic way. Let's head to the next lesson.
6. Style Authentically: I believe the best way to
style authentically is to use, since you already have, they are part of your life. They are great fit for yourself. And I believe you
can see that in the pictures on top of it. I have to say if you fall
in love with photography, you will go down a rabbit hole. I can promise you at one point, whenever you go shopping, you go on a market. You will find things you want to integrate
into your photos and cow getter radar like this, we'll maybe look good. So let it grow organically. Now we are going to
look at the thing that might make sense and you
probably already have it on. Let's do it. A lot of things I
use for shooting. I believe we all have
a nice routing table. May not have this one in my kitchen and another
one in my living room. And both are great
to use as reference. So besides, you look
at what it is you have gathered together
and use surveys is nice. Nice, and don't
show any funding. That how has an
interesting texture, because the way you can do
is create a background. Suicide has to buy that. And I feel like, you know, they send these ones are
totally great, cheap ones. Okay. So go visit your store
and get some boys. And these nice cool. This one was one of the TTAC looks like
copied on one side. And this one is texture refund work
with because they are found really helpful to learn a bunch of things together
and still make it look great. Boat. You learn anyway, but everything else you are looking on every
interior design store. And other students. You probably do things like play with those who
are not like this. The flexion reading,
Fahrenheit, lossy. There isn't the only lasts. A few. You can write the short run
if you wanted to. Work. She's place. Maybe you play
like this wasn't grids. It's a really nice job. You can lay out. Yeah, Yeah, they've got different widths. And the last thing that's really nice way for me while you can brushes in bad stories. Next thing. And maybe also how you
really miss my materials and new tools as well is special. But you can also have
a schema already. Similarly, Jaron, yeah. I think there are great tools. Awesome I USE. All too is if you work with, so this is one way you
can measure yourself. But of those meals you may have for sale or if you do something else
like embroidery. Head, looks more like
this does came with it. Especially because they were Chinese name until you can add them to see or I
think they're very free. As touch and nice texture. Year will the time I
finished, I assume. But it's also nice
to talk about which is the same that are switched over the years is the block
is Sue and also new products. Still on mute. I still
work in progress. I'm forgetting to take the
next category are books. Layering can highly recommend to use though, is that your cost? Because we can see one that you exhaust you. I believe it's, in that case, super cool to do a lifestyle. Hello, nice and easy to draw. But also really isn't
working for us. It's such a pretty lives and
his client pages like this. I also really good
neutral background. I feel like knitting is
a lot about this whoa, slow living lifestyle with
that really cold areas, Eugen. I think we'd all love them. It's my favorite as
special use combination. It was easier to sue. Those that don't reflect.
Keep that in mind. Lastly, I wanted to talk
about in a little detail, but the little personal stuff. Let's say you are on holiday
or you may see ocean. You get the fancy stuff. Can tell you when you son
loves to connect zones. Maybe some houses
was like How cool? Last but not least. I think we all run slowly. They always end of this year. I miss the spring force. The spring is good. The stylish. These days. Everybody loves this. Best of all. Isn't really small petals. I think it was cold.
Maybe read in English. And whatever we do, dry them. Can use a much longer. They are dried up really
good and they keep the car. Those were white. But also he loved that
drives you this the greens and then my wages. But by now, you should have a place to
shoot and everything together. You want to catch
you in your photos. Now it's time to look
at the urine gear. Let's do it in the next lesson.
7. Get Your Gear: So in this lesson, I'm going to talk
about equipment, basically about smartphones
at some additional gear. That's very helpful and I
would sink is great for you. As another next step to
get, Let's have a look. In all honesty, I shoot all
my photos with my iPhone. So as you can see, I have the normal version
was only two lenses. The pro version
has three lenses. So there's some
things I want you to check before you
start shooting. The first one is, do you have enough power? It really sucks,
having a great flow. And then comes the pop
out window and tells you there are only whatever
your five per cent left, only with stress you out, you won't be able to take another good shot
at that moment. The other thing is make sure
you have enough data space. I can promise you
that's a problem. All professional
photographers have to. Then every seems to
be enough data space. So maybe you have
to clean up a bit, make sure there's enough left. One thing that's super
important before you start shooting is
to clean your lens. Where the smartphone in our hands all the
time in our bags. They are definitely
fingerprints on it and they make your picture is
blurry and smudging. My favorite toy for this is
a very normal micro class. You usually clean your bathroom, mirror them if they achieved, you can buy them at
every grocery store. And they are amazing. They actually clean up better than any professional stuff. I ever tried. Some additional gear I
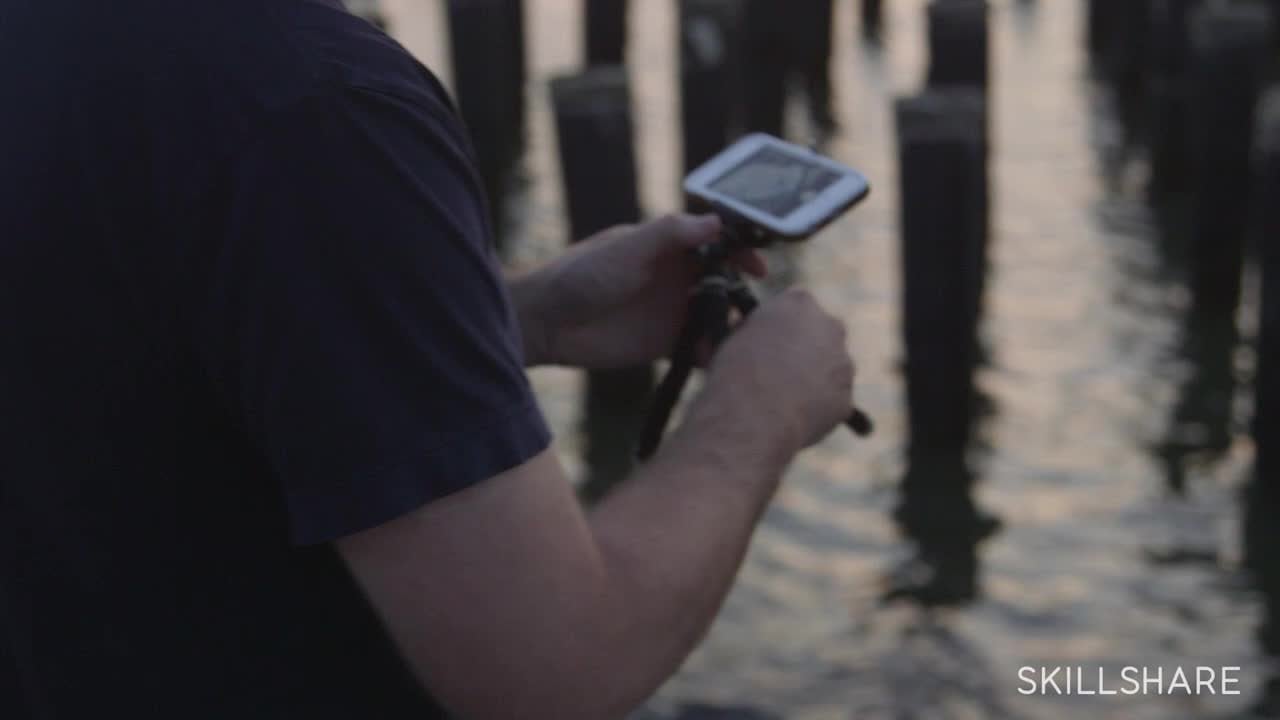
would like to recommend, first of all, tripod. And I'm going to show
you one in a minute. But be aware that
if you want to use a smartphone with
a regular tripod, you need an adapter like this. Just click US smartphone in, squid on your tripod, and then you can start shooting. Another thing. That's really great
as a remote control. It will help you to
keep your hands free. And you can also use it to shoot yourself without a timer, which is, trust
me, less trustful. So this is my favorite tripod. And here you can see
how it looks like when the adapter with
a smartphone is on. You can easily adjust
the height here. Through this. What I really love about
this tripod is less. And now you can shoot
fled lays perfectly. Not every tripod can do this. But I promise you
this one was really affordable and you don't need for shooting with a smartphone to super
inexpensive ones. The expensive ones are
for the heavy DSLRs. You can go for whatever
works in your budget. Alright, cool. Let's have a look
at the camera app. So the first thing
I want you to do is go into your settings. Click on the camera. I can honestly here you can
change all kinds of stuff. The one thing that's really
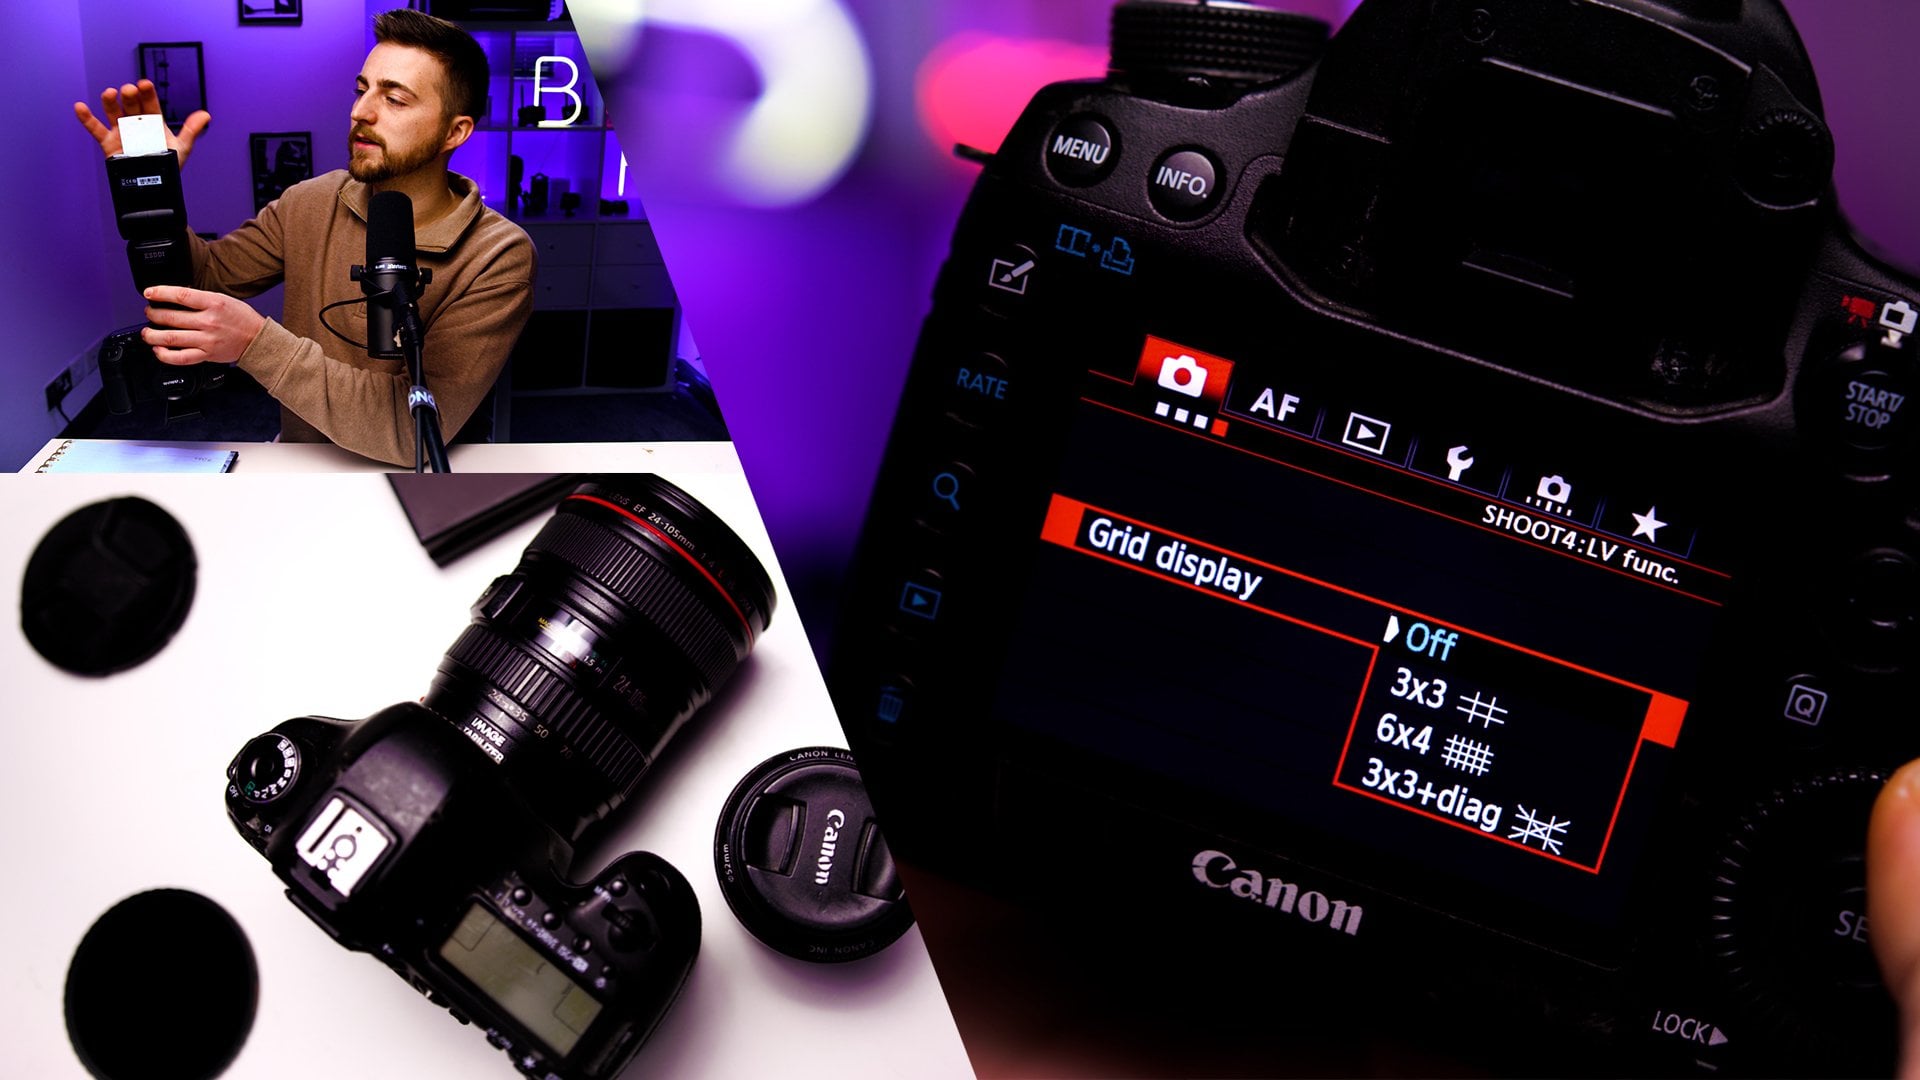
important is the Grit. Want to put on the grid. The other things, I don't
think we need much of this. I would go here in the
formats for most compatible. The high efficiency
format is pretty new and it will give you trouble if you are outside
of this Apple universe. So keep most compatible. That's actually a JPEG
and you're good to go. Forgot the other stuff, okay, It's not important. Instead, we are
now going to look at the whole camera
app, open that one. So here on top you have
some of the lichens. Quite honestly, they often
change that into a face. What I find important to you, and then you click
off the flesh. You can do that easily. And the same goes here
in the other corner. And that is true in life off life make some little
snippet videos, and we don't want to do video, we want to do photos
in this course, so only use one lens. The other 10.5 is one Enscape. So you can see the grid is on. It will help you tons to
create a decent composition. And then you have this
little X in the middle. And then one helps
you and show you if your smartphone is parallel
to the table or the floor. And it's really cool and really helpful for creating fled lays. Okay, I have this
awesome Yan cone here, so it might be nice to
photograph and help us. So you will see me
doing this later on in the compositions Lesson. Anyway. So you have here the several Modi you
can work with that video, especially video
and other things. We only want to work with photo. And maybe try the portrait mode. That can be fun. Don't work here,
but there might be, might be an
opportunity to use it. This little window shows
you the last photo you took and you can click
on it and then it opens up. And that's your shutter button. If you hold the shutter button, you can create a video. So just as we don't want to
make videos, just click once. This one, this icon is
to change the lens. So if I would click
on it, it will, would use this really
teeny tiny lens. And that one is quite often, you should never use it. Okay? Never. Alright. We have a secret toy
here, that little arrow. It gives you more opportunities. So the first one is
again the flesh. I want you to take
the flesh off. It's on auto and
you need to use it. You don't have enough light. So I'm going to put that off. It not helpful doesn't help
you to take decent photos. Then one is exposure. You can keep that on auto. It's fine. This is quite new. It's some kind of
filter already in it. Honestly. I don't
want you to use it. So this one can be
interesting for 23 years. Irregular digital mode noise. If you want to post on Instagram still in the square mode, this would be your
opportunity to have directly a look at
your finished photo. I often use this one
actually this is six into nine is suddenly a
format for reals, but also on YouTube. It's Council. It's just a video
format after all. But often enough, you
need a cover photo. And for that one,
this is really good. The next one is exposure. And here you can play with it and create a dark
and moody picture. Or also brighten it up a bit. If you feel like that
not enough daylight, you need to track the camera. I'm generally I would
recommend to keep it on zero. This one is a self timer. If you have shaky hands, this might be helpful. If you want to take
pictures from yourself. That's definitely come in handy. This one takes 3
s until it hits. And they all no one does ten. Yeah, and here are some filters. Please don't do that. Okay. All right. That's it. I hope you guys prepped. We will start learning about the basics in the next lesson. The first probably
important one is not. See you there.
8. Light: By now you have everything together to get
started with shooting. It's time to learn
about the fundamentals. And the first one that's really
truly essential is light. Photography means
drawing with light. So as it's already in the name, can guess, it's really,
it's really important. There are several
things to look at. What time of the day it is
actually where you live. Not only what day, but
although one months, what season you
are in right now, then where the light is coming
from, front side, back. So we will focus about only
the light from the sun, no artificial light at all. So let's learn about
where I knew best friend. Chances are high. You already heard some stuff around the topic of
light in photography. One is only shoot
with natural light, and I'm totally, completely
in sync with that one. I want you to shoot only during the day
when the sun is up and use our beautiful natural
light to capture your mix. However, that light changes
quite a lot during the day, during the seasons, and
so on and so forth. So what I want you to do
is really dig deep into it and explore what helps
us and or doesn't. The first step you
probably heard is shoot during the golden hour. And during that time of the day, our world gets filled up with this beautiful warm light and lifts up our landscapes and makes us people look wonderful, but it's also very yellow. And if you look at the
calories in this picture, you might get an
idea what happens if you shoot your own
materials you work with, they probably will get
a bit too yellowish. And I know that's the thing
that's really important for you to stay true to the colors, this picture, even from the
middle leader in the day. I think this is sundown
where the backlight, we see this person as a super fun,
adventurous silhouette. There's no texture, no detail. You've no idea what the jacket or the head
there's woman is wearing. I guess it's a woman white. Next point made off. And of course we want
to show that, right? We want to show what
we're working with. This is cloudy, rainy, even miss the day. Another one you might have heard about how
do you feel about those moments where the mist is actually rolling over the trees? There's not much left of the Beautiful Levy
textures, right? What about the color? I think the green is
very desaturated. So on a day like that, your color is
probably won't pop. The other thing that happens is that the light is so soft, then you don't get much
highlights, not much shadows. And that also means
not much texture. Have a look at her face. There's not one pore or a
wrinkle inside and yes, she's young, she's fresh, but the light really helps
to make him look like a bad. Now, look at oh, it's wetter, same, right? And you want to see
texture on your mix. In all honesty, this picture has another thing going on and
that is the low aperture. And this book effect
that makes her just only her faith in hyperfocus and everything else is
blurred quite a bit. Alright, what do we want? Well, I'll just show
our textures are handmade textures and we want
to stay true to the colors. How can we do this? Let's dig into it. So the
first thing I want you to get into your mind is that
your location matters. Where you live in the world, changes a few
things drastically. It doesn't matter if you live in the northern
hemisphere and get this northern lights
or if you live in the desert next to the equator. And I know we all don't live
in this harsh environments. So let's, let me talk about
my city and my location. You can go along and
think about your own. Okay, so I live in Cologne. It's one of the big
cities in Germany. Germany is in the
northern part of Europe. We get four seasons. Yeah, So the difference between winter and
summer is quite a lot. So in summer or sunrises and son downs
and not only an hour, they take hours, lot of
time to take pictures. Our days are
generally very long. Rnas are very short. In winter that changes
up completely, I believe on the darkest days, the sun rises around nine or maybe even 10:00 in the morning and it goes down around three
or four in the afternoon. So there are not many hours
in the day to take a picture. And on top of it, those days tend to be gray. And the light is
not very bright. Quite a challenge to get good photos here in
winter, alright.
9. Perspective: In this lesson, we're going
to talk about perspective. The best angles for
shooting your mic. A little spoiler alert. I think that you grade ones. And I quite honestly
struggle a bit with myself. So let's have a
look at that one. The first perspective I want to show you is
a worm's eye view. As very easy to understand, just imagine you are a warm, you lie on the pavement, you'll look high
up into the sky. That's the point of view. We also call this perspective
child's perspective because you know the kid, you experience a world from a lower point of view and look up to your parents and look
up to everything else too. I want you to keep this point
of view in mind because it also explains to you the feelings this
perspective can evoke. One is the feeling of wonder and the other
one is a people appear cool but also like experts and also a
bit aloof sometimes. So far as makers, well, you might have a pattern lounge and want to evoke
those feelings. Can be nice, can be fun. Generally, I feel like this is not a great perspective for us. The second perspective is
called bird's eye view. And of course, the
total opposite. You fly above the
world and look down. As a human being, you can imagine to stand high up on a building and look
down on your setting. And then you get this feeling
of plan, but also strategy. It's kind of neutral,
maybe even cool. But also if you look
into the distance, It's still bird's eye view because you are
above the things. If you don't look straight down, you will get this
torsion into your lines. For us make is fled
lays or grade. I think we all love them. They're easy to shoot. And you don't get any
distortions into your mix. I think that's one of my
favorite things about it. And of course, there's
a variant that can work well for in
lifestyle photography. Last but not least, comes the eye level
of prospective. And we'd say that's
a perspective, how we experience our
world in general, and how people feel authentic
and approachable to us. Have again, a look
at the lines here. You get this depths. But still all lines are
very clear and straight. There's no distortion in this picture depending on
how you take the picture. It can also look very flat. This perspective is perfect
for us to model our makes. Doesn't matter if it's a small soirees or if you want
to show off your garments. Oh, your phone,
your favorite for interviews with, in this lesson. The next one, we're going to
have a look at composition.
10. Composition: In this lesson, I'm
going to teach you about compositions that will help you to arrange your mix
and an appealing way. Let's that playing. First of all, let's turn on
our grid as it will help us immensely to understand
this composition lesson. First composition you can do is center ui star right
in the middle. We humans really love it. Do you have stuff in the middle? All empty space is
the same space. The other one is
role of circuits. And I hope this one makes you understand why you
should turn on the grid. So we divide our picture
frame into nine boxes, are, and then draw lines. At the intersections
of those lines, we place our stereotypes and off-center composition
helps you to gain and natural
balance and you can play it at any of those
four intersections. Okay, Next one is have one-star. Keep it clear and simple. And yes, you can layer that
one has additional items, but really just tell
the story of one. The other one is
the magic of three. By the way, our brain
loves odd number is, you could also do
this with five items. I want to show you is
you still have one star, could put that at
the intersections. And it gives your
composition a great flow, which also brings
us to another one. Help the eyes to
explore your picture. And this case, it's even
great to have a fourth one. The small one. Yes,
that is an S curve. Now we have another classic
composition. See that flow. Amazing, right? Really nice composition. As we are already talking
about letter compositions. Here's another one. This is a C curve compensation, where you leave
negative space around your item and your item is
kind of cutoff at one edge. And yes, of course you can
play with the item again. I'm not sure if this is helpful. Again, talking about
the negative space, because this space also
gives you the opportunity to add graphics on your
picture later on. Remember you're often have
something to tell, right? Okay. Next one, fill the frame. This is great to show kind
of ingredients like yeah, and it's more like a
micro composition way. A lot of items that are
accountants same and make sure you cut those
items at the edges. That's very important
to get this grid look. Last but not least, let me say there's
rules are just rules. They are meant to be
broken at one time. I think the most
important part for you is actually to play and maybe combine some of those and find your own style,
your own composition. So how did you like the less than I know
it's a bit special. It's quite a lot to take in. I hope you had fun with it. And on the next one we're getting a bit more practical and it might be great
to do less than that called, what do you do? If it looks too boring? Let's take into it.
11. Troubleshooting: Too Boring: May I introduce the star
of this lesson? This head? Let's pretend it's
not mine, it's yours. And you want to take
a picture of it. However, just plain
white background, it looks very boring. This lesson, we will
add to the drummer. I will show you a
step-by-step what you can do. It looks too boring.
Let's do it. All right, let's start
with the white background. And as promised,
it's very boring. That's not do that. Instead, at the background, giving a sense of
place and atmosphere. However, I don't like the yellow would want to try this one. My DIY background. That's the concrete side. I think that's very
nice, super harmonious. But today, I want
to work with color. There's no better background than black to make
your colors pop. So that's nice. But I feel like
we could do more. Sort a bit boring. So the free thing you
can do is layer up. It will especially give you
a flat lays some depths. And I get the chance
with this magazines and books to add in some
color contrasts. In this case, I'm going
for the big, okay? I'm going to work in the complimentary
calories to my green hat. And yet it always takes
a bit of time until everything is where
it looks good. So next tip is add
some sprinkles. They will give you more
texture and visual interests. And you can use this
little flowers. I really like them. But you could also
use stitch mark is, or even salt and
pepper if you want to. Just have those
teeny tiny little add-ons to make it look good. And I feel like this
already looks good. However, with those flowers, you can do even more. You can add a foreground. Blurry foreground gives
us peekaboo effect. Add more depth with it, and even frame using, I think that's plain lovely. Last but not least, we have a very central
hobby and it's personal. So do add those, give it a personal touch and show you people how much you love your
texture if you made. So one more. Why not tell a story with it? Bring your tools and
add some action. And how people, yeah, I'm ready. It's done. But I still have to
do in those threats. I think we all yeah,
but it's nice. It's nice. Everybody will react
to a photo like this telling you is
I love it or not, and it will be a
really nice picture. So I took the liberty to take
some pictures without you, just to show you what you can
do with a scene like this. And I think they turn out great. I also did edit them. Okay. Those are not straight
out off the iPhone. Yeah. All right. I hope you are
inspired and have a good idea. What did you next time? You're wondering,
what did you do? It looks too boring. On the next lesson
we're going to do is upset because you may get into the other trouble of putting together a
little bit to match. It looks a bit too chaotic and
you don't know what to do. So we're going to talk
about this on the next one.
12. Troubleshooting: Too Chaotic: So this lesson is all
about what did you wear? It looks too chaotic. Let's imagine. You can find the
perfect place in your lightest, amazing,
beautiful, perfect. You gather all the
stuff together to tell the epic story of your
Sunday and it's all in their composition is kind
of you tried to get it. Alright, rule
officers and whatnot. Still. It feels like it's a
Sunday dinner mess and not something that's
worth capturing a picture. I'm looking for it. You talk about what
might have gone wrong. Let's do it. All right, Here we go is I'll add pixie. The first thing I
want to say is, I really hate candles. Next 2 min. So this one has to go first. And now a lot of people like having this kind of coziness. Men. Now let me nervous
first things first, let's check our story. Is it about this green
hat and finishing it up? Or is it about the white unit that's still in the
making and not, I would say, skips
the green hat, let's say with white one here. The next thing I
always find a bit odd is that people can read books
and look into magazines. And that's kind of okay. But also read enrollment
in some kind of, you know, what
every story it is. And listen to audiobooks
that's released yet. Let's just keep
going with knitting, knitting books and
knitting magazines. Fine. Let's stay with
those. That's really enough for his name, right? I mean, I do understand that if you are
still in the making, of course you thinking
about should I count off close mine using with this? And it'll be really beautiful. Buttons or maybe with
something like this. But honestly,
finish it up first. Let's talk about
one thing is this. Garamond is not admitted
with this young. Make sure it's not art because we can make
us, we're not stupid. We know that these two
didn't fit together. You don't want to
talk about a new cast on you want to
finish this first? Okay. It's kind of
getting better. Riots. I'm not sure we need the flow
ECM them later on again. And now we are I feel like
we're kind of getting better. But what I also want to say
is this is kind of one. This is kind of
one. This is one. But also the book
Staples, also one. So you have kind of forcings. What do we like a
bit more is three. I would like to try and get rid of the
books table for a moment. Let's see what happens. In this case. We keep this really fun. I like it. Maybe change it up a bit. You might want to
add ligase again. Now it's kind of again, the boring riot could
use a bit of spruce up. So where are you? Good? Are we good? I think we're good. Let's take some pictures. So I hope you had a whole
lot of fun in this lesson. I know I did. It
was quite a party. On the next lesson, I want to talk about wood. What do check the last
sentence before taking a shot.
13. Take The Shot: So this lesson is a bit
like last minute checklist. I want to show you what to check and what did you shortly
before you take your shots. Let's do it. First of all, clean
up your scene. You're closes. Also the items you
want to photograph. If your hands are
in the pictures, your finger on yourself. And last but not least,
your camera lens. Honestly, I'm not a clean
freak in my real life, but totally sucks if you
take a great picture. But then you have to edit. I'm kind of stuff out and think I even really hard to edit. So don't do that to yourself. Clean up properly. You can see quite a lot of
things lying around here. And what I want to do
during this lesson is to show you that
with a little tweaks, you can change up, set-up quite a lot and give it a different
characteristics. Alright, let's continue with our checklist and
talk about light. For this question is, did you click out all of
your artificial lights? Is the lighter out? How about the bedside lamp? Remember, we don't want to have that ugly yellow light,
it's not helpful. Next question is, is
Useem evenly lit? Quite honestly, it's already
getting a bit too dark here. If I would like to have
this more evenly lit, I would need to put up a white foreign board
on the right side. Look at your shadows are your darkest part
in your picture. You can see here, this black wooden board
will give me trouble. It's super dark and
definitely a bit washed out. Now look at your lightest
points and the picture. Are your highlights washed out? Do you have inflammation in
your very right moments? I don't have to worry
about that part here because the
light is really dark. Special tip for you. If you want to have
coffee infinitely thin mixture where the
composition is alright, and then brew it in
the last minute, it will start looking
disgusting very soon. Always look through your lens, or in our case, check with the camera
app on your screen. If everything is alright, if your composition is what
you wanted it to be, good, it looks very different
than when you just experienced the scene
with your normal life. So this first conversation with nice black and whites
in very neutral, I feel a bit like art
directors finest. And I think before I explain to you the
camera up even more, I would like to have a
little change in scene. Let's do it. I want to change
too much this time, but go for a more natural look and get rid of the lake
when Boyd for sure. So we're going to work with the complimentary
contrast, red and green. Definitely one has some
stylish items like the kinfolk magazine
and the IQR loved us. And we could also
try peekaboo effect. Let's see how that turns out. This is how you do
peekaboo effect. You hold something like flowers. I think flowers with more petals are
actually the easiest. Very close to your lens. You want to have those NOT
IN for queries but blurry. Now click on your screen
where you want the camera to focus on and hold a little
bit longer so it can lock in. We have that. It's very easy to
take a decent shot. Alright, let's change up again. This time I want to go
for an autumn feeling at some little sprinkles in it
and stuff like an acorn. We will also try to do
peekaboo effect with smaller petals to
show you that it's really easier than
was a big, nice. Remember to forgo with
before you take a shot. Just click with your finger on the screen when you want
to have the four groups, you will see this yellow square. And that's it. You don't have to lock
it in every time. Check if everything important is still in view with
this peekaboo effect, we sometimes tend to overlay things we
actually wanted to show. So be mindful about that one. I wouldn't like to give you US Navy advice to even
count your smaller ones. It somehow works wonders. Alright, change in C this
time from autumn to spring. A little mindset reminder
here for you guys. Honestly, it often
takes a while and you really need to be patient
with yourself and your theme. Just trust. With time. You're getting better. You're getting
faster. A good day. If they're bad days, it's okay. It's a process. For the last scene, I wanted to try something
completely different. And at some seashells, I go for maritime feeling. Now it's your turn. Build a theme and
start shooting. Remember to work your scene from different angles
and perspectives. I think you've
seen me here doing this all the time and have fun. Alright, now, it's time
for you to take your shot. We really talked about
everything you need to know. Why don't you take a little
break here and come back with your final favorite
pictures on the next lesson. Because then we're
going to talk about the final touch, editing.
14. Edit To Make Textures Pop: In this last lesson, I want to teach
you about editing, the final touch for the
photography progress. And I feel like you
really shouldn't skip it. It gives you the possibility
to get your pictures from 0 to a lot of great classes
on Skillshare for editing. I personally have been
missing as a maker is somebody who teaches me
how to make the textures pop. And that's what we will
focus on in this lesson. I do all my edits in the Adobe Lightroom mobile
app on my iPhone. It's a free app if you have the Creative Cloud
or pay for it. In other words, you will get
some additional features, but quite honestly is a free
poets are already awesome, so get that app. So here are my three tips on how to make your textures pop. When you open up the app, hits a little light and then
scroll down to the shadows. Now watch what happens
with a dark net in the background while I'm
playing with a slider. I highly recommend starting here and trying this edit first. Next up is an effect
called textures. So pretty obvious that
one should help us. Unless it's really cool. Just be careful that you don't slide it up
too much because it tends to over crisp
at a certain point. Last one hit on the detail I can and get into the classic sharpening
tool, sharp them up. And now I want you to slide the Masking slider and
also hit on your screen. This will give you this black
and white view and much easier to adjust and
see that you only shop map the texture
and the outer lines. Round of applause for yourself. That's really cool. I have some final call to actions for you on the next one.
15. Final CTA: Innovated. I'm
super proud of you. Thank you for
watching this class. By now, I really hope you feel inspired and confident
to shoot your own mics. Please add a project
to the gallery. Fill on your favorite photos, talk a bit about it. What went well, what
would you like to change maybe next time? You have concrete questions, please don't be shy to ask away. I'm super happy to help. Well, I will definitely
give you some feedback. I would also like to ask
you to cheer each other on, don't forget, this is
the creative community. It's where we can grow
and help each other out. Last but not least, I would really appreciate some feedback and
comments on this class. And I hope we chip.
 Maren Odenthal, Knitwear Designer & Photography Teacher