Transcripts
1. Trailer: A solo artists and
entrepreneurs. We have to wear all the
hats now online businesses. And it can sometimes
feel like we just don't have enough
pairs of hands. Social media presence is
everything these days. And it's a whole job in itself. And keeping up with
content creation plus, well, actually making up,
It's a bit of a juggle. But by integrating
the two into artists workflow and having
handy templates, setup and ready to go. It doesn't have to be
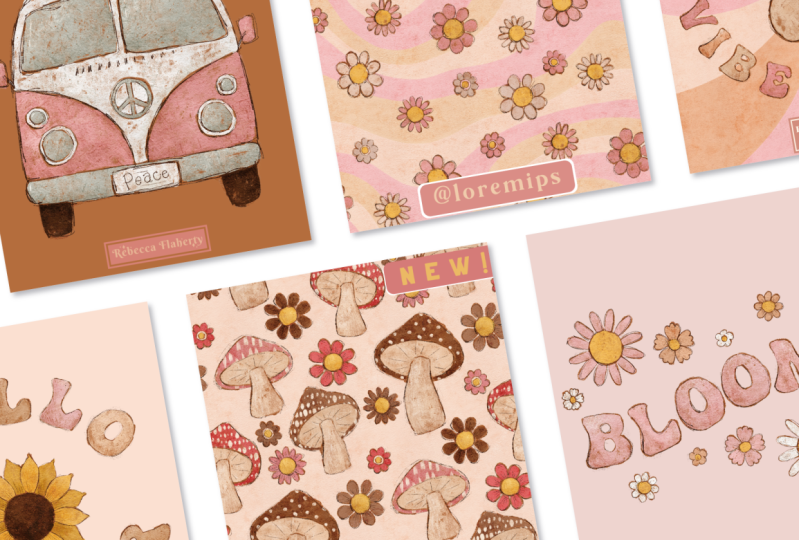
a whole other job. I'm Becky flighty, UK Illustrator on my speciality is Surface Pattern Design. I've been working as
a full-time artist, running my own online
business since 2015. And in that time
I've been constantly refining my crisis
is to come up with my own methods and shortcuts be creating patterns
and illustrations. I used to spend a
whole day every month batch creating my
social media posts. I soon realized this way of working wasn't
really serving well. Although I'm a fan
of batch working, I was wasting more time
than I was saving by having to revisit old
patterns and illustrations. But I had already finished. I now incorporate creating Instagram posts right
into my workflow. And it's one of
the first things I do after I create a new design. You're ready to go
templates setup. I can quickly paste
my new work into it, save opposed to my
social media folder, and then forget
all about it until I'm putting together
my next set of posts. No more trawling through
old files to find that one file I haven't
shared on Instagram yet. In this class, I will
teach you how to set up your own Instagram templates in both Photoshop and Illustrator. Whichever you use for
creating your work, you have templates setup to easily drag and drop
your work into. The templates can be easily customized to fit other
social media platforms. We'll look at how to set up a simple brand logo or
watermark on your work, but hide it in your
main page grid, as well as easily color
match it to fit each post. This is a beginner level class, but a little background
knowledge of how to use either Photoshop or
Illustrator is recommended. By the end of this class, you'll be able to set up your own time-saving
templates for social media and create
posts in seconds, ready to file away
for later use. And never have to be
scrambling around for something to
post, ever again. Excited to get started. Let's go.
2. Overview & Class Project 1: Welcome to the class. I thought we could start by explaining how I
integrate making social media posts into my workflow and how
it saves me time. Before he integrated
it into my workflow, I would set aside a
whole day every month or so to batch create
social media content. It would involve going through all my old files
from last month, pulling patterns back into Photoshop or Illustrator to then make images with and then
export them in one big batch. And although I am a
fan of batch working, this wasn't really a
time-saving method because I was
spending so much time going trolling through old files I had done and dusted
and put to bed. I made it my mission
to integrate social media image production
into my pattern workflow. So at the very moment when I had finished making a pattern, I would quickly use it to make a social media post
with my template, put it away for a later day in a social media folder with
everything in one place. And it was all there
ready for when I needed it at a later date. So I'll show you now what
that would look like in practice and just how
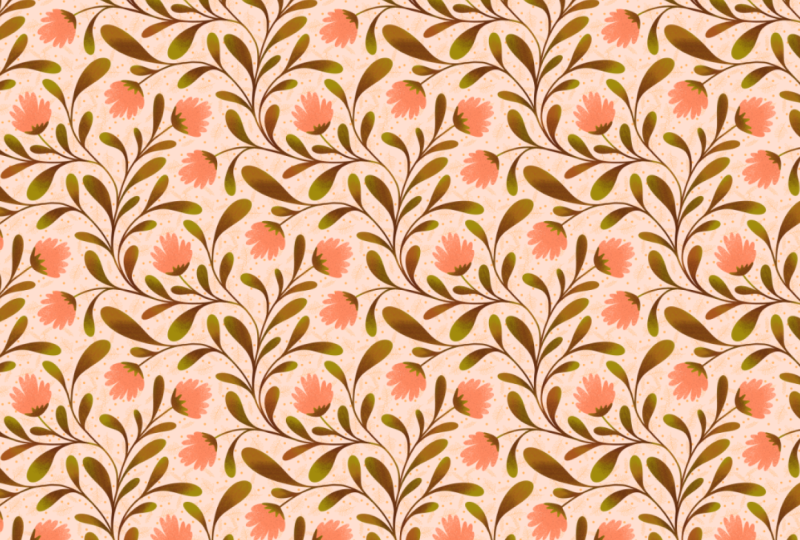
quick it is to do this. So I have this pattern here, and let's say I've just
finished creating this pattern. I've tested it, it
works properly. I've made all my assets
for society six, etc, and saved a copy for
sending out to clients. So now I'm done
with this pattern, but before I save
it and archive it, I'm going to add it to my
pattern swatches up here. I'm gonna go over here and
open my Instagram template. Have a pattern layer setup here. So I can quickly add this
pattern to my template. Now, these colors
don't really go. So I can just double-click on this and select a color
from the image to match it. Then double-click on
this one for the text and pick out a color
for the text as well. Then I can quickly press
Command E to Export. And we'll call this
one colorful clouds. And I'm going to save that over here in my social media folder. Press Enter, and that's done. I now have a social
media post that took me like 20 s to do. So this is something
I integrate into every pattern and
every illustration. Once I finished
it, I quickly make a social media post and
then it's done, dusted, saved away in that
social media folder from when I'm putting
all my content together. So now hopefully
you're convinced that this method will save
you a lot of time. Your class project is to
create your own template for any social media
platform that you use at your branding
or a watermark. And then drop a piece of your
finished artwork into it. Save it as a low-res
JPEG or PNG, and then share it with us
in the project gallery. If you leave a note of
your Instagram handle, I can share it to my stories, have fun, and get creative
with those watermark designs. I can't wait to see
what you come up with. We'll get started
in the next lesson and I'll show you how I set up my template in Photoshop for adding my raster image patterns. And then I'll also
quickly show you how you can create a template
in Illustrator. If you're a
vector-based artists. Because you don't want to
be wasting time dragging patterns and templates from
one software into another. I do recommend watching
the Photoshop lesson, even if you only
work in Illustrator. As that's where
I'll be explaining the process and reasoning behind these things which apply to
both pieces of software. If you only watch the
illustrator video, then you'd be missing out on the main content of the class.
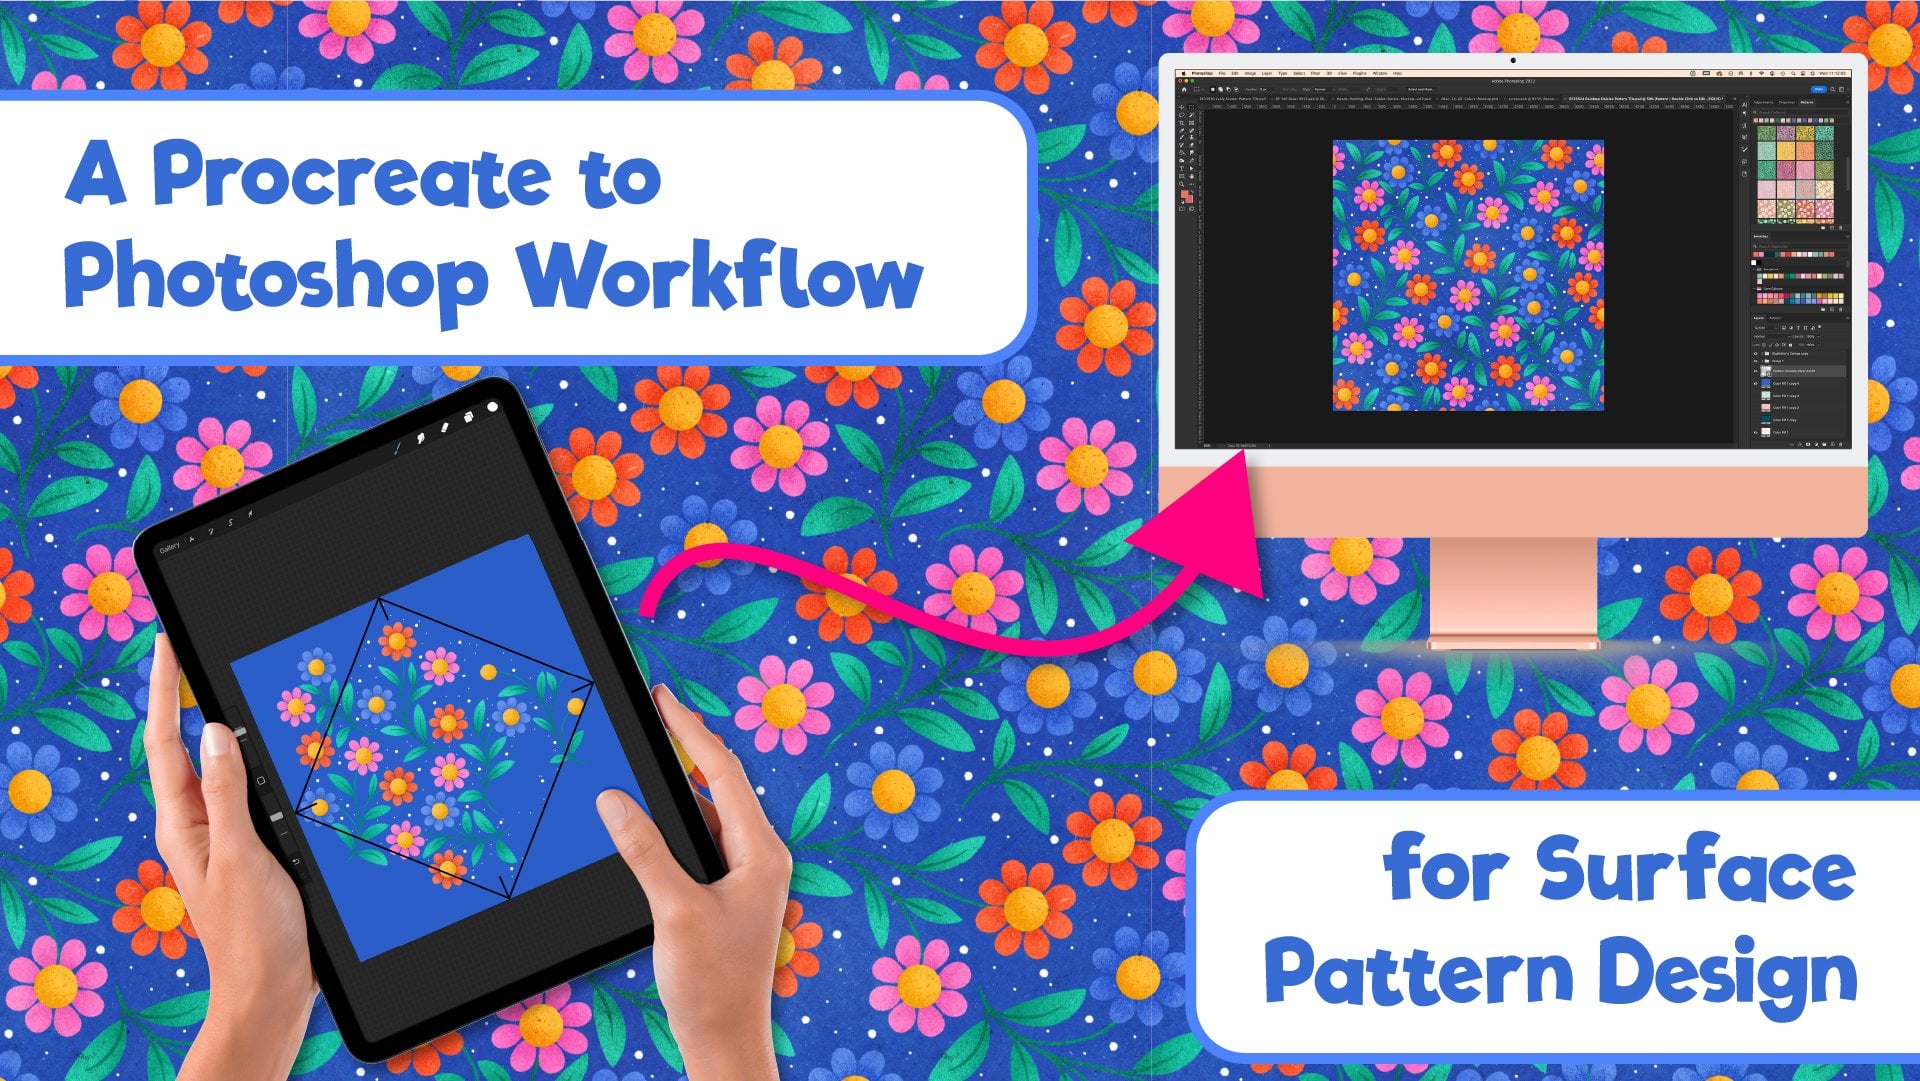
3. Creating a Template: So let's get started making our first template in Photoshop. We're going to start by
creating a new file. At the moment, the
recommended width for an Instagram post
is 1080 pixels. I suggest Googling
this for whatever the current sizes because
they are constantly changing. And what is relevant this year may not be
relevant next year. But today we'll go
with 1080 pixels. So let's put 1080 in
here and the white-box. Then for the height, I'm just going to
leave this as it is, creating a vertical image here
rather than a square one. And the reason I like to use a vertical image is two-fold. One, I like to take
up more space on people's feed than I would
with just a square image. But also I get to put my
branding and logo on it, but then have it
hidden on my grid. So when people look at
my grid as an overall, they're just seeing the images. And I can hide the branding
outside of that square crop. So I'm going to put
the width at 10:18. As I said, I'm just going to
leave the height as it is. I'm going to change the
orientation to vertical. And I know the height
that I need it to be, which is 1350 pixels. And that's a four to five ratio, which is the format
that you're supposed to use for Instagram at the moment, if you're struggling
with ratios and pixels and working
out dimensions, don't worry, as long
as you know the width, we can let Photoshop
figure out the height. So just leave this number as something bigger
than your width. The resolution, we want
to be 72 pixels per inch. I want it to be RGB
because it's for screens and this profile
is what I'll leave it as. So at this point, I'm
going to click on Create and create my document. Now, obviously, this is not the ratio we want for Instagram, but we can easily
figure that out by using the crop tool over here. I'm going to click
on this and you'll see here you have some presets. I think these ones might
come with Photoshop and then these ones down here are ones that I've added in myself. But either way, you
can click on ratio. And then up here you can enter in the ratio that you
would like it to be. E.g. if I wanted, I can have it two to five. That would be very
tall like this. So currently, as I said, the recommended ratio for a vertical image for
Instagram is four to five. However, Instagram are always
changing things uneven. Just recently I think
they announced that their training support
for 916 images, but for now it's four to five. So as I said, have a Google and see what the most recent
recommendation is. So once you've set
your ratio up here, you can press enter and then
enter again to set that. And then if I press
Command Option I, that will give me my image size. And we can see we
have 1080 by 13 50. So that's how you would work
out the ratio if you didn't know in advance the pixel
dimensions that you needed. Let's press V for our move tool, and then we'll zoom in so that we can see the full screen. So the first thing that
I like to do is have a background color that
I can easily change. So I'm going to go down here to this little circle icon and click on that and
choose a solid color fill. So I'm just going
to leave it with that color for now
and click on. Okay. And now that has put this
color fill layer that we can change the color of easily
with our swatches like this. And now I can go and delete
this layer underneath. So the next thing
that I like to do is to add some guidelines in. You need to make sure that
you have Snap turned on, but your rulers are
showing around the edge. You can enable those here. So I'm going to use the
rectangular marquee tool and just click anywhere on this left side
of the document. And holding down shift, drag out a square box. And then we're going
to click inside the square and just move it up or down until you get it to snap into the middle of
the document like that, and then you can release. And that means
that the square is nice centered in our document. And then from the top here, I'm going to drag
down a guide line and snap it to the
top of that square. And then drag another one down and snap that onto the bottom. And then press Command
D to de-select. Now the reason I like
these guidelines is although I like to
post a vertical image, they don't show this way
in my Instagram grid. If you're looking
at my profile page, instagram crops everything
to a central square. So if I was posting something
that had information that I want it to be easily
viewable from that grid view. I need to make sure everything is inside these guidelines. Another reason that
I like to have these guidelines is because when I put my watermark
onto the post, I will not to be visible
when viewed in my feed, but I want it to be hidden
when it's on my grid. So you can see just the images. So I know that I can put
anything down here below this guideline or up here
above this glide line, and that will be hidden
in my grid view. I'm also going to
make a guideline at the bottom here for
snapping by watermark to I'm just going to just
drag around the outside of the document and then snap a guideline down
at the bottom there. If you wanted your
watermark up at the top, then you could also
put one up there. So I'm gonna hit
Command D to de-select. Then make my watermark. I'm going to use the
rectangle tool over here. So I'm just going to
click on that over there. It will snap to these
two guidelines. And I'm going to drag a
rectangle about that size. It doesn't have to be any
specific measurement. So you can just release that when you have it in
the right place. I think I want mine to
have a rounded edge. So I'm going to click
and drag the corners in here as far as they'll go. And then once I'm happy with the sizing and
placement with that, if you wanted to make
it longer or shorter, you can you can drag to
the left and the right. Let's make that a little bigger. And then you can press
Enter to set that. Because we have the same color as the background selected, you can't actually see anything. But if I click on
the rectangle here, and then I go to my swatches, I can choose a color on that
rectangle is neither color. I'm going to just zoom in
and then edit this slightly. I think I want to make it
just a smidge smaller than this guideline so that I can be sure that there's no chance
of this being visible. So I'm going to press Command T, then just drag this down ever so slightly and let go of that. And then press
Enter to set that. And then let's go back
to a full screen view. So now we want to
add a text layer with our name or
Instagram handle. So I'm going to add a new layer down here
above this rectangle. And I'm going to choose
a different color over here because I want it to be visible over the top of this. So let's go for this
brown color. Then. I'm going to use the text tool. The shortcut for that is tea. Then we're just going
to click down here. And I think I'm just going
to leave it and pretend my business name is Lorem Ipsum. So then we'll press Command T, and then we can just
drag that across. And then if we zoom in, we can increase the
size of this to fill this shape nicely. There we go. So once you're happy with the positioning of
that transform, you can press return to
set the transformation. And then we'll go back
to our full-screen view. There we go. We've got our post with our
watermark over the top. And now we can easily change the colors of these by clicking onto a layer and then choosing
a different color for it. And on the text, if we've got that highlighted, we can choose a different
color for that too. So that is our basic
document templates setup. The next thing to do is add the layers that we can
apply our patterns too. So I'm going to come above
this color fill layer, and I'm going to
create a new layer. I'm gonna come up here
to my patterns panel. And I'm going to create a
pattern fill layer on top. You'll find that when you
paste patterns into here, because this image
is really small and your patterns are likely
300 pixels per inch, there will be huge in here. You'll need to change
the scale of them by double-clicking on
this little thumbnail. And then you can change the percentage to
something smaller. You can choose a different
size for each image depending on what works
best for each post. You may want something
on a small scale or you may want something
on a larger scale. I'm just going to
leave this set at 20% for now and press Enter. So that is how you would drop a pattern into
your template. When you're ready to save, you can use the shortcut
for Quick Export. If you don't have
Quick Export as PNG, yours might say Quick
Export as JPEG. You can change that
up here by going to Photoshop preferences export. And then you can change what
the Quick Export format is. Here. I always choose PNG because
it's a lossless format. Jpeg is also fine
for social media. To save, the quickest
way is to press Command E for that shortcut. And then I have a social media folder setup where anytime I make a pattern, I can quickly make this post and then dump it into
there for using later. So I'll just call this
flowers. Press Enter. And now that is done and
saved for later use. So that's how I would use
this template to quickly bring in a pattern and
export for social media. So once you're at this stage, you can save your document
and press Command S. And I will save this in
my social media folder, and I'll call this one
Instagram template. Then anytime that I
make a new pattern, I can quickly go and
open this document. I've got this pattern
layer ready and set up. I can drop whichever pattern I've been working on into there. And then quickly export a
copy of that pattern into my social media folder for when I need it
at a later date. Then I'm not doubling back
trying to make a load of new images of files that I've already done an
archived ages ago. Now I'll show you
how I were being a print design into this one. Let's hide this pattern
layer down here. Then we've got this
background layer behind. Let's open up an illustration that I've been
working on recently. In this document. I've
got a color fill layer. And then I have my illustration
groups together here. And I'm going to
copy this group. And then I'm gonna go over here into my Instagram template. I'm going to press
Command Shift V, which pastes it in place. That will paste it
in the middle of the document rather
than off to the side. So we're going to
press Command Shift V. I don't need all the layers
intact for this post. So I'm going to
merge this group by right-clicking and
choosing Merge Group. Night. The same as importing
a pattern here. If you're bringing a high
res image into this file, is going to be too big. So press Command T and then
go up here to your width box. Make sure you've got
image constraint enabled. Then I'm going to press
the Shift key and down until it's
almost in the screen. And then just use the down arrow to bring it within
these guidelines here. It's slightly easier
with this one because it is mostly
a square image. But if you had a portrait image, you want to make sure
that most of the image was within these
Squire Guidelines. When you're happy with
the positioning of that, you can press Enter twice
to set that transformation. For this post, I might want to change the
background color. So I'm going to
click on my color fill layer and go
to my swatches. And then I can choose
a different color and have a click around
and see what looks best. I think probably I'm
just going to leave it the same color it was in
this illustration over here. And another thing I like to
do is change the color of my logo or watermark to match the colors of the illustration. So I'm going to double-click
on this rectangle here. And you can use the
eyedropper tool to pull colors from the image. So I think I'm going to go for a yellow color for
the background. Now for the text, if we
double-click on this layer, it's actually just going to make the text editable like this. So let's press Escape
to come off that. The way I actually like to
change the color of my text is to create a new color
fill layer above it. Choose a solid color fill. But we'll just leave
it at this plain color for now and click Okay. And then if you hold down the Option key and hover
between these two layers, that will clip this layer to what's below it on this layer. And now we can
double-click on this and use the eyedropper to pull
colors from the image. So if we wanted this
light pink color or one of these nice whites from the daisies like
this. We can do that. I think I'm probably
just going to go for, Let's have a nice brown
color for this one. And then click Okay,
when you're done, then that is how I get my
posts to look color matched. Then, as before, we
can press Command E to quickly export this to
our social media folder. And we can call this
one hippie thoughts. And again, that is now quickly saved and put away for later. And it's so much
easier to do that when you already have
the document open. So that is basically
how I create my social media posts using
my Photoshop template. If you're not Photoshop
artist and you use Illustrator to
make all your artwork. I'm going to show you
how to do that in Illustrator in the next video.
4. Bonus: Illustrator Template: I'm now going to
show you how to use those same principles to create a template in Illustrator, which will suit you
better if you make a vector art and
vector patterns. We're going to create a
new file, same as before. And this time we're creating an art board instead
of a canvas. I'll just change the
units to pixels. And I'm going to use the
dimensions from before which were 1080 pixels by 13, 50. And then we'll change the raster effects to
72 pixels per inch. And then we can click on Create. So the same as we
did in Photoshop. I'm going to start by
creating a background layer. I'm going to use
the rectangle tool. And I'm just going to
drag out a rectangle which is the same
size as the artboard. Now this has made me
a white rectangle with a black stroke on it. So I'm going to press X to
switch to the stroke color, and then I can take
out that stroke. So we just have a
white rectangle that has just a fill on it. I'm going to use any color
for now for the background. To set up the guidelines
in Illustrator, I'm going to use the rectangle
tool to create a square. And I'm gonna make
it 1080 by 1080. And then let's choose a different color for this
so we can easily see it. Then I'm going to center this on my art board and then
leave it selected. And then I want
to go up to View, and I want to show rulers here. And then same as in Photoshop. I'm going to drag guidelines down and snap them to
the edges of this box. And then we can click
on that and delete it. And now we have these in place. I'm going to press Command
zero for full screen. So the next job is to
create a watermark. I think for this
one, I'm going to choose something
a little bit more intricate and use a
flag kind of shape. So I'm going to use
the rectangle tool to drag out a rectangle
about that sort of size. And then I'm going to
make a square shape by clicking and dragging and
holding down the Shift key. Then I'm going to hover the
cursor in the corner up here. And then holding down Shift, I'm going to rotate it
45 degrees like this. Then I'm going to
select this object as well by holding down Shift
and clicking onto it. Then I'm going to align
them centrally like this. Then when I select them both, you can see we've got our
flagship coming in there. So I'm gonna go to
the Pathfinder tool and click on Divide. This is now a group. So I can double-click onto
this and get into the group. And then just delete
these excess parts there. And then we're left with
this nice flat shape, which I can then easily snap to the edge of the
document like this. So then again, we
need to add our text. So let's use the text tool. And as before, we'll leave that as Lorem Ipsum are lovely
company name again. And then we can hold down Shift and drag that to
roughly the right size. Obviously, when
you're doing this, you can play around
with different fonts or logos and use the ones that
fit your own branding. So I think we can change these to some nicer colors
for now though, let's select the text, and I will come down here to my library and choose a
nice color from here. We can use this pink
color for the background and this nice brown
color for the text. Then there we go. That's
our basic documents setup. So I'm going to press
Command S to save. And we'll put that also into my social media
folder from before. We can call this one
illustrator template. Now we can have a look at how
we would use this document. So I've got a pattern here in this document that
I've been working on. We need to do is press
Command C to copy this square filled
with the pattern, and then go into your template and press Command V to paste. And then that will be added
to your swatches down here. So now you can just delete
this one and we can click on this background and then use the swatch to fill
it with our pattern. Then if you wanted to
change the scale of that, you can press Command L and then uncheck Transform
objects because we don't want us change
the size of the box, we just want to
change the pattern. And then you can just hold down Shift whilst pressing
the up and down key. And scale this up and down as to how best would
see your post. I'm just going to leave
it like that for now. Now, there's a couple
of different ways you could export this. You could either highlight
everything, hold down Option, and drag it into the
asset export panel, leave the settings at 72 PPI. And from there you can export it into your social media folder. You could also go to File, Export and Export for Screens, and then export it that way. Whichever you used to doing in your workflow is the best
one for you to choose. If you wanted to share an
image rather than a pattern, you can select this square and choose a background
color for your image. And I have this image here in this document
that I can use. So I'm going to copy that and then paste it into
this document. Then we need to do is resize
it to fit your template. I'm going to press
Command G to group that. Then I can align it to the
center of my document. Now these lines here are
strokes and they haven't scaled up with a
design because I didn't have that
setting selected. So I'm just going to go in
and change the width of those so that they are more appropriate for the
size of this image. That is basically how you use
the illustrator template. Just a case of dragging
and dropping things in, adjusting them and then exporting them to your
social media folder.
5. Final Thoughts: Thank you so much for
taking this class. I really hope it's been useful
for you and will help you save time when creating
social media content. The templates we've made today can easily be customized and edited to sue other platforms
like Facebook or Pinterest. We're not set up a
template for each and have a separate folder in your social media file for each format. Don't forget to upload
your templates to the project gallery or any
work in progress shots, if you would like
feedback or help from both myself or your
fellow students. I'm available here by the Discussions tab to answer any questions
you might have. You happy for me to
share your photos on Instagram account. Then leave a note of your
username so that I can tag you. If you'd like to know
more about me or my work, then you can find me
on Instagram at Becky flighty and on my website,
Rebecca flighty.com. If you found this class useful, I would really
appreciate it if you could leave a like
and a quick review, because it really helps
me be more visible on the platform and helps other
students find this class to, of course, be sure to follow
me here on Skillshare to get notified when I publish new classes just like this one. Thank you so much for watching. Stay creative and I
will see you next time.
 Rebecca Flaherty, Surface Pattern Artist & Content Creator