Transcripts
1. Introduction: Hello, hello. Welcome back. I know it's been a while, but I'm excited to be back with this new class. I'm Chavanne. And today, we are taking our artistic journey to New
Heights quite literally. Ever wondered how to capture the breathtaking views that you see from an airplane window? Well your infer treat. But before we soar into
the world of painting, let me ask, what's your
favorite airplane view? Maybe it's the pastel hues just before sunset or
gliding over the ocean. Drop a comment below because I'm excited to hear about
your favorite views. Now, let's dive into the colorful project
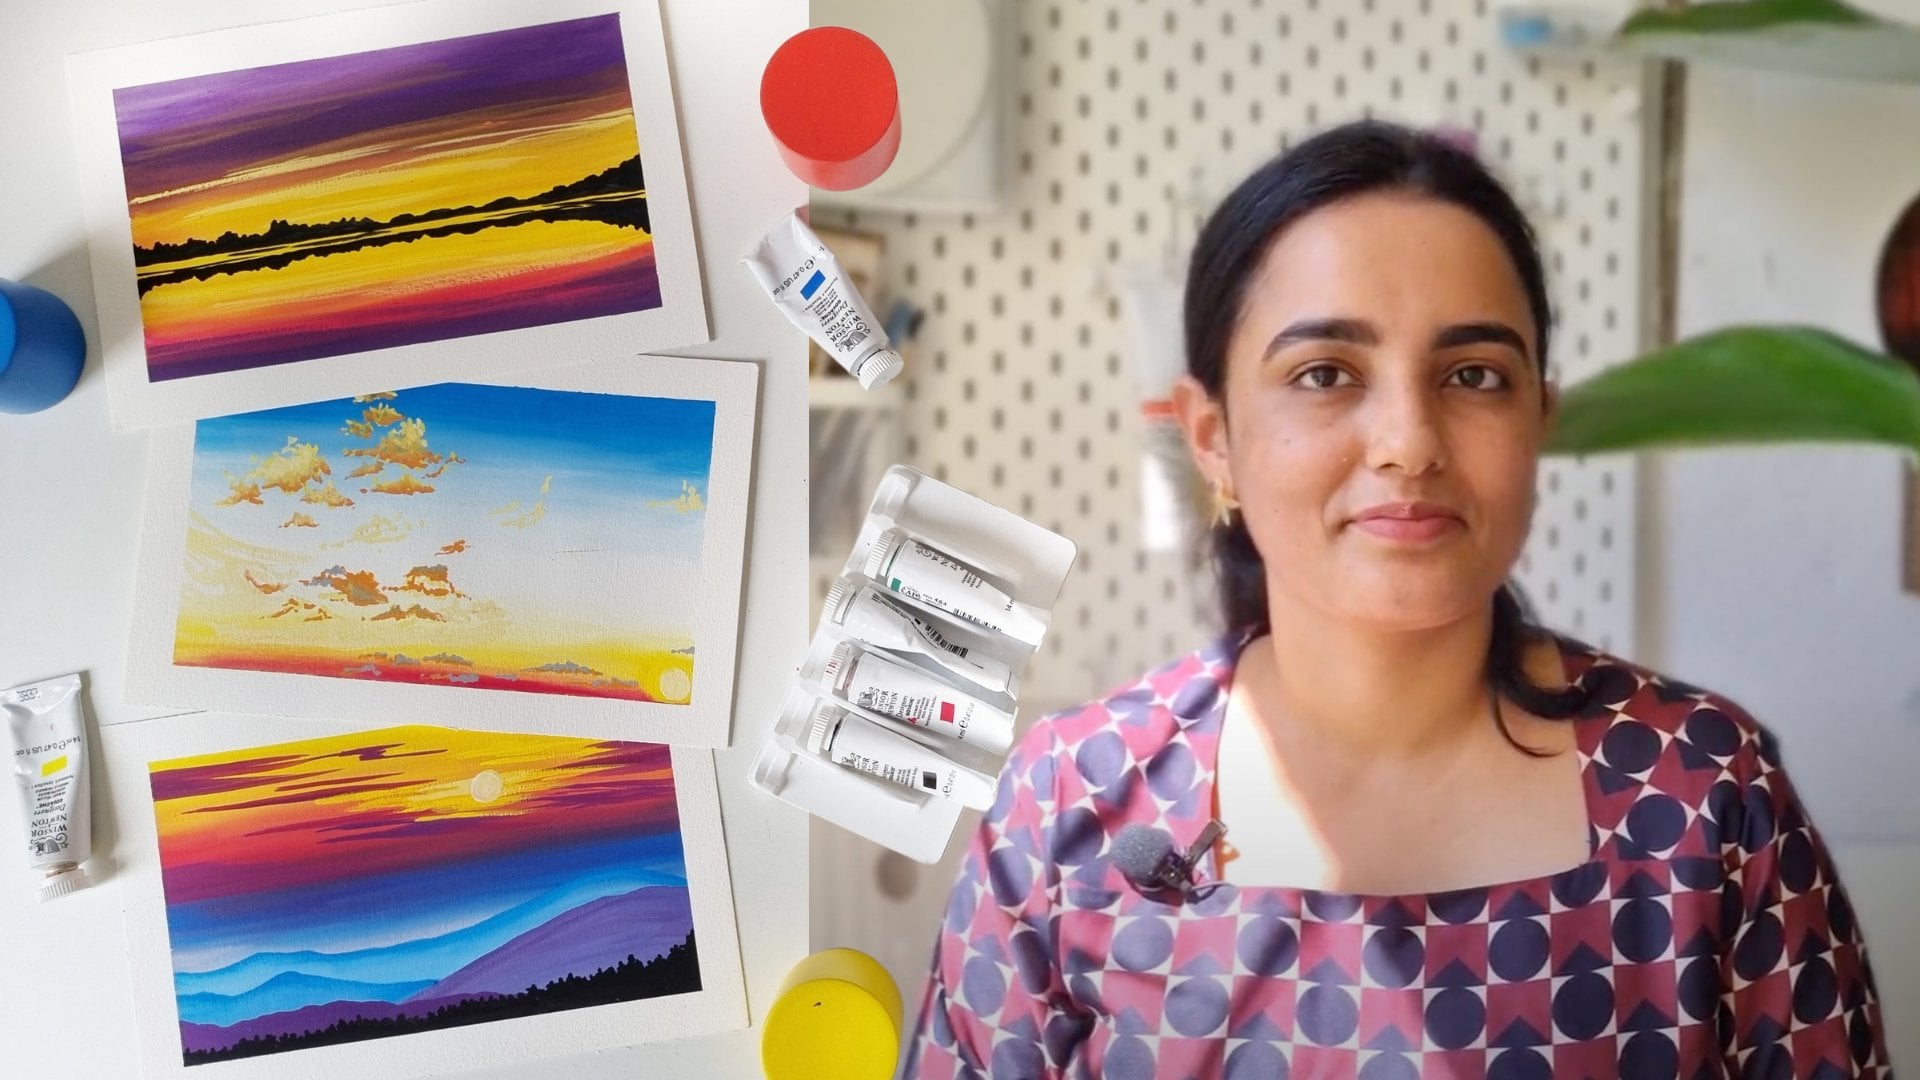
we'll be doing today. Today's project is all about capturing seven incredible
views from an airplane. Our choice of medium today
is going to be cache, which I believe is very ostile
and a very vibrant medium, from a very serene, cloudy sky to the pastal hues, golden sunsets,
majestic mountains, and the endless ocean. We're painting them
all. And the best part, the class is designed
for beginners. So whether you're
a seasoned artist or just starting,
you're in for a treat, like I already said,
grab your brushes, pick out your favorite
gauche colors, and let's paint the
skies together. I'll meet you in
our first lesson.
2. Class & Project Overview: This is a project based class. Like we already discussed, we will be painting seven different views
from an airplane. Your objective is to create these vibrant paintings
along with me. I would advise you to
practice the techniques mentioned in this class before trying to attempt the paintings. I can't wait to see
your stunning artwork. Submit your project in
the project gallery so that we can all view
each other's paintings. Now, let's get into the class.
3. Required materials: L et's start with the materials
required for this class. First would of course
be the gauche colors. I'm using a primary set
of six colors here. Watercolor paper, I am using a 300 GSM coal pressed paper. You can also use a hot pressed
paper if you prefer that. A pencil, an eraser. A ruler, a white color pencil. If you do not have that, you can also use a white jelly pen. We'll be using two brushes
for this entire class. One would be a round brush, a medium sized round brush, and the other would be a
small detailing brush. Then would be a color palette. Two jars of clean water, and a dry cloth to
wipe your brush.
4. Primary sketch: Before we get into the class, let's understand
the basic sketch required to create
these beautiful views. Here I'm taking a
watercolor paper and dividing it into
three sections. As you can see here,
an aeroplane window is not usually oval in shape. It is more of a rectangle
with curved edges. So keeping that in mind, we'll start with the
sketch of the window. I'm creating two
parallel vertical lines. And then two parallel
horizontal lines at the edge of the section. Noting down the centers
of these lines, and now I'm going to connect these centers like this
with the curved edge. This is one of the
easiest ways to create these curved
edged rectangles, creating another layer,
because as you can see here, airplane windows have
these two glasses with a little bit
of gap in between. Now adding another layer
to generate more depth. Now let's sketch the wing. This particular view
is something that you will see if you are sitting
at the back of the airplane. Please note that the wing
are not two parallel lines. They basically come closer as they go further away from us. Next, would be
these jet engines. This is the view that you
would see from your window. Now, coming to the middle
section, here again, I am creating this rectangle
with curved edges. Adding the other glass adding another layer
with very little depth. Now, here the view would
be if you are basically sitting on the that is
just next to the wing. Here again, the two
lines of the wing get closer as they go
further away from us. This is the view that you
would see from your window. Now moving on to
the third section, this would be the view
that you would see if you are sitting closer to
the head of the airplane. Basically, the wing
is behind you. So I've created the rectangle
with the curved edges. Adding the other class. And then adding the depth. Now, here, again, I've sketched the wing in
a similar manner. Please note the angles of
these lines while sketching. The next would be these jet
engines below the wing. Make sure the jet engines are at a slight angle to the wing. I've sketched
perpendicular here, as you can see, it
does not look right. Me sure that you do not
add them perpendicular. They should be at
a slight angle. This is the view that you
would see from your window. And here are the three
sketches or rather the three views that we end up seeing when we are on
a commercial airplane. Now, coming to the horizon, you can add the horizon depending on what do
you want to focus on? If you want to
focus on the land, then you can add the
horizon slightly high, like I have shown in
the third sketch. If you want to focus on the sky, you can add the horizon slightly below like in the middle sketch, or you can add the horizon
in the center if you want to focus on both
the sky and the land.
5. Cloudy sky view - Part 1: You usually end up
seeing a view like this from the airplane when we are
traveling during the day, and the sky is very clear. You see all the clouds, the sun shining through. So let's try to
capture this view. I'm starting here with taping
my paper to the table. Make sure you tape
it on all four sides so that it does not move
when you're painting. Oh. Starting with the basic sketch, the two vertical parallel lines, the horizontal parallel lines, marking the centers
of these lines, and then gradually connecting
them with this curved edge. Now sketching the
second glass, Oh. And then adding a third one to depict the thickness
of the glass. Then sketching the wing, make
sure that the lines are not parallel to each other
and end up going closer as they go
distant from you. Adding the jet
engines the horizon, and then giving these slight
sketches of the clouds. You can decide to make it
as dramatic as you like. I will then be
erasing the sketch so that it does not interfere
with the colors, but I can still see a faint
outline of the sketch. Starting with the primary
blue color for the sky, make sure that the consistency
of the color is thick. Mixing a little bit
of ivory black to my primary blue color and then blending it together
at the top of the sky. Now, I'm going to add a bit of zinc white at the bottom
layer of the sky. I and then blend it to the primary
blue at the top. To ensure a smooth consistency
and a smooth blend, please use a thicker consistency
of the gauche colors. If the colors have
dried a little bit, you can vet your brush
and create the blend. Now, adding a little
bit of black to the primary blue color and creating the shadows
within the clouds. D. This is where the sketch of the clouds that we did
at the start helps. Now, using the
primary blue color to add a medium hue to the clouds, As you can see, right now, I'm not really blending it. I am only placing the colors
where I want them to be. Please do make sure that you use a thicker
consistency of color. Adding the primary blue
closer to the wing as well. Now I have added a slightly lighter hue wherein I have mixed zinc white
to my primary blue, and then adding that
again to all the clouds. The intention here is to add these color variants to generate more depth
in the clouds. Now, adding these
highlights with white and a tinge of
primary blue color. My brush here has
a pointed edge. However, in case your brush
does not have a pointed edge, you can also use a detailing
brush to add the highlights. As you can see, while
adding the highlights, I'm also trying to blend them with the primary
blue color in the sky.
6. Cloudy sky view - Part 2: Now, adding a
slightly darker shade of primary blue
wherein I've added a little bit of ivory
black to it and then adding these
shadows to the clouds. As you can see with every
layer of color that I add, it just adds a lot of
depth to the clouds. Make sure that you do not blend the darker shadows along
with the primary blue, add them so that the
colors are distinct. Oh. Now with a slightly wet brush, I am smoothing out the shadows. As you can see, my brush
strokes are really small and in the shape of
the clouds that I want. I'm not really adding any colors here just with a wet brush, blending them together
in the shape of the clouds so that the
lines are not very harsh. Now, once the layer is dried, I'm going to add these
white highlights with a dry brush and a
lot of color pigment. Where the shadows and the
highlights fall for the clouds, totally depends on the shape of the clouds that you
sketched at the start. So just keep them as a outline when you're
adding these colors. Just make sure that your brush is dry with a lot of pigment. If you use a wet brush, it will end up blending
with the bottom layers. So this is more of a
dry brush technique. Now again, with a dry brush, here, I'm adding the sun rays. Now, adding the wing wherein I've added this
light blue color, which is basically
primary blue plus white. For the top edge of the wing, I'll be adding primary blue, plus a little bit of black. Adding the shadows to the
jet engines at the bottom. And then with a detailing brush, I'm adding these
lines to the wing. Now adding a little
bit of depth within another layer to these
sections on the wing. Adding the highlights
to the jet engines. Now with the black color, I'll be sketching the outer
section of the window. This is something that
we'll be doing for all the views that we
learn in this class. Because usually
when you're looking out from the window
and it's daytime, just to have some consistency
in all the views. You can also do this part with a black pen or a black sketch
pen, if you prefer that. Now adding a little
bit of white to the black color and having
this queue of gray. So I'll be adding
this gray color in this section of the window. Oh. Now, again, with the
detailing brush, I'm going to add this line
with the black color. This basically
depicts the thickness of the outside glass. This just adds more depth to the window and it makes
it look more realistic. Here we have the cloudy sky
view from the airplane.
7. Sunset sky view - Part 1: For this class, let's
see how to create this beautiful sunset
view from an airplane. I'm again starting with
the watercolor paper and masking it to the
table on all four sides. Now going on to the primary
sketch of the window. Now we'll start with
the sketch of the wing. The jet engines. I've added the horizon in the center here. Now I'm going to
erase this sketch before I start painting. Starting with the slightly
darker hue of primary blue. I'm going to cover top of the window view with that color. Now mixing the
primary blue color with a little bit of zinc white and blending it with a darker hue of
blue on the paper. Make sure that you use a lot of pigment and little water so that the blend is smooth and you will not have any water
patches on the paper. Now adding more white at the
bottom of the sky portion. O. Then comes a small layer of primary yellow
below the white color. Make sure that you blend
it with the white. Then I'm going to
add a little bit of white below the tinge of yellow. Now, I've made this
hue of orange by mixing a little bit of
primary re with yellow color. And I will blend
that at the bottom. And the final blend after the orange hue would be
with the primary red color. As you can see, I'm making sure to have a lot of
pigment on my brush. There should be
enough water so that your brush easily
glides on the paper, but not more than that. The rest of the view, I will be covering it with
this orange hue that I made by mixing a little bit of primary red with primary yellow. This is going to basically
be the base layer, so I have added more water. Now, starting with creating these wispy clouds at the
top part of the view, I have my dry brush, and I've added a little bit
of white and primary blue, basically a light blue
shade to add these clouds. As you can see my
brushes completely dry, that gives a very beautiful
effect of these wispy clouds. Of course, make sure that
your previous layers are totally before you
add on a new layer. These are free hand clouds, feel free to make any
patterns that you like. Adding a few more white
highlights to these clouds. Now, I am going to add these yellowish orange clouds
closer to the horizon. These clouds are basically
far away from us. Hence, they are pretty small. And I'm going to
add a little bit of red shadow to them because the sun is
setting behind them, so it's going to add a
tinge of red to the sky. Now, defining the horizon with the white color here
as a highlight. Now, I have mixed this
gray color on my palette, which is basically a little bit of black mixed with white.
8. Sunset sky view - Part 2: And I'm going to add
these clouds here. The clouds closer to us
from an airplane during sunset look dark because
the sun is about to set. The horizon looks colorful, but the clouds look darker. At the bottom of the view, I'm going to cover it
with this gray color. And now I'm going to
add another layer with a darker gray
wherein I've added a bit more black to the gray color to add
these cloud details. By layering any two colors, make sure that your
previous layer is completely before you
add the new layer and also make sure that you
have a decent amount of pigment in your brush and brush does not
have a lot of water. Again, these are
free hand clouds. You do not necessarily need to sketch them before
you paint them. The clouds will be
slightly thinner towards the horizon as some of them are slightly away from us. You can also use a detailing
brush for these details. Now I start by adding
black to the bottom of the wing as there will be a
lot of shadow at the bottom. And then blend it with
this light blue color, which I have made by
mixing blue with white. And then I will blend these
two colors on the paper. Adding further
details to the wing. This is with the black color. Now adding color to
the jet engines. I'm going to take some
white in my dry brush, and again, just add a highlight for the
horizon depicting the sun. Now, adding details
for the window panel. This would be the
same gray color, a slightly darker gray, mixing a little bit
of white to my black. Now for the outer
part of the window, I'll be adding his black color. Now adding the depth with a detailing brush with a glass panel and
using the black color. Feel free to do this with a
black sketch pen as well. I'm just going to add
some more black shadows to the clouds
because I felt like the clouds needed a
little more depth. This step is optional. And like I am, you can also try doing this
with a detailing rush. Ooh Ooh. Adding the highlight
for the sun. Again, with the
detailing brush and just adding a few other
highlights in the clouds. I'm also adding a
lighter shade of gray as a highlight to the
clouds at the bottom. O And here is the finished painting. A.
9. Pastel sky view - Part 1: For this lesson,
let's figure out how to paint a beautiful pastel sky. The sky looks pastil just
before sunset when the sun is slightly lower in the sky and its rays have to
cover the atmosphere, and that's why it
looks a little pastil. If you're traveling
in the evening, that's how the sky
would sometimes look from your airplane window. To capture that view, I'm again starting with
my watercolor paper. I've taped it on all four sides to the table and again sketching this rectangle
shaped window with slightly curved edges. Go up. Sketching the other
glass of the window. And now adding depth
to the other glass. A. Now, adding the wing. Adding the jet engines. As we are focusing on
the sky in this sketch, I'm creating the
horizon slightly lower so that we can cover
a lot of the sky. I'm going to now erase
the primary sketch and just be slightly there
to see its outline. For the colors, I'm going to start with making
this violet color by mixing equal amounts of
primary red and primary blue. You get this beautiful
shade of violet. As the sky is pastal, the skies are usually a
little lighter in hue, so I'm going to be adding
a little bit of white. And you get this beautiful
shade of violet. You can see how
vibrant the color is. Make sure that you use
clean water to mix colors. I'm adding the violet color
with a thicker consistency at the top part of the sky just
above the airplane wing. Make sure your brush
is slightly damp so that the color flows
comfortably on the paper. Now, I'm going to add
a little bit of white at the bottom of the sky
and then blend the violet and the white I go I'm blending it with
a slightly drier brush. As you can see, I'm
wiping it on my cloth. Don't worry about the color
going out of the edge of the window as we will be adding a darker
color there anyways. Now with the original
violet color that I created by mixing blue
and red of equal amount, I'm going to add these details. I'm just adding these to create a more wispy look
for the clouds, and now with a
slightly wet brush, I will blend them
into the base layer. At the bottom part
of the window, I'm going to add the
darker hue of violet. Now adding a slightly
thicker consistency of the same darker let color. Now I will add a layer of
primary yellow in the center. Again, adding wispy clouds with a slightly darker shade of
let at the top of the sky. Now, I'm going to
add this pink color, which I made by mixing
primarily red and white. And add these dry brush strokes. This just adds more depth to the wispy clouds,
as you can see. Make sure your brush
has a lot of pigment, but very little water so that it does not
activate the color below. Oh. Now adding a little bit of white to basically blend the pink and the yellow
tones on the paper. Adding white will basically make sure that the blend
is more smooth. As the sky is pastil, adding white helps to create
more depth never play. Now adding the pink
clayor again at the bottom of the yellow color and blending it with
the violet color. Now I'm going to wet my brush
and blend these together. Again, making sure to blend them together smoothly with
a little bit of white. O. Oh.
10. Pastel sky view - Part 2: Now I have slightly damped my brush to make sure that
I can blend them better The reason why I had to do this again at the bottom is
because my color was dry, so you can avoid that by blending the pink
color to the violet, while it's still wet. Now I'm going to add a few
details of the clouds at the bottom with a lighter hue of violet by adding a little
bit of white to it. These are basically
the clouds at the bottom that you
see from the airplane. You can also use
a detailing brush to add these details
and make sure that you have a
thicker consistency of color and not much
water on your brush. Now, because the sky is
violet, a lot of times, it ends up reflecting on
the wing of the airplane, which here I've assumed
it to be white. So again, the wing is violet
in color at the bottom, wherein would be the shadow. Now, I am adding
some highlights with white to the clouds that
I've added at the bottom. This just adds more
depth to the clouds. While I wait for the layers
in the pistil sky to dry, I'm just adding this gray color to the area in between
the two windows. Feel free to use a thinner brush or a detailing brush for this. Oh Oh. Now adding black color to the outer section
of the window pane. Do. Oh, go. Now with a detailing
brush and black pigment. I'm going to add this
to my second glass pen. Feel free to do this with the black sketch
pen, if you prefer that. Ar. Now adding this
darker pigment of let at the top of the
wing to add shadow there, and then I'm going to blend it with the lighter pigment below. As the sun is setting, the light sources
below the wing. That's the reason why the
shadow is at the top. Here on the wing, I'm adding a little bit of
primary blue color. Decided to give this wing
a little bit of color. Then with the violet color
and the detailing brush, adding a little bit of
shadow to the wing. And then these lines. Now, painting these jet engines here with the same violet color. I do. The highlights of the
jet engines at the top. I thought that those lines
were very perpendicular, so just decided to make them more in line
with the jet engines. And here is the final painting. L
11. Night sky view - Part 1: Getting into the lesson
of the night view, which is one of my favorite
views from an airplane. We're starting with
the watercolor paper and tabling it on all
four sides to the table. Starting with the basic
sketch of the window. I'm sure by now you
know the drill. O Mm. Now sketching the
wing of the airplane. I and the jet engines. Adding the horizon. I'll now erase the sketch with
only the outlines visible. Starting with the
primary blue color, I'll added to the sky Oh. Now mixing a little
bit of white to the primary blue
color and blending it below where I've already
added the primary blue. I'm now going to blend
the upper bit with black. I'm the medium sized ruh
for all these steps. Now, taking a lighter blue shade by mixing a little bit of
primary blue to white, adding it at the bottom, and then blending it together. Now I've taken this shade
of orange by mixing a bit of primary
to primary yellow. The reason why we have this
orange and white color in the night sky is because just before the night has
started, you have the sunset. This is basically the last
tinge of orange in the sky. Now I'm going to
blend this orange with a bit of primary
blue on the paper. So you get this beautiful
line of orange in the sky. Now, adding these cloud details with a darker blue color by mixing a bit of
black to primary blue. I've added these clouds in the distant sky by keeping my brush almost
perpendicular to the paper. At the bottom, now I'm going to add this darker blue color and then gradually blend it
with black below the horizon. This is the first
layer of the black, so I've kept it a little way, but I'm going to
add more pigment to it gradually with other layers. Adding another layer
of the primary plaque. Here I have just
sharpened my pencil and wanted to show this
beautiful flower that got created in the process. I've taken my white color pencil and I have just again sketched the wing of the plane so that we are aware of its
position in the sky. As it's a night sky, you don't really see the wing, so the wing could be black, and I'm going to
color it black here. Adding a highlight
of white at the top, which basically
reflects the sky, which is a little lighter
because the sun has just set. I'll blend that with
the black color of the wing to give
this grayish hue.
12. Night sky view - Part 2: Now, adding another layer at
the bottom of the horizon. O Blending it with the primary blue. Now I'm going to cover the window panel with
this gray color, which, again, I'm
sure you know by now, this is a standard step
in all the lessons. We are doing this as we wait for the black color in the view to. Feel free to use a
detailing brush or a thinner brush to add
these finer details. Now I'm going to blend
this darker shade of blue, which is made by mixing primary blue and a little bit
of black to the black and the primary blue in the paper in between them so that the
blend is more smooth. Adding this black color at
the outer part of the window. O. 00 00. Now I'm going to take this
white pencil and sketch these road like patterns at the bottom of the
horizon, basically. When the flight is just
taking off or about to land, you see all the traffic on
the road from the plane. Again, this is very free hand. You can create as many lines
as you like or as little. Just make sure that you use
the pencil very lightly. Now, to add these
traffic lights of the vehicles and in general, on the road, I'm going to use
this primary yellow color. And create these dot like patterns along the sketch
of the white pencil. In case you do not
have a white pencil, you can also use a
white jelly pen. Just make sure
that the lines are pretty light when you sketch
them on the black color. Make sure that you
use a detailing brush for this so that it's more precise and use a lot of pigment on your brush
and very little water. O o o o. Oh. Oh Now, adding a few more lights to depict houses or
traffic on the ground. Again, this is very free hand, make sure that your
dots are distinct Now I'm going to add a few
primary red dots, as well. Now I'm going to take
this white jelly pen, or you can also do this again with the detailing
brush and using the white color and add these dots depicting the
lights on the ground. This can also be done with
a white pencil color. O o. Ooh. Now adding the black color to define the depth of the
other glass in the window. As I already mentioned, you can also use a black sketch pen or a color
pencil to do this step. Here, we have the
finished painting of the night view
from an airplane.
13. Ocean view - Part 1: For this class, we'll
look at painting this beautiful ocean
view from an airplane. If you live close
to the ocean and whenever you're flying out
or flying into your city, this is one of those
beautiful views that you're really
excited to see. So again, getting
into the class, starting with my
watercolor paper, taping it on all four
sides to the table. Starting with the
primary sketch. Now sketching the wing the jet engines and the horizon. Now, giving this light sketch of the land where
it meets the ocean. Again, this is a
free hand sketch. Feel free to create
whatever shape you like. I was not happy with
the lower part, so I'm just redoing it. Now erasing the sketch before
we move on to the painting. Starting with a
light blue color, which is basically primary blue plus a little bit of zinc white. And covering the sky here. As our focus is going to
be more on the ocean, I'm going to keep
the sky very simple. Now blending it with
white on the paper. So I'm going to cover basically the whole sky above the horizon. Now taking primary blue and lending it at
the top so that we have a nice gradation from a
darker hue to a lighter hue. Now, painting the first layer of the ocean with primary blue, Oh. Blending it with a
little bit of white. You'll notice whenever
you're looking at an ocean from a
higher viewpoint, the area where the ocean meets the land is usually
because of all the waves. E I wanted to add a little more to my sky. I've added another layer of
primary blue in the sky. Then covering the land with
this permanent green color. If you do not have this color, you can a bit of blue to
yellow and have this color. Please note this is
just the first layer, so it looks like a
very rough paint. We're going to add a
few more layers on top. You need not worry about it. Now I'm going to add a
few clouds in the sky. I'm taking this white color and adding these wispy cloud
patterns in the sky. Now with again, the white color. I'm going to add these like I've shown Again, this is the first layer of the
white paint for the waves, so you need not worry about
the amount of pigment. We'll be adding a
couple of other layers. I'm trying to blend the
horizon here into the sky. Now, taking a darker
shade of blue by mixing a little
bit of black to it and covering the
bottom part of the ocean.
14. Ocean view - Part 2: Now taking white and
adding these highlights. As you can see, the amount of pigment of white
has now increased. Now I'm making this
darker green color by mixing a little bit
of black to my green. And adding these
topography in the land. Oh. This is again, free hand, and I'm using a
detailing brush for this. Feel free to add as many mountains or trees
or details that you like. As you can see this adds a lot of depth to
the land portion. It makes it look even more real. Adding the similar details
in the smaller land area. Oh. Now I'm going to take a clean brush with just a little
bit of water in it, and going to blend these
white waves into the ocean. Similarly, I'm going to blend this darker green pigment
into the rest of the land. I wanted to make the lower bit of the ocean a bit more darker. So I've again added more pigment and then
blended it into the ocean. Moving on to the
wing of the plane, I am here adding this darker blue pigment to the shadow of
the jet engines. Primary blue color to
the rest of the wing, and then I will blend the darker and the lighter
shades of blue together. Oh. Adding a little bit of black to add more shadow
and depth to the wing, and then adding primary blue
here in the jet engines. Now with a dry brush
and white pigment, I'm going to add these
waves in the ocean. Now taking the black pigment, adding it in the outside
part of the window. Oh. I have then added a gray color to the section between
the window panes, and then adding this
black outline with my detailing brush to depict depth of the second
glass window. And here you have it, an ocean view from your
airplane window.
15. Mountain view - Part 1: In this lesson, we'll
learn how to sketch this beautiful mountain
view from an airplane. These are one of
my favorite views. We don't usually get to see the mountains from
this perspective unless you're flying over them. I taping my watercolor
paper to the table. Starting with the basic sketch. Now adding the wing
of the airplane. The jet engines, the horizon. And then adding these details
for the mountain peaks. Now we erasing the sketch. Starting here with the
primary blue color and mixing it with a
little bit of white for this beautiful
sky blue shade. Adding that to the section
above the horizon for the sky. We'll keep the sky
pretty simple in this pecen as our most of our focus would be on adding details to the mountains
that are below the horizon. Now I've blended that with
the white color on the paper. O. Now to get this darker shade of blue, I'm going to add a little bit of black to primary blue color. And I'm going to basically cover the section below the
horizon with this color. At the horizon, I'm going to lend it with the white colors.
16. Mountain view - Part 2: Now, again, with
the white tencel, I'm going to add those
details of the mountains. Now, starting with
this light blue color, which is basically
primary blue thus white. I'm going to add
these snow details at the peak of the mountains. Make sure that your
previous layer is completely dry before adding these and you have a
lot of pigment on your brush. I'm actually using a
dry brush technique here is basically keeping your brush very with just the pigment and
adding it in this manner. Now, to add the shadow, I'm
going to mix black with this primary blue color and add the shadows
to the mountains. Again, making sure that my brush is very dry with
a lot of pigment. For these details
on the mountains, feel free to add them
with a detailing brush. Adding the highlights with this detailing brush
and taking white color, make sure that your brush
is completely dry for this. So it gives this
beautiful snow highlights at the peak of the mountains. Again, the brushes very much dry here with just the pigment. Now for the wing, I'm going
to add the black color. Now adding black to the outer
part of the window frame. O. O Now adding this gray color by mixing a little bit of black, with this area between
the window glasses. M. Now, with a retailing brush and this black color adding
depth to the second class. This is the finished view of the mountains from
your airplane window.
17. Lightening sky view - Part 1: I'm not sure how many people love this view from an airplane, but this is one of those views that I
really enjoy personally. It is when there is a lot of thunderstorm in the
sky when we are flying and you see lightning
in the sky outside. So I have tried to
capture one such view. Again, taking my
watercolor paper, sketching the window, and
then the airplane wing here. I'm starting with
mixing primary blue and primary red in equal amounts and getting this beautiful
violet shade. Adding a little bit
of white to it, and then covering the
whole sky with this color. As you can see, make sure that you use a lot of
pigment in your brush. Now taking a slightly
darker pigment of violet and then adding these cloud like
patterns in the sky. Again, this is a
lot more free hand. Feel free to create these clouds in whatever
shape that you like. This would just be
the background layer and the lightning
will be on top of it, so the details in this
can be ale blurry. Adding the darker pigment of violet at the top of the sky. As you can see, the movement of my brush is more
circular so that the pattern that I get is this
fluffy cloud like pattern. Now I have taken a clean brush with a
little bit of water in it and just going to blend these edges into the background. As I already said,
the blending need not be very neat because the lightning will be
on top of this. And the clouds look really rough and very blurry when
there is lightning. That is the kind of effect that we want to bring out here. The blending as well I have done it in this
circular pattern. So make sure that you
stay consistent with it. I've added a darker pigment in certain places just to add
more depth to the clouds. Now, once I've blended
these into the background, I'm going to add a little bit of black to my violet
color and then add another layer at the top to add more dimension
to the clouds. The sky is usually very and very blurry during
a thunderstorm. So that's the intention here. Again, blending that
into the background. I know this stage looks
very messy right now, but I would suggest that
you trust the process.
18. Lightening sky view - Part 2: Now, with the tip of the brush, just blending these edges with a clean brush
and no pigment. Now, with a very light
hue of the violet color, wherein I've added a
lot of white to it. I'm going to take
a detailing brush and then sketch this
free hand lightning. Make sure that you use a very thin brush so that the
lightning looks very sharp. Again, this is very free hand. You need not worry about the shape or how big
you want to get it. Just make sure that you use
a detailing brush for this. Also, you can see how the lightning is emerging
out of the cloud. And now that we have
painted lightning, the background is
not really focused. That's what was intended. Now, adding a few
highlights with just the white color on top
of the lightning painted. Make sure you have
a lot of pigment on your brush and very water. Now, painting the
wing of the airplane in this light violet color, then I've added a lot of white. And then the front of the wing, I have painted it black. The reason we have
painted the tip of the in this light violet
color is because it's going to basically
reflect the lightning. I'm now going to blend
this into the black color. The tip of the wing is light because the lightning
is shining on it. Now, adding black to the outer
edge of the window pane. Now adding gray to the area
between the window panes. I've made this gray color by adding a little bit
of black to white. Feel free to also use a
detailing brush for this. O. I thought I wanted to also add
a little bit of highlight at the bottom of
the wing because again, that's where the lightning
would reflect on the wing. So I've added this line with a very light hue of let and then blending
it with a clean brush. It's almost just like a line. Doing the same for
the jet engines. So, here we have it a
lightning w from an airplane.
19. Final thoughts!: Hope you had some
key takeaways from this class today and
most importantly, enjoyed painting along with me. Wo love to see the
projects that you make, and in case you
have any questions, don't forget to ask them in
the discussion section below. Please tag me at
Chavani Makes on Instagram in case you decide
to upload your work there. If you did enjoy this class, please to consider
sharing a review. Enjoy painting and
hope to see you again.
 Shivani Jadon, Gouache & watercolor artist