Transcripts
1. Introduction: My name is Toby, known as Toby
urban sketch on Instagram, YouTube, and of
course, Skillshare. Today I want to tackle that
problem that a lot of us have where during people can
just be so challenging. We're not sure if he's got
the proportions right. We don't know how
much detail to add. Perhaps we do a nice outline and then things just go wrong when we start to sketch in facial features,
things like that. Well, hopefully I'm here to show you that actually
we can all do this. It's not hard to sketch people. Yes, it can take little bit
of practice, but actually, there are quite a
few simple tips and tricks which can speed up that process and get a sketching happily producing things we're
proud of really quickly. In this class, I want to take you through a few
different lessons. We're going to cover simple
rules about proportions, about drawing silhouettes and really covering how much
detail do you need? When is too much detail? Well, too much detail. When does it actually take away from my sketch
rather than add? Just by learning
these simple ideas, we can suddenly sketch
people more accurately. Be more confident that we've produced
something interesting. Of course, we're also
going to cover things like the horizon line
and perspective. How do you draw lots of people? How do you get them
the right scale, the right size, and then colors. So my favorite colors, not the perfect colors, but the colors I love
using that I think make the most interesting sketches and my simple and easy way
of doing it for me as well. Finally, we've got
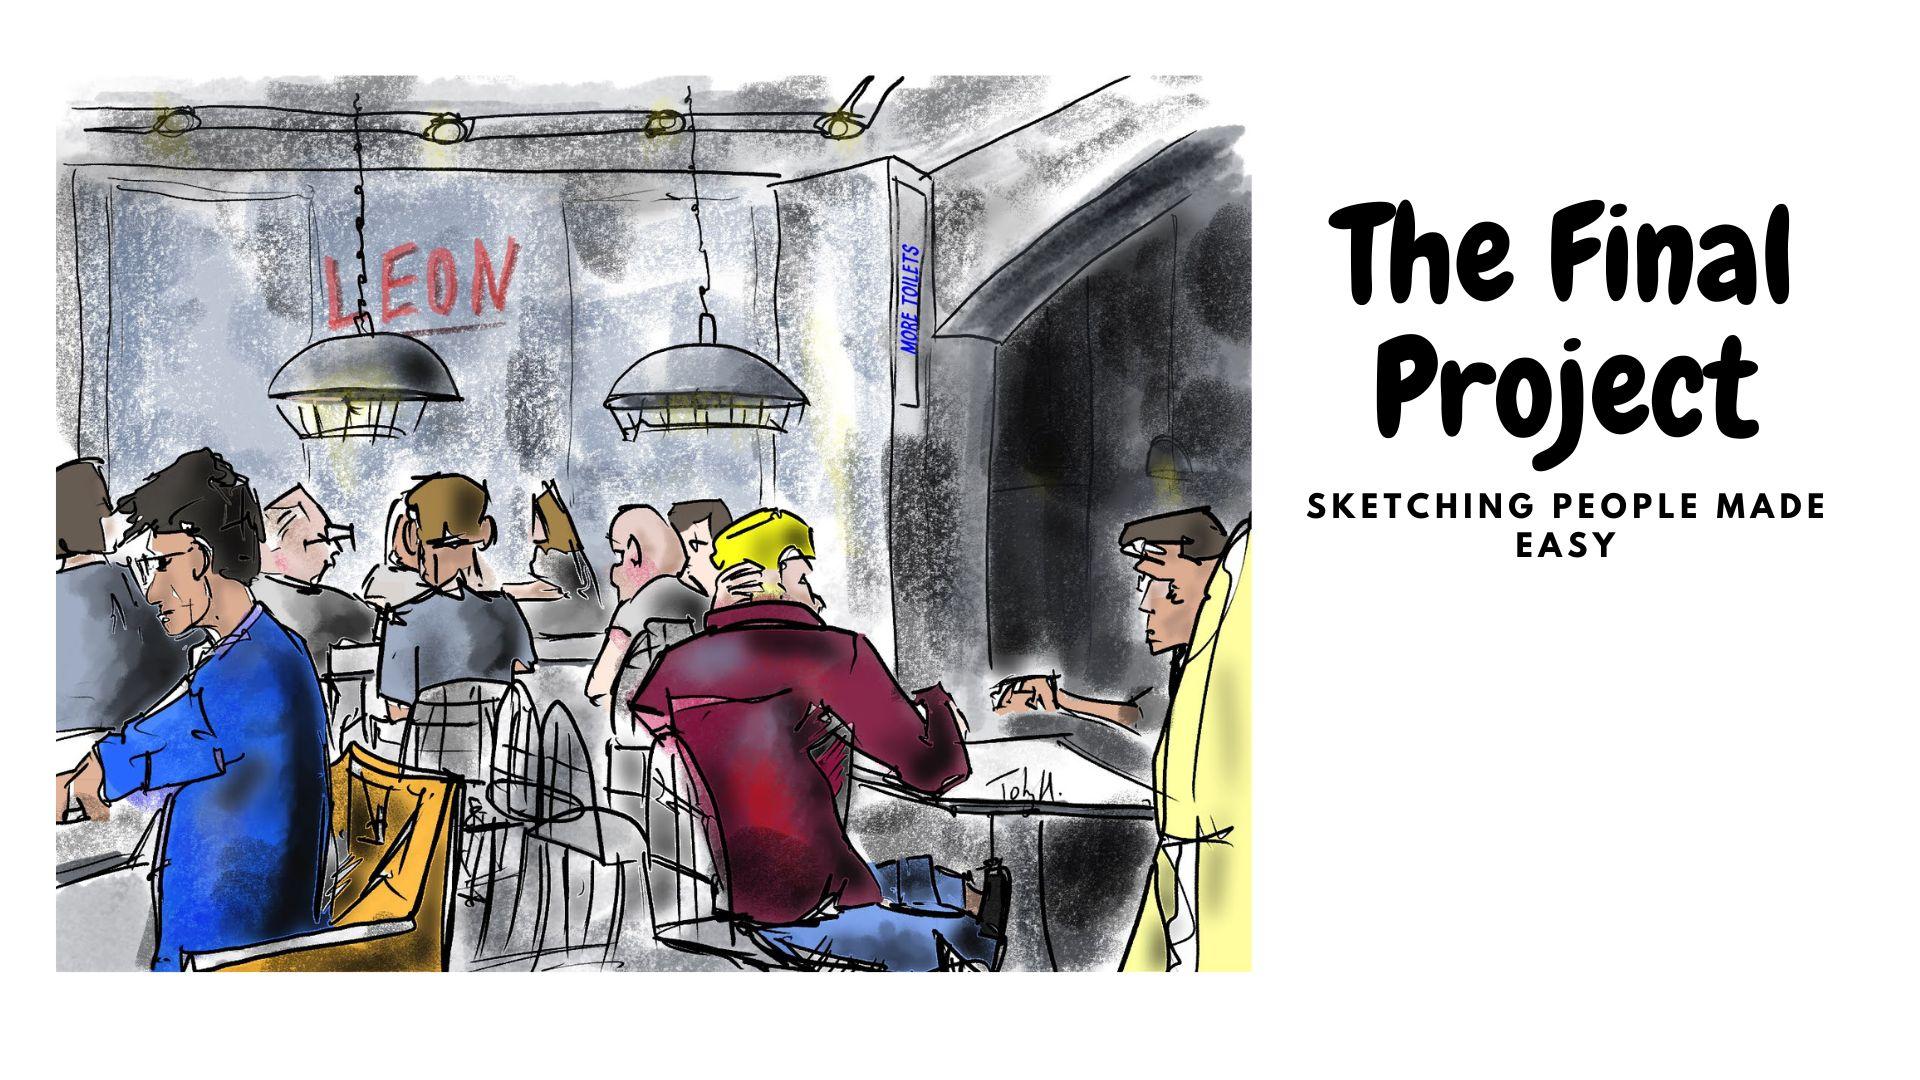
the final project. So that's gonna be just putting all of these different
things into, into practice and drawing either your own scene or
just filling a page with people and hopefully
having the confidence to share it with everyone
in the class projects. Anyway, thank you for
joining my class. Please leave me some feedback. Leave a review if you enjoy it. And please feel free to contact me on Instagram
or YouTube as well.
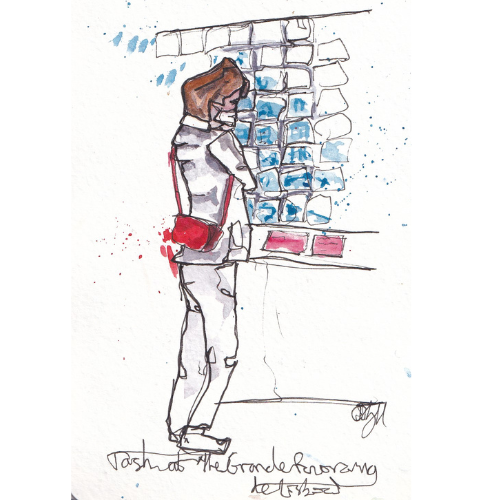
2. The Class Project: I would love if you could share your final
project with me, upload it into the
class projects folder. I will, of course, Popper
couple of projects there. This video is all about
different ideas of how you might want to care
about your final project, which is to fill a
page with people using these tips and tricks we've been discussing
the last few lessons. Perhaps you want to
take a scene and busy market or a street
and you want to, instead of focusing
on that scene, you want to focus on
all the people in it. Fill a page full of people. You might want to
just go for a seat in a cafe and sit and sketch and doodle the
people you see around you adding a few
splashes of color, a few bits and pieces
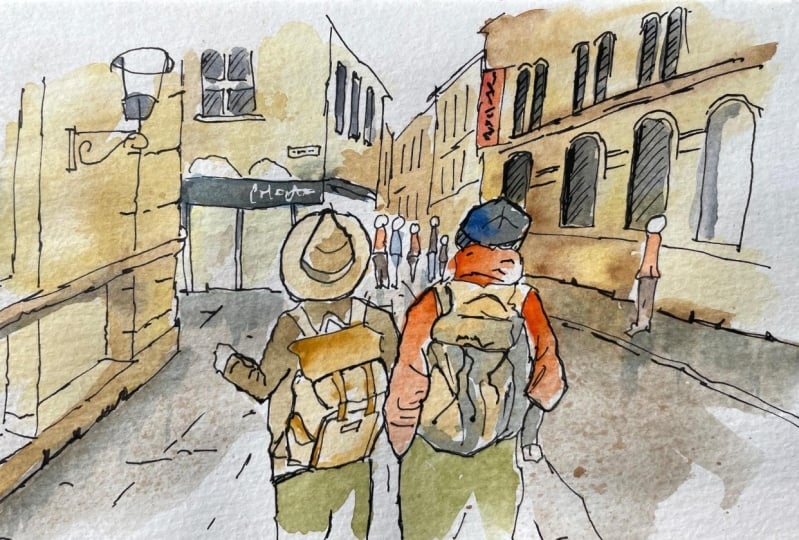
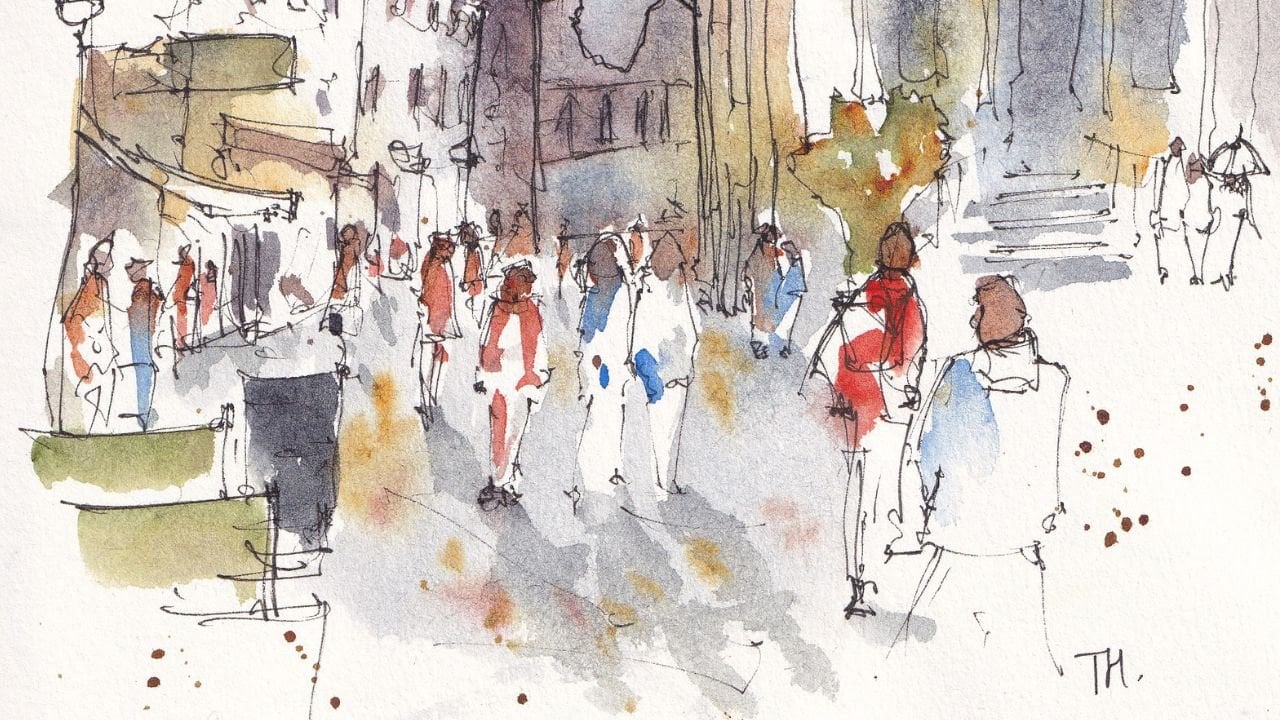
here and there. An example that
I've been working on just as part
of this class is, is doing, doing a big street. So I fill this street
with different people. I've just ghosted in,
in the background, goes to there and a few
of the street stalls, a few of the buildings. One thing which can
be really fun to just play with how
you're applying color. Do you want to apply realistic
skin tone to everyone? Or do you want to apply
some different things using bright or
representative colors? You want to color
everything in audiologist splash a few colors
in a few places. And what about the background? If you do have a background, do you want to add
anything to it? Or maybe you just want
to add a little. So e.g. maybe just bringing out a
blue sky in a tiny bit of shadow might be all you need to enhance
your final project. Anyway, anything goes, just
make it about, people, make it about using these little tips and
tricks we've been learning. And the more you practice, the easier it gets. And then if you want to,
you can progress on from these really quick
representative sketches onto beautiful fully-fledged portraits
and figure drawings. Or you can get
quicker and quicker. And like I do, just enjoy sketching lots of
people into lovely, interesting, fun urban scenes. And I'll say it one more time. It'll be amazing if you, if you have the confidence just to share your
class project. In the class projects folder. I love looking at what
people have done. I love comparing, contrasting, and we can all learn
from each other. And we can all get a lot
of confidence just for sharing and seeing the positive feedback that
we get from that. Thank you very much for
sticking with me to the end. And it's been great
having you with me.
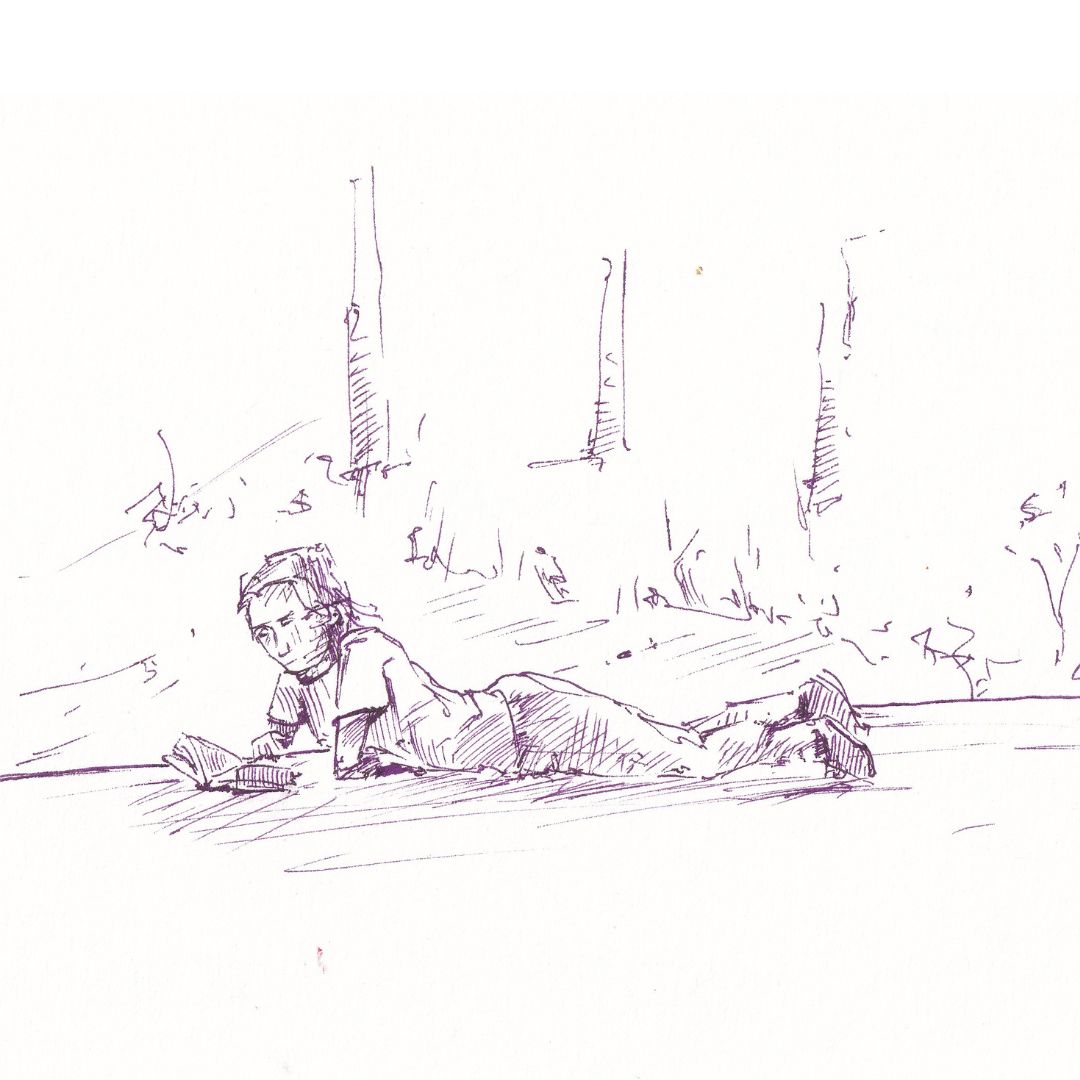
3. The Silhouette Method: First thing we're going to
do is a silhouette exercise. We're going to sketch
people get their outline, get their energy they feel. We're not going
to worry too much about accuracy about proportions because that's coming up in
the next couple of lessons. So proper reference up here, and you can see this is
literally a silhouette. Susan, doesn't mean
it's an easy start, but it helps us just look at how much information
do we really need? We can see there are
no facial features, there are no hands as there's
not much information. But from that, we can
tell that this is a person wearing trainers in
a hoodie walking up a hill. If we first, we just use this
silhouette that we've got. Just start by
capturing the head. Then my start is
always a bit wobbly. That's just what
I enjoyed doing. And you can do it. What will you could hit 100k to it with a pencil, with a pen. What I'm doing is
just trying to get these approximate
shapes that we see. And thinking about just getting
the silhouette, outline. This is just build a
little bit of competence. This is where we
can make mistakes. We can get measurements wrong, we can do a terrible
job even if we want. But when we move on to a
more accurate sketches, have warmed up and we'll
be ready for them. But also it's a really great way of just sketching outside. You can see all I'm
doing is just capturing these big shapes and really just trying to do a little bit of
comparative measurements. So looking, making sure I end his trousers just below
his trousers at the front. And then just trying to get
these bumps and things going. So there's little pump here
for the hood and there we go. So the foot is being cut off. I capacitor, if we could invent a new way to make this,
make a bit more sense. But that is definitely,
definitely person. And all we need is this is
little bit of information. So why don't we try
the same thing, but we haven't cheated where
we have to do it ourselves. So here's our next reference. And this time it's not
a noticeable that, but we can still capture
this as a silhouette. We just need to ignore
some of the extra details. Again, I'd like
starting at the head. So I always pretty
much always start at the head except in maybe from experimenting a
bit easier and for some reason come down
the back of the neck. Just get whether the neck line is and then just have a careful think about
the the actual angle. We're saying it's often easy
to assume we know the ankle, but just have a careful look. Then it doesn't matter if
we get it wrong, but it's, it's good to just observe, not, not assume, not draw
what we think we see. Again the same year, the leg, you want to think it's vertical, it's not a slightly slanting away and it's a
little bit wobbly. And then we get to
about the knee, slant even more
but then it curves back down and we just
got a little bit. If it curves out
catching the car, then curves in here. And then down. With these ones, I'm doing it all at once. But you don't have to do that. So we'll do one more after this, where we just do
a bit more loose. We don't have to capture
the silhouette all at once. It's sometimes it's easier
to do that, but not always. We don't have to. Let's, let's do another
simplification. We don't actually
have to go out, go up the side,
but down the arm, we could join the arm
here to the body and just capture the silhouette
of the arm. And then we go, if we just
another so careful look, see the front of the
face is coming down just inside the hair. We get the chin. And then we can also just
come back and add in our sort of sunglasses, perhaps tiny bit of, tiny bit of extra detail. Word of note here often. And we overemphasize
facial features. A noses aren't as big as
we want to draw them. See, this nose is
definitely knows, right? It's tempting to come and draw something much bigger than that. If we wanted to, we could
come in and we could separate out the body
from the arm here. There's lots of things
we can do for now, just sticking with
really simple ideas. Then let's do one more to
fill up on our page here. And this time we won't, we won't do it in this kind
of continuous line way. We will just kick back and forth as to which bits seem
right at the right time. So again, we're going
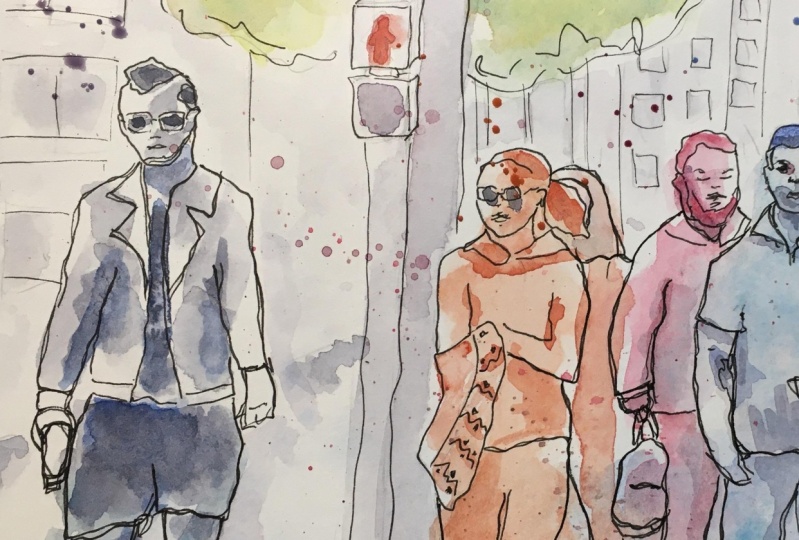
to start with the head. We're going to do the chap on the right here of this photo. Having drawn the
back of the head, I'm going to come
in and I'm going to draw the front of
the head as well. Again, just be careful we're not overemphasizing those
facial features. And then we can then we
can work out what is the chin come on the
front of the neck. Perfect. Then we can just start building
up the little bits, little bit by little bit. Front of the body comes
down and then we just got this outpouching
for the hand. And then come to
cross-cultural waistline. It can be nice just to
draw a little bit like that to give you an anchor
point to work from. And we come down again, just look at what that
angle is actually doing. It's quite surprising
how much comes out and then goes back in and aren't saying I've
done it perfectly. But it's worth just
having a little look. The same for the feet. Just have a careful look at what
the actual angles are. This time we can work
out the back foot is coming from there on the hill. And we can sort of build up from the other side this time. We know that we're
going to have to join the legs back here so
we can start up there. Like it means we can just
draw one smooth line. The same up here. We
know where we're going. We're aiming for a
maximum width here. Who even come out to a rock
sac. And we draw that in. We can add the little leap as well just for an
extra bit of detail. We come over this
shoulder and arm. And there you go. So that is another person done
again there we could just add in these little
extra bits of detail which can make a difference. And that's how people. So
we've got three silhouettes. Point no means perfect, but even just the silhouette, you can see that these are
definitely, definitely people.
4. Perspective for People: So we've done proportions, which is one scary thing. And now let's move on
to the next scale, distance perspective, thinking
about the horizon line. But again, I promise you, there are much simpler ways than it might sound
of breaking this down and just getting
out there and having an easy time sketching
people's gets you in crowns. So let's have a
little look at this, this reference picture which
is a street full of people. We can see the people was loaded and they're all at different positions
some far away. So I'm close and really close
through different heights, people standing in
different poses, moving in different ways. So how can we start actually getting these
people accurate, getting them easily
all lined up. Now, I'm going to suggest that the feet is a
difficult place to start. So let's see what happens
if we just put markers. Are all these feta, they're
everywhere, aren't they? They're up and down, up
and down, left and right. So feet isn't where
we're going to start. So what happens
if we just put a, a line across the middle? You've got nice bold line here. And actually look at that
captures their heads. So pretty much everyone's
head is on a, near this line. If we look at the pupils, use
head on, not on this line. We've got a very tall man, we got a very short woman. Everyone else's head
is on that line. So what is this magic line? Well, it's the horizon line. And what's the horizon line? It's our eye level. So whatever height we are, the height of our eyes
as we look ahead, everything, no
matter how far away, everything at eye level
will be on that line. So it does mean is
people who are taller, things which are taller
will be above that line and things which are shorter
will be below that line. The closer they are to you. Like this man is very close to us and he's a little bit tall. Therefore, he's quite a long
way above the horizon line. And the same for this woman. But if they were 20 m back, their head, we get closer
and closer to that line. All you really need to
remember is to keep heads approximately
the same height. And then we can take
things from there. So what's the next bit though? Because why the fetal ovary, but let's put the
feet marks back in. Now we can see that
where the fetus, that's telling us how far
away people are further away. So one is the heads
always on this line. But the further away they are, the higher up, the closer to this line that
their feet cap. So again, really simple rule
is now just to make people, as they get further away, move their feet up gradually. So let's have a go at
this ourselves and we're gonna do some
really simple people. Just really quickly fill a page. Let's just start with, let's do a normal
man in the middle. So we go ahead here. Can have a body which
you remember is 123 big. And then we're going
to have legs which are 123 heads big. There we go. We've got a fee. That's all we need just to
practice things like this. That's all we need to know. Our horizon line is here. So why don't we put someone in the distance, see what happens. So small head and then
we can just measure. So I suppose 123123. So I've got it right because
I'm used to doing it, but I often do place feet before everything
else and then we can just pop in a month. We could do someone
really close. What if someone's
just walking in here, they're walking in the edge so their heads still
going to be this line. Maybe they've got a
big nose this time. We can even give them a
little eyeball right. Now, what we got 12, so they're going to be off
the edge so we can just pop in the body. So there we go. We've got our people at different heights and
we can just keep going. We can easily just pop someone right next to him is slightly behind
arsenic because a fetus, but we could give him a child. So this is where things
get interesting, isn't it? We give this man a child. So what do we have to do then? We have to know that their
head is going to be smaller, but their feet, they're going
to be in the same place. So we can have to
scale everything down. And just be careful when we're drawing people
we know a smaller or taller that we get the
feet and the right place and we scale things based
on what's around them. So we could look e.g. if we had a reference rate well, the child's head is up their
shoulder to start it there. And then we put
the feet in here. Same with this. This man
has already tool chat. As a friend. We could
pop in their head. We know it's still
going to be the same. So his feet are going
to be about here, which is about the same. But this time halfway
between is going to be here. So it's wastes can be
a little bit higher. There we go. Despite their heads now actually being
at different levels, got a horizon line here. These things will
still make sense. We know these are
together. We know this person is just behind them. We named these people are
together and this one's taller. So it's really not
too challenging. I promise you, to just get used to drawing
this kind of thing. And we could easily then be popping in our
more detailed figures. So we could have done
this as a pencil sketch. And then on top of
our pencil sketch, perhaps we would build
up some of the details. So maybe this is actually
a woman with long hair. And now we can just add in arms and hands and maybe
like a rack sack. And so just by having
these little details, the little plan schemas, knowing we've got
the horizon line, knowing that the feet, and then marking the scale on
the position of the person, it's really easy to
get things accurate. So hope that has
helped a little bit. Just have a play, maybe look
at some reference photos and just practice popping people
really simple people, really quickly into
the right place and just checking that
this works for you. Checking that we get these
people in really quickly. But actually what
we want to know, it's working for
you, that it's easy. That is secondhand,
second nature. That you can just pop in people without having
to think too hard. Of course, you can affect, have to think at the beginning. But gradually this kind of rule just becomes second nature.
5. Proportions Made Easy: So I want to talk
to you now about proportions and what
our proportions. Well, I guess the easiest
way of thinking about proportions is relative size. So if we take a silly
example, we could go, well, this is a carrot and we know its relative length
is bigger than enough potato. So if we have an extra potato, potato to be much smaller, and that sounds very
silly, doesn't it? But it's important in
everything and in humans. This can be very challenging because there's
so many different bits. You've got head, arms, or legs. Trust me, when I say
there's a simple way to get started and
get competent. So if we have a look
at this, this is me. And I'm going to try
and persuade you I am the ideal person. A person can be measured in
the number of heads and that typically different parts of the body or different
numbers of heads big. So if we have a look at me again and we've measured it out, you can see I do actually
work out as a perfect person. So my head is obviously
one head big, the top, my body. And that is from my chin down to the middle of your zipper on your trousers,
your crotch loan. That's another three heads. And then from that point down to normally the middle of your feet or the
bottom of your ankles. That's another three heads. So you've got seven
heads in total. Then if you can just think
of those simple points, you're a long way towards getting things
pretty much right. There's other points
in the middle, so e.g. elbows are generally halfway
between the chin and the crotch and knees are about halfway between
crotch and the ankle. But it's really those
three big points that we want to focus on. Head, chin down to crotch, crotch down to ankle, or the middle of the feet. So how can we put
that into practice? Well, if we just take our
reference and it will do, will do Toby the
ideal person first? And let's just sketch
and see how it works. So if I am going
to capture myself, we're going to do a bit
like the silhouette method, but perhaps just a little bit of extra information this time. The reasons can be
a little bit of extra information is because we're going to do things
like bring the chin. So now we've got a
head so we can go 123. So we know we need to build towards here
for my upper body. Let's just do that. So let's just mark in the neck. And we can just pop
in these straps. We just have a little bit less
so angry with my t-shirt. It's kinda billowing
out a little bit. Got this T-Shirt here again. We can just look across and say, Is that about right place? Yeah, It is a tee-shirts
for billowing out again. Now we want the t-shirt
to finish up here above the crotch and then the legs
are going to keep going. We've got these zipper
marked in there. So we got one head, 123, and then we go 123. So we're aiming for my
ankles to be about here. If we just filled the knee, is it going to be
somewhere in the middle so we're saving these
are about here. And then sure enough, we get down to my ankles. Same invert this side. Get down to the ankles
and my feet are just popping out here on me. So it looks like
our proportions of work and we can just build in
the other details as well. Just get this
inside of the legs. We can pop in the arms and just be careful
not to do so I've over extended the
elbow on this side, which is fine, but just
a little bit of care not to do that and it'll
be even more fine. There we go. Not focusing
on all the details, but we can see how he could
just start to build this up now so we could pop in all
these straps coming off. We could pop in sunglasses
and things like that. And if we know
we've got a person, the proportions are right. All we did was we measured ahead three heads and
three heads again. Let's do it with someone else. So let's take this chap now he's looking
slightly away from us. And we'll pop them
just to the side. And I'm going to start
them on a different level. So I'm not confused by trying to copy the size of
Miami over here. Again, it's easiest for me, I think to start with the head. So we just get his hairline in. This time he's in
profile so we can easily add in facial features, but again, just down. Over-emphasizing, the nose is much smaller than you think. Then we've got his chin in's and now we know we've got 1123. Let's just map both of
these points in now. 123. So here is where
we're aiming at. I guess one of the
lessons you learn from this is the head is also
smaller than you think. When we do people, when
we do figures portraits, we tend to make facial features
much more of the face. Then they should be. And we tend to
make the head much more potent than it should be. But that's now take our man, just use these reference
points we've built. And just see even though he's
facing away from us and we can immediately see the
front of his trousers. Can't immediately tell
where this line is. We're still just be able to use. We can still see
where the trouser leg comes up around the bow. So we know the crops
is about here. So even just using that, we can ask them jump around the image all over the place and we can add in different
points that we got this flag, which we can add in before we, before we've got there, before we've done the whole silhouette. We can get the ITO
his shoulder coming across and then comes
sharply down, doesn't it? Coming up again and
then his hand is just gesticulating up here. Then we've got the
front of his body. Should have loops around. And then these straps coming over getting lost in
the curves there. And then the legs again, just look at these angles. It's tempting to draw
them straight down. But what's actually
happening is this is the inside leg and then
we've got the outside leg, the back leg coming
down and then it goes back quite a sharp angle
before curving down again. We can see this is our sort of mid foot line or ankle line. If we just get to that point, the front leg is
even the front legs of curving down a little bit. We can see that actually
popping his ankle in there. It's pretty much on point. And then we've got the middle of that and that's
gonna be the knee. There we go. So again, I'll person has fitted neatly
into our three-point rule. So just just to reiterate that, we've got one head, then we got three heads, then we got another three heads. And it's really simple, effective way of measuring
out your proportions.
6. Details and Character: It's now time to think
about how we add a bit more detail and
energy to someone. Sketches we've
been doing so far. I've had quite so
straight lines, been thinking a lot about
size and proportion. Now it's time to just
loosen up a little bit and start getting some of
those important details but without overdoing it. So this chapter, Let's just
start by drawing his head. As ever. The head sort
of sets the scale. From there we can often. And what details are
important in the head? Well, things like
glasses are great. They had a great reference
point for our drawing. There are sort of obvious, very obvious thing in
a reference photo. And they don't
overpower the face. I said little touches, like there's just
very gentle touches. The facial features are
normally more than enough, even just leaving a face
blank and is usually fine. But just a touch your
facial features, you can even draw him
sort of little shadows for eyes and things like that. Experiment. But remember,
less is often more. The biggest mistake
that we often make in drawing people is
drawing the head too vague. Biggest mistake we
often draw in drawing faces is doing all the
facial features cubic. So just remember that and
try and just certain things. And we can then start to think about the clothing that people are wearing
and getting that in, getting the angles of these
and kind of color lines, cutting the shape
of people's arms. How long, how long really
is there a sleeve? Building this all and takes
a bit of practice and skill. But when you've got the
proportions already done for you with your
easy, easy technique. This is when you can now
start to think about those extra little
details. Remember hand. So moving on to the hands now, hands can be easy to
overdraw as well, but you don't need to do much. So hand is really just
a shape like this. Your knuckles going across. You can assign like that. And that's your fingers. You got to fund sort
of coming out here. And that is the basics, basic shape of a hand that
kinda emitted like handing. You can build onto that. So this man holding his phone, you can build onto this
sort of MIT unlike hand. And we know exactly
what's going on. We haven't overdrawn. Same here. We could add in a little bit of shading to get the
shape of this hand. We don't need to
do more than that. Getting into crumbles and T-shirts is a lovely
detail as well. So just getting
these kind of lines is this is why I said
we just loosen up our lines a bit and
we start to build in movies lovely details and getting things like the shape
of people's stomachs, e.g. tells us a lot about who they
are, what they look like. Then this is where
the energy comes in, look at this late to
striding forward to getting these loose lines and just
building up these shapes. Getting the knee in about the
right place just all gives a sense, sense of movement. And you see how, because these
lines are nice and loose, I can go back and
correct them so I can do any old nonsense like this. Then I'm always gonna
be able to come back. And just actually
from that matters, find the right shapes. With feet, with trainers. That's another great
opportunity to add in an important detail
without overdoing things. So just getting things like
the tongue of the shoe, getting the laces,
if they have them, got a big heel, you add that in. If it's off the floor, you can get the
underside of the shoe. And that again
promotes this sense of movement and gesture to finish things off so I can
leave the shoes like this. Then we can come in and
we can refine things. A bit unkind to this man in
the shape of his leg there. Same with this one, but
again, these lists lines. Let us come and refine and just build all that
energy into this image. And let's do one
more really quickly. So this one is interest
one, this is my dad. Things would work to pop
them next to this chap, get a little bit
of sort of compare and contrast going on again, we can be really loose. Starting with the head. We can already start
building in details like these, ear defenders. And just getting the
shape of the face and already building
things like classes. And then just checking
where actually does the Jin Guo chance actually
doing really upwards here. Can't see the neck because
all the hair and the ego. So basically it was
just pop amazing. We've got everything we need. We could do suggestion of lips maybe this time.
So let's just try that. And then from there we can start building the rest of our body. So we got back coming
down Quite slim, so t-shirts coming
just like that. Then we got this arm sleeve kind of loops all the
way around, doesn't it? Comes out here. And an elbow in the middle between the
chin and the crotch. Arms kinda pointing out here. And this is again
where we've got interesting details to add
in relation to the hands. So this time the hand
is holding a tool. Can weaken. The hand itself, can be very simple. And what we can do is just
build in the shape is holding, which is much easier. Shapes draw. Evident just from
doing a very simple hand. This hand holding this object. Necked, bring in T6 but coming down and then another
arm in the back. I don't remember sense of scale. This is further back, so it's smaller in terms of diameter
and then the arm in front, of course, these leaks lines. Let's go back,
Let's move around, edit things up and they let us capture people really
quickly as well. This time we got sandals try and capture. So
how can we do that? We just kept this
idea of straps. We can get the idea of toes with a few little
shapes at the front of them. And the idea that we can see a heel and then loose trousers capture
with loose lines. And then just the
same idea of a sand old disappearing off this
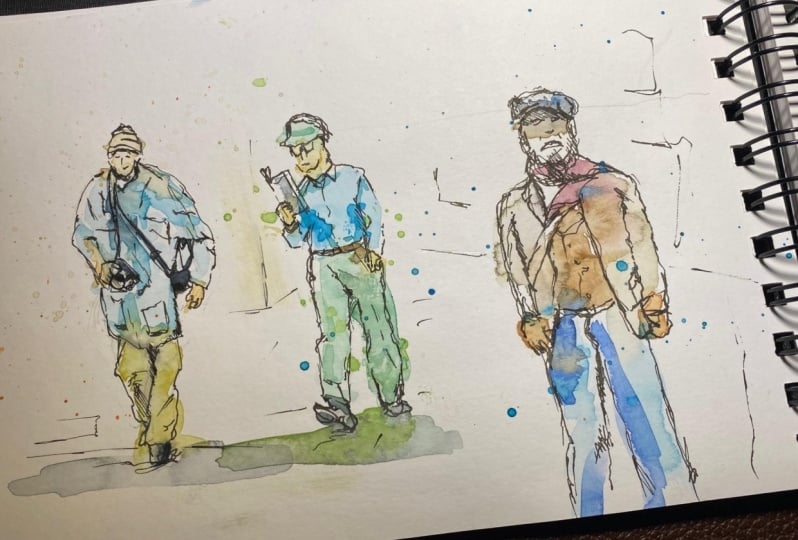
time into the background. Here. There we go. So these are
our people now with details. So what we did, we've changed a little bit of the
energy of our lines. We picked a few key details. We were careful not
to overwork things, but we captured the
essence of these people, captured the classes, the ear defenders,
what they're holding, where the hands
are, the movements are Hess guys striding. This guy is standing
still staring quite intensively doing a
bit of hard work. We can keep adding
lines if we want or we can stop there and be happy. We've got some lovely little
details built-in now.
7. Colour Palette for People: What colors can we
use for people? Well as phase, there's two questions around
their test people's skin, which is normally what
we mean by people. And then there's
everything else. Like clothes like
what they're holding. Exact colors aren't
super important, but I'll show you what
I use for skin tones. Also explain why I didn't think the exact
colors are important. The colors I use
are quinacridone, gold, nice, warm gold. Quinacridone, sienna,
little bit more there. She's a nice sort of Reddy
brown again, very warm. Then I use sometimes a bit
of magenta, purple tone. And a little bit
sometimes read like, I've got a scarlet lake here. And then we've got
shadows to think about. So just a dark tone like
Indigo can be nice for that. Also, often use a
bit of cobalt blue. Just get a bit more
there you will see a nice sort of
cool primary plea. So these are my basic colors. Mixing up skin tones. We can mix them in
a variety of ways. If I take some
correctly in Sienna. And if I take my scarlet lake, we just got all those colors. Can see if we mix, mix them
together in a palette. We can come out with these
nice warm skin tones. You can vary them. We can mix in some more red. If we do that, suddenly we
get this more pinkish tone. We can even add in a
little bit magenta. A little bit more magenta. Let's just take a little bit. We become a bit
more sort of fee. So lots of variation, but not necessary to be perfect, and we're not aiming for
perfectly matching exact tones. These two blues is
cobalt and indigo. If I just mix, even on this, on the page here you
can see they make quite nice shadowy colors. So that's the cobalt
and the indigo. If I just pop bit
of indigo there and bringing in some
way mixed skin tones, you can see different kind of shadow can see these
are the colors I use. And how do I use them? So let's have a look in the
next lesson and we'll talk through it at a real example of popping these
colors on a person.
8. Adding Colour on our Page: So for the colors,
we're going to bring back our sort of
detailed people. I'm going to use the same
colors, even mixing. So if I get a bit more of our quinacridone and a bit
more of a red herring. This is how I like mixing,
like having things just there that I can move it
around and pick and choose. If we take will start
with my dad here. Fairly dark skin tone. So let's take a fair bit of
the brain sienna and mix. We get a fairly earthy color. The important thing is
just to test things out. So normally on a
different piece of paper, but for here, just test out. Is that color okay? Because the amount of
water can drastically change how dark or light is
if I take a load more water. So very different tone. And then if I just mixed
it like this in the page, suddenly does,
obviously overpowering. So somewhere in the
middle is nice. And that's where
testing comes in. That's okay. Even
perhaps a little strong. So take a tiny bit more water. Because what we want to
do is first just pop in a few areas of the
lightest skin tones. We can always come
back and add shadow. We don't want to
necessarily cover the whole face because
we're sketching, we're getting the essence. We're getting bits
of bits of color, touches of color, rather than having to paint
everything perfectly. So we can just build up
little touches like this. If we move across one
more thing, of course, you got feet down here
now a bit less than, than in the face. So we just take more water, we make it a bit of
a lighter color. If we take our other chap here. He's got a lighter skin tone, but he's not a shadow.
He's a bit pinker. So let's add in a little
bit of scarlet lake here. Just do a little test. That's a bit too bright. So if we just take a bit
more water, That's better. Again, we can just touch in. We're basically just building up and it's fine to
leave those white. Use the same color
just to pull down onto his arms. And on the side here. And I'm going to persuade
you here as well. Just mix up a bit more that it's also fine to
let things pull around. So I could just let
things come off. I could do is legs,
but I could actually just two little patches. And this is all part of the
urban sketching experiences, just playing with colors, letting them move, letting them have their own
little bits of fun. Just noticed there's another, I want to pop a bit of
color on in the background. Now while this is
drying, we will go back to what's our next
layer of the process. Because this first gestural
lines in gestural marks and in the next part is to
add a little bit of shade. So perhaps we can try
using our cobalt blue. The reason cobalt blue works the shade is because
blue and orange, or blue and red neutralize. So we end up with these
kind of murkier colors. So you can see that that's
a sort of deeper here. We can just mix around until
we get the one that we want. I want it a little
bit warmer than that. So I'm going to keep adding in more of a crack between sienna. There you go. So we got a nice color. They're going to take a little bit of water on
my brush just on a tissue. And now I can just use this
darker color to glaze over, to add in a few
ideas of shadows. They just ideas of shadows. We can take other things. We can take some of this
magenta and that can add a different tone as
well to some shadows. What we're doing is just
building up a couple of layers. And don't forget, we can always, if we think we've
done two tuples, we can come back in with a clean brush and
move things back. Same with our chap in the front. And we can use the same blue, shady sort of pink color. We can just add in
big bold shadow. And again, we can let
this shadow pull out. It doesn't have to be perfect. It doesn't have to be
really wild drawn, painted rather within the man. It can be one of those
urban sketching, interesting feeling. Shadows moving around. Can even add. If we just take a nice color, can even add, just checking it, a few splashes to give that idea of these colors
just pooling around. So these are all options for
getting those skin tones and has another
funny one to draw. I like using a bit of cobalt
as a sort of background, but if shade or shadow, especially for grayer hair. So if we just pop that
in to start with, again, let it move around, let it wash around and just loosen up. Perhaps or a man at the front, we could start with indigo. And then if we mix indigo
and connection and sienna, DC, what a Dark Brownie black we get, and it depends how
much of each we use, but this is a very
nice neutral color. We can just touch that in. Maybe you can clean off
the brush a bit and then move the air around. It's really simple,
simple touches. We can even use the
same dark colors and a couple of places maybe to capture some deep
shadows in the skin or in the trainers
or this phone. Perhaps use the same over
here for this drill. Then this should be pretty much dry now carries a
very thin layer. So if we just take
more of our dark, just testing it out, take a little bit water off. There we go. And we can just build up some suggestive marks to
get the shadow in the hair. And also to just
get some sort of hairlike marks going on.
And that's what we need. That's all we need. A little bit of reflection in glasses always
looks interesting. So we can just add
the same dark there. But these are all
extra details really. The last bit is all
the other stuff. So what do we do with
t-shirts and things? Well, let's take our unmanned
trousers as an example. So I guess it's gonna get
a nice bright yellow. So let me just get it. I've been painting lots
of greenery recently, been mixing my yellow
up to make a green. If we take a nice bright yellow, we can just use that and the trousers and the shorts here. This is just suggestive. It doesn't, it's enough
to be exact at all. But again, it's just suggestive
and it can pull out, it can move around. He's also got some funny
bugs on his T-shirt. So just take a nice red, let's say we can just add marks which suggest that
kind of thing. Something on his T-shirt. We can soften them,
move them around, just let them spread and let the t-shirt have
a bit more real life, even though his t-shirt is
why it can be another color. No problem. A little bit of blue in there. And we can create
some shadows as well. What about over here? Well, why don't we just continue this high contrast are
there so we use indigo. If the front leg we keep
nice and light and the back leg we just take more
pigment, less water. We can get a nice bit of
shape going very easily. And that just emphasizes the different shapes
so we can use our colors to build
up value as well. Value and shadow. There's no reason we have
to paint the t-shirt, but if we wanted to, maybe we just use a nice blue
to get a bit more shadow. And this means we're
not taking away from our figure with
overpowering colors. So here we go. There's our, our people with
color, with detail. Not painted everything.
We've not been neat, but they're definitely humans and they're definitely
interesting. So thank you for
watching this lesson. And I didn't need to say that.
9. Summary and Thanks!: Thank you everyone for joining and it's been amazing having
you along for the ride. It's been a really quick class all about simple tips
on colors, details, right back to the
basics of silhouettes, having competence and growing proportions
and things like that. I hope it's been helpful. I'm pleased to leave
a review for me. It's amazing to get reviews so I can understand what
it can do better, but also so I know I'm bringing new things which are helpful. And if you've done a
project, please do share it. It'd be amazing to see
all the different people figure is drawing seems
that people make from this. You're welcome, of course, to follow me on YouTube at Toby urban sketch
on the same app, Toby urban sketch on Instagram, where I put up lots of
content and lots of tutorials on please follow
me here on Skillshare. Thanks again for being with me. And I hope you have a
lovely rest of your day.
 Toby Haseler, Urban Sketcher, Continuous Lines