Transcripts
1. Intro: Hello, and welcome to Sketchbook Snack
drawing funky Chicken. In this class, we're
going to relax, have fun, and most importantly, play in our sketchbook. That's what a sketchbook
snack is all about. It's perfect for when
you're feeling blocked, overwhelmed or when you just
don't know what to draw. And especially when you
don't know what to draw, but you know you want
to draw something. It's also short. So if you don't have a lot
of time to be creative, you can always fit in
a sketchbook snack. Hi. I'm Jenny Maclyn, the artist behind
Tiny Leaf Press and the creator of
sketchbook Snack classes. I teach sketchbook
snacks to help artists like you have more fun
in your creative practice, while also making it easy to do. So how does a sketchbook
snack make it easier? Well, first of all, it's short. There's not a long
time commitment, either to watch the class
or do the projects. You'll spend less
time watching me and more time making
marks on the page. Sounds nice, right?
It's also low pressure. I'm always going to
encourage you to stay loose and just relax and see
where the art takes you. We're not trying to make perfect portfolio pieces in this class. Just trying to have
some fun. And lastly, a sketchbook snack is
a little bit silly. Sketchbook snacks
like this class are often going to
include drawing something a little
bit silly or a little bit goofy to help you
enjoy the process. There's nothing more fun than looking back at
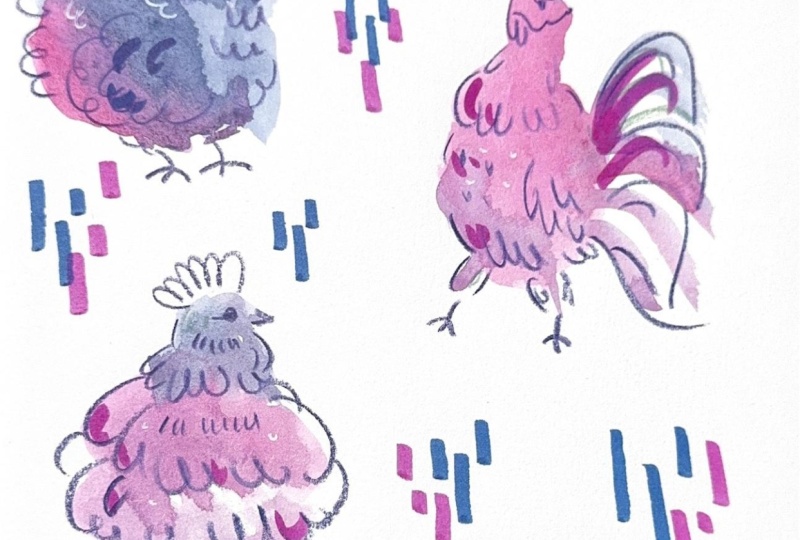
your sketchbook and just giggling at how silly your chickens look on the page. In this sketchbook snack, we're going to play with
mixing watercolors to create some funky
tie dyed chickens. You'll see my entire process, and I'll give you
some tips and tricks, but this is not a paint
by numbers class. You're gonna be creating
your own unique project in your own unique way. That's part of the fun
of a sketchbook snack. Just relaxing into the process and seeing what
comes out naturally. This is especially true
when we're mixing colors like this because
everyone's project is going to turn
out differently. And isn't that wonderful?
By the end of this class, you'll end up with
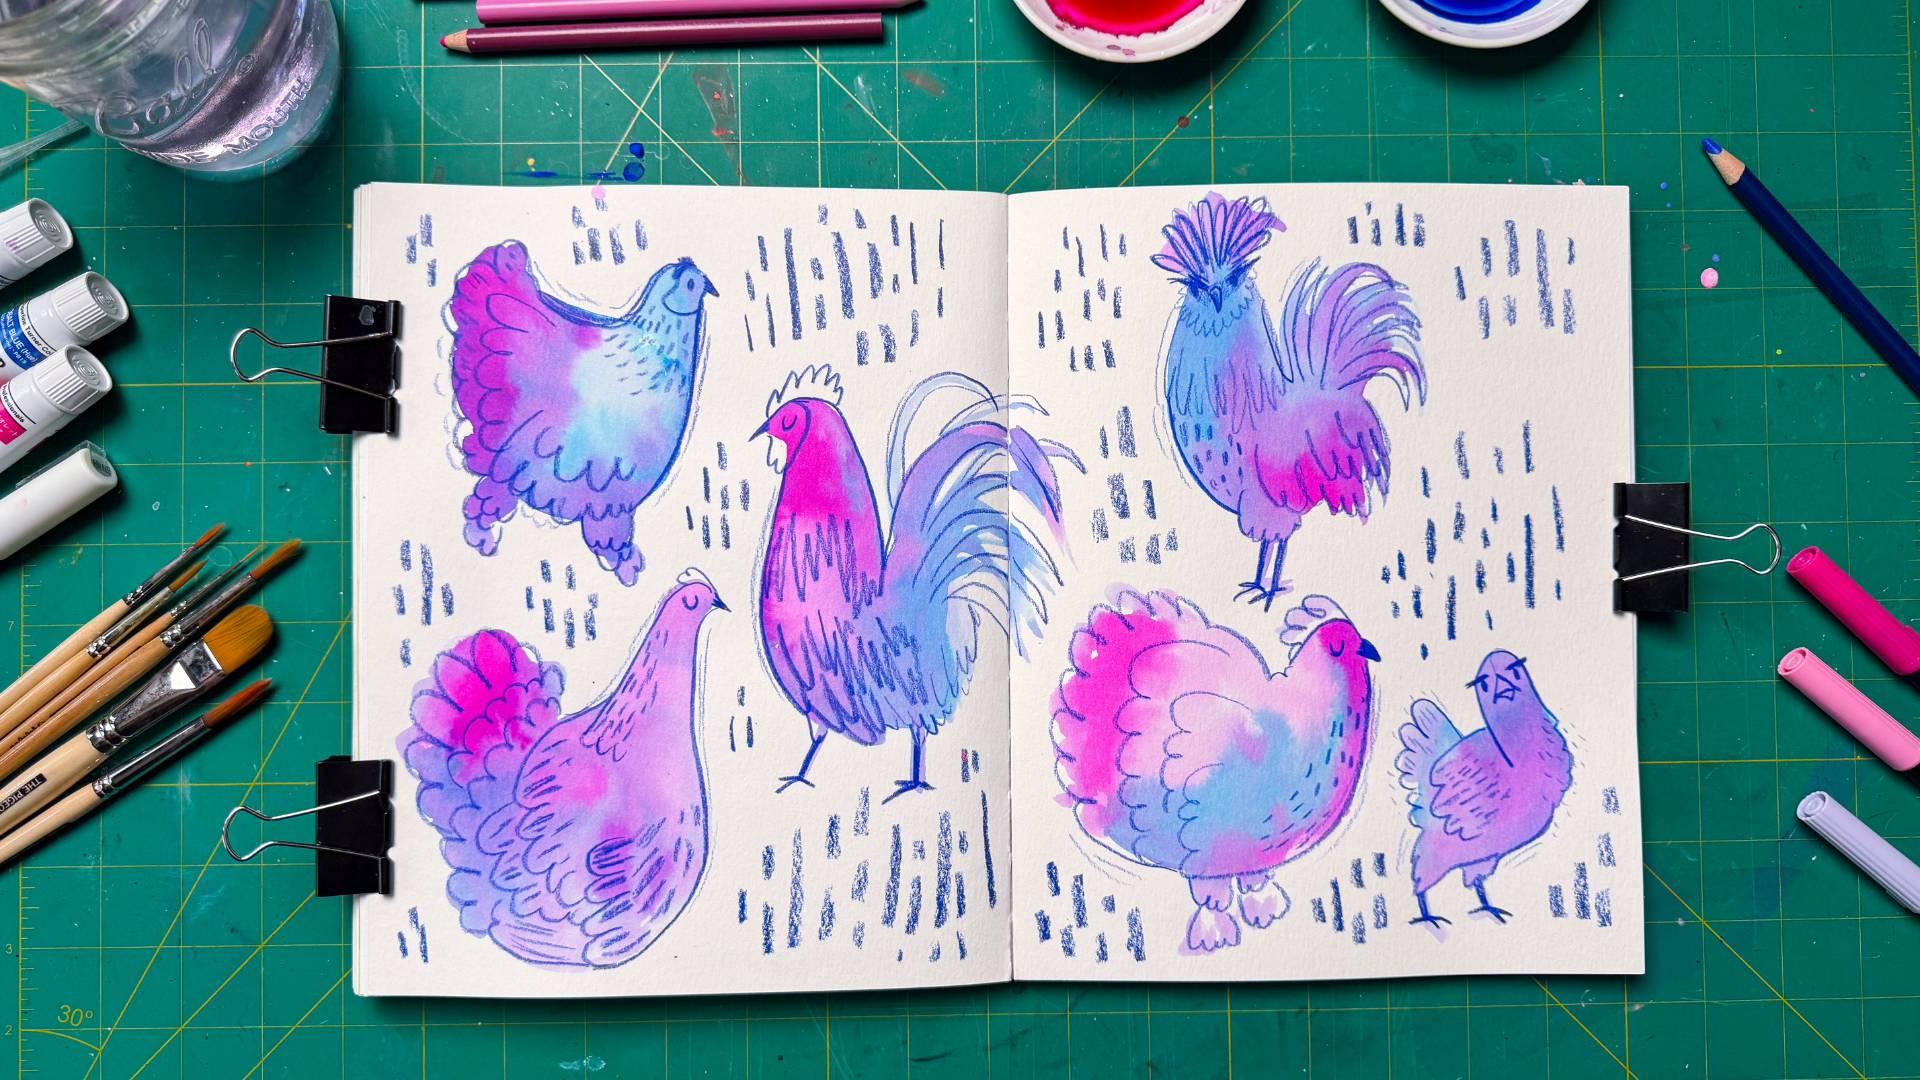
a sketchbook spread that is uniquely yours. For our final project, we'll be creating a double
page spread full of funky chickens that have
a beautiful ti guy look. First, we're going to cover
the materials you'll need, as well as how you
can substitute for any supplies
you have on hand. Then we're gonna dive right
into our final project. This class is short and sweet, just a tiny bit of setup, and then you'll be
painting immediately. Are you ready to paint
some funky chicken? Join me in class.
2. Materials: Here are the exact materials
that I'll be using. Just a reminder that you can substitute any
materials you want. No need to run to the art
store to buy anything new unless you're looking
for an excuse, of course. For my sketchbook, I'll be using a Strathmore soft cover
watercolor journal. Any mixed media or watercolor
sketchbook will work. And, of course, this
project can also be done on loose paper if you don't
have a suitable sketchbook. Just make sure whatever paper you choose can
handle wet material, as we'll be using a lot of water to mix our
colors in this class. I'll be using these
liquid watercolors by doctor PH Martin I actually chose them
because they're one of my art supplies that have been sitting on the
shelf for a while, and I wanted to
give it new life. Maybe you have something
like that in your studio. This might be the perfect
time to try it out again. You can use any watercolor or ink that you like
for this project. This is just the one
that I chose to use. If you want to get
that tie dye effect, just make sure you can easily mix whatever
material you do use. So like this watercolor ink or regular watercolor with a lot of water mixed in is going
to be perfect for this. And make sure that you choose two colors that
are going to mix well. I'll be using blue and pink, which go together really nicely, but you can use any mix
that you find inspiring. You just want to make sure
that when they mix together, they're going to make a
color that you enjoy and not something that's kind
of off putting to you. Some other things that
you'll need are a water cup. Paint brushes or a paintbrush. I'm using a round number eight
from the pigeon letters, a palette or mixing dish for your watercolors,
a colored pencil, and optionally a fat crayon
or color pencil like the stabil woody
three and one for making some texture marks
at the end of the project. And that's it. After this, we'll be diving straight
into our final project, so go ahead and
gather your supplies, and I'll meet you
in the next lesson.
3. Final Project: Part 1: It's time to start painting
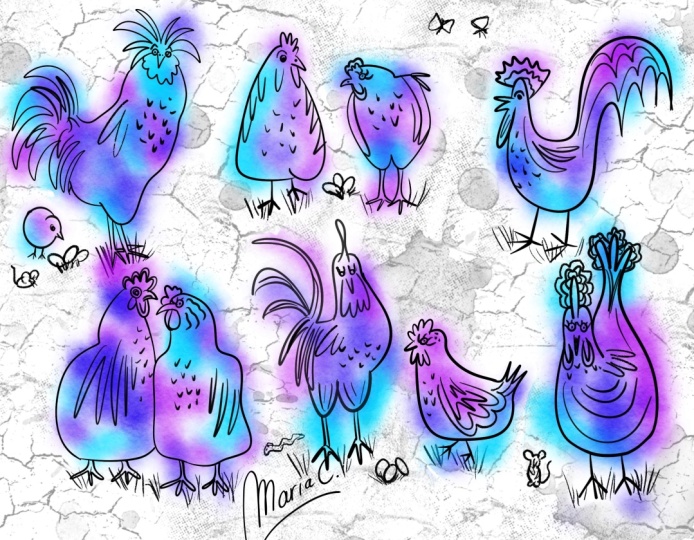
our funky chickens. In the download section, I've provided some
reference photos that you can use if you'd like
to follow along with me. But please feel free to use any reference photos you like or even just your imagination. These don't have to
be perfect chickens. They are funky after all. If you want to use the same
reference images as me, you can find them in
the downloads below. Alright, let's get into it. For this project,
we're going to break it down into three parts. First, we're going to paint our chicken shapes by mixing
colors directly on the page. This is how we're going to
get that ult eye dye effect. Second, we're going to well, 1.5, we're gonna wait
for that paint to dry. And then, second, we're
going to refine our chickens by adding linework and
detail with a color pencil. So if you need to, take a
break after painting and then come back once it's dry and you're ready to
add the linework. For the last step, we're
going to be adding a little bit of flourish
and a finishing touch to our spread by
adding some texture into the negative
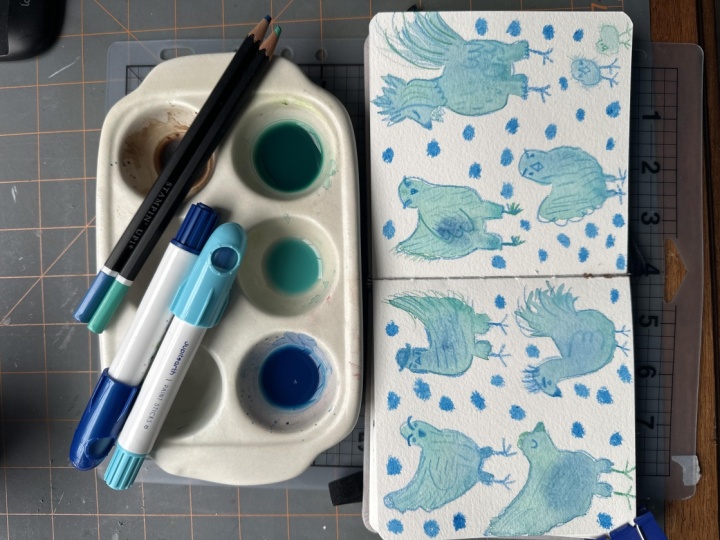
space. Ready? Let's go. The first thing that I did to prepare for painting
this spread was adding some of my
liquid watercolors to these little paint palettes
that you can see here. I just added a
couple of drops of each color to a
dish and then added as much water as I needed to get the right color and consistency that I
was looking for. So go ahead and prepare
your materials, and then we're going to get started painting our chickens. So first, we're going
to start by just painting these loose shapes. The way that I'm approaching
the tie dye effect is by starting in one color
blue, as you can see here. I'm filling in some
pretty watery paint here just to fill that shape in. And then once I have
it all covered, I'm going to grab
the second color and start dabbing it
into those wet areas. And this is going to
allow you to create a totally unique shape
for your chickens. It'll depend on where you have the most water and where you
apply your other colors. And as you can see, I'm doing, you know, little
dabs here and there, making the chickens
legs a different color, and then adding in little
dots of color elsewhere. And sort of blending the colors together on the actual page. And I'm also going to add in a little bit more water
from time to time to help those colors
mix together and just sort of swirl around
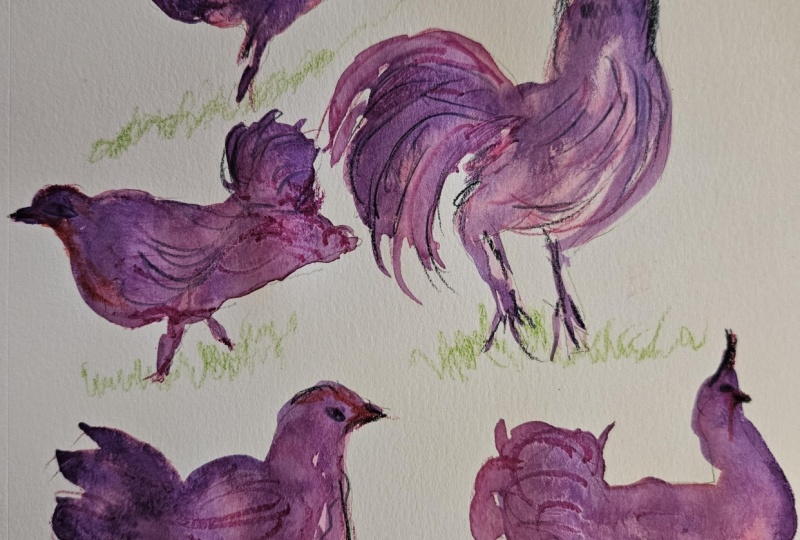
and get that tidite effect. As the colors mix
and as they dry, you're going to get this
really nice combination of three different shades, your original primary colors and then the color that they
make when they mix. So in this case, purple. And you can already see that starting to happen on the page, even though it hasn't dried yet. I'll do one more chicken, and then I'll speed up
the process so that you can get to drawing your own chickens as
quickly as possible. This time, I'm starting
with my pink color, and I'm just feeling
the shape out as I go. I am using the reference photo, but it's more of a loose
guideline because we will be adding details in
in a further step. But right now, we
just want to get that basic shape down
with our Tidd colors. And this chicken or
rooster, I suppose, has a very fluffy tail, so that's why I'm doing
those brush strokes like that for the tail. So depending on which
reference photos you use, you can explore making different chickens on
your page just like this. So as you can see, I
did the same thing. I just mixed the two colors, added a little bit of water, and then kind of
felt my way through. It wasn't really
anything precise. It was just these Where do I want to add a little
bit more color? That's part of the
magic of this exercise. Alright, I'm going
to go ahead and speed up the video
now so that you can see how I placed my shapes
and colors on the page. I'll meet you back
here in a second. Okay, great. So now
we have a full spread full of our basic shapes
with our tie dye colors. We need to let this paint dry. So depending on how much water you used or what
materials you used, you might need to give
it a little while. Maybe come back tomorrow
once the page is fully dry, and you're ready
for that next step. I'm going to go ahead
and let this wait, and then I'll meet you in the next video where
the paint will be dry and we'll go over our lines and details to create
these chickens. See you there. O.
4. Final Project: Part 2: Now that we've waited
for our paint to dry, we are ready to move
on to the next step, which is adding details to our basic shapes in order to actually create something
that resembles a chicken. So what I'm going to be
using for my lines and details is an ultramarine
prisma color colored pencil. You can use any
colored pencil, a pen, a marker, whatever
your preferred media is for outlines and details. If you have a very steady hand, you can use paint and a paint
brush, as well, of course. So what I'm doing
here is just using the reference photos and filling in the shape that I created
in the previous step. I'm not adhering strictly
to the reference photo. I'm more using it
as a guideline, and I'm going heavily stylized because that's how I like
to draw. Most things. So if you have a different
style preference, of course, stick to that. This is fun and unique to you. Just go through shape by
shape and add in these lines, draw feathers, some texture. I like to do little facial
expressions to make them a little bit more
anthropomorphized than their reference photos, but you don't have to do
that if you don't want to. Okay, I'm going to go ahead
and speed up this process now so that you can just get a general idea of how
I did my chickens. But get to drawing your
own a little bit faster. Feel free to watch
along and then pause the video to do
your next step or to draw along with me. All right. Now that I've got all the
lines and details filled in, I'll meet you in the next
video where we're going to add our final step and finishing
touches. See you there.
5. Final Project: Part 3: It's time for the final
step of our project. And that's just adding
in a little bit of finishing touches and filling in that white space
around our chickens. And, of course, you might
have a different amount of white space than I do if you chose your spread differently or use
different reverence photos. So you're going
to need to adjust this for your unique spread. A great option for this kind of filler marks are lines and
hatches like I'm doing here. You could also do dots. You could fill in with
little flowers or other smaller motifs that
are related to chicken. So maybe pieces of
grain or, you know, other farm yard things, whatever your imagination
wants you to do, you know, and then I also want
to mention I chose to use the same color as
my lines and details, but this could be a
really good option for adding another
little bit of color, a pop of color in there
or just to tie everything a little bit more
together if you wanted to use a new color. Since I used pink and
blue for my watercolors, they created this nice purple
on the chicken shapes. So this could be a
really good opportunity to tie it all together by adding in the color that was the result of the two
primary colors being mixed. So it's entirely up to you
what you want to do here, whether you want to do stars and sparkles or lines or dots. But go ahead and choose your texture and
your material and fill in those white spaces until you have a full
spread like this. All right. And then
once you've done that, I will see you in
our final video where we'll talk
about next steps and finishing up
class. See you there.
6. Next Steps: Congrats on completing
the class. How did it go? Did you love your
funky chickens? It's not always easy to take time for yourself in
your creative practice. So I want you to be
proud of yourself for making this time
and for sitting down and doing
something that's just relaxing and fun
and just for you. For next steps, if you're in need of another
sketchbook snack, you can check out
the whole series. I've got classes on
drawing Goofy Dogs, dreamy Dragons, and Me. I'll add the links below so you can check those out if
you haven't already. If you'd like to
share your work, I would love it if you submitted your project
here on Skillshare. It absolutely makes
my day to see student projects and I check out and respond to
every single one. If you want to
share on Instagram, you can tag me at
Tiny Leaf Press. Just be sure to tag me in the actual photo so
that I can see it. Instagram changes all the time, but as of this filming, that's the best way
for me to see it. Lastly, I am always
making new classes. So if you'd like to be notified when the
next one comes out, be sure to follow me
here on Skillshare. That's all for now. Thanks
again for joining me in class. I hope you had fun and I hope to see you next
time. Bye for now.
 Jenni Macklin, Illustrator & Surface Pattern Designer