Transcripts
1. Intro: Hi. Hello, and welcome to Sketchbook Snack
Drawing Dreamy Dragons. In this class, we're
going to relax, have fun, and play
in our sketchbooks. That's what a sketchbook snack
is all about, after all. It's perfect for when
you're feeling blocked, overwhelmed or when you just
don't know what to draw, but you know you want
to draw something. It's also short. So even if you don't have a
lot of time to be creative, you can always fit in
a sketchbook snack. Hi. I'm Jenny Maclyn, the artist behind
Tiny Leaf Press and the creator of sketchbook
Snack classes. I teach sketchbook snacks to
help artists like you have more fun in your
creative practice while also making it easy to do. How does a sketchbook
snack make things easier? Well, first of all, it's short. There's not a long
time commitment to either watch the class
or do the project. I'll give you the
necessary information and then send you on your way
to play in your sketchbook. Less time watching me and more time putting
marks on the page. Second, it's low pressure. I will always encourage you to stay loose and let
go of perfection. We aren't trying to win any
awards with these projects. Just have some fun.
There's no such thing as bad art in a
sketchbook's neck. In fact, it's against the
rules to label it so. And lastly, a sketchbook's
neck is a little bit silly. Sketchbook snacks
like this class will often include drawing
something a little bit silly or goofy to help
us enjoy the process and hopefully laugh a little bit whenever we look
back on our project. They're meant to be joyful. And what's more joyful than giggling at a bunch of
goofy dragons, right? In this class, as you may
have guessed from the title, we're going to be
drawing dreamy Dragons. First, we'll go
over materials and talk about what
actually makes a dragon and how to find references if you then for our final project, we'll create a double
page spread full of dreamy dragons that
are uniquely yours. You'll see my entire process, and I'll give you
some tips and tricks, but this isn't a paint
by numbers class. You'll be creating your
own unique project in your own unique way. That's part of the fun
of a sketchbooks neck. Just relaxing into the process and seeing what
comes out naturally. Are you ready to have some
fun in your sketchbook and draw some dreamy dragons?
Join me in class.
2. Materials Needed: Here you can see all
the materials that are used for the final project. And before we get
too far into it, I just want to make
a quick note that all the materials
and colors you see here can be substituted for
whatever you have available. There's no need
to go out and buy new supplies unless you
want to, of course. So for my paint, I'm using
this Karen dash gouache set, which are paint pans of gouache. I really like how rich and
vibrant the colors come. You can use any type of gouache, acrylic gouache, regular guash. You could even use watercolor or acrylic paint
for this project. I have these three paint
brushes that you can see. These are different sizes
from the pigeon letters. I really like these
brushes a lot. They're very high
quality, high quality. I think it's eight,
two, and six. I'll double check. I'm using this one hombo dual brush
marker in a light purple color. I believe it's 620. I'm using these prisma color
pencils in four colors. Just a quick note about the
lilac prisma color pencil, that's been discontinued. So you won't be able to
find that exact color if you don't already have it. But like I mentioned, you
can substitute anything. So if you're doing these
same colors as me, any light purple will work any brand colored pencil as well. You want to try and get
as close as possible, I think the amethyst
prisma color is going to be your
best bet there. I'm also using this white
posca pen that's optional. If you don't use mine to
draw teeth on the dragons, but if you don't want
to do that, that is totally fine. You
won't need that. And last but not least, the sketchbook you see here is the one that I'm
using in the final project, and this one is from odd orange. It's a hardcover cloth
bound sketchbook. For your sketchbook, you just need something that
can hold some paint. Mixed media watercolor
would be best. Of course, you can
always do this on loose leaf watercolor
paper as well. Totally up to you. Alright. Are all the materials
you'll need. Go ahead and gather them up if you don't
already have them, and I'll see you in the next lesson where
we'll talk about how to find references of imaginary creatures.
I'll see you there.
3. How to Find References of Imaginary Creatures: All right, let's talk about
how to find a reference image when the creature you're
trying to draw is imaginary. So I want you to
think a little bit about the types of dragons that, you know, pop into your head when you
think about a dragon. You've probably seen them in, you know, animations,
maybe movies, or illustrations in books, maybe on architecture or
other historical art. So just think about what a
dragon looks like to you, and then we're also going to do an optional little
bit of research. So if you aren't really sure, what a dragon looks like or how you want to
draw your dragon, you've got a couple of options. First, you can follow
along exactly with me. I'm just drawing these
dragons from my imagination. But if you just want to copy and follow along with
what I'm doing, that is totally okay. Second, you can do a
little bit of research. You can Google dragons, try to find some images from the public domain, some historic architecture or artworks. You could also research some
dragons around the world. There are different
iterations of dragons in different cultures
all around the world. They have different features,
typically, as well. So it's really
fascinating to look into. This is not a research class, so this is not your homework, but if you're interested and
you want to come up with your own unique version of a dragon, that's a
great place to start. Then lastly, you can
always go to Pinterest. And Pinterest is a little bit
of a tricky subject when it comes to reference
images because they're not always credited. So what we want to
make sure that we're doing for this
particular project, is finding a lot of
reference images, so they're not copying
one particular artist or, you know, version of a dragon. So as long as you're
sourcing images from lots of different places and not just one or a few, you
should be okay. And then, of course, this
is just in our sketchbook. So if you have no plans to
sell or monetize these images, you don't have to worry
about it too much. It's just when you start to
lean a little bit too much on one image for inspiration that you need to
credit that artist, and that can be very
difficult to do on Pintra. So that's how to find
reference images for an imaginary creature. And really does come
down to just finding a lot of images and using
a lot of imagination. But now that you've done that, if you want to optionally go ahead and do a little
bit of research, now's a great time to do it. And if not, I'll meet you
in the next lesson where we're going to get started
on our final project. See you there.
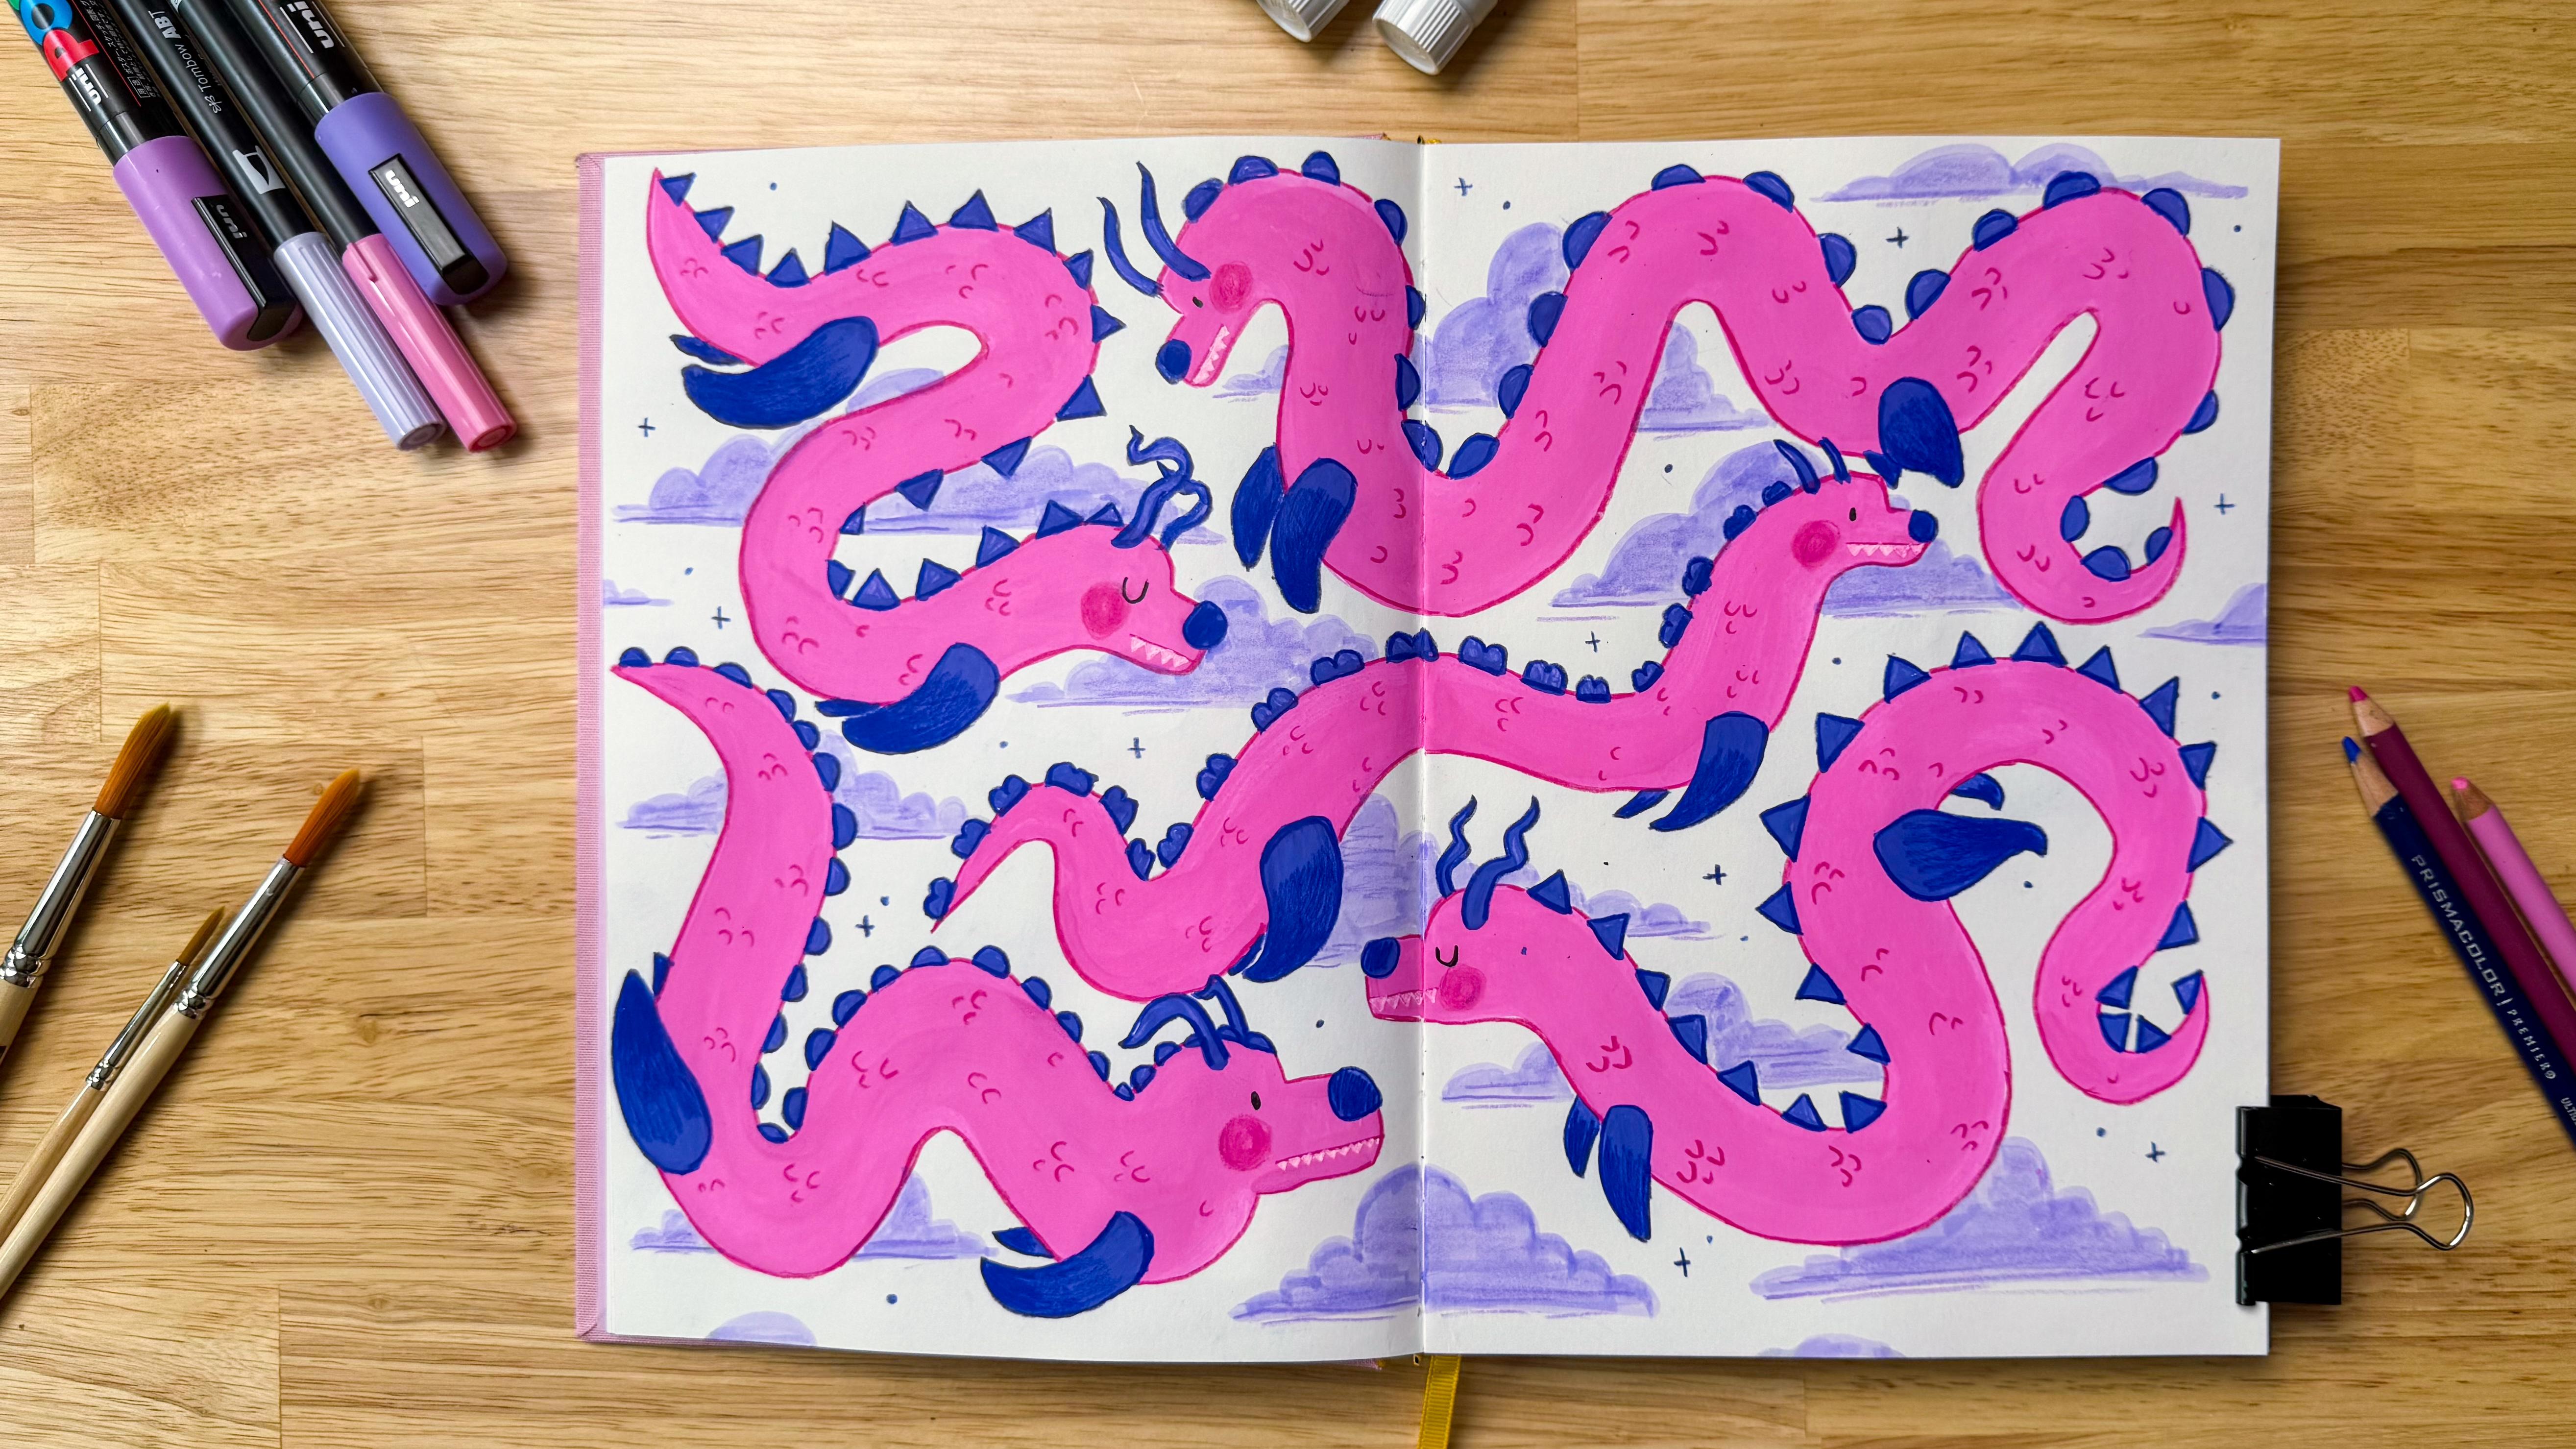
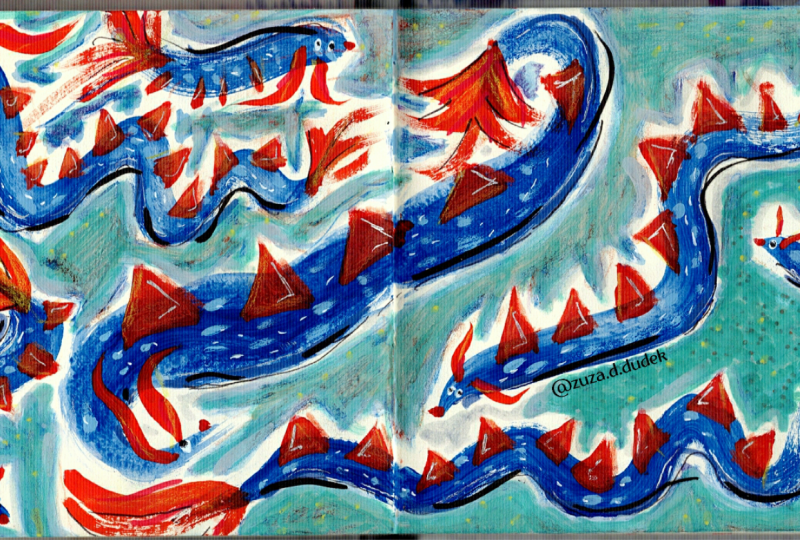
4. Final Project: Part 1: It's time to draw
some dreamy dragons. We've covered the supplies
that you'll need, how to find references
if you need them. Now we get to paint
some dragons. Go ahead and gather
your supplies if you don't already have them. Alright, I have my sketchbook
and supplies here, and the first thing that
we're going to do is mix up some paint for our dragons. And I'm going to
use one main color for the dragons bodies, which is this pink color from
the KarndashPaint pan set, which is Guash, as I mentioned
in the materials video. I'm going to mix
that with some of the white guash that
just comes with the set. You can use any white guash that you have if you're
trying to lighten it up. But I just wanted to make
more of a pastel color. So I'm going to go
ahead and give this a little mix and just try and get it to a good color
and consistency. And you may not
want to use pink. You might want to choose
your own color scheme. I went for a pink and purple
color scheme because I think that's very dreamy and
I really like that. But if you're following along with my color scheme,
that's totally fine. But if you want to
come up with your own colors, that's great. To, go ahead and mix those
up for your main body color. I do recommend painting all of your dragons
the same color just to start so you have more of a cohesive
sketchbook spread. Okay, so to start, I'm going to just drag
my paintbrush slowly across the sketchbook like
this in sort of an S shape. And I'm going to draw all
of my dragons like this. I just loosely go where
the paint takes me. I'm just kind of casually drawing a stroke
across the page, and then that's going to end
up being my dragon body. And then once I have
the initial shape like I've done here, then I'm going to
come in and add a little bit more
detail and sort of flush out the shape until
it looks how I want it. I'm just going to go through in real time this
first one with you, and then I will speed up
the rest of the dragons on the page just
so you can get to doing yours more quickly. But I did also want
to mention that I like to draw or paint, I suppose, over the center
of the sketchbook like this. In a couple of places, I just think it makes
the spread look more cohesive as a double page spread, but
you don't have to do that. If you don't like painting in the center, it's
totally optional. And now I'm going to
go ahead and speed up everything so that you can see the rest of these
dragons being painted, and I'll meet you back
here when I'm finished. And now that we've
completed painting our base paint color for all of our dragons
on the spread, we're gonna let that dry
and then we're gonna move on to the next step
in the next lesson. See you there. O
5. Final Project: Part 2: Now that our paint is dry, we are ready to add some details and features
onto our dragons. So as you can see here,
I'm adding some horns to the dragons using a
new purple color. And to make that color, I just use the base pink color I used for the dragon's
body and added a little bit of a
cobalt blue from the paint pan until
I got this nice hue. I chose a color that
has a little bit of contrast so that it stands out from the
pink a little bit. And what I'm doing
here is just adding some unique horns to each of the dragons so that they're all a little bit
different from each other. That's totally optional.
You can, of course, use the same horn
shape for each of your dragons or
go without horns. Maybe you want to do ears. Instead, that's
totally up to you. After the horns, I'm
going to get started on drawing the spikes all the
way down the dragon's body. And as you'll see, I'm
going to vary those shapes. So some of the dragons will have a triangular shaped
spike on their body, and some will have
more rounded ones. I tried to mix it up just to have a little
bit of variety, but it is a very time
consuming process. Probably the most time consuming process out of
this whole spread. So I am definitely going
to speed that up for you. You can probably speed
this process up by using paint pen or colored
pencil for your spikes. The paint did take a
little bit of time, but I really like the
way that it turned out, so I'm pretty happy with it. And I will go ahead
and speed that up now, and I will see you back in a second when we
get to the next step. Now that all these
spikes are complete, the next step is to
add some more details. I'm going to do noses and legs, and I'm going to use the
slightly darker purple by adding a little bit more blue
to the paint that I was using for the spikes. And I'm adding
these big round dog like noses just because that's how I like to draw my dragons. And even though they have
this serpentine body, I like to give them some
goofy dog features as well. And after I finish the noses, I'm going to go ahead and
paint some legs, as well. And as you can see, I've
sped up the process, so you don't have
to watch me paint all this in real time because
it took quite a while. But I just wanted
to point out that these loose limbs are not
anatomically correct, and that is okay. You can draw legs, no legs, wings, whatever
features you want. And it's totally
up to you because these are your
imaginary dragons, and nobody can tell you that they're not
anatomically correct. So I'm going to go ahead and let you watch
the rest of this, and then we'll get
into the next steps. Okay, now that we've added
these other details, instead of waiting for those to dry and just coming back
in a little bit of time, I'm going to switch
tactics and go ahead and add in some of our
background clouds. I'm using this Tambo marker to do the clouds on my painting. I'm just going over
very lightly carefully around the guash because
this is regular guash, so it can reactivate. So I'm just being a little bit
careful along those edges. You don't have to use
a marker for this. You could use watercolor, guash, colored pencil,
anything like that. I want you to do is just add in some background
features like this. It could be, you know, wind blowing around them. It could be water if you want
them to be water dragons, maybe some flowers or leaves blowing in
the wind could also be stars if you want them to
be more celestial dragons. I decided to do these
light purple clouds, and I'm just filling
them in where there's some white space
to tie all of this together and make it seem
more like it's one scene. After I finish this
one, I'll go ahead and speed it up again so
that you can just see where I placed them and what the general
shape I used was. But go ahead and do whatever background
element you want here. Make sure that it doesn't compete with the
dragons for attention, so you want to
make sure you have a little bit of
contrast in there. Maybe use a lighter
color like I have here. Alright, that's it for this
part of the final project. I will see you in the next
lesson where we will wrap up the project by adding all of our finishing
details and touches. See you there? O
6. Final Project: Part 3: It is time for the final
part of our final project, where we'll be adding our
finishing touches and details. So we have everything
painted in, and now we're going to
go in with our outlines and add in those final details that really bring
these dragons to life. So I'm using a prisma
color colored pencil here to just go around the dragon
bodies and outline them. I will speed this up as I have done so that
you don't have to watch this whole long process. But I just want to mention
I do switch colors. I'm using a dark pink right now, but when I get to
the legs, horns, and spikes, I'm going to be
using an ultramarine blue. And I'm going to use
the colored pencil to not only add the outlines, but also add a little
bit of texture. So some scales along the dragon's body, and
then just, you know, a little bit of an ombre
effect on the dragon's legs, that kind of thing
to make it have a little bit more texture and a little bit more detail. Okay. Enjoy watching this process, and I'll be back in just a
second to explain the next Now that we've
done the outlining and details on the dragons, I just wanted to
make a quick note to jump in and say that I did a little bit of that with the backgrounds and
the clouds, too. So it was totally optional,
but I just wanted to give them a little bit
more depth and texture. And then I'm going
to move on to adding some facial details
to the dragons. I'll put in some teeth with the white pen and then add our eyes for
each of the dragons. And then that's all
of our details done. So the next step is I
like to go in and draw these little sparkles and stars in the sky
with color pencil. You can see I'm
spreading it around the sketchbook spread like this, so it's, you know, just
in there a little bit. But I like to do that
cause it just adds, like, a nice little
finishing touch. Oh, and then one more thing, can't forget that
we want to give our beautiful dreamy
dragons some blush. So now that everything's
nice and dry, I'm going to go over each of
these dragons faces and just draw in a little
circle of pink blush. And I'm actually going to
go over in two colors just to mix it in and blend it a little bit more so it
doesn't stand out so much. So I'm going to use
this dark pink, and then I'm also going to go back in with this lighter pink to just blend that into the body color
a little bit better. You did it. Congratulations on completing your very
own dreamy dragons. I bet they're stunning and
hopefully you had fun. I'll see you in the next
lesson where we'll wrap up class and talk about
next steps. See you there.
7. Next Steps: First things first, take a moment to celebrate
your achievement. You made time for yourself and your creativity, and
that's incredible. It's not always easy
to carve out time in our days to play in our
sketchbooks, but you did. Way to go. As for next steps. If you'd like to share
your beautiful creations, I would love to see them. Be sure to share your project to the gallery
here on Skillshare. Just go to the Projects and Resources tab and
click Submit Project. Or you can also tag me on
Instagram at Tiny Leaf Press. And remember, if you ever
feel stuck or overwhelmed, you can always retake the
class with different colors, materials, or characteristics
of your dragons. It's endlessly repeatable
whenever you need a boost. You can also try out some of my other sketchbooks net
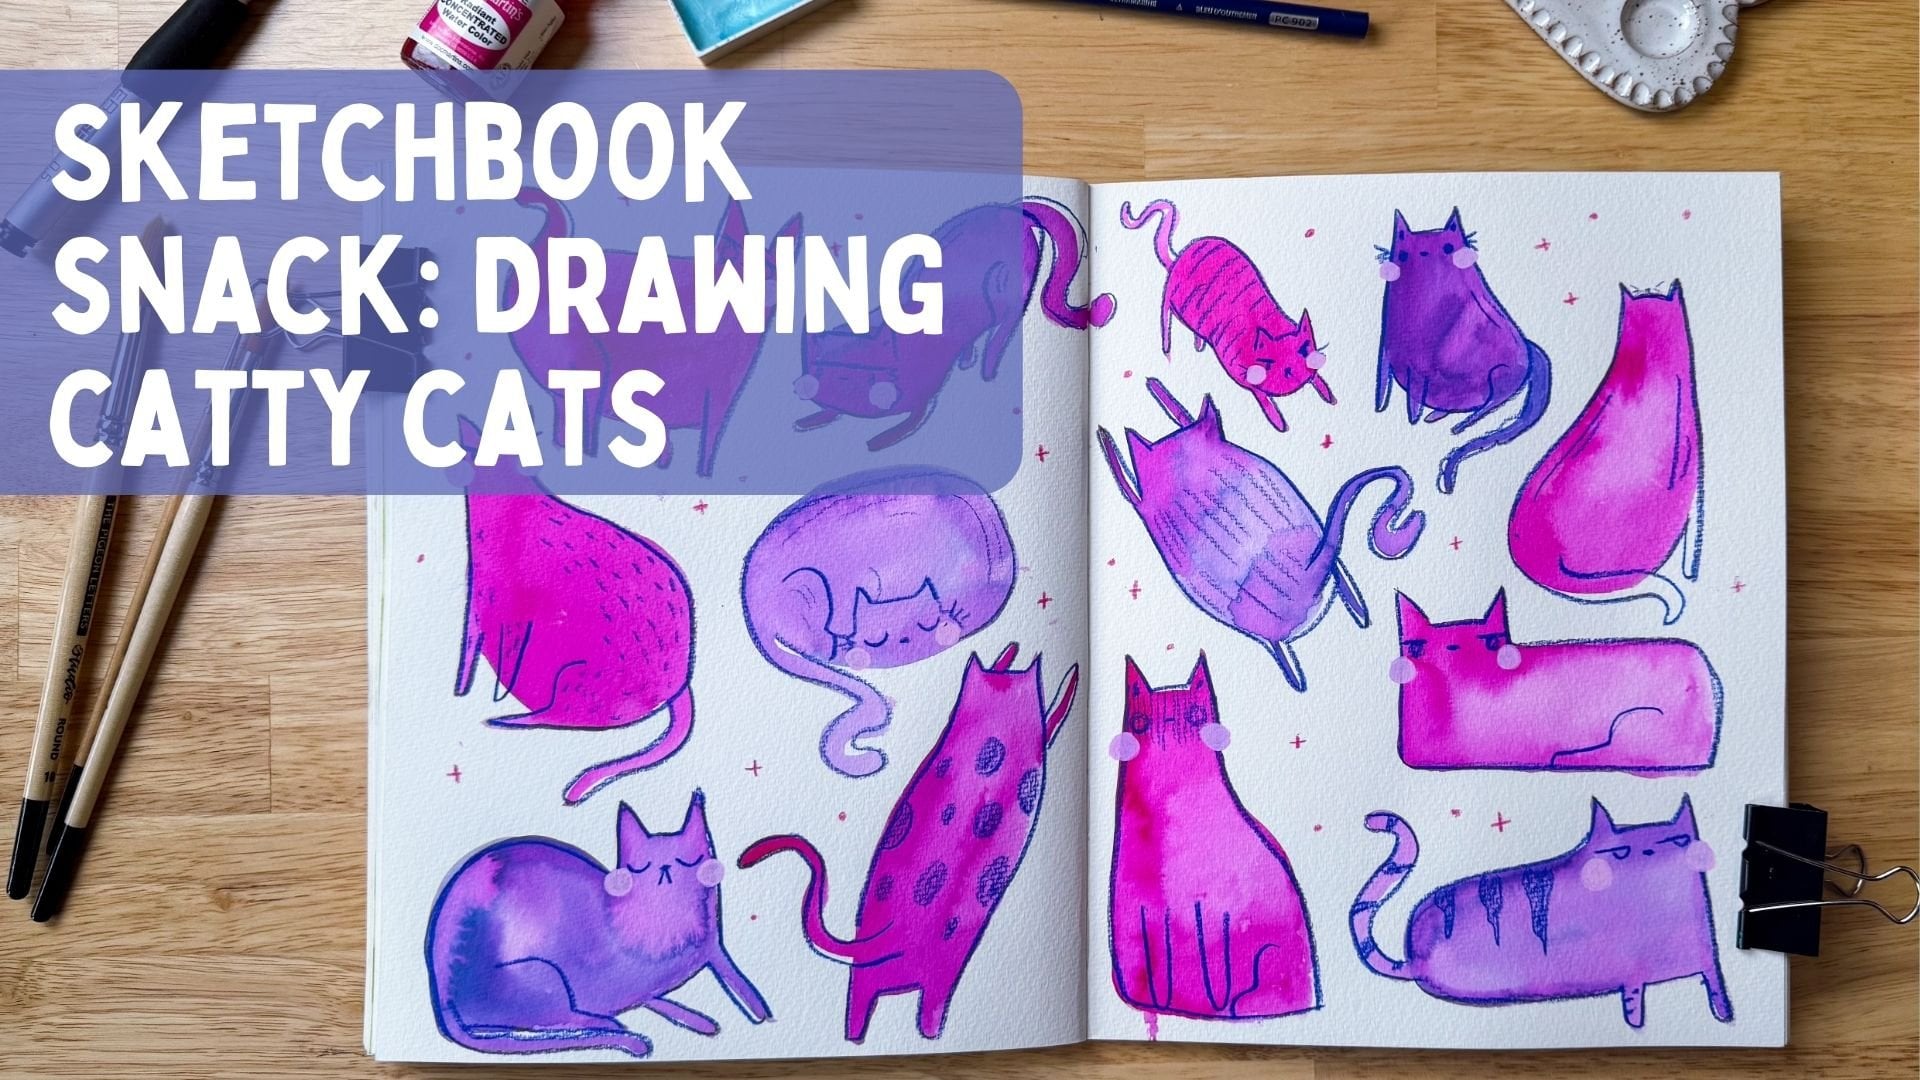
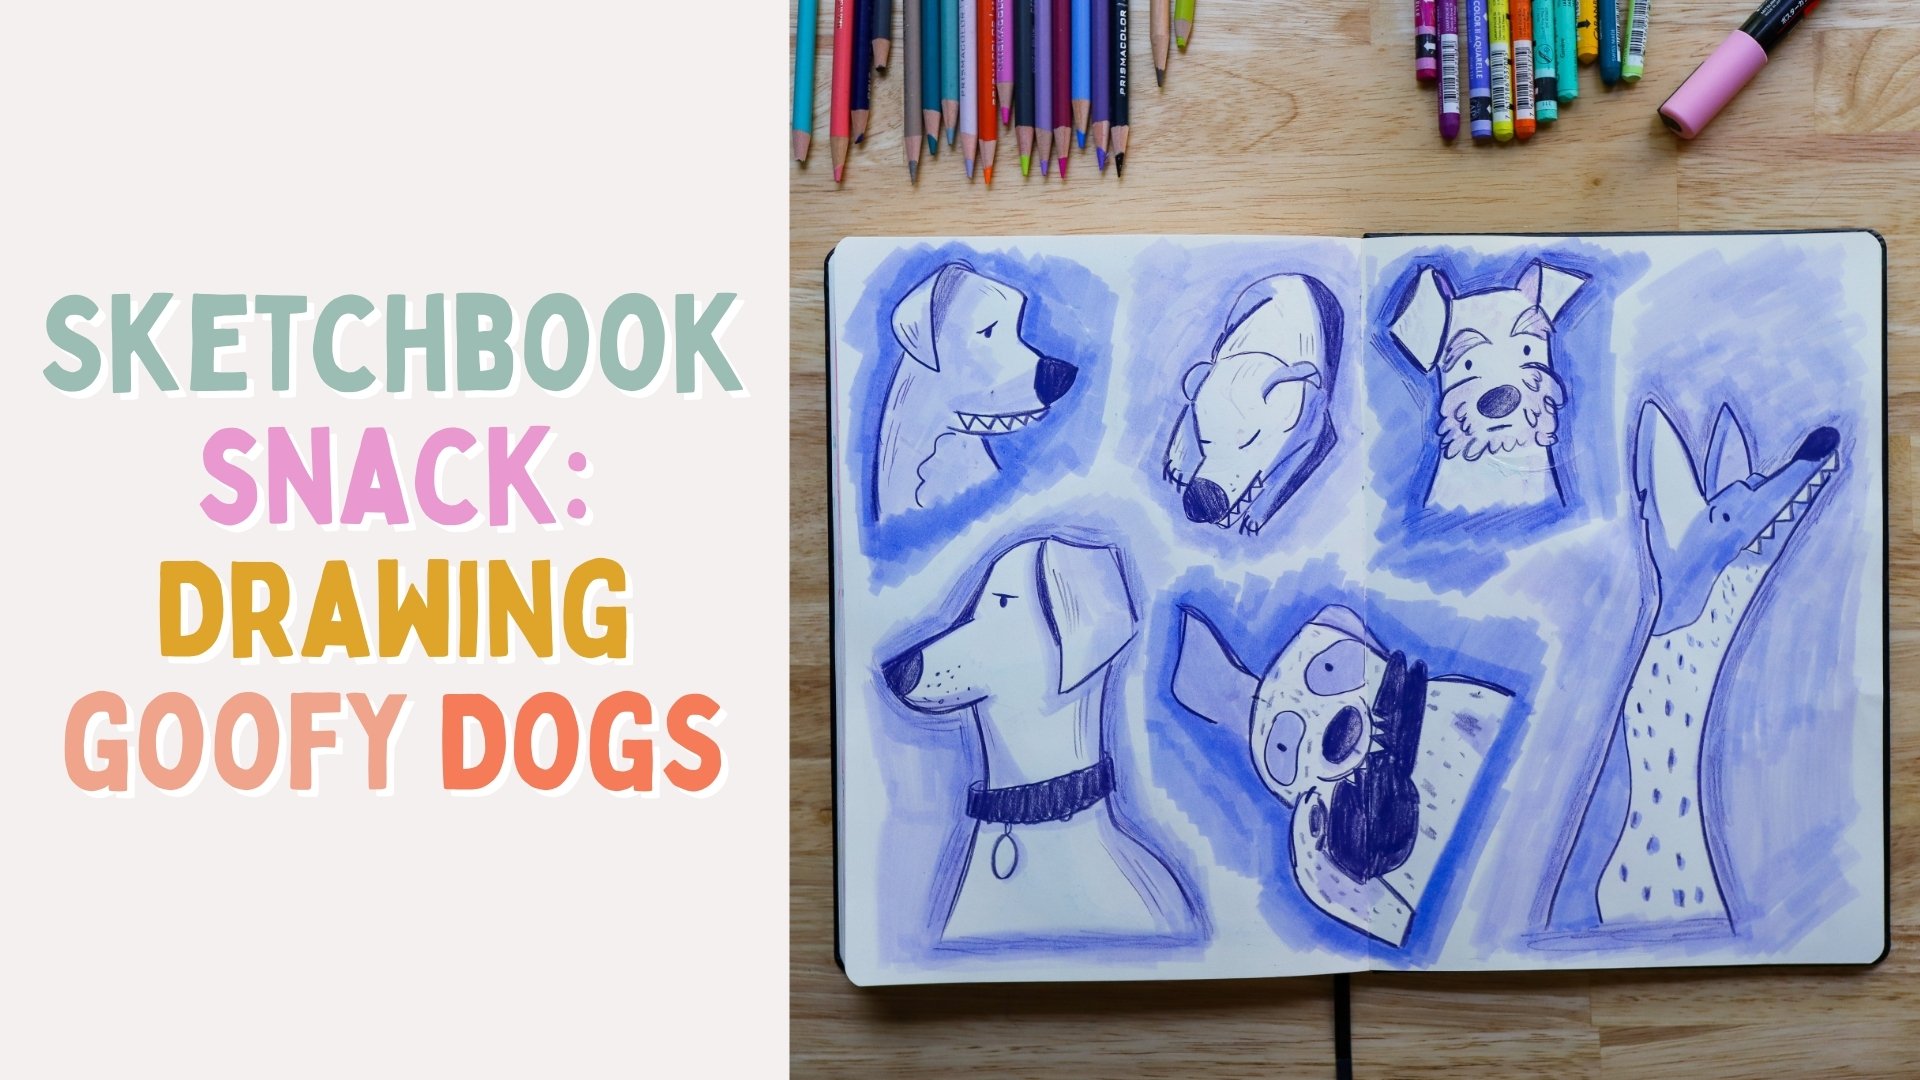
classes here on Skillshare, like drawn Goofy
Dogs or catty cats. I'll leave a link
to those below. I'm always working
on new classes. So if you'd like to be notified
when the next one drops, you can follow me here on
Skillshare or sign up for my newsletter on
Substack where I share free weekly
creative posts. Thank you so much for
joining me in class. I hope you enjoyed your dreaming dragons and I'll
see you next time.
 Jenni Macklin, Illustrator & Surface Pattern Designer