Transcripts
1. Class Overview: Welcome. I'm so
glad you're here. Summer, it's a perfect
time to slow down, pick up our sketchbooks and reconnect with
our creativity, even if just for a
few moments in a day. My name is Joe, and I'm a full
time artist and educator. In this class, I want to
show you how to paint, relax and expressive pages with watercolors and
just a few simple tools. We will work directly in our sketchbooks and we focus on play rather
than perfection, just so you can really
enjoy the process. You will learn how to
paint a floor quote page, a somber bouquet in a jump jar, and a wonderful white flower meadow all step by step
and beginner friendly. These pages are
designed to bring calm and beauty to your
summer sketchbooks. You may be taking
your art supplies on your holiday or simply enjoying a quiet
afternoon at home. This class is a lovely way to
stay creative this summer. My goal is to help
you slow down, explore your
sketchbooks and find joy in painting beautiful
summer florals. So grab your cup of tea, your favorite brushes,
and let's get started.
2. Inspiration: Let's talk about finding inspiration for our
floral sketchbook pages. One of the easiest
way is simply to take photos when you're out on a walk or spending
time in your garden. Snap the flowers
that catch your eye. Maybe it's the colors, the shapes, or just the way
they're growing together. You can keep these photos in
a folder on your phone or on your computer or create a small mood board to come back to when you feel
ready to sketch. Pinterest is another
great place to explore. Try collecting
images of flowers, gardens, leaves, color palettes. If you'd like a
little jump start, I also created a special
Pinterest board for this class filled with some
floral photo inspiration. The link is in a description, so feel free to
explore it as you go. Since this class is designed as a relaxing summer
sketchbook project, I also encourage you to
look around while you're on holiday or out on
a summer trip day. Take your sketchbook
with you and jot down anything that feels
joyful or uplifting. Whether it's a flower
growing through the crack of the pavement or a
colorful meadow. When you're observing flowers, pay attention to basic shapes, the petals, the centers, and how the leaves
attach to the stems. You don't need to copy
anything exactly. In fact, we want to stay loose and expressive, not botanical. The goal is simply to
understand the structure just enough to paint in a
playful and relaxed way. I will see you in the
next lesson where I talk about odd materials
and some preparation.
3. Art Materials: Hello, and welcome
to our first lesson. Let's chat a little bit about materials we'll be
using in this class. Now, this is the subject
I can talk about all day. I am going to try to
restrict myself and just talk about essentials because I don't want
to overwhelm you. Let's start with sketchbooks. Here I've got two to show you. I'm going to be starting this one with you.
Yes, no pressure. I'm going to be starting
this new sketchbook. As you can see, this is art
creation by Real Talents, which is a very popular, widely available, and actually
very affordable option. But you don't have
to use this one. Use whatever sketchbook
you already have, or if you're about
to buy new one, just buy something that is already available
where you live. I just wanted to
show you that I have another format of the same
sketchbook, so it's square. You can also use square
format. It's absolutely fine. It holds water really well. I used it for some
florals on holidays. I take it on trips with
me because it's so small and I can easily
put it in my bag. We will also use some paper, ordinary paper will
do because this is just for our simple
warm up exercises. Now, because I'll be
using sketchbook, I have these two bulldo clips or you can use some plastic
grips or whatever you have. It's quite handy to hold the pages in place
and sketchbook open. Otherwise, it might
accidentally close, which, by the way,
happened to me. So I always take these
with me whenever I go. Builder clips aside, we
will need some paint. Now, this is a very tatty
old watercolor set. But what I'm trying to say is you don't
need anything fancy. I just selected
colors I like to use. The most important colors I would say are the
primary colors, so yellow, red and blue. It's good to have the cooler and warmer version of
each of these colors. So that's how I lace them here. And I have some
additional colors. I have some darks, which is the burn Sienna, burn amber, paints gray. I also have sub green, which is handy for floals and I tend to use it straight or I mix it with a little
blue or yellow to create various hues of green. I also have some yellow ochre, and additionally, I have
this brilliant red, which I just put
in very recently, just because I've been
painting a lot of flowers, and it's good to
have a variety of different reds and
blues for mixing beautiful purples and
lilacs and colors like this which are
associated with blooms. Paint aside, we need
to mix our colors. I have this ceramic palette. You can use plate. You can use the
disposable paper palette, whatever you have on hand. In terms of brushes,
I'll be using these round synthetic
watercolor brushes. I have sizes six, eight, and 12, just what to look for in watercolor brush if you
don't have one already. Is to look for nice
long bristles that come to a sharp point and
have a little bit of snap, so they snap easily back
to the original shape. This will make the
painting experience a lot more enjoyable. For sketching, we're
just going to be using ordinary
pencil and eraser. This is just a HB pencil. As for the other art
materials, they are optional, but I will be using few details to my sketches with
the fine liners. So I have one in
sepia and one black. And I also like to use some
white gel pen for highlights. If you don't have fine liners, you can also use
simple gel pens. I have a few colors
here just to show you. And of course, there is another option of
colored pencils. I often use them to finish off my sketches in a sketchbook. I have a selection of
some dark colors here. Again, any colored pencil will do whatever
you have on hand. And because we're going
to be using watercolor, we obviously need water, water container, and some
paper napkin. So that's it. That's all we need
for this class. I hope this is available to you. Please grab your materials. And in the next lesson,
we're going to do some simple warm up exercises.
4. Warm Up Exercises: Let's start with a few
quick warm up exercises. So I'm going to grab
my largest brush, and I already have
some dark paint, some paint grays here, and we're going to practice few brush strokes
that are going to be beneficial for our
sketchbook paintings. So I'm going to go
ahead and start. So I'm going to
just load my brush with some of the pigment. So how to paint a thin
line using big brush. So first of all, we
have to make sure that our brush comes to
a nice sharp point. We can also help it by shaping that point as we picked up the pigment as we load in
the brush with pigment. So just make sure that all the
bristles are nicely tight. Secondly, we're not going
to rest our hand on the table and try to use
our wrist to draw it, but we're going to lift
our arm in the air, and we're going to use
this kind of motion. So let's start with
straight lines first. So I'm holding the
brush quite down. So as I'm writing with a pen, and I'm just gently pressing
down as I move my arm down. So something like this. And you can see that I can
paint very thin lines, even though my brush
is actually quite big. So what about if the
stems are slightly bent? So that's also quite
nice to practice. So we can go from one
end and the other end. We can overlap.
It's not a problem. And just practice that for a bit and see if
you can make them thinner or thicker and how
much you need to press down. So this is obviously
individual to your brush. What's nice to do
also is practice some shortest brush strokes
in a similar manner. So still thin but
slightly shorter. So, for example,
you making a branch of stems coming out
of the main stem. And they're a
little bit shorter. So you can just
practice that and practice trying to get them
into one point, for example. So this is quite
beneficial to practice. Even for myself, I find that if I do these
warm up exercises, my final work is a lot better and it's just much
easier for me to paint. So how about larger shapes? This is about water control. So this is more about
how are we going to fill a large shape with paint
that is relatively even. So we're going to have
some flower centers. They can be circles. Some flowers will
be on the side, so we need to learn
how to draw ovals. So that's also quite
good to practice to paint a nice oval. Maybe the flower is also
bent the other direction, so it's nice to practice
in both directions. Another good one to practice
is obviously petals. So we can now try to
press down on our brush a little bit more and see if we
can paint some petal shape. So we can start here and
we can do them like this. So we just start
from the top and then we press down and then lift again as we move forward. So it's up down, up. So if we just practice
few of those, and we can do them horizontal, we can do them vertical because obviously
we're going to be going around the flower. So let's see that
this is our center. We're going to normally go
like this around the flowers. It's nice to practice
that as well. In different directions, how it feels because it
feels different. If you go down up, you have to bend your wrist, for example, to go down. Of course, you can always
turn your paper as well, so it's not a problem,
but it's nice to practice varied directions. What about chunkier petals? So perhaps we would learn how
to make the sea curve now. So it's not straight
down or to the side, but now we're trying to
make the shape go around. So again, starting from top, press down, and then up again. And let's complete this petal by going the other way
and coming to a point. And now you can
feel in this shape. You can always leave a little bit of highlight
in the middle. It's always quite
nice in watercolor. So you can just quickly just practice how are
we going to loosely. They don't have to
be very precise. We are doing loose floral, so they don't have
to be perfect. But it's still nice to practice this gesture and this movement. How we going to do this? How are we going to paint this? For example, here,
we can practice leaves coming from
the stem like that. And then we can try
the other way as well. Another good brush stroke to practice is a
short brush stroke. So for example, I'm thinking
lavender, for example. So it's got the petals
that are very short, and we just want to make
some of them on this side, some of them straight, some of them like this. Just practice how
by using your hand, you can create these different
shapes using your brush. Another good one to practice, particularly for our art, tutorial is some wavy lines, so we're going to be
doing some wavy lines. Can we do wavy
offal, for example. So thin lines again, I'm holding very low down and I'm controlling that movement, and I'm just waving that line. Another one, very good one is, how about wavy leaves? Pressing down and do the sort of wavy loose leaf that perhaps is coming from
a stem somewhere here. And we're going to leave some
highlights in the middle. So it's nice to practice
things like that. So take time. It doesn't need to be long. Just take 10 minutes, even if you just take 5 minutes, just practicing
different shapes and different mark makings and how your brush acts when
you make these shapes. And you will learn that
perhaps you need to press down harder or you need to use
more or less water to create, for example, here, I
run out of my paint, and this mark wasn't
very successful. So by exercising like this, you will get a very
good practice. How much pigment,
how much water, how much paint you need
to have on your brush, how much water your paint
brush actually holds. As I mentioned, every
brush is different. So it's worth practicing with the brush you're
going to be us. I like to practice with
my largest brush first, and then it's quite good to
maybe do a few exercises with the smaller one as well because I'm going to be
using my smaller brush too. The smaller the
brush, obviously, the less pigment, the less paint you're going
to have on your brush. So you're going to have to
dip it into the paint more often to get this
kind of constant, continuous line or a shape, so you have to be
mindful of that as well. So I hope this helps you. I'll see you in the
next lesson when we going to dive in
into our sketchbook.
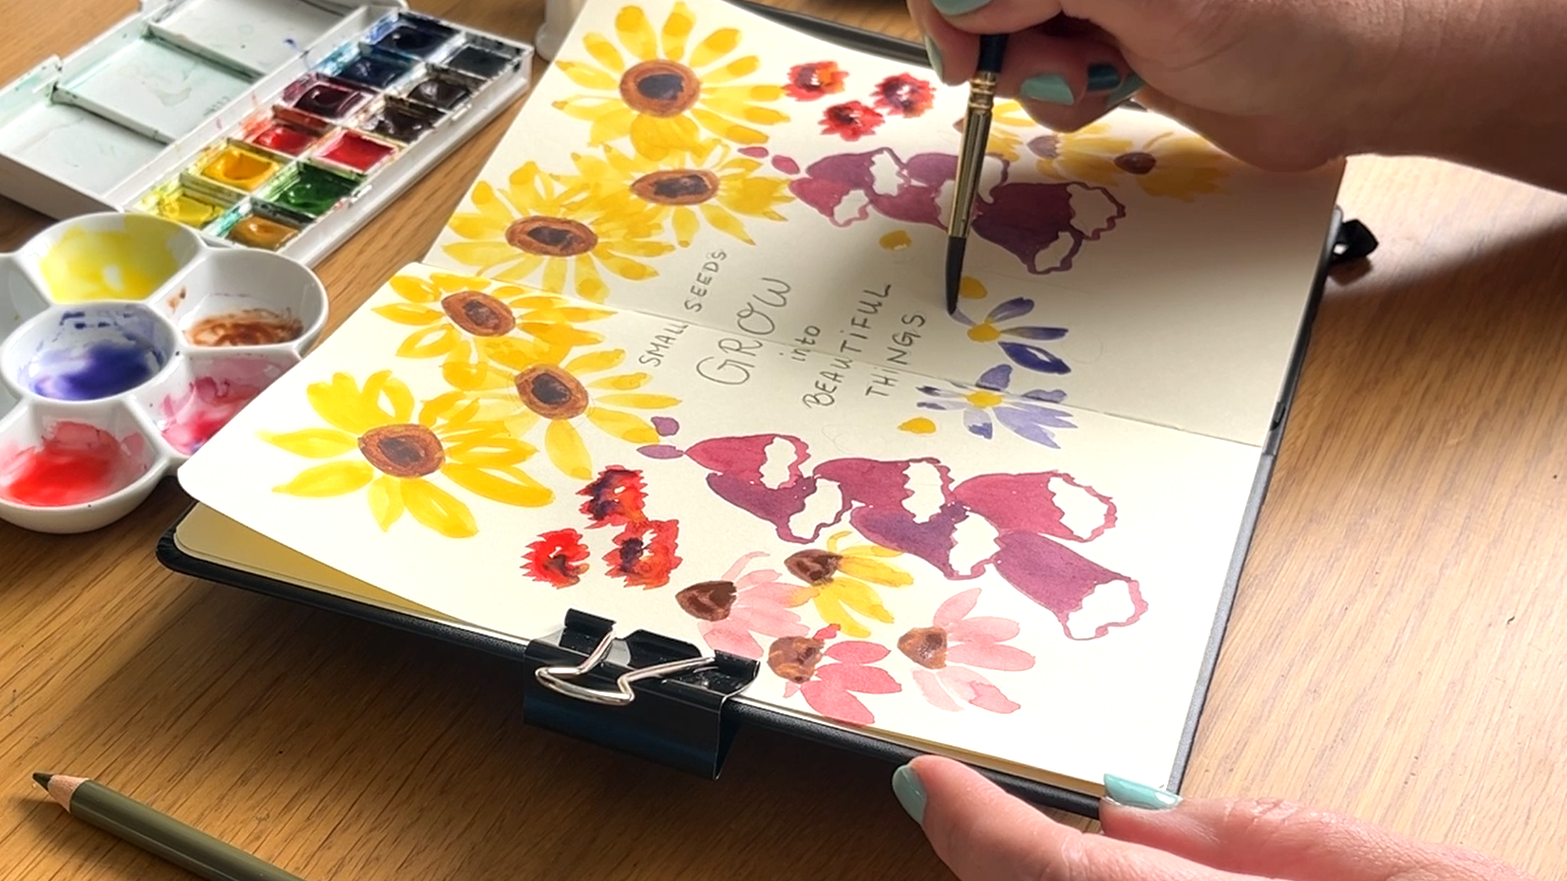
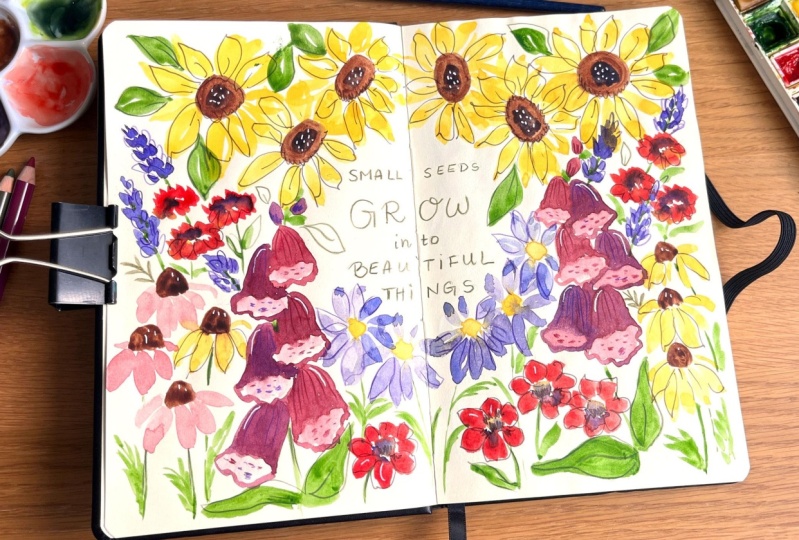
5. Floral Quote Page: Welcome back. I hope you enjoyed our short warm up
exercises and you are all prepped and ready for the
first sketchbook page. You can either do
a page or spread. It's up to you. I just quickly want to show you
what I have in mind. This is my old sketchbook
which I completed recently and I have some color sketches here, practicing some greens. But here is something
along the lines that I want to create
in our lesson. Let's put this aside. And let's break the seal. This is very exciting. It's so exciting to start
in this sketchbook. I spent a little bit
of time thinking about different quotes I could place in the middle
of this page. I knew I wanted something
nature inspired. That's always been a
big part of my work. But I also wanted
something that would motivate me to return to
my sketchbook regularly. That's how I grow in
my art by showing up again and eventually, I settled on the small seeds
grow into beautiful things. I'm going to sketch it
lightly with a pencil first. If you're comfortable
with hand lettering, feel free to make
it more decorative, but I am going to keep
mine really simple. I grabbed dark green
colored pencil and went over my pencil sketch. Now it's time to
plant the flowers. You can place your
floals randomly, like in the example from my
older sketchbook or like me, you might want to build
a little gardening. I'm sketching some tole
flowers at the top, then scattering different shapes and sizes on each side of the quote with a smaller ones like daisies near the bottom. At the top, I chosen to
place few sunflowers. I'm not drawing
them with details. I'm just talking
where they will go. Next, I want to add
some fox gloves. I had some beautiful
ones in my garden recently and they are one
of the favorites of mine. I'm sketching a tall stem
on each side of a quote. For variety, I will also add
few tenias and corn flowers. They are also quite tall, so they will fit nicely
into this top section. It's time to start painting. To keep things moving, I sped up this part
of painting process. I recommend watching
this full lesson first, then painting at your own pace. You can pause and rewind
as much as you like. I'm starting with a
medium size brush and using burnt sienna for
the sunflower centers. I drop in a little bit of ultramarine blue
while the paint is still wet and gently blend
the two colors together. After cleaning my
brush really well, I switched to a warm
yellow to paint petals. I'm using the same
petal brush strokes we practice in
warm up exercises. I'm leaving little white
caps between some of the strokes to keep the
flowers light and airy. I will speed up the rest
of the sunflower painting. Now, I'm moving on
to the fox gloves. These flowers grow along
long stems with tiny buds at the top and larger bell
shaped flowers at the bottom. I'm starting with a mix of magenta and touch of
ultramarine blue, painting the top bads first. Then I add the first large
bell shape at the bottom. You will notice the lower edge has kind of wavy oval shape. I adjust the color
slightly for each bell, adding more blue for contrast and interest as I
go down the stem. D. Next, I repeat the process for the second foxglove
on the other side. Don't worry about
making it symmetrical. Variation adds charm and keeps the page feeling
natural and expressive. I add few smaller loose
flowers in vibrant red. To balance the composition, I'm adding a few
corn flowers next. Using burn sienna, I paint the dome shaped
flower centers, then switching to
yellow foly petals, using the same press and
lift strokes as before. On the opposite side, I decided to add a little bit of diluted magenta for a
subtle color shift. To bring some color tones, I mix the ultramarine and magenta to paint loosely
some daisy shapes. I start with small yellow
dots for the flower centers. Then I use this watery
blue mix for the petals. Since I already had the
color on my palette, I used it to paint few
springs of lavender. I made the mix a little stronger this time
by using less water. At the bottom of the page, I decided to echo the red I used earlier by painting
few Gerba daisies. I used yellow ochre for the centers and brilliant
red for the petals. Then I added a little bit of ultramarine blue to the centers. I also use some diluted magenta to color in the inside
of the foxglove bolls. With the flowers complete, I'm moving on to
stems and leaves. I mix some sap green with little leftover purple
to tone it down. I started painting the
big sunflower leaves, leaving white caps for
the light and airy feel. I added finer stems and smaller leaves for
the other flowers. Fox gloves have large leaves, so I use broader
strokes for those. And this is it. The painting
part of the spread is done. I will let it dry
completely before adding a few final details. My page has dried completely, and I'm ready to add
few final details. Let's begin with the foxglove. I noticed that the inside of the flower bells have
the striking dark spots. These are called digitales, and they actually serve as a nectar guides to help the
bees find their way inside. I'm using burgundy
and purple pencils to add those spots
into the bells, along with a few lines to suggest the textures and
the form of the petals. With the same purple pencil, I'm adding few loose outlines
around lavender flowers. I use the same approach
for the daisy petals since they also have the
similar blue, purple hue. Next, I pick up my CiPia
fine liner and use it to add few sketchy outlines to petals of some
of the flowers. Not all of them, just enough
to bring a bit of contrast and definition without losing
that loose paintry look. Then I take a dark green
pencil and add some quick, scribbly marks to a few
of the stems and leaves. These marks give
the nice texture and help bring the
greenery to life. Lastly, I'm using
a white gel pen to add few small highlights, just little touches on some
of the foxglove bells and petals and a few tiny seeds in the center of the sunflowers. To finish off the page, I use my eraser to gently lift any visible pencils lines that I don't want to keep.
And that's it. The first spread in my new
sketchbook is complete. I really hope that you've enjoyed watching this
process and that it inspires you to try something similar in
your own sketchbook. In the next lesson,
I'll show you how to paint a very simple
white flower meadow.
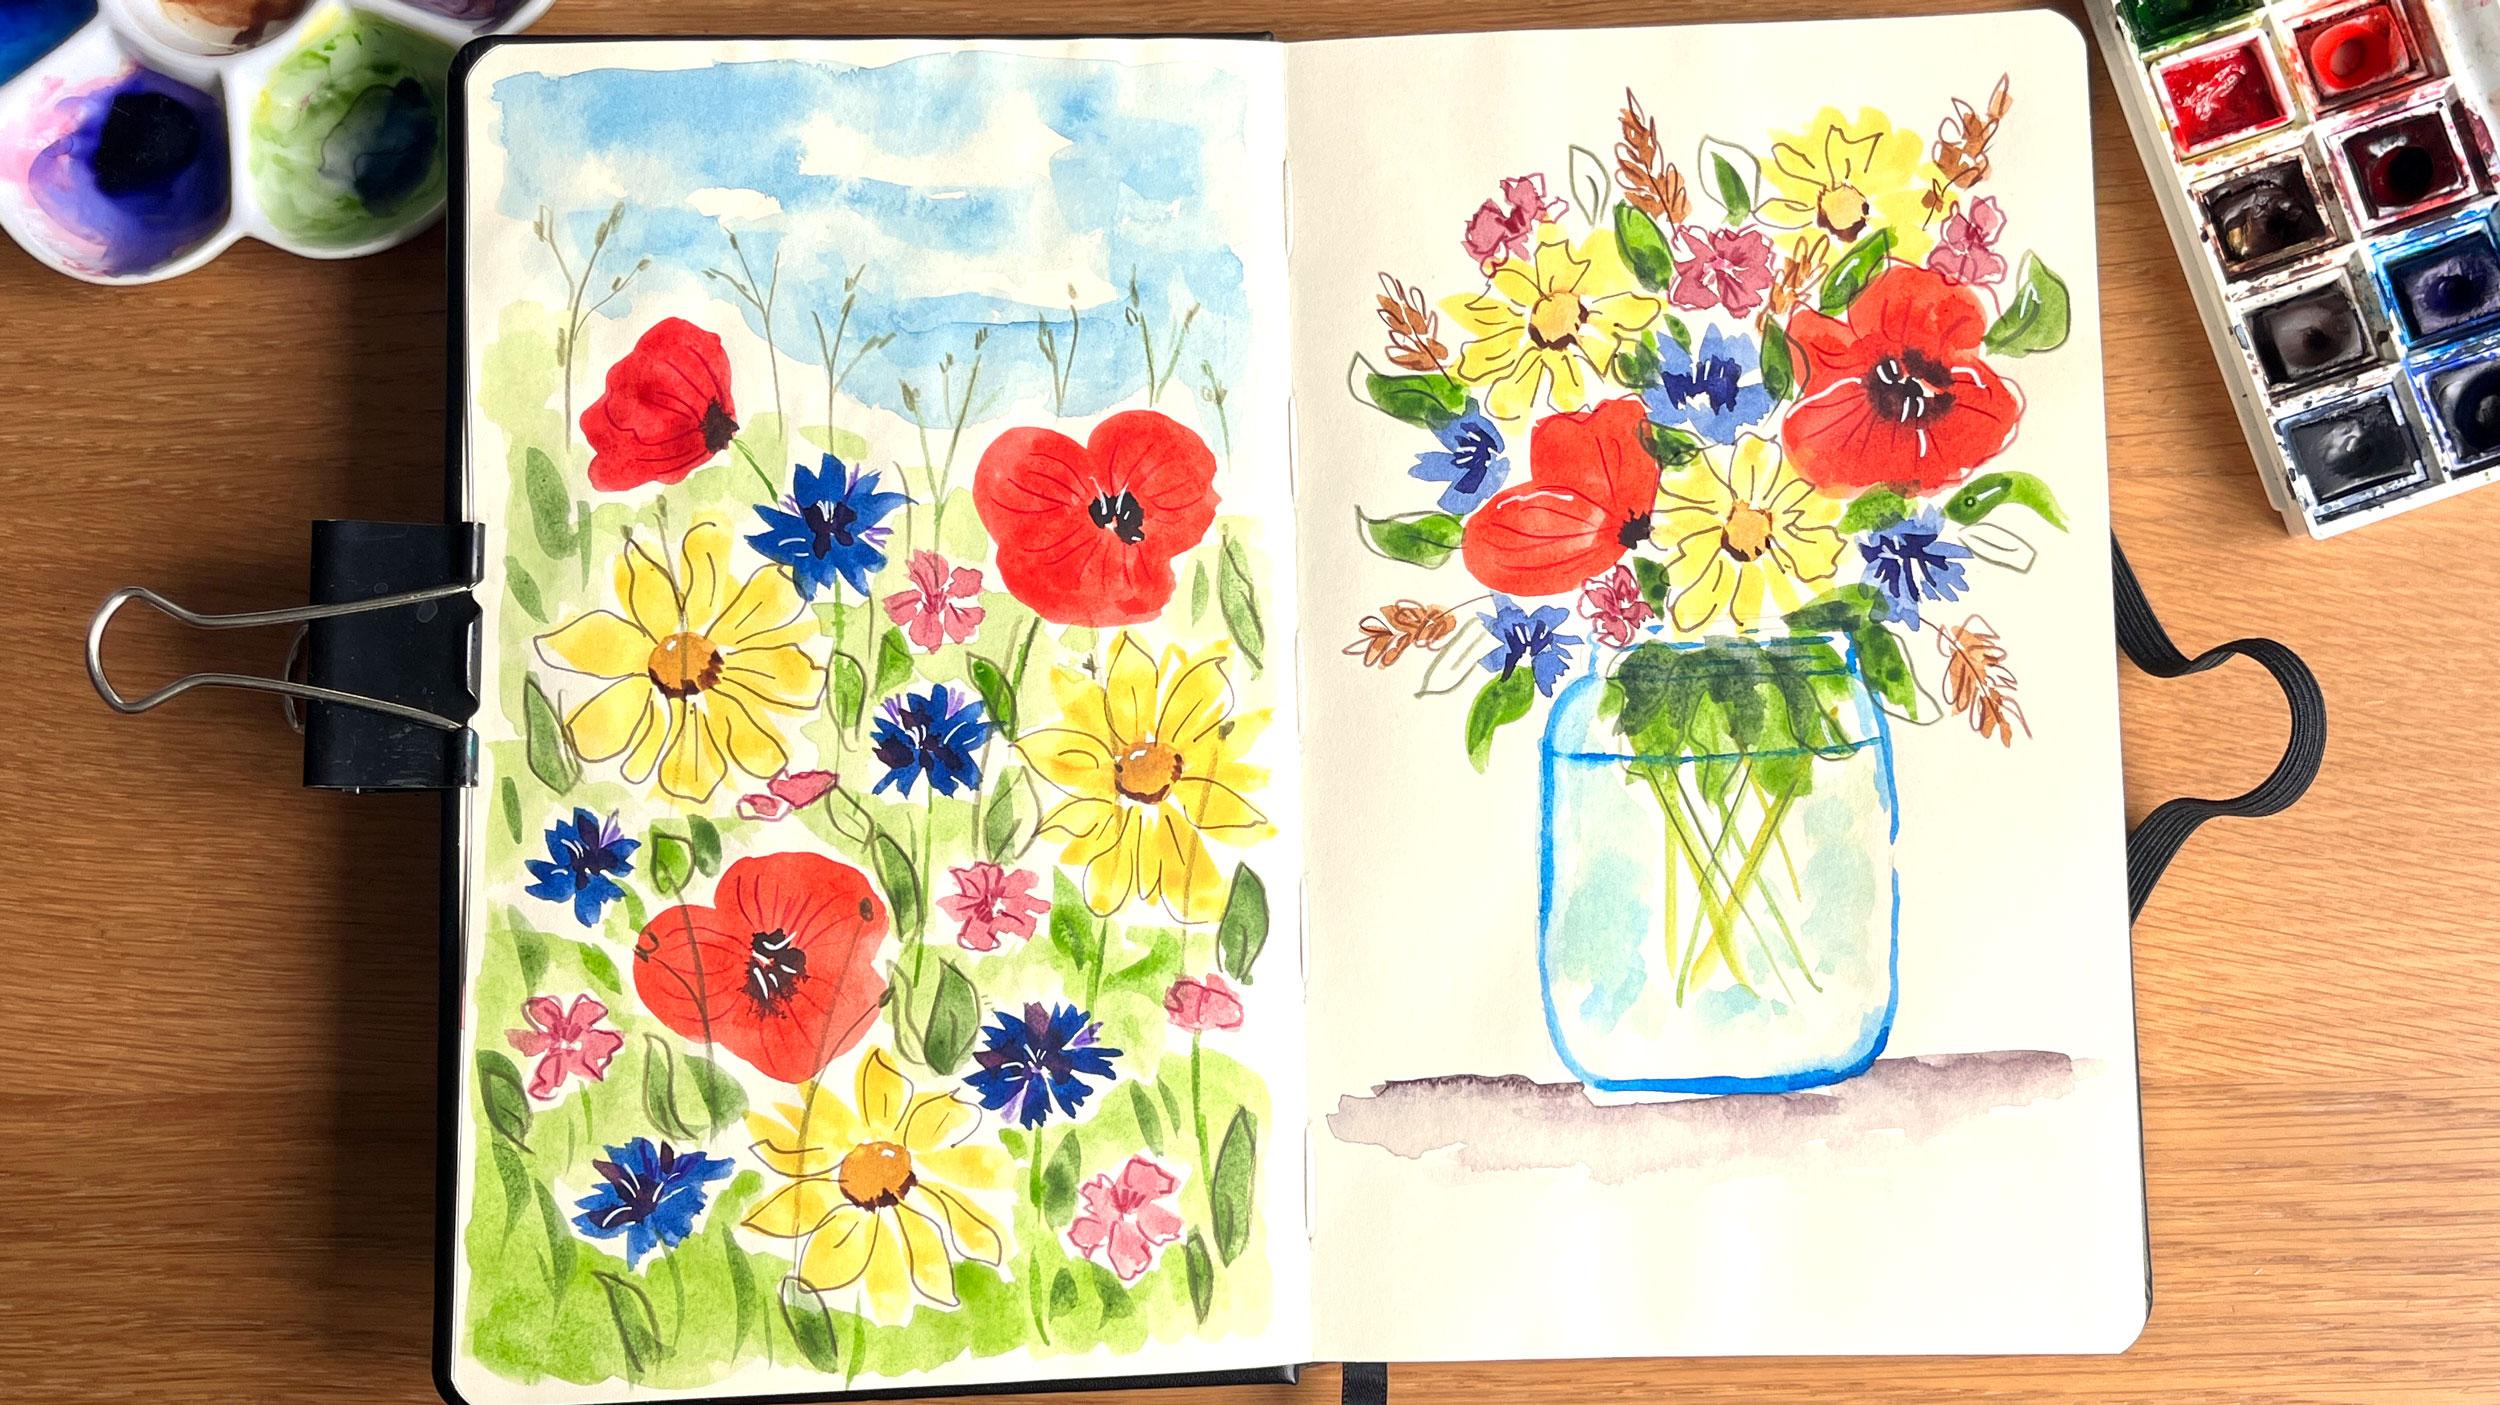
6. Wildflower Meadow: Welcome back. In this lesson, I'll show you how I painted a really easy loose
watercolor meadow. A quick note before we begin, the footage is slightly sped up to keep
the video flowing, but I'll walk you
through each step as we go so you can follow
along at your own pace. This time, I decided
to skip the pencil sketch and go straight
in with the paint. I had a rough
composition in mind. I wanted at least two thirds
of the page filled with wild flowers and a soft
loose sky at the top. The idea was to create a feeling of lying down in a
blooming summer meadow. I started with the brightest
flowers, the poppies. I mixed some warm red
with some brilliant red from my palette and
using my largest brush, I loosely painted
three poppy flowers. I spread them out across
the page for balance. One of the puppies is
slightly closed and shown from the side just
to add some variety. While the paint is still damp, I drop the mix of burn umber and ultramarine
into the center of the open poppies and at
the base of the closed one to suggest a deep rich
center that they often have. Next, I mix ultramarine with colour fallow blue to
paint some cornflowers. Again, I kept the shapes
loose and made sure to scatter them across the page
so the colors feel balanced. To add some warmth, I included a few
yellow corn maricos which are common wild
flowers here in the UK. I started with yellow ochre in acents since they are a bit
darker than the petals. I decided to change
to my bigger brush, and I used the same simple
petal brush strokes we practice earlier in
our warm up exercises. I switched back to my
smaller brush and with some magenta with just a
little bit of ultramarine, I added a few pink
malvasavestris. These are soft pink flowers you often see in summer meadows. With the flowers in place, I began adding the
green background. I mixed sob green with my yellow mix and loosely
painted in between the flowers, leaving some white
caps here and there. This helps the piece
to breathe and keeps the painting
looking fresh and light. I made sure to leave the top third of the
page blank for the sky. The sky, I first wet the top part of the
paper with water. Then I dig my brush
into a soft mix of thello blue and gently sweep
the color across the page. I mince my brush and
I use just water to soften any hard edges and
help the color blend. I'll mix slightly
stronger green and painted a few flower
stems and smaller leaves. To deepen the green,
I added a touch of ultramarine and use that to paint a few more stems
and plades of glass. I used burnt sienna on the
tip of my brush and added soft shadow beneath the
yellow flower centers of the corn marigolds. After everything had
dried completely, I moved on to finishing touches. I used the Burgundy coloured
pencil to add few details to malva flowers and also a few
lines to the floppy petals. With the purple pencil, I added sketchy lines and
textures to cornflowers. Then I use a dark
green pencil to draw some finest strands of grass with a little
seed boats on the top. I made sure to place
some of these near the top of the page
overlapping the flowers. I added just a few outlines to the yellow Marcos using
my CEPIaFneliner. Finally, I use my
white gel pen to add some soft highlights here
and there, and that's it. A very loose and easy
white flower meadow. I think it looks lovely as a part of the sketchbook spread, and I hope you enjoy
seeing it come together. In the next lesson, we'll
take these white flowers and arrange them into a simple
bouquet in a little jam jar.
7. Wildflower Bouquet: Welcome back. In this lesson, we'll take the white
flowers we painted earlier and arrange them into a loose watercolor
bouquet in a jam jar. You'll notice that the
footage is slightly sped up just to keep the video
from getting too long, but I will guide you
through each step. Feel free to pause or
rewind anytime you need. I'm starting with a light
pencil sketch of a jam jar. It's essentially a
rounded rectangle. You can also round the
sides if you like, to make it look more like a jar. I arrange the sharp
corners to make the shape look softer
and more jar like. I also added a long
narrow rectangle across the top to
represent the ring. Next, I'm painting the biggest and brightest
flowers first, the poppies. I used my size eight brush and a mix of warm red
and brilliant red, and I painted two poppies, one facing forward and the
other one on its side. Yeah. I added a touch of magenta to the second
poppy for color variation. While the paint was still damp, I mixed some burnt amber into leftover purple
from my palette and dropped it into the center of the open poppy and base
of the side facing one. Now, for some cheerful
yellow corn marigods, I use yellow ochre
for the centers and spaced them out evenly to
create a balanced composition. Then I painted the petals using a mix of lemon yellow
and warm yellow. For the blue corn flowers, I mix ultramarine
blue with a touch of tho blue and painted them loosely between
the other flowers. And I also added a few small malva flowers using magenta with a
bit of ultramarine. Because I wanted the bouquet to have that rustic
cottage garden fell, I included a few what
stems as decoration. I painted them in spaces between flowers using yellow ochre, similar to how we
painted the lavender. Next, I mix some fellow
blue for the glass jar. I swapped my brush
for the smaller one. I loaded it with paint and started painting the
edges of the jar, leaving a few white
caps for highlights. Once the composition
fell complete, I began adding leaves and stems. I painted the leaves
in a bouquet first, filling the spaces
between the flowers. A I painted the stems
inside the job, lightening my green with a
bit of yellow for variation. With a very diluted th blue, I loosely filled in
the rest of the job, leaving some white
areas for shine. I added more pigment
to my brush, and I painted the water
line inside the jar. I also mixed a little bit
ultramarine into my green to deepen the color
of the leaves that are in a shadow
inside the glass. To paint the cone
flower centers, I mixed ultramarine and magenta to create a
beautiful purple. And then I used a touch of burnt sienna to add a soft
shadow to the maricod centers. To ground the ja, I used
mix of burn amber and purple from my palette and painted a broken
line underneath. Then I rinse my brush, loaded it with clean water, and softened the hard edges at the base to create
a subtle shadow. Once the paint was completely dry, I added a few final details. Just like before, I used colored pencils to add
sketchy texture and linework. M. I outlined the marigot with a CIPA fine liner and added a few leafy details using
dark colored pencil. Finally, I edit some
gentle highlights with my trusty white gelpen. And this is it. Our final
sketch is complete. I hope this inspires you to try a bouquet like this
in your own sketchbook. But don't go just yet. In the next and final lesson, I'll share with
you tips and ideas to help you keep
going. See you there.
8. Final Thoughts & Next Steps: Thank you so much for joining me in this Flo
sketchbook journey. I really hope you enjoyed
painting along and discovered how joyful and relaxing flora sketching can be. Your class project is simple. Just complete one or all three sketchbook pages
we painted together. You can use your own colors, your own flowers, or add
your own personal touches. Your floral pages don't have to live just in
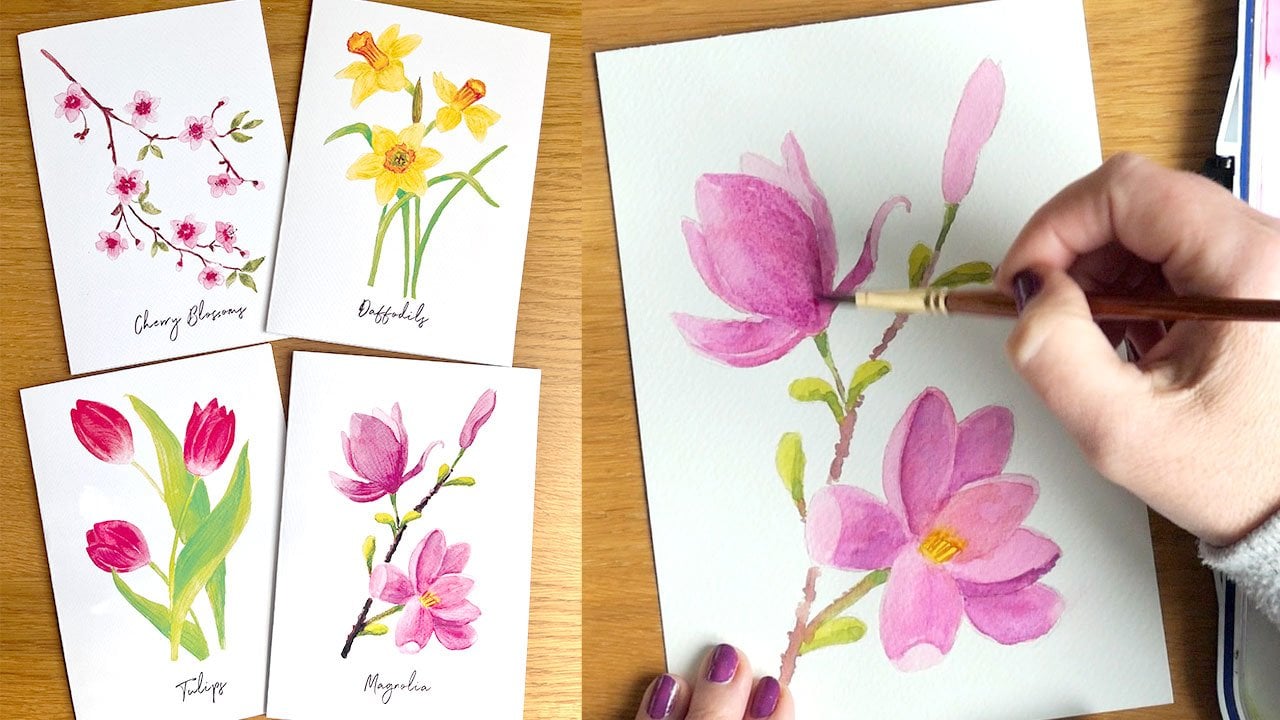
your sketchbooks. You can turn them into beautiful greeting
cards or stickers. Just photograph
them or scan them, and then you can digitize them in software like Photoshop. I show this process in
one of the lessons in my previous Skillshare
class on spring florals. So if you're interested,
go ahead and check it out. And if you'd like keep
learning from me, I have other classes
here on Skillshare, and I also regularly
post YouTube videos to my channel in which I share some sketchbook
inspiration, painting tips, and studio logs. So come and say hello. If you enjoy this
class and would like more inspiration and
tutorials from me, I would like to
invite you to sign up to my monthly email newsletter. When you sign up,
you will receive a five day free mini course in which I teach how to paint different flowers in a very
relaxed and expressive style. It's completely
beginner friendly, and it's a great way to keep
the creative flow going. Thank you again for
spending this time with me. I hope this class brought
you a little calm, a little color, and a lot of joy until next time,
happy painting.
9. Bonus - Sketchbook Tour: As a little bonus, here is a flip through or one of
my oldest sketchbooks. I hope it gives you some
inspiration for your own pages.
 Joanna Zygiert-Kan, Nature inspired artist and illustrator