Transcripts
1. Welcome to Botanical Mushroom Illustrations: Hi. Are you passionate about nature and admire botanical
style illustrations, but find them too intimidating
or challenging to paint. With guash and color pencils, I'll guide you step by
step through my process for creating beautiful, realistic
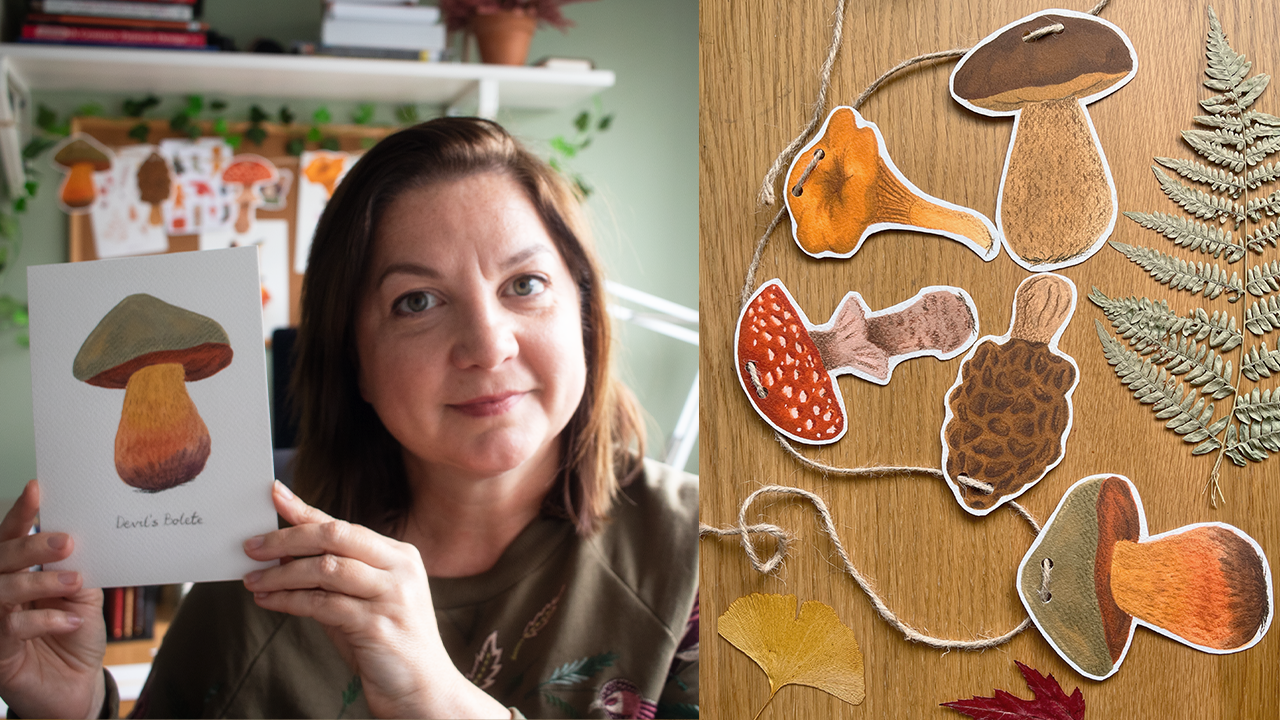
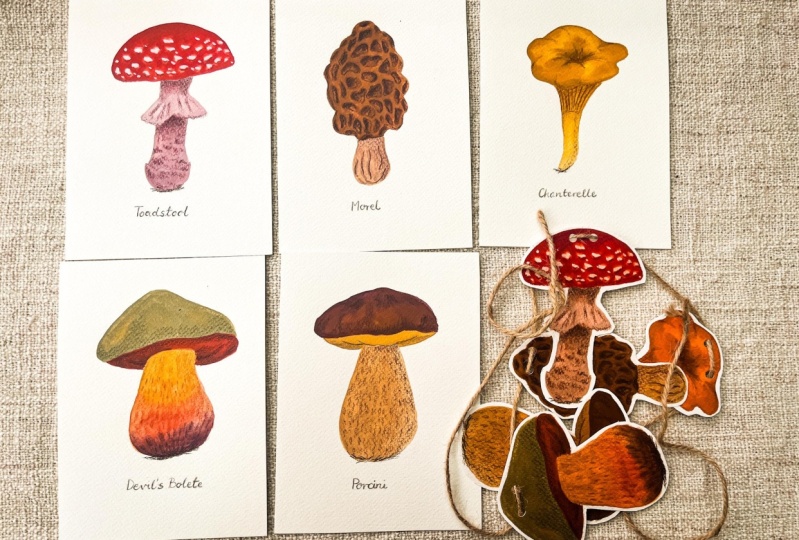
mushroom illustrations. By the end of this class, you have a set of beautiful botanical
mushroom postcards or a decorative paper
eco friendly garland. My name is Joe, and I'm a full time artist and
illustrator based in the UK. My expertise and knowledge comes from using watercolor
and gouache to create nature inspired
illustrations and using them on
products such as fabric, greeting cards, and stickers. This class is appropriate for all levels of
artistic experience. I'll take you through
my process for creating realistic mushroom
illustrations step by step from the easiest
to the most complex, each designed to
improve your skills. Join me in this fun
and accessible class, and let's bring the beauty
of nature to life through your own beautiful botanical
mushroom illustrations.
2. Art Supplies for Botanical Mushroom Illustrations: Let's talk about materials
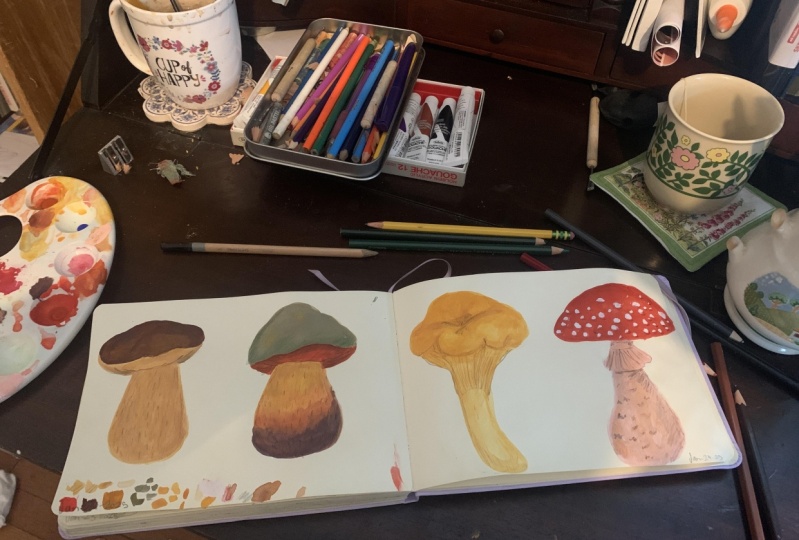
you need for this class. I'll be using a watercolor
paper that has been cut into approximately seven
by 5 " pieces to create a mushroom postcards. If you prefer, you can also use just a normal pad and paint
on your normal pad pages, or you can cut them into half, and then you have
also a very nice size A five size for your
mushroom postcard. I'll be using watercolor paper, but you can use mixed
media paper as well. You can use cold
press or hot press. It is totally up to you. It just personal preference. I like my paper with a
little bit of texture, so I'll be using a
cold press paper. In terms of gouache paint, I'll be using Windsor and
Newton designer gouache paint, but you absolutely don't have to use this particular brand, you can use any brand
you already own, as long as it's a good
quality student grade paint or even better an artist grade, and you will just
need four colors. Warm red, warm yellow, and dark cooler tone blue. I have ultramarine blue, I have yellow ocher, and I have something
called spectrum red. I also have permanent white, which is basically
titanium white. As long as you have similar
color to these ones, you'll be able to
mix all the colors we need for this class. At the side, we
need some brushes. I'll be using synthetic, very ordinary synthetic brushes. These are round brushes,
one is size six, one is size four, and I also have a size
eight filber brush. Again, very inexpensive
synthetic brush. Please don't use your
watercolor brushes because the guage paint
might destroy them. For adding details, I'll
be using color pencils. These are just ordinary
drawing color pencils. These are happened
to be by their went, but you can use again any color
pencils you have on hand. Try to find a similar colors
to what you see here. I. For mixing the colors, I'll be using the
ceramic color palette. You can use plastic one,
is absolutely fine. I'm also having the
spare dish is like a very old plate just to mix extra colors if I run
out of space here. I also have a kitchen towel
just to wipe my brushes. If you decide to go with a second option of
our final project, you'll probably need
some twine or a ribbon, so you can tread your mushrooms
onto and build a garland. You also need scissors to
cut out your mushrooms and probably a hole
punch to make holes to thread the this yarn through, or you can maybe use
something sharp like a sharp pencil or a needle to
make the holes afterwards. I think this is it. This is all we need
for this class. I look forward to see
you in the next lesson.
3. Choose Your Class Project: Postcards or Garland: You have two creative project
options for this class. First is to turn your beautiful
mushroom illustrations into botanical postcards. Perfect for gifting,
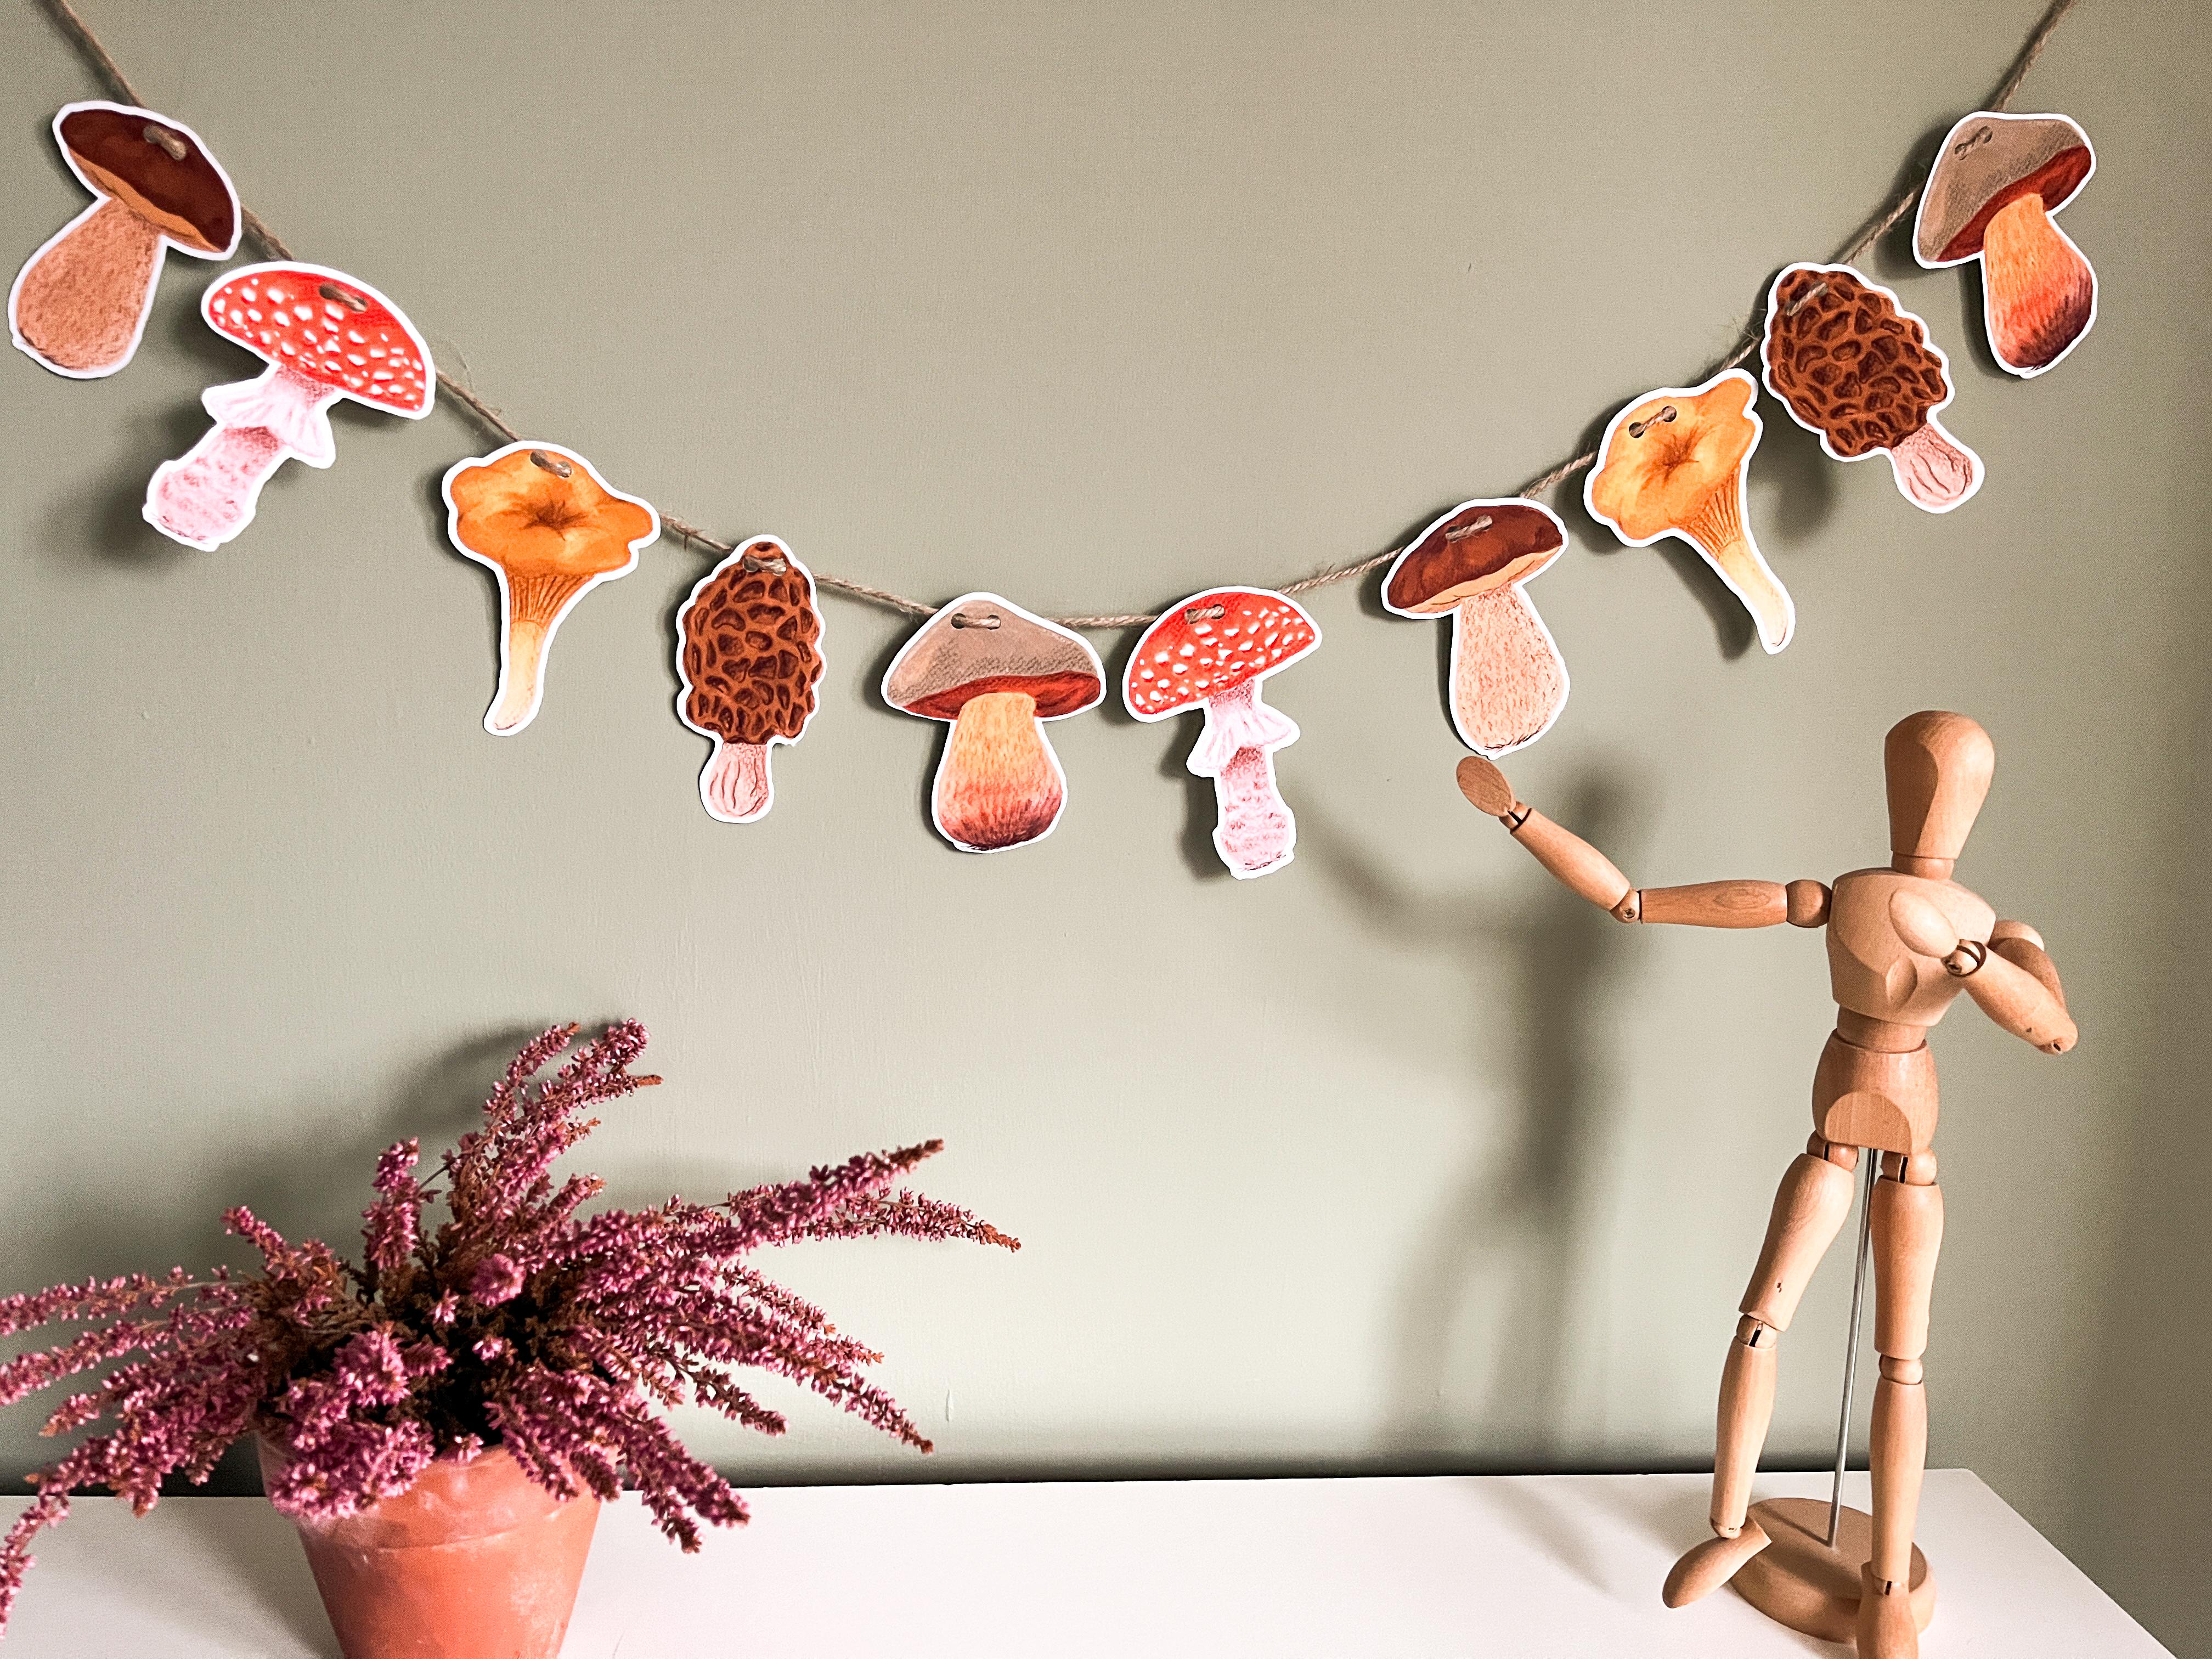
scrapbooking, or framing. The second one is to turn your illustrations into eco
friendly paper garland, like this one behind
me to decorate your office space or bedroom
or anything you like. Choose the option that
sounds more exciting to you, and I'll see you
in the next lesson in which I talk about how to find photo references for
our mushroom illustrations.
4. Finding Free Photo References for Mushrooms: In this lesson, I'll
show you where to find free photo references for your mushroom illustrations
that don't require a license. If you're looking for
botanical illustrations, one of the best
places I found is the biodiversity
Heritage library.org. You can explore the
extensive catalog by simply typing in the search
bar what you're looking for. For example, I typed in fungi, which is the scientific term for mushrooms. Check
out the results. There are so many
publications available. You can narrow your
search by clicking on one that seem most
relevant to your needs. If you want to focus
on just illustrations, there is an option
in a side menu to select only the
pages with images. Another fantastic resource for photo references is splash. You can create a
free account and dive into the vast
database of photographs. You can create collections
of reference images, browse through collections
made by other users, and follow your
favorite contributors. You can also explore
similar sites like pixels.com or pixabay.com. I'll leave the links
to all these resources in the project section
of this class. Although most of these websites have creative commons licenses, please don't forget
to read the details and terms of views
for the images. In the next lesson, I'll talk
about ash painting basics, and we do a warm up exercise.
I'll see you there.
5. Gouache Painting Basics: Warm-Up Exercise: Let's talk about
Gouache paint and do a quick warm up exercise before we jump into painting
our mushrooms. Gouache is basically
an opaque watercolor, and it became popular
with artists, illustrators, and designers
because of its versatility. Like watercolor,
traditional guage can be reactivated with water once it dries
unless you're using acrylic guage, which
dries permanently. But don't worry, in this class, we'll be working only
with traditional guage. If you don't have gouache
paint, don't worry, you can still follow
along with watercolors. One of the key skills
in working with any water soluble medium is controlling how much water
you mix with the paint. Let's practice and see how different amounts of
water affect your results. Pick a color and squeeze
some onto your palette. Now, take a brush
and dip it straight into the paint without
adding any water. You'll notice that the
paint is quite thick, making it tricky to
create a smooth line, but you'll get a lot of texture. Next, dip your brush in just a tiniest bit of water
and repeat the stroke. It's smoother, but
still has some texture. Now, add a little
bit more water to your brush and mix
it with the paint. This time, the line
should be completely smooth with quite even coverage. Do the same thing again, but with a bit more water. You'll start to notice the pain becoming
more transparent. Finally, add even more water, and you'll see the paint
behaves more like a watercolor. Keep in mind that the thickness of the guage straight from the tube can vary between brands and sometimes even
from color to color. That's why it's a
good idea to get a feel of how the
particular paint works. I hope you found this
warm up exercise helpful. Feel free to try out with other colors that you'll
be using in the class. In the next lesson, I'll
show you how to mix some beautiful hues from these three primary colors to prepare for our
first painting.
6. Colour Mixing for Earthy Mushroom Illustrations: Let's make some
beautiful earthy colors before we dive into our
first illustration. I've got our three
primary colors here along with some
titanium white. I've already added ultramarine
blue to my palette, so now I'll just add
remaining colors. The colors straight from
the tube look quite strong, so I need to tone
them down a bit. I'll start with warming up this red with a little
bit of yellow ocher. Maybe I added a bit
too much yellow ocher. Let's add some more red. That's better. Let's test it
on the paper. Looks good. Next, I'll make
some nice brown by combining all three
primary colors. I'll start with yellow
ocher and ultramarine blue. Let's see how that looks. Yeah, that's a lovely brown. Now for a natural looking green, I'll use yellow ocher and
ultramarine blue again. I'm running low on yellow ocher, so I'll add a bit
more to my palette. I also want to mix a warm
purple color by combining red straight from the tube with that ultramarine
here that I already have. The purple turned
out quite dark. I'll test the yellow ocher too. And then dilute the purple a bit with water to
get a better look. Finally, I'll check the green. What do you think?
Isn't it amazing how many beautiful hues we can create by using just
primary colors, and we haven't even
added white yet. By mixing only primaries
for our palette, we ensure that all our
colors work together. In the next lesson, we'll
finally start to paint. We'll paint our first room.
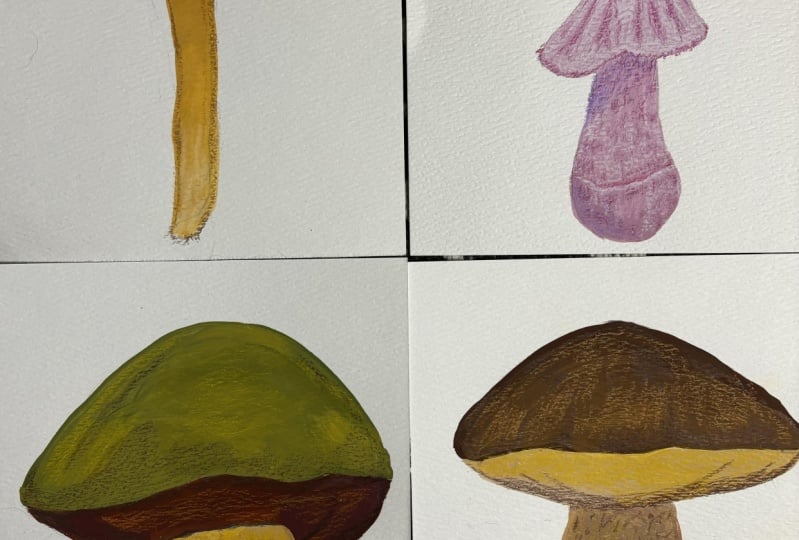
7. Painting a Porcini Mushroom in Gouache: Let's paint our first mushroom. In this lesson, I'll
show you how to sketch and paint a
Portini mushroom, also known as Sep
or King Bullet. If you have your
art supplies ready, feel free to sketch and
paint along with me. We'll be using the colors we
mix in a previous lesson. I'll start by sketching
with my HB pencil, marking where I want the
mushroom to sit on a paper. Setting the initial boundaries makes the whole process easier. I'm beginning with the
umbrella shaped cp. The bottom part of the cup has a wavy line and I'm not
making it too symmetrical, since we want this to
look quite realistic. After a quick check,
I realize the cup should be more rounded,
so I adjust that. Let's draw the mushrooms
underside, called hymnium. Unlike other
mushrooms with gills, but let's have sponge
like texture here. By adding this wavy line, we can show some
volume to that part. Now I will draw the stock, which is quite thick and sturdy. I'm happy with the sketch. I'll use my eraser to clean up any extra lines and gently
lighten the heavy lines, so they don't show up
through the paint. Now it's finally time to paint. I'll be using my fill bed brush, but feel free to use
your bigger round brush. We already mixed our
beautiful warm brown for the cup. Let's
start with that. To show some variation, I'll add a little bit
of yellow ochre and blend it with a brown
while it's still wet. G like water color can be
reactivated with water, making it easy to
blend the colors. While the cup is still drying, I'll paint the
stork using yellow ocher mixed with a little
bit of titanium white. I notice it's a little
bit too yellow, so I'll cool it down with a tiny bit of that
purple we mixed earlier. Since purple and yellow
are complimentary colors, this will tone it down nicely. Oops, I got some paint on the postcard from my
hand, but no worries. I'll can gently dab it with a wet paper towel and then
dry one to clean it up. Now I'll just add a
little bit of water to my brush and finish
painting the stalk. Since the cap and the top
of the stalk are dry, I can move on to the
spongy underside using the small round
brush for the precision. A mixing yellow ochre with a touch of titanium
white for this part. Now that we've colored
blocked the whole mushroom, we will wait for it
to dry completely before adding details
with colored pencils. I'll show you how to do
that in the next lesson.
8. Adding Details to a Porcini Mushroom: Now that our mushroom
is completely dry, we can start adding
the final details with the colored pencils. I'm starting with a
swarm gray pencil to shade the spongy
underside of the cup. I'll switch to dark
brown pencil to define the crease here and darken
the shading a bit more. Using the same dark brown, I add some texture and
contrast to the mushroom cup. The bottom edge of
the cup is darker, so I'll shade that area
a little bit more, and I'll add some
texture to the top to balance the shading. Okay. Now, let's move on to the sk. I'm using a light brown pencil
to gently shade one side. I'm not pressing too. Just using the
side of the pencil for soft shading that
lightly touches the paper. If you want darker shading, you can repeat the process a
few times in the same area. S As I shade, you notice the beautiful texture
of paper coming through. To add more texture, I press a little harder
and use tip of the pencil. The stork isn't
perfectly smooth, so I want to capture this
slight pattern on the surface. Okay. Finally, I use black pencil to add few dark
strands of soil at the base, giving it an even
more realistic look. This is it. I'm really happy with
how this one turned out, and I really hope you
enjoyed the process too. In the next lesson,
we will paint striking mushroom called
the Devil's Bullet.
9. Painting a Devil's Bolete Mushroom: Let's sketch our next mushroom. The devil's bullet. The name sounds pretty
sinister and rightly so. This is a very
poisonous mushroom, so never try to
forage or eat it. This time, we will use
different colors and create a beautiful gradient
with a guash paint. Let's start by marking
the size of our sketch. All bold mushrooms have a round cup and
thick chunky stalk. So we begin by drawing that. O. I'll lighten the lines using the flat
side of my eraser. Now it's finally time to paint. I'll use my fiel boat brush again and mix the
color for the cup. I'll start with the green we mixed in a color mixing lesson, adding a bit of titanium white. This looks a little too though. I'm going to adjust it by
adding yellow ocher and ultramarine blue to deepen the green and then
gradually adding white. It's very easy to overdo it with titanium white since
it's quite opaque, but I'm happy with
this new color. I'll fill the whole
mushroom with this green and to add
some color variation, I'll blend in few
strokes of yellow ocher. Next, let's paint this very beautiful red
underside of the mushroom. I'll use the warm red
we pre mixed earlier. This was a spectrum red mixed with a little
bit of yellow ocher. To add shadow, I'll blend some of the purple into the red, adding a little bit more depth into the back and the
edges of the underside. O H Now, for the stalk, I'll start with a light mix
of yellow ocher and white. Then I'll create the
grading by adding darker colors as we
move towards the base. I gradually add more warm
red to the yellow ocher mix, as I get closer to the bottom, I will mix in purple to
deepen the color further. I'll blend everything to make the gradient nice and smooth. And that's it for
the painting part. I hope you enjoyed the
painting along with me, and I'll see in the next
lesson where we add the final details with you
guested colored pencils.
10. Detailing the Devil's Bolete with Coloured Pencils: My Devil's bullet is
completely dry now, so it's time to add the final details with
a colored pencils. I'm going to use a darker
gray green pencil, but if you don't have
one, a dark gray will work just fine. I'll start with a cup, adding some shading to the edge, just like we did with
the Poriushroom. Now I'm switching to the dark brown pencil to
shade the underside. We added some shading
with a gash earlier, but I want to give it a more
definition and texture here. Next, I'll take the
light brown pencil to add shading and texture
to the mushroom stalk. For the darker
parts of the stalk, I will use dark brown pencil
to deepen the shadows. I'm also going to use black pencil to add few
earthy strands at the base. That's it. Our Devil's
ballet is finished. In the next lesson,
I'll walk you through sketching and painting
the hantrel mushroom.
11. Painting a Chanterelle Mushroom in Gouache: In this lesson, I'll show
you how to sketch and paint a beautiful
battery anteel mushroom. This mushroom has a
very different shape compared to the last
two we painted. It might seem quite intimidating at first,
but don't worry. I'll show you the easy way
to capture it on paper. Let's start by marking where we want the mushroom
to sit on a paper. I'll begin sketching
from the top. The cup is like a
turned out umbrella, and it's very
irregular in shape. The easiest way to approach
this is by drawing an outline that looks a little bit like cloud or a paddle. The stalk of the
chanel is thick at the top and tapers down
towards the bottom. This mushroom has gills and you see them
underneath the cup. To show that the
cup is inverted, I will add a line
here in the middle. This area will be
darker later on. Now that we've got
our basic sketch, I'll erase the extra lines and lighten every before painting. No. For this mushroom, I'm going to use just
one color, yellow ocher. I'll start by painting the
darkest areas on a cup, which are in the middle
and along the outer edges. Then I'll add a little
water to my brush and spread the paint to
fill the rest of the cup. Next, we paint the stork
using the same color. I'll start at the top, adding more pigment where
the shadow is. And then I gradually spread the paint down to the
bottom with water, leaving the base a
little bit lighter. That's it. We've got our
basic shape and shading done. In the next lesson, I'll
show you how to add details to make it look
even more realistic.
12. Adding Details to a Chanterelle Mushroom: Now that my Chantel
mushroom is completely dry, I'm gently checking to make sure it's ready
for the next step. I'm going to add some details
using colored pencils. I've chosen this
lovely yellow ochre, and I'll likely use a slightly
darker warm brown as well. First, I want to define the
shape of the mushroom cup. We want to make sure
it has a rounded look. I am adding the details that I didn't really get
to do with a paint. I'll focus on defining the edge and giving
it a little texture. The mushroom has this
inverted umbrella shape, and I'm following
the natural curves. On this side, the curves go
this way and on the other, they go the opposite direction. By following the shape, I can recreate a natural
three dimensional effect. I'll add a little bit of moon shadow here
with a color pencil. It is easier to get
these details with pencil and it adds
beautiful texture. You can already see
how this mushroom is starting to look
more three dimensional. I will add some
more lines here and there just to give it a
little bit more depth. Now I am switching to the darker brown pencil
to define the gills. I think this part
should be der to show that this is sitting slightly below the
outer part of the cup. You really want to press
down with the pencil, especially if you are using textured paper just like mine. I will add a little
bit more shadow on the side of the stalk. I'll switch to an
even darker brown to bring out the mushroom
connections to the mycelium. I will also add more
definition to this area, following the lines of the gills and pressing
a little bit harder. And that's it for
our chant mushroom. In the next lesson, we'll
be moving into one of my favorite mushrooms to
paint the Toast mushroom.
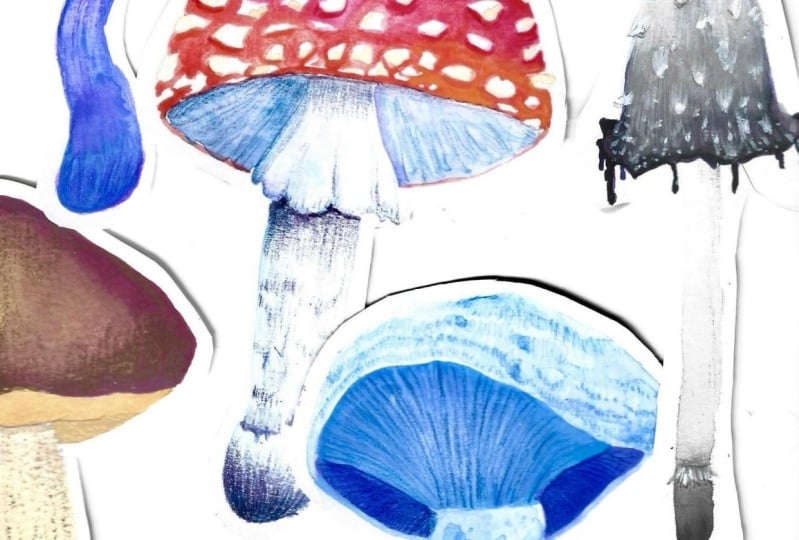
13. Painting a Toadstool Mushroom Step-by-Step: T. This lesson, I'm going to
walk you through sketching and painting one of the most iconic mushrooms, the toadstool. As always, I'll start
by marking where I want the sketch to begin
and end on the paper. I want the toadstool
to have a big red cup. I'll sketch a large
umbrella shape for it. The stalk isn't too thick, but it has a skirt around it, so I'll draw that too. I'll keep the shape
a little irregular, so it doesn't look
too symmetric. The stool gets a
bit thicker below the skirt and ends with a
mushroom sack at the base. Now that I've got
the sketch down, I'm going to lighten the
lines before painting. Next, I'll mix up a nice bright
red for the mushroom cup, and I will use my large brush
to cover the whole cup. Okay. To create those
natural looking spots, I'll show you how to gently
remove some of this pigment. I'm just going to use wet brush to rub the area where
I want the spots. Then I'll dry my brush with a paper towel and away
the excess of paint. Once the cup is d,
I'll refine the spots. I noticed that the bottom edge of the cup is a little light, so I'm adding more red
to darken that part. Being careful to leave
the spots untouched. In the reference photos, the stalk is almost white. But because I wanted to stand out against the
white background, I am going to mix a
red, purple, and white. Okay It's looking a bit too dark. So I lighten it up with
adding a little bit of white. Just a quick tip.
Remember, the guage dries a than it
looks on a palette. It's good to keep it in mind. I'll add a little
bit of shadow with a darker tone to give the a bit. And that's it for
the painting part. In the next lesson, I'll show you how to add the
finishing details.
14. Finishing Toadstool with Colored Pencil Details: Let's add final details to
our toadstool mushroom. First, I'll use white gouache to lighten the spots
on a mushroom cap. I'll allow them to
dry for a moment. I'll select the color pencils I use for the finishing touches. I'll be using a burgundy red, black, and a warm red. I'll start with a warm red to paint the top of
the mushroom cap and the bottom edges as these areas should
be the darkest. I will also add
shadow underneath each of the white spots
using the same color. The spots on a stro
are really flat. They stick out a little
bit from the cap surface. By adding shadows, we can create a three
dimensional effect. Next, I will use my
burgundy red pencil for the final details
on the stalk. Since my stock has a pink hue, the burgundy works
perfectly here. But you could also
use warm brown or even warm gray
colored pencils. I add few creases to the mushroom skirt giving
it a free like appearance. Finally, I will
darken the shadows underneath the white spots
on the mushroom cap. Here you have it. Our to
mushroom is complete. In the next lesson, we
will sketch and paint the final, the morale mushroom.
15. Painting a Morel Mushroom in Gouache: Let's paint our final
mushroom, the morale mushroom. The morale scap is very unique. With its hollow conical shape, at first glance, it might seem challenging to paint,
but don't worry. I'll show you how to simplify
it and make it easy. As usual, I'll start
with a sketch. The cup will look a little
bit like a cloud but position vertically
rather than horizontally. The stem is very simple, straight down and slightly
wider at the base. That's the sketch. Now I will lighten the sketch lines
before I begin painting. I decided to clean up my palette since some
of the colors became a, I'll mix fresh colors again. I will create two brown tones, one light, and one dark. I'll start by mixing the
three primary colors again, yellow ochre, red, and ultramarine blue to make
a lovely dark brown. To create a lighter tone, I'll take some of that
dark brown with my brush. I'll transfer it to the new well and add a little bit
more yellow ochre. Now I will use that
light brown to fill in the entire area
of the mushroom cp. For the stem, I'll need
an even nighter color. I'll mix some titanium
white with the brown. I'll fill the entire stock
area with this light color. That's our base
painting complete. In the next lesson, I'll
show you how to transform this melted ice cream on a stick into a beautiful
morale mushroom.
16. Adding Final Details to a Morel Mushroom: My morale mushroom has
dried and now it's time to add some details to
really bring it to life. I'm starting with my
dark brown pencils, but I'll go back
to the guash paint and use that brown
mix we made earlier. First, I need to add hollow
areas on the mushroom cup. They are very irregular, and if you look very closely
at the reference photo, you will notice
that they narrow on the sides because of the
cone shape of the cup. I'm going to begin
with the edges, keeping the holes
narrow and uneven. As I move towards the, I will make the hose
a little bit wider, but still irregular, just
like we see in the reference. Now I will switch back to the gouache paint and use
the lovely dark brown mix. With a smaller brush, I will carefully
paint ad each of the shapes I sketched
earlier with a pencil. I'm applying the paint thickly
and smoothly on one side, and then I'm going to
go over again with a clean damp brush to drag the color down and fill
in more of each hole. I will keep it random
and irregular. The holes along
the edges will be slightly darker than
the ones in the middle. Since I got some brown
paint left on my palette, I'll add a little bit of
water to thin it out, and I'll use it to paint the shadows on the top
of the mushroom stalk. No I'm going to add some creases, so it doesn't look too smooth. Now that the painted
holes have dried, I'm going to go back with a dark brown pencils
to define them even. I'll start at the top of the cp, darkening the shadowed areas and outlining edges
where needed. Oh. I think it's really starting to look
like a moral mushroom now. No more melted ice cream. Finally, I'll add
a little bit of shadow and texture
to the stem of the mushroom. There we go. Our final mushroom
illustration is complete. I hope you enjoyed
painting along with me. In the next lesson, we'll finish our mushroom postcards by adding names at the bottom
of our illustrations. If you prefer to turn your illustrations
into a mushroom glad, you can ski this lesson.
17. Completing Project 1: Mushroom Postcards: Let's finish off our
botanical postcards by adding the mushroom
names at the bottom. First, I'll grab my ruler and mark some light
pencil lines. I want to keep the text level and uniform across
all postcards. I want the names
to be aligned and at the same height on
each illustration. For the lettering, I'll be using my own hand lettering style. If you want to add
more authentic touch, you could trace land
script lettering or even use a Latin
names for the mushrooms. I'm happy with a pencil sketch. I will go over the letters
with my black colored pencil. You could also use ink
pen if you prefer. Now I will carefully erase
the pencil guidelines. I'll be mindful not
to smash the text. Now, let's remove all
the extra pencil marks from the finished
postcards, and it's done.
18. Completing Project 2: Mushroom Garland: I'll show you how to turn your mushroom illustrations
into mushroom glad. First, I'll need to
cut out each mushroom. I will draw a light pencil line a each mushroom to
guide me as I cut. I like to leave a thin white
border around the shapes, like you see on the stickers. But if you prefer, you can
cut it right up to the edges. Now, I use my whole
punch to make two holes at the top
of the mushroom cup. I'll do this for
all the mushrooms. Once they all cut out, I'll
lay them out and arrange them in the order I like before
stringing them onto the twine. I'll grab my twine and
thread the mushrooms on. It's a bit like sewing, but without the needle. Once the garland is finished, you can hang it
wherever you like. I decorated my office by
hanging it under my bookshelf. If you want a longer garland, feel free to paint more
mushrooms and add them. Now that you finish this class, you should be able to confidently paint and draw
any mushroom you like.
19. Upload Your Finished Mushroom Illustration Project: Thank you so much for
painting with me. I really hope you enjoy exploring gouache
and colored pencils. I'd love to see your
beautiful illustrations in the project gallery. Please remember your art doesn't have to look
the same way as mine. Feel free to put your own style and use the techniques
you learn in this class. Sharing your work is a great way to celebrate
your progress, get the feedback from me, and connect with a
fellow students. Head over to the project
section of this class and follow the instructions on how to upload your artwork. If you enjoy this class, I would love for you
to leave a review so others can also
find it useful. You can also follow me
here on Skillshare for future nature inspired
art tutorials. Thank you again for
watching my class, and I hope to see you next time. Bye.
20. BONUS 1 Amethyst Deceiver Speed Painting: A
21. BONUS 2 Oyster Mushrooms Speed Painting: [No Speech]
22. BONUS 3 Parasol Mushroom Speed Painting: [No Speech]
23. BONUS 4 Saffron Milkcap Speed Painting: [No Speech]
 Joanna Zygiert-Kan, Nature inspired artist and illustrator