Transcripts
1. Introduction: [MUSIC] I love experimenting with all the different
art supplies I can get my hands on. Today, we're going to
experiment with one that I rarely use and just see
what we can create. I'm Denise Love. I'm an artist and photographer. Today we're going to
play an oil pastels, and that's a product that I hardly ever pull out
of my art cabinet. You'll see the collection that I'm using looks practically brand new because even though I've had it for a
very long time, I'm a little bit afraid of oil pastels because
they never seem to dry. I'm a little afraid
of that because I stack art in drawers and around my art room and I tend to be a little haphazard in the way that I store things sometimes. If I have an art supply
that doesn't dry, I can just imagine
that getting on everything that I stack on
top of it or around it, or if I touch it because I
forgot what it's made of. So I tend to not head towards things that
don't dry naturally. [LAUGHTER] But today,
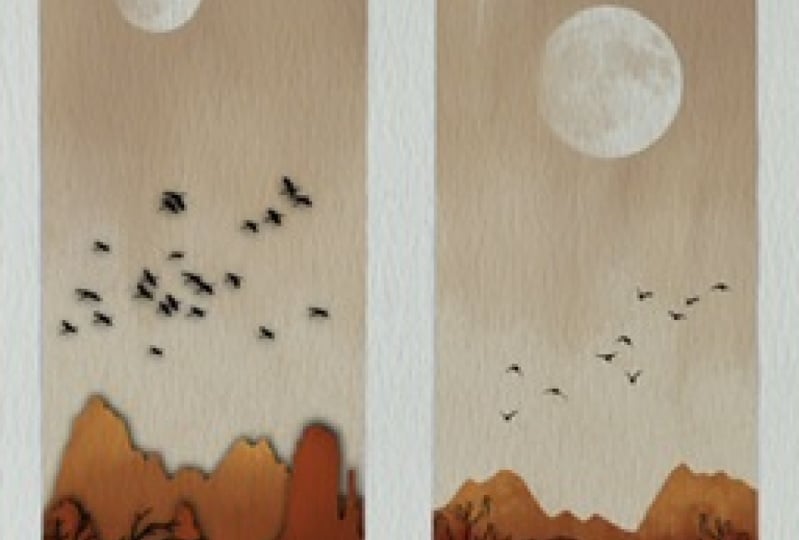
we're going to look at oil pastels and we're going to create some beautiful
little landscapes. I've done some that are
in this rectangular size and some that are
a little taller and a little more contemporary, and just create with the supply
that really doesn't dry. We know this right up front. Now I know I'm going to have
to store it a little more carefully or I'm going to
need to frame it under glass. We do talk about some
finishing sprays, but even those are just going to lend it to a little bit harder, but not necessarily
a permanent dryness like you think an
oil paint would dry. It's cool. It's very
interesting supply. We get some really beautiful
landscapes out of these in the ridiculously easy technique that I'm going to show you. I know you're going
to love this. [LAUGHTER] I can't wait
to see what you create. Let's get started. [MUSIC]
2. Class Project: [MUSIC] Your class
project is to make an awesome little landscape with the oil pastels and come back and share with me
what you came up with. Did you try it with
the white sky? Did you try it with
the colored sky? What color did your
mountains end up being? What paper did you really
love using when you did your paper test on
different types of paper? Did you love the
paper I was using? Did you prefer something else? I wanted to see what
discoveries you had as you're making
little landscapes. I can't wait to see those so
come back and share those with me and I'll see
you in class. [MUSIC]
3. Supplies: [MUSIC] Let's take a look at the supplies I'll
be using in class. These are ridiculously easy, and they come out super cool. It does not take a
lot of supplies, but you do need
some oil pastels. I have the little Sennelier set of oil pastels
with 24 colors. These are super
fun to play with. The only thing I
don't like about oil pastels is they never
really seem to dry. There's some things
that you can do to harden them up a little bit, but they always still
retain a little bit of that oiliness to it. Like if you touch it,
it still feels wet. That's just the nature
of the product. Usually, when you make some pretty little landscapes
or something with these, you would frame
these under glass to really protect them
over the long term, and then you're good to go. Oil pastels, you
need some of those. You could have a white and
then a variety of colors for the landscape part and
something for maybe the sun. Then you'd be good to go. I like having this set of 24 because there's
lots of fun options. I could do a green landscape, I could do a peachy landscape, I could do some gray landscapes. I could throw in some burgundy. You see there's lots
of fun choices. We could do a wild
blue landscape. The idea of these
is not to really be in my mind, true to life. I want to be able to create wonderful variations
and things that are a little bit different and some things that are maybe
just in my imagination, but they're still super cool. I want you to have
fun with the colors. I want you to experiment
with your papers. Having enough pastel colors is going to make
that fun for you. I've also got some
painters tape just to tape it down and have
a nice white edge. I've got a hole punch to punch out a hole to
say, make my suns. I'm using post-it
notes and I like these because
they're a good size. One side at the top is sticky and I can tear a
landscape out of that. It can hold itself down a little bit while I'm working
without moving around, but this is not necessary. You could use just
plain white paper to use and that would be fine. Today, I'm going to use some Fabriano Studio
Watercolor paper. This is 25 percent cotton, and 75 percent I'm
sure wood pulp. But I like this paper and
it's got a nice texture. I did a paper tests with all my different
papers to be like, what do I like? I had Fabriano Studio, and I had Bamboo, and I had Heritage Canson, and I had hot press paper. My least favorite out of
these is the hot press, my most favorite was the Bamboo, but I did not have a
big pad of Bamboo. I just have a little
tiny baby pad of Bamboo. But this Hahnemuhle Bamboo
paper is a mixed media paper. That turned out really
nice and I liked that. Now, I'm like, I need
a big pad of this, so I'll be ordering some
of that [LAUGHTER]. But I did like the texture
here on the Fabriano. I would recommend if you don't happen to just already
have this Bamboo paper, go with a cold press
watercolor paper about 140 pound and you would be good. But I would experiment with all the papers that
you have and just do a paper test and see what
did you end up liking. Then make several pieces on
your very favorite paper. Let's get started. [MUSIC]
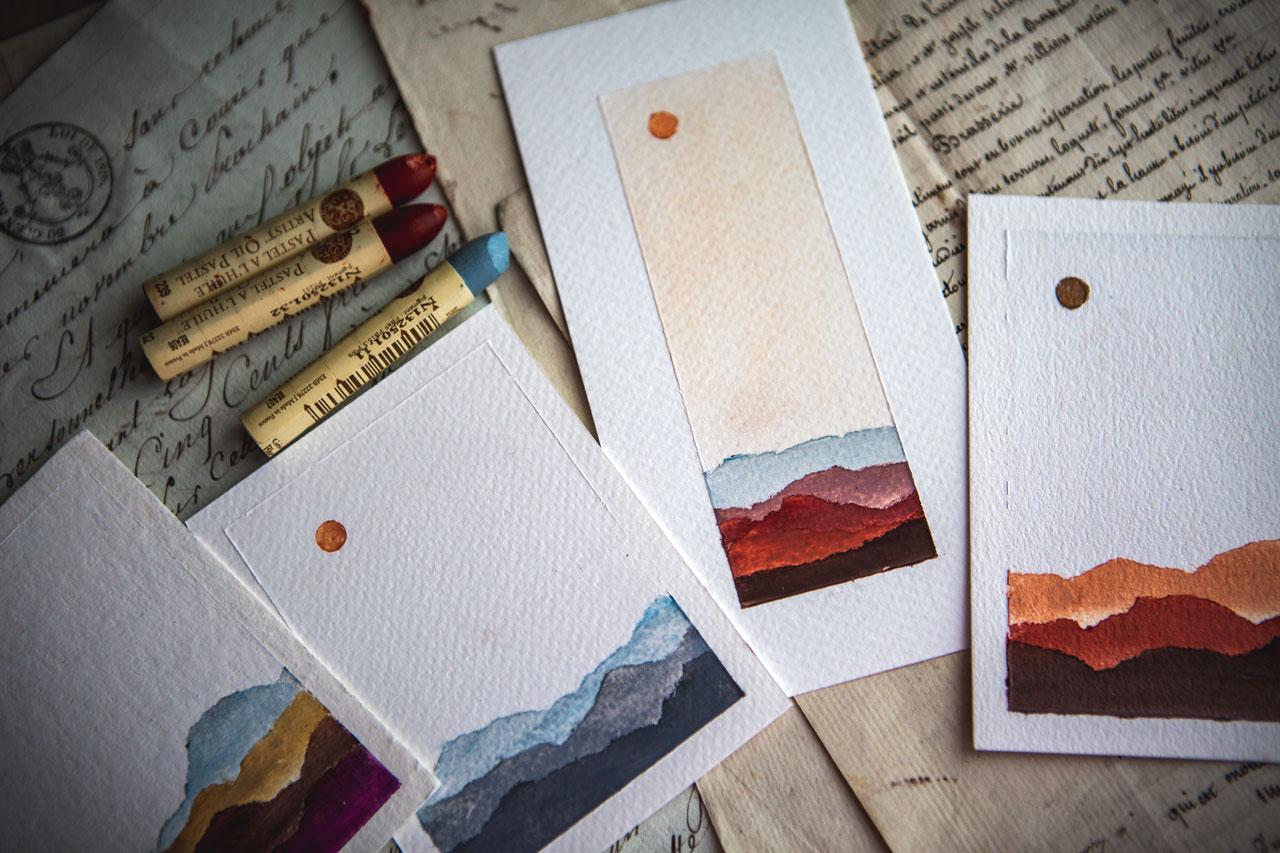
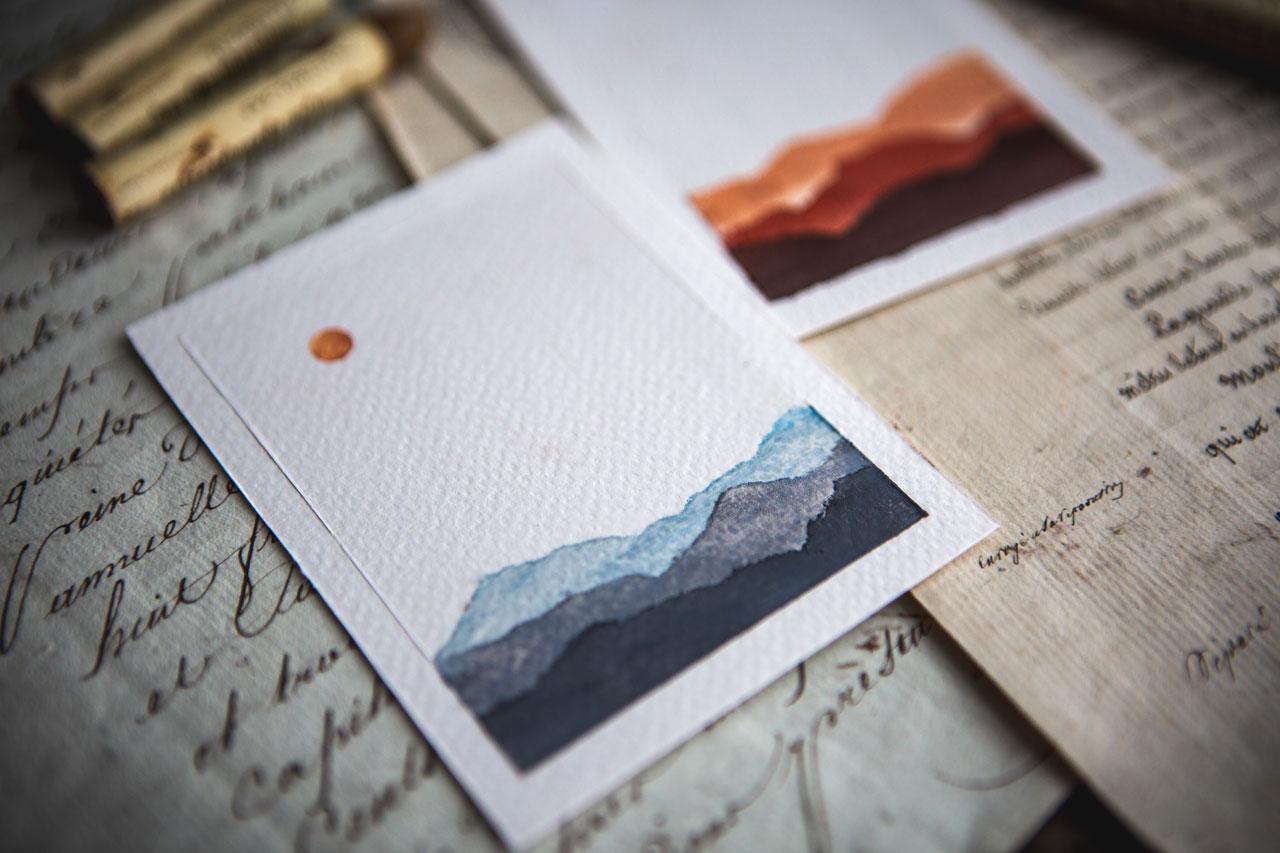
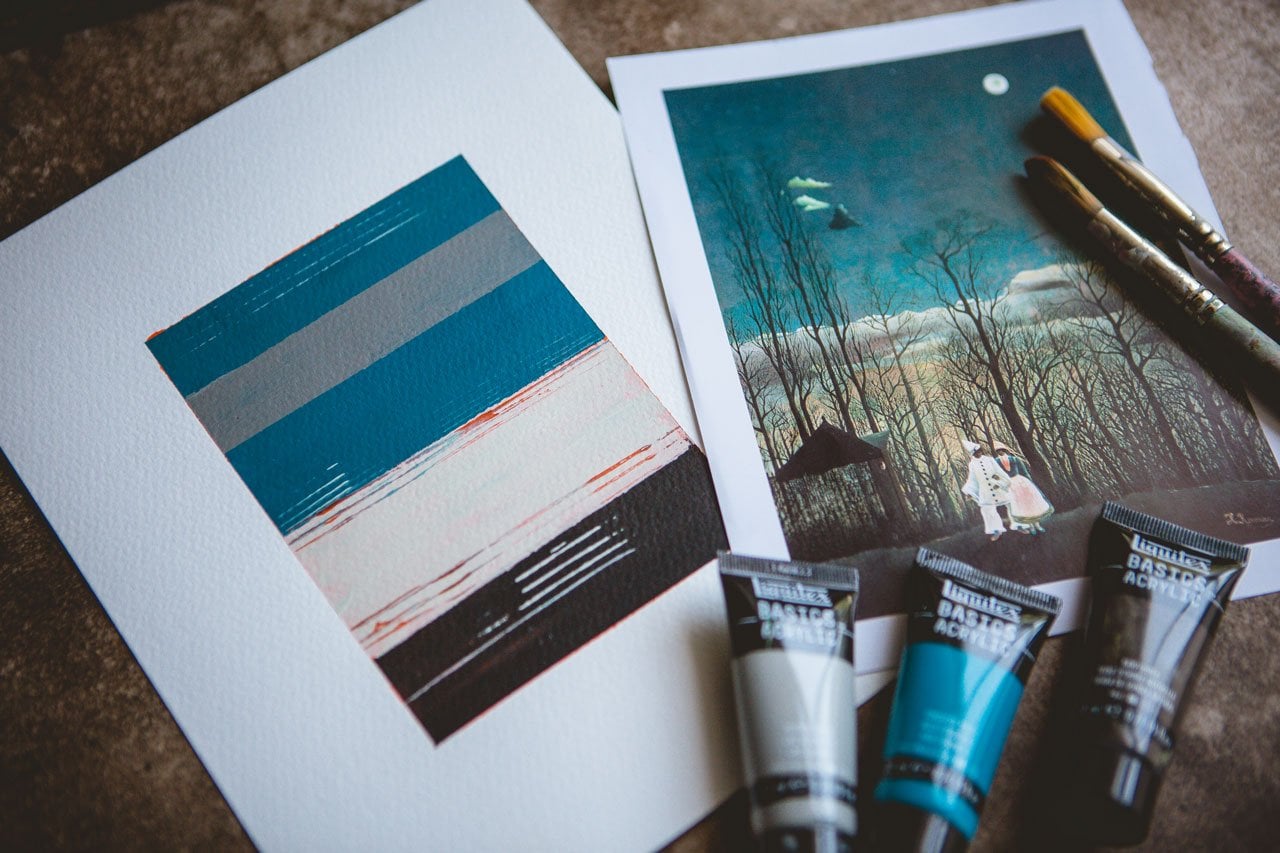
4. Small Rectangular Landscape: [MUSIC] I'm going to
start with a piece that I have trimmed out
of our larger piece. These are about 4
inches by 3 inches. I have just chopped this
into thirds and then those thirds into half
and come up with a nice, fun sample size to play with. Once you are playing with
your samples and you think, I love this so much, then you can definitely
go a little bigger. I can see these in 5 by 7 or something like card size maybe you want to do some cards. Drawback with the cards if
this stuff doesn't really dry, but that is a nice size, 4 by 6, 5 by 7. These are basically 3 by 4, which I like this size they're delightful little
miniature piece of art and you're going to love
making some of these because it's really is going to be the easiest thing
I've ever showed you. I start these with white. If I had a gray that was lighter than the lightest
gray that I have in here, then I might start
with say a gray or something that's just
a shade off a white. But what I'm going to do is just coat the whole page and
white and then I'm going to take my finger and smear
it around so that it's a smooth white color on there. It's not got any of the texture or the
drawing texture of the pastel on this
textured watercolor paper, I want it to be very smooth. After you do enough of these, if you're feeling pretty good, you could try like
an embrace sky. You could try mixing the colors
and seeing what you get. But this is the basic
landscape that I start with. I just start with a post pad, pieces of paper, and I'm just going to tear
[NOISE] something that looks like it could
be a mountain. Just something that easy and I wanted to remember
like rule of thirds. I'm feeling like I want
the bottom third to be my mountains and the top
two-thirds to be my sky. I'm going to start about right here and just press it down and that's why I like having that sticky side passed
on this post pad. It's not going to stick
down like a piece of tape but sticks down just enough for us to pick a
color and start coloring. I'm going to go
with a gray because sometimes when you're
looking at the mountains, the dark is in the forefront and it gets lighter as it
goes further back. That lightness implies
the distance and I'm just going to do like
a stripe of this gray. I do want to come far
enough underneath my papers so that when I come
back with the next stripe. I've got enough color
there that I can cover with the next
mountain range. I'm just going to take my
finger and smooth it in. You want to hold the
paper pretty good with your fingers so that the paper
is not moving all around. Look at that mountain range. Look at how beautiful that
mountain range is [LAUGHTER] I love how the pastel gathers at the edges and really creates a ledge and so just do that
one or two more times. Let's do that two
more times and now I've got my next
little range and I want to wherever the dip is, that's where I want
to line up with the bottom of the
current mountain range. I don't want to end
up with a bunch of white gaps in there. Then, what color
do we want to do? Do we want to switch to a
color, and it could be, maybe a blue or purple, maybe this mountain range
could be shades of gray. I'm liking the gray actually. I've got several shades
of gray in here. Really, we could do darker gray, black that might be nice. Although, I don't think
I have a black in here. I picked up one that I thought, this looks like it's black
and it ended up being a blue. That was a surprise. Let's do this lighter gray. Let's just see what these are. This is a pretty good,
this is a pretty gray. These are so easy
and simple to do that if you don't love these
colors, just do another one. Just rubbing these
in with my finger. I don't know if I mentioned, [NOISE] but I like to have
these little microfiber cloths around and when I'm all done smearing things
with my finger, I clean my finger on the
micro cloth and it just keeps me from getting paint on everything when
I peel this tape. Just something fun
to keep in mind. Those microfiber cleaning cloths are my favorite thing to have in my art room now and I wish I had discovered them years
ago because they're amazing. Let's just do a third mountain
range, third gray color. See, that's perfect.
[NOISE] Shades of gray. I'm loving it and
just fill that in. Come back with your finger, rub those smooth, get all that texture out. Really make this look like a beautiful landscape
going off into the sun. If you need to put more
on there, you can. Just smooth that right in. Peel that paper up. Look how beautiful that
mountain range is. Then we're going to take a piece of our paper
that's left over, cut a hole on it and make a sun. We can do any color for the sun. I don't really have a sun
color in this collection, but I do like this fun
salmon or red or yellow, I did a variety. Then just take your finger
and smooth that right in that little hole,
and there we go. Look at that, oh my goodness. Then we can use our
microfiber cloth just to clean our finger
off and peel that tape. I just love the edge that comes off of these
and even though I used white on
the top of there, it still creates
an edge when you peel the tape so you know
there's something there, it's not just a paper, I love that [LAUGHTER]
Look how gorgeous. Oh my goodness. Easiest, prettiest
landscape you'll ever make. How gorgeous is that and how
easy was that technique? I can't wait to see
what you do with this, I know it's like the
shortest little art class I've ever done but
how amazing is that. I'm feeling too that we
could actually go through and make these taller
and skinnier so I might do one more
project with a tall, skinny landscape just to see and I'll see you
back in class. [MUSIC]
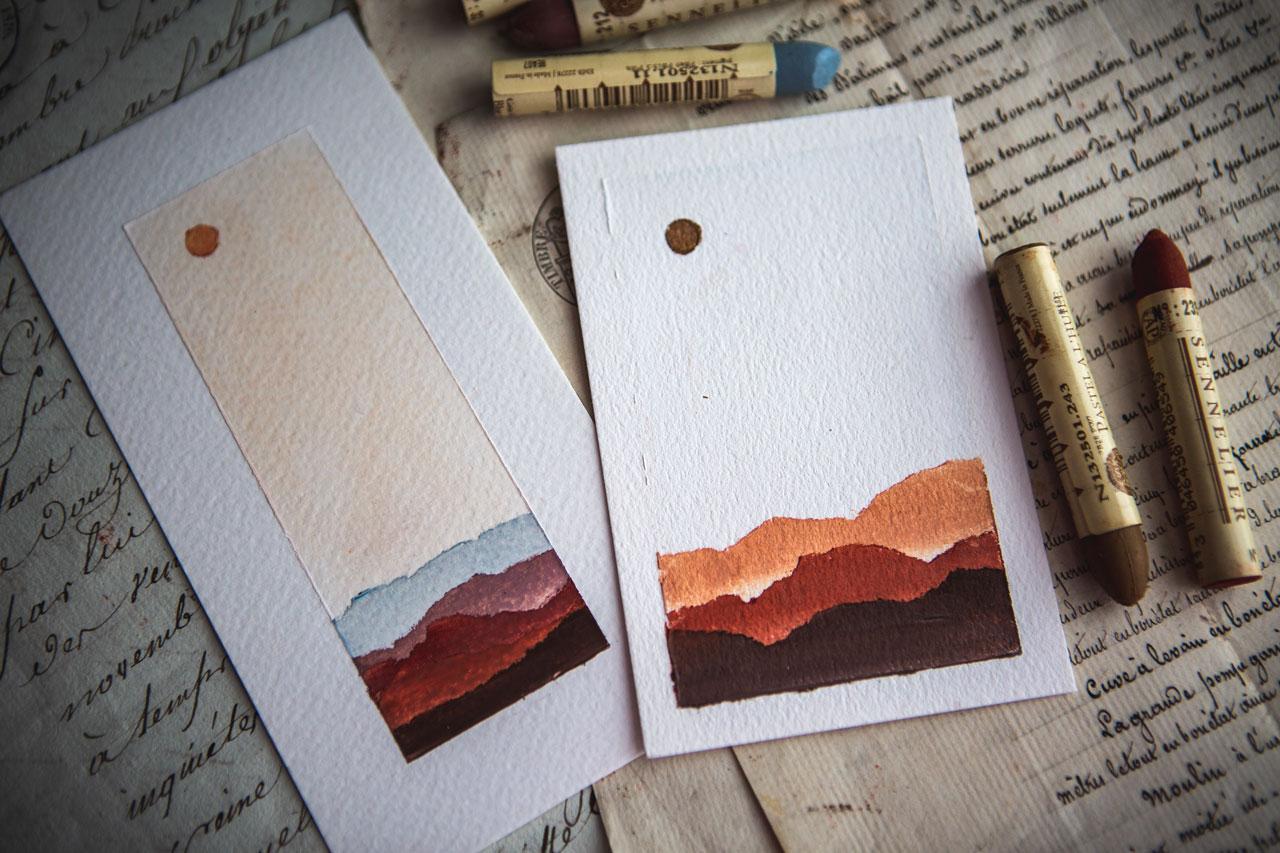
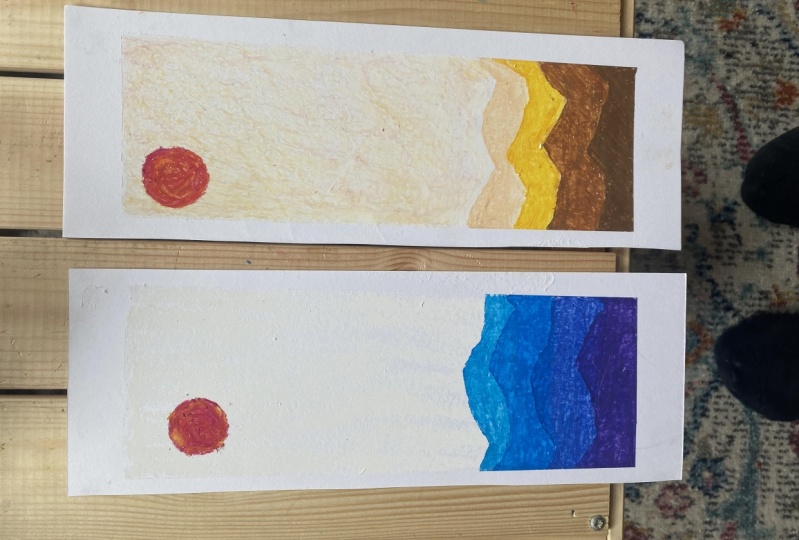
5. Tall Skinny Landscape: [MUSIC] Let's do a
tall skinny landscape. These are 3 by 6, so I added two inches
to the height. I almost feel like, what if we really honed
in more of the paper, made that a really thick border? Just see because it's
almost when you get really thick white around
the piece of art, it's a little more
contemporary and it's a little bit different feel. I'm just totally
going to heat up all that paper there with tape. Let's just see how
funky we can do it as a tall, skinny landscape. You know what? We don't have
to use landscape colors. I did colors of gray
in that one but, as tall, skinny, something a little
bit different, we can do different. Again, I'm going to
coat the whole thing with white that gives me a surface to smear on. It smooths out the texture, but I need the texture
because it grabs the pastel. If you're using hot press paper, it just didn't have
enough grid to really grab the colors I
piled on top of it. Then just really dig that paint
right down in that paper. Then let's check this out. What colors do we have? I think I can either do these
funky greens or the reds. I'm filling in the reds. Let's take a look at the red
options that we've got here. We could even end off in a
brown. That will be cool. Then what if we did our
sun and a funky gold? What about that? Why not? Let's just get these
sitting out here and you're welcome to
play an experiment. That's all this is. It's
just play and it's fine. Experimenting is how we get to these discoveries
on coolest thing ever here with these
pastels making a landscape [LAUGHTER] I want to
start about a third up. I'm thinking third, third, third and so maybe
about right here. Don't have to be exact, you're just giving
yourself some options and then coloring in our yummy,
yummy lightest color. I'll give myself enough
room down below that to add the next mountain without any white show
one when I get to it. Just smear that nicely. A caterpillar that is. [LAUGHTER] I just
love the bit of buildup at the top of
that when we do that. You could reuse these
pieces of paper over, but this pastel,
again, it never dries. If you are fast set
that down again, I'd be smearing that color into whatever color I
did and so I just tend to take a new piece
of paper each time. Here's our medium color. Let's go ahead and just
get that in there. Smear that in good
with our finger. It's hard to hold the paper
down and not being in the way of the camera. Don't be afraid to add a little more on there if you think, oh, I need to fill a spot in. Look at that. [NOISE]
I love these colors. That one I could have
actually gone a little higher up and got it a little
tighter, but that's okay. Let's go back with
this third color. [NOISE] Really it's
almost good if you go and color on the paper
and color down onto the watercolor paper
because that sticks the paper down for you
to smear the color across it rather than shoving
the color up underneath it. Just get your glue go
and as you're going. Super fun. These are going to sound pretty. Let's do that. Coming right back there on top,
just like that. Let's get this brown. See if we color right down
on top of that paper, we create ourselves
a nice barrier. Let's keep that all smooth
in and pick that paper. Oh yes, look how pretty that is. Let's take a little hole punch. I actually think these would
be even pretty or tighter, so next time I might
do one that's tighter. Just thinking to myself what
did I like about this one? Look at that. What
do I like about it? What might I change next time? It's fun to just
experiment and see. Let's peel this because
I know it's going to be long and lean and that's going to be
pretty, pretty, pretty. Oh, look at that. Look how pretty that is. That's gorgeous. Now, thinking, what if we arm braid it and
add some other in the sky? Let's just see what that
would end up looking like. I'll see you back
in class. [MUSIC].
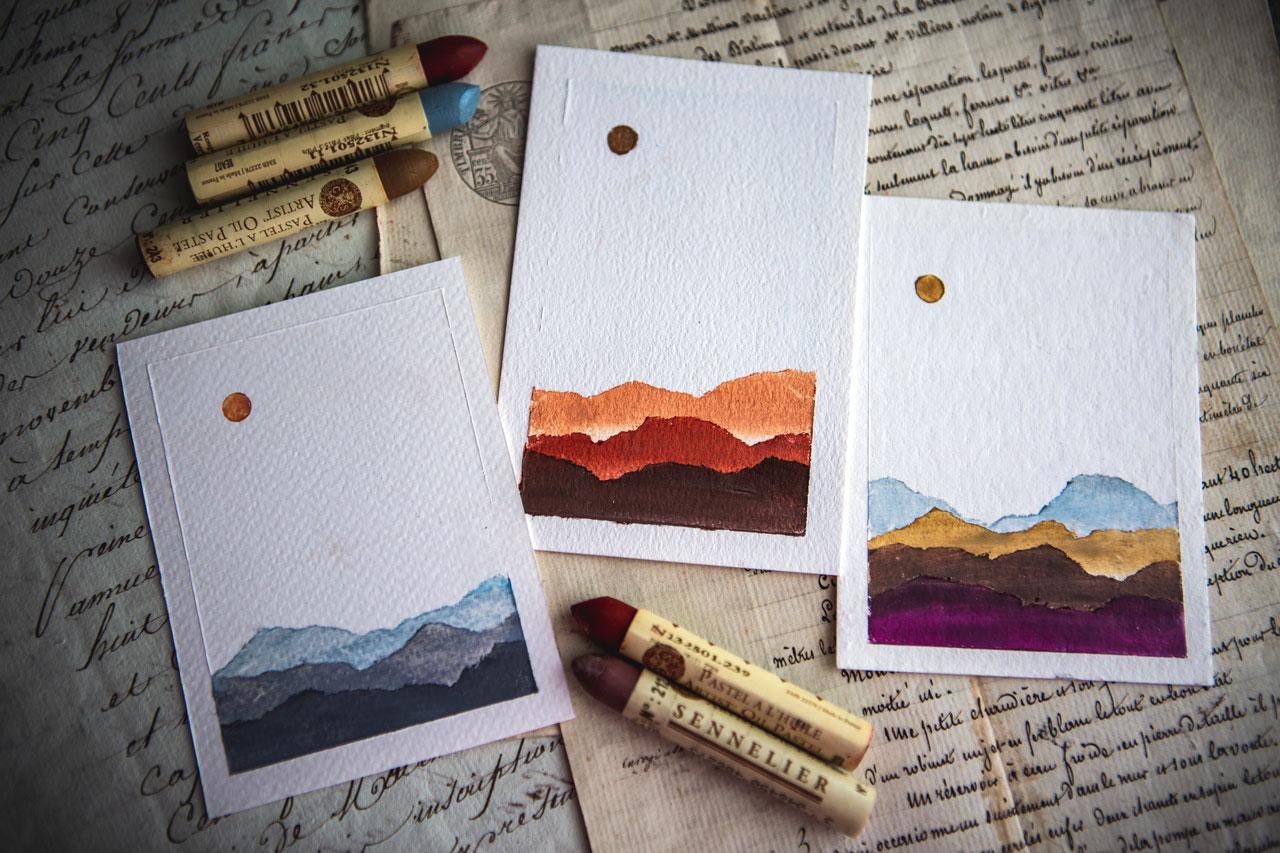
6. Colored Sky Landscapes: [MUSIC] Let's do
a third project. We're going to do
it where we add some other color into the sky. I really loved the long skinny of that piece that we did
in that last project. I loved this shape, so I'm going to do that again. I love the really
wide white border around our landscape, so I'm just going to tape it off and try to get the
same amount of tape all the way around it and do that tall skinny
goodness because man, that made a statement. Let me tell you, taping off stuff and putting on the tape, makes a statement piece
when you're done. That's why I don't like
doing edge-to-edge, it doesn't make the
same statement. Not a funny angle,
there we go. All right. We've got our piece taped off. Let's just go ahead and
check out our colors. I want the white so we're going to go ahead
and do the white. But we could, what
if we took the white and a little bit of color? I'm going to go ahead
and do the white. I'm not going to smear
it yet so hang on. Experiment with when you
add some other colors in here and when you start
smearing, experiment with that. What if we had just some other
colors up there like maybe some of this light gold, let's just smear some
of that on there, maybe this peachy color, like maybe this is
sunset and we're seeing the colors in the sunset, think of it that way, like what? This is not going
to be as vivid as some of the colors
that we might see but let's just add some of this in here
and see what we get. That's a lot of color. Let's just smear this in and I'm just
going to work it in. I'm not trying to really create
anything major up there, just something different than
the white but really light. You can get more dramatic as you make more and more of
these and you think, I love this, I love that. That was really not a lot of color once
we got it blended in. Maybe let's come back
with a little more, let's work that sky
a little bit more. [NOISE] I'm going in circles here to really
just get that to blend in. I don't want stripes, I don't want it to
be something weird. Look at that, that's pretty. [LAUGHTER] That's going to
be completely different. I love that we just
experimented and created that. Let's go ahead and do
our mountain range. I'm going to try to
maybe do it tighter, a tighter set of ranges. Let's go about a
third of the way up. Third, third, third is kind
of way I'm thinking there. I want them tighter but maybe different than what
we already did. I want a light color coming into a darker
shade set of colors. Let's go ahead and
start with gray. Get that smeared in really nice. Then we can pull that up. See, that's real soft. [NOISE] I'm going to try to get tighter so I really want to come
way up because maybe we'll do more
stripes, let's see. Let's do shades.
What do I feel like? [LAUGHTER] Let's see this one. It's more of a pinky color. Smear that right in. Let's peel that and we'll see getting a little tighter up. But still might even as tight as I intended, interesting. [NOISE] Let's just get even
further up above that. Well, no, this is a
little bit longer but we'll be further up on
some of this other, maybe. Is this the same
color I just used? Might've been. Let's use
this one. [NOISE] I'm just layering those in there. Look at that. I'm feeling that. Now I'm feeling pretty good. [NOISE] Let's just come
up here real tight. I'm not sure what this color
is but let's just use this. [NOISE] Look what we have. Very interesting it has a
little more orange to it. Look at that. Not as much of
a contrast as we're getting. That was very similar. Let's do this last
one in a brown. [NOISE] Just smooth that in. Look at that, pretty. What do we want to
do for the sun? I'm liking this melon color. Let's just do that.
Just color that in. Look how pretty that is. Let's clean our fingers off a little bit and peel that tape. See, now I can definitely
see a differentiation. [LAUGHTER] Now I can definitely see the
color difference with the white background. Look at that. The more you play, the more bold you get. Never stop with the first one. Look at it and think, what can I do next? Look at that. Totally different. Beautiful. Look how
beautiful those are. I really do love that
bit of color in the sky. How gorgeous is that?All right. I can't wait to see what
you do with this project, adding a little
color into your sky. I definitely want to see
those as you do them. I'll see you back
in class. [MUSIC]
7. Finishing Spray: [MUSIC] Let's talk
about finishing off these little oil pieces because these oil pastels never
seem to actually dry. It's weird. They
just stay tacky. They do harden a little bit, but you can still touch an older piece and think
that still feels wet. How would you finish these off? Most of these pieces, I would prefer framing under glass and then you wouldn't need to do
anything else to it, you just don't want to touch
it before you get it framed. If you're needing
something to harden it up, maybe a tiny bit so you
can keep on working on your pastels or you can
keep on doing something. You can use a
Sennelier fixative. I have the soft pastel fixative. They make an oil pastel fixative even though I'm
showing you the one I've got, you'll want the one of
these fixatives for the oil pastels and they make
one specifically for that. While it doesn't really
completely dry the piece, it does help it harden, so that it's a little
more protective. The other thing that you can
try is this Kamar varnish. It very specifically says non-yellowing protection for
oil, acrylic and watercolor. Because these are oil pastels, you could coat this
and that would give you a little
more protection. But still seriously, the
pastels never truly dry. You want to take
extra precautions after you make these to frame them under glass and
protect them for future. Just FYI there. If you want to store these, you could probably
use deli paper very carefully to separate
these from the next thing, the only drawback is
this is still tacky, so deli paper will stick to it and then if you
squish stuff down, things could possibly move. I'd be very careful
about how you store these in addition to
what you finish it with. That is just a little
FYI on finishing these. I'll see you back
in class. [MUSIC]
8. Final Thoughts: [MUSIC] What do you think
about this technique. Oh, my gosh. Anybody can create a really gorgeous landscape
with this technique. You better be making
some of these and coming back and sharing it with me
because they were super cool. This is one of the coolest
things I've ever done with an art supply
that I rarely use. Now I feel a little
bit better about the art supply and I
know I could spray a fixative on top of it and
I could work a little more on top and do some
other things with it. I'm going to go forward
and tell myself, don't be afraid of oil pastels [LAUGHTER] Which is really funny because I use chalk
pastels all the time. Even though chalk
pastels is chalk, so it's technically
not a wet medium, it still gets on everything. I don't know why I
gravitate towards the chalk pastel and I will
not use the oil pastel. But now going forward, I'm telling myself
we're going to use the oil pastel because
these come out really cool and I love how creamy
the paint is and I love how beautiful it ends
up on our surface. I hope you enjoy this super easy technique that we looked at
in class today. I can't wait to see the
pieces that you create. I hope you get over your fear
of oil pastels along with me [LAUGHTER] I hope you come back and share some of
these pieces with me. I can't wait to see what you're creating and I'll see
you next time [MUSIC]
 DENISE LOVE, Artist & Creative Educator