Transcripts
1. Introduction: Hi and welcome to this class where we're going to
talk about how to take your own headshot
image for LinkedIn or any other social
media just in your home. This course is designed for you in case you want
to learn how you can take your own photo just in your house,
maybe also outdoor. Because yes, I'm going to
show you different examples on how you can take
your photo indoor using either a white wall or this texture background with both a professional life and
just using window light. Plus, I'm going to also
show you how you can take that photo and
just using a camera, professional camera, or
using simply a phone. And in case you're
using a camera, I'm going to show you also
cheap different focal length, one a little bit wider and one a little bit tighter so that you know what kind of lens
would work best for your case. And also we're going
to have a look on how to shoot LinkedIn or profile photo outdoor as well without any
professional lighting, but just using
external elements that we're going to find
in our neighborhood. That in the last
part of the course, I'm going to show
you how you can enhance these portraits by anything on desktop and also
on mobile using free apps. I'm Simona, I'm Italian
and live in London, and I've been a
portrait photographer for the past few years. I now teach full-time
photography on social media, especially on
Instagram and TikTok, where I count more than 1
million followers combined, and also on YouTube when
longer-form content, I hope you guys
enjoy the class and I'm gonna see you in
the first lesson.
2. Gear needed: In this video,
we're going to talk about the good that you need in order to take this super
cool shots for LinkedIn, for social media is a profile
image wherever you want. And the first thing
that you need it, obviously something
to shoot with. I'm going to show you both
with a professional camera and also with your phone regarding
a professional camera, we're also going to try two
different focal length. This is an 85 millimeter F 1.8. And also we're going to
try a 35-millimeter. A 35-millimeter is a little
bit why there was an 85 is a little bit tighter so that you basically
have more compression. You're going to have
a bit more book here when we use the 85, but I want to show
you both so you can compare and see which
one works best for you. Obviously, if you
have a zoom lens or if you have a kit lens
when your camera, that's also completely fine. And then you'll
be able to decide whether you want a bit more tight or a bit less type
based also on these results, then the next thing
that you want to have in case you're alone and you don't have anyone that
can help you, is a tripod. You can use either
a cheap tripod or more expensive tripod. It doesn't really matter. They're all doing the job
because you just need a stable position
where you can put your camera when you're
taking your own portrait, then in case you're alone, there is one thing that
can help you a lot, and this is a remote, which is nothing but a wireless
controller that allows you to take photos on your own without having to
put a self timer, without having to go and
step control the camera. You can do simply by
using this one or e.g. if you have a Sony,
you'll be able to have also an app that allows you to control the
camera just using your phone. So you don't have, again to stand up, check their camera on, but you can do
everything, just use either remote or a phone. Then the next thing
that you might need, which is optional is
a professional light. Right now I'm using
a fs by neglect, which is your professional
life with a Latin modifier. And I'm going to show
you how you can take more professional photos
using this type of light. But I'm also going to
show you how you can take photos without any
professional lives, but just using the
wind dome light, then you can have in your
home or also we're going to see an outdoor, just again, natural light then in case you shouldn't indoor
and you want to take your hetro to the next
level and you went and use some backlighting
other than your key light, then we can use also a
tube-like or maybe embed lamp or any kind of lights that you want to have a bit
of a better effect, just maybe illuminating
the back of yourself on the opposite
side of your key light. But we're going to see
these, these are afterwards. Then the next thing which
is a super-important is about the background. And here you have
several options. I'm going to show you how you
can take a very short just using a texture and bad grid like this one
that we have right here, which is simply
some wood panels. I'm also going to show
you how you can do the same on a white plane walk, which most of us
have in our houses, is just really important that, that white plain wall is going to be close to a
window so that we can have a lot of light coming in in case you don't have
a professional light, the choice of the
grantee is extremely important and you might want to have some plants
in the background. If you're doing a door, you might want to
have a white wall. You can also design
your own background depending on what kind of
photo you want to get. E.g. if you are an artist or
if you are a photographer, then you can have something that represents you in
the background. Maybe it's a photo of yours, maybe is some paintings
that you've done. It's totally up to
you and you can also think creatively on
how you can make the background a little
bit more interesting based on your own
profession as well. Afterwards I'm going
to show you that also using a wide plain wall will be able to obtain
great background. Let's say then the next
thing that you want to make sure to take care
of is your outfit. And based on the result
that you want to obtain, based on where you're
going to use the photo, then you want to adjust
the outfit accordingly. I am a photographer so I
can be let say casual, wear it taking my own ship. But if you are a professional, maybe you are a banker
or you want to take your own headshot for just
specifically for LinkedIn, maybe you weren't aware, a shirt or a jacket. And afterwards we're
going to work as well. Then just as a complimentary
element to your outfit, you want to think about
some props in case you, or maybe an artist
or photographer, or in case you
wanted to represent your old profession
a little bit better. E.g. I. Am a photographer and my old image is with
a camera in my hand. So this is extremely
important because people from the outside don't know
what your profession is. And if you want to
target yourself, if you want to brand
yourself as a professional, if you already own a camera and you have
it in your hands and people will obviously link
yourself to your profession, which is a great
way to be noticed that especially in social media. If you have a very
good profile image, then you're going to stand out.
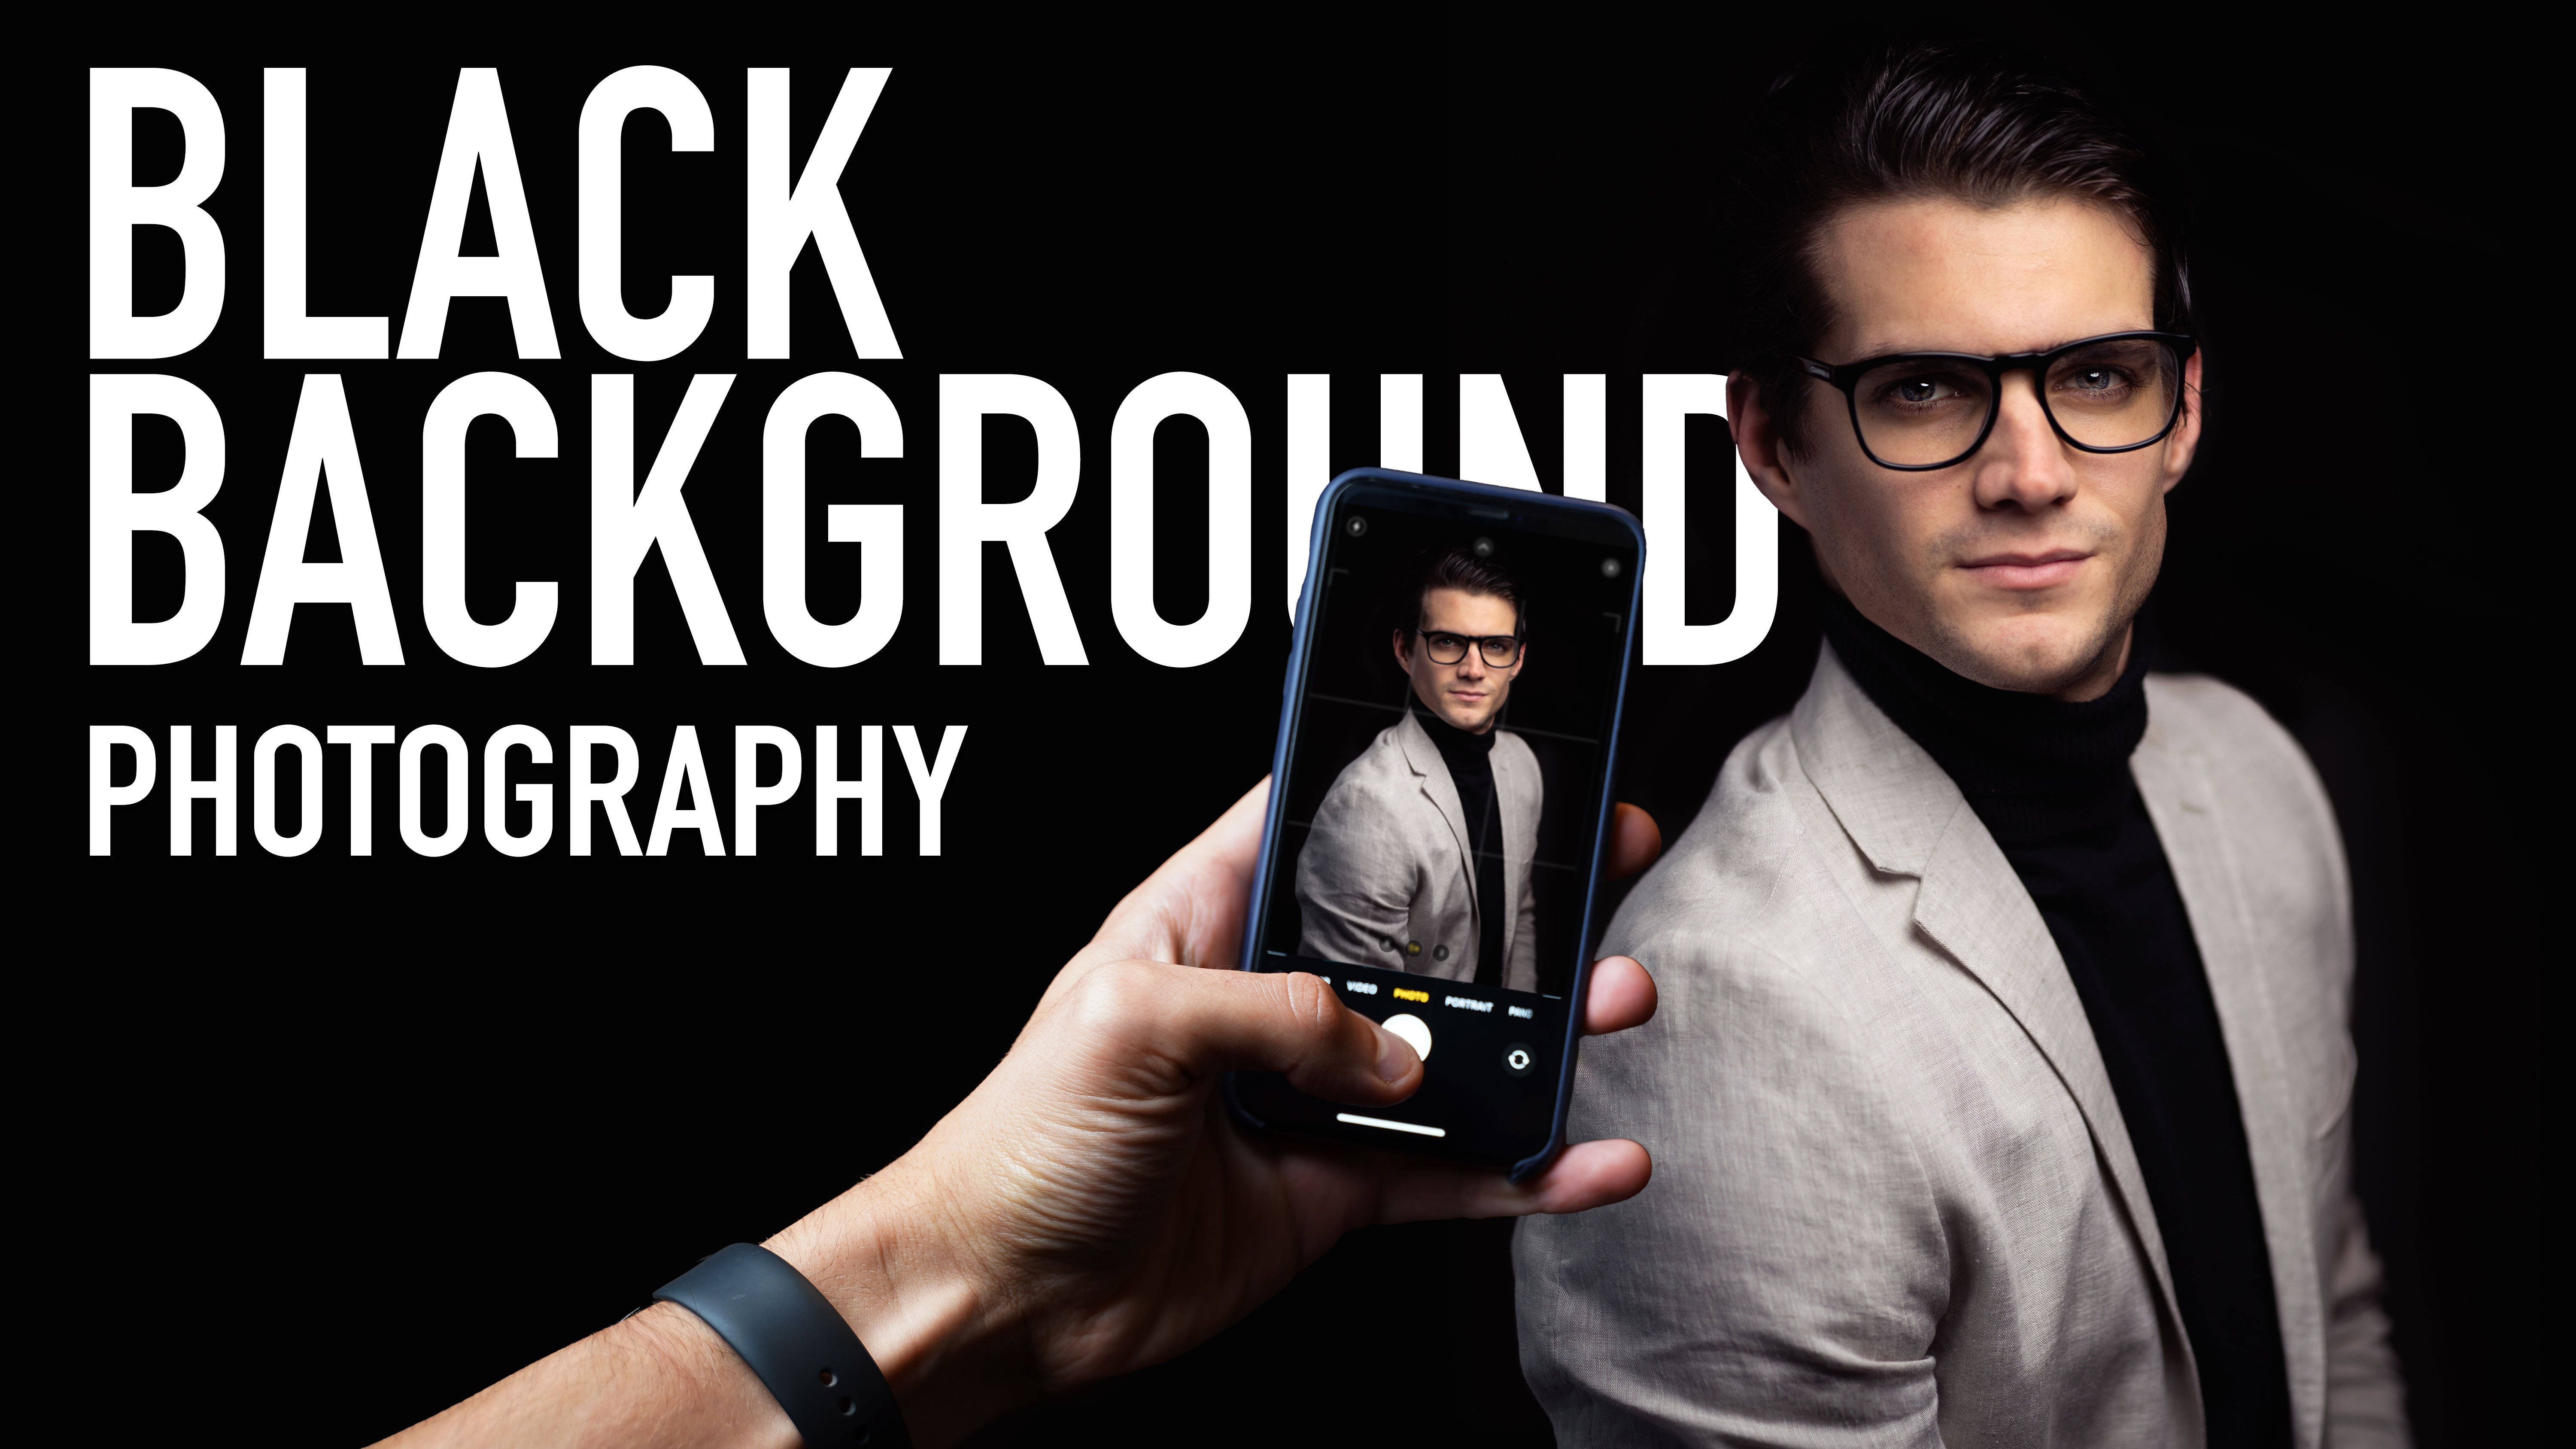
3. Camera + Professional Light (Textured Background): For this first example, we're going to use
a professional like to take our
own eyes shut and we're going to use
these wood panels that we have just
right behind here, as I said before, super, super important to
have the right outfit. So let me just change
it into a good one. This is the setup that we have. I'm now in my bedroom
and I tried to find a spot where I
can set the camera, where it can sit myself
or I can put the light. I'm not using a non
let F S six dB, which is a 60 watt light. So kind of the entry level
of professional lighting with a softbox
trip 140 times 30. Usually you can use also parabolic soft books that
will not make any difference. It just happened to have this
one right here, right now. So we're just going
to use this one as a softbox by anything will work. Then I'm just going to turn
off for the first photo, this light right here, and also the back lights
that we have here. There you go. And now we need to understand
where to place ourselves. And they just going
to let c plus it in the middle of the room or maybe a bit closer
to the background, depending on what kind
of lens you're using. Now we're using an 85
millimeter F1 point right now that I set on
a tripod right here. And I need to decide
where to put it. So obviously because it's a very tight lenses,
a zoom lens, I'm going to probably
stay around here because it has to be
a bit far, let's say. And then I want
to have the light 45 degrees to watch myself. So we got this angled. I'm going to sit and let's
say here in the middle, then we've got the background
over there and the light is 45 degrees in this
direction. There you go. Now, I need to understand now the angle that we
want to put the camera. And to do so, I'm going to connect my phone to
the camera so that I can see myself there and then
move eventually the camera. So now I place the
camera over there. I'm sitting here
and I'm checking on the phone and it looks
like is quite okay. But then maybe we can move a bit the camera towards myself, let say a bit like so you
go, Let's have a look. Yeah, that's that's a bit tighter depending
on how you like it. I have my light 45 degrees towards myself and now I'm going to do a test shot and see if there's anything
we need to change. Here you go. I quite like it. I'm pretty happy with this. Maybe I can remove the slant because they can see
it in the background. And then this photo,
I just want to use this tetra beggar
and right here, so I'm going to remove this. And now we're ready to take, let's say the real shot
regarding the settings, either you use
aperture priority. I don't know how much you
know not about camera. I like to use ammonia
so I can control all the settings and as long
as I'm not burned, e.g. let me give you an example. If you're like this,
then this is too bright. You're gonna be basically
blown out your face. I like to have a
natural, So e.g. like this could be fine. And then I've ISO 161.8, so it's already pretty
bright as the land. And then one on 100th. So there's gonna be
the framing regarding the posing and movement
and stuff like this. This is really depending
on your profession. If you are a banker,
most of them, they're just maybe
a bear like this or maybe holding the jacket or just rotating the
shoulder a bit. Just tried to not
stay to front because otherwise this looks
like a passport photo. So I like to rotate my
shoulder towards the camera, having the light 45 degrees and my shoulder or
towards the light, then we look into camera. If you want at smiling photo, then feel free to do so. Having a little smile, having maybe a laugh in case you want to come
across a friendly. There are few people
that they like also to cross their
arms in like this. But in psychology, I've
been told that this is kinda like a
closure movement. So it's not really good to
have that as a profile photo. So now e.g. we can just take a photo holding the jacket or maybe
buttoning the shirt, or maybe just hold one hand
or simply don't do anything. So let's try one very simple
one without doing anything, just going to rotate
the shoulder 45 degrees, check the camera. That is all good. My eyes are in the top third of
the rule of thirds. And then whenever I'm ready, I'm going to take the sharp. There you go. Just going to check it out. Yeah, let's take a couple
of more just in case. Cool. I'm pretty happy
with this result. Now regarding folks,
I'm actually using out-of-focus with
a flexible spot on my face because
obviously the focus is our face or you want to make sure that you're
focused that way. What are ways you can
use also a wide incase, you have a camera
that tracks humans. Now, this photo could
be a ready fine, maybe we need to edit it a bit in case we want
to enhance it. But if you want to
make it even better than we can add a backlight. So an opposite from the killer. So the key ladies here,
opposite is going to be here. And then we're going to
change the color as well. This is a white
warm color set at 5,700 Kelvin. These
are technicality. This is just a normal,
let's say daylight. And then we're going to use
another light right here, set at yellow light. So tungsten, 2,700 Kelvin, which is basically nothing
but a yellow temperature, let's say you can
use also a bedlam. You can use whatever
you want just to have. Sort of a, a light that will enhance this part of your face
and also in the shoulders. Let's see what we
can get right now. Right? And that's nice. You can see the difference
between the before without a backlight and
now when the backlight, I think it looks much
better just using this one eventually you can
also add multiple lights. I'm just going to
turn on the light that we had right here before and see if it makes
any difference or not. And then also the fairy lights that we have in the parameter, you might know C, Yeah, we don't see them actually. Then the result that we got, Let's take a couple
of photos now. Yeah, that's pretty nice. I actually like to have that
bet lamp right here that he matches also with that color of the tube like that
I have on the site. Then the next thing that I
want to show you is taking the same photo but
with a 35-millimeter. So I'm going to change
the lens right now. And obviously when
I change lengths, I'll probably have
to have the camera much closer to myself. So probably around
this position again, I'm checking with the phone whether it's a
good angle or not, even closer, maybe like so maybe he's a
little bit too tall, so I'm going to bring
it down a tiny bit. There you go. We have it at I9, depending also on what kind of angle
you like of yourself. A little bit lower,
a little bit higher. Island usually works
fine for everyone. We keep using this backlight. Now we are F1 0.8, but this lens can
also go down to F14. So let's try it out and
then we're going to decrease the ISO because F14 is a little bit brighter
and then we have it like so I liked
that lamp over there, so I'm just going
to keep it there. Then let's try to take a shot. There you go. So as you can see, the
difference between the 35.85 is that with
the 35 a wider angle, you're going to have a much more squished face on the side, whereas with the 85
you're going to have a squishy, let's say on the front. So we'd have 35. Maybe you can look slightly more skinnier, Let's say, but I prefer much more than 85 because
of that compression. My face just looks a bit more
natural rather than the 35, but this is totally up to you. Then once again,
as we said before, if you want to take a
profile photo that is not, let's say for a bank or
is not a classic one, super standards trade without anything, you can use a prop. And right now I'm going to take my camera to try to use that. Because I'm a
photographer, I'm going to use the main camera and try to maybe stay like this
and then do a few trials. Because now moving and
my hands are not free, I'm going to set a
timer in my camera. So I'm gonna go into
timer and then use it at 2 s so that
when I click it, I have 2 s to them be in place. There you go. Let's have a look what we got. Maybe right now, I
don't want to use F14 because otherwise the camera is going to be completely
burned out. So we're gonna put F2 plus
eight and then adjust the ISO. So we're going to put it
320 that she'd be alright. And also maybe this
time I can try to smile a bit so that we make it a little
bit more friendly. If we need to sell
ourself as photographers, maybe if you're a
wedding photographer or something like that. So let's try it out. All right. That said, I
like this one very much. Even if you put this
photo into a circle, imagining is for social media, is for LinkedIn or whatever. It looks pretty good already.
4. Camera + Professional Light (White Wall): Right now we're just going
to try to take a head should eat a living group using
a white plain wall. For this video, we're
still going to use the professional light
in the next one, I'm going to show you
the exact same thing but without professional life. So this is gonna be the setup. I'm just going to remove
these paintings right here. So we're going to have
a white plane wall, going to just leave them here. And then what I've
done is I've put a 50 millimeter on the
camera right here, and now I can see only
a white plane wall. I have my light 45
degrees juice right here. And I'm basically if
ready to take the photo. Now, the windows
that I have just on my side will allow me to have, let's say, more light
coming this way. But if we want a more
dramatic effect, we can close the windows and we're just going
to have the key that. So let's do this right now. As you can see, this side is now much darker because I closed
the windows afterwards. I'm going to show you also
when you have the windows open so that you have also
decided that he's bright. But then now we
have just tequila that is illuminating ourselves. So one side, because
we are 45 degrees, one side is brighter and the other side is a
little bit darker. Let's take photo. There you go. And unlike
already invest one. And now let's actually try to
have the same exact photo, same setup, but with
the windows up. Now there's much more
lightweight tequila and we will also a lot of light
coming from the windows. Now one thing that I want to
let you know this is that we use the white balance
setting Dana, because this light is
actually doing it. But then eventually
what we can do, especially if you're using a light that is coming
from the window, we're going to set it AWB, that means automatic
white balance. So basically the
camera will adjust the white balance automatically
based on the environment. So we're going to see what we
can get. And there you go. You've got the previous photo. And this photo, they are a bit different
depending on you like whether you like a
little bit more dramatic than you just want to have
a key light or otherwise, if you want to
have more daylight coming in and a brighter image, then you can have two
different sorts of light's coming from
opposite directions. Alright, that's it
for this video. In the next one, I'm
going to show you how you can take a photo just using light coming from the window without professional
life, Let's do it.
5. Camera + Window Light (White Wall): Now we're going to try to
take the hashCode without any professionalizing
purchased using window light. And we are again in
my bedroom and I just found literally
this half meter or meter of white plain wall and you don't need anything else,
but something like this. Even if you have the
light switch here, you're going to be
covering with your body. So that's not a
problem. Once again, I sat in my tripod right here and I already
set it so that I don't have any of these
chew pour out type. So I'm just going to
have the plain wall because the tripod
is not tall enough. I'm just going to bend
down a bit my niece and then do the squat position
just for taking the photo. Then we're going to
see what we can get. The settings right now. Or 2.8 eyes are 101
on 80 shutter speed. So these are kind
of normal settings. F2, the majority of lenses,
they have it as well. If you have 5.6 or anything
like that, that's also fine. That's not a problem. Now here the key is that because the light
is coming this way, if we rotate a bit our
head towards that light, then we're going to
have brighter park that say from this side, but then will be also able to adjust it a bit in
post-production. So don't worry too
much about that. Once again, about the pose.
It's totally up to you. Just gonna go with
the classic one. There you go. I'm pretty happy with the
result, I think is great. We're going to just did have
been in post-production, but that's it, super simple. Now, the key of all of this is simply have as much light as possible and tried
to have the light again 45 degrees
towards yourself. So even if you
have a window e.g. and in front, that's also fine. You can use that direction. You're going to have
a little bit of a flatter face
because the light, if it comes from the front, is a little bit flatter,
but that's also fine. So it's important to
have a white wall. Just a light position your
camera and you're good to go. Alright, that's it
for this video. In the next one we're going to have a look on how we can do the exact same thing
just using your phone.
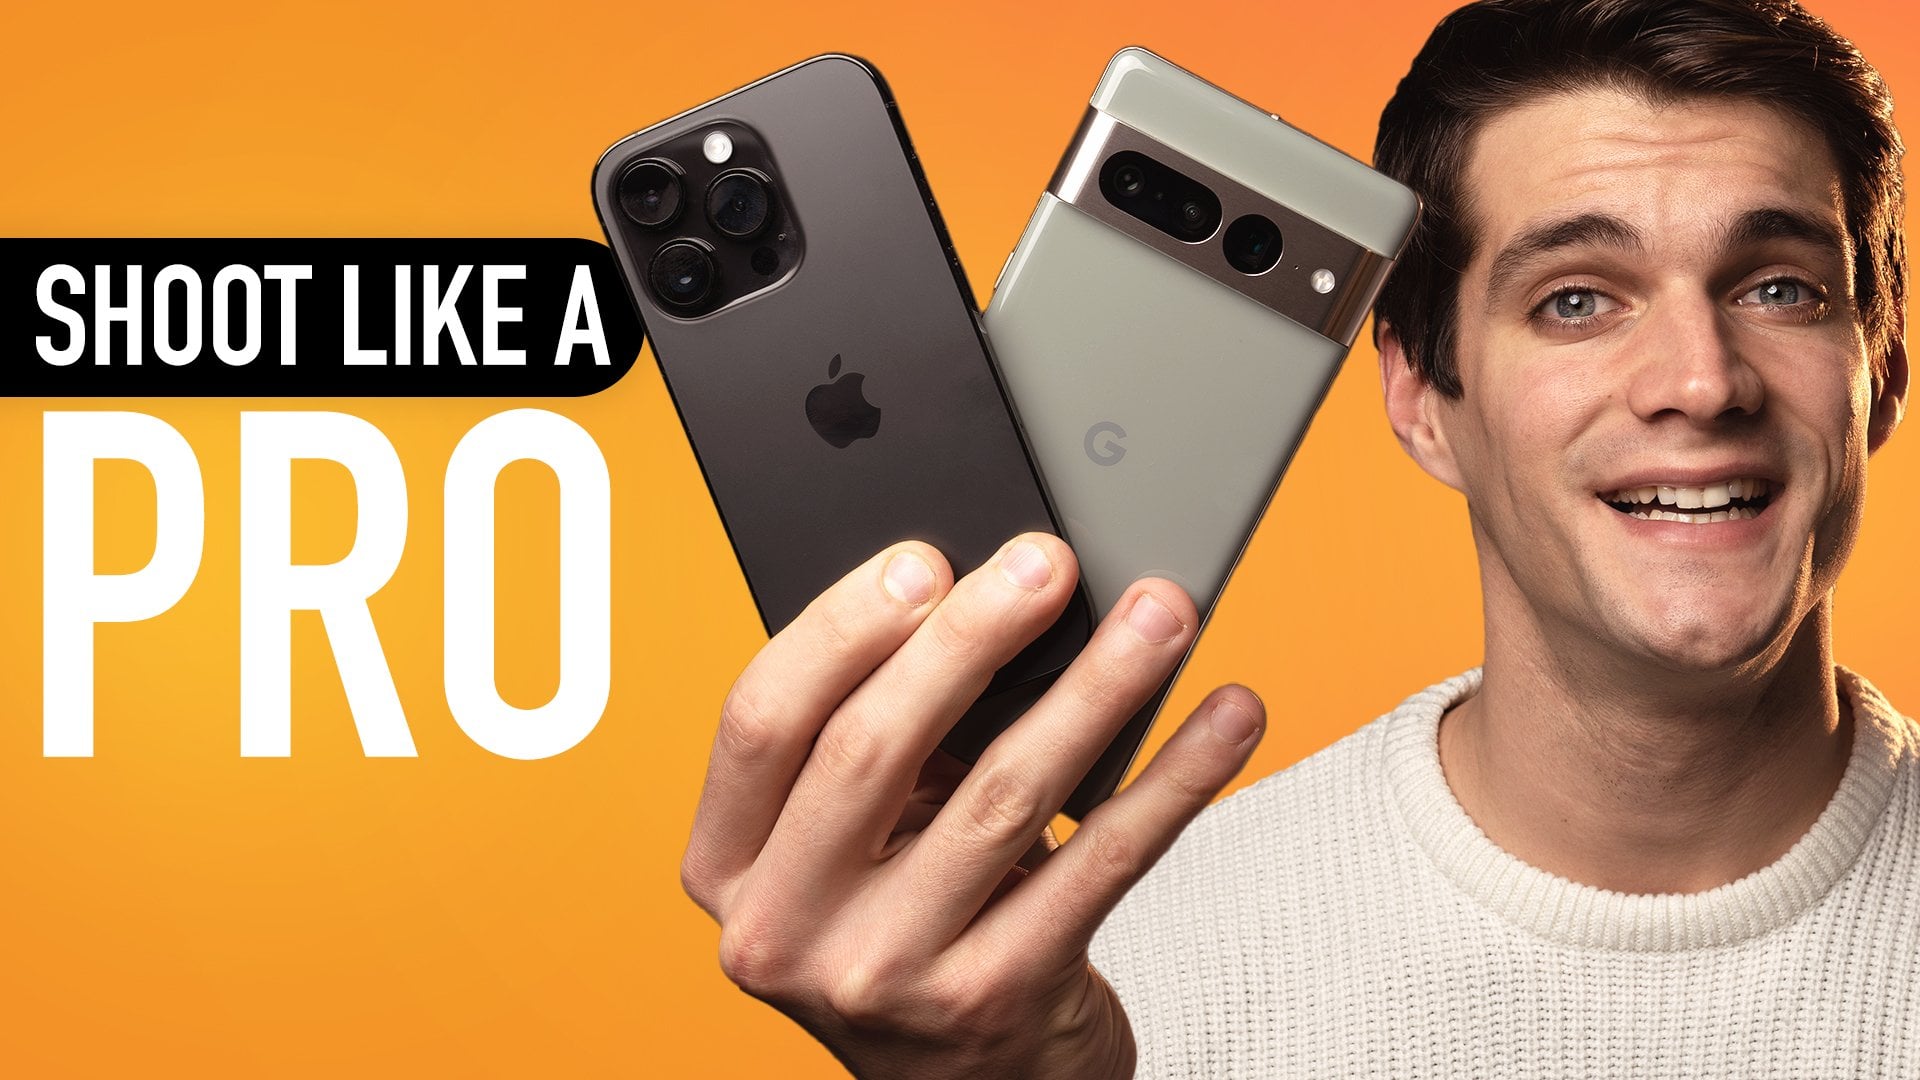
6. Phone + Window Light (White Wall): In this video,
we're going to have a look on how we can create an Excel exact photo that we
did before with the camera, but just with a phone using simply winter that so
we're not going to use any professional life
and we're going to use this small strip of white wall. And now to do this,
if you are alone, you might need a tripod. This is called
teleports poor by Joppa and it's great because
it becomes very, very small, let say like this. This one. You can also be detached. But then because they're
also pretty tall, like so if it's not tall enough because
you're taller than this, but you want to
have the photo and your online like I like
or a little bit taller, then I'm just going to use a chair to put a
tripod on top of it. I'm just going to
make sure that this is gonna be at my height. There you go. Then I'm going to place
the phone on Detroit foot. And then there are a few things that you want to make sure to take care of whenever
you setting up peer phone. The first one is that you
want to use a zoom lens. This means is zoomed in lens
to create the effect of the 85 millimeter that we
saw before on the camera. So in this case, I
have an iPhone 14 Pro, and this is amazing
because it allowed us to have a three pair camera. Than a sudden I'm going to click on the three pair camera. And he just want to
make sure that I don't pick any of the sites. If it's still too zoomed out, then I'm going to move the chair towards the wall. There you go. Now, I'm just gonna make sure
also that is on a level. Yes, Like so then if you
have a modern folder, you'll be able to actually
put their vol mode. So here they activate it and now it's activated, in this case, is going to be a bigger
file that will allow us to edit a bit
better afterwards. Then either you want to use a Bluetooth remote and you can
find on Amazon everywhere. Or in this case, I
have an Apple watch, so I'm just going to
use the EPA watch, especially in this case. If you don't have anyone, then you'll need to do
some trial and error. E.g. now is a little
bit to tilt up. I'm going to tilt
it down a bit now. Looks fine. Just going to try to
stay in the middle. And then once you're ready, you just going to
click on your face. And then we're going to try to shoot and see what we can get. You go to try to take a
couple of more just in case, same principles as before. Tried to move your face and
poses as much as you like. Right now we're going
to have a look at the photos and see if there's
anything that we like. I think we got something. And then this one, we can edit them with a
few free abstracts, some simple tricks
that I'm going to show you in one of
the following videos. Okay, I'll see you
in the next one.
7. Camera Outdoor: In this video, we're going
to see how we can take a cool headshot or
peripheral image outdoor. And here there is one
extremely important thing, as we saw already, lighting is the
number one factor that you should take care of, especially when we are adore. Not many people know about this, but actually the light changes. And in order to find
the best direction, there is a cool
trick that I'm going to show you right now, e.g. now I chose to
record the video in this position because
this area is dark. Here, is very bright and
therefore my face looks okay. But instead, let's
say we would have recorded on opposite
side where I have the bright and light behind
myself and the dark one in the front than the video and the quality image would
have been that good. So here's the trick that
I usually hold my hand in front of myself and
then I rotate around. Then when I see that the
hand is the brightest, that means that the
direction that I want to use for my portrait. So e.g. right now, the hand is pretty bright, but if I stay here, then the hand is
probably not as bright. So if we wanted to
take a headshot, maybe this could
be good direction, but then we need to take
care about one more aspect. And this is having a cool
background with cool, I mean, that might be playing, but you just don't want to
have a messy background. E.g. there is a no XD sign here and there is
another sign over there, then maybe it's
not the best thing for short that you're going
to use on LinkedIn, e.g. because you want to
look professional, you want to look,
let's say Cool. So either you find a plane
wall or either you find a texture that you
like that matches with your Alfred and
matches with your boots. I know we're going to
go around and find something that couldn't
have good with this jacket. And let's say we have photography
style of profile image. So we found this
brick wall that I think looks pretty
good because yes, it has a texture, but
it's also quite playing, so there's no
destructure around. And then I think
it looks good with the outfit because
this jacket is blue, that it matches with the brown. So I said the camera
right in front of myself, around eyeline maybe slightly
below because the tribe, but there's a little
bit shorter than I am, but I think it looks fine. Now we have a quiet
of a bright day, so I think it's perfect
for taking photos. I still have it linked with my phone so I can
shoot it remotely. And then I have also a
camera as a prop because I'm a photographer and
this time I wanted to take a profile photo for,
let's say Instagram. So I'm just going to hold the camera like
this or something, do something with the camera, even though I'm wearing a
jacket and might feel format. But again, if you're
wondering photographer, maybe this could be fine. So let's try to take
a photo together. All the rules that
we mentioned before about posing, about moving. These are all valid if you have the possibility to stay further
away from the background, this is much better than just staying very close
because you're gonna be able to blur
out the background even if you're using the
phone like you're using, let's say the portrait mode. So before we were in a room where we had
absolutely no space, just half meter of
space for White Wolf. So we have to stay
very close in order to not take distractions around. But in this case,
I'm going to stay, let's say a meter and a half, 2 m further away from the bag so that I can blur out
the background and just have myself and focus to draw the attention towards the
subject, which obviously me. Alright, I'm going
to hold the camera. I'm going to try to
take a photo and then we're going to have this
timer here with a phone. There you have it. We have a bunch of
photos and now it's time to have a look at
how we can edit them.
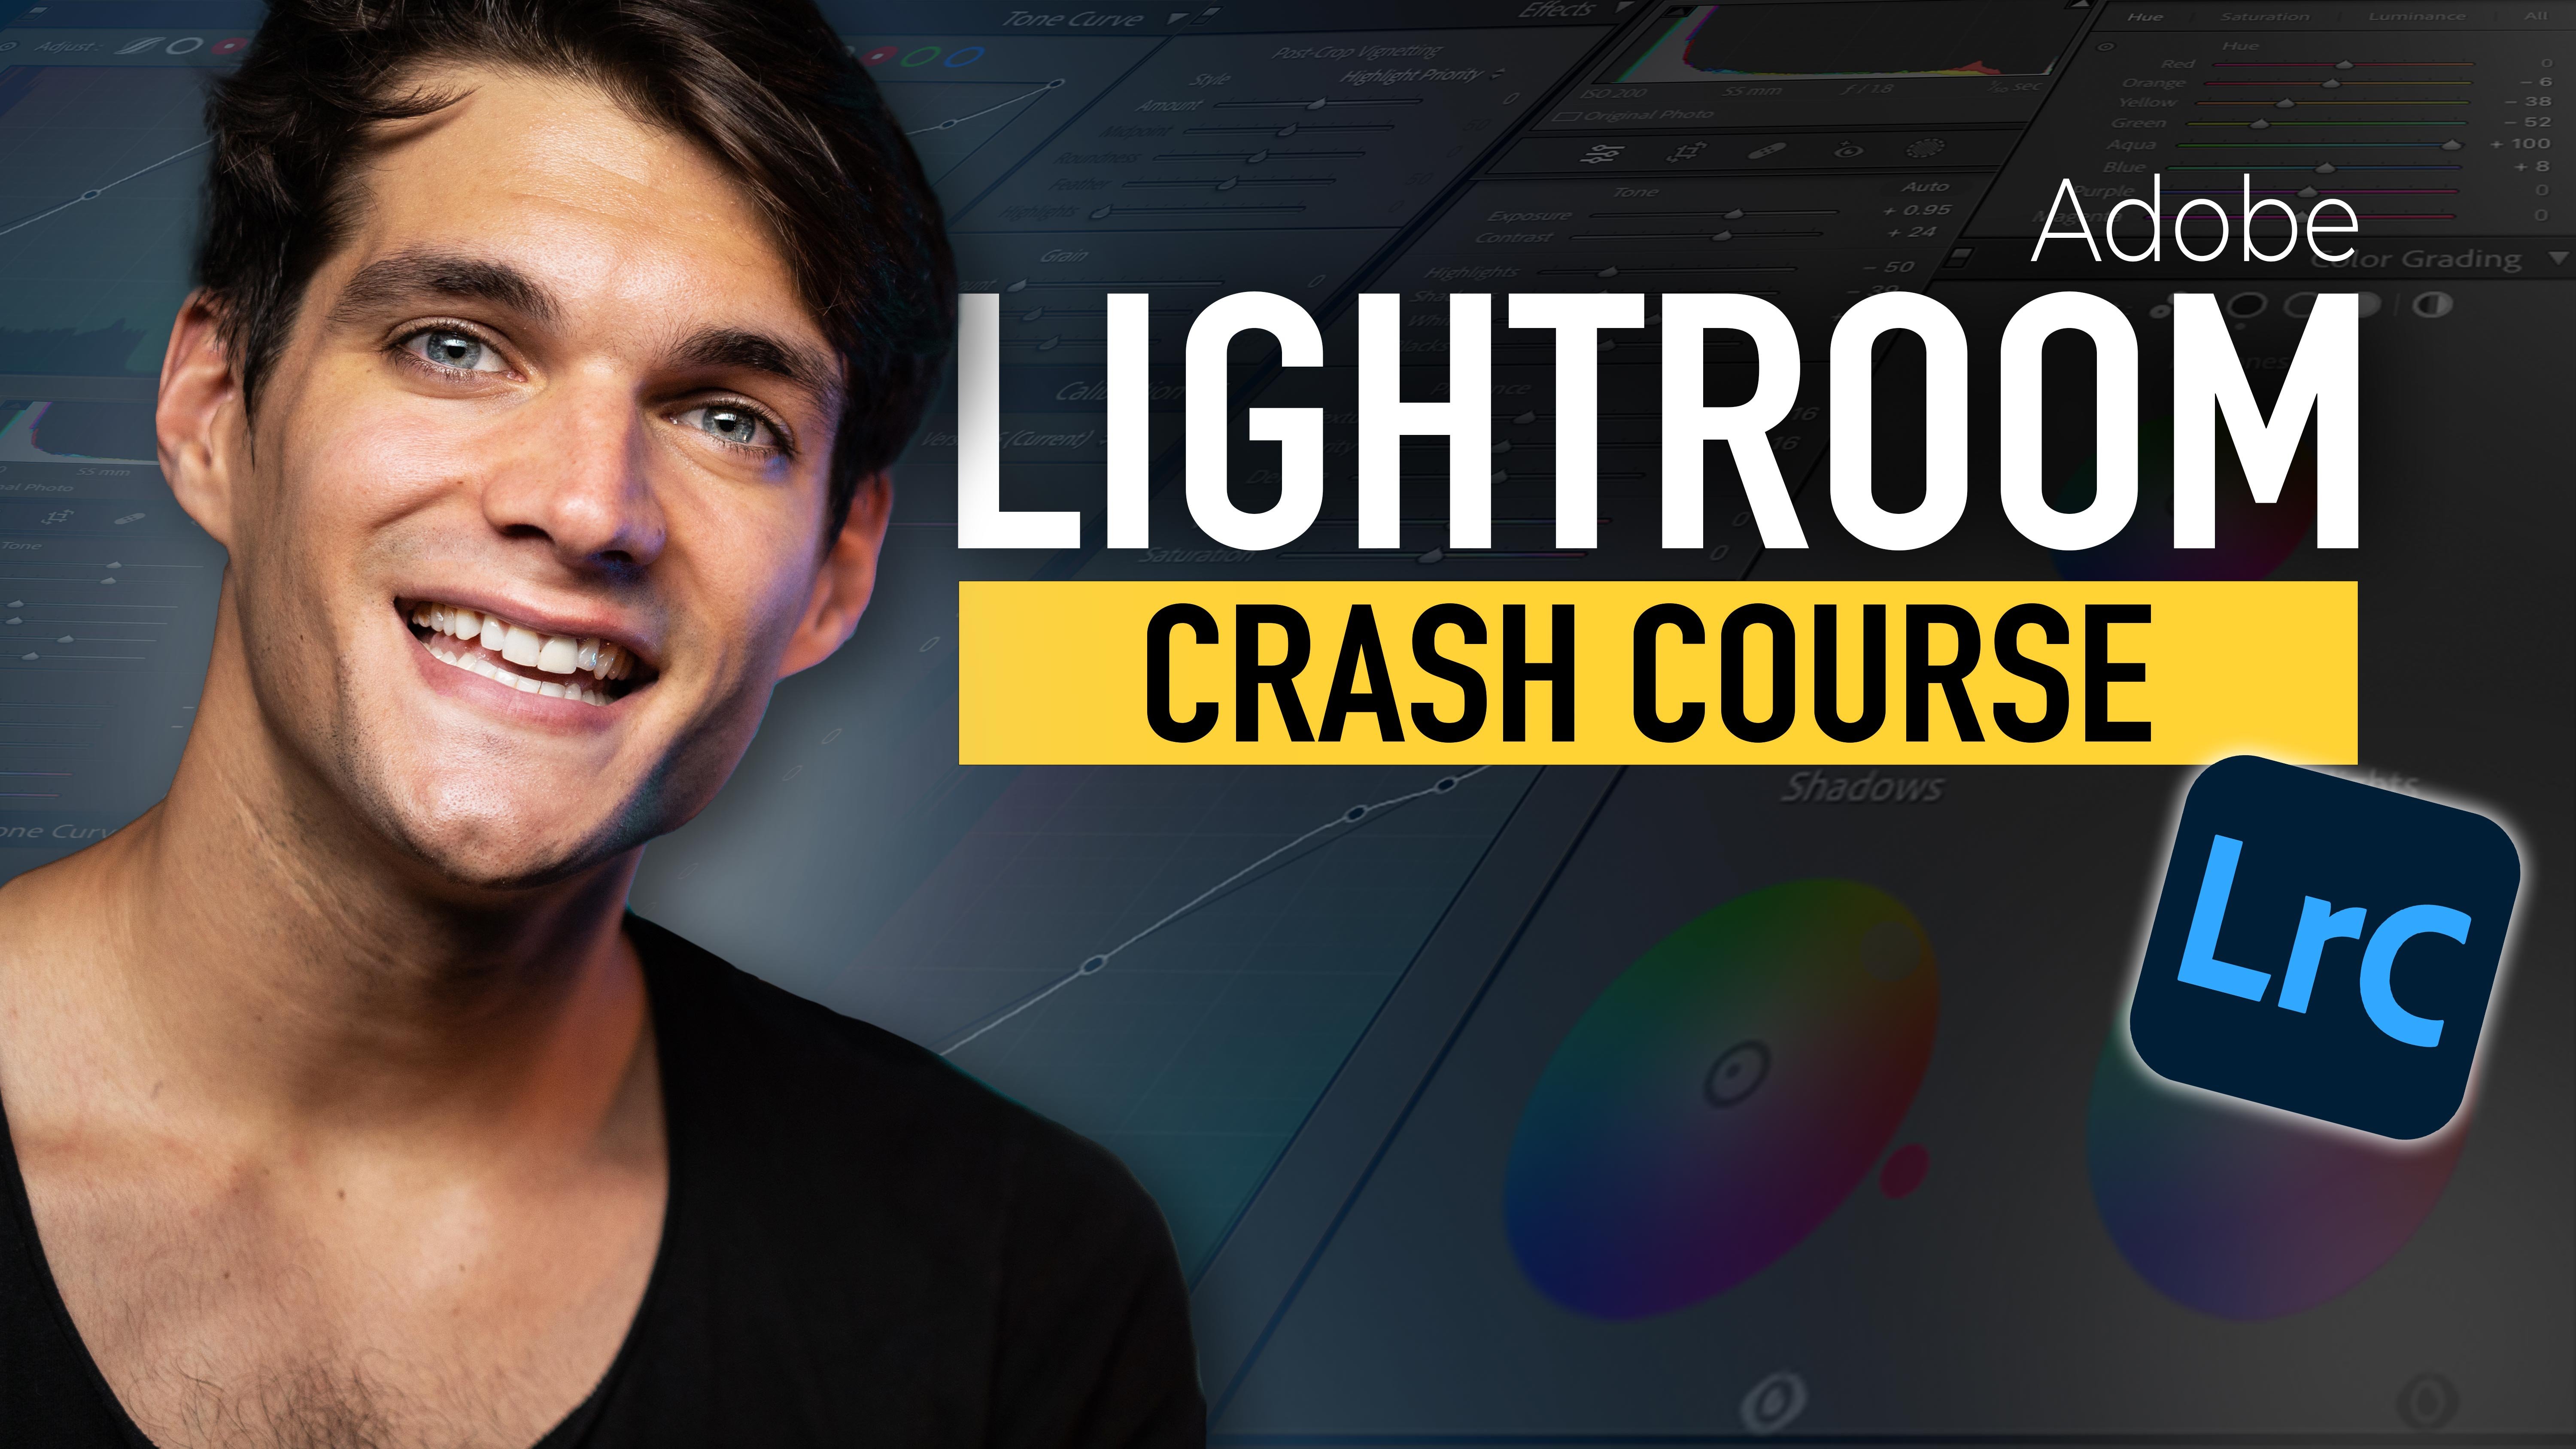
8. Editing on Desktop: Now it's time to edit these
photos at, in this video, we're going to see
the desktop editing process and an extra, we're going to see the
mobile editing process. Now, I've selected a
few photos here in Lightroom and I'm going to
give them a quick edit. Now, keep in mind that I have a full class talking
about lateral. And in case you want to expand certain
feature or understand more the color science behind the editing or how to
edit better photos, then you should definitely
check out that class. We're gonna go quite fast here, but I think it's gonna be
enough to edit our photos. Now the first thing
that I wanna do is always try to increase the exposure as much as I can before blowing
out some highlights. So these became completely
white and is not okay, It's too much, so we're
going to go backward. I think this looks
already great. Eugenia increase a tiny bit. The contrast, I play around
with the highlights, maybe sometimes I
have to decrease it. If one side is a little bit too bright
compared to the other one, then maybe increase the
shadows a tiny bit, increase the blacks a tiny bit, and reduced it clarity a tiny bit to help
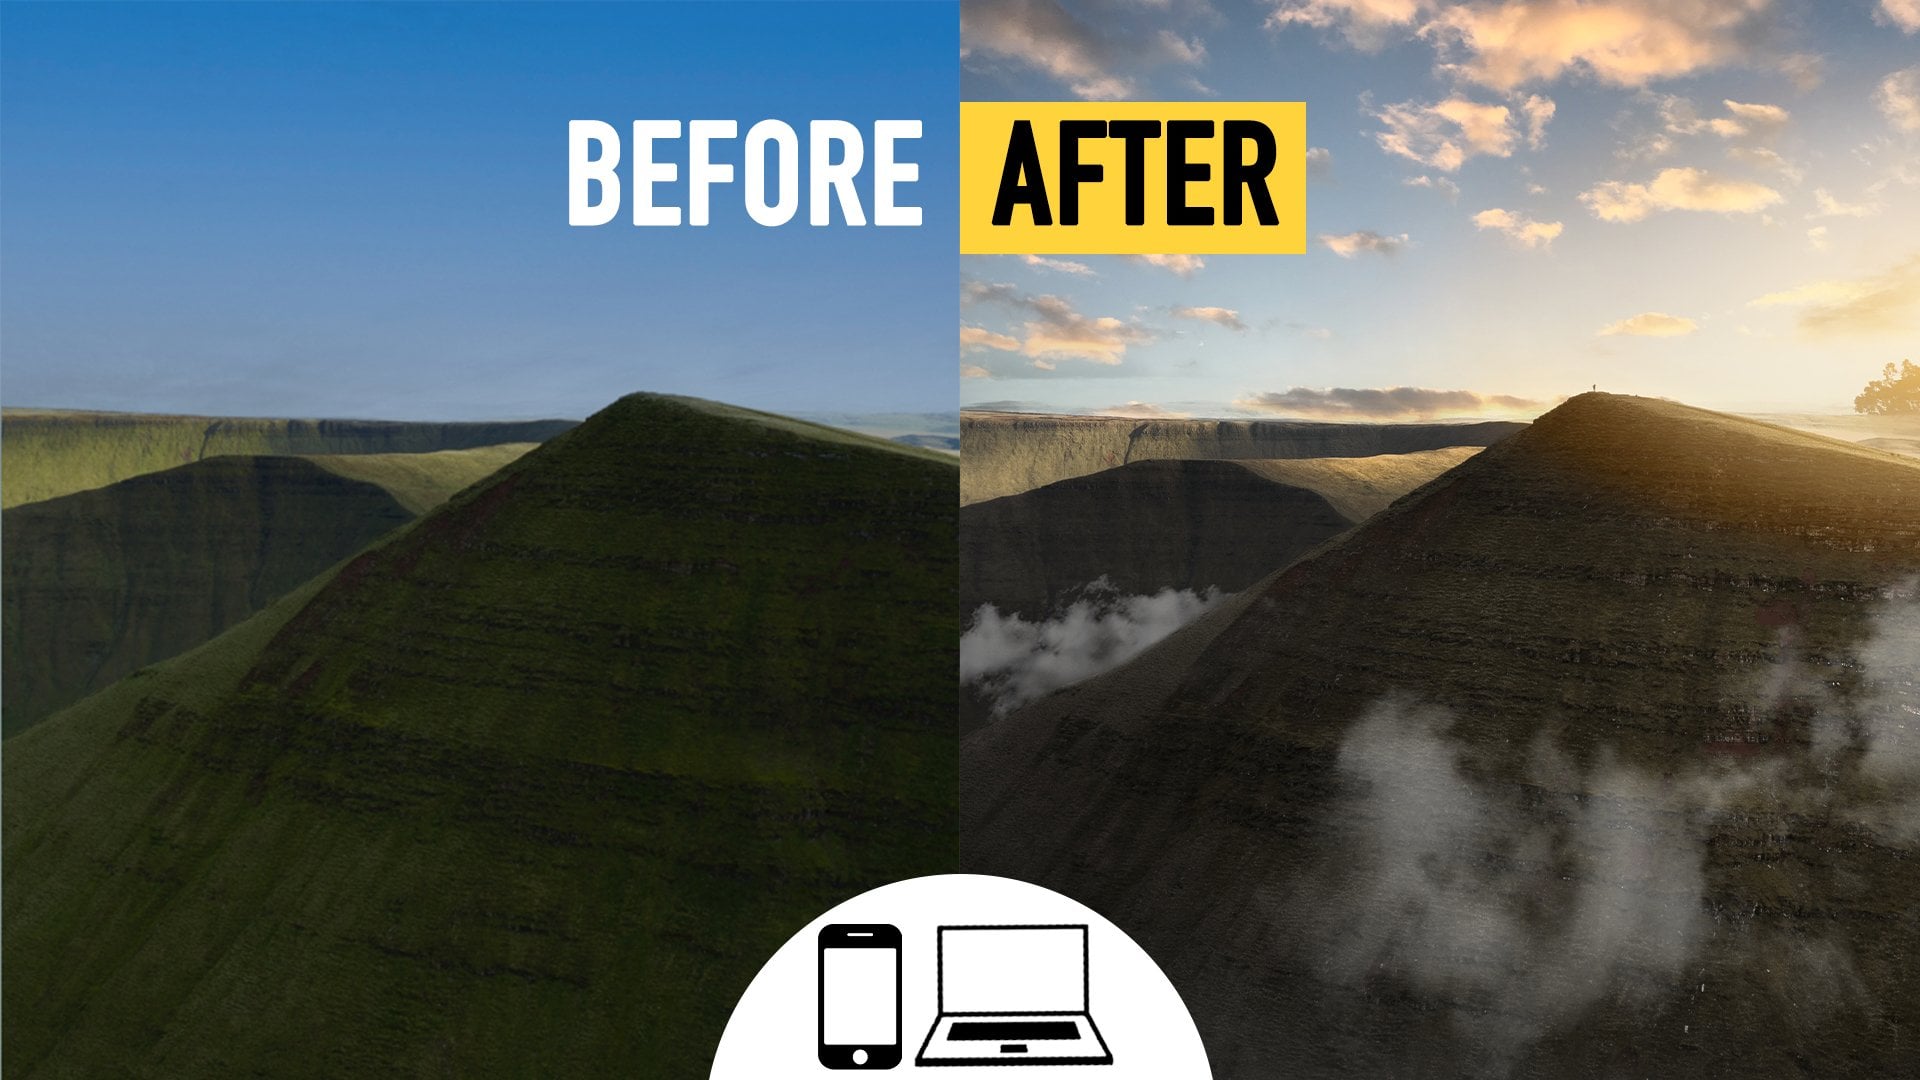
smooth our skin. And this is already much
better than before. These are the before
and this is the after. Now, if you want to
stay professional, you don't have to do much, you don't have to edit. But in case you want to
improve your photos, sometimes I like to
do an S curve here in the tone curves just to have
a little bit more contrast. And then I go back
in and just again, the highlights Find Me Too and then maybe decrease
the texture as well. And I'm think I'm pretty happy. One more thing that
I like to do is try to brighten up my eyes. So I select a mask or
a radial mask here. And then I'm going to
increase the exposure just a tiny bit and then increase
also the clarity. There you go. And the sharpness just to add
a little bit sharper eyes. Then I go on the radio filter. I duplicated the verge of filter and I put
it on the other. I just don't go outside
your boo and that's it. We zoom out and I think
we're good to go. That's perfect. Now, in case you want to edit multiple photos without having to redo everything manually, you can go into the next
photo that you want to edit. And then usually I click Option Command V to ten
past from previous. So whatever previous
photos was selected, then this common is going to paste the same exact settings. And now we just need
to adjust this shot on the 35-millimeter
with the backlight. And then we're going
to take the exposure, go little bit down.
There you go. Then we have to grab our two video filters
to put on the eyes. One is here, and then we select this one and we put it here. There you go. Then we're good. Maybe here we need to
adjust a bit the cropping. We're just going to
crop it until my eyes are on the top line of
the grid that you go, the rule of thirds,
super famous. And then we're going
to also increase the shutters a tiny bit
because I want to see my jacket a bit more and I think that's pretty much
it before and after. Keep going with the next one. Once again, we're going to click Command Option V to den
pass this same settings. In this case, the shadows
are a bit too high. There you go. We're going to
change the cropping. Zoom in a little bit
of my face like so. That looks pretty good. We're going to take the
radial filters again, find them and then move them
on my eyes. There you go. Just gonna decrease them. Yet. We knew with the other one too. Yeah. And that's it. This is pretty good visit
before and this is the after. Now in case you want
to darken or brighten the background and not
yourself will also yourself. You can use another
type of mask. So we're going to select subject first and then we'll
be able to invert the mask if we want to work on the background or just
keep it normal in case we want to work on the subject
with double-click on effect in case we want to
reset all the settings. And then from here we'll be
able to play on the subject, maybe brighten it up a
little bit and that's it. Otherwise, we can go here, right-click and then we
duplicate and invert. And very now we'll be able to, to work on the background. And maybe you want to
decrease the background if you want to stand
out a little bit more, if you want to have it gray, then you can decrease
the saturation. So we got the before and after, and I really liked this, so I'm going to
leave it like this. Then we're going to go into
next one and we're going to copy and paste
from the previous. Now these are very
quite perfect. We're just going to decrease the exposure without
selecting the mass. So here we select the exposure, we drag it down until we
are happy with the result. Here, it looks pretty good. We're just gonna pick the two radial filters that
we created for the eyes. And there you go. That's it. Let's go with the
next one once again, just going to copy and
paste the same settings. That's good. Now we're just going to adjust
their radial filter first. And then maybe we
have to brighten up a bit the shadows on this side of my
face because this was shot on the window light. That's it. We've got the before
and after. That's nice. Maybe we need to adjust a
little bit the white balance and the color
temperature because this one was a little
bit too yellow. So I'm just going to go
in temperature under color and we're going to move
this one towards the blue. There you go, In case you want to brighten up this part
because it's too dark, I'm going to create
another radial filter and then I'm going
to move it this side with a little bit
exposure pumped up that sit before and after. Then we're gonna go
into external follows. Once again, let's see
what happens when I paste the settings from
the previous photo, right, that's great, but
we'll be able to adjust it. First of all, I
want to bring back the colors from the
background because I like the kind of brick
color there is behind. Then we're gonna
just the cropping. I like this, but I wanted to
have my face in the center. Then you go and then we'll
just our visual filters. And then probably we'll have to brighten up a bit the subject. So we're going to
select the subject and then we brighten it up. Let's see that sit. Then we'd maybe need to adjust the temperature to have it
a little bit more warm. And I think I'm
pretty happy with the result before and after. Eventually, if you don't want these radial filter maybe
uses, you can remove it. And then again going the
subject and brightening up. Girl, maybe we decrease a bit the texture and
clarity that sit. And then again, you
can play around with the background depending
how you like it. This is totally up to you. And we can brighten it up and decrease the texture
just to have a little bit more separation between the subject
and the background. That's it. Got the before and after. Then you can select all
of the photos that you edited or that you
want to explore. And then you go
into File Export, make sure that the
quality is at maximum. And then you just gonna put
in any folder that you want, we're going to call it
had shot handy tip, then you can export it. Then one last thing
that I want to show you is how you can use Photoshop to remove the imperfection of your skin in case you
want to change anything. In this photo, I have this
pimple that I want to remove because it's just like temporary and I don't like it. So I'm just going to
open in Photoshop. And then I'm going to zoom in
into my pimple and I'll be able to use the
Spot Healing Brush to them basically
make it disappear. It just needs to
click it and you go. And you can do with all
the imperfection of your skin in case you
want to modify them. That said, I just want
to show you quickly. But again, in case
you want to learn both Lightroom or Photoshop, I have two full classes where I explain
everything you need to know about these two programs
to edit amazing photos. I'll see you in the next video.
9. Editing on Mobile: In this video, we're
going to see how to edit the photos
just using mobile. And I'm going to use
the app on mobile, which is completely
free so you can download it whether you
have an Android or iOS. And the first thing
that you wanna do is you have to import photo. So we're gonna go into camera
roll and then you want to select what is your
best photo or photos. And I'm going to probably
select this one. Didn't you? Click Add and you're gonna be able to see it in your library. So you go into it and then
you're going to start doing all the adjustments
that you want. E.g. I. Like to increase
the exposure a tiny bit, then I like to reduce the
highlights a tiny bit, maybe increase the contrast. There you go. Maybe you want to crop
it if he's not perfect, like to cooperate in a bit. Yeah, like so then you
want to adjust the color. If you wanted a bit warmer, maybe you can change the
temperature towards the yellow, let say like this. Then you want to go into detail. I want to decrease
the sharpening. I don't want it too sharp. Then I want to go into effect. I'm going to decrease
the texture a bit and also the clarity.
There you go. And this is the
before and after, very subtle changes,
but it's enough. Or eventually if you have the premium
version of Lightroom, you will be able also to use masking is the same
thing as desktop. You just go very close, e.g. to your eyes. You can add a radial gradient. You're going to draw
a radial graded on your eyes Like so. Then you go into light. We increase the exposure
just a tiny bit that set. Then we're going to zoom out. We click okay, and
we're gonna do the same thing in the other eye. We're going to select masking. We do another one and
we do radial gradient. We draw it over
here, That's nice. Then we go into light and we increase the exposure
just a tiny bit. And that's it. In case you want to remove some spots that you
have in your face, you can go into healing. Then you zoom in. You have the brush size, as big or as small as you
need to, then that's it. You just need to
drag your finger and Lightroom is going to apply. It's magic. Let's remove actually also
this one we're doing healing. Then we just draw on it
and boom, it's gone. This is the before and
this is the after. Quite simple, but that's enough. One thing in case you
want to do is that you can add another mask
as we did on desktop, we select subject, and then we're going
to be able to work either in the subject or
if we invert the mask. And you need to tap this button right here to invert the mask, you'll be able to change the exposure of the
background so we make it slightly darker so
that my face pops up more. We click OK and we're good
to go before and after.
10. Bonus: Photoroom App: In this video, I want
to show you how you can make your profile image a little bit more catchy using a free app called foot's room. So you need to open the app. And then here you'll be
able to start from a photo. In this case, we're going to
use our peripheral image, one of the ones that we took. It doesn't really matter. And that automatically for the room we've removed
the background. And then from here, we'll
be able to choose a lot of different design options already integrated within the app. Most of them are free. There are also a pro version
if you want to pay. And then e.g. there is this
section called profile pics. So I'm going to click on SEO. And here I'll be
able to see a lot of different options that
footer room already, create it using my profile image so we can pick any that we want. Let's say, Let's get one free, Probably the first
one I really like. And then from here we'll be able to change lots of
different options, including the color
of the background. So if we click on background, then we'll be able to choose
any color that we want. Let's pick e.g. a. Yellow. Yeah, I like that.
Then if we click Done, we're gonna go into
person in here. We'll be able to
move our finger, our face wherever we want. So maybe let's put
it in the center, a little bit bigger. There you go. And then
obviously you'll be able to choose whether you want to
have an outline or not. Change the color and
cleaves the blur. Maybe you want to have
a shadow on your face. And then let's say if
we remove the outline, we can maybe just play
around with the shadow. So when we can increase the chateaux that you
go or decrease it, I'm going to increase it a bit. And also you'll be able to play around maybe
would reflection with some other options and
also with filters, e.g. we can use the mono to have
the background with color, but our self on black and white. And this is also the effect
that wolves myth has on his Instagram photo. And
I think he's pretty cool. He also has an outline
and white so we can add an outline if we want. We're going to go on outline
and then we pick the color and we live in like this
there you're going to probably doesn't have a shadow. Then what you have to do is just simply explore the image. If you want, you can
create a paid account. I have the free version because
you can save the image. And then eventually you
can go on Instagram and then change it to that
peripheral image. You're gonna go to
choose from library. And then this is the
result that we got. Once again, I have
the free version, so I have the logo photo
room and bottom right. But then if I increase it, I mentioned of the
peripheral image than the logo will disappear, then I can click
Done and this will be basically my new image. I think this is a very cool way, super easy to create
something that he's way more catchier than anything else that
you see out there. Obviously, you can pick any
sort of design that you like, but I'm going to
leave you to it, play around with it
because I think is really, really cool this
app and he's super, super good at removing the
background from your photo, especially if you don't
know how to use Photoshop.
11. Class Project: For this class project, I'd like you to try to
take your own headshot or your own profile image for any of the social
media that you have. Whether it's LinkedIn,
whether it's Instagram, whether it's TikTok,
whatever you want, tried to also edited a bit, even if you have
just a smartphone, tried to use the editing
with a smartphone video to get inspired on how you
can make it even better. Feel free to use any of the technique viscous
in the class, whether it's with
just a smart phone, whether it is with a
professional life or just with a window
light, or even outdoor. Try to be creative. Try to think about something that really
resonate with you, that will make you
stand out with a great first impression on whoever lands on your profiles. I would love to see
your results in the project section down below, because you'll be able to receive constructive
feedback from myself and from other peers in case you have any questions, feel free to post them
in the discussion. I tried to reply
to everyone about any kind of issue or any
questions that you might have. I really can't wait to see
what you come up with.
12. Conclusion: And we're reaching the
end of the course. I hope you enjoyed this
short but intense journey together and you now know
how to take a better shot, whether it's just
with a smartphone, with a camera, we try
different techniques. So I would love to see
your final projects down below and also in case
you enjoy this course, I would really, really
appreciate if you could leave a review when
you're honest opinion. This helped me a lot
being discovered by other creators and help as
many people as possible. Now, in case you want to learn
more about maybe editing, about photography,
about social media. I have loads of different
courses on Skillshare, probably depending on when you're watching this the Monday, more than six or
seven out there, whether it's about lab
darkroom photography, creating short viral reveals, mobile photography,
lot, Photoshop, Eastern for beginners
and probably more. If you have any
questions, feel free to post them down below in the discussion panel
are also reach out on social media because
I reply to everyone, you find the apps that
are 21 on TikTok, IG and similar for
Etsy on YouTube. Also, don't forget to follow
me here on Skillshare so that you'll be notified
when I upload a new class. Thank you very much
again, and I'm gonna see you in the next class.
 Simone Ferretti, Professional Photo/Videographer