Transcripts
1. Introduction: Have you ever wanted to add a personal touch to
your home decor, favorite clothing
or accessories? Or perhaps you've seen
beautiful embroidered initials and wondered how you could create something
just as beautiful. Besides, throughout the year, we have so many different
events like weddings, baby showers, or even Christmas, when personalized items cannot unique and memorable flare. If you are looking
for how to do it, you're in the right place, welcome to this masterclass or embroidering initials
with metallic threads. Hi there. I'm Katherine Never, an embroidery designer and mixed media artist
based in London. I started embroidering
six years ago, transitioning
smoothly from swing. I realized I wanted
to make my hand, my garments even
more napa chile. I love creating embroidery items that you can wear or use
in your everyday life. I especially adorn Minimalist
designs for the simplicity, thin lines, and
monochromatic palette, which are the essence
of this class. I have several
classes on Skeelsare, focused on embroidery and swing, and I also run a nazi shop where I sell my
embroidery designs. Today's masterclass topic is
inspired by vintage designs. Initial embroidery has
been loved for ages. It can make things
special and memorable, adding the noble yet heartworm
ite to everyday items. These classes for beginners, and you don't need any previous
embroidery experience. The tips and ticks
I'll share will help you master working
with metallic threads. I'll also show you how to add
volume to your embroidery, making your designs
even more impressive. You can also complete
this project using regular or steel
embroidery threads. That would work as well. However, I'll be explaining
how to embroider the initial using phtaic threads
because I love date icy, and there are
interesting nuances of how to work with them. So this class is in fact, not just about initials. It's a chance to pick up some new techniques that might
be used in other projects. Whether you're here to explore
new embroidery threads, add a personal touch
to your items or simply enjoy the creative
process in a company. They tune it. I'm thrilled to have you join
this Master class. Let's move on to
the next studio, where I'll tell you more about the project we'll be
creating together.
2. About the Project: In this master class, we'll be embroidering
an initial. You can do it on clothing or
an accessory of your choice. I'll share two techniques for creating this
voluminous effect. The first technique is ideal for items we wear or use frequently, like shirts, scarves,
pillows, linens, and robes. For this, we'll be using felt. The second technique,
which is also very interesting is
better suited for decorating accessories
or creating artwork and other items that
we won't be machine washing. For this, we'll be using heavy
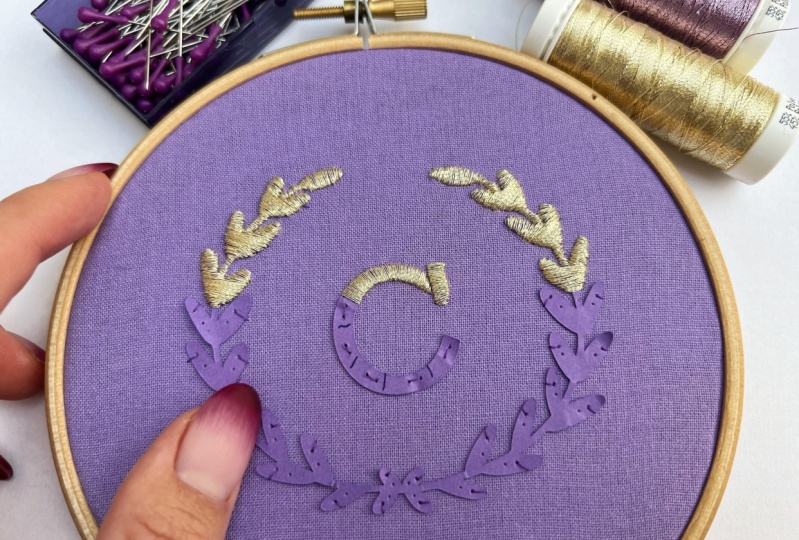
paper. As for the design. We have some options
to choose from. The first option is to embroider
a minimalistic initial. The second option is to frame
the initial with leaves. The third option is to embroider two initials
in one frame. Perfect for a special occasion. In the project and resources
step below this video. I've uploaded a PDF file with the Alphabet and frame
that you can download, print, and use for this project. I'll show you how to
transfer the design onto fabric in one
of the next videos. Any kind of creativity is
welcome in this class. Don't hesitate to choose
any colors you like, add decorative elements, or select an unusual
item to embroider on. Feel free to ask
any questions you have during the process,
below this video. It will also be
helpful for everyone working on this project to
share their experiences, look at photos of each
other's progress, discuss any challenging parts, and of course, see
the final result. Please upload your photos in
the discussion stab below. Now let's move on the next video where we'll go over
the materials needed.
3. Materials and Tools: Before we start embroidering, let's take a look
at the materials we need and get everything ready. First, we need an
embroidery hoop. They come in various materials like bamboo, wood, and metal. Any of them will work. The size of the hoop is more
important here. For a small embroidery
project like ours, give preference to a
centimeters or 5 " hoop. It will keep the fabric n. If you're buying
your first hoop, consider getting a t engine hoop as they're very easy
and quick to set up. Next, we'll neat needles. What embroidery needles and
regular needles will work. The differences that embroidery needles have a larger eye, making it easier to
thread the flows. Opt for a set with
different needles, so you can choose the one
that best suits your project. The key is to avoid needles
with around the tip. We need sharp needles to make precise small punctures in the fabric without
leaving large holes. To make threading even easier, you might want to get
a needle threader. Let's move on to the threads. We'll be using metallic threads. Look for high quality threads that are specifically
designed for embroidery. I prefer threads that come on
schools rather than skins, as they tangle less and have
more even metallic coating. I can recommend threads from Mettler for the quality
and ease of use. For the fabric you'll
be embroidering on. If this is your first project, it's best to choose a
non stretchy material. Think of fabrics
used for shirts, caps, jeans, or handkerchiefs. These are easier to work with. If you want to
embroider on a T shirt, hoodie, or any other
stretchy fabric, I've included a link
below to a YouTube video where I explain techniques for working with
these materials. That's also possible, but the fabric will need some
additional preparation. To create volume, we'll use a baking of felt or thick paper. It's best to choose a color, that matches your
embroidery thread or the fabric you're working on. It doesn't stand
out. For the paper, select one that is sturdy
enough to provide support. Around 200 to 300 GSM
should work well. We'll also need
regular thread that matches your fabric
color, and some pins. For transferring the design, we'll need a printed design, a hea erasable pen, chalk, scissors,
or a paper knife. In some cases, when the fabric is dark
and not transparent, we might need a
water soluble self adhesive stabilizer
for embroidery. Lastly, in all to piercing
holes in cardboard. I've prepared a PDF with all
the material listed to make it easier for you to purchase them in a store or order online. Let's move on to
transferring the design.
4. Design Transfer: In this video we'll focus on transparing the design
of the initial. We'll transfer the design either anti felt or
paper to create volume. If you're working on clothing, a handkerchief, or a cushion. Basically any item that's
likely to end up in the washing machine will be transferring the design
onto a piece of felt. Felt is more resistant to moisture and won't
dissolve when washed. If you're working on accessory, the piece of artwork, or any item that won't be washed or might only
be dry cleaned. You can transfer the
design onto stiff paper. Let's go through each
option step by step. Below this video, you can download and print
the initial design. One common method
for transferring the design is using
the light source. You can print the design, place it under your fabric, and if the fabric is light
and sufficiently transparent. The design will be visible when held up to a window or tablet. Then use a pen with erasable
marks like one that can be removed with heat from an iron or stem from a kettle, to trace the design
onto the felt. Try to make your
lines thin and clear. Take your time with this step
to ensure a meter design. Once the design is traced, you can cut it out
with scissors. Erase any pen marks
with an iron or stem. If your felt is dark or a pack, we'll use a different method. Print the letter and frame on water soluble paper and
stick it under the felt. Now, carefully cut out the design along the
outline using scissors. Once finished, don't rush
to remove the paper. It stabilizes the felt nicely, which will help during
the embroidery process. After the first wash the
paper will dissolve on a son. Here are the felt
pieces we've prepared. Another method is to transfer the design
onto stiff paper. You can print the design directly onto the paper
and then cut it out. Make a few small holes with a knoll around the design
to attach it to the fabric. This is our result.
The final step is to stitch our basis to the fabric or chosen item with
irregular read. Now, our templates are
ready for the main work. In the next do, we'll dive from the technique of stitching
with metallic threads.
5. Stitches: In this video, we'll
explore and try out the techniques of embroidering
with metallic threads. We already have
our initial layer of the designs stitched
onto the fabric. First of all, I recommend
marking the directions in which the thread will
be laid out on the design. This will ensure that the
embroidery looks neat. Since letters have
curves, like the S, or junctions, like the T, that can be trickier
to embroider. It's a good idea to plan how to tackle these
areas in advance. For example, with the letter
S, I'll stitch it like this. The thread will go horizontally through the middle
of the curves. As I approach the rounded parts, the thread will begin
to angle slightly, and then transition to
a vertical direction. By choosing the direction
of your stitches, you can optimize
the stitch length. For instance, if you try to embroider the entire S
with vertical stitches, the stitches in certain areas might end up being
too long and uneven. We've now marked the
thread directions directly on the base layer. When it comes to the crossbars, it's best to stitch
them horizontally. We need to ensure there's
a gap between them and the main design so that the thread can
pass through easily. We can make small notches with scissors in this areas
to help with this. Now take a length of thread roughly from your
wrist to your elbow. Tie a thick note at
the end of the thread. Keep the needle in one
spot on the thread on this short tail because the metal can wear down the
thread due to friction. Let me show you what I mean. You'll probably notice
this after a few stitches. We don't want any worn out areas showing up in our embroidery. Tech over the entire design, following the drawn
directions with the thread. This will create gaps that
we will fill in next. The thread should come out from one side. Go down the other. And come back through the front right next
to the first stitch. It's important to lay the thread flat
without twisting it. As you pull the thread, you can use the needle to help
keep it in place and make sure to smooth and lay it parallel to the previous
stitch with this motion. Also, they calle attention
to where the needle goes in. For a need result,
the needle entries shoot align in a straight
line along the design. You can insurre the
needle slightly under the felt to
create a cleaner edge. To better control where
the tread will lay, you can also pull it
through to the other side. Hold it in place
with your finger, and then sore the needle
precisely where you want it. In the curved areas, the thread will start to
slightly change its angle. On one side, you'll increase the density of the thread
while on the other side, you'll maintain the
same density as before. Here's our result.
For the letter t, let's make the main
vertical stroke completely horizontal. I'd like to stitch the base
vertically on its own. For the center, I
have two options. I can either overlap the
threads in the middle like this or smoothly transition the angle from both sides in
the vertical line. Dark by stitching the cross bar, gradually filling in
the entire design. Begin with diagonal
stitches at the top. Then move to the center. This will give you
a result like this. For the reason, I think both arizontal stitches and slightly angled ones
would work best. What about stitching on paper? Outline the directions and make any necessary
cuts if needed. Now, let me show
you how to speed up the stitching process by using two threads
simultaneously. Try both methods and choose the one that
work best for you. Thread the needle,
holding it in the middle, and tie both ends into a knot. Let's practice stitching
the frame this time. Make a stitch, bring both
threads to the other side, and insert the
needle between them. This technique helps lay the threads flat
without twisting. Once again, lay the threads parallel to the previous stitch, then insure the needle
between them and pull it through while holding the thread with your finger. This method is a bit
tricker since there's a higher chance of damaging
or tangling the threads, causing them lose their coating. But with some practice, it's a faster technique, especially when stitching on paper where thread tangent
is easier to control. I really like this method
for its clean counter lines. Also, using paper allows you to easily adjust the volume
of the embroidery. Whether you want a light effect or layered for moon dimension. Teaching with metallic thread is as beautiful as it
is challenging. It's normal to
encounter difficulties. Don't get discouraged. Everyone, including myself,
raises these issues. Now it's your turn to
practice teaching the initial before moving
to the next video.
6. Main Project: In this video, I
want to walk you through the entire process
from start to finish. I'll highlight what
I'm focused on, how I choose my
embroidery technique, and of course, I'll show
you the final result. I'm going to
embroider an initial inside a botanical
frame on my cap. Let's start by discussing how we can best bring
this idea to life. There are three key
things to consider. First, we need to
decide on the biking, whether to use felt or paper. I plan to embroider
on a paper biking. Since I'm not likely to
machine wash this cap, this option works well for me. Second, we need to
analyze the item itself and choose the best
spot for the embroidery. The front part of the
cap is reinforced, which makes it difficult to
push the needle through. So I'm planning to do the
embroidery on the side. Third, we need to make sure the design size is appropriate. The fabric section between the reinforced parts is smaller
than my original design. To adjust for this, I printed
the design at 50% scale. I checked to make sure it fits. Then cut out the details
along the edges. Now I have two templates, the initial and the frame. We're ready to get started. Let's punch some holes in
the templates for stitching. I'll make a lot of them, so the paper will lie flat. Next, I position the design on the fabric and pin it in place
to ensure it's centered. Then I'll stitch the
templates to the fabric. I take the length
of metallic thread, thread it through the middle, tie a store the large
note at the end, and start carefully laying the threads on the
surface of the paper. I'll be using the
two thread technique I showed in the video
about stitches. I prefer this technique
when embroidering on paper, since it requires less
attention to thread tension and creating
a neat outline. And it also lets me cover
the design more quickly. Make sure that two threads lie parallel by inserting
the needle between them. Hold the thread with your finger and adjust with the
needle if needed. Insert the needle slightly under the paper for
a cleaner edge. The initial is done. Now, let's move on to the reas. The process is pretty
much the same. I try to lay the
threads as evenly as possible because that's what really impacts the final result. It's not a fast process, but it's very meditative. Of course, I had a few moments where the thread got tangled. That happens often even when using regular
embroidery floss. If you feel the threads
are starting to twist and are about to tangle, untwist the thread
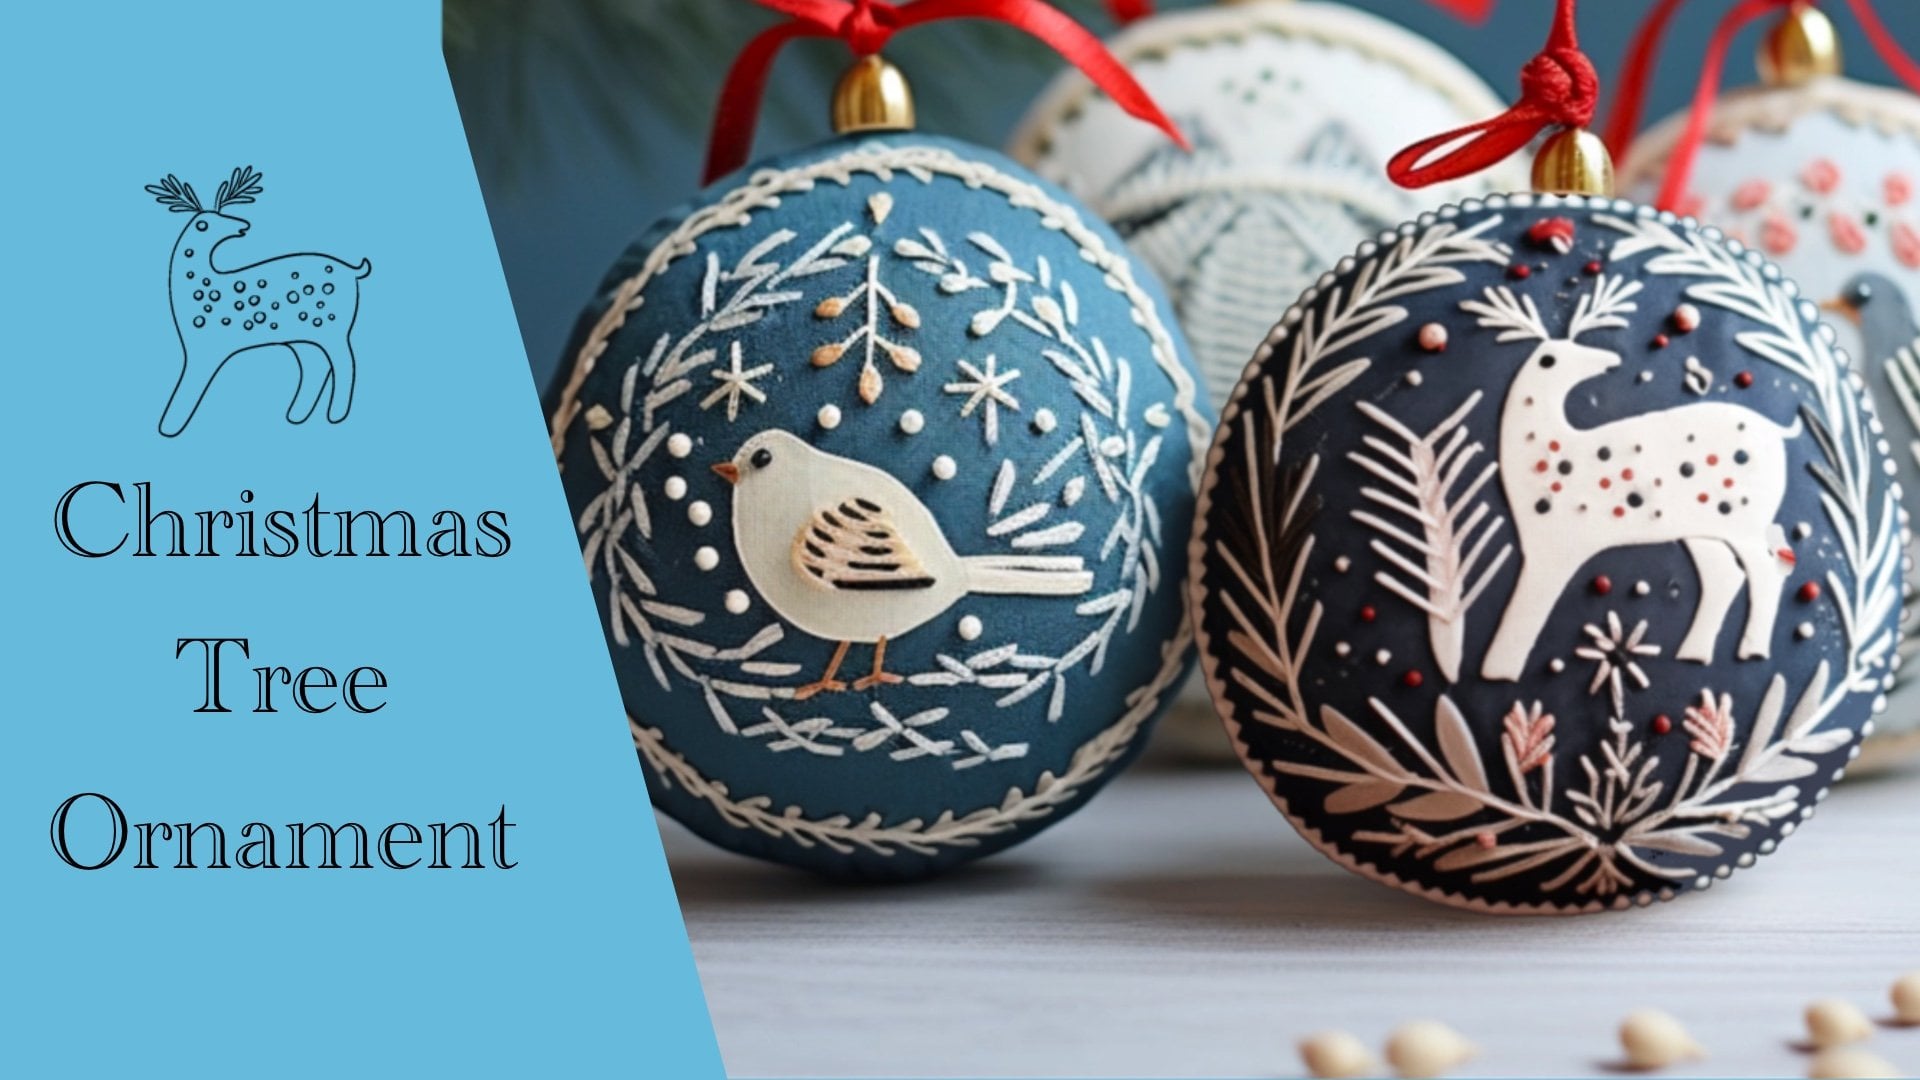
with your fingers. Here's a final result. I plan to embroide a few
more items like this. I think this metallic
embroidery will look great in the corners of decorative
pills on Christmas ornaments, and of course, on my dis cover. In the final video, I'll share a few more important
tips, so stay tuned.
7. Final Thoughts: Thank you so much for
watching the video. I'm really glad you're
joined my Master class. I hope you'll decorate your belongings and home
items with your initials. Of course, the world of
embroidery doesn't end here. It's full of exciting
techniques and methods to explore beyond
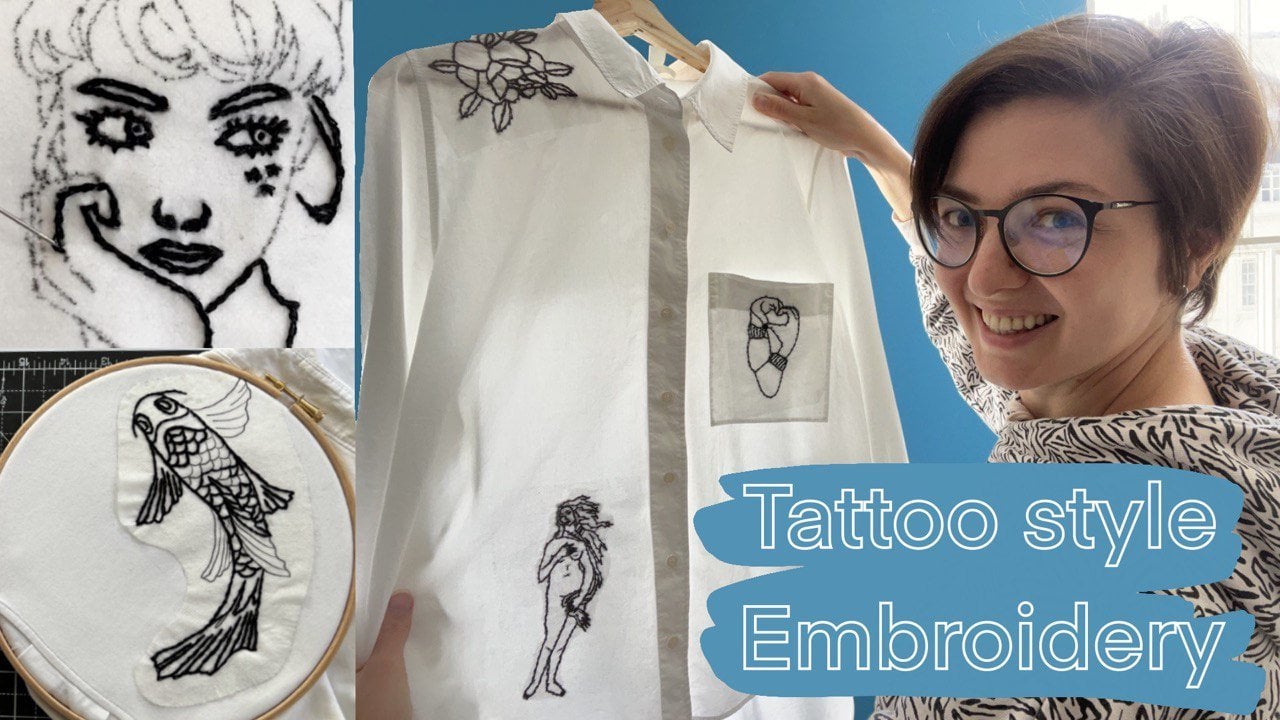
we've covered here. My account already features several other
embroidery techniques that you might find interesting. I'd love to see you
in my other classes. And, I greatly
appreciate it if you shared your recreations on social media using the hashtags. This way, we can grow
together on social media, follow each other
and offer support. Next, I plan to film videos
on lace like embroidery, creating a RFA bag, and making folk book marks. Make sure to subscribe so
you don't miss any updates. See you in the next videos.
 Catherine Never, Embroiderer, Artist & Designer