Transcripts
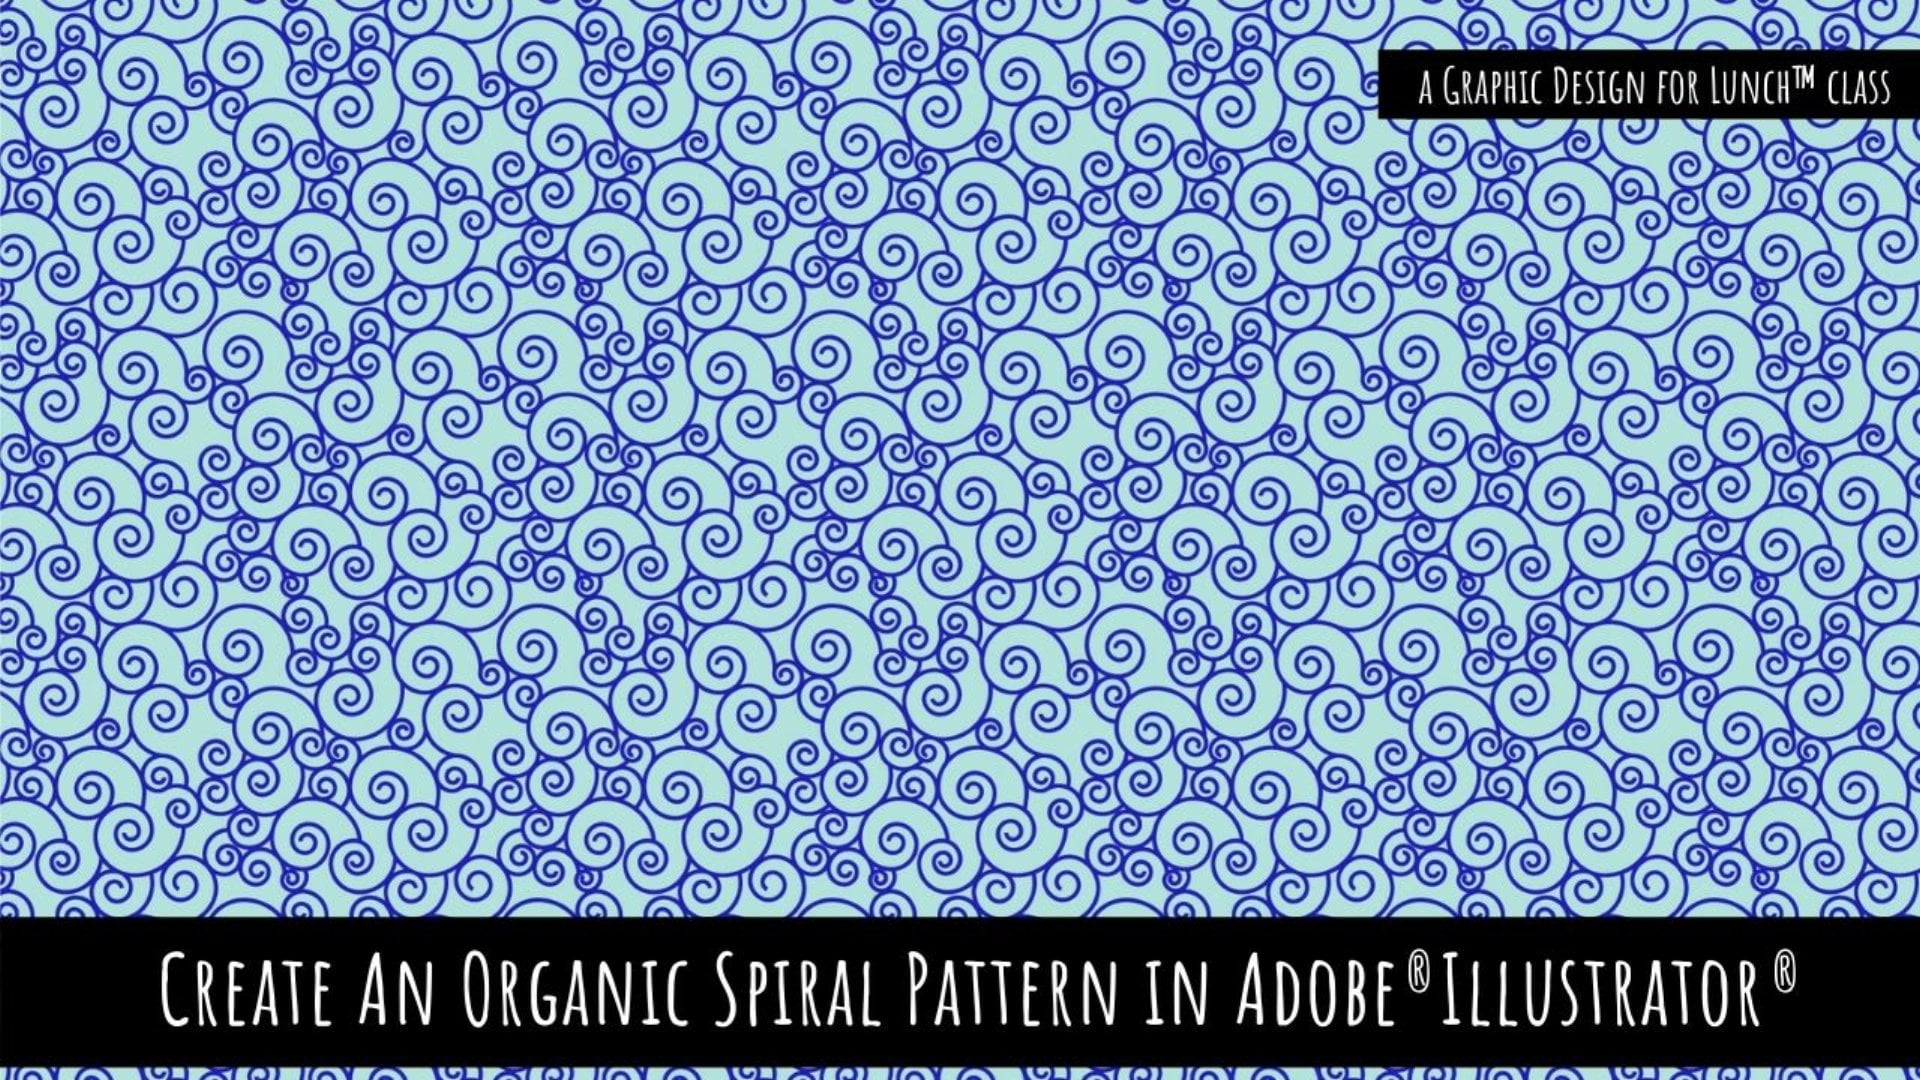
1. Seamless Repeating Texture Patterns in Illustrator - Introduction: Hello, I'm Helen Bradley. Welcome to this Graphic Design for Lunch class, Seamless Repeating Texture Patterns in Adobe Illustrator. Graphic Design for Lunch is a series of classes that teach a range of tips and techniques for creating designs and for working in applications such as Illustrator, Photoshop, and Procreate. Today we're looking at creating a seamless texture pattern in Illustrator and we're going to look at some of the issues around creating seamless textures. We're going to create them from various objects that we either download or are already built into Illustrator. Along the path of creating seamless patterns, you're going to also learn some things about Illustrator, particularly about clipping paths and cropping objects. Now as you're watching these videos, you are going to see a prompt which will ask you if you would recommend this class to others. Please, if you are enjoying the class, would you do two things for me? Firstly, answer yes, that you would recommend this class, and secondly, write even in just a few words, why you're enjoying the class. These recommendations help other students to say that this is a class that they too might enjoy and learn from. If you see the Follow link, click it to keep up to date with new classes as they're released. Now, if you'd like to leave me a comment or a question, please do so. I read and respond to all of your comments and questions, and I look at and respond to all of your class projects. If you're ready now, let's get started making seamless texture patterns in Illustrator.
2. Pt 1 Understanding Crop and Crop with Clipping Mask: Before we start making seamless patterns in Illustrator, let's just have a look at some of the problems that we may encounter as we do so. I have a couple of circles here. The circles have a stroke and a fill. Over the top of them I have a rectangle, it's just a black stroked rectangle. What I want to do is to crop out this portion out of the circle. So I'm going to use the Crop Tool to do it. I'll select either both of the shapes, making sure that the item that I want to use as the crop, in other words, I want to crop everything to this rectangle here is on the top, so it needs to be above the shape I'm cropping. I'll go to the Pathfinder palette and click here on "Crop". You can see that the result of this crop is very different to what's happening here. This was what you might have expected to happen. This is what has actually happened. Now, the reason for this is that when you use the Crop Tool, the final shape just has the same appearance as the original shape. Because the original shape had a stroke all the way around it, then so too does the final shape. Now, if you don't want that to happen, and we don't want that to happen when we're creating pattern paces. If we're going to be cutting something, we probably want this as the result and not this. Well, let's see how we would avoid this problem. These objects are identical to what we were working on previously. I'm going to select just the circle at this point, and I'll choose Object, Expand Appearance. Now, instead of having a circle that has a stroke and a fill, we have an inside circle here. Let me just go and grab it. We have an inside circle here that has a fill on it, and we have an outside shape that also has a fill. So our stroke has been expanded to be exactly the same object as the circle itself. It's a path that is filled. Now, let's go and select all three items, because this time we have three items. We've got what was the stroke but is now a path, we've got a circular path with no stroke, and we've got this rectangle here. I'll click on "Crop". Now, we get more of what we expected to get. It looks more like what we have down here. So anytime you have an object that is stroked, if this is the result you want to get from your crop, then you'll need to expand your shapes first. Now, down here, I've got a clipping mask. If we would have a look in the last panel here, let's just go and do that. Here is a clipping group. I've got an object that has been the clipping mask, this rectangle here, and we've got our ellipse underneath. Now, if I wanted to crop this shape, we could do it a couple of ways. Either we could break this shape out of its clipping group, so we could select the clipping group and we could choose Object, Clipping mask, Release, and that would release everything with our rectangle still in the right position. We would select either both of the shapes and go ahead and do our crop. But of course we're going to encounter this situation here, because the ellipse itself has a fill and a stroke. So on this instance, we would need to expand the ellipse before we did it. Object, Expand Appearance. Now, let's go and pick up the two shapes, the rectangle that we're using as a cutting guide and the ellipse itself, which has now been expanded. So now the Crop Tool will work as we expect it to. Now, over here, I have an exact duplicate of that clipping group. There is another way that we could do this. We can go and grab the rectangle that is the clipping mask. I'm just going to target it alone. I'll drag it onto the new icon and then put it above the clipping group. I still have the clipping group intact. I don't actually have to break it out, but I will have to expand the ellipse if I don't want this to happen. So go to the ellipse, choose Object, Expand Appearance. Now, I'll select the rectangle that I broke out of the clipping group plus the clipping group itself, and I'll click "Crop". The result is what we would expect in looks. It looks like the version that we wanted to see. But you will notice if you open up the group that you have the two paths that we expect to have what was the stroke and what is the fill. But we've also got rather annoyingly, a no fill no stroke shape. So we'll need to be aware of those. If you want to keep your layers palette nice and neat, you would delete that. Just be aware that if an object has a stroke and the fill and you use the Crop Tool on it, the result may not be what you expect. Since we're going to be using the Crop Tool in this video, that's a fairly important thing to know.
3. Pt 2 Create the Starting Tile: Now, it's time to have a look at how we would create a seamless texture in Illustrator. I'm going to start with a simple brushstroke. I'll click on the "Brush Tool" and just drag out a brushstroke. I'll select it over and go to the Brushes panel, click the "Flyout Menu", choose Open Brush Library, and then Artistic and then Artistic_ ChalkCharcoalPencil. There are some brushes here that makes some good texture effects. I'm thinking particularly the one at the very top here. It's pretty much ideal for creating texture, so I'll click on it and it will be applied to my brush. I need to increase the stroke on my brush so I get the texture I'm looking for. All I'm looking for here is some elements that I could use as a texture. If I try to crop this at this stage by adding a rectangle over the top of everything, it's not going to work. Let's just have a look at it for a couple of reasons. Firstly, when I click to add a rectangle, I actually want my rectangle to be a square, so I'm going to make it 500 by 500, and I'll click "OK". Well firstly, it seems like it's inherited the original brush, so we just need to be aware of that. If you press the letter D, you'll get the default settings for the brush., a fill and a stroke. We'll just target the fill and turn that off. That's the first thing that you need to be aware of and don't panic if it happens to you. Let me just put my rectangle over the top of my brush. I'm thinking my brush could be a little bit bigger, so I'm just going to extend it a bit beyond the edges of the rectangle here. That looks pretty good. Now, if I try and select over this and use the Crop Tool, this is what's going to happen. We're going to lose absolutely everything because we're trying to crop a brush and that just doesn't work in Illustrator. Let me undo this. We will go and target just the brush line here, and I'll choose Object, Expand Appearance. Now that it's expanded, it's going to work just fine. Of course, this rectangle has to be on top. You might need to double-check that in the last pallet always to make sure that the rectangle that you're going to use as the cutting guide is on top of what you want to cut. The elements that I want to cut are all inside a group. That's just fine. They can be inside a group, works just perfectly. Let's select over everything, and this time, again, go to the Crop Tool, and I'll just click it. Sometimes, even though you know it should work, because I told you it should work, something will happen and everything will disappear. If you're pretty sure that you did everything right, just undo everything and start again. I find that sometimes I can click the Crop Tool a couple of times and everything disappears. If I just undo it and try again, it works perfectly. I don't know why that happens. It's annoying, but that's the way it is. We now have an element of texture. Now, this is not a seamless repeat. Let's see what would happen if we try to repeat it. It's going to put another version next door, which is what would happen if we had a pattern. You can see, there's a very clear seam down here, and ultimately, there would be the seam anywhere else we joined it. That is not a seamless repeating pattern. It's just a 500 by 500 piece of texture. What I'm going to do is move it up to the top corner over here just so that the mathematics of everything is going to be nice and easy. I'm making sure that it's top corner up here. We'll select the top left of these little nine objects here. I'm going to make sure that it's at zero and zero. Well, it's not quite, so I'm going to make sure it's there. Then, I'm going to select over this object. I'll click on the "Art Board Tool" and then double-click on it. From the drop-down list, I'm going to select "Fit to Selected Art", and that will give me an art board that's 500 pixels by 500 pixels. I'll click "OK". We now have an art board that's 500 by 500. I'm just going to size it up a little bit and then we'll just shrink it down one step. Now, there is a process for creating repeating patterns that will work in every version of Illustrator. I think that quite often, when you're trying to get textures to work that this is the easiest way. Even though it seems a little bit more cumbersome than using the Pattern Make Tool, it actually works pretty well. I'm going to save this starting point, and in the next video, we're going to look at creating this pattern by hand in what I think is the easiest method.
4. Pt 3 Break up the design: I've saved my file a couple of times and I've just reopened one of them. The document is 500 pixels by 500 pixels. That's important to know. It's also important to have used a round number because we're about to divide everything by two. If I divide 500 by two, I get 250. I'm going to select the Rectangle tool. I'm going to click once in the document and create a rectangle that is 250 by 250 pixels. I'm going to fill it with a color. I'm just going to apply any color to it and I'm going to remove the stroke. This is going to help us see what's going on. That will move it up to where I think it's going to need to be. I'll auto option, drag a duplicate away. This time I'm going to color this a different color. Then I'll do the same down here and the same across here. Next, we need to align these perfectly, so I will select one. I'll go to the "Align Panel". If you don't see the "Align Panel" here, just choose "Window" and then "Align". Open the fly out menu, choose Show Options, click "Align" tool and click "Artboard". That's pretty important because you want to align these pieces to the artboard. This one needs to be in the top left, so I'll click top and I'll click left. Go onto the next one. This is top right. Make it the top, make it the right. This one bottom right, let's go and find the bottom and the right. This one is bottom left, here's the left, here's the bottom. We've made sure that these hole in the exact right position. We're also going to view the last panel because we need to do some work in there. In the last panel, I've got one group of objects which you might take. Just an over the top of that I have four rectangles. Well, I need three extra copies of this group, so I'm going to drag it onto the new icon and position H_1 immediately under one of these colors. Let's go and put this one up here and this one up here. That's going to make the cuts a whole lot easier to do. I'll click on this rectangle here, the pink one and the group immediately below it. Everything's going to highlight. Don't worry about that, this is working perfectly. I'll go to the "Pathfinder" and I'll click on "Crop" once. That gives me a shape down here that is a 250 by 250 piece of texture. I'll just repeat that for each of these combinations, the rectangle and the one immediately below it. You can see why I'm just placing these in order it just makes life a whole lot easier, so "Rectangle", "Group" below it, "Crop". We have four groups. Let's go and see where this group is. Right now it is in the bottom-left corner. It needs to end up here. It needs to end up diagonally opposite where it is right now. Let's focus on where it needs to end up. It needs to end up top right. We're just going to call this top right. We're going to name each of these blocks where they need to end up not where they are now, but where they need to go. This one here, it needs to be up here, so it needs to be called top-left. This one at the moment is in the top right it needs to end up bottom-left. The last one double-check it. It's up here, it has to end up down here. It's going to be bottom-right. Each of these four shapes should have a different name. If they don't, then you'll need to go back and check. Now, let's go to the top right, where we're going to select it and we are just going to the "Align Panel" and we're going to put it where it needs to be. We're going to click "Top" and we're going to click "Right", and we're going to ignore everything else that's going on. Let's select top-left. We're going to click "Top", we're going to click "Left", ignore what's happening on the screen. We'll choose bottom-left. We're going to click "Bottom", and we're going to click "Left". That would be the other left. Let's go and choose bottom right. Let's choose "Bottom" and "Right". Let's see what we've got at this stage. What we have got is what is going to be as seamless pattern repeat. Now there are problems down these lines. That's just fine. Whatever is on the edge though, is a seamless pattern. That's going to be seamless when this pattern gets styled. In the next video, we're going to look at how we get rid of these same lines.
5. Pt 4 Removing the Obvious Seams: The tool that you're going to need to focus on right now is this one. It's called the Group Selection Tool. It shares a toolbar position with the Direct Selection Tool, but it's going to let us get into these groups here really easily. I'm going to target this shape here, and all of a sudden we've got a problem that we need to deal with. Because if we start moving this shape, we're going to lose this piece over here. We can't afford to lose it because it's a direct match for this piece here. I'll leave this targeted but I'm not going to move it, not even one pixel. I'll go to the Knife Tool. It shares a toolbar position with the Eraser Tool. The Knife Tool is a really handy tool because that cuts through things. What we could do here is just cut through here, so I'm just going to cut this shape through this spot here. It cuts it into two pieces and it means that I can do something with this bit, because this bit is not along the edge of the shapes. So moving or doing something to it will not affect the pattern repeats. Now, I could bring this across here. I could also make the edge of this a little bit uneven. With it selected, I could come in here with the Knife Tool and make this edge uneven. I'll go back with the Group Selection Tool, just select the pieces that are on the edge here and I can remove them. I could go and get other pieces like this piece here, I'll just target it. Then I'll press the letter V to actually select it. I can do Control C and Control V to make a duplicate of it, and I could just put it in here just to add to the variety around this shape in the middle. I'm just going to select with the Group Selection Tool every object that is over this line and which looks cut-off. You can zoom in, and you can do things with it. For example, you could come to the Pen Tool and you could add an extra couple of anchor points here. Then go back to the Direct Selection Tool, target these anchor points and just make something out of it. If you like just try and roughen up the edge so it doesn't look like it's been cut. You'll do that with everything that is over these lines. You can see where the lines are, because you can just hover over them. Just be aware that if you start using the Selection Tool and you click on something, you're going to click on everything. Just realize that you've done the wrong thing. Go back to the Group Selection Tool, click away from it so that things are unselected. Now, you can come back in with the Group Selection Tool and just work on these pieces that are over the edge. Sometimes the easiest thing to deal with them is just to delete them, and go and find something else you can use in its place. Select this or press "V" In this case, I can just Alt Drag. This piece over here, I'll rotate it around so it looks a bit different. Now, I've got a piece over the edge of the same, that's breaking up the visual that there is a line across here. You could go and do that with other shapes. Just make sure that you're using the Group Selection Tool. It's just really a handy way of getting access to these pieces. I'm just bringing this piece up as well. I've got a bit of work to do on these pieces here, I'll continue to do that and we'll come back when we're ready to do the next step. I'm going to speed up the video as I work, just in case you want to see what I'm doing and how I'm doing it. One thing to be really careful here is that you don't disturb anything that is on this bottom line, because this is where the shapes are going to join up later. However, we could go to this point here and we could adjust a little bit. Now that I've removed all the visible same, it's really hard to say that these are actually cut shapes. There's nothing that's particularly that is indicating that these shapes are cut. What I'll do is I'll select everything, so I'll choose "Select All". I'm going to expand these groups. I'm going to choose "Object Ungroup", and I'll continue to do that until Ungroup is no longer an option. In fact, that's just one time. Let's just go and check at the very bottom here. Make sure that we don't have what I'm saying here. I've got a compound path and another path. These are just no film or no stroke shapes. If I target this one, you'll see It's not a fill nor a stroke. It's left over from some of the work we did, so I'm going to delete it. But before I delete it, I'm going to use it as a way of selecting any others of these paths that are just sitting there. I'll choose "Select, Same Fill & Stroke". It appears that there are a few others throughout this document, so they are all selected. I'll just press "Delete" and that will just get rid of them, so that the only things that are left here are actually filled shapes. I'll select everything with Select All, and I'll put them back in a group just so that they don't move. This thing is a seamless repeating pattern. If I choose "Select All", because everything is inside this 500 by 500 pixel art board and because we've created these edges as sameness repeats and fixed up what was wrong in the middle, we can just drag this into the Swatches panel. That then becomes a seamless repeating pattern.
6. Pt 5 See the pattern at work: To see our pattern at work, I'll drag out a new art board. I'm just going to drag an art board or at least start dragging it. Click the top right box of these nine boxes and I'm going to make it the size of my screen which is 1920 by 1080. Clicking the top right box just means that any re-sizing happens to the left and underneath the current position so it doesn't run into this art board over here. I'll add a rectangle here the same size as the art board. I'm going to align it to the art board. I'm going to use these selectors here. Well, it looks like I've lost my align to art board option. Let's go and get that. We've aligned the shape to the art board. Target the fill and go and apply our pattern to it. Now if we zoom out to the art board, this is our repeating texture pattern and there are no seams in it, there are no visible seams in this pattern. You can see repeating elements, but you're always going to see repeating elements in a pattern. It's just we don't have any seams in this one. That I think although it can be a little bit time consuming to remove the elements down the internal seams. I think it's probably the easier way of creating a repeat seamless patent texture in Illustrator.
7. Pt 6 Texture Pattern using the Pattern Make Tool: Let's now have a look at the alternative way of doing this, and this is going to apply if you are using Illustrator CS6 or CC, you can use this process. We have the exact same starting point as we had previously. This is just the original texture cropped to a 500 by 500 piece size of texture. It's not a repeating pattern yet. Let me go out and get the last panel because we want to have a look and see what we've got here. We've got a group and inside the group are all the elements that go to make up the pattern. It's worthwhile always checking the bottom of the group because if there are no fill, no stroke, shapes, they're usually at the bottom of the group. I'm just going to tag one of these. You can see it's no fill, no stroke. We want to get rid of any of those because they're just going to be in our way. I'll choose, Select, Same, Fill and Stroke. They're all selected. I'll just press Delete that, just gets rid of them. What's left are only filled shapes. We can make this into a pattern using the pattern make tool. We'll choose, "Select All", so everything on the outboard is selected, we'll choose, Object, Pattern, Make. I'll click, "OK." and here is our pattern options dialog. Now this is one of the reasons why I don't like this pattern options dialog, because the art board and our pattern are actually offset. The seams are here and here, and around the edge, so they are not square on the art board. Now I've got, Show Swatch Bounds, and Show Tile Edge set on. That allows me to see what's going on here. What I'm going to do is square everything up. I'll choose, Select All so I make sure that all of the component parts to the pattern are selected. Now, these are just copies, the rest of it, some I'm just going to dim the copies to 20 percent and you can see that the copies are not selected, only the original pattern elements. I'm going to align them to the top of the art board just simply because it's going to make life a lot easier. It's going to be cleaning up the screen, if you like. I have them selected. I've also got all my transform options showing here. If you don't see them, you can just go to Window and Transform and do it via the palette. I've isolated this corner reference points, so you can see in these nine boxes, I have selected the one in the very top left, that will allow me to position the X and Y values of this selection, and they're going to be at 0, 0. Zero on x and zero on y, and that just squares everything up. We can just click away from that, and everything we're still in the pattern Make tool, we haven't moved out of it. We've just put our pattern element over the top of the art board. These are where the seams are. All around the edge of the art board are the same areas, just squaring it up like that lets you see the seams more clearly. Now I can return my copies to 100 percent, so it's going to be easier to see. What you'll do is you'll go around all the edges. We're just going to, each of these edge elements is going to be really clear that we've got elements that are over the edge. Now, anything that is in this dark gray area is not actually part of the pattern. The piece that makes up this is way over here, 500 pixels over to the other side. This is a pattern pace that we can affect. I'll go to the group selection tool, let's just click on it. We can do something with it, so I'll just press the, a tool which allows me to get to the anchor points that's going just target one of these anchor points and let's just make a different shape out of it. Now, we'll see this if we go over to the other side of the art board, and here it is. That is now part of the pattern and we've got a piece that goes over the seam, so the seam is not going to show up, obviously. You'll just work down the sides of the shape, fixing everything up, but you'll need to work on both sides. When we fix this side we'll need to go over here and see if there's anything here that we need to also extend. For example, we may need to extend this piece here, or remove it, or do something with it because it's got an obvious cut. I'm just going to make it a little bit different so it's over the edge, and so it's not going to be reinforcing the fact that we cut this down the edge. Now you work all the way around this art board just fixing everything that runs into this edge. You don't have to be as careful as you were in the other process of minding things where you put them because what you're going to see on the screen here is going to be your finished patterns, so you can move things around, you have a bit more flexibility that way. I just find this a little bit more of a cumbersome process, but your mileage might differ, you might prefer this, and if you are using Illustrator CS6 or CC this is an option for you. When you're done with this, you're just going to click, "Done. Now I'm not going to go ahead and do that one. I'm going to move forward because I want to show you other textures that we could make into patterns in Illustrator, ones that are easy and ones that, you might not even bother attempting, and I'll tell you why.
8. Pt 7 Textures that Work as Patterns without Much Effort: In some cases you won't even need to create textures as a same as repeating pattern because the texture itself will lend it to just a regular repeat without any work or without very much work at all. I'm going to give you the download link for this particular grunge overlay vector pack from Vecteezy, because this is the pattern that I'm talking about or it's a set of elements that I'm talking about. It's not actually a pattern, but it is going to behave as a pattern and I'm going to show you how to make it do that. Download it, open it in illustrator. I've already done that, so let's just go and get the file. This is the file we're talking about, inside the file is a gray background, a solid gray background here. I'll select that, and then we'll just ask the time which was these blocks contains the texture that we're interested in, and it's this one here. I'm going to copy it, so I'll choose Edit Copy. I'll open a brand new document, I'm just going to make mine the size of the screen, and I'll paste this pattern or the object into it with edit paste. I'm calling it a pattern because it's such a spread apart series of little flecks that I think that you probably won't need to do anything to it or anything much to it to actually make it a pattern. I'm selecting it and I'm going to drag it into the swatches panel, and by doing that, it just becomes a pattern. I'm going to move it out of the way for now, just in case I need to work on it a little bit. Let's create a rectangle here that is the size of the art board. I'm going to align it to the art board. Then with the fill selective of fill it with my pattern. We're not seeing any obvious seems in this pattern, the only thing that is a little bit off putting of these elements here, this set here, and this set here. But it is really a seamless repeat because the little flecks are so far apart from each other that you're just saying I pattern, not the cut-off lines. Let's go to the elements that we just saved to one side here, I'm going to the group selection tool, I'm going to click on this pace and just delete it because I think it's too obvious a problem and it's way bigger than everything else. Now go to the last Sue tool here, and I'm just going to let so some of these paces. I'll zoom back out a little bit, and I can just move these paces somewhere else in the pattern they don't have to delete this because they're actually quite nice little elements. It's just that they're bunched up too close together. For this, go and get a few others of these, I'm just making sure that I select entire shapes, not parts of shapes, and I'll just move this somewhere else. Now you can delete some of them if you think that they just annoyingly large. Having cleaned up the worst or the most obvious paces in this selection, going to select either everything, and again, I'll just drag and drop it into the swatches panel. This time I'll hold the Alt or Option K because that will allow me to replace the original swatch with the new one. You can see that the shape underneath is now filled with our pattern note, there are no obvious sames in his pattern, so we haven't had to be really pedantic about getting rid of the sames. All we did was get rid of some overly large objects in this pattern that we just making it look like a repeating pattern. It's way, way more of an organic pattern now and we haven't really had to do any work to it. Now you're going to find that that will be the case with patterns like this, where there are really small elements, and where they are all separated pretty much apart. So if you're working with elements that look like that, test them out as repeating patterns and see if they'll work just as they are without you having to do all the work of dividing them into paces and moving the paces into corners and then getting rid of saints because you probably won't say that there are any seems to be bothered getting rid of.
9. Pt 8 Working with Complex Texture Documents: The last texture that we're going to look at is this one because there are a whole hap of issues to consider if you're going to try and make this into a seamless repeating pattern. At some stage you might say, look, it's too much effort but I think it bears looking at just to see what the issues are. This is a fairly downloadable texture that you can get from Vecteezy, and I've already downloaded it and unzipped it and opened it here in Illustrator. Here is the file, let's just go and get the last pallet so we can see what we got with the file. This topmost group of objects is this text down here. You'll see when I turn it on and off that the text disappears. Well, we don't need that, so we're going to remove it. Let's have a look now at the bottom most object, because that is a rectangle that's filled with a gradient. If I target it you can see it's got a radial gradient. Well, if you're familiar with making patterns in Illustrator, you will already know that you can't make a pattern that has a gradient in it. More than that, if we use this as the background for a pattern, then we're going to get dark areas and light areas through our pattern. That's going to be pretty obvious that it is a repeating pattern that's been made with a gradient. That's not going to look very pretty at all. What I'll do is target the eyedropper tool and shift click on a color here that I like, a neutralish color. It's now applied as a solid color to that shape. We've got the gray look but without the dimension that we had previously because the dimension is not going to work particularly well with a texture. You may not even want the texture background but for now you probably do want a solid color because what we want to be able to see what's actually going on in this texture. Let's turn back on what is now our top-most group and that is these lines. Yes, that's our stone lines. That's going to be perhaps the most difficult part of this entire element to fix, to make into a repeating pattern. But let's turn that off for a minute. Let's have a look at the next bit. The next bit is some gray texture. That looks relatively doable. Next up we've got some white bits, these are some light or white bits. But let's go and have a look and say what this group really does look like. Let's just open up the group. You might be a bit surprised at this. You see the paces that are inside the group themselves are actually a brown color but they're not showing up as brown on the gray background. If we have a look at the appearance panel, nothing is going to be unusualness. It's just got this brown fill and it's got no stroke at all. Everything that is happening with these brown shapes that is causing them to look like this on a gray background is happening at a group level. Let's target the group and let's see what's happening. Well, over here in the appearance panel, we can see that the group has a reduced opacity of 10 percent and it's blend mode is set to screen. Let's have a look at some of the issues with groups that have opacity set to 10 percent and screen as the blend mode. Now, I've already created a document with some shapes in it. Let's see what we've got here, let's go to these two shapes first. These are just regular circles but each of them has been filled with a solid color. But they're not showing as a solid color because over here in the appearance panel, they've had their opacities set to 10 percent and screen blend mode has been applied. Here when we create individual shapes and apply a 10 percent opacity and screen blend mode, where the shapes overlap with thing a cumulative effect, it's darker where they overlap. If we had three of them overlapping, then the overlap for all three of them would be darker still. Here is a different scenario. In this case I have a group of shapes. They're two shapes again with this solid orange fill. But the fill for each of these is just a fill. There's no opacity or blend mode change. All of that takes place at the group level, so here at the group level, I've applied a 10 percent opacity and screen blend mode. The result is very different to this one where there's an overlap here. It's not being reflected by any additive effect because what happens is that when you apply a blend mode or opacity setting to a group, it's as if all the elements in the group were one object and they just having that single effect applied to them and there is no cumulative effect. Down here, I have another version of this. It's the exact same setting. You might think that we could perhaps join these shapes together. Let's select over them and let's go to the Pathfinder palette and click unite. That unites them into a single shape and in this case they look exactly the same as this object here. What we could do in solving the problem in our document is apply the effect, the screen blend mode and the opacity setting to every shape in the group rather than the group itself and then just unite everything. Let's go and see how that would work. We'll go to all of the objects in this group. I'm just going to break them out of the group, but first noting what the settings are. We do want to note that it's 10 percent opacity and screen blend mode. With our group selected we'll choose object ungroup. That still leaves all of these paths selected and that's exactly what we want to be the case. Now we'll set them to screen blend mode and 10 percent opacity. Now we're going to get some sort of a cumulative effect here. Still with a shapes selected, I'll go to the pathfinder palette and click unite. Now when I click away, we should have pretty much the original effect but we've got it set up in a way that we could create a repeating pattern from those elements. So we've taken care of that group. We have a look at the elements in the group. You'll see that they're filled with the color that they were originally but they have opacity and screen blend modes applied to them. Let's just close down that group. Let's have a look and say if there's anything going on in the middle group here. We have fills applied to them. Let's have a look in the appearance panel. The fill looks solid, let's go to the group and see if there's anything. Well, there is. There's a 24 percent opacity setting and a multiply blend mode. Let's break all of these objects out with object ungroup. So with them selective, we'll go back to the appearance panel and we'll set them to multiply blend mode and 24 percent opacity. Now there will be some intense effect here. Multiply blend mode is going to behave like screen blend modes, so anywhere there are shapes here that are overlapping, you're going to see a more intense effect. To remove that, we'll just go and join everything together. So click here on unite. Anything that is overlapped is going to be formed into a single path and we're not going to get that buildup of the effect. We've taken care of that group of objects as well. Let's check the topmost group of objects and just say what's going on here. The appearances look like they're pretty standard throughout. Let's have a look at the group. Well, the group has got a 100 percent multiply on it. So let's go and do the same thing. We're pretty much back to the original texture except obviously for the background color, we've turned that from a radial gradient into a solid color. But now we've got elements that we can actually do something with. We could go either to the pattern make tool or we could carve these shapes up and move them into opposing corners and build them back into a texture. It's just going to take quite a bit of work. You're going to be well advised to work with each of these groups individually to join them up. It could take quite a while to create a seamless repeating pattern from a texture like this. When you're looking at textures just ask yourself how easy is it going to be to turn that texture from a texture into a seamless repeating patterns. Some of them are going to be dead easy like the one that we saw where it was only just little flex. Very, very easy to do that. Something with a bit more detail in it then might take a little bit longer and something like this is going to be quite a considerable job. But if you want a cracked stone texture and if you want it to be as seamless repeating pattern, then that's how you're going to do it.
10. Pt 9 Make the Large Cracked Texture: If you're curious about how I would go about creating this as a cracked stone texture. Let's go and do that. In places I will speed up the video, but we'll start by just keeping an eye on the layers pallet so we know what's going on. I'm going first to the art books. I want to know how big this art board is and it's 1400 by 980. I'll click away from it. I'm going to click on this path and just say what it measures. It doesn't measure the same thing. All of a sudden, we've got some pretty major problems happening here. I'm going to set this to 1400 by 980. I'm also going to make sure that it's top corner is in the top corner of the art boards. I'm going to position at 00. That's a pretty important starting point to make sure that things are actually in the right place. I'm going to make a duplicate of this because I know now that this is the exact right size, I'll make a duplicate of it. I'll move it to the top of absolutely everything. I can lock this copy down and just turn it off because we know that that one is perfect. We're just not convinced right now as to how everything else looks here. These groups may not be the right size. Let's just go and sample them and just say what's happening here. This group of objects here isn't 00 and it's 1400 by 980. It's stretching the full width of the art board, so that ones are okay. Let's go and select this one and see what it looks like. It's exactly the same and it's dead right too. Let's go to this one and here are some of our problem. What we want to do is move this group up into the top corner at 00 and we want to make sure that it also is sized to 1400 by 980. We're stretching this ever so literal a bit just to make sure that it goes from edge to edge. If it doesn't go from edge to edge, then that's going to give us even bigger errors to have to fix up later on and we don't want to have to do that. Let's turn everything back on, including this top element. Now, I'm also going to use that as a cutting guide, but I don't have to cut anymore because I've double-checked to make sure that everything is inside the art board. Let's go to this shape and let's actually just make it half the size. Half the size of 1400 by 980 is 700 by 490. We'll just make that 490 and that's one of our shapes. We need to make sure that it's bottled up in the top corner, which it is here. I'll alter option drag a duplicate away. We're going to recolor this one just so we can keep an eye on where everything is. This one needs to have its top corner here, at 1400 and 0. You could use the alignment options that we use previously. It doesn't matter how you make sure that they're in the right place. You just need to make sure that they're in the right place. I'll select both these rectangles, Alt or option drag them away. I've got a combined selection here, I'm going to make sure it's bottom corner here is at zero and 980. That should line everything up. Let's go and just recolor these spaces. Now the next thing that we're going to encounter, I'm just going to tell you what's going to happen so we're going to avoid doing it. If we were to use this path here, just take this gray path and if we were to use it as a cutting guide for all of these shapes underneath, for all of these groups underneath, then we would end up with one group with all of these colors in it. That's not really what we want to do. We want to be able to deal with each of these textures separately. We're going to need to make multiple copies and we're going to need to crop everything really, really carefully. What you'll do is you'll make a full set of copies of these groups. Let's go and do that, and we're going to move the full set of copies up so it's placed underneath the cutting path that we're going to use and we're going to do the same thing again. We'll move those up underneath the pathway going to use for cutting it. They're still selective, we're going put them on here, and we're going to do the same thing again. But because we're going to cut all of these individually, we're also going to need three copies of this green path and three copies of the red and three properties of the gray. But for now, let's just turn everything off except what we're going to cut first of all. We're going to cut this space out of these three groups, all individually. Let's go and get another two copies of this path. We'll select a path and a group and will crop them. This is the piece that we just cropped away. I'll lock it down. Going to get this path. I'll make a second copy of it. I'll bring it just above the group that we're going to crop it with. Let's turn everything else off so they're not in our way at all. We've got a path and a group and we'll crop this. We'll lock it down. We'll bring back the last group that we're working with and will bring a spare path down, make it visible, select both of these, and go and do the crop on this. Now we have all of the elements for this top corner. They're all the elements that later on we need to stick back together. But we also know that if it lives in the top left corner right now and needs to end up in the bottom right corner. Let's go and get all of these three sets of objects, and let's call them bottom-right. This is the crack texture. I'm going to call this bottom-right cracked. Then the next one is going to be bottom-right gray texture and then the other one is the bottom-right light texture. Now that they're labeled they're going to be easy to select and put into position later on. We could put them into position right now, should we want to and then we can just turn them off. Let's actually go ahead and do that. I'm going to select all three of these and their position is going to be bottom-right. Let's go to the right and let's go to the bottom. It doesn't look like we've got aligned to art board selected here. Let's align them to the art board and right and bottom. They're in position and they're cropped and they're all ready to go, so I lock them down, turn their visibility off. Now I'm going to do the exact same thing for all of the other groups. As I said earlier sometimes you will find that Illustrator will go one step too far in the crops and you'll end up with nothing at all. If you're sure you're on the right track just undo everything and have Illustrator have another look at it and see if it can come up with a better result. We're at the stage where we've got the elements ready for our pattern. Everything that is around the edge is going to be seamless when it's stuck back together as a repeating pattern. The problems are along these lines, down the middle and across the middle of the design and they're the bits that we have to smooth out to make our pattern we have to join things up. You might start for example, with this overall cracked texture. What I would I would lock everything else down and just leave the cracked textures visible. I'm going to lock the background down, but I'm going to leave it visible just simply because it's a little bit easier perhaps to see the gray over the background. The only things that are selectable are the cracked elements so I'll choose Select All, and I'm going to ungroup them with Object Ungroup. Now every single one of the elements in the cracked groups is broken out and having done that, I'm going to group them back again. That's going to make one group where they were previously four groups. They're probably going to be easier to manage that way. I'm just going to call this cracked. We can go ahead with these cracked elements and do something with them. What you want to be careful of is that you don't change anything around the edges, but you can change things in the middle. Let's zoom into one of the problem areas here. This is a problem area. What I'm thinking is I could borrow a pace from somewhere else in the artwork that I could use as a filler. I'm looking at this one here. I'm going to select it with the Group Selection tool because it's in a group that's going to be the tool to use and I'll go to the Selection Tool so I can do something with it, and then lay the original where it was, but I'll Alt or option Drag a duplicate away. I'm looking to place it between these two shapes here to operate as I join between them. We don't need to be too finicky because it is going to be a little bit difficult to see this in the final production but you want to be a little bit careful. Looking at it from a distance the crack join looks pretty good. Everywhere these two shapes have overlapped we're getting a visible overlap. We're going to want to deal with that. I'll go to the Group Selection tool and select this shape and I'm going to choose Object, Arrange, Bring to Front, and that will bring it to the top of this group. I'm going to do the same with this other pace Object, Arrange, Bring to Front. I've tried joining that previously when they're not in the front and it is a little bit of a nightmare, so that's why I'm bringing them to the front so I can select both paces here and then go to the Pathfinder and click Unite. If you're having problems joining things together, just do that. Again this time we go to this shape here and we'll bring it to the top Object, Arrange, Bring to Front, and that will bring it to the front of everything. Now we can grab the first two objects which are the ones we want to join together, go to the Pathfinder, click Join, and that's going to remove the overlaps. But we do still have some things we want to look at. Where we put this other shape across here to join these two shapes together. You can see we've got some little paces that are doubling up on the darkness because of their positioning. They may or may not affect the final presentation and if you think they are going to affect the pattern, get them out of the way. Going to lock down this big shape at the top so that I can now select this one behind and move it out, and then I'll unlock this. There are some benefits to moving the paces that you're working with up to the very top so that you can do something with them. Now I'm just going to get the Smooth Tool, I can get rid of this bump if I wanted to with the smooth tool that will help even out this area if you're concerned about it. Then you'll go all the way down the same just joining up these paces once you've finished with the crack texture and once it's looking okay, then you'll hide it and then do the same thing with the top-left Grey and the top-right Grey, bottom-left Grey and bottom-right Grey. Expand them out of the groups, group them all together and work on them here. I'm thinking I might pull some paces off this edge and you could probably solve the problems of this one pretty quickly. Just bring a few elements down over this, there's not a lot to do in that particular texture. Let's have a look and see what's left with the lighter color one. I think you might even get away with not doing anything with the lighter texture elements at all, I'm thinking you probably won't even see the lines through this in the final presentation if you clean up the other two groups of objects, this one's going to be pretty seamless anyway. Once everything is done then you'll just unlock everything here, select everything and drag it into the swatches panel. Create your new Art Board, create a shape on the Art Board then fill it with your pattern. Check and see if it looks okay, If it does you're done, If it doesn't you can come back in and fix any element in the original pattern that you think needs fixing and tested again. Just in case you're curious, I did go ahead and I did make this into a seamless repeating pattern. I left the bottom most white grunge layer intact I didn't do anything with that. In the middle layer, I did pull some of these elements out when I first created the pattern. They were a bit heavy, so I just deleted some of the elements out of the middle layer, and with the cracks, I joined them up. The gaps in the cracks here we're in the original patterns, so I fixed up these paces in here. If you wanted to you could probably fix up these as well, but they were part of the original image. They're not actually a problem caused by creating this as a seamless repeating pattern. You probably took me, but how can I just [inaudible] do this? It will take a little bit of work, but it is eminently doable
11. Pt 10 Use a Texture with a Pattern: Before we finish up, let's have a look at one really important scenario where we might want to use our seamless texture. So I'm just going to click "Create new" here, and I'm going to create a new document for a pattern. So that's just going to be 500 pixels by 500 pixels. I'll click "Create". I'm going to put a rectangle here on it that is, 500 pixels by 500 pixels in size. I'm going to fill it with a color to use. So I'm just going to fill it with this blue color. I'm going to remove the stroke. I'm going to align this rectangle to the artboard. Now I want my pattern to be polka dots. So I am going to change my color at this point to a white color. I'm going to drag out a ellipse. I'll hold the shift key as I do so that it is a circle. I'm going to align this to the very center of the document. So I can just use the "Align" options because it's set to align to artboard. Now I also want dots in the corner, so I'm just going to Alt or option drag a dot up to the top corner here. I want to make sure that the center of this dot is right over the top corner of the artboards. So I'm going to click here on the middle reference point and set the x and y values to 0 and 0 I'll Alt option drag another copy away. Now I could just move this, it's just that by the time I do all those moves, I might just as well have drag them myself. So let's select both of these and Alt or option drag them down the bottom here. Let's go to the "Transform" panel and the y value for each of these should be 500 and the middle point of the two selected shape should be at 250. So let's just do that and everything should be nicely lined up. So this would make a regular pattern pace. Of course, what we would need is a bounding box, the size of the artboard at the very back. So let's go and do that right now. So do a rectangle, 500 by 500. It has no fill and no stroke. So it's just a regular bounding box. It's centered immediately over the top of the artboard and it needs to be at the bottom of everything. "Object" "Arrange", "Send to Back". Now if I select everything at this point and drag it into the "Swatches" panel, what I have is a seamless repeating pattern. So let's just prove that that is the case. So drag out a really big rectangle and fill it with our pattern. Now if you're working in anything other than Illustrator CC 2018, that will probably work just fine. Illustrator CC 2018 has a problem that occurs sometimes with a no fill, no stroke rectangles. So I'm just going to target mine and fix it up. To do that, I'll open the "Appearance" panel and just set it to reduce to basic appearance. Now it's a proper no film, no stroke rectangle. This is a known issue with Illustrator CC 2018 and some of you, I know, already are experiencing that problem. So if you get patterns that look like mine just did, go and fix your bounding box and then Alt or option drag it over the top then pattern again over the top of the existing pattern and now when you come back, you'll find that your pattern is working just perfectly. So there is 500 by 500 pixel repeating pattern. But if we want to add a texture to this pattern, let's see how we do it. Because our pattern element is 500 pixels by 500 pixels, if we want to add texture to also be a seamless repeat, we're going to have to use a texture that's 500 by 500. Otherwise, it's not going to work. It would work if it was 250 by 250 because we can put four of them in here. It would work if it was some size that we could evenly arrange whole pieces of the texture in here to sort of create faux pattern, which we could then create the whole element as a repeating pattern. But by coincidence, one of the patterns we already created here today was 500 by 500. So let's go and get it. I'm just going to reopen that file and it's up here. Let's go to the original paste. This is the paste that we made the pattern from, and then we fill the rectangle with the pattern. So this is an actual pattern's swatch. This is going to repeat perfectly. I want this version of it, not that version of it. So I'm going to select all these elements because this is 500 by 500 pixels in size and we know it's a repeating pattern because we made it to be one. So I'll choose "Edit", "Copy". Let's go to our pattern that we're working with. Let's select this artboard and let's choose "Edit", "Paste". Now I want to line this up so it's perfectly positioned. So let's go to its top left corner. We know it's 500 by 500. So we know it's top corner has to be at 0,0 and now it's positioned exactly over the elements that go to make up our pattern and it too will seamlessly repeat. Now we may not want it to be at the top of everything, so I'm going to pick it up and drag it down and place it just over the solid background. I'm going to set it to multiply blend mode, and I'm going to change the color. So let's go and target the fill, and let's go and apply a gray color to it so it's lighter than it was originally. And let's go to this group and just use the "Multiply" blend mode on it. So that will blend in a little bit better with the colors underneath. You could even adjust the "Opacity" if you wanted to. Let's just make sure we still got our "Group" selected. Let's just reduce the opacity. So we've got a subtle texture effect happening here. But because we're using a element that is a seamless repeat, and because we're not using a pattern, because you can't have a patent in a pattern, this altogether now should create a seamless repeating patterns. I'm going to select everything. Open up the "Swatches" panel and drag this lot in. We'll select our rectangle and let's fill it with our new textured pattern. So we now have a seamless repeating pattern that incorporates a texture. Now this textured got a pretty big slab of content in the middle of it. We may want to remove some of that to make it look a little bit less intense, but it is a seamless repeating texture, so you're not going to see lines through it. So I hope that's helped you understand not only how you can make seamless repeating patterns of textures in Illustrator, but also the things that you need to think about if you want to actually use those seamless elements that you've created inside a pattern itself and you can't have patterns in patterns. So you're going to have to build it from scratch. I have some other videos that I'll link in the description below that will show you how to get these sort of faux pattern in pattern effects if you're interested in creating them.
12. Project and Wrapup: Your project for this class will be to make one or more of these textures into a repeating pattern or go and find a texture that you actually like from [inaudible].com. Download it, just make sure that it's a vector texture. Open it in Illustrator and then go and use these techniques to make it into a seamless repeating pattern that you can use in your own projects. Post an image of your completed texture as your class project. I hope that you've enjoyed this class. I hope that you've learned things about Illustrator of which you were previously unaware. Now, as you were watching the class, you would have seen a prompt to ask if you would recommend this class to others. Please, if you enjoyed the class and learned things from it, would you do two things for me? Firstly, answer yes, that you would recommend this class to others and secondly, write even in just a few words, why you're enjoying the class. These recommendations help other students to say that this is a class that they too might enjoy and learn from. If you'd like to leave me a comment or a question, please do so. I read and respond to all of your comments and questions and I look at and respond to all of your class projects. If you see the follow link on the screen be sure to click it to keep up-to-date with my new classes as they're released. My name is Helen Bradley. Thank you so much for joining me for this episode of graphic design for Lunch, and I look forward to seeing you in an upcoming episode soon.
 Helen Bradley, Graphic Design for Lunch™