Transcripts
1. Introduction: When I first learned how to make patterns, I couldn't stop. I made so many that it was
like unlocking a superpower. Taking some random doodles that seemed like
nothing on their own, but when arranged into
a repeating pattern, suddenly, it was like, What? What? Wow. What, what's the noise that I'm
trying to make here? It was like, Whoa. Look at this. It's infinite. It's forever. It's infinity. It's Hey. I'm Chris Biasi.
I'm an illustrator with a background
in graphic design. I've had the opportunity
to work with a ton of big brands and great clients, including Nike,
Google, Nickelodeon, Cartoon Network,
and so many others. One of my favorite
things to do create seamless repeating
patterns that you can use in anything from
products to wallpapers. There's just something so
satisfying about taking some random drawings and turning them into something
that can go on forever. Am I communicating the
forever part of this? I don't know what
it is about that, but it just it's
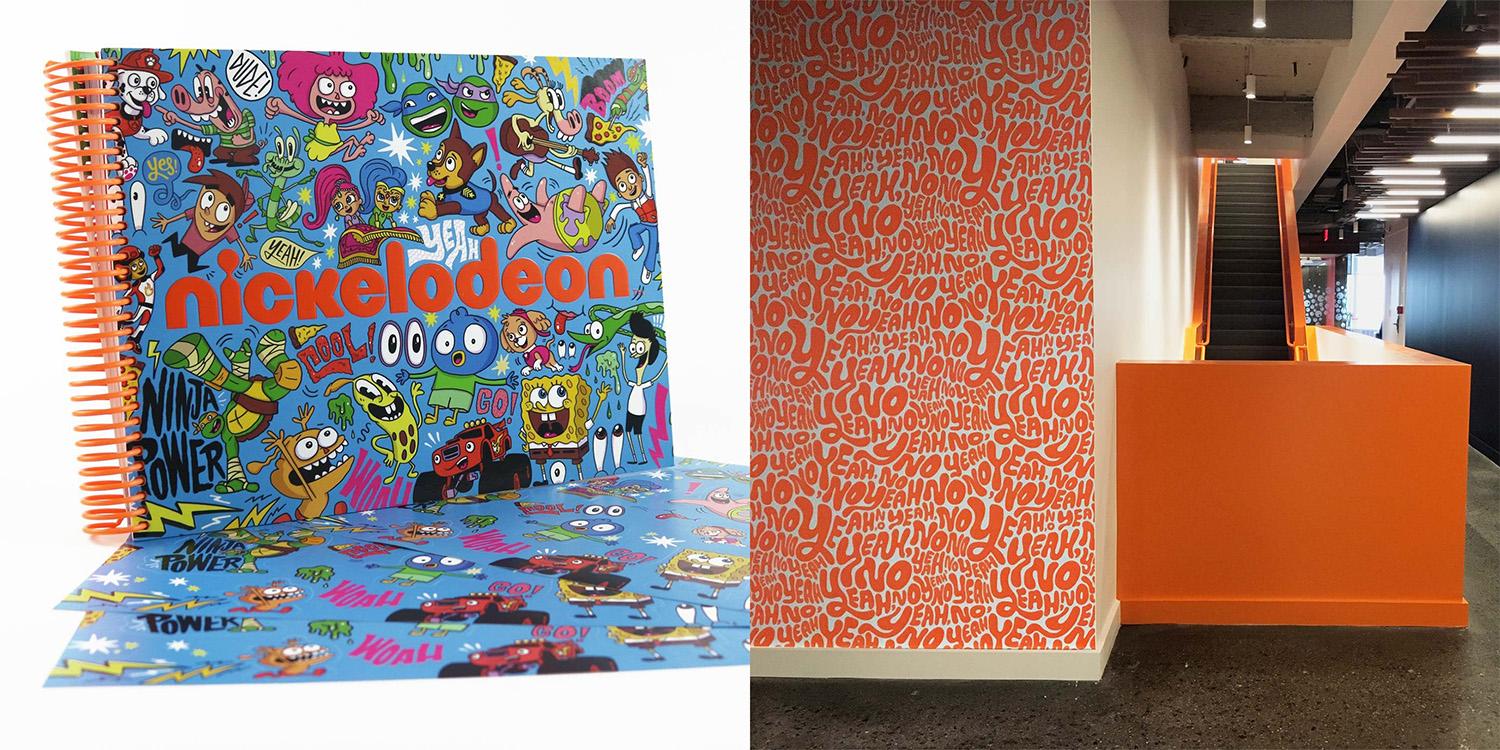
nice. Feels good. Over at Nickelodeon
headquarters, my patterns are on wallpaper, they're on furniture,
and that's wild to me. Little Baby Chris would
never have imagined that I'd be making custom
patterns for packaging, desk mats, and even the
envelopes I ship things in. In this class, I'm going
to show you one of my workflows for
creating patterns that speeds up the process
and makes it easy for anyone. It's perfect for beginners, so no need to have
any existing pattern making background. If you can doodle, you
can make a pattern. Even if you can't doodle, you probably still
make a pattern. I'll walk you through
the entire process from brainstorming ideas, sketching out those ideas, and then turning them into
a repeatable pattern. Perfectly repeatable design. We're going to cover
everything you need to know, including how to
choose your elements, how to arrange them in
a way that works and makes the repeatingne
seamless and, you know, not have
any weird gaps. I'll talk about how you can add color to really make it pop. Plus, I'll show you
how you can export your pattern so that you can
use it on actual products. Could be custom packaging, could be wallpaper for your phone or for your
wall. Everything about? Even fabric. You can get some fabric
made with your pattern. For this class, I'll
be working on my iPad using Adobe Fresco
and Adobe Capture. Both of these are free apps, so you don't have to get any new apps. You don't
have to pay for anything. By the end of this
class, you'll have your own custom
seamless pattern. And if you're anything
like me, you're not gonna be able to stop
once you've done one. Whether you're looking to expand your creative skill
set or just add another tool to your
creative tool belt, this class will get you there. Let's get started. I can't wait to see what patterns
you come up with.
2. The Project: For your class project, you'll create your very own
seamless repeating pattern. Whether it's for a
seasonal theme like Halloween or something
entirely random. This project will
help you practice the skills from this class and walk away with
a finished design you can apply to products, packaging, or even just a cool
wallpaper for your phone. First, we'll start by
brainstorming concepts and ideas for our pattern. Different kinds of nuts, toys, Popsicles, penguins, parrots, different kinds of
birds, duckbill, platypus, and then
we'll start sketching elements that maybe we could
include in that pattern. We'll think about the shapes and sizes and how they
may fit together. Next, we'll narrow down
our sketches to include a variety of different
shapes and proportions, simple things and more
complicated things. We'll then create
tightened up versions of our drawings in Adobe
Fresco, add in some color. After that, we'll be able to
seamlessly bring them into Adobe Capture and create
our repeating pattern tile. Winter satisfied
with how it looks. We'll then export and
share our patterns. As a bonus, I'll show
you how to easily use these patterns in
Photoshop and other apps. We'll make some product
mock ups and more. By the end of this
class, you'll have a custom pattern that
you can apply to real world projects and the skills to design
1 million more. As always, don't forget to share your work in
the project gallery. Definitely feel free
to show mock ups of your own that show how
your pattern could work on different objects or
products or whatever you want. The possibilities are endless. Sharing your work will
inspire your classmates, prospective students,
and myself, as well. I always love to see
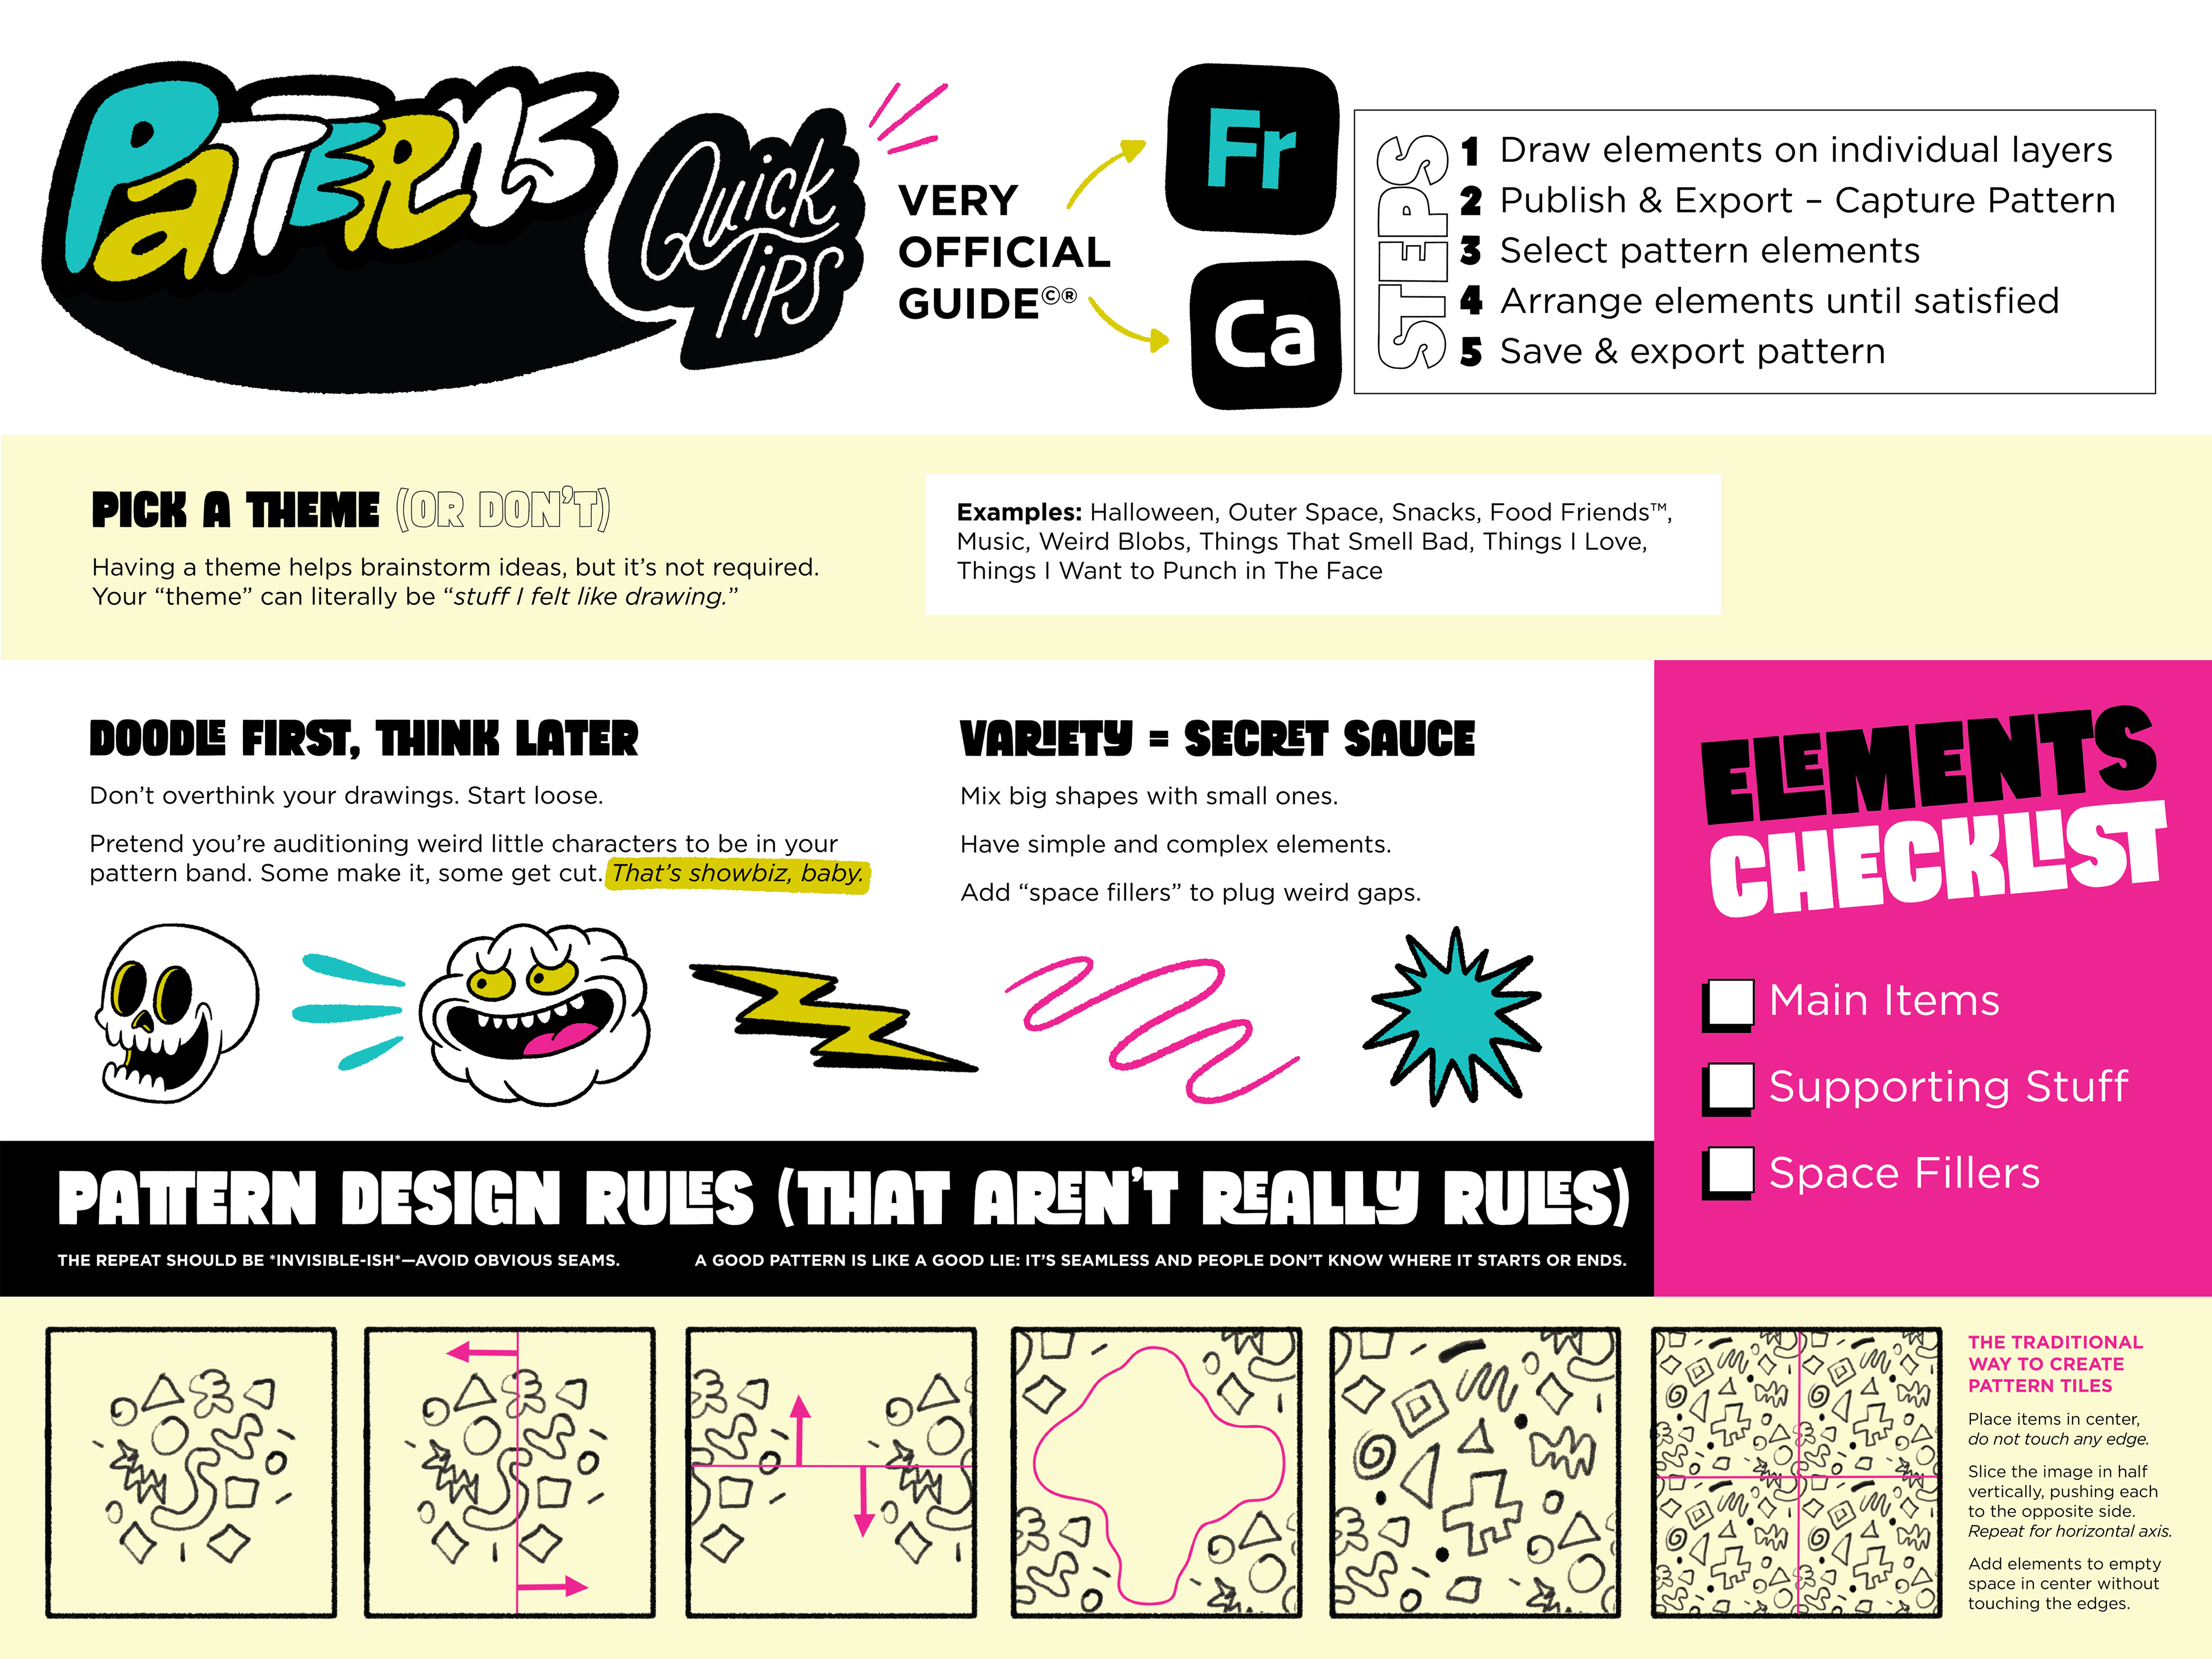
what you all do. In addition, a pattern
quick tips guide will be provided to help you get started with positioning your elements. Are you excited? Because I'm
excited. Let's get into it.
3. Choosing a Theme: Although you don't
have to, I suggest coming up with a theme
for your pattern. This will help in the ideation process
when you're coming up with a list of things that you
could potentially include. Well, I mean, I guess
your theme could just be things you want to
include in your pattern. I mean, really, they don't
even have to be things. They could be shapes or words or literally anything you want. This is your pattern. I'm
not telling you how to make. Well, I'm gonna show you
how to make a pattern, but if you're someone who struggles with
ideas and you just want me to give you some
ideas, here's some. What about holiday theme?
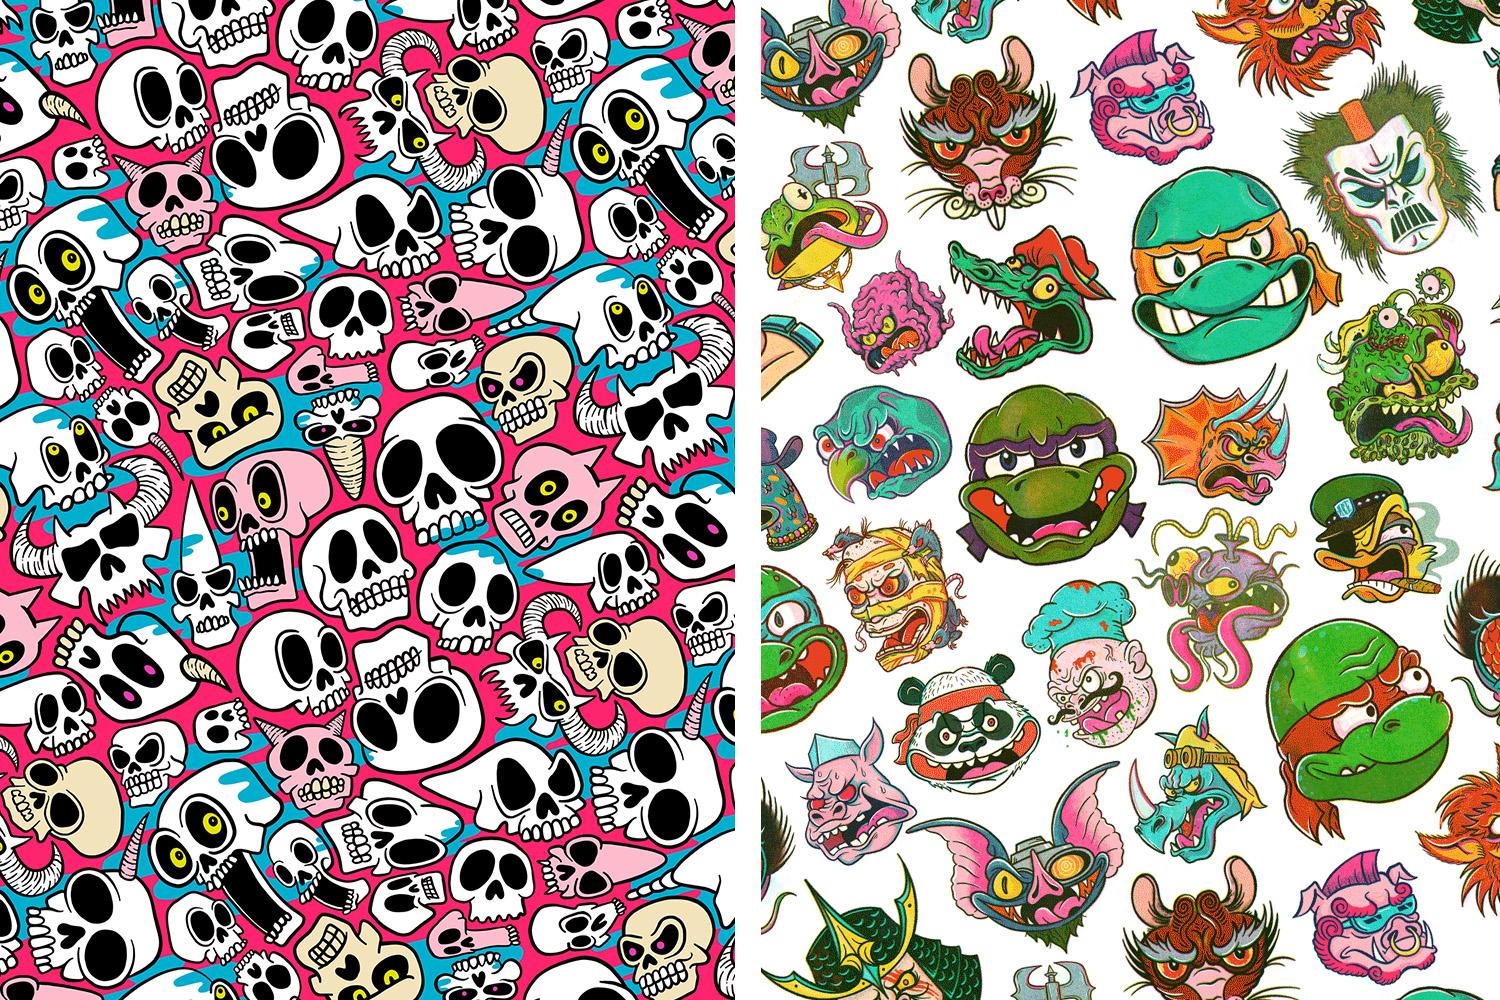
You like a holiday? You like a Christmas theme? What about a spooky Halloween
pattern with lots of scary monsters and candy
and pumpkins, skulls? What about outer space? Rockets,
aliens, planets, stars? The milky way or food. Different kinds of snacks. I'm hungry. Music?
Instruments, animals. Different kinds of nuts, toys. Popsicles. Penguins, parrots, different kinds of birds,
duckbill platypus. Superheroes. Super villains.
Bananas and pajamas. Eyeballs. Fruit with
attitude. Pair don't care. Technology, keyboards,
mouse, mice, microphones. Cars
bikes, bananas. Once you've settled on
something, make a list of things that you associate
with that theme. Don't just think of
things that you can draw. You don't want to limit
yourself in this stage. You're not writing a list of things you're going to
include in your pattern. You're just getting
your brain moving, getting the brain juices
flowing so that you can Wow. Brain juice is disgusting.
What is brain juice? The brains floating in.
But seriously, though, letting yourself think
more broadly can lead you to unexpected places that you wouldn't have thought
if you were just, like, thinking of things that you could draw
or wanted to draw. Because maybe this
thing that you think of will trigger something else
that you might want to draw. Also, you actually don't even have you could do
this with collage. You could cut stuff out and use that. Doesn't
have to be drawing. And also, we're not going to
use everything on this list, so calm down. Don't
worry about it. We're just just putting
down as much as you can. Don't make a short list because you're worried you're
gonna have to draw it all. I'm gonna pick. I'm
gonna pick what we want. We make up their own rules here. You make up your rules,
I make up my rules, and we come together
to make patterns. Alright, I'm gonna go
figure out my theme. Also get a snack. You go
figure out your theme, do some brainstorming,
and we will meet back here to start sketching.
4. Making a Good Pattern: The key to pattern design
is making something that will repeat when tiled. Pretty obvious, but there's
more to it than that. A good pattern will make
it less clear where that transition point from one tile to another
tile happens. I'll just look more
organic and natural, not like clear tiles,
like a checkerboard. I've always been drawn to
illustrative patterns and just things where illustrations are jam packed together
like a puzzle, filling in all the
little spaces. Just something
satisfying about that. Even before I learned
how to create patterns, I would just fill
compositions with lots of different little
things. I enjoy doing it. It was fun, but it also took the pressure off of
drawing one good thing. I would just start with
something small and then just keep filling the page
until it was all done. I always just felt
so accomplished when the whole space was filled with lots
of little drawings. Learning how to make
repeating patterns just took this to a
whole other level. I mean, the possibilities
for filling a space became
literally infinite. There was no composition safe. I could fill it with
pattern forever. In the past, when I was
making a repeating pattern, I would illustrate
everything in the center of my composition without touching
any of the outside edges, and then I would divide
it into four quadrants. And you would push the
middles out to each side, and then you would have
to fill in the space in the middle that
was left over from the stuff at the edges, and then you would have
your repeating tile. The process we're going to
use in this class completely eliminates that step in
that process altogether. However, because of that, if you're wanting to create
that same sort of tight pattern where everything fits together like a puzzle. We're going to have
to set ourselves up for success by creating
some things that will help fill in
those leftover voids and spaces between our elements. I suggest aiming to have a
selection of main elements, that'll be your bigger,
more focal point elements, and then an assortment of small supportive
elements that you could use in small spaces and maybe not use at all if
there's not a need for them. But having those options will make it a lot easier to
get things nice and tight. If, however you
want to keep things more loose and airy
in your pattern, you don't really have to
worry about this. Oh.
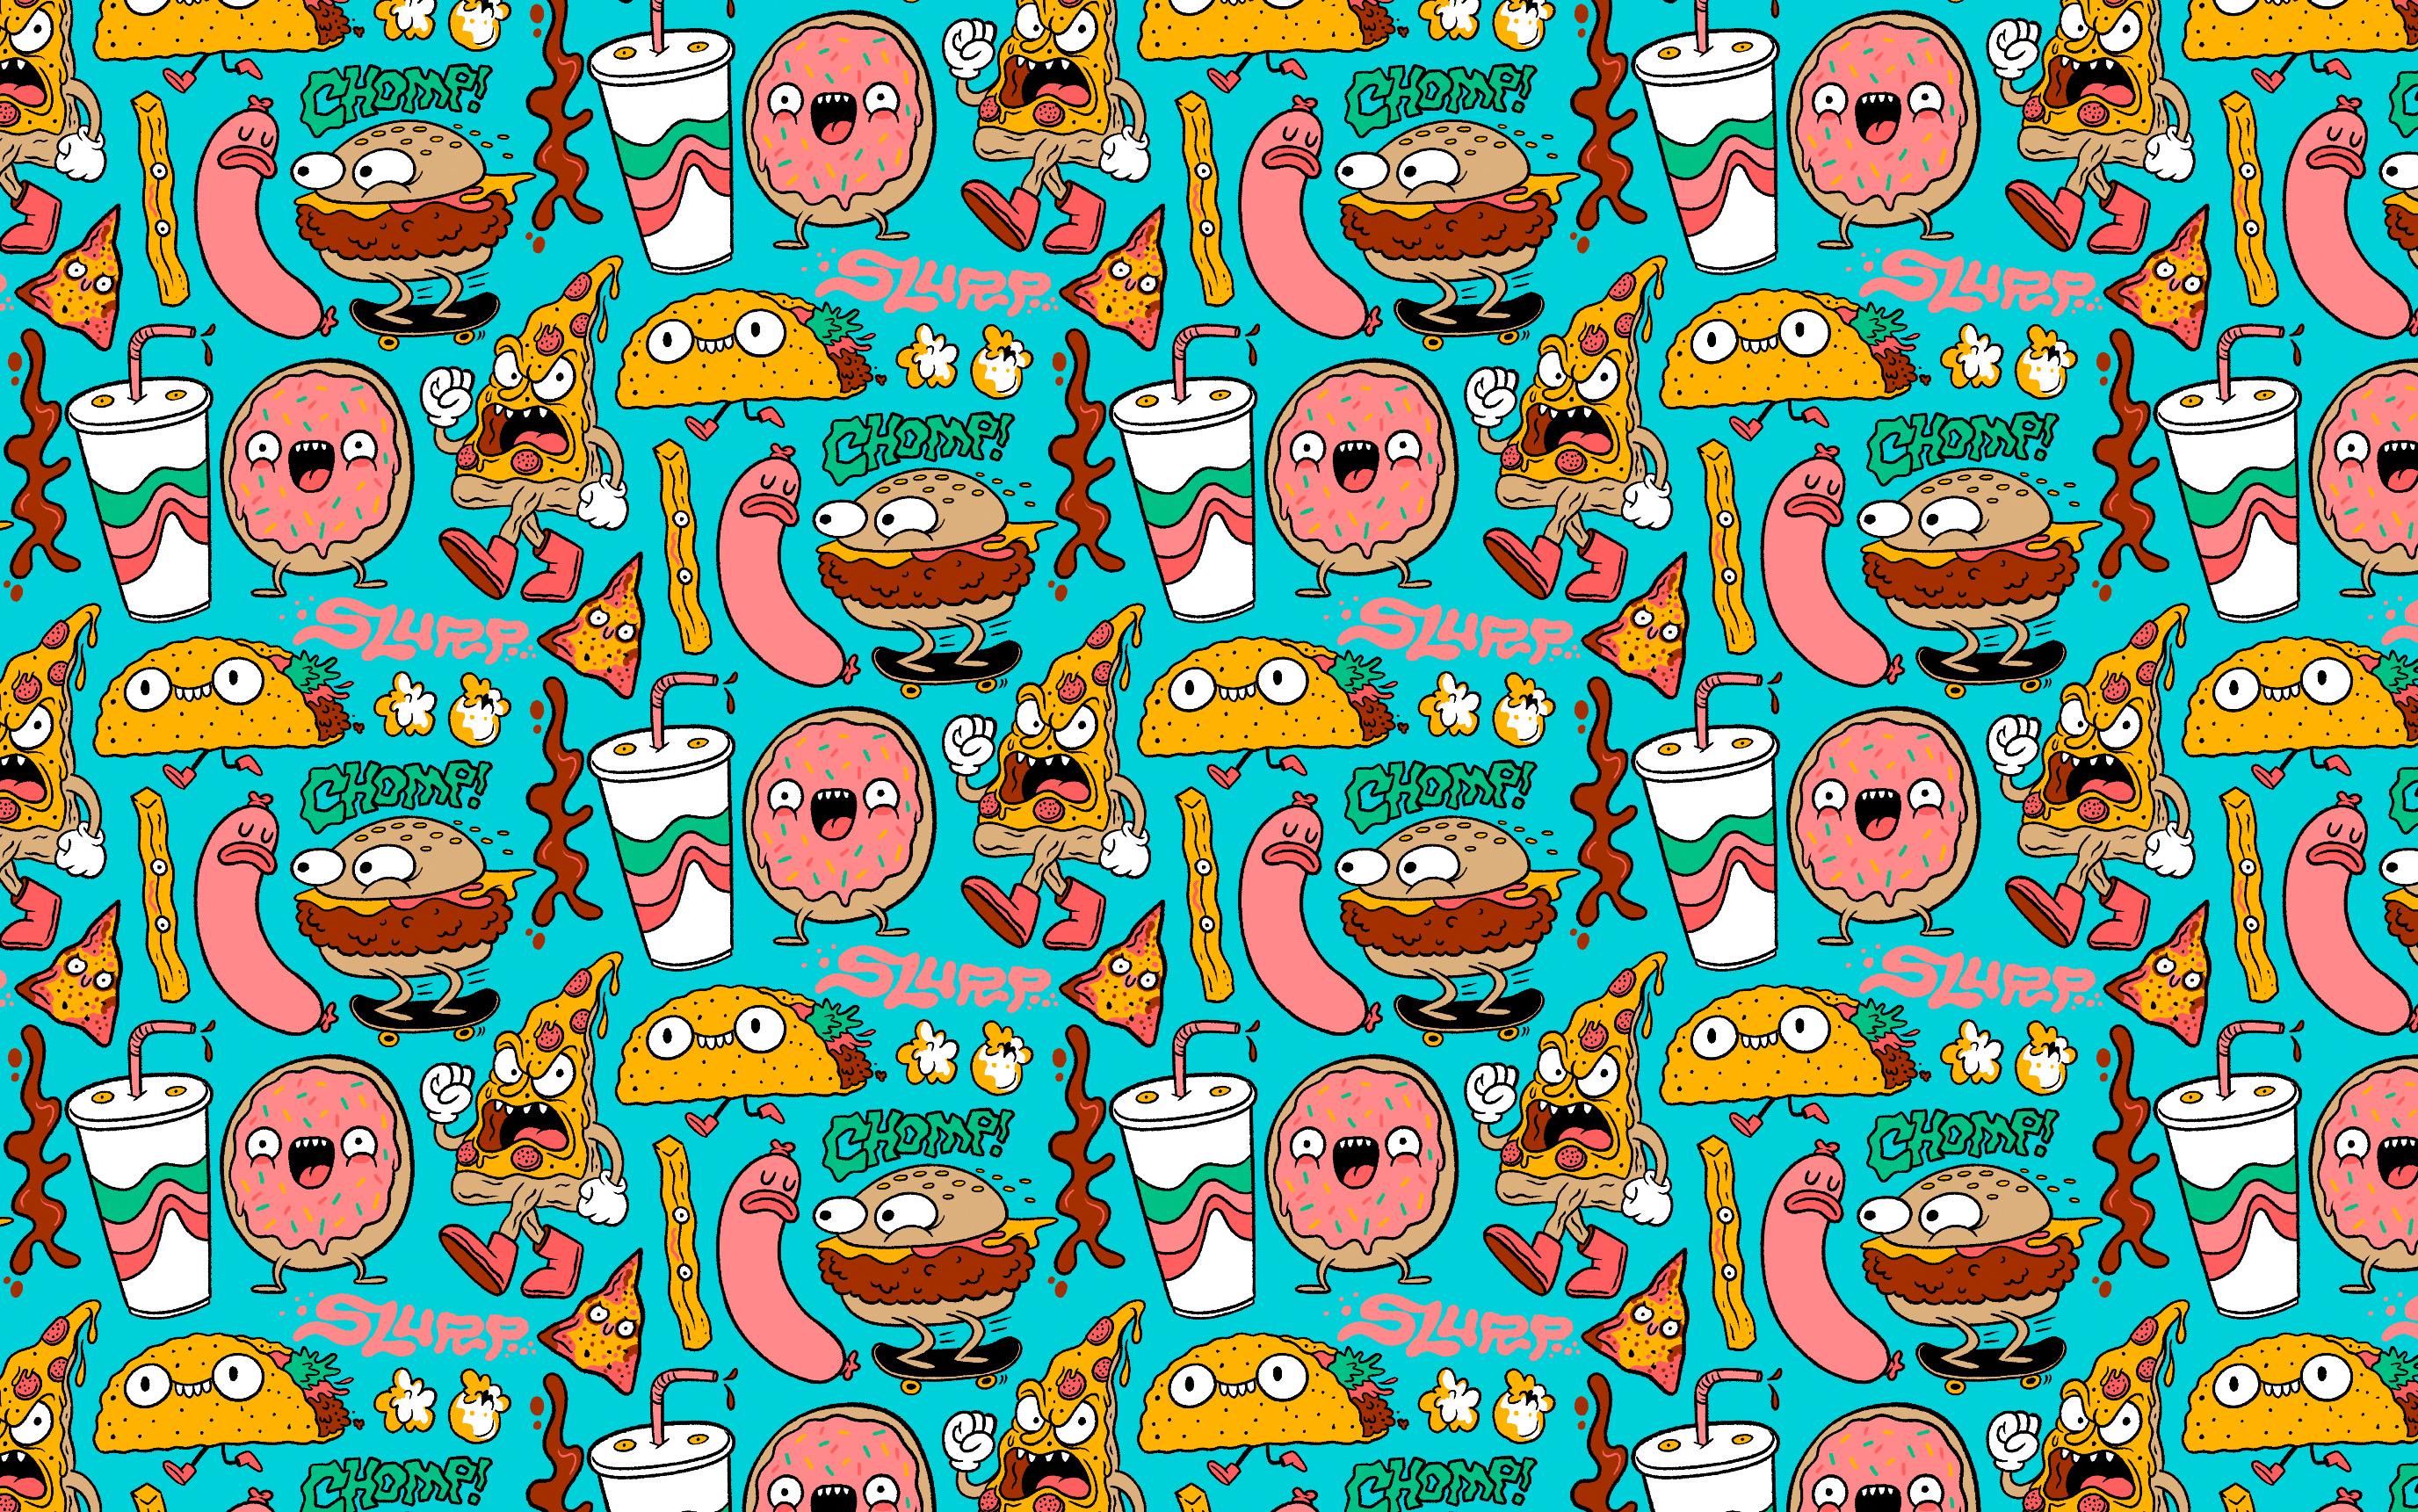
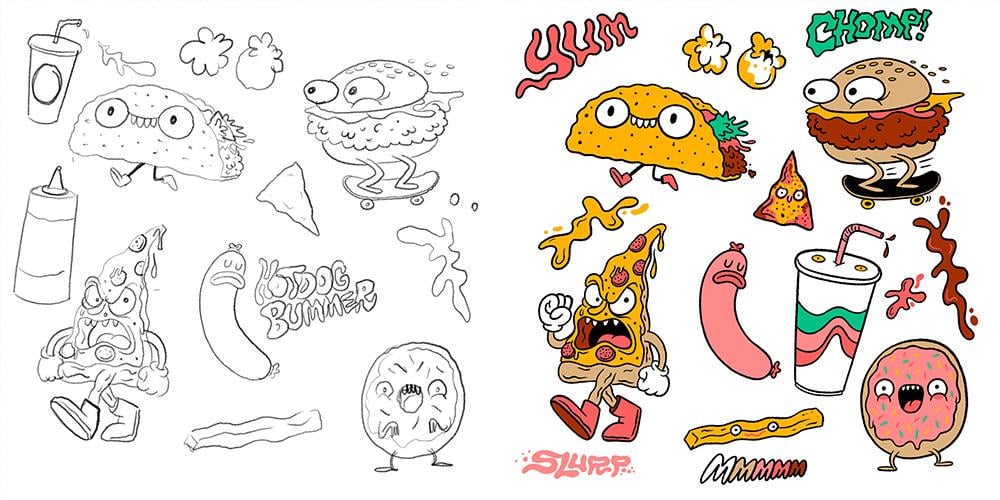
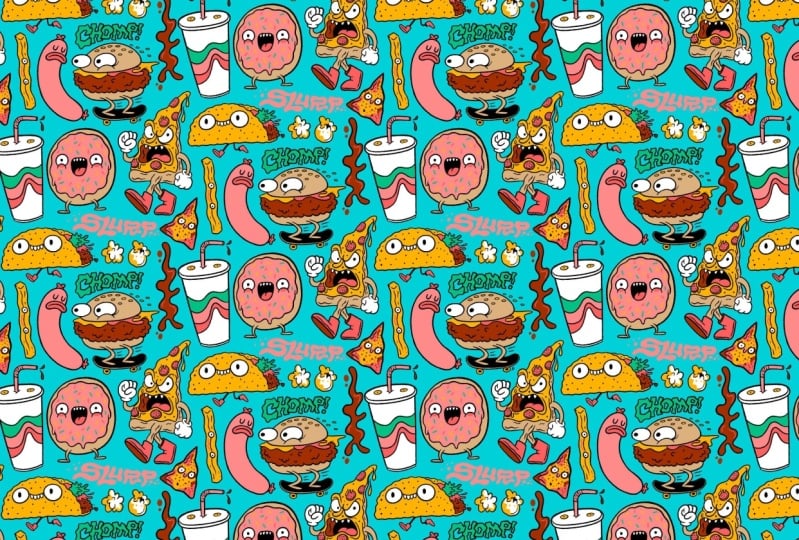
5. Sketching Pattern Elements: I guess I was hungry
because I ended up choosing the theme food. Well, sort of. Food food
friends, food with faces. And I don't know,
maybe some more stuff. Alright, so I got my list here. I'll read you some of
the items on here. We've got a pizza guy. This is basically just a guy, and he's also a pizza. A doughnut friend.
It's a doughnut. He's your friend. Then
I wrote down Hot Dog, and then I was thinking
hot girl summer and, like, hot hot dog summer. And then I was like,
Wait, hot dog bummer. Like sat hot dog. And then
I wrote down Yum, chomp. See? Like, this is
not serious business. You're just coming
up with things. I wrote down yum and chomp, 'cause I thought maybe
some hand lettered words would be nice in
there. Chips, Dido. Drink, like a fountain drink. And then I was
thinking, Oh, what about some, like,
drips or splats? Those will be helpful
in some tricky areas. What about the word slurp? You ever thought about
that? Fries would be good. They can bend in
different shapes. Fit different areas?
Popcorn. Popcorn's little. And then, taco friends. At this stage, I'd just like
to loosely doodle things from my list of ideas and not worry too much
about the pattern yet. I'm basically just
playing around and maybe auditioning some characters to star in my upcoming pattern. Working this way allows me to generate a lot of ingredients. See what I did there that I can choose to include in
the pattern or not. In addition to bigger, more clear items like
this pizza guy here. I'm adding in little
things that will work in weird little spaces
when we assemble the pattern like this
sauceplat or this french fry, things that are maybe skinnier or more flexible in
how they can be drawn that might work in some sort of weird space between two
things where something bigger or more
complicated or more needing more particular
shape won't work as well. For example, a sauce flat can be any shape you want it to
be. And that's a pro tip. As you work on your sketches,
make sure you're covering a broad range of things
of different shapes and sizes and proportions because it's gonna make your life easier when we start to assemble
this later on down the road. If you still haven't made your
idea list yet, get going, go do that and then
sketch out some ideas, and we will meet back
in the next lesson. Don't cheat. Go do your
stuff. I'll be waiting. I'll wait here. Take your time, but go do it. Go
do it right now.
6. Finalizing Pattern Elements: You can do your final
drawings, however you want to. The only thing that
you'll need to remember to do is to make each one of your elements have their own layer
within Adobe Fresco. For me, tightening
up my drawings isn't much different than
the sketching process. I'm just refining what's
there in the sketch, tightening it up where needed, and just making my lines
a little bit better, a little bit more confident,
a little more precise. And then every
time I draw one of these, I just start a new layer. So they're all on their
own layers, ready to go. Alright, so I got my
tightened up drawings here. You may notice that these
are all on one layer. And you said, Hey, you said the only thing
that's important is making sure they're on
individual layers. And listen. Yes, that is true. However, because of my
style and the way that I work and the fact that
I'm just going to be using the paint bucket
to color these, it's gonna be easier
to do it like this and then break them up
after the fact. You do what works for
you. The end result is that each of your elements
is on its own layer. Now I know this class
isn't about patterns. No, this class is
about patterns. I know this class isn't
about color, per se, but because we're working with patterns and thinking
of something as, like, a cohesive repeating things, I feel like color plays
a big part into this. I like to keep
things a little bit minimal because it's
going to be repeating, like crazy anyway,
but, you know, maybe you could lean into the crazy and do a whole
bunch of colors. I have a whole bunch of
different elements here, and instead of
coloring them each on their own as individual things with their own
individual colors, I want a consistent pattern
for each of these things. So I want to color them all
with that same palette, and it's just going
to make it feel more like a finished
refined thing. I picked a color palette here. It's Honestly, it's more
colors than I was hoping. I wanted to stick
to four to five, but you know, we didn't
we didn't get there. Let me tell you how I pick this. I start with the
things that I know are non negotiable because
you just need them. We have a taco and
we have pizza as, like, main stars of the show. We can't do that without yellow, so we got to start with yellow. Next on the list,
we have a hot dog. Hot dog is not going
to be a hot dog unless there's some sort
of reddish pink involved. So that took me to
that pink color. And then our taco
has lettuce on it. Lettuce has to be green. So
I put the green in there. I mean, I guess it
could have been I mean, tacos don't have faces, so I could have change. The good thing about the pink is it works for the doughnut. We can have a pink strawberry frost thing
on that doughnut. And then we've got a variety of other colors that we could
use as sprinkles on there. The yellow we also need
for the French fry. Thought I was gonna be all good, but I remember we got a
burger on a skateboard, and we don't want it
to look like raw meat. So we're going with a
darker version of that, but there's sort
of, like, different values of the same tone. I like to tell myself. So
when I'm coloring my work, because it's solid
shapes like this, I can use the paint
bucket, as I said, but I like to do it on its
own layer so that I have some more flexibility and I
can go in and adjust things. So to do that, I just tap
on my linework layer, and I go to set as reference. And now on the layer below, I can go ahead and
fill in colors there, and it won't mess up
my linework layer. So I can start with
this yellow color, and we just start filling in. And I sort of just kind
of stick with one of the colors and use it everywhere and then move on
to the next color, and then I sort of spread
them out as we go. It's just a process
that works for me. It's not crucial to patterns. You can color any
way you want to. But we got we're we got
stuff happening here. Was this Dido? This french fry. Also, this darker red is
probably crucial for this soda, 'cause it's like Coca Cola or something like that or Pepsi. It's a cola beverage, or maybe it's a doctor
Pepper, if you will. Having this little bit of
a darker pinkish red, too, allows us to have some variation on this little sad
hot dog, right? Alright, I'm gonna color
the rest of this in and check back in with you.
7. Making Your Pattern Tile: At this point, you
should have all of your different
little illustrations colored in and finished on their own separate
layers in Adobe Fresco. With everything ready
to go, we're just going to use Fresco's built in publish and export
options at the top right to send them directly
over into Adobe Capture. So you choose
Publish and Export, and then you'll see
the last option on the left, capture pattern, and this is going to
load Adobe Capture, and you will see all of
your different layers here as separate elements. You're going to go ahead
and select all of them unless you have
things that you don't want to bring in to capture. And then once they're
all selected, you'll hit the done
at the top right. Here, it'll bring it in as like a default setting
and just a square, and you won't see all of your
elements, but that is okay. I recommend changing this over to freeform grid so that we can move things around
and keep things flexible. And then I like to
choose the hexagon for my overall shape. Just find it's the
most flexible. At this point, it's as
simple as selecting individual items
and then sort of scaling them and rotating
them and moving them around. To find the stuff that is
not showing up by default, you're just going to
click over on the left, you tap that little shapes icon that'll give you a menu
with all of your items, then you can just drag
them onto your canvas. Move things around,
you'll start to see how it's affecting
the overall pattern. As you can see here, having
some different varieties of shapes and sizes and proportions really allows you
to fine tune this. And you could noodle
around with this. I should have put
noodles in here, huh? Why didn't we put noodles
on the list? The spaghetti? That would be great for this.
You can put it anywhere. You can play around with this
until you are satisfied. Sometimes this is a
quick process for me. Sometimes I noodle
for a long time, especially if you've
got a lot of elements. Fitting them all in, you know, can be a little bit tricky. I'm gonna mess around
with this some more, get it to a spot
that I'm happy with. You know, I like my
patterns nice and tight. So I'm gonna get this
as tight as possible, and then I'll check
back in with you. Alright, I'm feeling
pretty good about this. I got everything nice and tight. One thing I forgot
to mention was we've got an option
for background color. You can throw a
background color in here. Can be a nice addition
to your pattern. Sometimes I will leave
this off so that I have the flexibility to change my
pattern up after the fact, or I can just throw in
different color backgrounds or, you know, have it transparent. So whenever you're
satisfied, you can just go ahead and click the
save at the top right, and it's gonna save this
pattern to your library. It'll then open it up within your libraries. Look at this. You can just zoom out.
Look it repeats forever. Can you believe
that? It's amazing. From here, you can
export the tile itself, or you can export a nice sampling of the
pattern to use as, like, a wallpaper on your phone or your desktop or whatever. It'll also stay in your libraries so that
you can use it in Photoshop or Illustrator or any of the other Adobe things
straight from your library, which I will show
you in a minute.
8. Using Your Pattern: Alright, now I'm going to
show you some more things you can do with these patterns, especially utilizing
other Adobe apps. For example, if you
have Photoshop or Illustrator or
you're using design. So I'm in Photoshop now. All I'm going to do
is go up to the top to Windows and then
choose libraries. This is where it would be in
any other Adobe app as well. And then you'll see all the
different libraries you have. I've got a lot of
them. You may not. But I'm going to open
up the patterns one. You'll choose wherever you
saved your pattern too. And you'll see a little preview of all your little patterns. So the simplest way
to use them is to just drag it into your artboard, and you'll see it just
applies the pattern there. You may look at that
and be like, Hey, that's a lot bigger
than I want it to be. All you have to do
is double click on the pattern thumbnail
and your layers, and then you'll get a
little menu where you can control the scale
of the pattern. You can control the angle
if you want it to be, like, rotated a little bit. You could do all kinds
of stuff like this, and it will just
repeat infinitely. You can even decide
that you want to change where it is
in your composition. You can just kind of grab
it and move it around, and it'll repopulate the areas where there wasn't
a pattern anymore. I told, I'd show you how this could work with some
mock ups and how you can make some real looking stuff using Photoshop in the
libraries like this. So let's get into it. I got a sample of
different mock up files. I got these off of
creative market, but, you know, you can
find free ones online. You can, you know, make your own doing a little bit more
creative photoshop work. But these templates are pretty cheap and work really well. So if you want to make
some professional looking real looking
product mockups, I don't know, check
out creative market or something like that.
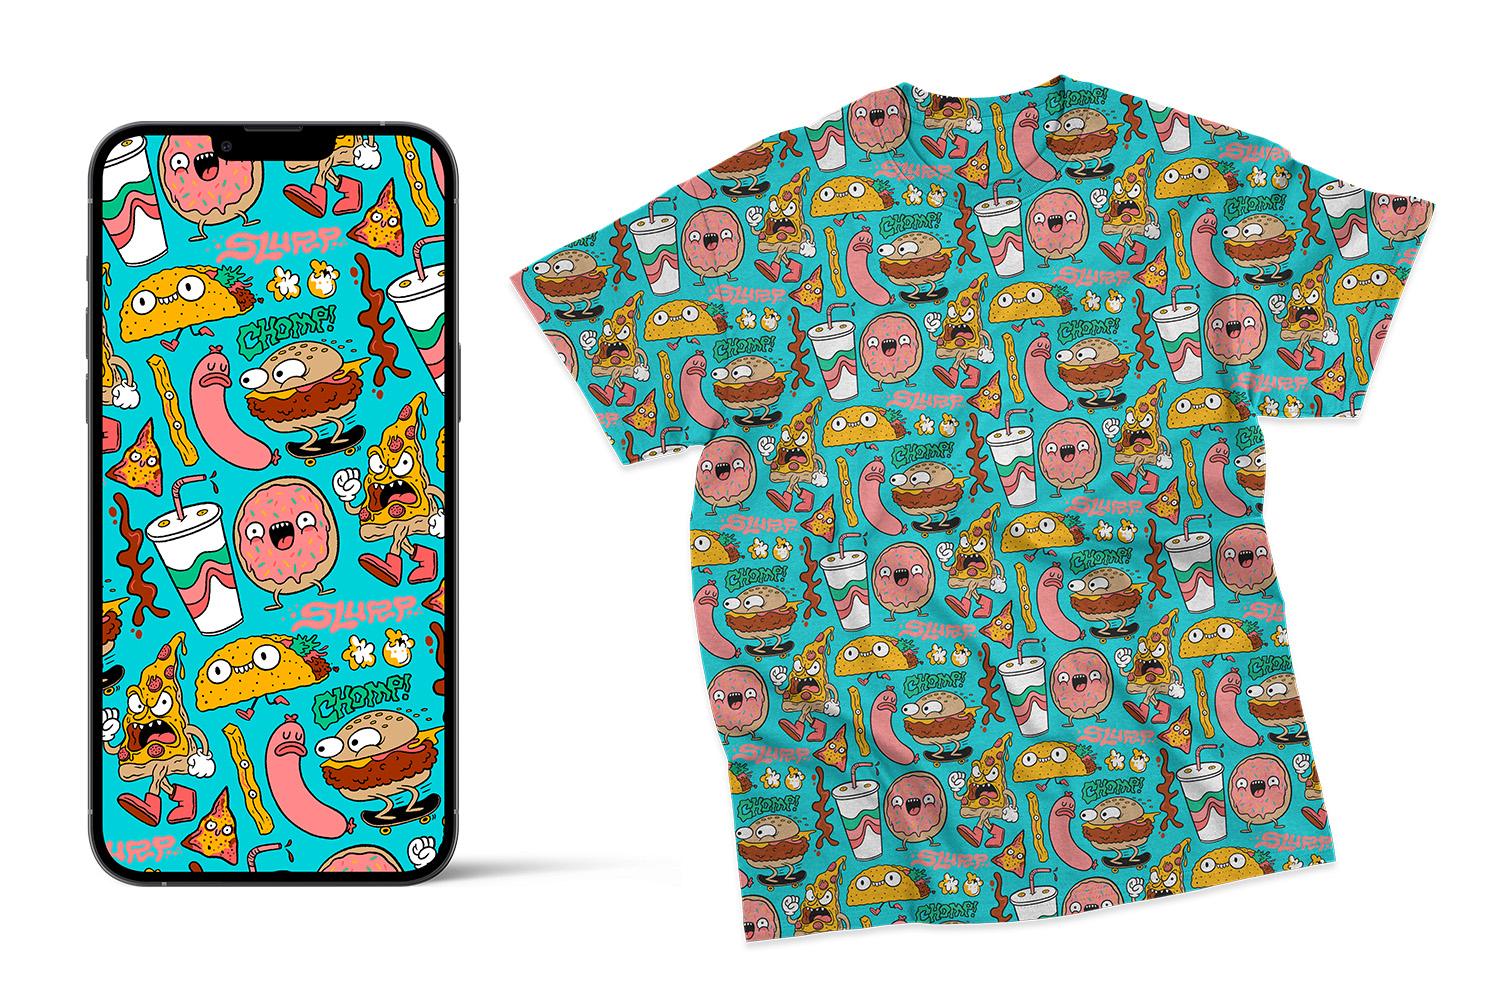
So we got a T shirt here. Let's say we wanted
to see what it would look like if we didn't
all over pattern shirt. With these mockup files, you will often have, like, a smart object where you will update
that to add your design. So here, it says T shirt design, so I'm going to
double click on that, and this just opens up a place where we can put our designs. This is where I'm going
to put my pattern. So I'll turn off the
example they have there, and I'll just drag this food
friends pattern into here, and I will size it the
way I want it to be. So I'll just make this
a wee bit smaller, maybe like that, and
then maybe we'll just, like, throw a
slight angle on it. So you just save
the smart object, and then we come right
back to our shirt file. And would you look
at that? We got a cool repeating pattern, sir. I think it's a pretty
cool shirt. I got to say. Let's do something else. What if you wanted to see what
it look like if it was the cover of a little book or maybe you're making you
want to make a sketchbook. We'll do the same thing
here, update this artwork, we'll delete their design
and put our pattern in it looks cool. I like that. I'd buy that sketchbook. Would
you buy that sketchbook? Let's see what it
would look like a some straight up wallpaper
on the wall. So for this one, I'm
just gonna drag it in to where the wall is
because it's pretty simple. It's flat. I'll
put this in here. Us already looking cool. That looks pretty fun.
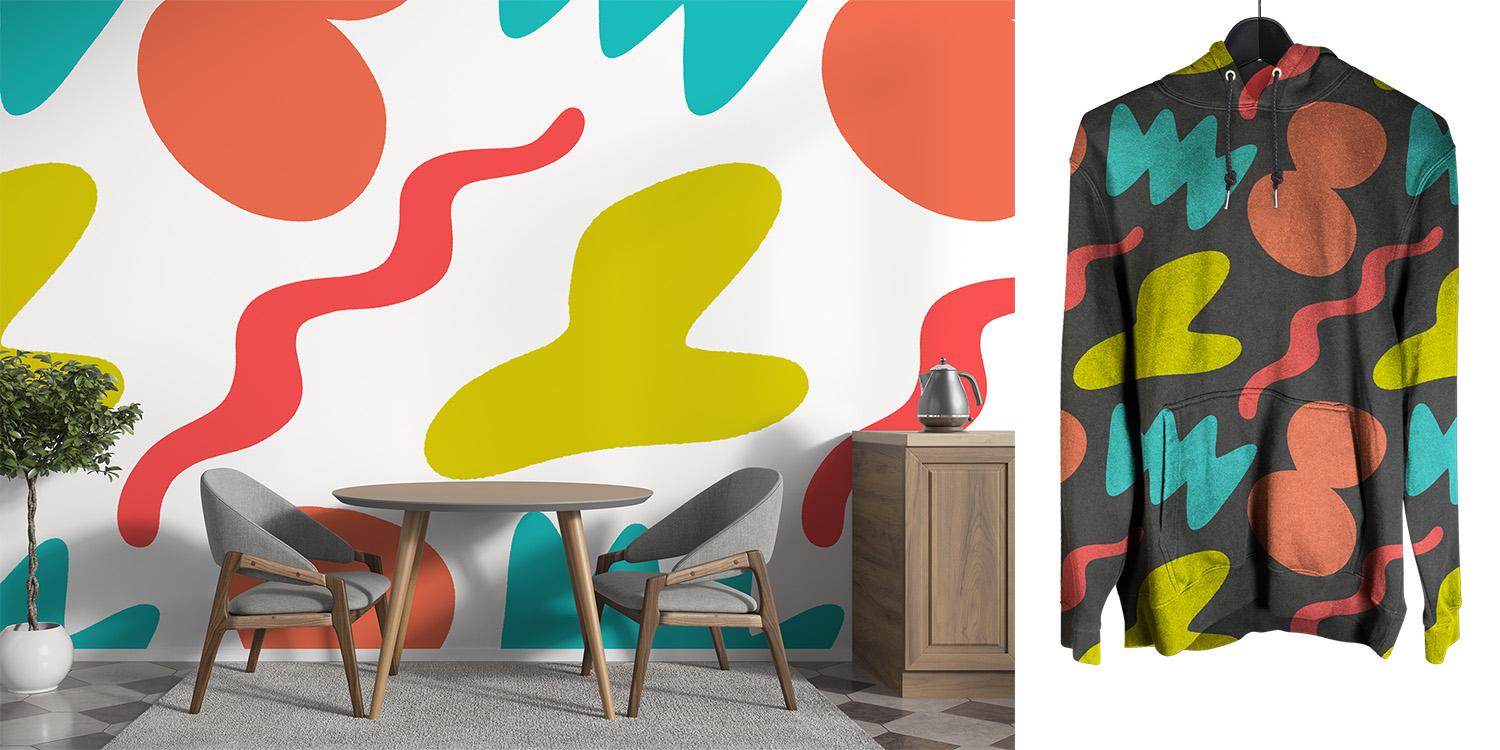
It's a little loud. Maybe we should try that really simple
shape space pattern that I showed as an
example earlier on. I think that might be
a better solution for this clean modern living space. Look at that. I made that as a mindless little demo just scribble in
some random shapes. And I got to say, that looks
pretty rad on this wall. Let's Let's adjust
the wall color and see if we can
make it even cooler. This is what I was mentioning before where
you could decide to not have a background
color to give you more flexibility as you're
using the patterns. So here we could just kind
of move stuff around. That's kind of cool. I like it. I could sit there. What
about this hoodie? Let's put our shapes on this. So with this one, the
smart object thing isn't gonna work because the graphic is in the center of the hoodie, but I'm just going to clip it to the shape of the hoodie,
just where the color is. So I'll just click on
our pattern layer, and I will go to
create clipping mask. And now it's clipped
right there. What we can do is
just scale this down. That looks pretty
neat. I want to wear this hoodie right
now. Are you excited? 'Cause I'm excited. I want to make more patterns right now.
9. Final Thoughts: I hope this class has
helped you unlock the endless possibilities of
creating repeating patterns. Whether you're designing
for fun or looking to apply these skills to
real world projects, there's so much you can do with what you've learned
here in this class. Over the years, patterns have become a big part of my work, and I hope that
they will inspire your creative process as well. Don't forget to
share your custom patterns in the
projects gallery. Seeing what you do will inspire me and your fellow classmates. Plus, it's a great way to get feedback and continue improving. I do my best to get feedback on all the projects submitted
into the gallery. So keep experimenting,
keep creating, and most importantly,
keep having fun. Thanks for joining me,
and I can't wait to see the incredible patterns that you've come up with. Okay, bye.
 Chris Piascik, The illustrator formerly known as designer.