Transcripts
1. Scrollsaw Woodart: Welcome to citizens woodshop. In this woodworking lesson, you will learn how to
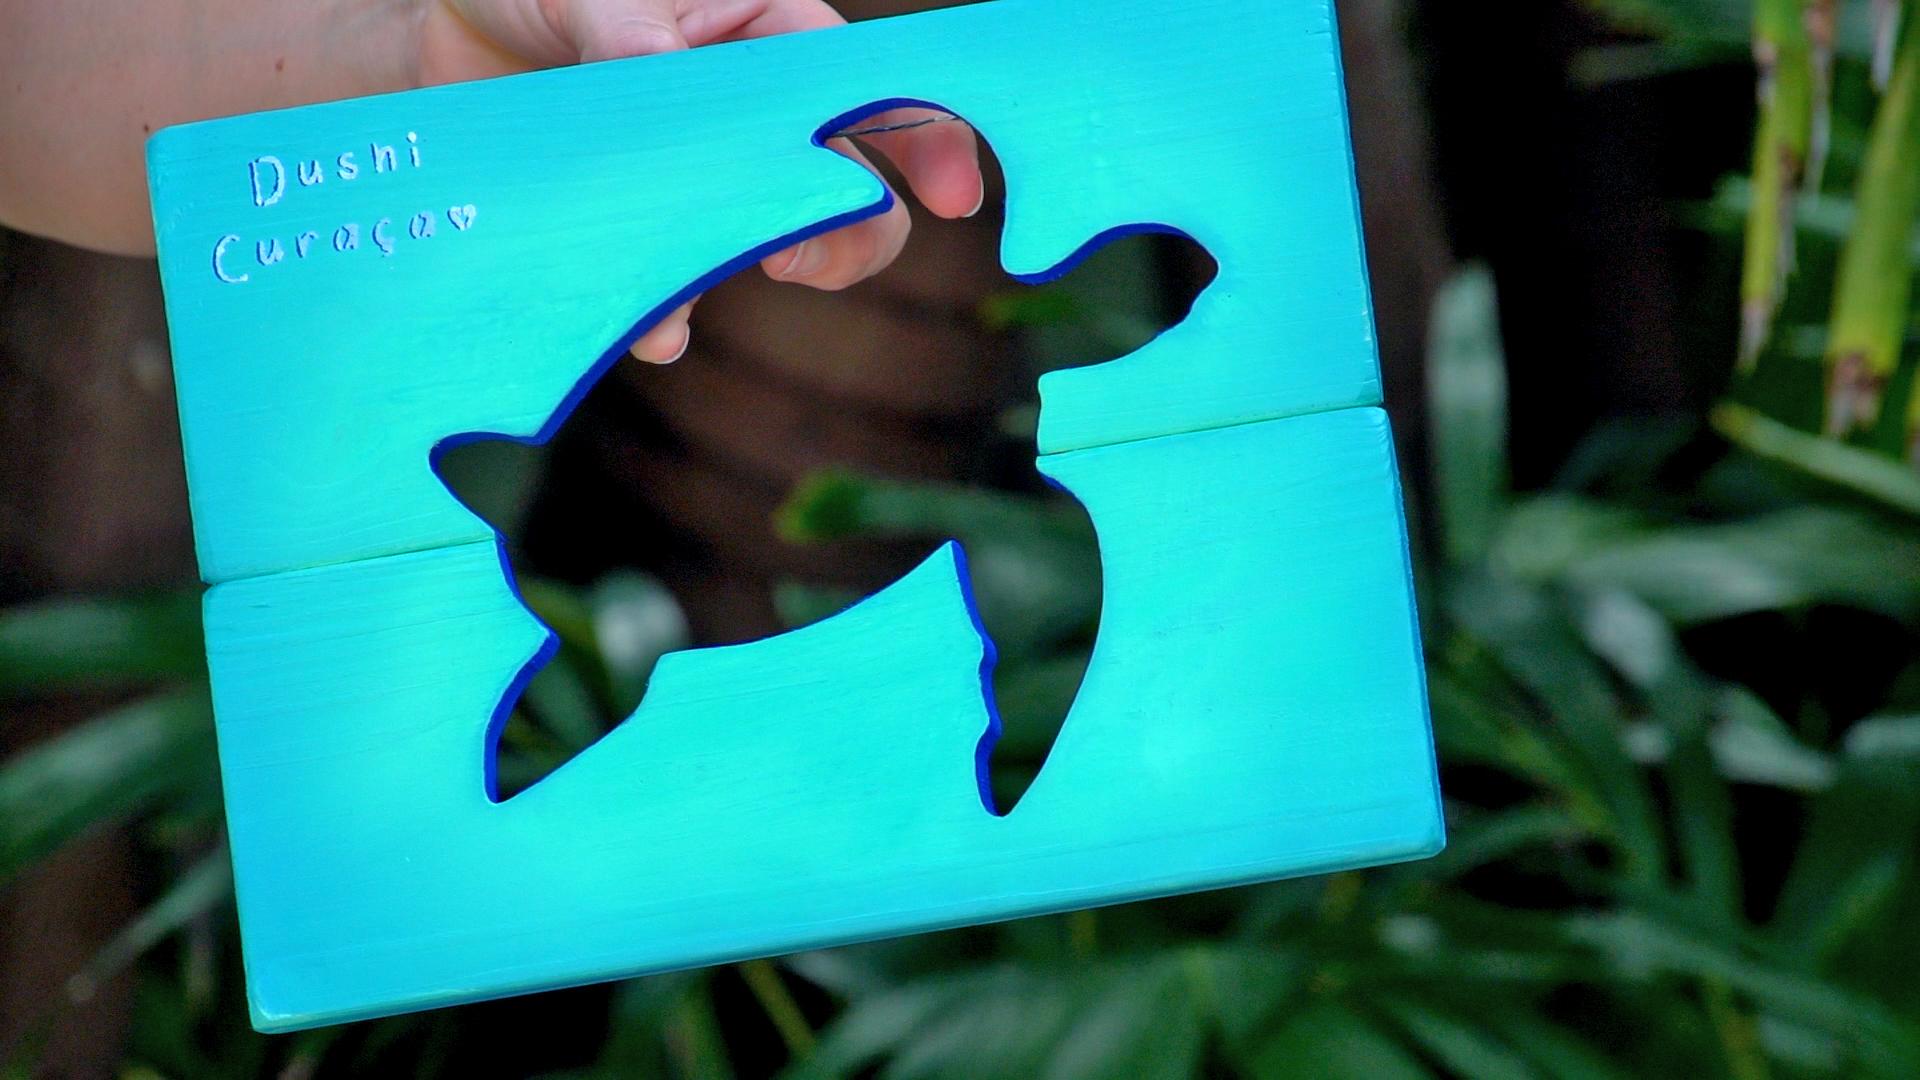
go from this to this. I will show you every step starting from how to take apart the pallet wood to my
special painting techniques. This lesson is
beginner friendly, but basic power to
experience is advised. Here's a list of the materials
and tools you will need. Don't be discouraged if
you don't have access to all the power tools on my
list, there are workarounds. The only essential
tool is to scroll saw.
2. SAFETY first: Wearing gloves will protect your hands from
getting splinters. One, handling the pallets, safety goggles and
a dust mask are highly advisable to
prevent irritation and permanent damage
from the fine would particles that get
released during processing.
3. WOOD options: I prefer to work with this card. It would like pallet wood
because I think we should minimize the amount of trees
so we need to cut down. You can often find
discarded pellets at your local supermarket. But if you don't have all the tools to cut
the wood down to size, then buying pre-cut width at your local hardware store
is always an option. Just give them the exact measurements and
they'll cut it down to size for you to remove the
wood from the palette. I don't use a crowbar
to take them apart because I only need a
small part of the slats. So a jigsaw is easier.
4. PLANER: The next stop is the planar. Honestly, you can skip this part as I have
done for years, but it often does make
the sanding easier because it removes the
rough surface on your wood. But sometimes a little bit of a rough look might just
be what you're going for. So this is really
a personal choice. The main reason I use the planar is to make the word lighter so that the final product is easier for the customer to travel with. As my wood art is sold mostly to tourists
visiting our island. Adjusted depth to your
desired thickness and gently guide
the wood through. Being careful not to let
your fingers get too close. And be careful not to
make your work too thin because then the word
will be too frail.
5. MITER saw: Then I cut the pieces to the exact length that I
want using the miter saw. The length of the word will
depend on the width of your wood and the figure that you plan on
cutting out of it. In order to cut the two pieces
to the exact same size. I often just stack them on top of each other
and make my cut.
6. SANDING: It's time to go to
the belt sander. You can also just use sounding paper if you don't
have a machine. The only difference is that it will take you a bit longer. Since I'm mass produce these pieces of art
and sometimes I'm making 60 pieces of month
for me about Sanders, the most efficient option. At this point, you don't have
to send it down to finally yet because this is just
a preliminary sounding. After you've cut out
the shape of your wood, you will be sending
it down a bit finer and make sure that the
edges are not too sharp. By holding the wood in an angle to bevel the ends a little bit.
7. STENCIL DESIGN: Now it's time to grab
your pencil and stencil, aligned the two pieces
of wood perfectly, and then place your
stencil in the middle. When you're aligning
your stencil, something to keep
in mind is that you don't want any
frill shapes to be too close to the edge
because then the piece of wood is too likely
to just break off. So the more complex your shape, the more fragile
your piece will be. For my son, Saul's, I simply use old cardboard
like from a cereal box using a sturdy material life carts and makes it easier to
outline your shape.
8. SCROLL SAW: Now, for my favorite
parts, the scroll saw. This is the most important
machine and the process. Of course, there is a
work-around here too, because you could technically
use a hand figure saw, but I haven't touched one
of those since high-school. And I can't imagine
doing this kind of work with a tool like that. If you're new to the scroll saw, keep in mind that it might take some time before you
get the swing of it. I started using
one as a teenager. And when I compare
my recent work to stuff from back then, I see amazing
improvement in accuracy. You simply aim to follow the line because of the
thickness of the blade, you're limited to how sharp overturn you can
make while cutting. If you forced the blade, it will simply break. But no worries there,
easily replaceable. If you notice that it turn
is too sharp for your blade, an option is to trace your woods backwards to remove the blade, and then begin your cut
again from the other side. When making the cut, you're merely guiding would
pass the blade, meaning that you
don't need to use too much force and pushing
the woods towards the blade. What I did for my
projects is that I use the inverted cutout as well. So I technically get two
pieces of art from one cut.
9. FINAL SANDING: Now for the second
round of sounding, first and let around
on the belt sander and then some finer
manual sounding. My least favorite part. Smooth out all the nooks
and crannies until you are satisfied with the look
and feel of your piece. I generally don't go any
finer than 120 grit, but this is a personal
choice depending on how thoroughly finished you
want your piece to look. You can make it as
smooth as a feather or just smooth enough so
it doesn't feel sharp. To me, it's about giving
it a finished look, but there's no need
for extreme smoothness because it will just be hanging on a wall in
the end and won't have to endure the human touch.
10. ASSEMBLY: To attach the two
pieces of wood, you can use narrow
slats like these. Sometimes I find these in
the woods, scrap yards, but since I have a planar, I can also make these from
scratch from pallet wood. Or again, you can just buy something similar in your
local hardware store. You'll want the length
of these to be a little shorter than the width of your two planks and
thick enough to be able to hold it all
together without bending. To assemble the piece. I like to use wood glue
in combination with Nils because it just adds an
extra layer of longevity. Just make sure that
your two pieces aligned perfectly and there's no
big space in the middle. To attach the slats. I use small nails
like wire nails. The length of the nail
has to be just a little bit shy of the
thickness of your wood combined with the thickness of the slat for nails on each end. So everything stays
nice and sturdy. To attach a hanger and
tobacco for your piece, there are two options. For the horizontal pieces. I like to use a metal
chord instead of a hook. For this, you will
need to U-shaped nails and a cord of your
preferred material. I like to use the metal
cords because it can handle a heavy load and it doesn't
slip as easily as nylon. You will wrap the
cord around the U-shaped nil at least twice. I like to hammer them
into the wood slats on the back because that way it's
extended a little outward, which makes it
easier for hanging. Once you have one side secured, make sure it is enough
tension in the cord, and then security other end. I like to have the court
pretty tied because I don't like the wire to be
showing when it's hanging. Got the cord with
the wire cutter as close to the
water as possible, so it's nicely tucked away. For vertical pieces, I find the sawtooth hanger to
be more convenient. These are really
easy to install. They come with their own nails. All you have to
do is place it on the top slot and center it.
11. PAINTING: Now it's time for the
creative expression. So grab your paintbrush. Because of my particular
painting technique, I always adapt a
paint brush in water and make sure that the
wood is also a bit moist. Before painting,
a little trick I learned is to start with
a base coat of white. This will help your
top colors pop. And I already have my other
colors ready at this point because I have to add them
before the white paint dries. You see it's a very delicate
blending procedure. You can use as many
colors as you want. But the more colors you use, the more complicated
this process will get, it might be good
to start off with three colors the
first time around. You'll want them to
be complimentary. Since I want the center of my work to be lighter
than the edges, I will start with
a lighter color and work my way towards
the darker ones. When you move on to
the darker colors, you work from the outside in. As you move closer
towards the center, your paintbrush will have
less of the darker color, making for a nice transition. You have to work really quickly. As you can see, this
video is not fast forwarded and my hand is
moving rapidly back and forth. If you find that your transition doesn't run smooth enough, you might have to keep your
paint brush a bit wetter, or perhaps your paint
is drying too quickly. This is a process that
you will need a lot of patients for because it
just takes practice. But it creates a really
nice finished look. So I think it's worth it. You will finish up with the
darkest color and be sure to also cover the sides so
there isn't any wood exposed. Once you're happy with it, set it aside so
to paint can try. When the surface has dried. You can paint the inside with a darker color for contrast. I usually go for shade darker than the darkest color
I used for the surface. Be careful to stay
within the lines. If your paint bleeds over. Use your finger or
a damp cloth to wipe it off carefully
while it's still wet.
12. STENCIL LETTERING: Once the paint has dried, you have the option
to add some text. You can always buy stencil
of various letter types. Are you going to have your
stencil custom made with a specific text for the letters, you'll want to use a color that highly contrast your background. There are special
stencil brushes and sponges for this that make
your life a little bit easier. You just dip it in
a little bit of paint and dab, dab, dab. Then you want to
move to stencil over just ever so slightly. Because now we're going to
create the shadow effect. Dip your brush in
some white paint, and then the app
again. And that's it. This part also took me a
little time to get the hang of because it's not as
easy as it seems. It's a very delicate process. So it might actually be
a good idea to practice your stencil technique on a
piece of paper beforehand.
13. FINISHING : Now for the final touch, I use a clear coat
spraying locker to cover the painted surface of the woods to protect it from the elements. Whether you use gloss or math, depends on your preference. But try to use non yellowing lacquer so to
color won't fade over time. This should be done in
a well ventilated area and just follow the
instructions on the spray can. The easier option as opposed
to how I'm doing it is to layer on a flat surface and
then spray varnish onto it, let it dry properly, and then your piece
is officially done. I will attach a PDF file with all the steps
for your convenience, as well as a copy of
my turtle stencil, which you can print
out to whatever scale works best for you. And then either trace the
lines with carbon paper or cut it out and simply outline the shape on the wood as I did.
14. OUTRO: And that's all I have
for you in this lesson. Hopefully you're
excited to start working on your
own would project and feel free to hit me up with any questions you might have
throughout the process. Let me know how it goes for you. Have fun with it and
remembers safety first. Always. Thanks for learning with me and see you next time.
 Shannon Solange, Inspired-life Muse