Transcripts
1. A Creative Journey Begins: Imagine the endless
possibilities as you combine news and chads weaving them together to create intercut patterns and
captivating designs. So are you ready to embark on
an exotic creative journey? Welcome to Tabstr
Crochet Mastery unleashing your
creative potential. In this class, you will learn
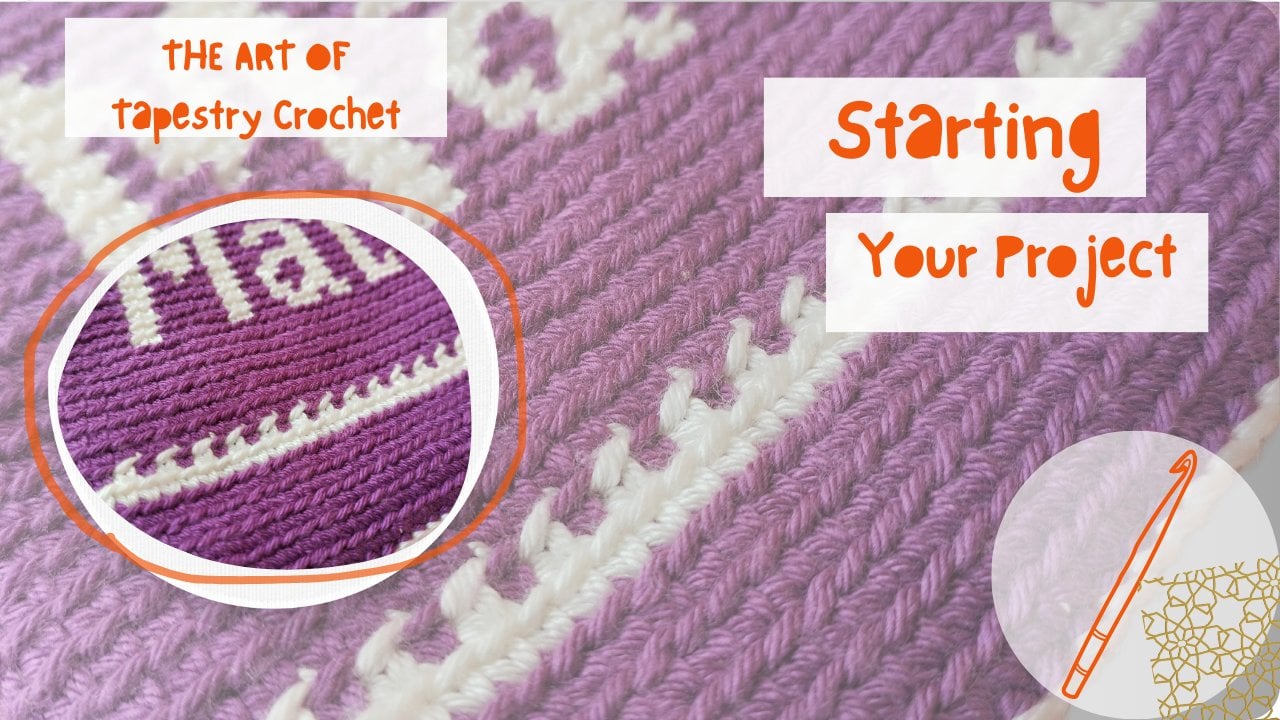
the art of Tabstr crochet, a fascinating technique that combine color work
and intercut design. Whether you are a
complete beginner or advanced crocheors, this class is designed to
guide you step by step through the process from the basics to the most important
teps and texts. My name is Sara Shadi. I am a pharmacist
who fell in love with Tabstri crouche
12 years ago. Do you know that my first
tabstricroch project still unfinished now? Do you know why? Because it had a huge number of stitches. But other projects like this, this and this are now in their
places with their owners, so that I decided to introduce this step by step easy class to enter the world
of tabstrcroch. We will cover essential
techniques like color changes, reading charts and how to
design your own chart. By the end of this class, you will have the skills
and confidence to create stunning tapestry
crochet pieces of your own. But it is not about
learning the craft. It is about unloking
your creativity and expressing yourself through
this unique form of crochet. Join our vibrant
community and follow crocheters where you can
share your progress, ask questions and receive
feedback on your project. I will be there every step of the way to provide guidance, answer your questions,
so be ready to dive into the colorful
world of tabstriTrch. And now let's get started.
2. 2. Project Starter : Essential Tips & Tools : Welcome viewers.
Some important notes that I will explain
during the tutorial, but I want you to dedicate a separate video for them
due to their significance. The first note, the
starting chain is a chain that I will use
two ends of the arn for. You can make these
ends in one color, and you will have a
chain in one color. Or you can use two colors as
I did in the tutorial video. This is the crocheted case, and these are the
starting chain stitches. By using two ends of the yarn, each end in a different color
from the project colors, you can create a
visually appealing chin. Of course, I will explain this specific technique
in the upcoming lessons. Remember, practice is key. The more you practice changing colors and maintaining
consistent tension, the more comfortable you
will become with the brcess. Your speed and the skull
will improve over time, leading to beautiful multi
colored crochet pieces. Second note I want to discuss here is about the blaze
of the stitch we make, the single crochet,
in the back lobe, as you can see now. The third note, there are
two ends of the yarn. When working crochet stitches, one end is the working yarn which you use to create
the crochet stitches. The other end is the caragon. To keep your work tidy, make sure to carry the
yarn under your stitches, not over them to ensure
that the cargon is hidden. And will not interfere
with your pattern. After every five
or six stitches, I tighten the carriage yarn. If you notice here, I am working with two
strengths of the same color. When I tighten the
carriage yarn, I tighten each
strength separately, holding the fabric
between my thumb and index fingers before
the five stitches. This is to avoid excessive tightening of the yarn compared to the rest of the row. If there are any increases from the caragon visible in the
middle of the stitches, they will disappear when
you tighten the urn. Note that this tightening
should be done after every five to six stitches
and add the corners. It should be done after
completing the corner, not too long after to prevent the corner from
shrinking the base. In this pattern, I started with the base and a few rows
in the main color, then a row in the second color. Then in the following row I made a stitch in the main color and stitch in the second color, resulting in this pattern. This is based on your choices
and personal preferences. After finishing writing
the word by the ar, you can execute
the same pattern, but in a mirrored way. That's a row with one stitch in the main color and one
stitch in the second color. Followed by a complete
role in the second color. There are all
personal preferences, and based on your
blends for the project. Remember that the
most important thing is to enjoy the process. Crocheting is a relaxing
and creative activity. Don't stress about mistakes. They are part of the
learning process. Keep practicing and you will
see improvement over time. Another important time
is yarn tingling. If I randomly change
the yarn every time, it results in annoying tingling, which requires me to stop
working and tingles the yarn, wasting time and energy. It is best to follow symbol and specific steps during work to avoid the problem
of tingling. I will explain this
during the work. So make sure to understand
this point well. Another point is about the suitable yarn
for such brjects. It should be acrylic or pure cotton yarn without elasticity, which provides stability
for projects like bags, makeup, vouches and pncil cases. The yarn usually comes in 100 gram skins with approximately
350 meters of yarn, more or less a little. The recommended needle size is two millimeter and you work with two
strengths of the arn. The starting chain
should be made with 2.5 millimeter needle. Of course, you will
need stitch markers and scissor and weaving needle. Final note, some people
make the back loop stitch by putting the urn
from underneath the needle, making a loop and
completing the stitch. However, this method is not
suitable for tapestry work. Because it will show the
carriage on the front. The correct method is to blaze the needle from
underneath the urn, make a loop, and then
complete the stitch. Now it is time for technique we will be
using in the workshop. My advice to you is to
practice this technique thoroughly before
starting the project to ensure polise and brood. In the next video,
we will dive into crucial aspects like preventing yarn tingling and mastering
the back loop stitch. This will prepare you well for your crochet
journey at Cedar.
3. 3.Designing Personaluzed Patterns: Welcome viewers. We will choose now a pattern
or a design. The bettern we need,
since in this project, we will write a word or a name. Of course, it is difficult
to find the name fully prepared on a
website like Bentrst. In this case, we will bring a graph paper
composed of squares each square measuring 0.5 centimeter times 0.5 centimeter. If this beber isn't
available to you, there are two solutions. Either you print it
from the Internet, I will provide a copy
in the class resources, or you can draw and
lay out it yourself. Each square on the beber
represents a stitch. I will choose the name Malek. Now, I need to search
for a font style that I like and look for the
letters ALA and K. Before transferring the
letters to the chart beber, I will count squares
for each letters. Then I will check if
this number suits the number of stitches required
for the desired project. For example, if the number
of stitches required is 60, and the total number of
squares for the word is 30, it means that when placing
the word in the center, it will appear slightly smaller. In this case, I will need
to search for another font. Where the letters consume a
greater number of squares. Next, I will transfer the
letters onto the graph Baber, leaving two or three squares as a space between each letter. At this point, the bruises
will be completed as I will know how many stitches
I needed and how many rows. You may wonder why I don't brand the letters and the best them next
to each other. The reason is that by manually
transferring the letters, you will gain
experience in shaping the letter forms and
creating curves and bends. This experience will
be beneficial when designing other shapes
or words that may not have ready made letters on bentst especially when there are no ready made
letters available, such as in the case
where I decided to write in English and
found a wide range of letter styles
or fonts while I couldn't find
satisfactory font styles. When I decided to
write in Arabic. As a result, I relied on my previous experience in transferring English
letters to write the name this is my goal for you to learn things from scratch
without relying on others. There is another aspect
I would like to discuss, which is the height
of the battern? The pattern consists
of ten rows, which may not be
sufficient to create an abropriate height therefore, I will add a few rows above and below the
desired pattern. Everything needs
to be determined before starting to work
calmly and efficiently. I have decided to blaze
the word in the medal, so I will create five rows before and five rows
after the word. Would you like to blaze
a pattern in this area? These are all available options, but it depends on your
personal preferences. Now, let's name the colors. There is the primary color. Or the main color, and I will name the second
color as the secondary color. You can create more complex
and intercut patterns. But at the beginning
of the journey, you need an easier path to reach your goal and stay
motivated to do more.
4. 4. Smart Starting Chain Technique: Welcome viewers. Firstly, I will use a
slightly larger needle. The needle I will be using for the project is two millimeter. In the beginning,
I will start with the needle size of
2.5 millimeter. Red is the main color and a
white is the second color. The starting point will
be with the second color. I will make a slab knot and adjust the tension of the urn. Then I will bring in
the main color and hold its end together with
the end of the second color. The yarn over of the stitch will be made
with the main color. I will lift the yarn from left to right over the needle while holding the slip knot with my middle finger and some to secure the ends
of both colors. After lifting the yarn, I will position the needle under the second yarn and pull up a loop to create a two
colored chain stitch. The focus here is
not on the colors, but on the durability and
the strength of the chain. That's why we
crochet the Du chin. I will repeat this
process again for you. The main yarn goes
from left to right with the needle positioned
under the second yarn, Babalu to create a chain stitch. Be careful not to tighten the main color yarn
too much as it will result in a curved and
tight chain stitch that we don't want, of course. For the last stitch, we will reverse the color. Now, we will start working on
the first row of the base, which starts with increases. I will not make three stitches together in the last stitch
of the chin as it will create a hole to address that we will make
the three stitches on the two strengths of the second color on
Blaze the needle. Under both yarns and pull the main color yarn to
complete the increased stitch. Oops, I made a mistake here. It became a slip stitch. In this case, I have
three extra stitches. Place a marker in
the first stitch, where we will make the increases in the second round of the s. I will make the single crochet stitches along this
side of the chain. I will crochet on the back loop of the color different
from the chain color. Which means the chain
is in off white yarn, and I will insert the needle
into the red color yarn. Here, the first stitch has a visible loop of
white. That's correct. Because we reverse the colors on the lost stitch of the chain. Don't forget to take the
carried yarn with you. It is located between the working urn and
the work itself. Then for the second stitch, insert the needle into the
lobe of the main color. Here I have reached
the end of the chin. When transitioning to the
other side of the chain, I will switch to the regular
needle size for the project. We were supposed to make
three stitches together, just like we did
on the other side. But remember, the
first stitch in the chain has only the
second yarn chain. Stitch only because we didn't secure the
main color yarn yet. It is loose now. In this case, we will make
four stitches together onto strengths of the
second color yarn to achieve the correct
number of stitches. The first stitch on
the other side is hidden between
strengths of yarn. So don't lose it
and look for it. Fortunately, it is
a different color. Don't forget to ensure you are carrying the second
yarn at all times. Try this method as it gives
a beautiful look to the bis. If you find it difficult
to work in the back loop, you can use the
alternative method. Here we make the
starting note or the slip note with
the main color, and yarn over is made
with the second color. Repeat what we did before, except when we work on
the edges of the chain. We enter the back lobe
of the chain itself, along with the back lobe
of the second Caliole. And thus we finish this side. We make the increase of three stitches together
and add a fourth stitch. Take the carried yarn with you and remember to always ensure you are
carrying this yarn. Set aside these tails and
continue to the other side. Here, you will insert the needle under the other
back loop of the chin, under the back loop of the chin. But don't take the back
lobe of the second join. Only the ba loop of
the chin is enough. Look behind the work and
tighten the carriage yarn, but do it gradually one
strength at a time. At the same time, the right
hand thumb, the index finger, hold the work firmly
to prevent it from shrinking while
tightening the urn. Here, we have completed
the first row of the Bs, which includes three
increases on each side. We started with a
certain number of chins when making the chin. After the first row, we add 60 stitches. To this count, now, remove the marker and make an increase in the first stitch. But from here, we will work in the back loop for the
rest of the project. Continue without increase along this side until you
reach the marker. Remove the marker and repeat. Increase in the next
three stitches. One, two, three, four, five, six, after that, flip the work and tighten
the carried yarn. Repeat the tightening
bruises every five or six stitches
to ensure kat finish, but do you know why I
made this type of chain? Instead of regular chain? It is to avoid
holes or wide gaps. Continue working
on the Bs as blend and wait for me in the lesson
on changing yarn colors. See you in the next lesson.
5. 5. Color Changing Mastery: Seamless Transitions: Welcome viewers. Let's see how to
change the n color. If the next stitch in the
button is in a different color, I will not finish the
stitch with the main color. Instead, the final step of the stitch will be with
a new color like this. To make the stitch, we crochet it normally, taking the main color or the caragon along
under the work. Here, I will change the urn
color back to the main color. The steps to change the color start from
the previous stitch, where you finish it
with the new color. Make sure to leave the urn in
the direction of its skin. I left the second
yarn in the front because its yarn skin
is here in the front. I will take the urn under the work and crochet
the stitch normally. Here, I will check
the pttern and find that the next stitch is
in the second color. I believe you have
memorized the steps. Then I will start crocheting the required number of stitches as specified
in the butter. The next stitch in the same color will be
finished with the same color. The next one is in
the main color. Insert the needle
into the back loop, yarn over, and Bula bap. Here, I will switch the color. I will leave the yarn here in this direction because
its yarn skin is here. I will make a loop and finish
the stitch in this way. As shown in the button, there is a stitch in
the second color. Then a stitch in the main color followed by three stitches in
the second color. I and then three stitches
in the main color. One. Two. For the third stitch, I will not finish it
with the same color, but I will start the
colors as I did before. Three. Here I switch back to the main color and
continue with the pattern. Always remember to check
the pattern and the blend your color changes
one stitch ahead. Heavy crocheting. It is natural for
the work to curve during crocheting because
you have stopped increasing. On the other hand, this curving is necessary as it provides the desired
shaving for the project. If I always take
the easiest way, which is blacing Zion
forward each time, it will result in tangled yarns. I will demonstrate this in
front of you to emphasize the importance of
blacing Zion in the direction of its
yarn skin each time. Here, I will crochet a stitch in the main
color and another in the second color to expedite the demonstration of
yarn entanglement. Placing the yarn
forward each time may seem more comfortable
for the crocheor, but it is not the correct method because
it leads to tingling. As mentioned before, it
is important to practice this technique to become
proficient in changing colors. These stitches appear
to be correct, but there is tangled
because I brought both the main and second
colors forward each time without blessing them
in their correct positions. Mmm. This note is very important for organizing your work
and future projects, especially when working with four or five different colors. Imagine the amount of
tingling that can occur. Mm. It's messy. This note will save your energy and the breath
tingling completely. This swatch is
important for practice. I will provide you with a very simple pattern to
practice changing colors. Once you understand
the technique, you will master it easily. It is simple, but requires concentration
in the beginning. Now, get ready with me for the upcoming video.
See you later.
6. 6. Expert Journey: Guidance for Quality: Welcome viewers. There are two ways to
work from the pattern. Either you crochet by following
the chart in front of you or by reading the
written instructions. Alternatively, if you
would like to translate a charted pattern into a written pattern,
here the method. Let's assume this
is the pattern to be translated into
a written pattern. The start is from right to left. Number rows from bottom
to top where row number one is the first row with the first stitch in
the second color. In this pattern, there are two white squares representing the main color in the project, which I will denote with the
letter M for the main color. Grab a new clean paper to write. Here, I moved two
main color squares. So I will write two
M on the paper. After that, there is a
square in the second color. So I will write one P where
P represents the color pink. Then the stitch in
the main color will be one followed by four P, then one, one P, three M, and one B. After finishing
writing the first row, proceed to write the remaining
grows in the same manner. I advise you to write the translation vertically
underneath each other rather than on the same line to avoid any mistakes when
looking at the samples. Another tap is to cross out each crochet symbol from the
paper as you complete it. All of this is to ensure a curious and prevent any
errors while working. As miss blessing, even a single such can disrupt the
intended pttern. In this batter,
in the first row, we have 13 stitches
in the main color, followed by two stitches
in the blue color, which I will denote
with the letter B. I will repeat these
steps with any word. Any language or any
charted design. To start changing the
color in this button, you will begin with the stitch right before the
desired color change. In this case, assuming the red dots represent
stitches in the second color, and the remaining squares represent stitches
in the main color. We can see that the
word to be written in the second color is
centered within before it. There are stitches in the
main color and after it, there are stitches in
the main color as well. We crochet in the
direction from right to left to indicate the beginning
of the word pattern, place a marker on the
stitch before it. Additionally, place a marker
on the stitch numbered one, we will go through
the explanation with detailed
instructions shortly. Now, let's examine
the marker placement. Assuming the verbal shape represents the bag
circumference. There is a corner
on the right and a corner on the left at the midpoint of
the corner itself, the front side of the bag begins and ends at the midpoint
of the opposite corner. At this corner, the
backside of the bag starts. The stitch at the midpoint of the corner is the
stitch number one, as indicated in the
previous chart. I hope this explanation is
clear and understandable. Since the word pattern is located in the middle
of the front side, we need to crochet some
stitches to reach the word. Here, we will blaze a marker on the previous stitch before the
first stitch of the world. In this pattern, we
blaze the marker here. And in this pttern, it is true that the first stitch in the second color
comes after 13 stitches, but it is not the first
stitch in the word pattern. However, here is where
the marker is balist. At this point, I will calculate the stitches
and translate the pttern into
symbols to minimize errors and define the
battern area precisely. You can translate it
into symbols as well, and theblacing the marker alerts you that the
color change area has reminding you to refer back to your symbols to begin
the color change process. If you have a word name or design on the front side and another design
on the back side, it is important to
differentiate each design by using a different color band when writing their symbol. Also write the name of the side above each
group of symbols. Organize your work in this way, helps prevent mistakes and ensures clarity in the butters. When working on the back
loops of the stitch, it is natural for the front loop to protrud
representing row. Therefore, it is easy
to follow the rows. When converting the
button into symbols, it is advisable to
place a dot dash or even numbering on each square
when working on the square. This helps maintain
accuracy in the work. Having a numbered square gives you confidence that you
have attended to it, and any square without a marking indicates that it has
not been addressed yet. I hope these guidelines
assist you in your work and contribute to the precession and efficacy of your
pattern convert. Now that we have discussed the process
of converting patterns into written symbols and the
importance of organization, we will move on to the
practical application. In the next video, we will actually
begin the process of crocheting abs with
multiplical change. We will discuss in detail how to handle these changes
and how to maintain the correct tension
with on so gather your supply guess you're a D fours and that is
the step. Goodbye.
7. 7. Practical Mastery : Techniques Applied: Welcome viewers. This video is a quick review of what has been
previously explained, but in a practical way. Here, after creating
this special chain in contrasting color
to the base color, I proceeded to create
a base consisting of two rows of increases on I want to remind
you that you can enlarge the base and create
more rows of increases. Please refer back to the
video on creating the base. I then work at several
rows without increases until I reach the starting
grow of the buttern. Remember how we designed
the pattern using a chart. The first row consisted
entirely of the second color. While the next row
included stitches in the main color and the
second color alternatively. Please note that. The
rows are connected, and we don't close them with a slab stitch
at the end of each row. Instead, we blaze markers to indicate the start of
each row every time. In the second row
of the pattern, I made a stitch in the main color and stitch
in the second color, which gives a visually
bleeding pattern. However, its main function is to train you in changing colors. After this row, I
worked two more rows in the main color to start
drawing the desired pattern. Whether it is a word, a letter or a shape. This is the stage of transferring the
pattern onto the paper, which was explained in
detail in a previous video. You can highlight
or use a washi tape to highlight the
working group if you prefer working
directly from the button. This method is suitable
for simple patterns. However, if you have a
pattern with multiple colors, I have translated it into symbols as explained
in a previous video. Let me provide you with an example of how to
position your pattern. In the center. Et's assume that this side consists
of 21 stitches, and the width of the desired pattern
here is seven stitches, referring to the widest
row of the pattern, which is the horizontal row with the maximum
number of stitches. Therefore, the
working area will be within these seven
stitches in the center. This means that I will work seven stitches in
the main color, the next seven stitches
for the pattern, and the following seven stitches will be in the main color. Now, let's see how we work. First, I will identify the stitch at the right corner and the stitch at
the left corner, which are exactly
the middle stitches. Place a marker on them and do
the same on the other side. I rely on visually identifying the metal stitch and it
is easy to determine. Then I will work the stitches from the first marker
to the second marker, which is, I will
count the stitches from the first marker to the
second marker, which is one. For up to nine stitches. There are a total of 29
stitches in this section. When I subtract seven stitches, which represent the widest
of the heart pattern, the width of the heart pattern, I will have 22 stitches left. This means that I will work 11 stitches before the heart
pattern in the male color, and 11 stitches after it. Even if you end up
with an odd number, one stitch will not
make much difference in the overall final
appearance of this section. After working the 11 stitches, I will place a marker
on stitch number 11, which is the last stitch before the start of the heart but here, I will remove this
marker from here. I only needed it to
determine the bablacement. However, the most
important marker in the this is the starting
marker of the button. Which is located at
the last stitch in the first third
of the other end. I also identify the
first stitch of the third third and
place a marker on it. I will not remove these markers. They will serve as a guide while working the
stitches between them, which are seven
stitches in total, representing the desired batter. The first stitch
after the marker is the first stitch
of the heart pattern, as indicated in the diagram. The marker on the diagram is on this stitch and
also on this side. Here, you can attach
a stitch marker or a safety bin at
each previous row. To keep track of the rows or translate the
pattern into symbols. Now I will bring two pens, one of them with a color matching the color of
one of the two yarns, and I will translate the
battern using this method. The work is done
in this direction from right to left until
I reach the marker. After the marker,
I will continue working the stitches
in the main color, and I will check each square to distinguish it as I proceed. Here, there are three
stitches in the main color. I write three with
regular bend color. Then there is one stitch
in the second yarn color. And I have brought a bend in the same color
at the second yarn. So there is no need to
write symbols here. I rely on the bend colors, or you can rely on the samples as explained
in the previous lesson. This method reduces the effort during work and minimize
mistakes completely. Making the brcess smooth,
comfortable, and enjoyable. After completing each section or group of stitches in row, you can cross them
off on the paper. Here I will review the color
change the color changes. I remove the marker, work the stitch and then
reapply the marker. This stitch will be in beige and the neck
stitch will be in red. No, this is incorrect. Instead, I don't complete
the Big stitch all the way, but leave the lost stead and finish the stitch
with the red color, insert the needle into the next stitch and
bowl the red yarn, but don't close the stitch
with the red color. Close it with the beige color. Continue with the neck
stitch in beige color. But don't finish it
with beige colour. Finish it with red colour. This way, you will have a row consisting of beige
stitch and red stitch. Now let's move on to the crochet heart pattern
to crochet heart pattern. The first row consists of three stitches
in the main color. The fourth stitch will
be different in color, meaning I will not finish the third stitch
with the main color, but with the second color. Here, I position
the main color at the back because its yarn
skin is in the back. I hold the jar along with
the base yarn while working. Close it with the beg color. Then I bring the red yarn to the front because that's
the direction of its skin. I work three stitches
in the beg color. For each symple or number
that I work on here, I mark it to keep track of my progress and
avoid any confusion. I will continue this
pattern until I reach the next set
of the next throw. And then I will show you how to work according
to the button. Now, I have reached the
stitch where the marker is. Always remember that
the stitch with the marker is the last
stitch before our button. I will crochet it and
then put the maker back. So I am currently
inside my pattern. It reminds me that there are two stitches
in the main color. Don't forget to tighten the urn every few stitches to
ensure clean and neat work. I work the first stitch
and the second stitch, but I don't close the second
one with the beige color. I close it with red color. Then I work with stitches in red color but will not finish. Last one with red color, I will finish it with
beige color and so on. Now, after this training, you can start your project and I will wait for
your questions, and I will be happy to
receive your applications. In the end Always
remember that patience and practice are the keys
to learning any new skill. Don't trush the results and
enjoy the entire process. I am eagerly looking forward to seeing the wonderful works
that you will create. After this application, you
can start your project.
8. 8. Elegant Final Row: Creative Touches: Welcome viewers. After completing the pattern and reaching the desired length, there is one final row
to close the pies. You have a couple of options. For finishing this case, you can use single crochet stitch to close
it or you can use decorative stitch like the reverse single
crochet or bicota stitch. Additionally, you
can choose to finish the work with either the main
color or the second color. These choices depend on
your personal preferences. Now I will demonstrate
reverse corcheti. Start by chaining,
turning a chain. This time, we will work in the opposite direction
from left to right. It may feel a bit
unusual at first, but continue to see the
decorative left the stitch before the chain and insert the hook into the preface stitch
from front to back. Then urn over and pull a ballot to match the height of the
single crochet stitch. Yarn over again and complete the reverse
single crochet stitch. This is how it looks. Now, let me demonstrate
the Biko stitch, which will add a delicate touch, especially if done
in the second color. Here, I will work stitch in the main color and close
it with the second color. Then I will change
three and join them with a slip stitch in the two threads that form
the base of the chin. If you notice, I carried the main color yarn along
with me while working, the next stitch can be
done in the second color, and you can close it
with the main color, crochet three or five stitches, depending on the distance you prefer between
each Biko stitch. Repeat the Biko stitch at
intervals alternating between the second color for the bicode and the main
color for the distance. You have the freedom to
choose from these options. Here is an important note. When working on the corner, it may feel a bit uncomfortable. Simply flatten the wast to
make it easier to work with. Do what helps your
hand feel comfortable. As I mentioned, from the
beginning of these lessons, you have the freedom to
design everything yourself. Another way to create
decorative stitch is by inserting the hook
into the next stitch, lifting the urn upwards, and then rotating the hook 360 degrees from left to right. In this case, the
stitch should be long. After that, you can
finish the stitch. As usual and leaves yarn
in the second color. You don't need to
carry it along while working because you
will not need it again. I will proceed with the reverse single crochet
stitch to finish the room, and then I will show you how I will close
the lost stitch. Here, after reaching
the lost stitch, I will cut the yarn and also
cut the second color yarn, leaving a distance of 15 to 20 centimeters to
clean up any excess stress. Thread the yarn through a tapestry needle and insert
it into the first stitch. You work it from front to back. So that the thread tail
is inside the case. Here, you can weave
the shred tail between the stitches to hide it as you would normally do in any brject. If the stitches are tight, you can use the
crochet hook itself. Just insert it two rows below, and cut of the exa srand. Now, you can prepare with me for lining the case and
attaching the zipper, or you can choose to leave it without lining and
zipper as you prefer. Now it is time to put your newfound crochet
skills into action. Take what you have
learned and start working on your own
unique projects. Remember to have fun and
impress your creativity. I can't wait to see the
beautiful things you will create if you have any
questions or need assistance, don't hesitate to reach out. Heavy crocheting.
And enjoy journey.
9. 9. Perfect Finish: Lining & Zipper Assembly: Welcome viewers. To make the lining of the bag, prepare bits of fabric in the color and
pattern of your choice. It may be cotton or satin. You will need what's equal
to the width of the case. Plus, an additional five
centimeter four side seams. The length of the fabric should be twice the length of the case. Plus an extra five
centimeter for sewing. To fold the lining
in this manner, you can align the edges and trim any excess fabric that
deviates from the itch. If you feel there is
a significant excess, you can remove it, leaving just a small
allowance for sewing. I am now sewing along
the back of the fabric. If you have a sewing machine, you can use it for stitching, or if not, sewing by hand is easy and
doesn't take much time. Once the sides are sewn, you can insert the
lining into the case. For this end, secure
it in place by attaching it to the zeber
as we will see shortly. Now, let's move on to
installing the Zabel. Bend the zebr in place, making sure to sew it
below the decorative row. The most important
step is to secure the zebr with bends
properly before sewing it. Take your time to adjust and secure the zebr in the right
position before sewing. After seeing the zebr, we will install the lining in this way to hide
the zebr stitching. I will use a suitable
white thread that matches the
color of the zebr. Here, the thread color will not make much of a
difference since it will not be visible from the back
or the inside of the case, as the lining will cover it up. Now, after installing the zeber we will proceed to
install the lining by inserting it inside the case and securing it with
stitching on the zeber. This end can either be folded and stitch it
prior to installation or folded during its attachment
to the zebr in one step, which is what I did. The most important step
is to secure the corners, meaning attaching
the lining corners with the case corners, stitching the side of the
lining at the cases corner. If you are unable to secure
it in this position, flip the case inside out, and the stitching will be
easier when it is flipped. Next, I will fold this
end inside between the lining and the case and
secure it to the zebra. But make sure to stay away
slightly from the Zebr teeth, stitch it using a hidden touch, and I will explain
it to you now. After securing the Bs with a
burn in a vertical position, return the case to its original position to
ensure that the lining, when attached is properly
and correctly secured. At this stage, spending more time adjusting
the Bs Zebr and lining is much better than
discovering any errors after installation and
having to redo the work. If the lining circumference is slightly larger than
the circumference, you can make a small
bleat and stitch it, which will not be noticeable. You can create multiple
bleats at spaced intervals. Come with me, and I will explain the head and stitch for
securing the lining. The head and stitch means
that the thread will not be visible on the
outer surface of the kiss, allowing you to use any thread color according
to your preference. It is an explanation of
the head and stitch. Insert the needle into the zebr horizontally
and tighten the thread. Then insert the needle
into the lining, folding the fabric, at the top, parallel to the zebr also
in a horizontal direction. Repeat the brcess
alternately horizontally in the zebr and horizontally in the upper part of the lining
parallel to the zipper. By following this method, you will sew the zebr
in a adden manner, and the stitching will be
invisible from the outside. After completing this stitching
for the entire project, you can be assured that the lining has been securely
and professionally attached. With the lining and zebr
successfully attached, your crochet case
is now complete. You have done a fantastic job, and I hope you are
proud of your creation. Remember, the skills
you have learned in this course can be applied
to many other projects. Keep practicing and exploring new patterns and designs.
Happy crocheting.
10. Grateful for You,Let’s Keep Creating Together: Pair. And with that, we come to the joyful end with our grand
adventure together. Congratulations. You
have learned so much, and now it's time to put
your knowledge into action. Let me practice make perfect. Learn from mistakes
and keep growing. Your potential is limitless, and I believe in your ability
to make the best brochure. Thank you for being part
of this learning journey. I can do it to see how you apply what you have learned
and achieve great thing, wishing you success as you put your knowledge
into practice. Remember, this is
only the beginning of our shared exploration. I encourage you to continue your journey until
we meet again in the second level to
explore further and keep pushing the boundaries of
your knowledge and skills. And now, goodbye. D.
 Sara Shuhdy, Where Yarn Meets Imagination