Transcripts
1. Introduction: You don't need to
have 1 million paints in your kit to be able
to do a good painting. Hi, I'm Nadine, a
watercolor artist from Melbourne, Australia, and you don't get a fancy
introduction to this one, you get a really quick
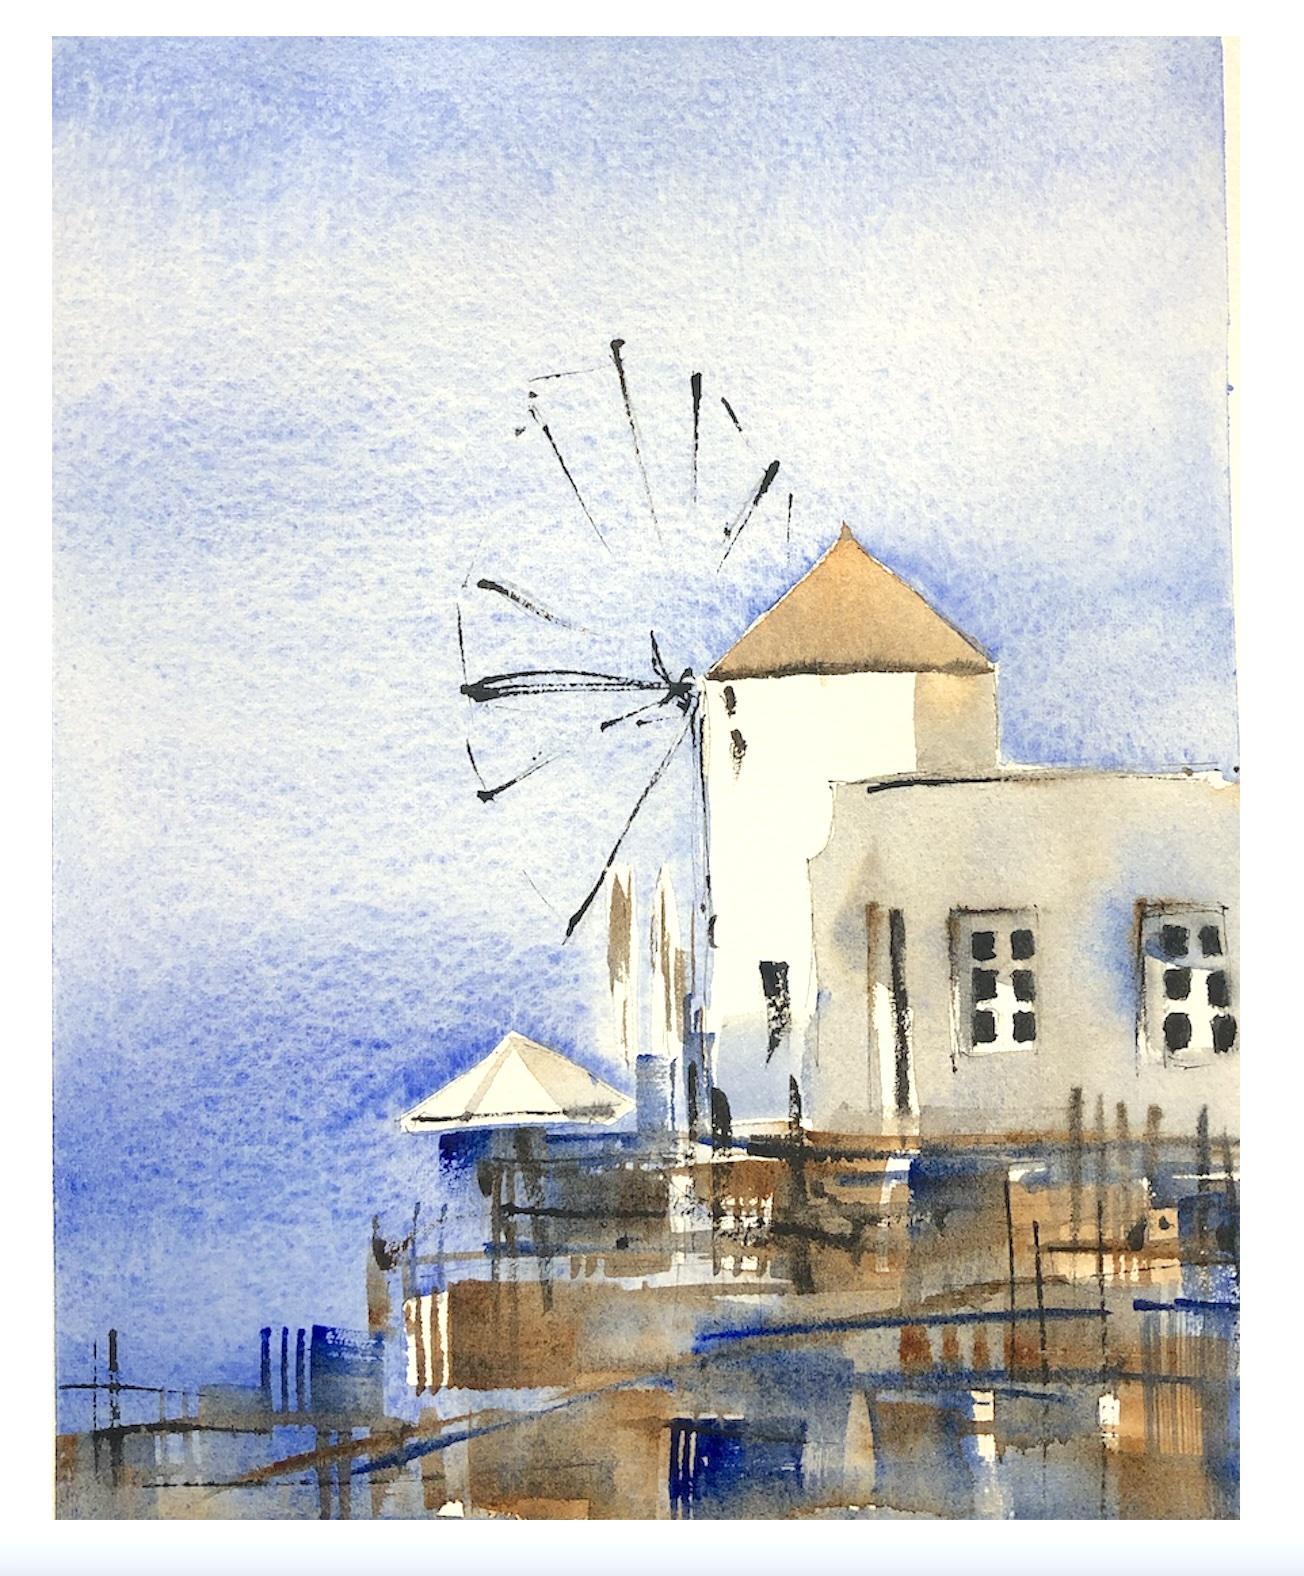
look at what we're doing. I want to show you today how to do a really fast
painting of Santorini, where we get the impression,
so we know where we are, but we're only using two colors, and we're practicing
our brushwork. So we'll go through
the reference, we'll go through the materials and do a really quick
step by step painting, where I'm hoping
that you'll let go and see that you can do
well with just two colors. It's not really that hard.
2. Materials: Okay. We'll go through the
materials for today's class. First up the reference photo. This one's from
Pixabay and there's a link on the Skillshare site, which you can download
the image from. I'm painting on 300 gram
archers Cl press paper. But today, which is a bit
unusual for me today, I am taping this
down to the board. I'm not leaving it roaming free, just because we're painting
for the full page wet and it is easier to have it
taped down for that. For the sketch, you'll
need a regular pencil, HB pencil and eraser, and I'm also going
to go my sketch with just a little black fine liner. This is a waterproof fine liner. In terms of paint, we're
just using the two today. I've got some Winds and French alter Marine and
some W Burnt Sienna. I apologize ahead of time for
the number of times I say, French alter Marone Burnt Siena. I'm used to having
to talk to you about more than two paints, so I keep naming them, but we just just using the two. The brushes, I've got three. This is an important one. This
is just a nice flat brush. This is good for getting in
all these geometric shapes. I've got details of that on the skill share
material section. I've also got just
a little synthetic for doing some of
the finer detail, and then I have this rigor. This is quite nice. This
is what we're using for doing the windmill because you don't have very
much control over it. You get a little
bit of randomness in the strokes that you make. Other than that, you'll
need your palette, a box of tissues,
and a jar of water, and I think we're good to go.
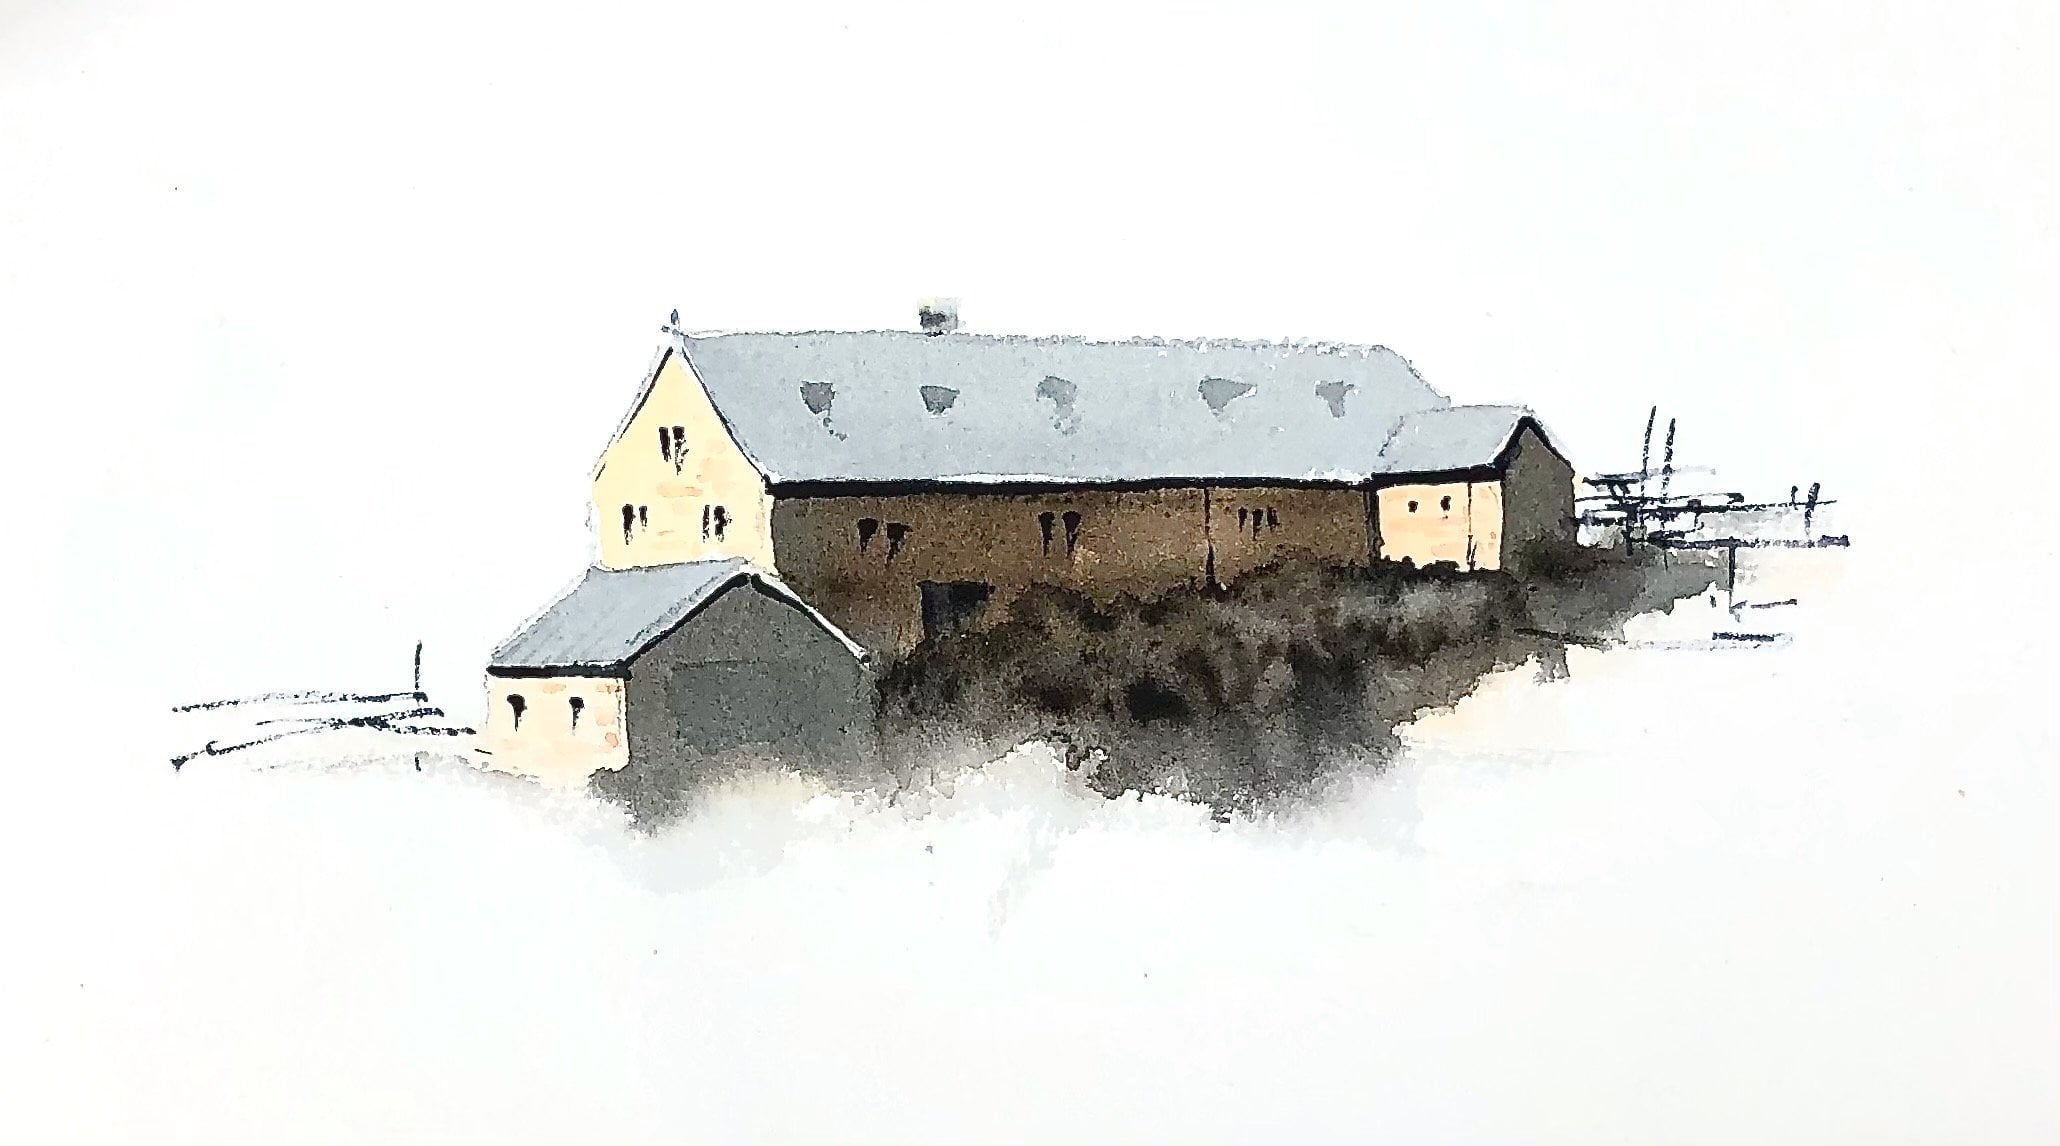
3. Sketching Up: First up, we'll have
a look at the sketch. Now, when I look at this
picture, it's very busy. There's all this
detail down here, which I'm not
interested in doing. What I want to think
about, or what are the main structures and the main patterns that
I see in the image. Obviously, we want the windmill. This building here with
these lovely windows, and I quite like
this umbrella here. I'm going to keep all
of those elements in. And then I'm going
to handle some of the patterning in here when
we're actually painting. Keep the sketch really simple.
This is all I'm doing. What I'm also going to do is sometimes when I'm
painting loosely and a little bit abstract, I find that the pencil
lines can disappear a bit. For this, I'm actually going to come through with
a fine liner and just restate these lines so
that when I'm doing washes, they don't all disappear on me. Now, with the windmill here. Don't be tempted to try and draw all of that in initially. Just give yourself
the indication of where I don't know what
they're actually called, but where they actually
sit in your circle. I'm putting in a little bit of messiness for the
umbrellas there. I want to keep this umbrella in. Maybe there's a bottom
bit to that as well. Then all the lines that I've
got down the bottom here, they just really a
little bit of nonsense, just to keep my eye in when I go to paint so I don't
get to carried away. My pen is just about how
it. Doesn't really matter. Just so that it
doesn't all wash off. I've got these little
windows in here. I just feel more comfortable now that if I get all of this wet, I've still got
something to go on. Now, I have uploaded for
you the template of this. I don't think you'll
need it. You can sketch this free hand
without too many problems. You'll laugh when you see
how simple the template is, but you are welcome to
use that if you need. I think we'll get
straight in and paint.
4. Sky and Water Wash: Now this is not the
first sketch I did. This is a second sketch because my neighbors started
a little more half. Fill me. I'm going again. Hopefully he is done. I'm going to start with a flat
wash of French tra Marine. Now to help me get all this distance without
having to think too hard, I'm going to wet the page
down first with clean water. Well, my water's got a
bit of a blue tinge, but that might help you
see where I'm going. Just whacking it on. When I come down
to the roof here, I'm just going to chisel out. The shaky could paint straight
through it because we are putting at the top, but I'm just going
to chisel out. I'm also going to
leave a little bit of white dry paper where
those umbrellas, the folded umbrellas are. I'm going to chisel
out the open umbrella. Just rough. When I get down to
the bottom here, I'm I'm going to do a mixture
of burn and French tra. I'm not going to paint
all that furniture. I'm just going to let
my colors bleed a bit. I am fairly wet. Now I'm going to get a
mocki wash of French tra. I've got freshly squeezed paint and I've thrown a bunch
of water in here. Throw the top of
my page, actually. I'm a bit tilted. I'm on my computer,
but I think I probably need to be
a bit more tilted. That was because the
page is already wet, it will move more easily down the page than go straight
onto the dry paper. Because I am using French tra, there will be a
bit of texture in here because that's
a granulating paint, but that doesn't really matter. All right. Okay. Remembering when I come
down here that I'm leaving a bit of dry
paper for the umbrellas. I might start to get
a bit thicker paint now, bit heavier pigment. Don't forget to choose
all out the umbrella. Now, the washes here, are going to want
somewhere to go. I'm just going to bring
that down just a touch. Now I'm going to switch and
get some burn center in here. And just paint a little
bit of nonsense. I'm not thinking too
hard about this. I'm just putting a
little bit of color in. Then I think maybe
a bit stronger. French tra just down
the bottom here. I'm happy for these colors
to bleed into each other. I'm just grabbing a
bit more French tra, and just dragging it through. Now what I need to watch, see what I've got up here, I've got pigment pulling. I've got a big lump of water. If I don't watch it
and down here as well, if I don't clean those up, they will as the paper dries, I will push it back up into the dry paper and cause blooms. I need to wick off
any excess bits of water while it's drying. Down here, all of
that, that will push back up if I'm not careful. I've got a bit of
color flower going on here but there it doesn't matter because I'm going
to put a whole lot of nonsense in there, that's just really, if
anything, adding some interest, but I don't want this
sky wash coming into water to have too
many blooms in it. You can do it you page
around and move the water. Don't go too far
away from it because what happens is you walk
away and when you come back, something terrible
will have happened. Say here and keep an eye on it.
5. Putting in the Roof and Darks: It's been about 5 minutes
now and I'm not fully dry, but while it's
continuing to dry, I'm just going to start
in these little windows. Normally when I'm doing windows, I just do a little brush
throat to suggest it. These ones I'm going to
go a little bit harder. I've got a small brush
and I'm going to mix up some bent ciena and
French tra to get a black. Really toothpaste paint. Then I'm just going to
paint in the window shapes. Then you can see
how, you can get a pretty good dark by
mixing these two together. If I don't get these dark
enough in the first hit, that doesn't matter, I can
come back and restate them. It also doesn't matter
if I've got a mix up, you can see that my
pencil or my pen, any of the other
marks underneath, again, it matter it just
adds some interest. Then I'm going to add a bit of a dark on the inside
of the door here. I'm just going to drag a line down and then
just restate a bit. T lines around the window. It's probably a bit too bit of a wet brush just a bit
of a dark on the side. Possibly across the top. All right. Okay. I'm keeping it
quite messy in tension. Now I want a bit more
of my B sienna and French ultra to pop a bit of a dark there. Straighten
that up a bit. Then these two
little windows here. That's bugging me a little bit. It's a little bit
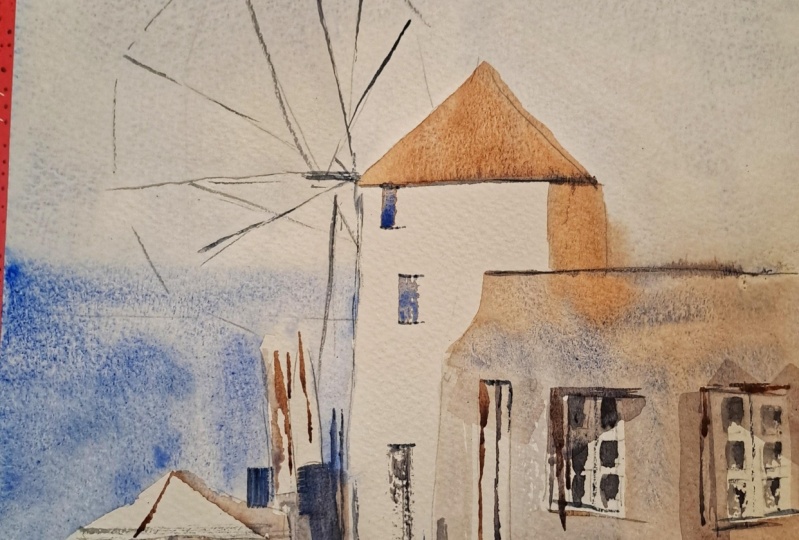
too rocky for me. Now, I think I'm dry up there. Let's. I'm going to
copy sienna roof. I'm just going to stick
with my flat brush. Now, if it's if you get some bleeding into the skin,
it doesn't really matter. Doesn't have to be
particularly perfect.
6. Adding the Foreground: All right. I think I'm dry
enough to go back in here. While that's drying,
I'm going to put some nonsense
down the bottom here. I'm going to do a combination of Burnt Sienna and
my French ultra. I want to pay attention to it. I like the patterns in the
picture of the little fences. I'm going to try and get
some of that in here. But really, I know I talk
about a lot of my lessons, but these types of lessons,
I just want nonsense. I just want stuff because the picture isn't about
this, it's about this. I'm I've got bit of
both on my brush. Let's see not enough.
Tikish paint. I'm just going to go
through and start to put vary my lines and start thinking about some patterning that might be suggesting
the little gates. A little bit of a dark
underneath that umbrella. Just moving from side to side. Don't get too caught
up in one spot. Don't worry if stuff
bleeds. That's fine. It's fine if it all mels into each other.
That doesn't matter. What you don't want to do is stay in one area
too long and get mud. You do need to move around a bit and be aware of how many layers you're putting on because
we can keep adding to this. We don't have to
put it all in now. Because I'm just
trying to suggest that there's a bunch of nonsense
going on down here. Okay.
7. Finishing Off: Now, I think my windows are
dry. What I want to do? I'm going to put
a bit of a mix of my B Sienna and my French ultra. I want to be able to see both. I to come, over
the window there. Chisel out that little curve in the buildings that door shape. But what I want to do is cast a shadow across the
cross the window, and across that window, I picked up too blue then. I just back off a bit. Because I want to release the light at the bottom
of each of those windows, then I want a little bit
of a shadow across here, just to settle that
back and then there's one up there as well. Now, while that's drying,
me get my little brush, bit of bien, bit
of French ultra, I'm just going to
walk it around. I'm after a bit of bleeding, a little bit of messiness. Restating a few of
those lines that I had. I'm now after a bit of a black, quite enough paint on my brush. Everything's a little bit gummy, a little bit wet still
here, and that's fine. I'm after these
small solid marks now and just a bit of nonsense. Maybe under the umbrella. That one is not working. Is
to there. C that one back. I'm going back to my big brush, getting better mark
better marks with it. I need something in where
these umbrellas are. Maybe just again, it's
a bit of nonsense, doesn't have to
really mean anything. I'm going to just on one
side of this umbrella, just a touch of the shadow, and then a little
bit of a line to suggest that they are the
partitions of the umbrella. Underneath here,
while this is still, it might be dry yet, but
that's okay. Let's see. I'm just going to
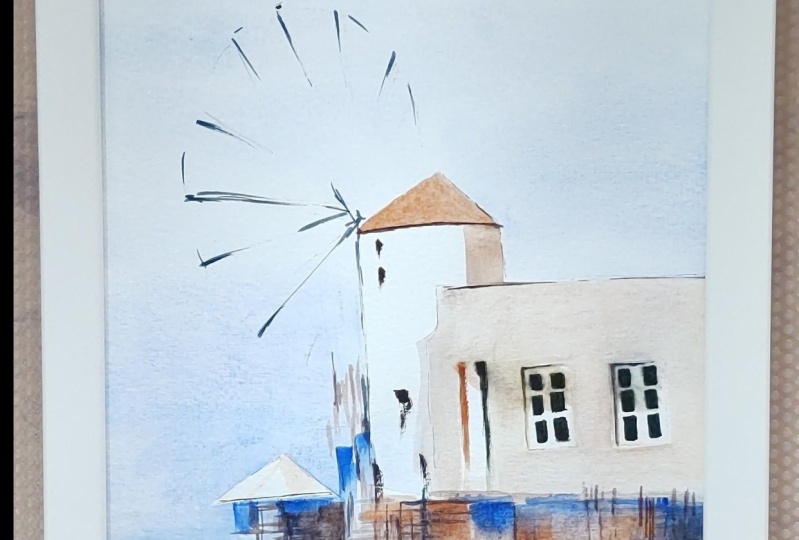
grab my black mix and just drag a dark under there. Then we're going to do the
place of the windmill. Just going to get a
little bit more dark. This, this is a bum bit. This bit you do with a ga. This is my rig. I want a mix of French
ultra and ciena. Big puddle of the dark. But I don't want to
water on the brush. I want to be able
to make thin marks. The reason I'm using
this is because you don't have much
control, which is good. I am putting in these lines roughly and I'm not painting
them all the way. I'm just getting some
marks in a big lump. My reference photo
just just be um. Getting some stuff in
without overthinking, and then I'm going to put a
few mas if I paint my tissue, so it's really not very
much on there at all. I can put a couple
of those lines in, but I don't want to overdo it. Then before everything is dry, I am going to throw in just
a few more random marks just to make these lines, these dark lines talk to
the rest of the painting. Maybe one up here. I'm just going to restate. Okay. On that window. Now, if your little windows
here have disappeared, mine are pretty strong still. You can go back in
and repaint them. Make sure because
this release of light is although it's a messy
abstract really quick painting, these two lights are
quite important. I think I probably need to bring that do that dark probably needs to come all the way down maybe a bit too
much light there. I'm just going to back
that. Off. So let's have it Let's see
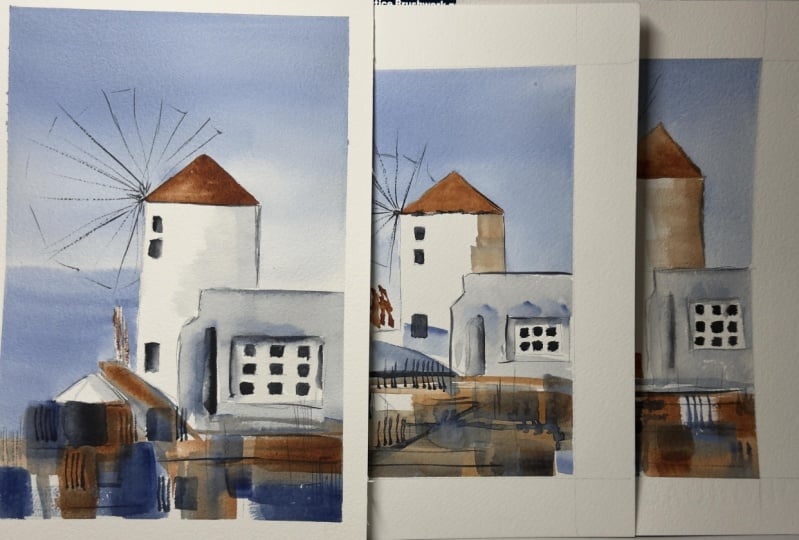
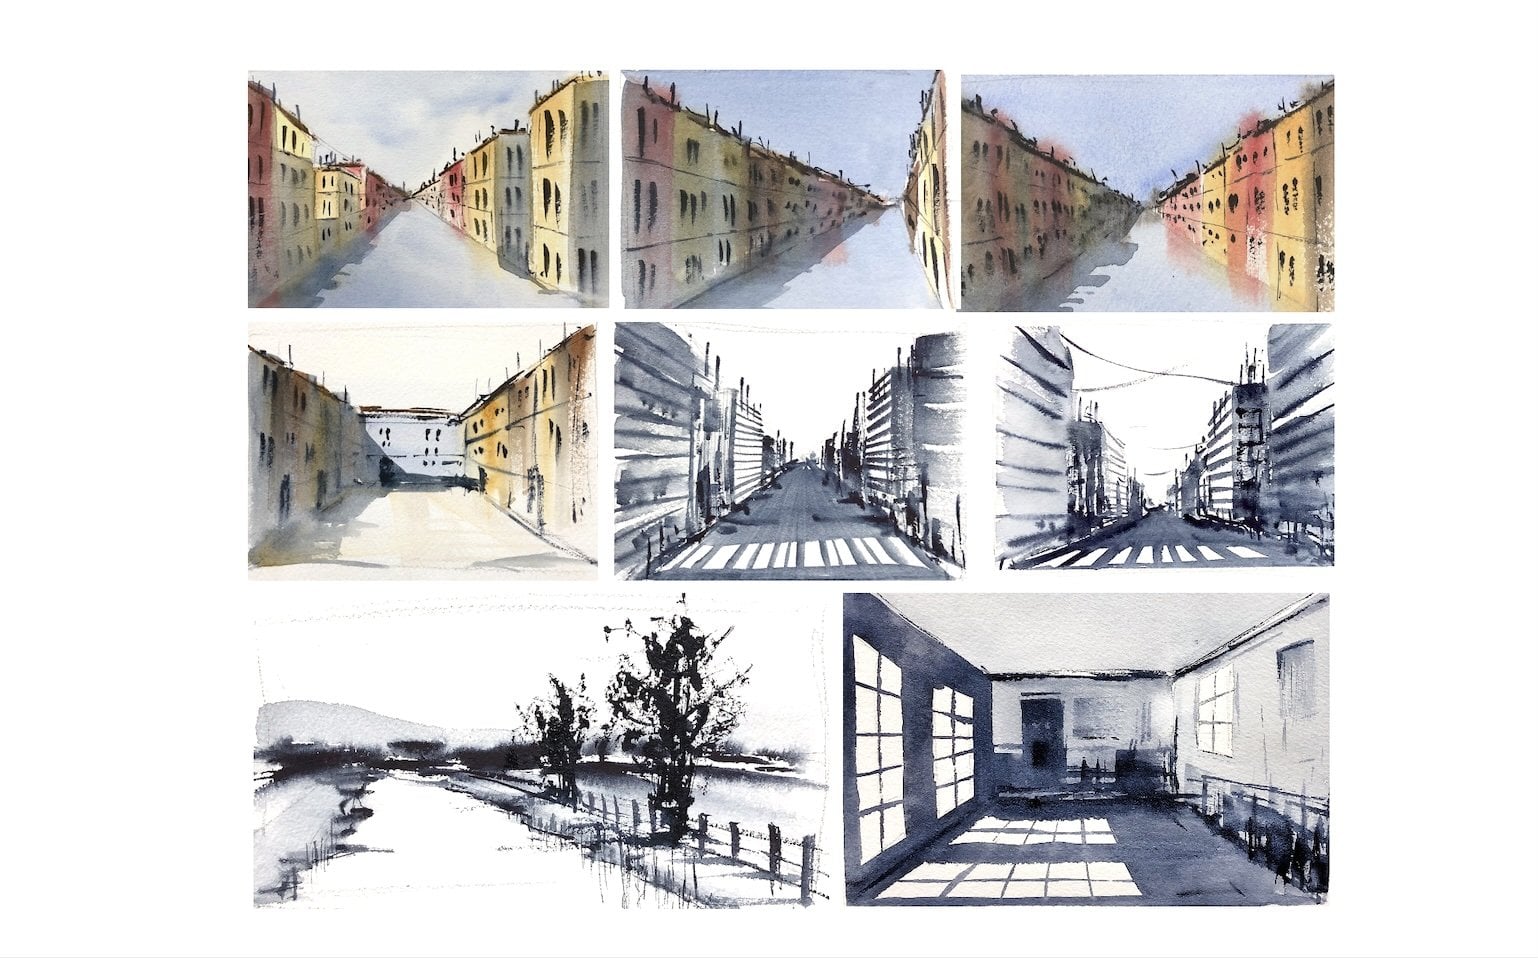
where we're sitting. So I've actually done this
one. I've done this one a couple of times in trying
to film it for you. I don't I like bits of each one. So if I show you,
they're all messy. They're all very messy,
which is what I'm after. But for example, I like
the roof on this one. In this one, I prefer the gaps and the whites that I have
in this area down here. To me, that's just a bit softer. I think I like the light and
the warmth through here. And then on this one,
I like these windows, but I like these windows
on the middle one. I do a lot of this where
I do multiple versions of the same little
painting to try and see which bits work well and
where I actually want to go. So I think it can be a
really useful exercise. The only disappointing
thing is if you can't get all the bits you
like on the same painting, but usually after three or
four goes, you can do that. So take a photo of your painting and pop them up on this project
section for me. I'd be interested to see
how you go with this one, but I want you to just
remember to keep loose, and it's really just a bit of a practice and a bit of a play on brushwork and
releasing light. It's always about
releasing the light. So thanks for joining me.
 Nadine Dudek, Professional Watercolour Artist