Rotate And Reflect: Simple Snowflakes in Adobe Illustrator | Sarah Renee | Skillshare
Search

Playback Speed


1.0x


  • 0.5x
  • 0.75x
  • 1x (Normal)
  • 1.25x
  • 1.5x
  • 1.75x
  • 2x

Rotate And Reflect: Simple Snowflakes in Adobe Illustrator

teacher avatar Sarah Renee, artist, SVG & pattern designer

Watch this class and thousands more

Get unlimited access to every class
Taught by industry leaders & working professionals
Topics include illustration, design, photography, and more

Watch this class and thousands more

Get unlimited access to every class
Taught by industry leaders & working professionals
Topics include illustration, design, photography, and more

Lessons in This Class

    • 1.

      Rotate & Reflect Trailer

      1:00

    • 2.

      Rotate & Reflect to Design Snowflakes

      9:29

  • --
  • Beginner level
  • Intermediate level
  • Advanced level
  • All levels

Community Generated

The level is determined by a majority opinion of students who have reviewed this class. The teacher's recommendation is shown until at least 5 student responses are collected.

10

Students

2

Projects

About This Class

Class Overview

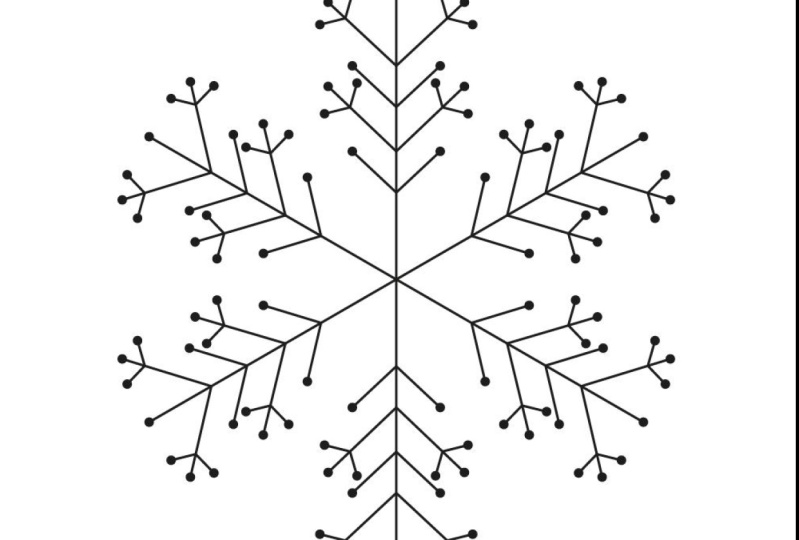
Learn an in-depth lesson on the Rotate and Reflect tools in Adobe Illustrator with this short Skillshare course. In this tutorial, you’ll learn how to use these tools to create a perfectly symmetrical 6-branched snowflake, and foundational techniques with the Rotate & Reflect tools that can be applied to countless design projects.

What You Will Learn

  • How to use the Rotate and Reflect tools effectively in Adobe Illustrator
  • Changing reference points and angles when using the rotate and reflect tools
  • How to apply these tools to design something like a snowflake quickly and easily
  • Practical tips like Smart Guides and keyboard shortcuts to streamline your workflow

Why You Should Take This Class

Learning the Rotate and Reflect tools can open up new creative possibilities for your designs and help to streamline your workflow. With this class you’ll gain the confidence to incorporate symmetry into your projects quickly and easily with the Rotate & Reflect tools. Whether you’re designing snowflakes or something else, these skills are a must-have in your Adobe Illustrator design toolkit.

Who This Class is For

This class is ideal for beginners with some familiarity with Adobe Illustrator who want to refine their skills. No advanced knowledge is required—just a computer and Adobe Illustrator software.

System + Software I Use In The Course

In this course, I'll be demonstrating using the 2025 Adobe Illustrator version and a Mac computer. Throughout the course you'll hear me reference keyboard shortcuts using the Option and Command keys, which you can substitute as follows for Windows based computers: Option/Alt and Command/Control

Meet Your Teacher

Teacher Profile Image

Sarah Renee

artist, SVG & pattern designer

Teacher

Hi, I'm Sarah! I am an artist, surface pattern designer and svg designer for Cricut & laser based in Texas. I love to combine traditional mediums, such as gouache and watercolor, with digital artwork made on my iPad. Creating art brings me a sense of peace and joy, which I convey through my calming color palette and often nature-inspired subject matter. I absolutely love planning and organizing, and translate my design skills into creating digital planners for personal use and to share with others.

See full profile

Level: Beginner

Class Ratings

Expectations Met?
    Exceeded!
  • 0%
  • Yes
  • 0%
  • Somewhat
  • 0%
  • Not really
  • 0%

Why Join Skillshare?

Take award-winning Skillshare Original Classes

Each class has short lessons, hands-on projects

Your membership supports Skillshare teachers

Learn From Anywhere

Take classes on the go with the Skillshare app. Stream or download to watch on the plane, the subway, or wherever you learn best.

Transcripts

1. Rotate & Reflect Trailer: In this short course, I'm going to show you an in depth look at the rotate and reflect tools in Adobe Illustrator. We'll learn how to change the point of rotation or reflection and how to rotate or reflect by a specific angle. We will then apply the knowledge that you learn about these tools to the simple project of designing a snowflake. We are going to design one branch of a snowflake using the Pen tool and reflect it to make it perfectly symmetrical. We will then rotate and duplicate that branch around a circle to complete a finished snowflake. I hope this class teaches you a quick and easy way to design a snowflake and gives you ideas for how you could use the rotate and reflect tools in other types of designs in Adobe Illustrator. I'll see you in class. 2. Rotate & Reflect to Design Snowflakes: Hey, there. Today, I'm going to be showing you how to make a simple snowflake using the rotate and reflect tools in Adobe Illustrator. First, I want you to create a new document with a square artboard. It can be any size that you want, as long as it's square. If you want your tools to be in the same location as mine, you can go to Workspace in the top right and select painting. So before we begin, I'll go over a few of the tools we'll be using to create the snowflake. So I'll predominantly be drawing using the Pen tool. Then I'll also be using the Rotate and reflect Tools, which the Rotate tool is here. And if you right click, the Reflect tool is underneath, and I'll also be using the keyboard shortcuts for these quite often, which you'll see pop up at the bottom of the screen. The Rotate tool, the keyboard shortcut is R, and the reflect tool, the keyboard shortcut is O. Let's take a more in depth look at the rotate and reflect tools. When you select an object and click the Rotate tool, the point of rotation is by default set to the center of the object. You can see that by this light blue target. You can click and drag to rotate the object, or you can double click the rotate button to bring up the options box and type in a specific angle. To change the point of rotation, you can click anywhere on the screen where you want that point to be and click and drag to rotate around that point. To change the point of rotation and select a specific angle at the same time, you'll hold down option and click at the angle that you want, and that options box will pop up again. Reflect tool works in a very similar manner. Single clicking allows you to change the point of reflection, and double clicking the reflection tool or holding down option to click will bring up the Options box. You also have the option to press copy for both the rotate and reflect tools instead of pressing Okay. Other helpful thing to have turned on before we start drawing our snowflake is smart guides. So you're going to want to press view and make sure that your smart guides are checked all around. All right, so for this method of drawing a snowflake, we're going to draw a six branch snowflake, and we're going to draw one branch and then rotate it around the circle to make copies of that branch and complete the snowflake. So let's start drawing our first branch. So first, I'm going to select the Pen tool, and this is where those smart guides will come in handy. I'm going to hover over where I think the center of my square artboard is, and you'll see it come up with the center mark, and I'm going to click and drop an anchor there, and then I'm going to come up to the top edge of my artboard and hold down shift to make sure that line is perfectly straight. And click to drop that there for this project, I am going to be using just a black stroke and no fill. And then I'm also going to increase the stroke width just a little bit and change the end caps to round it. Okay, so we have our first branch of spike. So next is to draw some branches coming off of this branch to add some detail, and we're just going to focus on the right side of the branch first. I'm just going to click on the Pass and draw some lines. And then if you want your lines to be at the exact same angle, you can select them, hold down option and click and drag. To make a copy. This may remind you of when you were a kid and you used to make paper snowflakes or you can do it as an adult, too, for fun. Then I'm going to use the Ellipse tool to add some rounded encaps to some of those lines. So if you don't see the Ellipse tool on top, it's probably under your rectangle tool, and you just need to right click to find it, and then I'm going to swap to fill in the stroke. So I'm just going to make a little circle let's send a little bit. I'm going to hold down option, click and trag that. I'm going to trag that all of the end caps. Okay. So now I am going to use the reflect tool to basically mirror everything that's on this side to the other side of the branch, so that it's an exact copy. So I'm going to highlight all of that and group it together, and then I'm going to use my keyboard shortcut O for the reflect tool and hover over until you can see that your path is highlighted and pull down option and click and then we're going to change the angle to 90. And you can click in unclick preview if you need to see what that's going to look like, and then press Copy. Okay, we're looking good. So let's get this Snowflake branch duplicated around to complete the rest of our Snowflake. I'm going to highlight everything and Command G to group it together. I'm going to select and then press R for the rotate tool. And then this is the center point of our artboard. So we're going to be rotating from this anchor point around in a circle to make copies. So to select this as our point of rotation and also bring up the options box for the rotate tool, we're going to hold down option and click on that anchor point because we're rotating around a circle six times a circle is 360 degrees, and then we're going to do divided by six. Okay. And then we're going to press Copy. Perfect. And then we're going to make sure that this is still selected, and we're going to duplicate that rotation by pressing Command D. And we're going to just keep pressing Command D until we have our completed snowflake. Then you could finish this off by creating some circle end caps for those points. And you could use the rotation tool to make copies of those two or press R for the rotate tool, and to select this as your point of rotation and bring up the dialog box, you're going to hold down option and click. And then it has the angle that we put in previously. So we're going to keep that angle and just press copy and then Command D to keep duplicating that all around. And there you have a quick and easy snowflake. I hope you enjoyed the simple lesson on creating an easy snowflake using Adobe Illustrator and a more in depth look at the rotate and reflect tools. Your project for this class is to create a snowflake using the techniques I showed you with the rotate and reflect tools, and then you can either save it as a JPEG and upload it to the project section of this course, or you can get a screenshot and upload that as well. I can't wait to see the snowflakes that you create and what types of projects you'll use them in.