Transcripts
1. Intro: Hi, I'm Sarah. I'm a surface pattern
designer and illustrator. When I first began my journey
as a surface designer, I was immersed in
creating tons of artwork and learning more about the world of
pattern design. Soon enough, I had a large number of files
of digital artwork on my computer that
were only seen by myself and what I
displayed on social media. I would procrastinate sending
my artwork to companies because organizing it into a
portfolio felt overwhelming. Finally, I figured out
a process to cut out the overthinking and created
portfolio templates in Mva. This way, as soon as
I create new artwork, I can quickly and easily drag
and drop my artwork into the templates and have an updated portfolio to
send out within minutes. If you're an artist
or surface designer who procrastinates sending your artwork out
because you find the process of making a
portfolio overwhelming. This class is made for you. In this course, I'm
going to teach you how to quickly and easily create two styles of professional and visually
pleasing portfolios, right? In Mva, I'll show you how to use these portfolios as templates to drop your artwork
into again and again. Then I'll show you
how to publish your portfolio as a
digital flip book without ever leaving Canva perfect for embedding on your website
or sending to companies. Some basic Canva knowledge will be helpful to
take this course. That way we can dive right into intermediate level tips and tricks to craft your portfolio. Are you ready to streamline
the process of creating a portfolio so that your
artwork can finally be seen? If so, I'll see you
in the first lesson.
2. Class Project: In this class, your
project will be to create a portfolio
template in Canva, fill it with your artwork, and post it to the
class project gallery. We'll learn how to create two different styles of
portfolio templates, cell sheets and Lookbooks. Your cell sheet template project should include your artwork, your name, contact info, and logo your collection
or artwork names and colorway names if it's available in
multiple colorways. Your Lookbook portfolio
template project should include a cover
page, intro page, table of contents, a
collection or category, cover, and the content pages, and a thank you page. We'll go through the
steps for creating each style in the class lessons. If you need help
getting started, head to the resources tab and download the class
resources page. There you'll find links to two Canva Portfolio
templates that you can look through as an example and modify to suit your
artwork and style. You'll also find an example of a flip book for you
to click through. Once you've created
your template, you can dragon drop
your artwork into your template and
download a page as a J P. Then you can upload it to the project
section of this class. You can also share a link to
your flip book portfolio. We would love to see
and admire your work. Before we dive into
working in Canva, we'll go over exactly how to prepare and save your
artwork for your portfolio. I'll see you in the next lesson to get your artwork ready.
3. Saving Your Artwork: In this lesson, we're going
to go over how to save images of your artwork to put
in your camp a portfolio. Before saving any
of your images, you'll want to decide
what page size you're going to create your
portfolio template on. Some common sizes of
portfolios are eight a two by 11 " or 11 by 17, ", all to use eight on a two by 11 " just in case the company I'm contacting doesn't
have the capability of printing a large size paper. If you're going to be making
a sell sheet portfolio, you'll just need
the artwork from one collection in however many color ways
you have it available in. For a lookbook
portfolio template, you'll want two to
three collections or categories of artwork. Once you decide on the page
size for your portfolio, you'll want to save
your artwork in the same page size that you
chose for your portfolio. This will allow us to
maintain the scale of each piece of artwork amongst
the entire collection. If you're wanting to make the
lookbook style portfolio, you should also
save any mock ups, motifs collection, logos, or process photos that
you might want to include. They don't need to
be full page images unless they are a mock up. But definitely keep
your page size in mind so that you don't
make them too small. It's also a good idea to
prepare a photo of yourself and your logo as well for a
lookbook style of portfolio. This is just a nice touch for your introduction page so that art directors can put
a face to the artwork. 500 pixels by 500 pixels
is a good size to shoot for when you're saving your images for your
Canva portfolio. It's important to keep
your file names in mind and make them something
that's searchable. If you have a free
Canva account, you do have the
capability to organize your uploads into folders
to help with organization. But there's also a search
function in your file upload. And if you use keywords
when naming your files, this can really
help with locating that specific piece of artwork
that you're looking for. Just make sure that
you name the file, something that's
easy to remember. Or at least add keywords after your artwork name just in case you forget
what it's called. You can also rename the file after it's
uploaded into Canva. If you have a Canva Pro account, you're also able to add tags to your images to help with
search and organization. Once you have all of
your images saved, you'll need to create
your portfolio document in Canva so you can start
uploading your images. I'm going to be
demonstrating with a canvas size of eight a two by 11 and you can pick any
option for 8.5 by 11 ". I'm just going to colic, create a design and flyer. And then you can upload
all of your files and organize into folders or
add tags if you need to. Okay? Okay. Okay. Now that we've created our document, we're ready to get started
learning how to use grids to create our
portfolio layouts. I'll see you in the next lesson.
4. Grids & Frames: Next we're going to
learn how we can use grids to create our
layouts in Canva. There are two options
for shapes that you can photos or images into
grids and frames. There are some significant
differences between the two. It's important to learn where the best use cases are for each. Both you can drag and
drop images or photos into and you can resize the
images by double clicking. Frames come in many
different shapes, and grids only come in
rectangular or square shapes. For frames, the proportions are locked and grids can be
resized in any direction. Why would we use one
versus the other? Frames would be great for Lookbooks for
showcasing a mock up. Because you can use
different shapes to add interest to the page, are what we're going
to be using to create the layouts
for our portfolios. Because you can resize
them in all directions, it'll give us
flexibility to create a layout that best
suits our artwork. To make your layouts
for your portfolio, you can choose a grid that has the number of
boxes you would like to display and
resize it to your liking. You can even change the
spacing in between the boxes, or you can make your own
free form layout using the single box grid and arrange them how you
would like on the page. Now that we know how to
use grids and frames, in the next lesson we'll
get started making a cell sheet template.
I'll see you there.
5. Sell Sheet Template: It's time to get started
making our first template. We're going to start out with
a more simple portfolio. First a cell sheet. What are the parts
of a cell sheet? You obviously need your artwork anywhere 1-12 pieces of artwork, as good, as long as
it goes together. You don't want to
put random pieces of artwork on the same page that
don't look good together. You'll need to have the name of your artwork or a collection. This could even be a skew
number or something that an art director could refer to if they want to ask
you more about it. You can also add
the colorway name. If your artwork is available
in different color ways, you want to have your name and your logo and most importantly,
your contact info. I like to include my
website, e mail address, and my social media
handle because some art directors
like to look at social media as a
mini portfolio. Okay, now that we know the parts of a cell sheet portfolio, let's start making one. I'm going to cell sheet for this collection
of artwork here, which includes five different
pieces in two color ways. First, I'm going to look
through the available grids and see if there are any
layouts of five that I like. For this cell sheet, it's important to keep in mind
how many hero pieces you have versus how many
coordinating pieces that can help
determine your layout. Because you'll probably
need a bigger block for your hero pieces as opposed
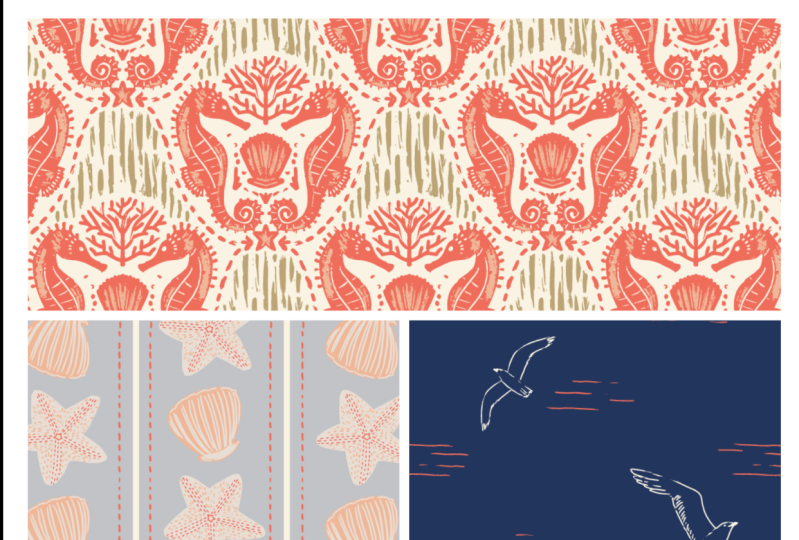
to your coordinates. I definitely know I want to feature this sea horse pattern. Pretty large. I would
call this one the hero. Then I have two other pieces
that are coordinates to, that are blenders
that I would just need a smaller
block to showcase. I don't see a grid that's
a grouping of five. That's exactly what
I'm looking for. I could use this one here, but I'd like to have the
blocks for the blenders be proportionally smaller
than the coordinates. It's not perfect for
what I'm looking for. I'm going to use a
block of three and that will be for my hero in
two main coordinates. Then I'm going to add
another grid with a block of two and just resize
that to be smaller. Then I'm going to
resize all of those so that there are some
margins on the sides. Canva does provide you
with page margins, but I find them to be
a little bit thick. I don't like having that much white space around my blocks. A trick I like to use
for spacing elements and put down a rectangle or a square to use as
a spacer template. If you go to position, you can type in
exactly what size you'd like your
spacer block to be. I'm going to do 0.5 ". And that will be my guide. You'll see these guidelines that will snap into
place as you're re sizing to help make sure the margins are the
same on all sides. Okay, I think that
looks pretty good. There's a lot of white
space on the bottom. I'm going to do the same
for the bottom as well, and change that block to 0.5 ". And I'll just move this edge until it matches
the spacer block. Okay, that looks much better. Next we need to add all of our text elements
that we went over. I'm going to write
the collection name and the color way name, because my artwork comes in
two different color ways. Then a keyboard
shortcut, I use a lot. Hold down the option key, click and drag, it will
duplicate that item. I use that to make
another text box. There are several ways you could arrange all of this information. Just do whatever you
think looks best. I would have the collection
name and your name or logo featured a little bit larger than the rest of
the text on the page. You could have your logo
and your name over to the side and then all of your
contact info in the middle. Or you can put everything
over to the side, whatever looks easiest to
read and the least crowded. I'm pretty happy with
this layout now, since I have two different
color ways for my artwork, I'm just going to
duplicate this page. And then I even like to change the names of the pages in Campa. That way when you download them, it will be a part
of the file name. Okay, now you've successfully made a portfolio
cell sheet template. You can use this
template again and again by dropping
your artwork into it. We'll go over exactly how to
do that in a future lesson. Just stay tuned for that. Up next, we'll learn how to make a lookbook portfolio template. I'll see you in the next lesson.
6. Lookbook Template: In this lesson, we're
going to learn how to make a lookbook
portfolio template. First, we'll go over the
parts of a lookbook portfolio so that you understand
the difference between a lookbook
and a Sal She. Because a lookbook
includes more pages, you'll need more artwork to
make this type of portfolio. This will be organized as either collections
or categories. Depending upon your
style of artwork. I recommend only having
two to three collections or categories so as not
to overwhelm the viewer. Because the lookbook is more
like a magazine or a book. You're going to
include a cover page. Just be a full page of one
of your pieces of artwork along with your name or your logo and whatever
your artists title is. Next you'll have an
introduction page. I encourage you to include a head shot on this page because it allows the viewer to connect with you and put a
face to your artwork. Then you'll want to
include a small paragraph about yourself and the type
of artwork that you make. You can even include what
type of work you're open for, whether it's licensing, custom work,
freelance, et cetera. You could also include a few process photos on
this page if you want. And then finish with your
content info and salutations. Next you'll have a
table of contents. Since this will be a
portfolio with several pages, it'll allow the viewer
to navigate much easier On this page, I'd like to include
a preview image for each collection or category. Including a clickable link for navigating is also a nice
touch for the viewer, and this is really easy to
do In this example here, I used a frame for the preview images just to
add an interesting shape. Then to make a link,
you just highlight a piece of text
and double click. And then you can link
to one of the pages. It will list all of the
pages in the document. You'll scroll down and
find the page that you want to link to and
then press Done. The next section will be
the bulk of the portfolio, which will be your collection
or category sections. On every single page, you'll need to include your
contact info at the footer. I include my name, my website, and my e mail just
in case somebody prints just one page
out of the portfolio. That way your
contact information will always be attached. Each section I like
to lay out with a section cover page and
then your artwork pages. You'll make these
pages similarly to your cell sheets and include
your collection name, color name, and artwork names. I just left or right
align the text depending upon if it was a
left or right facing page. Then depending upon
how many pages I have, I may or may not add a
section preview page. The most important thing
to keep in mind for the artwork pages is if they are left or
right facing pages. If you have a collection that is spanning across two pages, make sure that with the
order of your document, they will appear
right next to each other as left and right pages. Otherwise, you may need
to add something like this preview page here. I'm just going to check which
pages are left and right facing the cover page
will be by itself. And then after that, you'll
count left, right, left, right, to make sure that all of your pages are going
to appear as you want. I didn't have enough pages for my collection sheets to
display left and right, so I need to add an extra
page after the section page. I'm just going to
add a collection preview page where I'll put small images of both
of the color ways in that collection just
to give an overview. Another type of filler page that you could do is a mock up page. If you're working with
categories instead of collections here I'm just adding some grids so I have the correct number of blocks
for my collection preview. Then I'll go out to the
all pages view and I'll duplicate that page and added in after each
collection cover page. All right. The
final page will be a thank you and contact page. You'll want to thank the viewer for taking the time
to look through your artwork and talk about your interest
in working together. Then you'll put how to contact you if they would
like to move forward. I'd just like to include all
of my contact info here. Again, just to make it easy, the viewer doesn't
have to scroll all the way to the
front of the portfolio. Again, adding clickable links will also make it that much
easier to contact you. Here's an overview of what a lookbook portfolio
layout can look like with all of the pages
that we just went over. Of course, you'll need to modify the sections to
suit the number of pieces of artwork that you'll have in each category
or collection. All right, next we'll
learn all about mock ups. Making mock ups inside of Canva, and also some great
places to get mock up templates
outside of Campa. I'll see you in the next lesson.
7. Mockups: There is a way to create
realistic mock ups right within Canva and some
of them are pretty good. They have them divided
into categories. I'll show you some of
my favorite categories that would be
useful for artists. There's a print category for things like cards and notebooks, home and living, that has
pillows, mugs and bags. Apparel that has shirts but not a lot are full
coverage mock ups. Those would be best
for placement. Prints packaging
which has boxes, gift bags, tags,
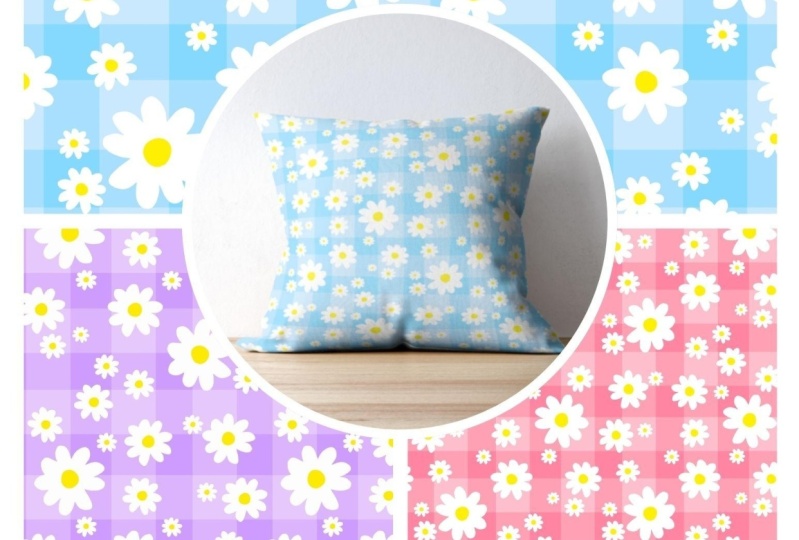
and water bottles. Today I'm going to show you
how to create this pillow mock up from the home
and living category. First, you'll go to the left
toolbar and click apps, and you'll type into the
search bar mock ups. This is a third party app. If it's your first
time using it, you may have to give Canva your permission to use the app. Then we'll scroll down
to Home and Living. If you're not already on the page that you want
to place the mock up on, you can navigate to that page,
but don't worry about it. If you want it on
a different page, you can move it around later. After you click on the
mock up that you want, you can see these
instructions pop up to just drag and drop any image
into the mock up. It's really that simple. I'm going to go to
my Projects folder and find the artwork I want
to put in the mock up, and then I'll drag
and drop it on top. You'll see this spinning circle to let you know
that it's loading. Okay, now that the
artwork has loaded, I want my artwork to fill
the pillow in completely. To do that, you will go to
Edit and then click Fill. I think that looks
pretty good for completing a mock up
all within Canva. Okay, let's say you have a circle frame that you want
to bring this mock up into. You can't just drag and
drop it into there. We need to get the mock up
into our upload section. First, to do that, you will just click
your mock up and then click the three dots
to get a pop up menu. And then click
download selection. It didn't matter what size
my mock up was on the page, the image, download
it as the same size. Regardless, you can change the file type to
whatever you'd like. I'm just going to do PNG, then I'm going to upload the
file that I just downloaded. Then I can drag and
drop it into my frame. Aside from these
mock ups in Canva, I get mock ups from
places like etc and creative market smart
objects in Photoshop. My favorite mock up maker is
a company called Creates. I've bought their fabric
factory collection of mock ups and it was definitely worth the money because
I use them all the time. If you have Photoshop, I recommend checking out their website and clicking
their freebies tab, because they have plenty of good free mock ups
for you to try out. Okay, now that we know how
to create a lookbook and a sell sheet template in
Canva and make mock ups, let's learn how to best use your templates every time
you make new artwork. I'll see you in the next lesson.
8. Using Your Templates: In this lesson, we'll go over some tips for using
your templates. There are two ways that you
can utilize your templates. Either by duplicating the
entire template or duplicating individual pages
within the template to keep things organized. I recommend duplicating
the entire template each time you have new artwork. This ensures your
portfolio stays neat and avoids having
two meaning pages. Especially for lookbook
portfolios for cell sheets, you could get away with just duplicating pages within
the template document. It just depends on your
organization style. I'll give you an example
of both of these options. I can make a copy of the
cell sheet document by selecting the three dots
and clicking. Make a copy. Then I can add my title for
my new artwork collection. You can repeat this process every time you have new artwork, or I could simply just click
into the template document, go to the all pages, grid view, and duplicate those pages and then fill
them in with my artwork. Next I'm going to
show you how to actually put your artwork into your template and resize and make sure that
everything is proportionate, just as you designed it. If you're keeping
all of your files organized in Canva like mine, you'll go to your projects, click your Collection folder, and then just start dragging and dropping your artwork in. I like to get all
of my artwork in place first before
doing any resizing. When you drag and drop your artwork images
into grids or frames, Canva is going to
automatically resize the image proportionately to the size of the grid or frame. That changes the scale
of your artwork. In order to show the true scale in relation to each other, we need to resize each
image to be the same size. This will be easy
because we saved each piece of artwork to be
the same size as our page. You'll just double click
the image and then choose a landmark to
drag the corners out to. I like to either pick
the page edges or the content edges
as a landmark here. In this example, I'm just extending the artwork to
the edges of the grids. And then you'll double click on every single piece of
artwork and do that. You don't have to
worry about being too precise about
lining the edges up, just try to get it pretty
close to your landmark. You can also double click and reposition the artwork
if you don't like the part that's showing
for a lookbook, you would do this
exact same process. Duplicate your lookbook
template and just go through and drag and drop
all of your artwork in. And then re size as necessary. Every time you make new artwork, all you have to do is drag
and drop your artwork in. Resize, move around
a little bit, change a little bit of a
text and then you're done. In the next lesson,
we'll learn how to export your portfolio
as a flip book. But if you just want to export
your portfolio as a PDF, all you have to do is click Share and then click Download. Then you can select
which pages you want and adjust the
size and format. To export a PDF with
clickable links, you want to select
PDF, standard. Do not check Mark, Flatten, as this will
remove your links. Canva writes on their
website that standard PDFs export at 96 DPI. But when I looked at my file, it looks like it's 72 DPI. Either way it will
be a Los file. Perfect for sending out. All right, we're getting
down to the end. In the next lesson, I'll
show you how to export your beautiful multipage
portfolio into a flipbook. I'll see you there.
9. Export to Flipbook: In this lesson, we're
going to learn how to publish your portfolio
as a digital flip book. First, you'll want to select either your lookbook portfolio or multiple pages
of cell sheets. Otherwise you won't really see the flip book effect if your document is
not multiple pages. Canva has several integrations with apps that create
flip book PDFs. When I search flip book, these are all the
ones that came up. Most of them are paid
and some of them do allow one free flip book issue. And Hazene both allow five
flip books in their free plan. Hazene allows embedding with their free account
and issue does not. I've tried both
of them out and I do have a preference for Hazen, but I'll still go through the steps of
publishing for both. And you can decide what
you'd like to choose. First, I'll walk you
through the steps for exporting your
portfolio to Hazen. This process is super simple. All you have to do is
open up your document, click Share, click More. Go to the Design section
and click in Flip Books. Then you can click open, and it will automatically only select your first ten pages. You'll need to click that and click all pages in the design, and then click Save. You can do this whole
process without actually creating
a Hazen account. First, I'm going to click
View in Hazen Flip Books. I have already made an account. But if you haven't
made an account yet, it will tell you that your
flip book will be available for one week unless you'd
like to make an account. I would just go ahead
and make an account so that your flip book is
available for longer. Once your flip book
is done processing, you can look around and see everything that
Hazene has to offer. They offer a lot for just
having a free account. You can share your flip book as a link or embed it on
your website for free, and there are no ads when somebody clicks
the link to view. You can even set a
password to protect it. They also have an option to get a QR code for your flip book. If you haven't already
included a table of contents, you could make one
within their platform. Here's an example of what the Hayzene portfolio looks
like embedded on a website. It's just an interactive
way to view a portfolio. You can navigate with the
arrows or your keyboard arrows, and all of the links
are clickable. All right, next let's try exporting our foot
book using issue. First, head to the Apps
tab and search for issue. Click Open, and then you'll
need to click to Preview. Remember not to
select flattened PDF, otherwise your links
won't a anymore. Make sure that all
pages are selected. And then click Export. It's going to show you a
preview of your foot book, but your foot book is not
uploaded to issue yet. If you haven't connected
the app through Canva, you'll have to press
press Connect again. Then you can either make a
new account or sign into your existing account and give Canva permission Integrate. Unfortunately, it takes you
through this process again. We'll click Export
Draft to issue. Again, don't check anything, Make sure all pages are selected
and press copy the link. And then open a new browser tab and head over to that link. You can see the flip book looks pretty similar to
the one with Hazen. You can just click the arrow or use the arrow keys
on your keyboard, and all of the links
are clickable. You're going to have to name your flip book and then press Publish with a free
issue account. You can publish up
to five flip books, but you can really only
share it through the link. You're not able to embed your flip book on your
website with a free account. When I go to the link it shows a lot of ads
around the flip book. For those reasons, I definitely
prefer haze over issue. But I wanted to
show you how to use the Canva integration just in case you already have a
paid account for issue. If you want to see a live
demo of the Ha Zen flip book, you can download your
class handout PDF from the resource section
and there will be a link in there to see
the flip book example. You can click around
and see what it's like. I hope you had fun
learning how to make portfolio templates and Canva and have learned
something new today. I'll see you in the
next lesson for some closing thoughts in a
review of the class projects.
10. Conlusion + Project Review: Now you officially
know how to make portfolio templates quickly
and easily in Canva. Thank you so much for joining
me during this class. I hope that you
learned some tips and tricks in Canva to help make the process of creating a portfolio something that you don't need to stress about. You learned how to make both
a cell sheet style portfolio and a lookbook style portfolio. You even learned how to
publish your portfolio as a digital flip book to
display on your website, whichever style of
portfolio you choose. Remember that there are no rules when it comes
to making a portfolio. Take what you've learned
in this class and use it to craft a portfolio
that works for your art. Then start sending it out so that your artwork
can be seen. If you haven't already, don't forget to
upload a J peg of your portfolio or even the
template that you've made. I can't wait to see
what you've created. Be sure to follow me on Skillshare to see when
I create more courses. I would love it if
you left a review and a comment of what you
would like to learn next. Thanks so much for
joining me today. I'll see you next time. Until then, stay creative.
 Sarah Renee, artist, SVG & pattern designer