Transcripts
1. Welcome to the Class : Hello, and welcome
to this class. My name is Heidi and I am your
instructor in this class, where we are going
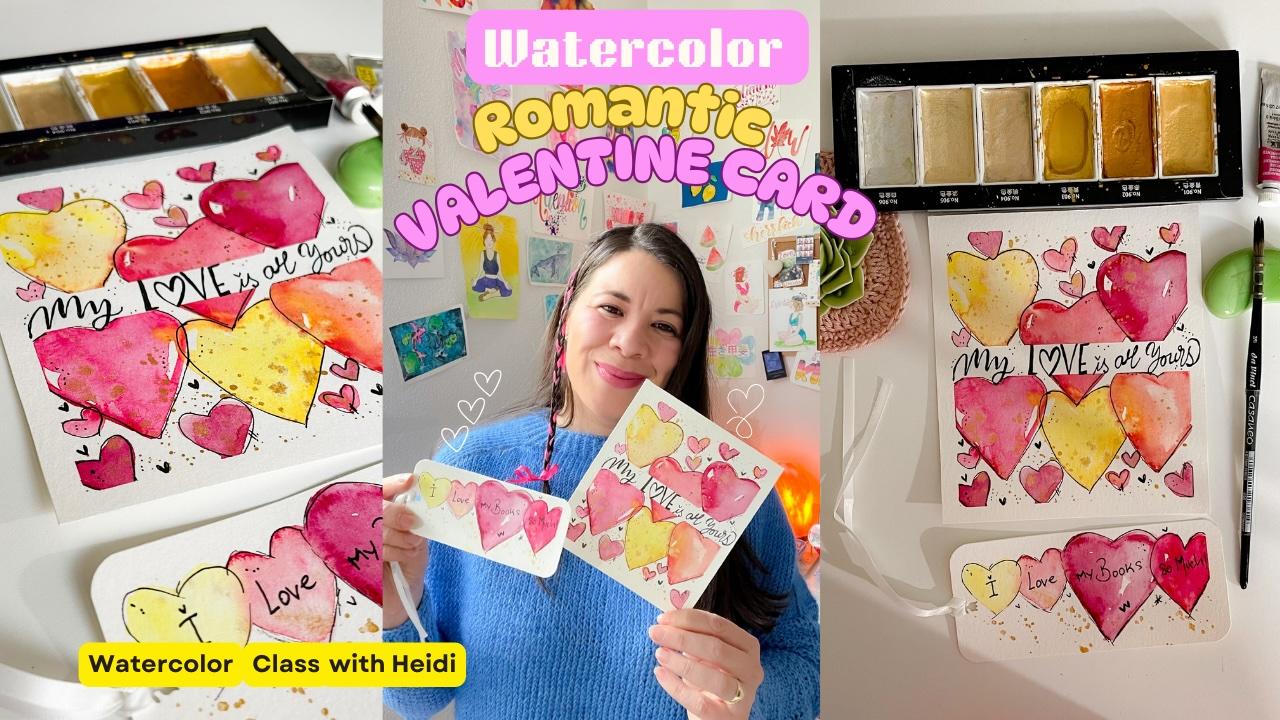
to be painting a beautiful Valentine's card using a cookie cutter to make the most beautiful
background hair shapes. I will be guiding you
to the whole process, starting with a blank canvas and then going step by
step in grating every element and using the most beautiful shades and adding some
lettering at the end. I will be also showing you what I do with my
Chloe color charts, and in this case, I will be transforming my color
chart in a bookmark. So you can do it too. It is very fun and very useful. So I can wait to
see you in class. I hope you join me. And if so, please consider following me here on
a Skill chat so you don't miss any update or any new class that I share
here on a skill chat. I can wait to see
you in class and I will see you in
the next video.
2. The Supplies : Welcome to the class. Thank you so much for entering the class. Now we are officially
ready to start it. So we are creating together these two beautiful
Valentine's motif, a card, and a bookmark. For that, we will need
the following supplies. Starting with a round brush, any size will do a fine liner. Better in black. It will be used to make accents and outlining
the hair shapes. We need some washi tapes and some masking tape
to fix or paper. Of course, we need
watercolor paper, and I will recommend you
use a Call press one, I always use a cutwod to fix my paper so it doesn't
move in the table. We need water, clean water. I have 2 yards to
clean my brushes. We need a khaki cutter. In this class, we are
making a Valentine's motif, so a hair shape is the best
choice and a clean towel. We need gold color. So we can use ink or we can use watercolor as I'm
showing you here. You can choose also to
use a gel pen in gold, and it will do the work. We also need shades to make
our hearts and a mixing pan. The colors for the
watercolors that I use, I will explain to you
in the next video. So have as well as some
scissors, and let's begin. I will see you in
the next video.
3. Making the Color Chart: Okay, before we start painting, we always do a color chart. And I am here placing the
colors on my mixing pan, starting with the
permanent yellow, following by the rose mother. And now we are placing
the crimson lake. And lastly, we are placing
in the permanent rows. These are the shades that I selected for the glass because
they go well together, and we will see that when we start creating
the color chart. I have a piece of paper, the same paper that I
am using for the card to make the color charts. And I am fixing it with masking tape on my cardboard
to start painting. Here we are using all the
materials and supplies. So you can have an idea
on how you will work on your final piece or your
card or your bookmark. And I am here activating this
gold, color, watercolor. And remember, you can use a
ink or gel pen for this one. Starting with my wet brush, I will start picking
the colors that I have on my mixing palette, and I will show you how I use the free hand
making the hair shapes. And adding more water to move the color and
make the hair bigger. Now I am using the rose mother. And you can see all
these colors are in this romantic be type of colors, using the free hand
technique to make the hair shapes and using
water to move the color. Now I will show you how to
use your cookie cutter, make your brush wet, place the cookie
cutter onto the paper, and then go around the shape. Crimson lake is the
color we are using, and now we are just moving
the color to the center of the chape more water than color. So we get the beautiful
color effect. This is the wet or we
technique for watercolors. And now we are free handed another shape using
the permanent rose. And this is just an idea of the design that we are
creating together. Adding a little bit more
of water if needed, so the color dilute a little bit and make
a beautiful effect. Now we are just making some
splashes with the gold, making it as wet as
possible and then tapping onto the brush with my finger. Make sure you tap the brush
very gently because it can then splash too much color and the splashes
will be too big. So be gentle and go slow and see how they are
forming in the paper. And, of course, letting it
completely dry as well. Now that it is completely dry, I will then outline
all the hair shapes. It is to give more contrast and definition to the painting. Yeah. You can also add
some little touches of lines and dots and hair shapes around the
hairs to see how it looks, popping up popping
up your painting. So we are creating
our idea on how our final piece or final
card will look like. So with this color
chart, we are the. Later, we are
creating a bookmark. So stay tuned because we are doing it at
the end of the class. I will see you in
the next video.
4. Preparing the Paper: Let's prepare the paper so we can start working on
our beautiful card. I am using the size
13 by 15 13 by 15. You can use whatever
size you prefer. It's up to you. Let's begin. I will fix my watercolor
paper on the cardboard. This is to prevent my desk from being stained with the watercolors and the splashes
when we do them. I recommend you do
the same if you don't want your workplace
to get stain. I am placing the masking
tape at the bottom and on the upper side and then on the sides,
left and right. It makes easier when we need to take them off from the paper. And I am leaving 1 millimeter
to make a little frame. So the car looks
cleaner and sharper. You can also use here your
washi tape if you don't have the masking tape.
It's totally fine. So now that we have fixed the
paper onto the cardboard. I will then divide the paper in the middle because I want to add a
lettering for the card. And for that, I am
using this washi tape. And the sizes are perfect. If you want a bigger space for your lettering is
completely fine. I will see you in
the next video.
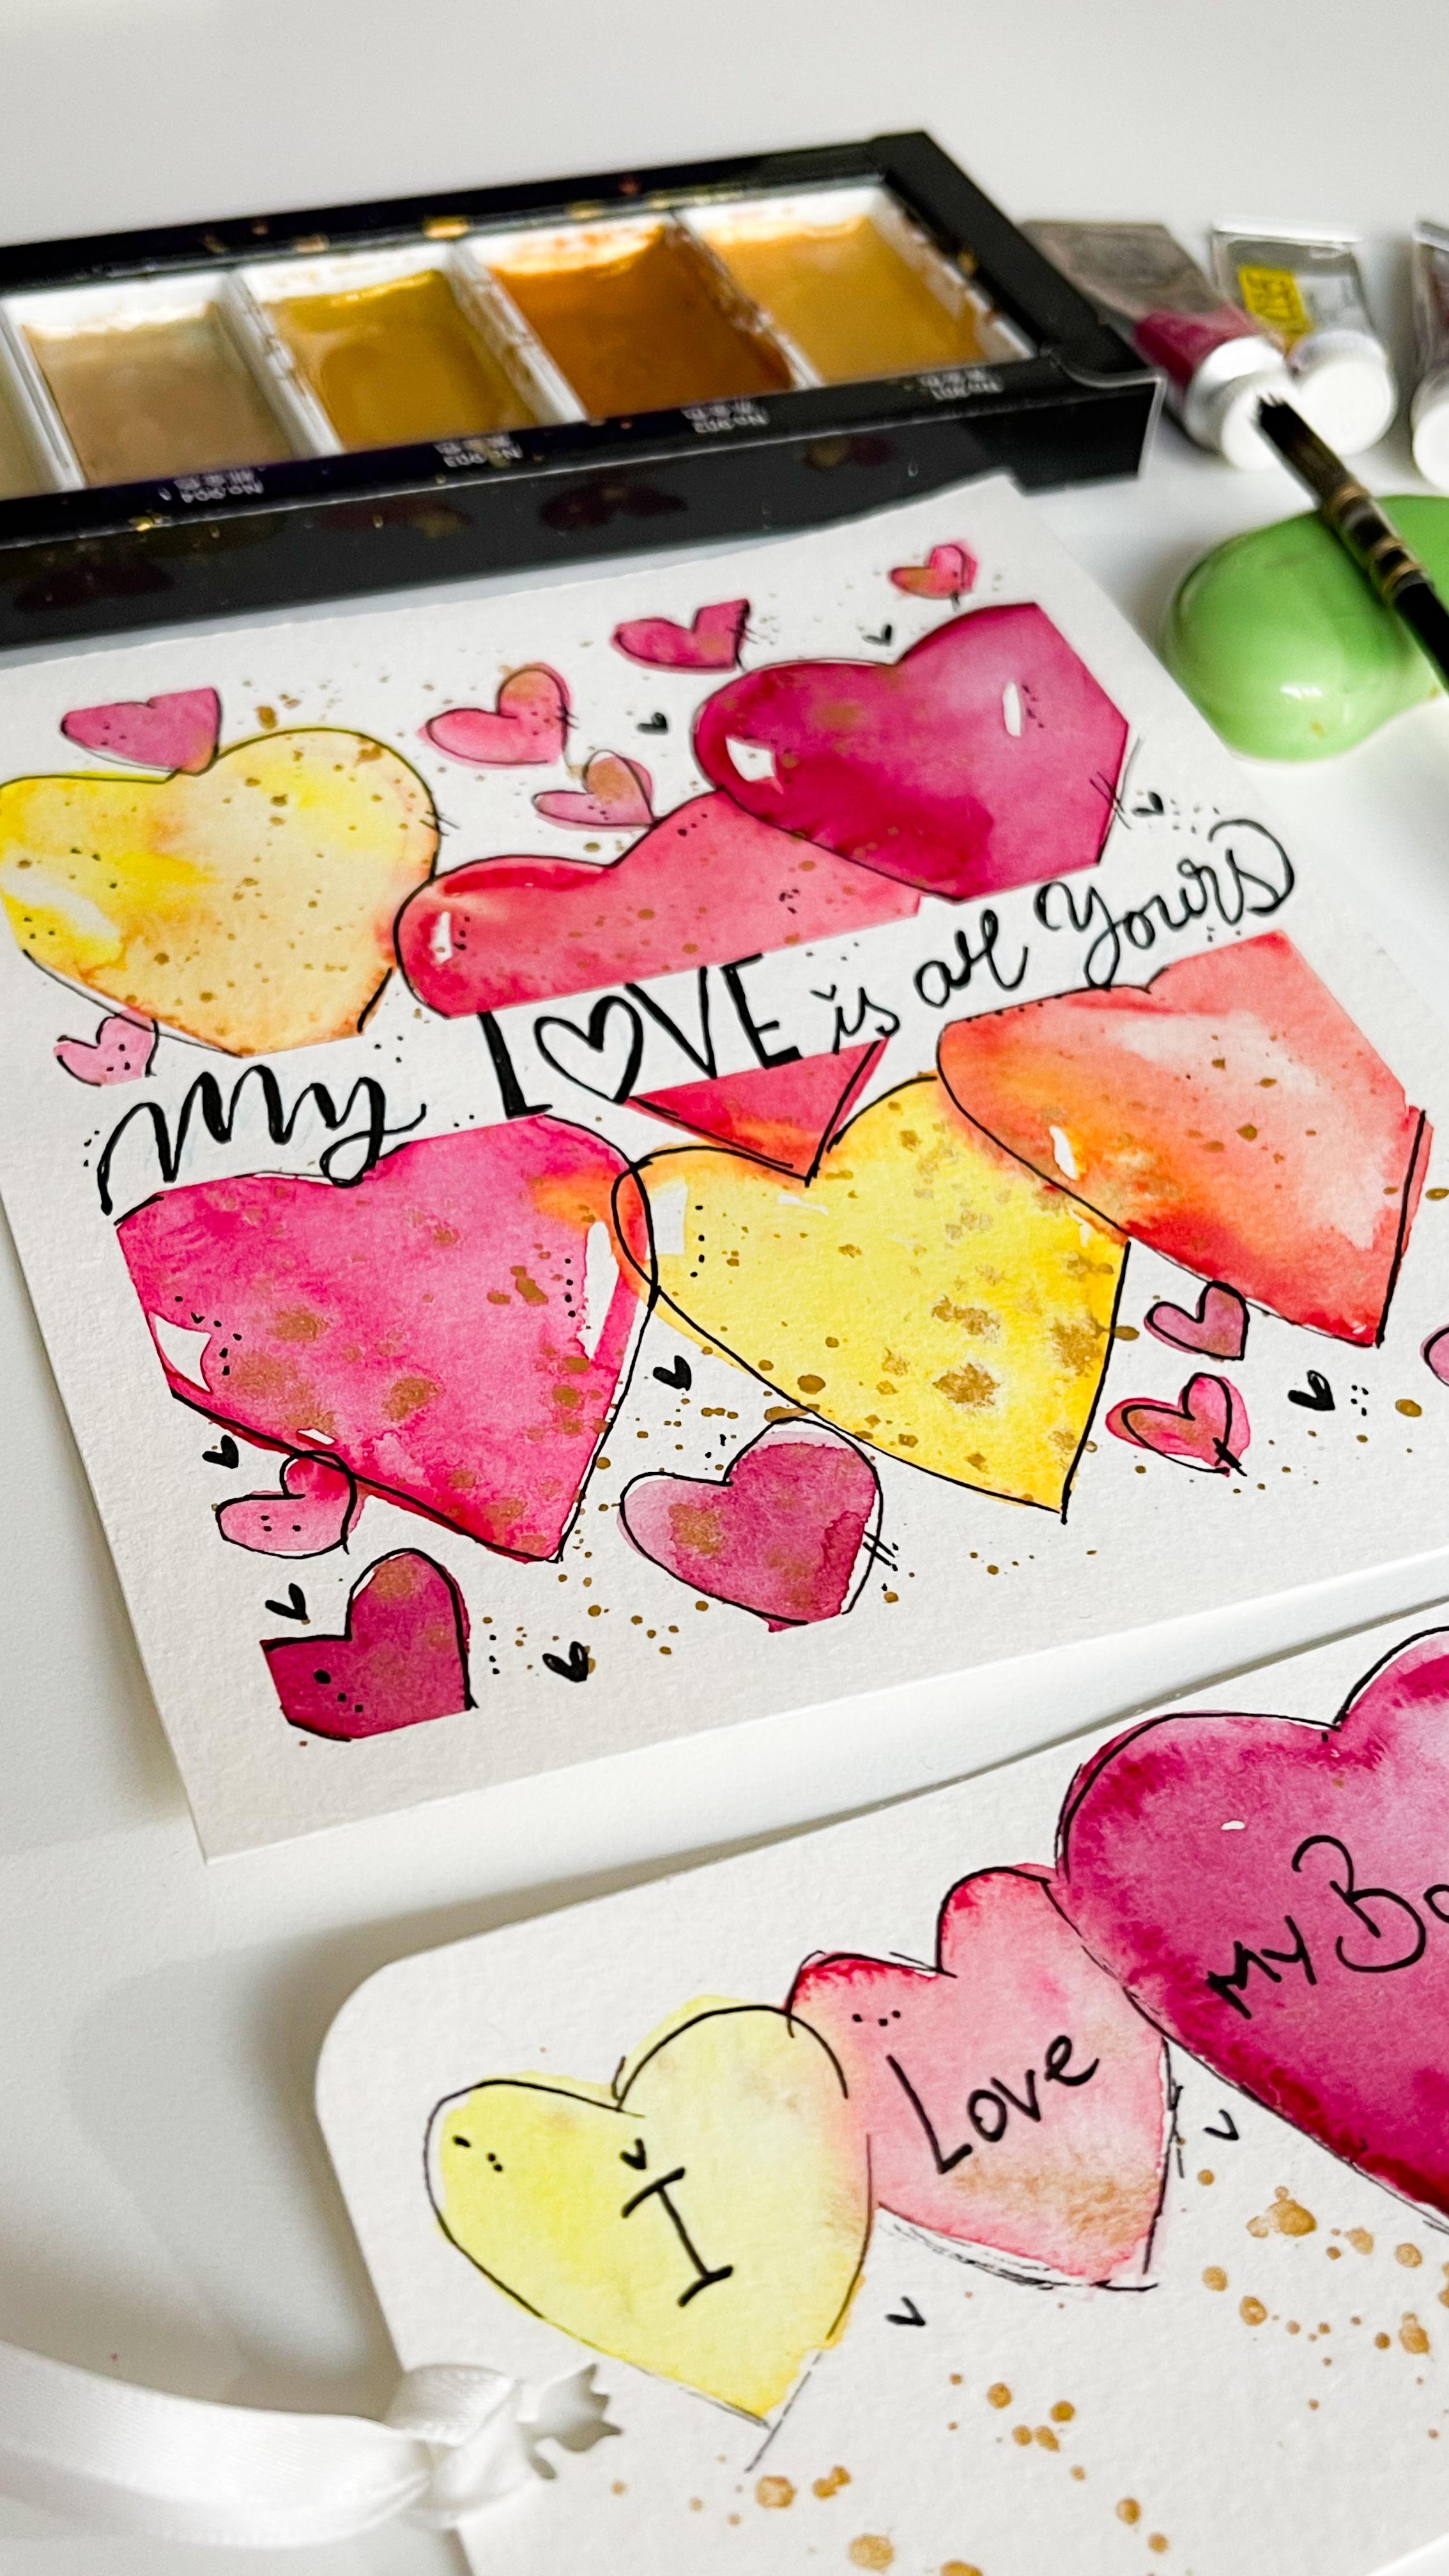
5. Painting the Cookie Cutter Hearts: We are set to start painting our beautiful romantic
Valentine's card using a Kaki cutter to
make the hair shapes. And we have our khaki cutter. And now I just make my brush wet and then placing the
hair on the left side first, and starting with the yellow, watercolor going around
the shape, the hair shape. I have a little bit of red here because the Kaki
cutter was not clean. So make sure your
cookie cutter is clean, and this is no problem
because this color work well together as we saw
in the color chart. Now with just water, I then just moving the color
to the center of the shape. I will do three hair shapes
on the upper side using the cocky cutter and three hair shapes on
the bottom sides, using the cookie cutter as well, and using the colors that
I have on my palette, mixing them well
and adding water on my hair shapes to move
the color around and to create this beautiful balloons
effect on the watercolor. Now I will place the shapes, cookie cutter head shape above the washi tape where
I am dividing my paper. So it looks like
the head shape is behind the lettering when we do the lettering. You will see. Now with water, I will
move the color as well and let it sit and
see how it looks. Here I am using
the second color, which is the rose mother. And it's a beautiful shape. I can wait and see what color
you choose for your card. There are many combination
of colors that works together and you will discover that when you do
your color chart, as I was explaining to
you in the past video. So we are ready to place the the head shape on
the right side and a young overlapping as well on the previous hair that I did. And then using water
to dilute and move the color to the horse
surface of my hair chip. Looking and really beautiful and I am leaving,
as you can see, some white space, so it
made the shiny effect. Now I will place the cocky
cutter on the bottom side, starting with the
left as well as well, cleaning my cocky cutter here, so it doesn't get
mixed just yet, and making my brush, wet and placing the color. And as you can see, I am pledging with
all the colors, and now I will be using the
permanent rows here first, and then moving the
color with my wet brush. So easy and so beautiful
is this playing around with things that you had at home and with your
watercolors, of course. Remember to lift
those white spices because they make defects. And if you see that you
have too much color, use your brush and
pick up those excess of color and clean the
brush in your clean towel. As well, remember to
clean your cake kettle. We always learn something
when we are experimenting and playing with our
tools and watercolors and brushes and things
and techniques. Now I will add a yellow heart shape in the
middle to create contrast and more cohesiveness on my painting and then moving the
color to the middle. And now let's use the last Let's make the last hair
shape with a Kaki cutter. And I will use for
that. Tose mother. Looking very beautiful
and very cohesive, picking up some color, and then I need to let
this a little bit dry. And for the next part, I will do some free
handed hair shapes, smaller ones using the
colors in my palette. Trying to make a
harmonious painting, adding those had shapes where
I think they look well. On the edges and between the heads that we
have in our paper. But making some smallest and some medium size. It gives more contrast
between the heads, sizes. Add as many you want, or when you feel
there are enough, stop and let it completely dry. I will see you in
the next video.
6. Adding the Gold Splashes: The painting is completely
dry and now it's time to add the splashes with
gold watercolors. Remember, you can use ink for doing this
part of the glass, or you can do it by hand using
a gel pen in gold color. Tapping the wet brush
in gold watercolor, I tapping the brush with my
finger above the painting. And the splashes are perfectly
small and beautiful. Let it completely dry. I will see you in
the next video.
7. Outlining The Hearts Shapes: Painting is completely dry, and as we did in the
color chart practice, we are going to be outlining
all or her shapes. As you can see here,
all of them are dry, and I will go through with my
fine liner in color black, making them pop
with the outline. Super slow and
maintaining the shape. The smallest and the medium
size and the biggest, all of them are going
to be outlined. I am adding as well some other elements like
little hair shapes with my fine liner and making some dots inside
the hair shapes. This is just to elevate the
cuteness of this painting. Go through all the
chips that we did, all the hairs with
our fine liner. Go slow, don't feel rushed and add as many little dots and little accents
to the hair chips. You see the utility and
the helpfulness of doing your color chart and looking at how your colors work together or the
supplies that you have for your painting before you start making
your final piece. It gives you a broader idea on how you can play around
with these tools and, of course, making
your painting and your experience of
painting a joyful one. And you can discover
new things that you want to integrate
in your work. This card is looking
really pretty with the gold accents and with the splashes and all these
little highlights that we are adding now with our
black fine liner. So I hope you are having fun and making your card as
beautiful as possible. And I will see you
in the next video.
8. Peeling the Masking Tape: Painting is completely dry, and I will peel off the tape, which is one of the
most satisfying part of every painting I do. And to see the revealing of the painting is
in fact magical. And you can see how
beautiful it is coming out. And we will peel off
the painting to get ready to then add the
lettering in the middle of it. So satisfying the tape
peel off so easily. So I hope your
painting is turning out really cute, and of course, I can wait to see what
you create and can wait to see your class project in the project section
for this class. Look how shiny and pretty and cute and beautiful
this card is. And now we are ready
to add the lettering. And for that, I have a
watercolor pencil to add the text that I want to add to the card and then going
with my fine liner over it. I will see you in
the next video.
9. Adding the Letttering: Using the watercolor pencil, I will trace the guide
for the text that I will then outline
with my fine liner. The text that I am writing
here is my love is all yours. You can use another
text, another message. But I think being romantic
is all about creativity. So you can use any
message you want, or you can include the
name of the person you are giving this card
to and be creative. Of course, this is
always your choice, how to do it, and what to
add to make it unique. The best of the watercolor
pencil is you can erase them. Or if you are using them for painting something and
then adding watercolors, it will just dissipate. And that is very easy
to use and helpful. Then you don't have any trace of the pencil, the
normal pencils. Now I will just trace all the
letters with my fine liner. And going slow
through the lines. And I am using two
types of lettering. So I give some contrast here. And then I will just go
through again making the lines thicker
on the letters. It can then be easily read by the person who
is receiving this card. You can use these Valentine
cards for your loved ones, for your wife or for your husband and for your
boyfriend or girlfriend. But also, you can use this
card for your friends and for the family members that you love because this time is
to celebrate life, love and relationships
you have in your life, and they are very important, of course, and we need to
nurture them and give our best. So any type of message
you want to convey, you can use these little
moments to do that. But remember, you
can do it any day, any moment you feel like it. You don't need a
special day to do this to show your love. So I'm trying to make
this thicker to get more dramatic effect and that it is very contrasting the other elements on the card. E. You could use another
color if you prefer, maybe gold or red, or you can interchange
the colors in the letters that will
make a beautiful touch. As always, I recommend you left creative guide you while you are making and here into your intuition because that is the best guide we can have. Now I am adding some
little dots here and there to mix a little bit
with the painting, and I think this is Gret. I will see you in
the next video.
10. Making a Bookmark: Let's make the bookmark
with our color chart. For that, we need
a paper puncher to make the round edges. You can use a scissors, another paper puncher to make the hole where we are
going to place the ribbon. This is very easy. Take
your piece of paper. I hope you did this
rectangular as I did. And go to the edges, make it round with
the paper puncher. If you don't have one like this, just use your scissors and
make these round edges. And with the paper puncher, we are making the
whole so we can go through our ribbon here. So it's mark or bookmark. So we see when they are inside the books.
This is very easy. If you don't have another
paper puncher like this, you can use your
scissors and make a small hole to go
through your ribbon. Super, super easy, super
fun and super beautiful. Okay, this is
looking really cute, and I really love this idea
to make this into a bookmark. Now I will add a beautiful text as well because you
can give this as well. You can give this to someone
you know love books. And I am adding the message. I love my books so much. Such a lovely message. And Wala, we have
done our bookmark. Now you can use
this in your book, or you can prepare it to give to someone else that love books, and now they have a
beautiful item to use while they are reading and
taking time to themselves. So easy and so useful. I hope you take this
idea and use it as well. So our bookmark is done, so we can continue to make the big reveal of our
card and bookmark. I will see you in
the next video.
11. Final Piece Reveal: And here we have it or
bookmark and or card, a beautiful way to celebrate love and life
for Valentine's Day. Here we have, I can wait
to see what you create, what color you choose, what message did you want
to convey in your card. Let me know when you upload your class project in the
class project sessions for this class because I cannot wait to get in contact with you
and your beautiful work. That makes me always so
happy and smile when I see your class project on the class project
session for this class. Hope you have fun
and enjoy the class, learning something
new, and at least got inspired to create
something beautiful. So this is all for the class, and I will see you
in the next video.
12. Class Project: So for your class
project, is super easy. You just need to take pictures of your process, your materials, your final piece,
and share it with me uploading this on the class project
section for this class. You can also check out the example class project
that I uploaded to the class, so you have a better idea
on how to create your own. You can left big comments so I can get in contact
direct with you. Thank you so much, and I will
see you in the next video. Can you wait to see
what you create.
13. Thank You: Congratulations.
You made the class, and I can wait to
see what you create. And I also can wait
to know if you have any comments or any
doubts or any suggestion, please don't hesitate to contact me uploading your class project, and then you can share with me your ideas or anything you
want to share about the class. Tell me also, how was
the cast for you? What is easy? What is fun? Are you trying this
new technique? Are you inspired to create some beautiful things and
a bookmark, for example. So let me know and I can wait to see what
you had created, and how was this
experience for you? Remember, you can always
support me in this class, leaving a review and uploading your class project in the
class section for this class. And if you want to
leave a review, you just need to click the
tab here in the video says, review the class, so you can
share with me your inputs and help me to know how
do you like the class? And if so, please consider following me here on
skill chat so you don't miss any update or any new class that I share
here on a Skill hat. So I am so happy to have you. And it was so much fun, and I will be thrilled to see your reactions and
your class project. What your color is used for your hair chips and anything you want to
share about the class. Thank you so much, and I will
see you in the next class. Keep creative. Bye bye.
 Artjourneywithme Heidi, ARTIST AND FACILITATOR