Transcripts
1. Introduction: Are you looking for realistic watercolor paint
digitorials for Christmas? I got you. Welcome to realistic watercolor
Christmas elements. Easy to advance holiday
theme in watercolor. You can learn to paint
three holiday elements such as cotton flower, pine leaf, and poinsettia. This class is for aspiring
watercolor artists at any level in
watercolor paint. Hi, I'm Bianca, a watercolor
artist from the Philippines. I paint realistic watercolor
flowers and fruits. In this class, you will learn to simplify the
reference photo with step by step voice instructions and mostly real time painting. Also, we will use
some metallic paints to level up our
watercolor painting. You may use also metallic pens. These metallic
paints are optional, and you can use the art supplies you have available with you. Remember to check the projects and resources section to get the downloadable file that
includes the reference photo, the outline drawing, the
list of art supplies, and the color mixes a
use in every painting. This is my third
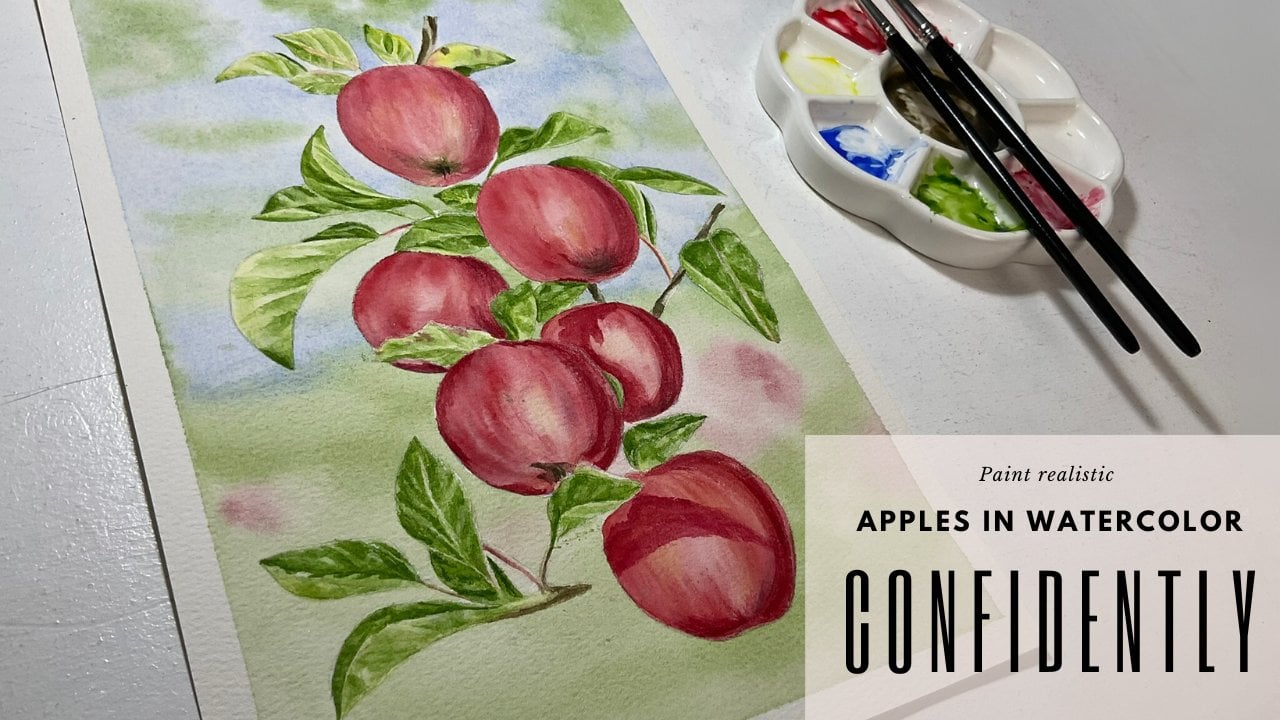
class on skill share. I also have a class about painting realistic
apples that have watercolor basic guides like transferring the outline drawing to your watercolor paper, brush, strokes, water, and paint ratio or
watercolor consistency. I also have another
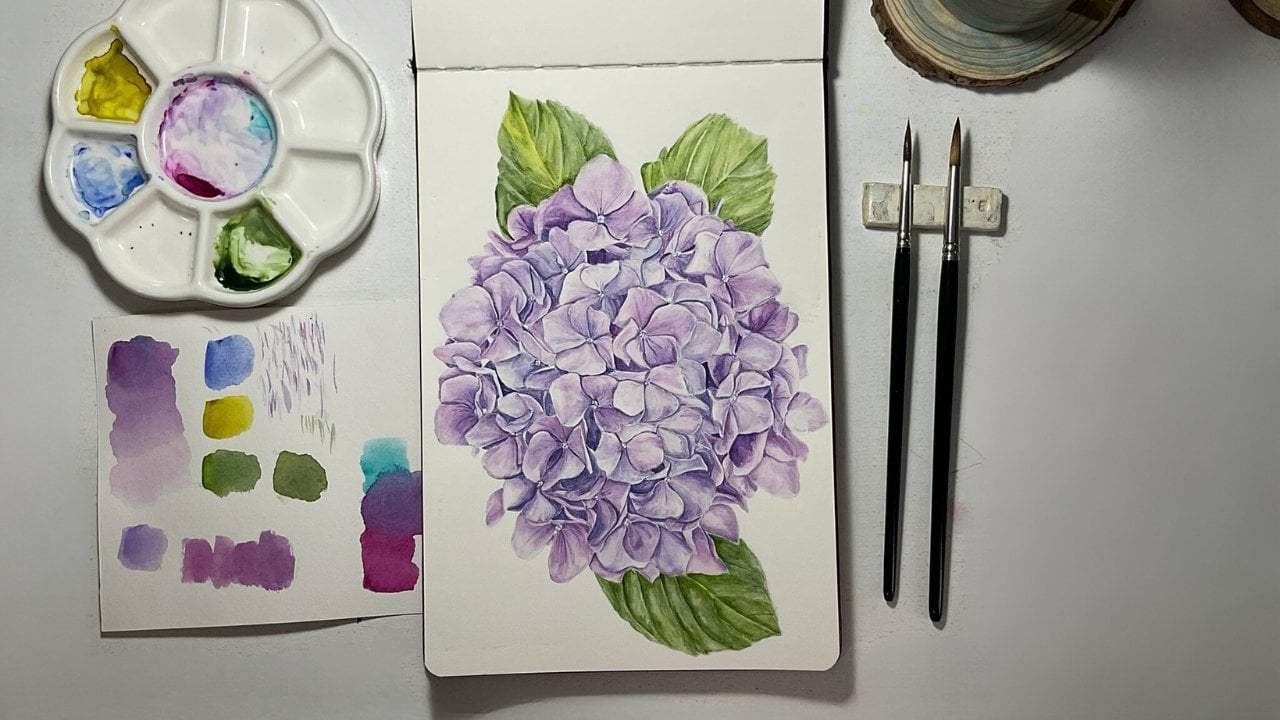
class that focuses on negative painting
techniques with a hydrna. You may also check those
classes if you are interested. So if you are ready,
paint with me these beautiful holiday elements and finish this class to
get an exciting gift.
2. Your Class Projects: This class has three projects. For beginners, I suggest
painting the cotton flower. For intermediate, I suggest
painting the pine leaf. For intermediate to advance, I suggest painting
the poinsettia. But don't limit yourself
to paint just one project. I recommend challenging
yourself to paint two or all
holiday elements. Remember to submit your
class projects because I'm excited to see your
watercolor paintings. So let's prepare
our art supplies.
3. Art Supplies: Welcome back to my class. Here I will show you
the art supplies. You'll need to paint
the holiday elements. First would be the paper. For the paper, I am
using a sketchbook. If you have loose sheets or
block, that will be fine. I'm just using a sketchbook, and this is Bao hong
Academy Press paper. This is 300 GSM and 100% cotton. So hot press is smooth
and it's not textured. You may use cold press
if that's what you have. But for painting
realistic floras, I prefer hot press, cut on watercolor paper. So I'm using a sketchbook. If you don't have a
sketchbook, that's fine. You could use whatever you have loose sheets or
block, that's okay. The size of my paper or my
sketchbook is six by 9 ", but the kine drawings, you can use it on transferring to A four size or bigger paper. Next, we have two cups
of clean water here. One is for cleaning our brushes, and the other one is
to wet our paper. Next, we have mixing palette. So I use ceramic mixing palette. You could use whatever you
have if you have tin palette, if you have plastic,
that's fine. I just prefer ceramic mixing
palette with multiple wells, so I won't mix colors
to the other one. For the colors, here
are my watercolors. These paints are in
tubes like this, and I just pour this into
small also in watercolors, I will be using tarpinelTuches, metallic
watercolor paints. This one is from Daniel Smith. This is Iridescent antique gold. And I have here from CR, this is interference,
green, blue shift. So these are the same colors
I just poured into pans. Since we have watercolor, I have also hyped to privett the watercolors
before painting. Next, I will show you would be the brushes that I am using. The first two would
be the main brushes that I normally use on
most of my paintings. This is around size seven. This is a synthetic brush, and also this one
a synthetic brush. This is size four,
fine tip brush. When if it's wet, it is very pointy. So if you have a pointed
brush, that would be good. Also, I will be using my
smallest brush that I have, this is two by zero, it's called the
OptimoKalnski brush. This is the smallest
brush that I have, and I will be using this
to paint the pine leaf. If you have size zero or size
two, that will also good. But if you have a
small brush like this, it will be very great to paint the details
or the pine leave. The other brush
that I have this is an old Kolinsky brush. I just use this to pick up color from the pens to transfer
to mixing paette. I do not use this normally to paint and
this is Kolinsky brush, so it holds a lot of water, but to paint realistic subjects, I prefer synthetic brushes that do not hold too much water. Also, for transferring the
outline drawing to your paper, I use this four H pencil. Use four H. If you have H
or HB, that would be good. Don't just avoid B brushes because B brushes are smooth and can smudge
on your paper. I use four H pencil because this is light
enough on my paper, and it can easily
remove before painting. I also use this needed eraser
to erase some pencil lines. I also have a towel here, a microfiber towel to remove the excess
water from my brush. Since I am using a sketchbook, I will be using also the clips, these clip binders
to hold my paper. Or you may also use
tip if you have tape. And the last one would be
these outline drawings. So I have the outline drawings
ready for cotton flower, pin leaf, and also
for the poinsettia. You can check the projects
and resources section to get these outline drawings
together with the color mixes that I have
the list of materials I use. If you don't know
how to transfer your outline drawing to your
watercolor paper neatly, I suggest to check my
other class that is paint realistic apples and
watercolor confidently. So check it out if you want
to learn how to transfer your outline drawing properly to your watercolor paper
without a mess. Now, let's go to painting.
4. Preparing the Cotton Flower Colors: Before painting, I
prepared the colors that I will use in
this cotton flower, and the main color
that I will use for the stem and the leave
would be English red ochre. This is English word ochre, and this is in T consistency. All of the colors
that I have here on my palette are all
in T consistency. For the shadows, I will have also Daniel Smith,
French automarine. I will also use
transparent Py orange, and this is from CR. And the last one I have is very diluted T consistency
of CEPIa from Shinhan PWC. So just mix it. There you go. So these are the colors that
I will use for this cotton.
5. Painting the Shadows First: For the first layer, I will be painting
with underpainting, so I will be focusing
on the shadows. So what I will do, I will paint here first
on the left, Okay. And then here and then the stem. And last, I will be
painting the cotton itself. Since this cotton is very, very light and also the
stems and the leaves, it will be very
thin consistency. So basically what I will do to enhance the color
would be glazing, it means that applying
thin layer of colors once the first
layer has dried. So I will zoom in so you can
see clearly where I paint. I will start here at the top. In this area, especially
this part is very, very thin and very small area. So I won't paint
this wet on wet, but I will paint
this wet on dry. I will need to remove other
pencil ins here and here. I will use thin consistency
of English red ochre, and I will paint here. There we go. And I will add I will
continue painting here. Now I'm done with this. I will continue painting this area. I will paint the shadows first, and I will paint I will
be painting this area, the inner leaf with the consistency of
French ultramarine. This time I will be painting
wet on wet technique. Okay, there I will add
more paint in this area. And I will soften this. I don't want to leave it dry
and I will wet this area. So when you soften the strop, I drag the color and use the water that I have in my brush to wet the
other areas. Okay? So here, I am going to add more blue this is the darkest
area of the leaf. So I will add more blue here. This would be our underpainting
and here as well. And here, soften this. I will also soften this area. Okay, it. And I will
also paint here. It looks like I
missed a line here, so I'll add a line
here, curve line there. And I will continue painting. I will wet this area. Okay, there you go. And
here's just a small area. I'm painting this part, what on so instead
of what on what. There's a small area
and will soften that. Now I will leave this, and then I will go here
to paint this part, this I will wet this area. I will be doing wet
on wet this part. This, I will soften this part. Okay, there we go.
And I will add more paint here.
Okay, there it is. And this area, there's
like a hiding there. So I will just wet this area a little and add a
little bit of blue. O. There you go. And then soften this, and then I will be
moving to the stem. Now on the stem, I will still paint
this wet and wet. I will be starting painting
this part that is at the very bottom of the
flour or cotton flour. I will still use
French ultramarine. I will just paint this area, this part on the left. And a little bit
here on the right, but I will just wet this
again. There you go. This is the darkest part of
the stem because this is the one that is right
below the cotton flower. Okay, now, on the left side, I will paint this wet on wet
with French ultramarine. There you go. And I will soften this part. There are parts on the
left that is dark, so I will paint
just a little bit There you go. I
will soften this. I will rinse my brush
because I will use orange on some
parts of the stem. Next, I will paint this area, the middle of the stem with
transparent or orange. This time, I will be
painting wet on wet. Make sure if you do this, that the blue is really dry before you paint it with orange. So just but on wet a
little bit, right? The color will help
to enhance our brown. Okay, there we go. This time, I will be
painting this area, like the sides of the leaves with very diluted
English red ochre. So make sure that you have a very diluted English red ochre because this is very light, as you can see on
the reference photo. I will start wetting this area, painting this wet on wet. Okay. And I will get
English red ochre. Should occur here on this area. Very, very diluted,
very, very watery paint. Okay, and here as well. And here. I will just pick up the paint here. And this time, I will
paint this area, this small part with more
of English red ochre, adding more color,
but there here. Okay, I will leave it here. I will paint this area
again with wet on wet. And I will start painting
this in a curve manner. Okay. So to avoid our
painting to look flat, I am painting in a curve manner. There you go. If you think you need to raise more pencils, you can do so. My brush is very watery, so I just use whatever I have in my brush and I will
just soften the sides. There you go. Here, I will
paint this wet on wet. Okay. Seems like
there is a line here. I will just remove it first
or release this line. There you go. I will painting this wet on wet. Sure. There you go. This is more brown. I will need to rinse my brush, remove the excess water, and then I will move the paint to lighten the
color because it's too brown. It should not be too brown
but very watery, very light. And there you go. And here. And here I will
soften this area. The I go. And I will add more around here there. I will leave it dry, and then I will come back with second layer of
this cotton flour.
6. Intensifying the Shadows: No now I'm done with
the first layer. Now I will be painting
the second layer of this. So I will use English red ochre to paint the inside of the leaves, okay? I will use the same mix
that I have on my palette. I will be painting
this wet on wet. So I will start wetting
this area first. I will start here. This
is quite big area. So I will be painting
this wet on wet. There you go. I still use the
consistency of English, red ochre, whatever I have in my palette that
I prepared earlier. I just glaze it. Okay. It's okay to start light and
continue painting light. Since this is just
a second layer, we are starting to
build up the color. Okay, there miss soften that. And there o. Okay, that's it. I
will leave it to dry, and then I will continue
painting on this area. I will be painting
this wet on wet. Okay, there it is. Okay, there I drag the paint, and I will continue painting
this area this is like the folded part of the leaf and drag the color and soften. That's it. Now, here below, I will just paint
this wet on dry because this is very tiny area. There it is. Now, this part, I will be
painting this wet on wet I'll add more paint here on this area so that I can enhance the color
and at the same time, it will help the other area
to show up more So basically, we are doing negative
painting on this part. And I will continue painting. I will be painting the edge, wet on joy, whatever
paint left on my brush. Okay, there it is. Now we'll
continue painting the stem. I will just move it. There you go. And then I
will paint the stem wet on wet with English road ochre. We'll be starting here. Okay. There I go. Then I will wet this
area this tower part. The getting more paint
and add it here. Okay, there it is last
on the second layer, I will be painting this area. I will still use
English red ochre, but this time we'll
be painting this wet on dry instead of wet on wet. And this part here. Okay, there you go. This is the second layer, and I will let this dry, and then I will come back for the third layer and
continue with the cotton
7. Painting the Cotton: So this is the color flower
that we have right now. This time, I will be painting
on the cotton itself. So since it is white, I will paint only
just the shadows. Okay, just looking on
the reference photo, we will be focusing on
the shadows because we are going to paint
white on white paper. This time, I will be painting
on the cotton itself, since it is white and the
paper is white, as well. We will be painting the shadows. And aside from that, as
for the reference photo, we will focusing on the shadows, we will keep the white as white. But we will also show where the shadows are so that it
will look like a cotton and not like a transparent on paper because we are
painting white on white paper. So if you have
pencil lines there, you can remove as
much as you can, as long it is not very visible and you could
cover them with paint. So I have here a
very diluted sepia. Once sepia is diluted, it won't be as dark as it is. It will be actually yellowish,
brownish, grayish color. So that's what Sepia is. So I will be
painting the cotton. Flour. This time before
painting the cotton flower, I will be painting
this wet on dry. So I will be starting to
paint here on the left, and I will enhance the
color here as well. So we'll be focusing
on the shadows. There we go. I'm going to get pergolutd wash here and test the color here.
Okay, there you go. So here, I will remove some
of the pencil lines there. And I will use also
the tip of this brush. I will just follow the shape, and I will just paint
like the strands of the so I cannot follow
the reference photo, but that would be
my still reference. I cannot just copy as
it is unless if you are going to paint hyper
realistic, you can do that. But this is more of simplified version of
the reference photo. I am painting just the
strands of the hmm. There we go. So we'll
be adding shadows here. If you think it is dark, you can raise your brush, and then you can brush again on your paper
as long as it is very, very light, it
should not be dark. You can think this
also wet on wet, but not too much because
this is more of the details. And I'll add a little
bit more here. So basically, once we are
painting the shadows here, we are actually doing
a negative painting, just like the other class
that I have that I painted Hydranga with a negative
painting technique. You could also watch that. Okay, there you go. And here, since they
are cut on here, I will paint like some strands. You can make like curve
lines or curve strokes to show the shadow and the
strands of your cotton. It will also give
your cotton shape, unlike if you paint
with straight lines. So if you do not have a
pointy brush like this, I suggest use a
very small brush. I think rigor brush
will also do the trick. All right. And just
following the sheet there. Okay, there you go. I hope this time, it looks
like a cotton to you. Not just a ball of
paint or whatever. Okay, so here, there is,
like, separation here. So I would bet that
and a thin line there. And shadows here are the
division of the cotton. I will also soften this
with my damp brush. And here we have the
shape here of the cotton. I will just paint this
with some strokes using the tip of my brush.
There you go. I will get more
diluted sepia here. I will add some strokes here
or shadows on this side. You may also follow the
shape of your drawing. I will just soften this
area and this at the top. There you go. I'm just following the shape or the
drawing the line joining. There you go. You can
add some strands there. So your Ciba should
be very diluted. There you go. Also here, And we have also some part of shadows on in this area
as well of the cotton. Okay. And so often
that, there you go. So we have the shape
of the cotton now. Okay, since we have the shape of the cotton as of the moment, I can just I can add more as much as you want to as
many details as you want. But you can also
continue that later on once we are
painting the details. For now, I will
just let this dry, and then I will come back to the leaves and the
stemp and finish it.
8. Enhancing the Leaves: This time, I will be painting more on the leaves and the stem. I will be starting here. I will just paint
this time wet on dry. Okay, this is a very small area. I will be painting this wet on dry using the tip of my brush. And if you are doing negative painting or painting
around your subject, it will help your subject
to stand out more, especially if you have, like, white subject like this cotton. There you go. And then
I will paint here a Adding the shadows there and here I rinse my brush a little, remove the excess water. And I will add more paint here. This part of the
leaf is very light. So as much as possible, I will avoid adding
too much pigment. There you go. And here I will soften
my brush strokes. There you go. And this part, I could have done that
earlier, but it's okay. There you go. And here, this time, I will just paint the
details of the leaves, the lines with what on drag technique is at
the tip of my brush. There I go. Now I will paint
inner least here. This time, I will
add more pigment. Okay. And I will be
painting this wet on dry. There we go. I will add more pigment in this part so we
can create D here. I will add also Sepia later. I There you go. I add more paint on this side. Okay, there. And here as well. Y There you go. And and here I will just soften my brush stroke and move the paint around. Okay. That's my brush. That's my dump brush, and this is my small brush, and I will just move
the paint around. Okay, there you go. And here as well. I didn't mix any more pigment. I just use the paint
that I mixed earlier. Okay, there. Now, this time, I will be painting the top. Again, I will be painting
this wet on dry. This is a thin long area, so I will paint this wet on dry. There you go. I there and also the veins here. Here I'll add veins
here. There you go. And I will paint the lower
part of this leaf here. Y there and I'll add a little bit more
lighter shade on this side. Okay, there. Now, I will be
painting the stem. I will just use the color. This is English red ochre. You may also add a bit of
sepia if you'd like to. But I will do that later for more darker richer brown color. I will be painting
starting here. Again, this is what on dry. I move this as water. Because it looks like
my brush is bit watery, so I remove the excess water
to my towel on my right. I always have a towel here on my right because
I am right handed. If you are left handed,
you can have towel here. Okay, I added more
brown on left, and I will add more on the right as well.
Okay, there you go. You may add more
color on the sides, but not too much on the center. You can add more color on the part that is at the very bottom of the
cotton flower because there would be shadow here because it is at the
bottom of the flower that it can cover the light
is covering by the flower. Okay, there we go. So this is this stage and I will let
this painting to dry. Then I will move on with more thicker and
darker consistency.
9. Adding Darker Colors to the Leaves: In this stage, I will be
adding more color on the leaf, and I am starting to build up
the color. So for the leaf. Since I have sepia here, I still have some of English
red ochre on my palette, but I will add a bit of sepia to make it more
darker and richer, and I will use that
to paint the shadow. I will add a bit of
English red ochre. This time I'm mixing milk
consistency of my color. I would like this to be dark
because I will be painting the shadow of the leaves. Okay, I will just try this here, and this is how dark it is. You can do a little bit more
darker if you'd like to. A little bit more
of sepia. Okay. And let me try. There you go. That's a good
one, and milk consistency. Even if I have a milk
consistency of my brown mix, I will still paint wet on dry. Okay. And I will also
paint some of the details. This one, for me, it is already good enough,
so that's fine. But I will be
painting this leaf. Okay. So I remove excess
water on my brush, and I will get some paint here. I will be starting
to paint this part. This part of the leaf, is it has more shadows because it is inside of a leaf itself. There it go. And here I will just soften
this to make it lighter. And I will continue
painting here. Get more. Y Okay, there you go. And I will add more here
as well. Color here. There you go. And I will
add more color here. I will add more depth here. I did not went up to the
edge because I would like to show a light color light color of the leaf that is folded. So I did not continue up
to the end or the edge. There you go. And then I will soften this. There we go. There and a little bit more here. Now, this time, I will be
adding more color here. There you go. And also
this part of the leaf. Okay, since this is the one that has also folded leaf here, so that should be darker
because it has shadows as well. There you go. Okay, there and some color on this part. Okay? That's it. Now, we'll be
painting this stem, but I won't add too
much of the color. Just some parts of the leaves. I mean, the stem. And here, I will soften this part there
and that one, too. Mostly I will paint the edges of the stem, some part here. There I go.
10. Painting the Cotton Flower Details with Metallic Paints: Lo Love Okay, so down
with the shadows, I would like to
add more details. But this time, since we have this since we have this
mix that is dark and ch, I will just get some of this, and then I will water it down. Okay. So water it down and I
will add some details. So this time, it
would be the details, and I will be
painting what on dry. Okay. So I got a little bit. I will just use the
tip of my brush and I will add more paint here. And here as well. I'll be painting with
just thin lines. There you go. And this part And here, this time, just paint, going from left to right, just Okay, there I softened it. I will just paint
like the edge there and remove the excess water and soften. Okay, there you go. This time, I will be
painting here with just thin lines using the tip of my brush to add
details of the leaf. Since this is a
folded leaf there, I Okay, there I go. Now, I will paint the
details on this leaf. So I will just add some lines, and it will soften this. My brush has too much water. So I will remove excess water. I wipe it on my towel
here beside me. Okay, there you go.
Add more details. Aside from that, now I will add some glitters or shimmers. And for this, I will be using
Daniel Smith Antique gold. Okay. I will just mix a
little bit on my palette. This is anti gold. You could use any metallic
gold that you have or silver. But I use that gold, and I like it so much. Okay. So I'll be using
just a tip of my brush, and I will just add thin
lines here using the gold. You may use small brush
if you'd like to. And here as well. So it has go there, I will just soften the edge and the brush stroke,
and there you go. And I would like to add more of Okay, there you go. I softened
my brush stroke there. There. Aside from
this part of leaf, I will also add
gold here as well. And also, I would like to add
a little bit of gold here. You may also add a little
bit on the cotton. I will just add some
thin lines on the cotton itself. There you go. And also this part of
leaf in the cotton. There you go. So
it would be like shimmering on in this part. I use only just the
consistency of my gold, and I will add
more of gold here. There it go. A little bit in
this part, I think, I guess. Okay, there you go. There. I'd like to add more of gold here just to enhance
and add more details. I'm just using the
tip of my brush, and I just use the consistency
of the antique gold. It is not very gold, but it has shimmers. So I can add here. What I like about antique
gold is not very gold. It just has shimmers. It's not yellowish gold. Here is the finished watercolor
realistic garden flower.
11. Simplifying the Pine Leaf: Oh pine leaf has a lot of
tiny leaves sticking out, and the reference
photo is complicated. To simplify the
reference photo and to translate the pine
leaf into a painting, I remove the other leaves and added some in the areas
that will be planked. So in the file attached in the projects and
resources section, you will see the
reference photo, the outline drawing, and a combination of
the reference photo and the outline drawing, so you won't get lost. You can study the
reference photo and the outline drawing before
diving into painting. Take your time in painting, don't rush. You can do.
12. The Colors of the Pine Leaf: Welcome back to my class. In this lesson, I
will be talking about the colors that I will be
using for the pine leaf. So this is a pine
leaf on my phone. There you go, and I zoom in. I will be preparing the colors. If you can see that there
are some very light green, and there are some
yellow or brown, we will be using
just a few colors. So first, I will be using
would be green gold. I am preparing only tea
consistency of green gold. So this would be my
underlying colors for the light areas. Next, I will be
preparing sap green. This would be the main green. But then I won't use sap green. I will mix it with a little bit of paints gray, add
a little bit more. So this is paints gray. I have from white knight there. I can water it down to use it for light areas of the leaf. Next, I will be using Daniel
Smith, English red ochre. There you go. And
for some areas, I will be adding also, we'll mix this with sepia for the dark brown
color. Okay, so there. So I have just a
few colors here. Okay, recap. I will be using green gold. This is green gold. Next,
I will be using would be sap green with paints gray. Next, I have here Daniel
Smith, English red ochre, and the last one that I
have is Daniel Smith, English red ochre with sepia. I would like to add also
French ultramarine. This is Daniel Smith,
French ultramarine, and I will be using this for
dark areas of the leaves, and I will add it here. Okay. Again, just a recap, we have here green gold. I have here from CR, sap green, from Windsor Newton with paints
gray from white Knights. I have here Daniel Smith, English red ochre,
Daniel Smith, English, red ochre with Sepia
from Shinhan PWC, and last one I have here French automarine
from Daniel Smith. So these are the colors I will be using to paint the pine leaf.
13. Starting to Paint the Top Pine Leaf: No, as you can see, the pencil lines are
somehow a little dark, but I will erase the
pencil lines as I paint. I won't erase the pencil lines
all of it before I paint. I will erase as I
paint because whenever I take a break and
whenever I stop painting, just to just to let
the watercolors dry, I won't be able to see the pencil lines whenever
I put paints ready. So I will just erase the
pencil lines as I go. But I will start
painting from the top. So I will be removing
the pencil lines here, but I will go as I paint there. It is very helpful to
have kneaded eraser with you because kneaded
eraser doesn't hurt the paper, it doesn't destroy the
paper whenever you paint. I will zoom in a
little bit more if I have to so I can hang. I will zoom in as much as I need to so that you can see
the details as I paint. Also, since this is pine leaf and and the pine
leaves are very small. I will be using a
smaller brush this time. I am using it's called the
optimal size two by zero. This is a very small brush, smaller than size
zero or size two. So this is what I have.
This is Kolinsky brush. I don't have another
smaller brush than this. But this is fine, even if
this is Kolinsky brush, not a synthetic
brush, but it's okay. As long as you can use
size zero or smaller, that would be good for
painting pine leaf. Pine leaf has small
tiny leaves in it. What I will do is I will paint this wet on dry instead
of wet on wet because I don't want to
move the watercolor around or move the watercolor
outside of the lin. So I want to be careful
on painting the leaf. So I will be painting this leaf. And here I will be painting this with green gold and
French ultramarine. I will move paint here. So again, this would
be green gold. But then I will be still
using the bigger brush to soften. Just a little bit. I will pick up French Atumarin
without rinsing my brush. So the colors will mix on
my paper, and that is fine. I will be just careful
on painting outside of the line there. I won't paint this part yet
because this area is dry. So I will skip it, and I will paint this part of the leaf. I will pick up green
gold and paint here. So whenever I see the part
on the leaf that is lighter, I painted with green gold. And then on the dark area, I painted with
French ultramarine. I pick up French ultramarine
without rinsing my brush. That's fine. As you can see, the colors mix on my paper and also on my brush,
and that's okay. Alright, I will be moving on the next leaf, which is here. This part of the leaf
is dark in the middle, but I will just use French ultimarin and
I will paint here. So wherever you can
see dark green, you paint it with
green and light green, you will paint it
with green gold. I'm painting this wet
on dry because we don't want to spread the watercolor
outside of the line. And here below, I will be painting this with
more of the green. I mean, blue here because
this is the part that has more shadows because the leaf here is overlapping
and creates shadows. So be painting this
with more of blue. Okay, the next leaf that I
will be painting is this area. So I'll be picking up blue here. If that happens, it
means your brush is dry, so I dip my brush into the
water and pick up some blue. There you go. I won't
rinse my brush, but I will get green gold, and I will paint here. If that happens, it means
that my brush is too dry. I can remove excess water
using the towel beside me. There you go. I can go back here and paint the lower leaf here. I will be getting green gold
and paint on the left side. And then I will pick up
Bang ultramarine and I will paint on the right side. My brush is dry, again, so I dip my brush. My brush is dry, so I will dip my brush through the water just one time or two. And then I will remove
the excess water, but I will pick up color. I will get ranch tamarin here, and I will paint here. I will add more blue on the lower side because this
part that has shadows. There you go. And here I will
paint this with blue here. So as I paint, I look at the reference photo where
I could see the shadows, I paint it with French tamarin. Here, this leaf, I will
paint this with green gold. I will add more green
gold on the right, but I will pick up some blue, and I will paint blue here, blue, and also here. If it's mixed together, it creates green,
and that's okay. Next, I will paint this
area with French autumarin. I dip my brush my water and remove the excess water
and pick up some blue. This leaf is very small. I went out of the
line, but it's okay. I just grab the color and slowly painted only painted
the leaf going down. Okay, next I will
paint this leaf. This leaf is a little bit dark, so I will be painting this
with French ultimarin there. This is the reason I would
like to use a small brush. This is a continuation. There's a continuation leaf here that I will paint with more of blue because it has
overlapping leaves here. Next, I will paint this
leaf with also blue, and I will add more blue here. And I will paint green gold on the left side. There you go. So this is what I'm
going to do for the rest of the leaf
for the first layer. I will be doing time laps
so you can see how I paint. But sametruction, same
technique that I will do. I will switch from
green gold to green, and I will be back later if
I need to explain something. I paint, I will be also using this needed eraser to remove
the pencil lines as a paint. For now, I will be
on time laps but paint with me together
with a spine leaf.
14. Painting the Bottom of the Pine Leaf : Now I'm done on the first
layer of the leaves. So what I'm going to
do now is I'm going to paint the first
layer of the stem. For the first layer of this, I will be painting
with two colors. One would be French
ultramarine on the dark areas and English
red ochre on the light areas. For this part, I will be
painting this wet on wet, but on the other parts I will be painting with wet on dry. Like here in this part. This would be I will be
painting this what on dry. In painting this, I will zoom in a little bit so that it
will it will clearly see. Okay, so I will be starting
here at the bottom. I will remove the pencil lines. But I will be painting this with English red
ochre T consistency, since this is the first layer. And I will soften this and
here as well. And here too. As I go up, I will
be painting wet on dry because the spaces
here are very small. But if you can't paint wet
on wet, that would be good. So when I soften
my brush stroke, I also drag the water going
up where I will paint. There, I will soften this, and there you go. I move up with water dragging the water and then painting
this with wet on wet. I will soften this brush
strop and here as well. And here I will wet this area. I will zoom in a little bit more so that you can see closely. Okay, I zoom in a little bit
more so you can see closely. Here, I will be
hotting this area. And here, too. There you go. And there I will still
wet these parts. I'm not looking on the
reference photos as of now. I'm just wetting this area. So I have already
vision on my mind where the stem would be
there and here. There are parts here
that would be like, darker because there
are more thes here. Here, I will be painting with French ultramarine
and here as well. I will let this dry I
will soften this part. I would like to add brown here, but I will just let
this dry first. Now I'll be painting wet on dry because this is
really small area. I remove excess
water from my brush. If your brush gets watery, just remove the excess water or else it will create
puddles on your paper, and we do not want that. And here, I will paint
this with wet on dry with English red ochre
and soften the brush stroke. Now I'm done on the first layer. I will let this dry, and then I will come back on the second layer
starting on the leaves.
15. Second Layer of Pine Leaf: Welcome back to my class. On the second day, I will be painting the green
areas, the leaves first. I will use the green
mix that we have here. So whenever I paint, I can pick up more light green
or I can pick more green, okay, or more pigmented.
What mix here. And it depends how watery your brush would be
to pick up the color. I will get in on this area. I will get more so I
can get darker green. But if I have a watery brush, I will get light green. To paint this, I will still use the smaller
brush that I have. This is two by oh or
00 on other brands. Zoom in a little
bit so that you can clearly see where I am painting. And you can also see how I pick up colors from my palette. Okay? So my brush is wet. I will be painting
this wet on dry. But still, I will
use the big brush to soften the brush
strokes if I need to. So for the yellow areas
or the yellowish areas, those are those are
the areas that I will paint very light green. It will show light green, and then the blue areas
that will be darker Okay, so I'm getting some paint here. Remember, not too watery. I will start on the
left. I'll start here. Still, I am using T
consistency of my green mix. I will be just
painting some of it, but later on, I will
be on time lapse. I'm just showing you
how I paint this. As you can see, when I added
the green mix on the yellow, it becomes yellowish green
or lighter green and darker green when I
paint on the blue areas. If you notice there
are some parts of the leaves that
I did not paint on the sides because I
would like to paint it with just green,
and that's okay. There you go. I
will add a little bit more here. Okay. And here if you notice my brush is not very
watery and I control the water on my brush even
if I use a Kolinsky brush. I'm done on the second
layer of the leaves. This time, I will be painting on the second layer of the stem. I zoom in a little
bit so that I can show you and you can see
how I paint the stem. Okay, so I will be focusing
on some areas only that I can paint on the shadows
and more of the stem. For this, on the top, I can paint this what on dry
because the areas are small, but here I can paint
this what on wet. I will start here. I can still use I will still use the smaller brush in painting
the areas here on the top, I will be using the
dark brown mix, which is English, red ochre and sepia and I will paint here. So this is still tee
to coffee consistency because I am just glazing it. But this is just
the second layer. And then I will smoothen
the edges and here as well. So this is this stem is
inside the middle of it. So there would be
shadows forming there. Okay, and here I will get more paint. I remove the excess
water from my brush. There you go. And then I
will smoothen the edges. This happens if you
have too much water on your other brush
or the big brush, so I will just pick up the water and I will
paint it again. So I picking up color on the side that it's
not really wet. See, if your paper is very
wet, that will happen. Your paint will run. So I will just
smoothen this area. And here. Okay. And this time, I will just paint some
areas only that is, like, beside the leaf, I will remove excess water
from this brush by tapping out my towel and here as well. And here. I will just add
more brown on some areas. I will add here
because there would be shadows on this part because
there are leaves here. So I'm adding more
brown here and here. Be careful, also on painting. You can put paint on the
areas that are green, or you can go out of the
line to just be careful. And I will just add more here. Here and here as well. And here. So you don't have to copy as it is what you can see on
the reference photo, you can simplify it. If you know where to put your
colors, then you're good. Well, I'm adding brown
on some areas like this area because this is
where the leaf attach. So I'm adding shadows
here and there. Or more color.
Okay, there you go. My brush is too wet, so I will just soften. I will remove the excess
water from this brush. I tap it on my towel
beside me. There you go. If that happens, it means
that I have too much water, I will remove excess
water and soften this. There you go. My brush can be too wet, even if it's small,
it's okay there. I think this area
should be brown. I'll add a little bit more. So here. So here I can
just add brown here. But I think I can
paint this wet on wet instead for smooth
blend of colors. I will use this
size of our brush. And I will add more
color on this stem. I will still leave some spaces unpainted to keep the lightness. I do not follow the
reference photo that much. I'm just using it as my
reference as my guide, but yeah, I'm not painting
hyperrealistic, so it's okay. You can simplify your
painting. Remember that? And later on, I can still
add more details on this. Okay, and I will just
soften the brush strokes. Well, I remove the
brush stroke here, so I will paint again. There you go. So
I rinse my brush. I will let this dry
and I'll come back for a third layer where I will build more colors and
finish this painting.
16. Defining the Shadows: Welcome back to my class. In this lesson, I will be painting a third layer
of the pine leaf. I zoom it a little
bit so that you can easily see where
I am painting. I will be using the same green that I have on my
watercolor palette, and I will be painting
the third layer. This would be wet on dry. What I am going to do is
that I will paint more on the dark areas and the
shadow areas of the pine leaf. So I will be using the
same green that I have. I'm still using this
small brush that I have. I have here the reference
photo beside me. Alright. And let's start painting. So I'm using the same watercolor mix
that I have in my pad. I did not mix another
one or added more, but that's what I have. Okay. I will be adding more
green on some of the areas. I won't paint all of the leaves, but just some of it. I'm painting this wet on dry. I'm picking up color on the most green here and
not on the watery part. So I will add more green there. Next, I will paint this part. And I'm trying to paint
slowly and carefully because the leaves are
very thiny and thin. For the others, I won't
touch them anymore. I will just paint on some areas that needs to be more
green or darker green. Here you go. If your painting
is still bluish, you can add more green to that because the blue
what we've painted earlier to be shadows of the leaves that we
are painting right now. There you go. Especially on this area
that is very near the stem. And if we're getting lost, always check the reference
photo. There you go. I will just I will
add more green here. For the light green areas, I won't touch them
anymore or maybe later, but I will just add shimmers with the interference
watercolor that we have. I move the sketchbook
a little bit. I just want to make sure
that all of the pine leaf is seen on the video or
the whole leaf is shown. A Make sure that your brush is not very
waterly like this. So what I'm going to do
is to get my big brush. I wet this and remove the excess water on
my towel and just soften it and soften or else
it will dry with harsh edge. So I will be continuing
painting here and here as well. I do look at the reference
photo right now, but I'm looking on my
watercolor painting where I added blue there. Especially, I will add
more green on the sides that are very near the stem because there
would be shadows there. Like here this part. And here. There
you go. And there. Then I will move on the right. If you notice I paint from left to right because
I am right handed. I make sure that I won't smudge what I've
painted on the left. That's why I do this. If you are left handed, you can do the
opposite right side first and then left side. And this time, you should be
able to see the division, the separation of the leaves between Okay. Here. I'll add more paint here. Here. Here we go. I remove the excess
paint here, this is way. Add more paint here
at the bottom, and here as well. Here too. I hope this time you can see more difference on your
painting than earlier. There and added here. And here. Almost done. And I hope that you are also
happy with your painting. Like how happy I am with this. Almost done here. I'll add more paint
here and here too. There you are. I finish with the leave the next thing I
will paint would be the stem.
17. Adding More Shadows: Now, the third
layer of the stem, I will be starting to
paint the details. I will be starting with the
English red ochre here, and I will add more paint
here on the bottom. I'm painting wet
on dry this time. I would like to paint
more on the details now. I'm starting to build up
the colors for the details. The and I will add more color here and here. I'm going to painting
wet on dry this time. We're done with
wet on wet stage. We are now painting wet on dry. But still, I use a tea
to coffee consistency. But what I did is just I glazed. It means that I
painted a thin layer on top of a dry previous
layer of the stem. There you go. This is the
finished third layer. I'll come back later to add more details on
the fourth layer.
18. Painting the Details of the Pine Leaf: Welcome back to my class. On the fourth layer, this time, I will be painting more
the details on the stem, and also I will start to
add shimmers on the leaves. So for that, I will
wet this paint, this is the interference
green blue shift. I will be using the paint
directly from my hand. I won't mix it anymore
on my palette. For this, I will just use the interference green
blue shift and I will be painting on the leaves only. I have my small brush here and I will get paint
directly from my hand. There I did not mix it
anymore to my mixing palette. I will just use
what I have here. So I will just get paint here and I will start
painting on some areas. It's up to you where
you would like to add the green, blue shift. It's up to you, but
I will add paint on the dark areas or
the dark leaves only. I won't add the metallic
colour on all of the leaves. I will just add on some leaves. A almost done. I think it is very nice to add the metallic color on the side of the leaves
that are the end. I don't know. You can
experiment a char on your own. But do not overdo it. You just some of the leaves. So This time, I will be adding
details on the stem. I will be painting wet on dry using the dark
brown that I have here. So just paint some details like curvy lines and
shadows on the stem. So this would be the final
detail on this pine leaf. The shadow areas there
and some details. There we go. And this is
our finished pine leaf. And look how shimmering it is.
19. The Colors of the Poinsettia: I am preparing the
colors that I will use for this wine seta. So I will have here
French ultramarine. This is from Daniel Smith. For the red that
I will be using, this is a mix of azarin
crimson and pyro scarlet. So the azarine crimson that I have is from
Windsor and Newton, and the pyro scarlet that I am using is from Daniel Smith. Next mix that I will
do is for purple, I will just use a little
amount because we have just a little purple
on the reference photo. So this is a mix of cobble
teal and cinacadonmfenta. Okay. I'm preparing only tea
consistency of the colors. So this is what I have. For the green, I
will have sap green. The sap green that I have
is from Windsor and Newton. I will mix only tea
consistency for now. Then I will also mix it with French ultramarine to make
it a little bit bluer. And I will also mix it with a little bit of the
purple mix that I have here. To make it a little bit darker. I can make this a
little bit darker later on by adding some red. This is the sap green mix
or green mix that I have. So again, this is
mix of sap green, French ultamriin with
purple mix that I mix with, cunado machenta and cobalt teal. For the yellow, I will
use a tiny amount. This is naples yellow deep. And to add shimmers
on a painting, I will be using antique gold. This is Iridescent antique
gold from Daniel Smith. And I will add also a bit of interference green
blue shift from core. Green blue shift is hard to see because it's
really transparent, but when you put it
on a dark color or the green or any color,
you will see them. Okay, so this is it.
20. Underpainting of the Poinsettia: A recap the colors
that I will be using would be
French ultramarine, a mix of pyro scarlet
and a azarne crimson, cobalt teal with
Cacro and magenta. This is a mix of sap green, French tamarin cobal
teal and magenta, naples yellow deep, iridescent, antique gold, and interference,
green, blue shift. I will add a bit of red or Alyzare crimson to the green later on
to make it darker. But these are the colors
in t consistency. For the first layer, I will be painting
with blue first of the red and the dark
areas of the painting. I will be starting on this part on this leaf or petal Okay, I will start painting
here at the bottom. I remove the excess
water from my brush. So if you are painting, remember not to have
paddles on your paper. Okay, so I will paint
this in t consistency. And I am painting
the shadows area. You can paint this
with very light purple if you want to make it darker. But later on as we paint
on the next layers, I will show you how to
add more shadows to add more color so that your
painting won't look flat. Okay. And also in this area, you may soften your brush
strokes. Okay, there. And then I will be
painting this part.
21. Finishing the Underpainting: Okay, I will continue
painting on this part. And this has small leaf
here, that is green. So I will be painting this
what on dry. And here. Okay. Make sure your
brush is not watery. So I remove the
excess water from my brush and I soften it. Okay, this part is big red leaf. So I will be painting this. This would be wet
on wet because this is how big I will start
it here on the edge. And I painted with to consistency of blue
and spread it out. Okay, and soften this. Especially this. I remove the
excess water from my brush. Okay, there we go.
And here as well. I will wrap this
area. There you go. Okay, and make it dark
here and here as well. There you go, and here and here. And here as well. There you go. Then I will soften my
brush strop to make sure that they won't
dry with harsh edges. Okay. These areas actually dark. So I'll be painting this wet on dry because it's small also. So getting blue here, this is the part that is
inside or the very bottom of the Poinciata and you could see whatever that is below
like other leaves. So there. A so I'm carefully painting
this part, this area. And I love the center unpainted. I won't use masking fluid. I will just avoid painting
them. And here as well. I will soften this part, and I will also paint
this with blue. This is a stem
there. Okay. I like painting with my phone on my left so I can
see the details. There you go. And then I will
just leave this dry. Okay. Now I will continue painting this Poinciata on
the first layer. I will speed up the process of the video of painting
the first layer. But then I will also put the reference photo on the side so you can see
where I am painting. Yeah. Yeah. Yeah. Okay, so this is the first
layer, I'm done with it. I'm just letting it fully dry. Then I will build up the colors. I start painting
with red and green, and I'll see you on
the next lesson.
22. Let's Paint the Poinsettia Red: In this lesson, I will be starting to paint
the second layer, and this time, I will be
painting with red and green. So this is the reference
photo on my left, but I will zoom in, so you
will see where I am painting. So I would still use the consistency of my red mix and my green mix at this time. Even if I use the consistency, you would still see
the difference, and you would still
see the colors starting to build up
with the shadows. So let's start. I zoom in so you can easily see
where I am painting. So we'll start at the very
left part of the poinsettia. I will still paint
this wet on wet. So I will wet my brush, and I will also use the
consistency of my red. So by this stage, for
the second layer, you will still see some blue from the bottom of the paper. But eventually,
after this layer, you will see that the blue
is lowly covered by paint. Okay. So I'm starting to paint with the consistency
of my right. I remove the excess water. Remember to remove the
excess water as you paint, and avoid puddles. So here, since
there are puddles, I slowly remove it and use the towel here on my right
to remove the excess water. I'm dragging the water
or the bead Okay, there. I added more water
and more paint. Okay, there you go. I will suffer this edge. Then I will paint this area. Okay. There I go. And I will soften this
and drag the paint. Then as I do it, I also
wet the other areas. There I go. There. There you go. Or I will let that try. I will continue
painting on this area. A I use pyroscardt because it is orangey red. And pyroscard is a
fiery red color, which is really, really nice. Okay, there I go. I will paint this one first. Okay. I'm trying to leave the
paint here, but it's okay. I will paint this side, left side of this leaf. As you can see, as my
first layer, they are. It's very light orange red. Yes. Okay. And here I'm dragging the watercolor bead
or the water Heart. Okay, there. Okay. There you go. Next, this heart. Okay. Make sure that Okay. There you go. I will drag the paint going
down and soften the edge. Get more paint. This time, I will paint
this part of the leaf. This is the big leaf here. And I will be painting
this what on what? Most likely, I will paint this lower part first
or the left side. I will soften this part. And here is to make
sure that I will have good color transition or color blend as I
paint wet on wet. Okay. I will move the paint here
and so often that edge. Still. Okay, there. So Okay. There, and then I will paint
this part of the leaf.
23. Adding More Red to the Poinsettia: Wetting this area. It's okay if I went
out of the line. I suffered the brush,
stroke, and away, but it's fine because I will be painting it with red
as well, so it's okay. This is just the second layer. So remember to paint likely
as we build up the colors. There, I will be
painting this area. I will be painting just
the red area first. And then later on, I will
be painting the greens. So for now, I am focusing on the red leaves of
the point sectia So see when I paint, I press my brush hard on my
paper to release more paint, and it's okay because my brush has a big belly and
it can release more paint. I'm painting just the
second layer this time. I'm not painting
the details yet. I'm also painting big
areas, so it's okay. Just remember whenever you
paint for the second error, it's just tea to
coffee consistency. No dark colors yet or
saturated colors yet. Consistency is still very
light as we are going to blaze the colors we're painting
layers by layers. Okay, there. And I will be
continuing this part. But I will avoid painting this small area here that
is supposed to be green. There you go. Y. Okay, it's getting dry, so we'll just rewet this area. Okay, there which is
soften brush stroke. And here I will need to add a little bit more
of red here, small part. This area would be green. So I left it untouched,
and that's good. Now we'll go back
here at the top. I will start painting
this small area here. Okay, for this one, I will paint it wet on dry instead because
it is very small. It is a very small area. If you think you need to paint with a smaller
brush, that's fine. The brush that I am using has a very pointed tip. So there. Now I'm going to
paint this big leaf. Here are the top as you can see, I left this part unpainted. I will keep this very as well because on
the reference photo, there is a highlight on this
part of the f. So there As for the first two layers, I'm not painting with
shape and form yet. It's just the base,
the underpainting, the colors as I build Just the
colors as I paint. There you go. We'll
drag the color. Well soften that soften here, and lift up the color there. There you go. Okay. Sure. All right. As much as possible, I will paint this area very, very light because
I don't want it to be I don't want it to be dark because it is the part of the leaf
that is a highlights. So there I just paint
it up to there, but I will just soften
my brush stroke. There you go for a
smooth blend of color. There it is. Okay. I will just soften that. There you go. Okay. Now, this time, I will be painting
this part of the leaf. This is quite this
is quite big. Okay. I'm removing excess water. I can see this leaf has
highlights here at the bottom. So that's why that's also the reason that I did
not paint this area blue. So I will just keep my red
very light on this area. But I will still
paint this with red, but I won't build up the
colors later on on that area. There you go. And there. Okay, now, this part, I will just wet a
little there you go. And then I will add it here. Make sure that when you
paint in a small area, your brush should
not be soaking wet. There you go. Okay. Now I'll be painting this big leaf here because this part is
green with this one. Okay. And of course, since it is a second layer, I will be painting what on what? So we'll paint this
area very lightly. There we go. We'll soften this. Seems
like it is dry in that area. There you go. I I'm trying to avoid to go out of
the line because this part is green,
a little bit. I think that will
be okay because it is complimentary colors. So it can be darker
if I will put red, and then I will paint
it with green on top. But for now, I won't touch that, and I will keep painting
on the areas that has red. Okay. I will soften this. This
part has already dry, so I need to soften the brush
and move the water there. There you go. While waiting this to dry, I will skip it, and I
will paint this area.
24. Painting Red to the Right Side: So here I will be
painting this wet on wet. The leaf is not fully
painted with blue. There are some areas
that are light. So I would like to keep
that light as well. There For now, the painting looks flat. But it's okay. This is just the second layer. But later as I build the colors on the
third layer and so on, I will also paint with shadows and form there. And here, Okay. There you go. I soften
the brush soap there, and then I re wet this
area because it is drying. Make sure that I can have
nice blend of colors. Okay, there you go. This part is red, and I will be painting
this part also. If this area is dry,
this part is not. Now, I will be
painting this part. On the reference photo,
has been cut here, but I just added
pointy line here. I just added some lines there
so that I can make it as a hoof leaf instead of cut
like on the reference photo. This area is light red, has been touched by the light. So I need to paint
this very lightly. There you go. Next, I will be painting the
small leaves in the middle. There you go. I remove
excess water from my brush. I wipe the excess water
using the towel beside me. Now, this area is
the red with purple. So I will be painting this red, and I will also drop
some purple here. I'm starting to paint this
what on what was red. And then I will smoothen
my brush through, especially on the sides. I'll add a little bit more red
on the areas with shadows. And then I will smoothen my
brush strokes again to make sure that those won't
end up with harsh edges. So I'm painting with the
purple mix right now. I will drop some purple on this leaf especially
on this side. So I wet this side, so you can drop the purple. I'm adding purple on this leaf. I add it on the sides first, then smoothen my brush strokes. And then I will add purple. I make sure also
that I smoothen it, and then I do the
area where I will paint to make sure that my
colors will blend smoothly. So I can just add
purple on this leaf. I don't have to copy exactly
as it is on the photo. This time on the
second day I will be painting green on some areas. For some small areas, I will be painting wet
on dry like this one. So I have my green mix here. Again, this is mix
of soft green, the purple mix, which is
cobaltil and magenta. It also has French ultamriin and I will be painting this wet on dry on this area. Remove the excess water. There you go. There. Now, I will paint
this area wet on dry. This part, I will be
painting this wet on wet. So what my brush, remove the excess
water because I don't want to create puddles on
this part. Small area. There you go. And I will soften. Now I'll be painting this area, this big leaf here, but I will be painting
this wet on wet. So I start to wet this area that is from
the center going out. Okay, got my green mix here. It is darker on this area because this is part of the leaf that is below I mean,
under other leaves. So there will be shadows here. But before it will dry, I will soften and soften this. There I go. It's okay if I painted this a little
bit darker because this is supposed to be darker
area of the poinsettia. I softened that area and wet the other parts
dragging the water I drag the water to the other
part of the poinsettia to have nice land and
transitional paint. There we go. So here, I'm dragging the
paint going down. There. There you go. Next, I will paint this area green as
well. This is green. And I will be painting
this wet on wet. I pick up some green and started painting from the
center going out. Then I will soften the edges, and also rework
the lower part to prepare to add in
there on the side.
25. Painting the Center: Now, this center,
the one that has painted with blue is
actually appears darker, but is actually red. So I will be painting
this with a darker color. I will get here also the
mix that I had earlier. I will be painting this part. I The semi painting what on dry instead
of what on wet? Because I don't want
this to mess up. It's small area of the center, so I don't want to ruin this. So I painted this what on dry. Now for the center, I will be painting
some areas with green, but I will be painting
the wet on dry. This one was green. So there are like four like buds the middle here. And the next one is here, and the other one is here. But on the top, there would be a small area that is red and yellow green here in this area. And for the red, I will get I mix here. And Okay. I will get Napal seal deep, just a little amount. And it's just with
the t consistency, I will paint on this side. But I will paint more
of the center later on. I will paint more on
the center later on. But for now, I will
let this second layer dry and I will move on to the next layer for
more saturated colors.
26. Enhancing the Shadows: Welcome back to my class. This is a third layer of
painting the poinsettia. This time, I will be
adding another layer of t consistency
on the dry layer. It means that we
are going to glaze. For now, on the third layer, I will be painting
just de consistency. But still, I will be
building up colors. I will building up shadows. I will be building up the color and the form
of the point setia. So in this stage, it will help our layers to
be less flat than this one. Okay, I will be painting
on the left side first. The left side.
Going to the right. I would still use
the same consistency and same color that I
have in my palette. I was just going to wet it. To prepare for our painting. Okay, this area of
the leaf is light. That's why I just leave
it as light as possible, but I will add in
more color to it. And in this stage, you will see you will slowly
see that the blue would be covered with another
layer or green or red. But I will be just
focusing on the red. I will be painting here first, and I will be
painting wet on dry. I will start painting from
the center going outward. So you can see I
mix my paint here. Okay, move the excess. At this area again
just to make sure. Okay. We start painting here. Here on this I carefully painted it with
the tip of my brush. Go. I have too much
paint and water. I remove excess water from my brush using the
towel beside me. So there and soften and
soften in this area. And soften just to make sure that this area won't
dry with harsh edges. I'll try to avoid that. Now this leaf, I will be
painting this wet on wet, but not the entire leaf. I will leave some
part would be red. So here, I will be painting. We'll start painting here. This time, my brush I
follow the shape of the leaf so that it
won't dry looking flat. But this time it
still look flat, but lesser flat and adding
more color on this side in this part and here as well in the center and wet this area. Okay, I will leave
this part dry. I will move on to this
leaf, which is bigger. Since I am focusing
on the shadows, I will be adding more
paint on those areas. And for others, I will
leave it as it is. I will be painting
on this left side or the top part first. Painting this area. My brush is too dry. So I will get a wet lace
brush and get more paint so I can have nice color
transition of paint. I will have add color here. This time, I am creating I'm
slowly creating veins. Okay? Using negative
painting technique. So for now, I am painting
as I'm drawing as I paint. Let's try. But in this area, it is darker because it
has fold on this area. So I watch that part and
adding more paint here. I'm wetting this area and I will add more
paint in this side. And here as well. There are some areas on
these leaves that are dark and some are Light. Make sure to look at the
reference photo very well. You don't have to copy as
it is, what you can see, but you can simplify how
the point setia looks like, and that is what I
am doing right now. Okay, so there's there here. I will add more here. I'm just starting to
build up the color. I'm not painting the
details yet, the color. Okay, this area is dark red, so I will be adding
more color here. And for that, I will be
getting more of the red, and I will be
painting this on wet. It looks like this part is darker than the one
on the right side. But this time, I will soften my brush stroke. There you go. There there are parts
that are darker, red, and some are lighter. So I left those area unpainted. There you go. I softened
my brush stroke here. There we go. Now I will move
on to the top area on here. This area is small and this one, so I will just paint this
little wet, not too wet. Okay. I'll just add water here. Okay. There are some
parts that are dark, but I can add more color later. I will build the
colors more later. There you go. And I will
soften this here as well. There you go in this part. This area, it is very small, so I will be
painting this wet on dry and careful
carefully painting There I painted just
these areas that are at the very bottom or beside the
other leaves and soften it. There now, I can
paint this big leaf. I'll be painting
this, but on dry. I mean, wet on wet. I could start here on the
bottom and then on the top. So I can avoidmudging the paint. There you go. I will get more red and I will add
more starting here. That's why I like this brush
so much because it can reach thin and small
areas like that. There you go. It's getting dry, so we'll wet it and smooth
then wet the other areas. Okay, there you go. This part. There There are some parts of this leaf, I did not. I was able to paint blue for the underlying
colors, but it's okay. I can build up the colors
here. There it is. Okay. And pulling
the water there. A and more color here. And this part also. Here. There we go, and I will add more color here. I will soften this. It seems like I added too
much of paint, but it's okay. As long as your painting is
wet or you can rewet it, you can easily correct
your mistakes. As long as you just
put the color there. But if you painted wet on dry, it would be very difficult
to lift up the color. I think you will need to
have lifting preparation, liquid on that if anything that you cannot
lift easily with water. Okay. There we go. And adding more color here. There are some parts of
this leaf that are folded, so be sure to add
more color into it and build more
colors on them. Okay. Like this part, I added too
much paint, but it's okay. I drag the color as
I paint and here. There you go. And I will soften my brush soups
there. There you go.
27. Improving the Poinsettia's Shape : Now, I will paint this area. I will be painting
this wet on wet right there and soften. There we go. I will add
more paint in this area. This is supposed
to be dark here, and here as well. And more of here. And here, as well. There it is. Okay, now
I'll be painting here. This leaf is folded. So I will make sure that I
won't add too much colour on some parts of this to
show the fold of this leaf. Okay, with wet on wet. I will add more red here on this side this part. And then I will
soften this area. I would like to make
sure that I won't I won't add color or dark color on the areas that's
supposed to be shadows. But for now, it's sit there and here I will soften
this and soften here. Okay. There you go.
I'll soften there. Okay. Okay, there it is. I will soften them.
There you go. And here I will add a
little hotter on this side. There you go. Here, I will soften it and
I will regret this area. I will add more
color on this side, especially on the areas that
I painted it with blue. It means that there are
shadows there that I will need to I mean to paint more of red there and soften soften Okay, there. Here, I will need to
add more paint here. My paper dries so fast. I am a slow painter. That's why. And I will need to rewet
my paper again and again. Okay. This part Okay,
and soften this. And here I will need to wet this area and soften
and add more of red. There are parts here that are very light touched by the light, so I won't paint them. I will leave them unpainted
for the highlights. But here, I need to paint this. What on dry. I mean, wet on wet. Building up the color. There you go. There. Okay, now I will
paint this area. Okay, I wet this earlier, so I will be painting just more on the side inner
part of the leaves. Okay, and soften
and brushes rope. There you go. Okay, so
now on the third layer, as you can see, there
are a lot of difference. From the second layer, I'm building up the colors here. Okay, I will paint
this area, but on wet. But I will be focused
on the dark areas. Okay, it's still dry. I will wet more on this and I will add
more water on my brush. I dip my brush
into my jar there. Okay, there it is. There you go. Oh Okay. There you go. Now I will paint this big area. Since this is big, I will paint this what
on I mean, what on what. As you can see, I left this
part earlier unpainted. I will still leave
that part unpainted. I will start on the
left side first. A But I will still build up the colors here. I will soften this and
re wet the other parts. This middle part
of the I focus on this middle part there and soften and soften,
especially this area. There we go. And there. So some parts I
added more of red, and some areas I
left it untouched. There you go and soften here. I will move my paint
here on the right. I will be painting in this area. There we go. And here
add more bad here. And Okay. It's dry there, so I soften it. There are some
highlights on this leaf, so I'm carefully painting this. But I just add more
red on some areas, but later on, I will be
focusing on the shadows. Okay, there you go. Okay, now I will be moving on
to this leaf at the bottom. Okay. This leaf has more
highlights than the others. So I will be painting
this carefully because I will be adding more
color on just some areas, especially those dark areas like here or the shadow areas. There go. And for some parts, that will be just like and soften and
soften, there you go. Whatever left on my brush, I just drag the water to move it to other
parts of the leaf. There and soften that part. And here, this area has more
has shadows on this area. That's what you did
this part. There. And for this area, I will just add more
paint on some areas here, especially this part that's
supposed to have more color. It's folded in this area, and darker color can
help to have fold, form and shape with whatever subject that
you are painting. In this area, too, I am adding a little bit
more of red on this area, but it won't make it too
dark because there's no shadows on that
part of the leaf. This part of the
leaf is more light, more highlights than the others. But yeah, I'm adding more shadows and
colors on some parts. Okay. This one is quite big. I will be painting
this one on in wet.
28. Elevating the Poinsettia's Redness: I will start from the top here. Okay. This area
is at the bottom, just below of another
leaf like this. So there I will just add more paint or more
red on this leaf. Soften. Remember to soften
before it will dry. Okay, there you go. And add more color
here and here. For some I just add more red, but I will add just more on those areas that has more color. Okay, r there. Okay. And I'm adding
more of red here. Again I'm just using the consistency of
my red mix for now, as I glaze them, and more paint here. But here, I will add
more red in this side, and going to the left, I will curve my stroke here, curve my stroke to
show that there's actually fold on this leaf. There you go. And more color here on the one that has blue, there is highlight there, so I won't touch this area. Okay. I just soften my
brush strokes, right. I will soften this. And here, there you go. Now we'll move on to
this part of leaf. This was quite big and folded. So painting this wet on wet. There are some parts that
are have more shadows. Like here in this area. So I will add more red on this area to show that
there's fold here. There you go, and add
more red on this area. And here. I'm trying
to avoid that to paint this with just
putout strokes because I'm trying to maintain
the highlight here on the reference photo
and here as well. There you go. Here, I
will wet this area and prepare and add more red on
this part and here as well. There you go. And remember to soften the brush stroke there, and I will paint here first, add more red on this side. Here. There are more highlights on this leaf is so I'm careful on adding too much of red because
I might regret it later. There. It's dry. Okay. There you go. I regret it again. There you go. And soften and
soften and wet in this area. And soften there. Now I will be
painting this part. This leaf has more shadows than the others because this leaf is at the bottom of other
leaves that I painted earlier. And also it's the
reason that I have I added blue on most of
these areas here, earlier. So now, when I added
more of red here, you can see that this leaf
on the top pops up more. I will soften my brush
strokes just to make sure that they won't dry
with harsh edges. A more paint here
and here as well. Okay. Basically, what I'm doing
now is negative painting, as I painted more of that
to help to stand out more. Okay, now, this area And of course, here I
am wetting this area, so I can add more of red
in this area as well. There you go. A there and I will add a little bit
more of red here. Okay. I will leave this dry. I will go to the
small leaves here. This area is small, so I will paint this
what on dry instead. And I will add red more on the ones that
has in the bottom. And it will soften because I don't want this to
dry with harsh edges. I now on this part, I will paint here
first in the middle. But I will soften this. I think it'd be better if
this is painted wet on wet, especially also this part, so it won't have harsh
brush strokes it. There you go. It's just that
I'm trying to be careful because this area is very small. Add more. I will go to this area. I want to add more
paint here and cover the brush stroke
that I did earlier. Okay. Now, I will
paint this one last, but I will paint this
part of the leaf. This part of the leaf, it has highlights here, so I won't add too much color, but adding more here
because there's a shadow on that side
and here as well. Now on this part of the leaves, it actually has two leaves, but I think I missed
drawing the line here. It's supposed to be like this. Okay, so I will paint the
part of the leaf here, and this one would be
a little bit darker. Okay. There you go. Adding
more color and paint here. And in this area, too. This part should be darker. I was able to add blue
here, but it's okay. I just I is just a small area, and it won't be noticeable. Okay, so that's okay. There. This part has more shadow, so I add more color here
and the other leaf here. Now, this part of the leaf, it has purple as well. So I will prepare my
purple and my red. Now, I will paint
this wet on wet. I will be dropping with
red and purple this leaf. This is the only leaf
that has purple. We'll add more here. I will get purple and I
will drop some purple I added more purple on this
side and here as well. Okay, there it is
29. Increasing the Poinsettia Shadows: This time, I will paint
on the green leaves. I will start here. I
will get more green. I started from the
inside going out, then softened the brush strokes. I we the left side
for smooth blend of the color and painted the
tip going to the left. And I will soften this
part and here as well. I will add more here and here. I will skip some lines. I mean, I will skip some
part to create some lines. Okay, soften. And here I will add more
green on this side. I painted this right side, wet on dry because this
area is very small, using only the tip of the brush. There you go. Now this time, I will paint this area. I will paint this we on. What? I added more green
on the inner part as there are shadows on
the overlapping leaves and smoothing the outer part with a damp brush. And I will be painting this wet on dry because these
are small areas. Okay. I'm almost done. I will just paint this
part of the leaf. I'm painting this, on what? Because this is bigger leaf
than the previous leaves. I started painting from
the inside going out, then smoothing the
brush strokes. Here as well. I'm leaving some
part of the leaf that are unpainted because I would like
to use that space later or part later to built to
paint the veins litter. So I will paint just the center, like the bottom center
with darker red here. We'll pat this on
dry because I don't want this to disturb the
other areas of the painting. It's too wet, so I remove
the excess water from my brush and drag in
the water bead or the watercolor bead and paint a Okay, that's it. This is the finished third
layer of the poinsettia. I did not touch the center
or the small areas here. I didn't touch that. I will
just paint it later on. But for now, I will
just leave this to dry. And then when I come back
on the fourth layer, that is a time that I will
add more shadows painting with milk to cream consistency
to enhance the color, the shadows, and the
depth of the poinsettia.
30. Boosting the Colors: Welcome back to my class. In this lesson, you will be painting the fourth
layer of the poinsettia. So before I start painting, I'm going to prepare the
colors that I will use. I am going to prepare more saturated color and
darker colors of the red. This time, I will prepare, like, milk to cream consistency
of the red mix. Olive here, Lazard
crimson and pyro scarlet. Et me test the color. Now I have my
watercolor ready here. I will start painting
on this side, and I will be painting
this wet on wet technique. I will be starting here, remove the excess water. I will be painting using
more saturated red mix, and I am going to paint
just the shadows. I will enhance the colors of the shadows of the pinseta.
I will soften this. All right. And I
will soften this. At the same time
I drag the color. I could see there are more
these are more darker. There you go and soften there. If you have the stil wet, you can add more colors on
some other areas as well. There you go. Then here, I will add more
shadows on this area. And here I will soften this. And here, Okay. This area should be
a little bit darker here because it is
overlapping leaves. So this would be darker here. Remember to control your water. If your brush holds
too much water, I suggest remove excess water. It is the reason that I like to paint with synthetic brushes. The synthetic brushes do
not hold too much water. All right. I cannot copy
exactly the colors, unless if you are
trying to paint hyperrealistic, you can do that. But for me, it's just
some areas only. But this part of this would be obvious because this would
be an overlapping leaves, so I need to add shadows here. Ligo, and here as
well, and soften them. Now I'll move to this
area this area first. We'll add more color here. Well, there you go. There. As long as your
paper is still wet, you can still blend the colors. It would be nice to blend
colors with your colors. But then if not, yeah, you need to wet your paper. There it is. And here, this part is more darker red, this is, like, folded
in the middle. So I need to add
more color here. There you go. And add
more color on this side. As you can see, I'll
also covering the areas where I painted
blue because these are the areas that have shadows and darker
areas here as well. I will be on time laps again, but I will come back later with an explanation
of the other details. This area is very small. So instead of painting
this wet on wet, I will be painting
this wet on dry. Just painting just
the inner part that very beside
the other leaves. Okay, there. Now I'll
be painting this area. This area is a
little bit bigger, so I will be painting
this wet on wet. Especially the areas that have dark colors or shadows
like this area. As you can see, my paint
brush is not very watery. My brush is very controlled. I will dip this brush
into my water just once and then get more
water I mean paint, what this area that
I'm about to paint, and I will add more color so I can have smooth
transition of colors. There you go. There and smooth in these areas. And here I will drag the water. So every time I
smooth in an area, what I do is I use
the same brush to drag the water and wet
the other areas as well. Okay, there you go. I'm not painting
the details yet, just the underlying
colors, the redness. And later on after this layer, I will be painting the details, and we will paint with
more saturated colors. There you go. So I just use the
same technique. I will be on time laps again while I paint
the other areas. A a I am painting this leaf wet on wet so I can easily
blend the colors. Same technique. Then I'm focusing
on the shadow areas or the dark areas
of the poinsettia. Okay. As you can see,
I'm avoiding painting this area because
it has highlights. So when you paint this
leaf, as you can see, I am following the shape and
where the the leaf is going. Like there's a
flow of this leaf. Like here, it's going inside and it's
curve the same time. So I'm carefully
painting this area. Okay. If it's still dry, get your brush and wet it, and I will dip this
brush a little. There you go. So I can
easily paint there. All right. As of now, I am using the tip of the
belly of my brush as well, so I can disperse more paint. Okay. On the left, I just ran a little bit to
add a little more color, but I do not add too much of it. Remember, we have highlights here that we need to preserve. So I keep it that way. I do not paint on that area. I just painted on the
other areas or beside it. Okay. And here, Okay, there you go. So that's
the left part of this leaf. I can add more color
or more shadows here. And look at the reference
photo as well at the same time while you
paint. There you go. I will paint the right side now, but I will wet this area first. Okay. Again, this leaf is curvy, so we need to curve
our brush strop. And here, I'm wetting this
area and add more paint here. Kis, I press heavy on my brush, and I disperse a lot of paint. So if you think that you're
not dispersing more paint, I suggest press your brush
a little bit to the belly. There you go. And here as well. Be adding more paint
here, more here. There you go. I remove the excess water from this
brush so I can soften my brush strokes to avoid letting it dry
with harsh edges. There you go. I will
leave this dry. I will move to the
leaves here to bottom. But I will add a little bit
more of pad here. Okay. Just a little bit
more and soften. There you go. I think I will
add more red on the middle. But later on, I will paint the fine details
on this onsetia. Okay, there.
31. Strengthening the Redness: Now I will move to this area. I will start here the big leaf. So I will add I
will wet this area. Then I will start painting
on the edge going down using the tip of my brush, and then smoothen it. Okay. There we go. And we this area. And here, I'm painting this, adding
more color here and here. Then I will soften this
area and drag the color. I'm going to wet this area. There, and I will add more color here and a little bit
here on this side, and I will soften this
rewetting this area. I would like to add more color
here since it's too light and my pencil line are
very visible in this area. There, I will add
more paint here on some areas to show that
this leaf is folded. There you go. And here I will add more
paint there. Here. I will add a little bit
dark here to show that this leaf is folded
here and there. I will add more color here, more shadows to
emphasize this leaf. There you go. And more
on here this area. I will add more paint
in this area and here. There you go, and here as well. This time, this
part of the leaf, I'm painting this worked on dry because it's a small area. And I will soften. There you go. There. Now I will move on to this leaf. This part of the leaf has
more highlights as well, so I will be just adding more
color on the dark areas. Okay. Like here. There you go. But there are highlights there. Okay. As you can see, I'm dispersing the
colors from my brush. There, I will just
soften this area. I will add a little
bit more of color on this area there and will soften. There you go. There, I will wrap this leaf and I'll add more
color here on this part. I dip my brush
into my water so I can add more water to
my brush and get paint. There you go. And
here I will add more paint on this
area. There you go. The and here I will add more paint on
the dark areas only. Okay. Remember, there are
highlights on this part. So we need to avoid painting on the
highlights and add more color on the shadow areas. There you go. And here I will just soften
the brush strokes. And I will add more
color here and here. There are some areas
that are highlight, so I avoided painting on them. I will add a little bit more of color on other sides like here. And I will just soften
the brush strokes there. There you go. To add
more color here, it seems like it's too light. It's still wet a little
bit, so it's okay. There you go and
add more color on this side to emphasize
the leaf here. And when I emphasize another
subject on another part, I'm doing negative painting. There you go. And I will soften
the brush strokes. There you go. Now, as you can see, there's more shape and
form on this leaf. Next, I will paint
this part of the leaf. I will follow the
same technique. So I will do time
laps on this area. This time, I will be
painting this area, and then this one. Okay. I will start
with this leaf. Then I will be painting
this wet on wet. There are also
highlights on this leaf. So there are some areas
that I won't paint them, leave it or I will just
ran a little bit of color. There you go. And
more of color here. And there And now here, we'll be adding more paint here. I'm starting on the left. It feels so dry so smooth
here and rewet the paper. There you go. So adding more paint here and there re wet I will re wet this area
because I picked up some color earlier. There you go. And here as well. There, I will just soften this area and
disperse the color. Okay, there you go. So you can see I drag the color
that I have in my brush, but I will clean this
brush, totally clean it. And I soften the brush stroke. And here I will add more
color here and there. As long as your brush is wet, you can soften your
brush strokes. I just added just a little
bit of color here and there, and there you go. And here, I will add
more color here, more pigment here
to show there are some folds and her contrast. I'm just softening the brushes
roof that I left there, but I will leave some
highlights on this area. If you look at the
reference photo, there is a highlight there. I will add more paint here. There you go. And I will just
soften these brush strokes. There you go. Now, I will heat this leaf. This leaf is supposed
to be darker. So I'll wet this area
this area first. They are adding more
color here will help to help to help the other
leaves to stand out. A and I will soften this. But here I will this area because I will add
more paint here. There you go. You add more color here to show the curve of
this leaf on the left. I drag the color here. It's not too white
or not too light, but it has color. So I drag the color here. Just a little bit,
but not too much, but I add more color or
shadow on this area, and I will add
more here as well. I will add more color here
to emphasize this area. And there, I will add
a little bit more of saturated color here to
emphasize the leaf on the top. There I go. Now I
will paint this leaf. For this leaf, I will be
painting this wet on dry. So now you can see there
are more colors and more saturated winsetia than the one that we have earlier. So I'm painting the more leaf. And I will add more
color here as well. As for this leaf, I will just fit it there. Now, I will be focusing
on the center part, which is below, but I will be
painting it on dry instead. So here we on dry with
saturated red color. A So there I added more saturated
color on this area. Okay. So it helped our lease on the sides
to show up more. Okay. Now I will be
painting this area. I will just do the same, but I will be on time labs.
32. Emphasizing the Form: Yeah. For this leaf that has purple, what I will do is
I will just add more purple instead of red. So I rinse my brush and I will use the purple
mix that I have here. Still, I will be painting
this area wet on wet. But I will be painting this with more
saturated purple color. There you go, aqui see
it's more saturated. Next, I will paint would be the green areas or
the green leaves. So I will be starting with this. For that for painting this, I will add a little bit more purple on this
or more red, rather. Okay. Then I'll get
a little bit of red, and I will mix this with
the green here that I have. So there you go, it's
more darker green. Alright, so I will
be painting this with what on what technique. Yeah. Yeah. I'm soften the sides. Then I will add more green here. There you go. And I will just soften the brush sorpes
there. There you go. Next, I will paint this area. And add more green here. It's not too wet, not
unlike those areas. Those leaves I mean
cause there's also some highlight that I need to preserve as well. There you go. I will remove excess
water on this brush by putting it here
under my towel, and then I will paint green
here and here as well. I there you go. Next, I will just use the
same green that I have in my brush to paint the center. There are some small
this here there. Just soften it. I'll add a little bit more
of green. There you go. This is the fourth layer
of the poinsettia. I will just leave this dry, and then I will
paint the details.
33. Painting with Metallic Paints: Alright. If you notice
there is, like, a smudge of red on this area, I will wet this big
brush that I have. I remove the other paint
that I have on my brush, and then I will try
to lift the paint. I will use some tissue as
well to lift the paint. I'll try to clean it, and hopefully that will lift. The red that I use is staining, so hopefully I can
still fix this. I tried to lift the color, but then it did not lift
fully, but it's okay. It's not very visible
unlike a rear. No I will be painting the last layer or the
details of the poinsettia. What I will use would be the tip of the brush
that I have here. I will just paint
with the lines, and I will be doing
what on dry technique because I will just paint the details like the fine lines. I will be using the same
color that I have here. But I think I will add a
little bit of green to this. So the red will be a
little bit darker. So I have the green mix here, and I will add it here. There you go. I just added green, a
little bit of green. I will be starting to
paint on the left side. I will just be using
the tip of my brush. If you don't have a very
pointy brush like this, I suggest to use a
small brush like size two or zero or it can
be smaller than that. But I will be painting what
on try with this brush. So we'll be starting here. It will be also helpful if you
would like to paint, like, thin lines or a line
directly using your brush. Now we will be painting this
line here on the left, here. And here, I will brush a
little bit on my brush there. It's still wet. So I will drag the
paint going here, and I will, as you can see, I still have paint
that is wet here, so I drag them. As of now, I'm just using
the tip of my brush. Okay. There you are. It's up to you if
you would like to paint that is from
the center going out, or if you would like
going in, it's up to you. I will use my pinky to
rest on my paper so I can draw lines. There you go. I won't draw the lines
all of the lines. I will just paint some of them. But later on, I will be
using a metallic paint. There and here, I will
just add some lines there. Okay, I do not follow
whatever the reference photo, I just paint whatever
I see there. I will just continue
adding more of the lines, but I will be on time laps Here for the lines, the leaf is curve. I will curve the lines
as well, like this. My brush is too
dry, so I wet it. Then I added the
curve line there. So it will show that the
leaf is curve or folded. And here and here, again, I will rest my pinky on top of the paper to balance. There you go. Just some of
the lines, there you go. And here, I avoid adding lines on the highlights. To try, I just dip
my brush in to the water to wet my brush
and pick up more color. And here, add more paint here and there and line here. My pencil lines are not very visible at this
time, but it's okay. I'm just following whatever I
see on the reference photo. Here. I And also, I will add lines on this area. There you go. For this
part of the leaf, I will use purple. I will just finish adding
more lines here there. So I will rinse this brush. Rise this brush, and then I
will get purple mix here, and I will paint here. Remember to curve your lines. Okay. There you go. Now I will be painting
the center here. I will be using green. I'll add more details,
just the shadows. I know the yellow has been
covered there, but it's okay. I could just use red and
add more color here. I will be re wetting the antique gold and the interference green
blue shift here, so I can use them to
paint the details. For painting with
the metallic paints, I won't mix them on
the mixing palette. I will pick up the color and
directly use it to pink. For the green, I didn't
add more green or nice, but because I will be using the interference green
blue shift there. But I will start with
the green blue shift. Okay? So this is
how it looks like. I will just remove the excess
water here on my towel. So this is the one
that I will be used to paint the lines here. And also here. But here I will just
use to paint here. I added green there, but I will soften the
brush stroke there too. Okay, to add shine
on the whole leaf. Then I will add more
here on this area. And here. Then I will soften
the brush strokes. There you go. Now if
we ran this brush, I remove the excess
water as well, but then I will get
the antique gold directly from my pan. So this is the antique
gold on my brush. And then I will just add this to some of the areas I would like
to add here on the center. Then I will use this
to add more lines. You can use this to add also some metallic color
on some areas like on the highlights, like here. I think I would
like to add here. It's to gold, so I
will get my big brush, remove excess water
and soften it. There you go, just to add shine. And then I will
also add more here. I don't have any
specific brushes rolls but I just added
on the highlights, and I will add also here
where the highlights there. I dip my brush into the
water a little bit. Okay. There you go. I added more here and also here. I don't have any specific
location in mind where to put the Antique gold and
specific brush stroke. I just add wherever I would
like to have litters. So I decided to put them
on some of the highlights. You can put gold metallic
paints on other areas as well. That's fine. I will add more
gold lines here and there. So you can start here, and I will add more
gold here as well. And here I don't have any specific location
where to put the gold. But I think it would
be better if to put the gold on the highlights. I won't put the gold on all of the leaves or
I won't add too much. I would just add
some here and there. I will soften this. And there I added on some of
the highlights there. And here. I will soften this. This is a finish point set
ya. I hope you like this. Again, adding metallic
colours are optional, but it's up to you if you'd
like to use it or not.
34. You made it!: Good. You made it. I'm happy you made it this far, and I would like to congratulate you on finishing this class. Have you submitted
your class project? If not, then take your time
to finish your class project. I'm excited to see your watercolor realistic
cotton flower, pine leaf, and poinsettia.
35. For you: Good. Did you see something else in the projects
and resources section? If you see those printable
Christmas cards, great. That is my gift to you. You can create it
on a good paper and give it to your loved ones. Happy holidays and enjoy
 Bianca Santiago, Watercolor Artist