Transcripts
1. Class Introduction: Negative Painting: Negatively can be tricky
and it needs focus. In this class, we will paint a hydrana using a negative
painting technique. Also, in this class, I will share the
perfect purple mix that can be reddish or bluish. I will also explain what negative painting is
and how would you apply this challenging
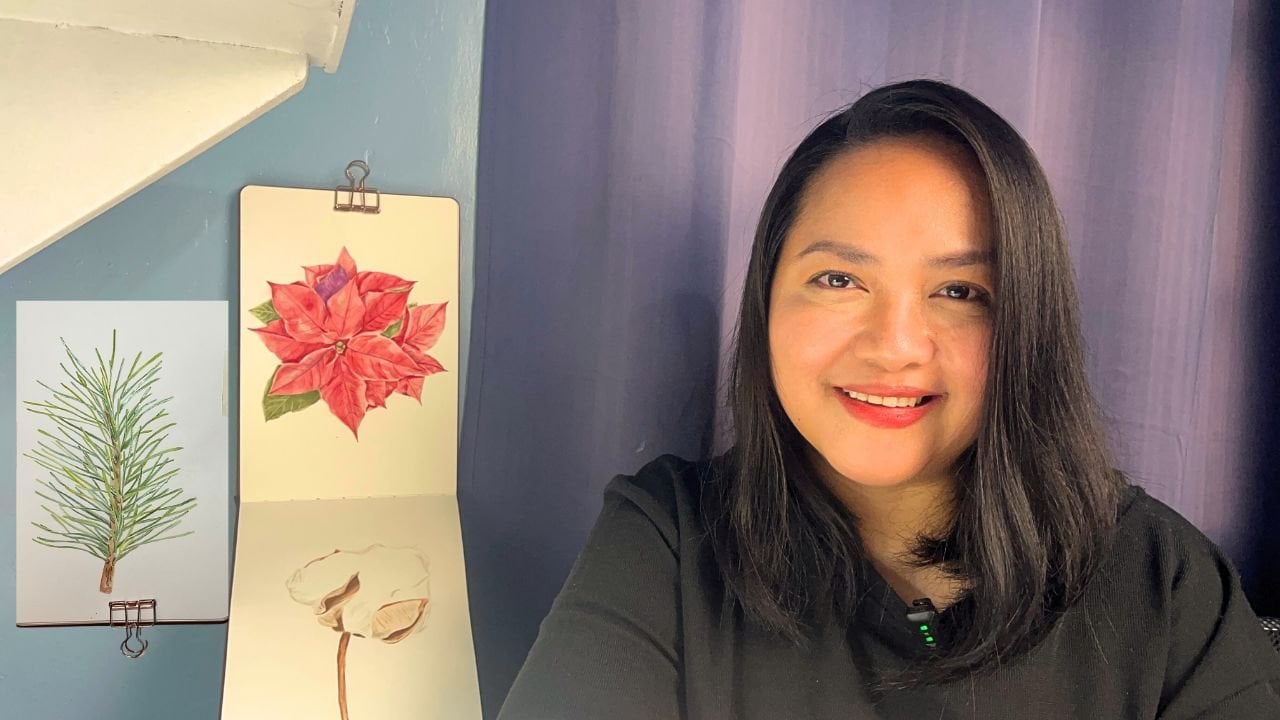
and tricky technique by painting a hydranga. I am Bianca, a
watercolor artist, I paint realistic
flowers and fruits. This class is open to any
level in watercolors. I provided a downloadable file in which you can get
the reference photo, the outline drawing, the list of materials I use
in this class, and the list of the colors
to mix the perfect purple. You can use in any painting. Since the classes focus on just one watercolor
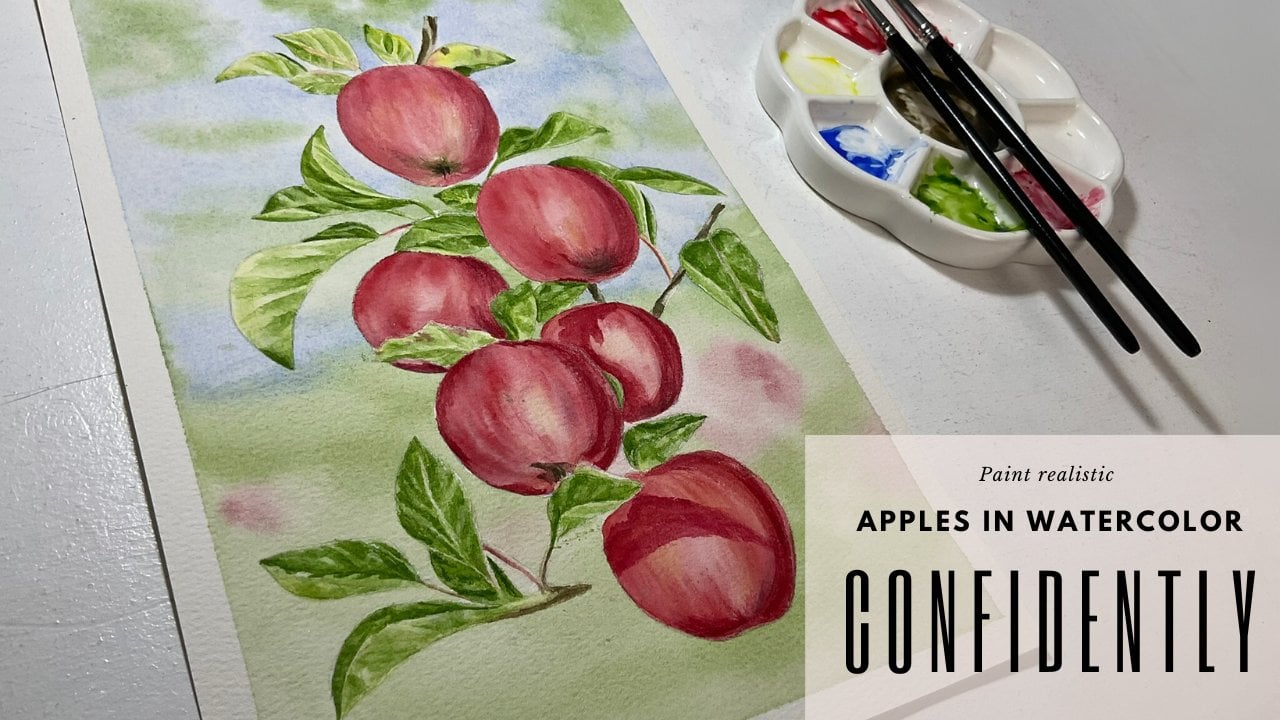
painting technique, I suggest watching my
first kill shark class titled painting realistic apples in watercolor confidentially. Where I have lessons
about transferring an alpine drawing to
your watercolor paper, watercolor consistency,
brush strokes. And watercolor techniques. This class has just one project, which is the purple
hydranga with three leaves. By the end of this class, you will be able to apply negative painting not only
by painting a hydrange, but you can also
apply this technique on your next watercolor
painting projects.
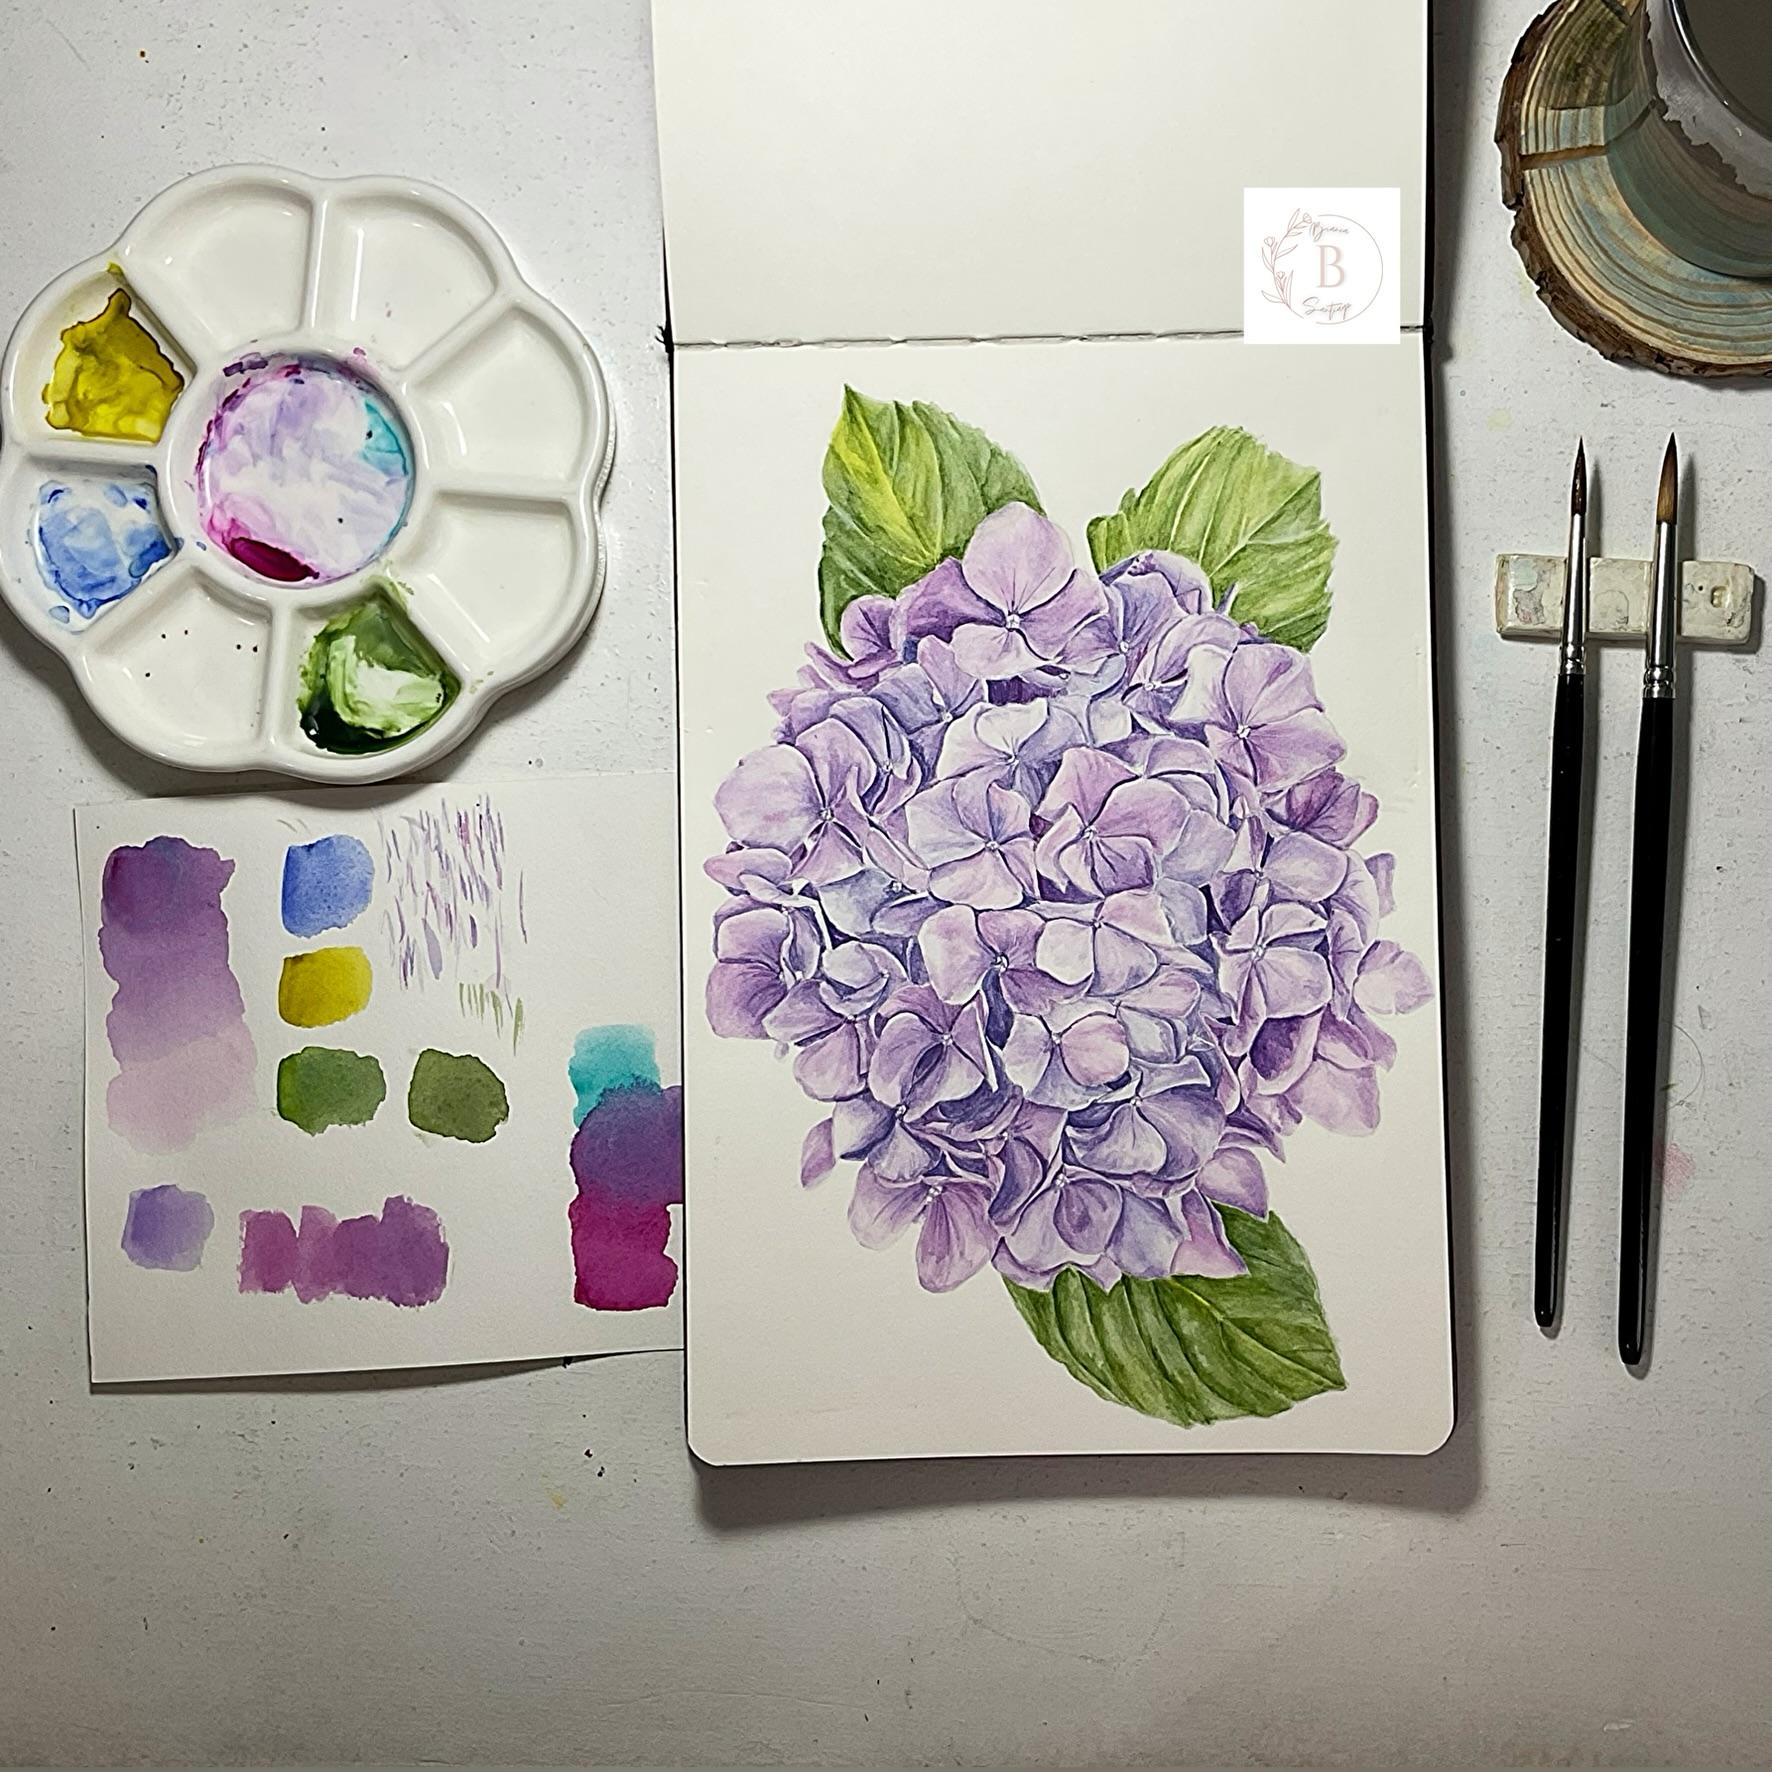
2. Art supplies you will need: In this lesson, I
will be showing you the materials that I will
be using in this class. So I will be using
a sketch book. This is Bau Hong
Academy Hot Press. A watercolor sketch book. The size of my sketchbook
is six by 9 ". Next I have the outline drawing. You can get this for free
together with this class. I will be also using
a light pad for transferring the drawing to my watercolor paper or a
watercolor sketch book. I will also use a light pad to transfer my outline
drawing to my sketchbook. If you don't have a
light pad, it's okay. There's other way that
you could transfer the outline drawing to or
paper or your sketchbook. Since I will be
using a sketchbook, I will have also clip
binders with me. Also, I use masking tape
to tape down my paper. I mean, the outline drawing to my light pad and also my paper. We will have also water colors. I won't use all of these colors. I will be just using some of it. For transferring the
outline drawing, I will use four H pencil
to transfer the drawing. This is light and easy to erase. So I use four H pencil. I have also a pipe so that I can pret my paints
before painting. I have also a needed eraser. A mixing palette. I use a ceramic mixing palette, and also I have are
a towel with me. Also two jars of
water clean water. For the brushes, I will
use mainly two brushes. One is size for fine tip brush. This is a very pointy
brush when it's wet and size seven round brush. I have an old brush here
that I use only for picking up colors from my
watercolor pants. So that's all for the materials, and let's go to painting.
3. About the class project: For the class project, we will paint one
purple hydranga. The reference photo together
with the outline drawing, and the list of materials are in just one PDF in the projects
and resources section. The focus of this class is
negative painting technique. But I also suggest watching
some lessons how to transfer the outline drawing
to your paper using a light pad or
without a light pad, watercolor techniques,
brush strokes, and watercolor consistency in
my first skill share class titled Paint realistic Apples
and Watercolor confidently. If you are familiar
how to do those, you can continue to
the next lesson. If not, then I suggest watching the mentioned lessons before
you start the class project. The techniques and rush
strokes are repetitive, but it's also relaxing. So I encourage you to paint with me and submit your
class project. You may also upload
your class project on Instagram or
Facebook and tag me. I'm excited to see
your purple hydranges.
4. What is negative painting: Negative painting is a
technique where you can paint around the subject
or the negative space. In this class, we will paint a high range of flower
using negative painting. This means we will
paint more around the positive space or around the flowers than
the flowers itself. We will focus on painting
on the negative space or in between the flowers
and on the main subject. The advantage of using
this technique in our watercolor painting
can help the main subject. To stand out more, and the viewer will rest the eyes on the positive
space of our painting. This watercolor technique is
tricky and in this class, I will show you the step by
step process of painting a hydranga by applying the
negative painting technique. I will use negative painting, not only on the flowers, but also creating
veins on the leaves. Let's jump into painting.
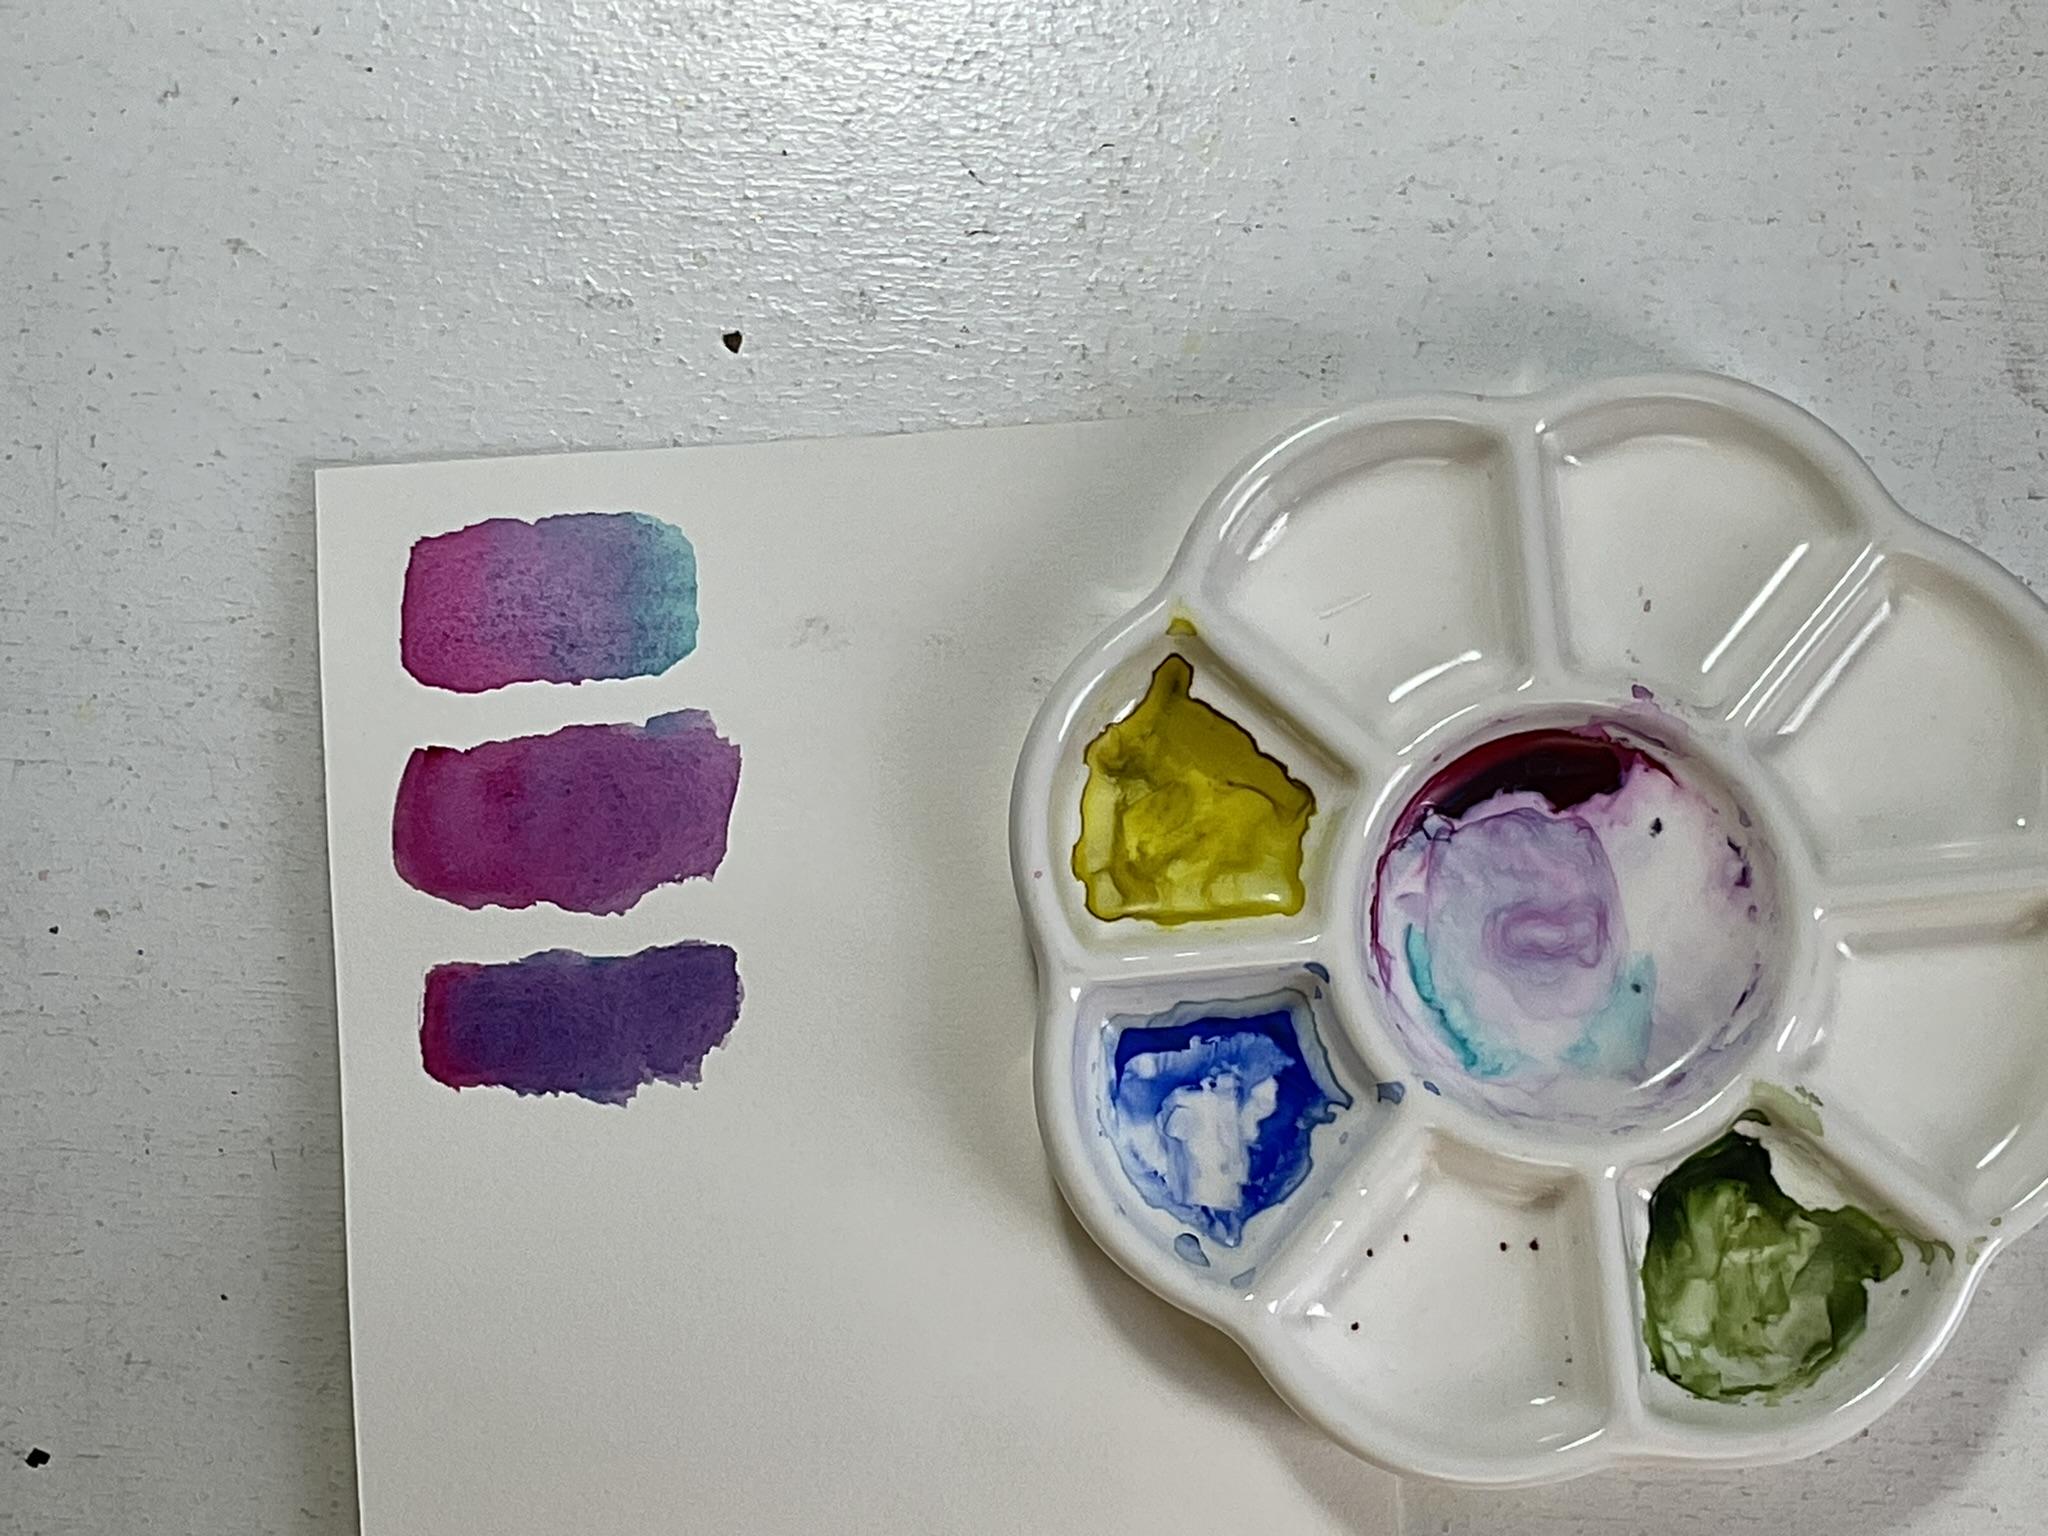
5. Color Mixing: This time, we will be
talking about color mixing. So looking at the
reference photo, and I chose already the colors that I will
be using to get purple, I would like to have magenta. Then I will mix this
with cobalt teal. Okay. This is a good
purple mix. Okay. It has more blue, I
will add more magenta. You can see because I used these two colors before
and it has perfect purple. This is the purple. This is ac magenta
and cobalt teal. I can water it down. If I water it down, this
is how it looks like. If you do not have cobalt
teal and magenta, it's okay. You can mix other
colors in your palette, whatever you have, or you can just water down
docosan purple. If you have, just
add a little bit of red to have a nice purple mix. This is Cobaltl and Kira
da Magenta mixed together. For underpainting, I will be using Daniel Smith to Marine
blue or French auto Marine, that would be for
my underpainting. For the leaves, I
will use green gold. This is from core, some
parts of the leaves. Also for the leaves, I will be using sap green. The Hap green. I
will mix it with a little bit of
French to Marine. Sabran and French tomarne. And I will also add a
little bit of purple mix that I will have from
magenta and Cobalt teal. Because subgran is
a bright green, and do not like it
to be bright green. So I add a little bit of
purple mix that will be I will get it from the mix
of magenta and cobalt teal. If you don't have
the two colors, you could also use
the oxycin purple. However, you need to
water it down so. This is in purple, and you can water it down. You can also use this. If you don't have the colors
that I have, it's okay. You can mix the other colors that you have in your palette, use whatever you have
in your palette. I will show you the magenta
and the cobalal mix. So if I have here magenta, and I will mix it
with cobalt teal. All right. I have
a lot of bac til. I will get more of
magenta this time. All right. So if we mix
cba tl and magenta, we have a very nice purple. Then if I will have
more of magenta. Okay. And I will add a little
bit of cba tl here. All right. We'd see this mix. But if I will have magenta, and I will add more
of cba tal All right, you would see that's
more on blue side. So here, I have more magenta
than the cobalt teal. So the purple mix that
I have is reddish. Here is more on cobalt teal. So what I have is more
on the blue side. So even if I have two
colors ses mixing well, I will get here to get
more of the blue side, I will get here to
more on the red side. I don't have to mix
three colors like one here for the perfect
purple or middle purple, and one with more
reddish and one with the blue bluish purple. So I don't have to do that. I just mix one in one well. So I can get either of
the sides of red or blue. So it's up to you
if you would like to mix in es one well, or if you would like to prepare three color mixes of purple, so you are ready for painting. But for me, I just
use one mixing well, and I will get you will
see me picking a color on either on the bluish side or on the red side.
So it's up to you.
6. Preparing the Colors: We already know what
colors that we will be using for the hydranga. As you can see, you
can adjust actually the reds and blues
on your purple. So even if you have more reddish part and
more of the blue, you can just adjust it with the color mix
that you will have. So I will just prepare the
colors that I will use. So this is French to Marine. This is from Daniel Smith. This would be my
underpainting color, especially for the hydranga
and also the dark areas. For the lease, for
my underpainting, I will use this green gold. This is from green
gold from core. I will mix the purple. I will mix it here,
this is a magenta. I will mix consistency
of the purple. I will get cobot Tal. The two colors
that I have cobotl and magenta s are
from core as well. I will add a little
bit more of cobot. That's a beautiful purple color. I will try it here.
It's more of red. I can add a bit
more There we go. And more of cobotl. You can adjust how
you like our purple. This is also good. There you go. I already have the nice purple. I can just water it
down if I need to. Now, for the leaves, I will use sap green. I just put it here. Sap green. Most likely, I will use the sap green if I'm going to paint the
second layer of the leaves. I do not like it
to be so bright, so I will add a bit
of French automalin. The sap green that I have is from Windsor and
Newton Professional. That's a bluish green
that I have now, and I will get a little
bit of purple here. I can a little bit more. I added a little bit of
purple to my green so I can lower down the
brightness of my green. This is what I have now. You could see it's
a little bit muted, but beautiful green color. These are the colors that I will be using for the hydrana.
7. Painting Process Preview: Whenever I start a
watercolor painting, I study the reference photo. I look for the shadows
and the highlights. Also on the form and
shape of the subject. I zoom in and out of
the reference photo on my phone so I can
see the details. I also change the reference from color to black and white
to see the shadows. For transferring the drawing
to my watercolor paper, use a light pad, so I can avoid erasures and it can
be a clean transfer. If we don't have a
light pad, don't worry. I have an alternative
way to cleanly transfer the outline drawing
to your watercolor paper. I showed the step by step
process in my first class, titled painting realistic apples in
watercolor confidently. When it comes to the
first two layers, I always use tea to coffee,
watercolor consistency. As much as possible, I would like to use a very light wash on the first
two layers and glaze them. On the third layer of the painting is where
I start to build up the colors and I use coffee to milk watercolor consistency. I use the wet on
dry technique for painting tiny areas
and painting details. I painted that tiny center
of the flowers plast. It is up to you if you would like to use a maskin
fluid or not. I didn't use a maskin fluid
in painting this hydranga. If you are not familiar with the watercolor techniques
and brush strokes, I suggest watching some of the lessons in my first
skill share class, painting realistic apples
and watercolor confidently. The techniques and brush
strokes are very repetitive. I have a step by step
guide in my lessons. I talk as I paint. But since the steps
are repetitive, the rest have part
of the lessons we speed up with relaxing
background music.
8. Class Project: 1st Layer: Now, I will be painting the
first layers of the hydranga. I can start painting
from the top going to the bottom of the hydranga. I will be doing the veins of the of this leaf. Very likely. I will erase the
dark pencil lines. But I will be doing
this negative painting. Whenever I paint, I do not
raise the pencilines all over. I just raise the pencil
lines as I paint. I do not raise
everything in one go. Since I am going to paint this area first, I
will start there. I'll be painting this but
looking at the reference photo. First, I will be painting with green gold and
French ultramarine. I will be painting
this wet on wet. So the middle, I will
be painting this with green gold and
some area here. And F in some areas, I will be painting it
with French to Marine. I this area. I will soften this area
with my damp brush. So I use my bigger brush here. This is the reason I use two brushes painted
at the same time. There we go. And here. Here, I will use
French to Marine. As you can see, it's very, very light. And here also. Okay. And softening. Okay. I'm going to wet in
this area. One more time. Okay. And I will be
painting with green gold here here as well. And here. We're not
on the details yet. It's just painting the
underlying colors. The is brush. I will paint with
French marine on this tip of the Okay. This time, I will be painting
the hydranga, wet on wet, and I will just paint the areas that have
shadows. I will start here. For the hydrange
I will start with the French auto Marine
for the berg areas of the hydrange
this is wet on wet. I will soften this with brush, the wet my brush. If you don't have
any french automat, you could use warm blue. I will speed up
the video without voice instructions
because the process and the techniques are the same. B. B B M. M. M. Oh. I'm done with the first layer, so this is how it looks like. I painted on the shadow areas or dark areas on the flowers and on what you could
see like insides of the flowers and whatever
that is at the back. So that's what you could see. I'm painted it French train. I will part of the d, but the rest are
good to paint to.
9. Class Project: 2nd Layer Hydrangea Part 1: So I will start with painting the flowers with the purple
mix that I have here. I will be doing it on wet this
time for the second layer. So for the second layer, I will be starting to
build up the colors. And later on, as you build the colors on the th and layer. It would be on the shadows part. We will be doing more
on negative painting. But for a second layer, I will be just
painting. As it is. Okay, I will be painting
starting at the top. I will just cover this area, just to make sure
that I won't pass it up or there will be
no drops of paint. I zoom in a little bit, so it's easier to see. My paint here on the mixing
pet has already dried, but I will just use this pipe to rewet the paint and so
that we can start mixing. And also doing wet on wet
technique for this painting. As you can see there
are some parts of the flowers that
are not painted. Those are the light
areas of the flowers. I will be starting to
paint on this flower. I mix the color
here, the purple. As much as possable, I would like to get the
light color like that because this petal
is very, very light. I'll be removing
the excess water on my brush and drag the water drag the bead
on my painting. I will get more of the paint. I will just follow the
shade of the itself here. I will add a bit more
of paint on this area. And a little bit more. Move the excess
water from my brush. There we go. Just moving
the paint up and down. I will soften this area
with a damp brush. So my big brush is damp. I lease it and remove
the excess water, so I could use it to rea the
next area of the flower. There's a little bit
of bleeding here, but that would be fine. I will just fix it, I will build the
colors later on. So that's why I will
leave this wet. I don't want to paint
this area because this flower or this petal is still wet and I don't
want to bleed the colors. When you look at the
reference photo, you could see that there
are some areas like especially this is
very light blue, so I didn't paint that, but I will just leave
it unpainted for now, and I will paint it later on. And so as you can see
that my color mix here, there are some
parts of the paints here that is more of blue and some more of magenta
or mix in it. So this is where I will
carefully get or pick up paint from my palette
to mix it on my paper, since I don't want
to bleed this area. I will protect that. I will continue painting on this petal. Here in this petal, it's more of purple on this side and more on
bluish in this side. I will wet the area
first with my brush, with me bigger brush. The reason that I
like painting with synthetic brush because it
holds good amount of water, not too watery,
especially if you like painting
realistic subjects, it will be really helpful. This area is more light. I will just get
more of paint here, and I will just move
the paint around. There we go, and just move
the beat, move the paint. There I will just soften this. There we go. I will get
more on the blue side here, and I will add on this part
of the flower or pet I mean. And I will just a. There it go. I will leave
this to dry and then I will move to the
next pat on the left, which is this one. I will move the pencil lines on this to make it a
little bit more lighter. Since this is small area, you can actually paint this on. But, you can also pick
this on we It's up to you, but I would like to pick
this on wet so that I can have a good transition
of color and blend. And more of purple on this side. I will leave that to dry and I will move to this
petal on the right. I will do this wet on wet. I'll get this part of the
palette and will be here. In this area, I will just soften this and what the part
of the petal here, move the excess water. Paint Whatever
paint on my brush, I just use it to paint and I curve my
brush stroke as well. And on here. I did not pick up any
more color I just use, whatever left on my brush. This is supposed
to be very light. I softened it and
added more paint on this area and here as well. Okay. There we go. I will add more paint here
going on the side while. It's still wet. There. Now, I can paint this petal.
10. Class Project: 2nd Layer Hydrangea Part 2: Now, this petal is more
on purple on the sides. I will get the part of my
pet that has more magenta. Right? It could see here, and then I will add
the paint here. And moving on here here. I will soften this, move the paint going here. I will this bruh. Now this time, I will get the part of my mixing
pallet that has more blue and I will add
the paint here. You could see that I blended
two parts of my color mix, that this part has more magenta, and this part has more blue
and just it with each other. I have a damp brush
here so I can soften brush stroke
here like that. I finished one petal. I mean one flower. Now I will move to this area. These areas you can
see that we have an underpainting or
underlying colors. Okay. So we'll just this area Then I will get the
part of my mix that has more blue on my palette, and then I will start
painting from here, starting from the one
that has shadows. Okay. My paper dried fast. What I will do is
I will just get this dump brush and I will just soften my brush
stroke, like that. I will remove the excess water. There. I will continue painting on the rest
of the flowers. I will do the same
process as I showed you. I will speed up the process, so it will be faster, but you will see that I will use the same technique every flour. Oh. D D There's Oh There there Oh.
11. Class Project: 2nd Layer Leaves Part 1: All right. Second layer of
the high ranges already done. Now, I will be
painting the leaves. Now, so we have
only three leaves. This is just only
the second layer. On the third layer, we will be focusing on the
shadows, intensify the colors. As you can see, as we
do negative painting, And if we paint dark colors
on beside the light areas. The light areas pops up more and they become
more visible. That is the beauty of
negative painting. But on the third layer, we'll be focusing more on the shadows,
intensifying the colors. For now, let's paint the leaves. So I will be starting on
the leaves here or the top, and I will be doing
this what on what. So I have my green mix here. Here on the blue side. If you will notice that when you paint green on top of the blue, that will be a little bit
darker and intensified color. I just the left part, I did the entire leaf
because it might dry. I have here a consistency
of the green. There. You would see also difference if you have different color
on under painting. We have green gold also here. I will add more green here. I will remove the
excess water from my brush and get more paint. There you go. With then from the center, I will be moving around. I drag the water here. It won't have water
too much on this side. There you go. There are some parts
of the leaves that are more darker
that would be with the blue underpainting and lighter leaves when we have
the green gold underpainting. If we didn't have green gold, you could use yellow
like a bright yellow lemon yellow and add
a tiny amount of s green. I. Now I will be continuing
painting the center of the leaf. I will add more green on the side and also following
the shape of the leaf. And softening this
part and here as well. There and you will add green
on this side of the leave. Here, I will be adding more green on this part
of the leaves. You could see when we
have a blue undertone, we have a darker
color of the leaf, and we have yellow, we have a lighter green. This is just a second layer and I will be intensifying
the color on the th layer. So basically on the
first and second layer. I use only tea to coe
consistency of my water color. And when I go to the
third and fourth layers, that is a time that I use more saturated colors and more concentrated
colors of the water color. There as I drag the water. I also in the edge. I also lift up the other paint there. Hey. And softening this part. Lifting the blue here. It's supposed to be just
very light purple there. I will add more green a
little bit here, and soften. I will leave this area, then will move on to the
next leaf here on the right.
12. Class Project: 2nd Layer Leaves Part 2: Because it will be starting on the left going to the right. If you have too much water, if you see that there are
puddles of water under paper, you can just remove
the excess water. That is the reason I
always have a towel on my right so I can
remove the excess water. I'll remove excess water
also on my small brush, get some green here. I'll start painting on the left, moving on to the right side
of the green of the leaf. Here when I rest the
belly of my brush, it releases more paint. Painting on this side. I can start also do negative
painting on this leaf. While softening this edge. I will add more
here on the left, and follow the shape of the
leaf and also the veins. I can ski the veins. And continue painting on
the next part of the leaf, but I will rewet this
area because it try. When you skip a line
there or the vein, it will show that
there's a vein already. So that is the
reason I like doing negative painting on
because you cannot actually remove the
paints or lift them up especially when
the paint has been. There. And here I will soften this
and will drag the water and rewet the other
part of the leaf. There. Self in this. Okay, now, I will the right side of the there. You follow the
shape of the leave. There. This part I will soften
this with a damp brush. Hes damp because the
fuel brush is too wet, it will create blooms. That's what you intend
to do to create blooms, but if not, damp. You can remove the excess
water from your brush. There and soften this and here as well. There. Self in this area.
Now, I will be moving on the last below. Okay. So in. And then I will paint the last. I will be doing. I will
be starting on the part. Okay, et my green. Okay, I will soften this part of the and t the next part. Get there and will
solve in this part. And we this area. There we go. No, soften this part
and here as well. You could see I left
this part painted. This part. I can create veins. Okay there. Okay so next area.
13. Class Project: 3rd Layer Hydrangea: We are now on the third
layer of the hydranga. So this time, I will be
focusing more on increasing the saturation and also painting
more on the shadow side. This will help the light areas to show more and elevate
more by painting the shadows and the dark areas of the painting or the hydrange. So we'll be starting with
the flowers at the top. And then later on, I will
be painting the leaves. I zoom in a little so that I can show you how I will paint the shadows and also the
dark areas of the hydranges. I will speed it up later on, but this time, I will just
show you how I do it. In my next here, I have
magenta and cobalt teal. I did not fully mix them, but I will just pick up
some color whenever I need. So I will be starting here, and I will be doing
this wet on wet. I will cover this part first. And this is more on
the more red side. I'm picking up color
on the red side of my mix and I'll paint here. Very light. I'm not using a thicker consistency
as of the moment. What I'm using now is
coffee to milk consistency, that is a little bit thicker, but not very light. There we go. And on this side, I will add on the
blue side here, blue. I use of my bush bit, so I can release more of
the paint. There you go. Then I will soften this. Here, I will drag
the color here. Li. As you notice, I did not put paint here
on the second liter, but I will do that in a bit. I will get more on the
blue side of my next. I mean, I will be painting this. It is very area. I will skip this petal here. Because this is very light, so I will skip it. I will paint on this petal. I'm doing the that not
that one, but this petal. For this petal, it's
on the red side, so I will pick up the color, more on the magenta. A there and this, I will soften this area. I will add more paint
on the side here. Get a little bit more I. And here. No, I will soften this. I will add more
color on this side. I didn't put color
yet on the center of the hydrange but I
will do that later on. Okay. Okay. There and I will soften this. Now on this petal. This is actually the inner parts of the petals that
the overlapping. I will use darker and
thicker consistency on that. I will get more paint here, more on the magenta side. I will pin There we go. Now since I painted this dark, it helped the other petals
around it to show more. I will also do it here. So it's very helpful if you have a very pointy brush
like this. There we go. It helps to elevate
the other petals here. This is the reason
that I like using this brush because it's
very pointy when it's wet. If you have a pointy
brush like this, it will help you to
paint the small areas. Okay. I will add more paint
on the side on this part of the y drain and I'm painting this what on because
this area is just small. There you go. And here as well. Sometimes you will see
me picking a color on the blue side or
on the red side. It depends on the
reference photo. Whenever you paint, always
look at the reference photo. I. And I will so in this. Add more paint here. There you go. I
will just speed up the process and I will
show you how to do it. You will see me doing the
same process like what I did. Oh. Bo. Bom Bo Bo Move. Move. Move. Move. 00. Yeah. No. Yeah. Yeah. A D. No. No. No.
14. Class Project: 3rd Layer Leaves Part 1: I'm done on the third
layer of the flower, so it is done on
the third layer. Now I will be focusing
on the leaves. So this would be the third
layer of the leaves, and I will be adding more
dark colors on the leaves. I will be using the same mix. I will just glaze them. I will start on the top. So for the leaves, I will be painting the leaves
section by section. I will be starting
here the bottom. Because it's quite big leaf. So I will painting this
section by section, and I will be
painting wet on wet. Okay. I will soften this area, and then I will
wet the next area. Let me look flat there, but I will be s like a line. So that will be there
will be veins there. All right. And I will add more darker
green on this side. And here I will soffit this. Also this part. There you go. And the whatever
left on my brush, I will just use it to
wet the next area, and I will add more paint here. I will skip some lie I skip a part here to
create lines or veins. Then I will solve in this. There we go. We with this area. This time, it will
be a green. Yeah. Okay. And then we solve in this area. There we go. And then I will
be wetting this right side. I will just get some green. I did not pick up
a lot of color. I was pressing my brush harder to release the pigment
from the belly of my brush. Soft in this. And here as well. Okay. There we go. I will stop in this. Okay. Ss, I also did negative
painting on the leave. As of now, I do not follow
much on the reference photo, but as much as possible, I look at it and see where I
would put the darker colors. But we won't paint the leaf as detailed as the leaves as we
see on the reference photo. Okay. What this area Yeah. Z. Okay. This time. I will add more
green on this part. I will solve this. And here I will just cor, I will add more. And south this and here as well. There we go. Add more green on this area there.
15. Class Project: 3rd Layer Leaves Part 2: I will leave this
painting to dry. I will move on to
the next leaf here. This leaf is more lighter than the other green or other leaf that we have on the
left because this is part of the leaf or part of the plant that is touched by the sun as we have here,
the reference photo. I will do this painting on wet. I will start here I will paint on this area first. I soft and we'll add another
part of the, green here. This time I'm using only coffee consistency
of my green as I glaze. B as if we remember, we are going to glaze, we are just thin
layers of the colors. Here. I will soften this. I will wet this area. I will add green on this part. I left the edge unpainted. Okay. There we go. I left that part unpainted, but I will soften it
and here as well. Then I will wet this area. I will just paint first here, the part that is at the
edge of the flower. Then I will concentrate
more on the side. And I will leave
that part unpainted. I will soften this.
There you go. And then I will wet this area. We'll add more green here. Because this part of the leave
that is under the flower. There would be shadow
forming there, and I will paint on the side, leaving space here, so
we could show the veins. I'm painting like a
little brush strokes, going to the right, and I will soften
this and here also, I will pain going to the left. This is a very light and coffee
consistency of the green. Then I will soften
this. There we go. I will do the same on
the other parts of the. But here I will I will wet this area to
prepare it for wet. S. I will start here. And I will paint, going to the right here. I left this part unpainted, so I can leave a
part for the veins, that will soften
that and so as well. Now, get more green. All right. There we go. And I will solve in this area. Now I will skip some part of the leaf here.
I'll read that. I will add more green here. I will start here this time. This looks like easier to paint, so I can soften the
green as I go pain. There we go. Some part of the leaf I did not paint, I just let the watercolor
flow there and soften this. L a little bit more of
green on this area. There will go. Then
I will move here. This is a part of the leaf
that has darker green. Then after this part, I will speed up the process. I will be doing the same
process as I paint the leaf. But as you paint this, make sure to look at the reference photo to see
where are the dark color, the part of the leaf. There you go. For
now, Let's sit. I left some part if
you see unpainted. I would just soften
that and soften this and also this
area the veins. I will speed up the process, but I will be doing the same
technique as I did earlier.
16. Class Project: 4th Layer Hydrangea: In this lesson, we will
paint the details and add more shadows to help the
other petals to stand out. This time, I will
paint wet on dry using the tip of my size
four fine tip brush. If you don't have
a pointy brush, you could use a small
brush like size two or zero or smaller. I will start here
at the upper left and I will paint fine lines. I will also add more color
to the edge of the petal. As you can see, as soon as
I added a darker color, the petals with a lighter
color showed up more. Then I will soften
the brush stroke for a smooth and
color transition. I'm getting color on the
bluish side of my purple mix, and I will paint
on the top part. Then I will smooth in the bush. As you can see, the
petal on the top is very light and showed up
more when I added shadows. I will add more shadows to this petal and on the
edges of the light petals. U U I will add shadows
on the right to show the fold of the petal more. Then I will smooth in
the brush strokes. I will add shadows
around the center of this flower and fine lines
to the light petals. I am using the tip of my brush and fine
lines are very thin. I am leasing my brush to
remove the excess peak because I have a lot of
pigment on my brush. I am adding some thin
layers on this petal. Then I will smoothen it. I am carefully adding
purple and shadows, especially to the light
petals like this. I also ensure that my lines follow the
shape of my petals. I am carefully picking
up color bit by bit and painting the
center with a cross. As I paint, I look at the reference photo zooming
in so I can see the details of the hydrange I carefully add shadows
around each petal. I will also carefully paint
the center of the flowers. I will do the same
to the other petals. The technique is the same, and I repeat the process
on every flower, so I will speed up the video. Here, I'm adding more green to the different
areas of the leaf. I am leaving thin space to
create the veins of the leaf, and I will do the same
to the other leaves. As you can see, I
have my reference on my phone as I paint so
I can see the details. And here is the finished
watercolor hydrant painting. I.
17. My Final Thoughts: Wow, you made it this far. I would like to congratulate
you on finishing this class. I know painting a realistic
hydrange is a challenge, but I'm happy that
you took a step forward and took the challenge. I hope this class help you understand what
negative painting is, and how would you apply it to your next watercolor projects. Remember to submit
your class project and upload it on
Instagram or Facebook. Tag me as well
because I would like to see those purple hydranges. Once again, congratulations.
 Bianca Santiago, Watercolor Artist