Transcripts
1. Trailer: Hi everyone. I'm Collette and I'm a professional, stop-motion artist. I run my business, out of streets in Beach, California and I get to work all over the world. I've been shooting stop-motion ever since I was a kid because I've always, been obsessed with magic. I work with all brands to bring their products and experiences to life with stop-motion. Some of my clients include Starbucks, Nickelodeon, Califia farms, Sony, Doritos and more. I'm also, one of Sony's alpha females working to empower women in film and photography. Stop-motion may seem tricky, but after this course, you'll be able to create your very own videos and have everyone asking you, "How did you make that." Throughout this course, I'm going to be showing lots of examples of stop-motions, live demos and screen recordings from the app that I use. This course is designed for anybody looking to put out really creative video content on their social channels and digital assets, such as the content creators, social media managers, creative agencies, influencers, marketers, or entrepreneurs without having to spend $1000 on cameras or software. Stop-motion can be used to showcase people, food, clothing, products, pretty much anything you can think of. Here's what we're going to cover, concepting, laying out your idea and planning how you're going to shoot it. Settings on your phone and how to optimize these settings specifically for stop-motion video creation. Stability, why having a tripod can make or break your stop-motion. How to properly light your video no fancy equipment needed. How to create the look of a professional studio without breaking the bank and lastly, how to edit your videos and export them for different social media channels. This is a workshop style course, you're going to be creating right alongside me as I guide you through how to create a stop motion step-by-step. All you need is your phone, curiosity and a childlike sense of imagination. Are you ready?
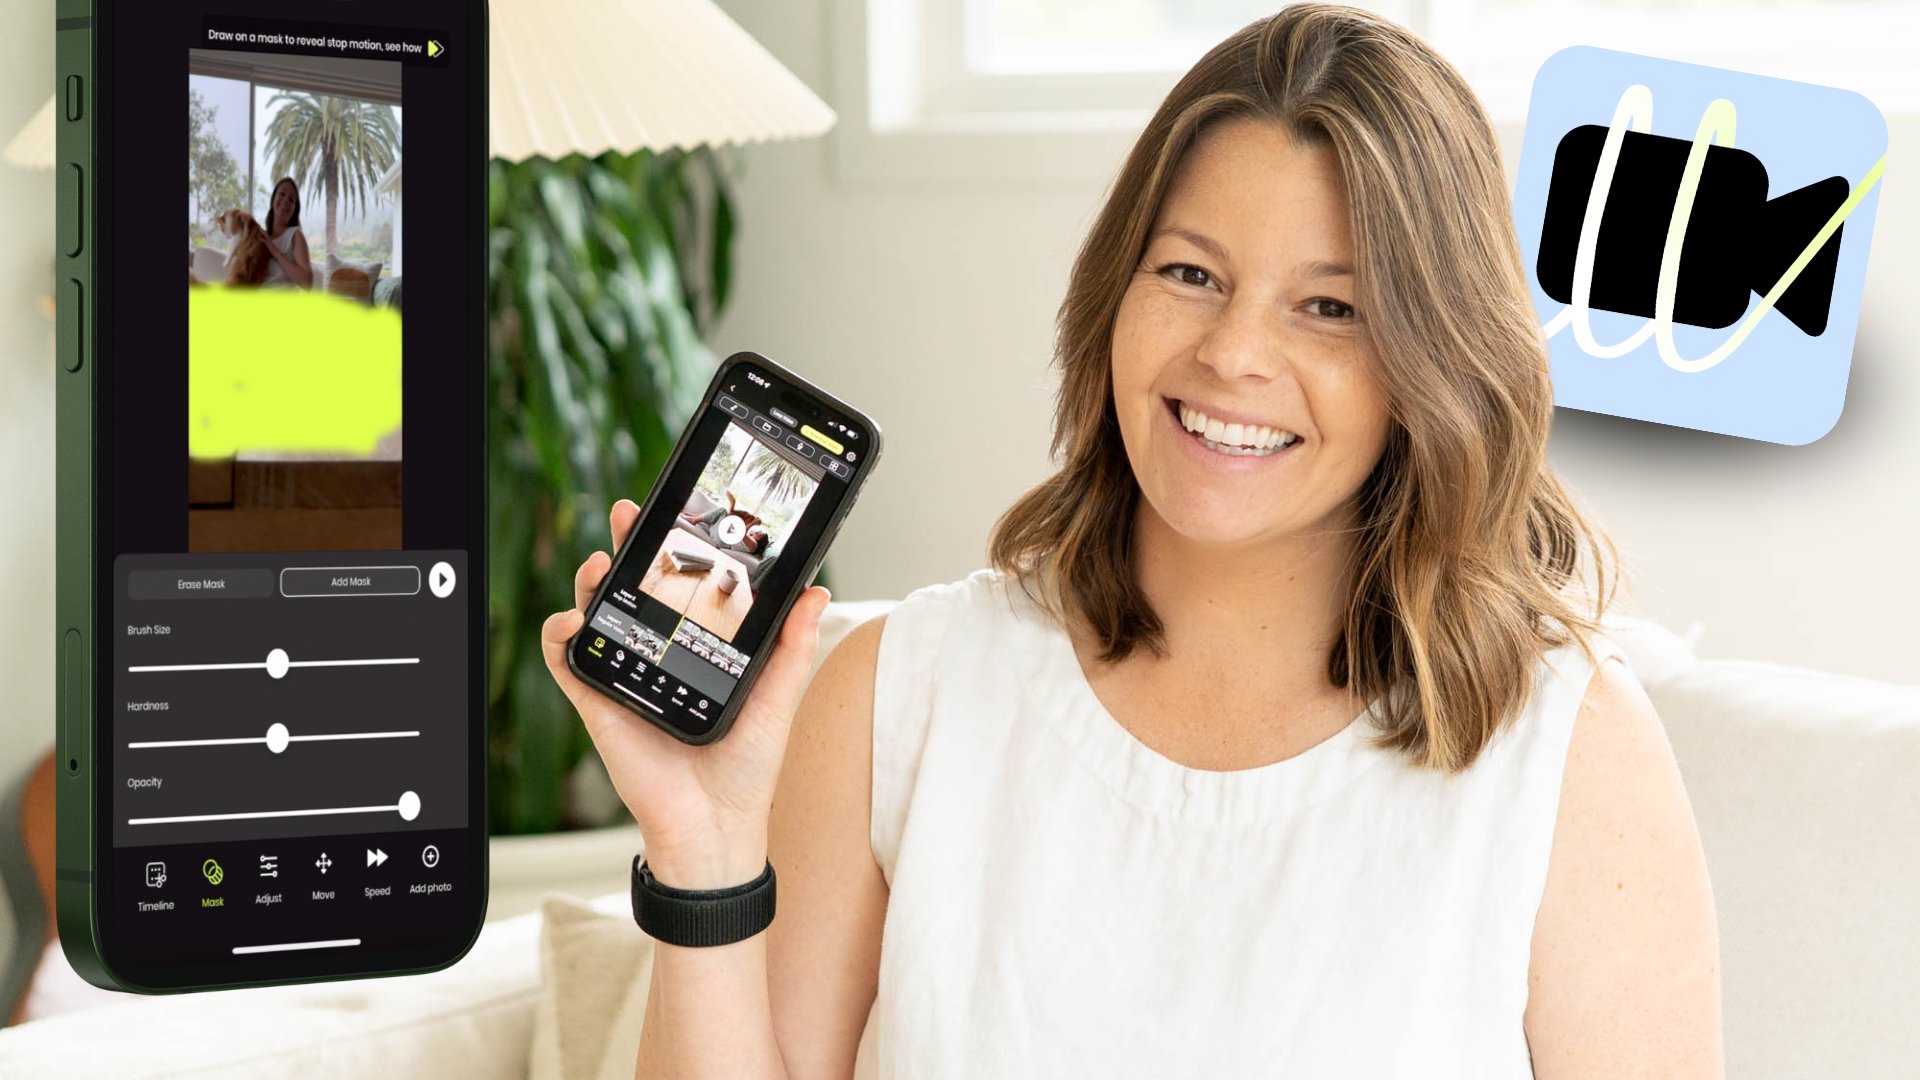
2. Getting Started: So first off, what is stop motion? Stop motion is shot one photo at a time with objects being moved between each shot. When you string the photos together and play them quickly, it creates the illusion of movement. It's magic. So here's what you'll need to get started. First, download the free Life Lapse app from the link in the notes, a tripod, but don't worry if you don't have one, we have hacks for that, and something to animate. Need an idea, go grab your favorite mug. First, I'm going to show you the basics so you can get a grasp of how stop motion works. Then we're going to spiff it up a bit, and by a bit, I mean a lot. The first step of creating a stop motion is figuring out the effect that you want to achieve. In this lesson, we're going to shoot a mug traveling across the frame, when it gets to the center, it'll spin, fill with coffee, and be topped with whipped cream. Before we jump the gun and start shooting, we have to make sure our settings in our phone are correct. So here we go. First, make sure that your phone is fully charged. Then before we get shooting, we have to adjust one setting in your phone. Open up Settings, go to Display and Brightness and in Auto-lock, click "Never". This will prevent your phone from falling asleep while you're shooting. For Android users, please just reference the notes on this module. Now, open up the Life Lapse app, start a new project, put the mug in the center of the frame and lock those three settings: your exposure, white balance, and focus. This will ensure that they don't change throughout the shoot, which could cause flicker. Next, enable the grid. We want to make sure everything is straight and lined up.
3. Practice Shoot : Now that the basics are set up, it's time for your first assignment. Make this mug move on its own. Follow along with me. First, place your mug on the very right side of the frame, take a photo. Now move the mug a little bit, maybe a half an inch. When you go to take the next photo, you'll notice the ghost feature is on. This is showing you a ghostly overlay of your previous frame. This will help you so you know to move the mug about the same amount every time. Take the photo. Now go and move the mug a little bit more. Take another photo. Go ahead and move the mug a little bit more. Now take another photo. Move the mug a little bit more. Repeat this until it gets all the way to the other side of the frame. Now, press "Play" and see what you've got. This is the basic art of stop-motion. Fun, right? Did you notice that it's a little bit shaky and the lighting isn't quite right? Let's get a little bit more advanced.
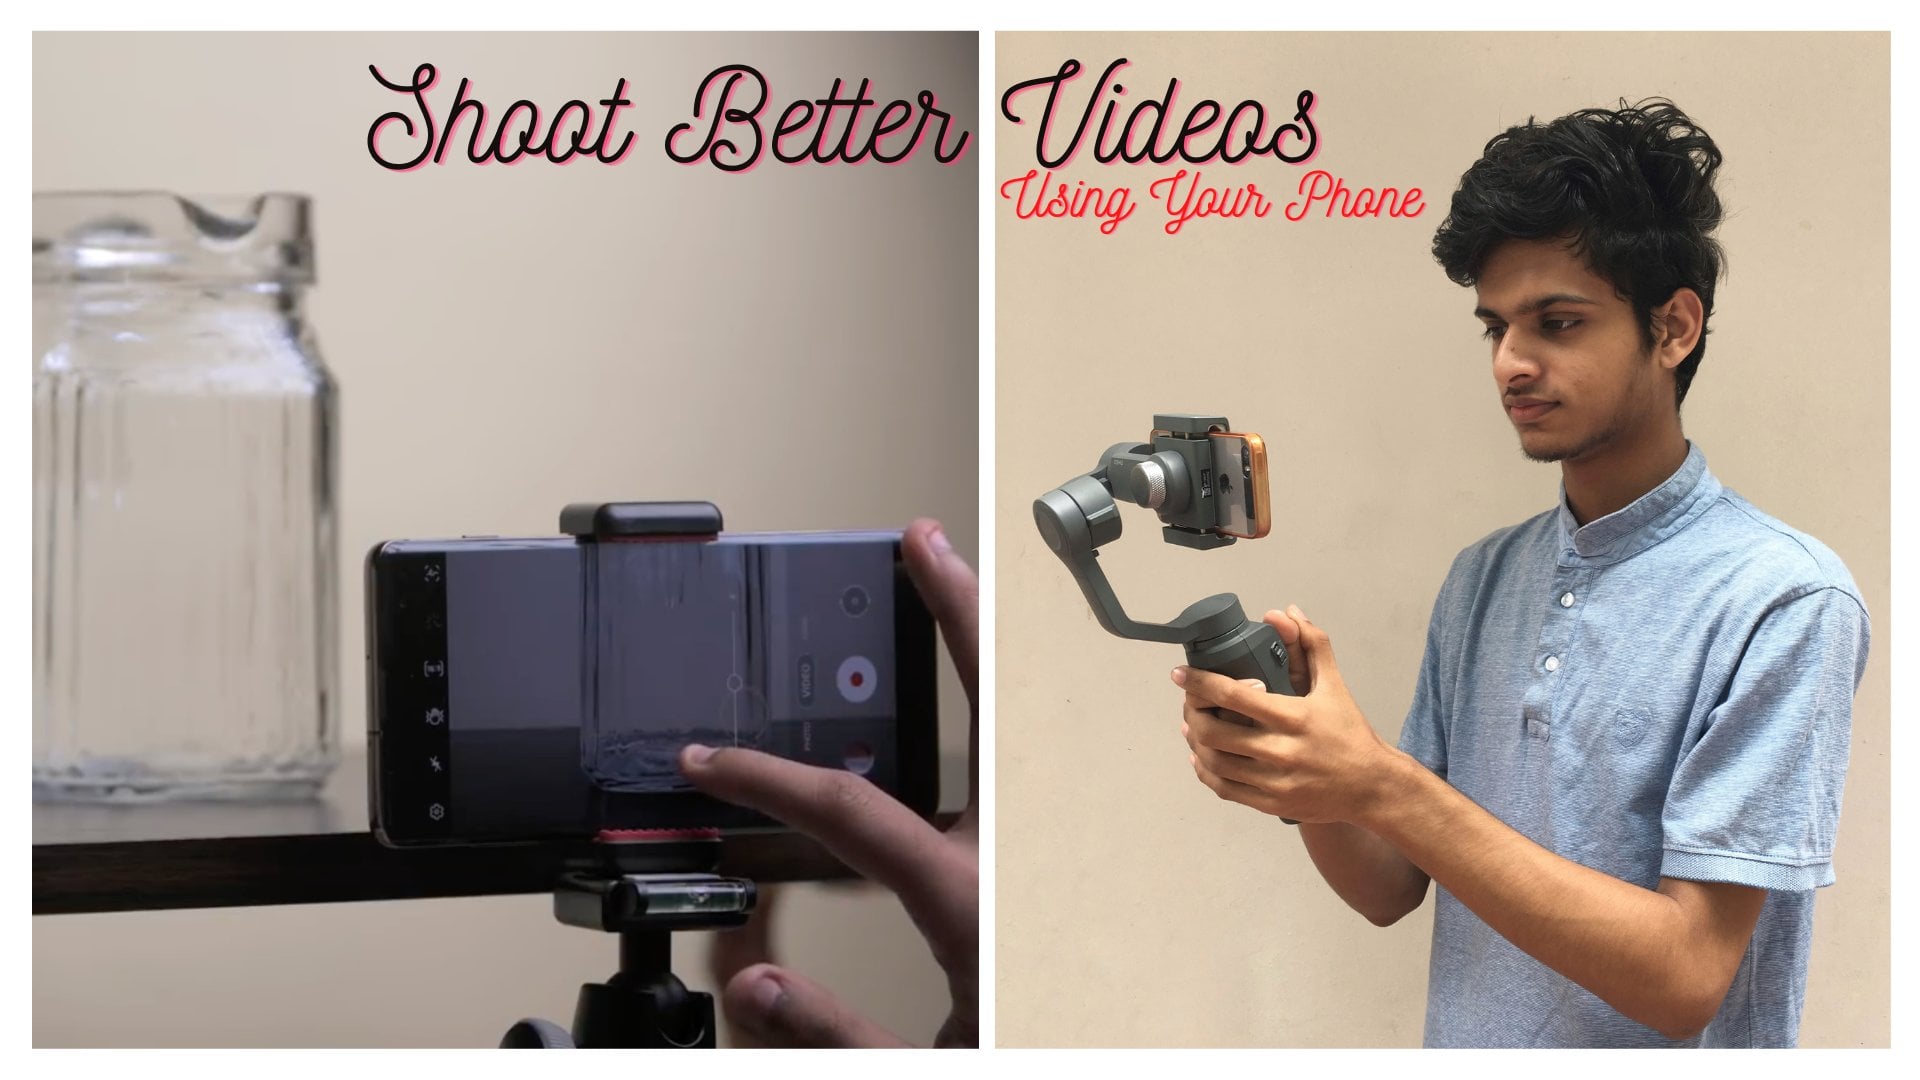
4. Studio Setup : Now, you can use anything as a background, but I like to use a piece of paper to create a nice even color behind your product, and it really makes it pop and look a little bit more clean and professional. You can find paper like this at any craft store. In stop-motion, consistent lighting is key. If you use natural lighting, the light might change from frame to frame, for example, if a cloud rolls by. This is what causes flicker, which you might have noticed in the video that you just shot. So make sure you're not by a window, and grab any studio light or household lamp, and point it towards your scene. Also, make sure you're not getting in the way of the light because you might cast a shadow. Do you have a tripod? If so, great. If not, don't worry, I have a hack. Place your phone into a mug and use that for stability. Using a tripod will create a much smoother stop-motion animation. You might have noticed in your previous shot that the background changes a little bit. If you set your phone on a tripod, this won't happen, and it will look a lot more magical.
5. Next Assignment: Now, it's time for your next assignment. Remember the first video you showed. We're going to start just like that again. Open up life laps and start a new project. Make sure you have those settings on. Lock white balance, focus, and exposure and on your phone settings, make sure auto lock is on never. Also make sure that your grid is enabled. Move the mug about a half an inch, take another photo, move the mug and other half an inch, take another photo, repeat this until the mug reaches the center of the frame. Now, we're going to spin the mug around as if it's hitting each number on the clock. Right now, the handle is at three o'clock. We're going to spin the handle so that it goes from three to four, now take a photo. Now, spin it again to go from four to five, take a photo. Now, it's at six o'clock, take a photo. Continue this until the handle reaches back to 3:00 pm. Now, take some coffee or any liquid and fill up the mug frame-by-frame. We'll take about five photos for it to fill up. I'm going to pour a little bit, take a photo, pour a little bit more, take a photo. Pour a little more, take a photo, and so on. Now, if you have any whip cream, who doesn't? We're going to swirl that on for about five frames. Swirl little bit on, take a photo. Swirl little more, take a photo. Swirl little more, take a photo. Until it looks nice and pretty just like that.
6. Editing : Now let's edit the video. First step, change the speed to about 80 percent on the slider. Now play your video back and see what you've got. Pretty cool. To hold the last image a little bit longer, we can go into the photos and duplicate that last photo a few times. This will create a hold at the end of the video. Next up, try the boomerang feature. This video would look super cool, playing forwards and backwards, back and forth. For this one we can crop to one by one if we want to post it on our Instagram feed, or if we want to post it on Instagram stories, just leave it at its current crop, which is nine by 16. You can also play with the filters and add music. If the loop features enabled, it'll play the video repeatedly until the end of the song. I'm going to have it off for now.
7. Bonus Tutorial: All right, so let's go through how we made this outdoor stop-motion. As you can see, the phone is on a tripod and we're locking the exposure, auto white balance, and focus to make sure that those stay consistent throughout the video. Then we're setting up an interval timer for five seconds so the camera will automatically take a photo every five seconds. In that way, we don't have to touch it and potentially cause camera shake. It will just automatically take the photo. Every five seconds the camera shoots and in-between that, I'm rotating and setting myself up for the next shot. You can see it's really important that one leg stays totally in the same place. That leg that's down on the ground, I'm trying not to move and the camera shows that onion skin feature of the previous frame, which is really helpful to make sure that my body isn't shifting too much left or too much right. You'll also notice that we're shooting outside with natural light. But this video hopefully will be done quickly enough that the light's not going to change too much and we won't have too much flicker. If for some reason I mess up which I definitely do when we're filming this, it's okay because after in the timeline we can delete certain frames. The key takeaway with that is to just keep it going and keep shooting and re-do it if you need to. But there's no need to start over if I mess up one frame. All right. Almost done, coming back around to the center. The effect of this is going to look really cool. I'm basically going to be spinning around on one leg and it's so fast, this is shown in real time. Then we will go and click play, speed it up a bit and see what we've got.
8. Conclusion Video: let's recap what we've learned today. We've talked about concepting, coming up with an idea and figuring out how you're going to shoot it. Phone settings and making sure that your phone doesn't fall asleep in the middle of a project. Stability and how a tripod can really improve your stop motion lighting, making sure that you're blocking out natural light to avoid flicker. Setting up a studio backdrop with a plain colored paper background. Then editing and exporting and making sure that your video is optimized for social media or whatever needs you have. The key takeaway here should be understanding how you now have the power to bring any object to life with Stop Motion. Extra resources like a tripod, clean background, and consistent lighting will make it all that much more magical. Be sure to upload the project you made during this class to the project's gallery on the class page. So we can all take a look. Plus, I would love to see your favorite mug.
9. Tips & Hacks: One hack you might want to use is shooting backwards. A scenario you might want to use that for is if you're shooting something that ends in a style design. It's much easier to work on styling that perfectly, and then start animating, and have everything come off frame versus trying to style it as you're animating. Another hack you might want to use is for when you're shooting a flat lay. If you don't have a tripod with a lateral arm, you can just put your phone on a chair or a table. If the legs are getting in the way, just stacks some books, and put your phone on top of those. Also, I recommend you try shooting stop-motion outside with people. You can animate humans, and make it looked really fun and engaging. Now that you know how to create stop-motion, I'd love to see what you're making. If you post on Instagram, please tag me @collete.peri, and I'll check them out. Thank you so much for watching. The more you practice stop motion, the better you'll get, and the easier ideas and concepts will come to you. Don't worry about making it perfect. Just get out there, and play with it, and have fun. Let your imagination run wild. Get out there, and go create some magic. If you felt like this course was valuable, please leave a review. It really makes a big impact, and it would mean a lot to me. If you didn't feel like it was a five-star experience, just reach out, and let me know because I'd love to continue to update the course as needed.