Transcripts
1. Introduction: Mobile Videography: Creating Amazing Video with your Smartphone from Start to Finish: What if I told you that you can make videos like this one with your smartphone that can compete with the results of much, much more expensive
cameras and all just with a phone
right in your pocket. The problem is just that most people's results
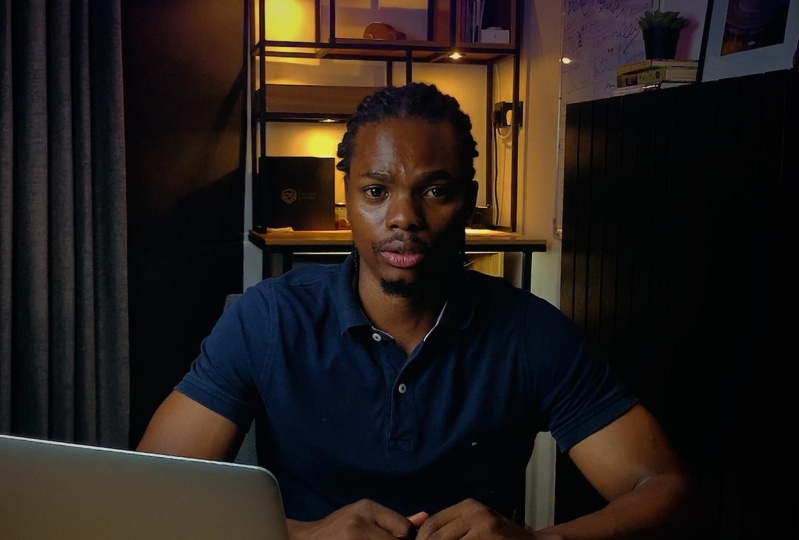
look more like this. My name is Dennis and I'm a freelance video
creator from Germany. And by now I have taught almost 30,000 students
here on Skillshare, on different topics all around
filmmaking, production. On top of that, I still work as a freelance videographer
here in Germany. And one of my personal learnings of the past five years in my own career was that gear is not the most
important thing, despite what everybody
else tells you. And that is precisely
why in this class, I want to teach you how powerful even just our everyday
smartphones have become and that you can
create amazing videos, amazing images without the need for expensive cameras anymore. But as I said already, there are many things along the way. We're a bit of experience and a few tips can make
all the difference. To really get the best out
of your smartphone camera, you need to know the
most important steps to get nice image quality, vibrant colors,
great audio quality, and also learn the super simple and yet amazing
lighting technique that is perfect for those. We want to get good results
with little effort. So in this class I will cover
all of the things you need to know to make amazing
videos with your phone. I will give you a
behind the scenes and kind of over the shoulder look to not just see what to do, but also why to do it and
how exactly to do it. And it's really my
goal with this class to sort of demystify a lot of things that you might think are too
complicated to master. Things like camera
apps, stabilizers, the exact cameras
settings you need, the composition of your shot, audio quality, and even the most feared topic of lighting. And after finishing this class, you will be able to recreate a shot like this one right now by yourself and all in a way
that is fit for beginners. You don't need to have
any pre-knowledge to get started with this class. That sounds good to you. I'm really excited to see
you inside the class.
2. What you need for this Class + Class Project: Welcome to the class
smartphone videography. I'm excited to see you here, or at least know
that you're there. Unfortunately, I cannot
personally see you yet. But anyway, as the name
of the class says, I want to share
with you everything you need to know to start making amazing videos with
just the camera in your pocket, your smartphone. And I want to just give
you an overview of the things you might
need, the items, the products that you
might need in this class to really follow
every bit of it. Now the first thing is,
of course your phone. It doesn't need to
be any special phone or even the newest iPhone
or anything like that. Just any phone
that was released, I would say in the last maybe two to five years will
probably do the job. Now the next thing is a tripod. A tripod is going
to be very helpful. It's not actually
necessarily ready to participate or to learn
the things in this class. But I just think making all of those different settings and
learning about composition. And definitely when
you get to build your first shot with
your smartphone camera, it will come in very handy and I have linked and affordable
tripod down below. And the gearbox for
you to check out. Tripods for smartphones
are generally much cheaper and much smaller than
the ones for big cameras. So I really recommend
you check it out. Now in terms of the lighting, you can definitely
start out with nothing but sunlight
there as well. There's no need to have anything specifically bought beforehand. But however, for later on, I do recommend that you get a simple and cheap
set of softbox, softbox video lights that I've also linked down below
for you to check out. Last but not least, you
should at some point invest in a microphone
solution for your videos. Again, this is not critical for now for most of
the class because it's mostly all about image quality and the
things you can do visually. But as I teach you in
the lesson on audio, audio is really important
for professional videos, or really any videos that
you want people to watch for any more than 5 s. And just
because it's so important, I have also here a link below my personal favorite microphone solution for you to check out. Now, other than those things, you really need nothing else but your creativity and focus when we get through the lessons. And I'm sure you will
be rewarded with great looking and
great sounding videos right, from your smartphone. Students Project. Now guys, this is the exciting part. The student's project in this class is going
to be really hands on and it's going
to be relevant in pretty much every single
lesson of the class. I really want you to
take your phone and follow along with all the
changes, all the steps, all the things that we
learned as we build our shot and learn how to build a shot with nothing
but our smartphones. So just work through the class. And at the end of the class, I would like you to
upload a short video of yourself in a typical
talking heads situation like mine right now, and that you have
created by yourself with the knowledge that you hopefully
learned in this class. Just remember when you do this, pay attention to the
correct settings and nice lighting situation according to what
you have right now. If you could just use
daylight, that's fine as well. And you can really
make cool things happen with daylight only. For extra points,
extra, extra points, even a good audio
solution if you want, I will give my
personal feedback to every single entry and I'm
excited to see your results.
3. Why Even Film On a Smartphone?: Why are smartphones and amazing tool to get
great looking videos? In this lesson, I want to take a quick look at why
you should even use your smart phone as a camera instead of just
using a real camera. And reason number one
is that smartphones are just much smaller than any
professional video camera, and that includes even the
smaller mirrorless cameras. And this small size brings a lot of benefits with
it because you can literally take out your phone out of your pocket
and hit record. No matter in which
situation you are, there's no heavy camera body. There are no big lenses, no extra batteries that
you need to carry around. And the fact that you
can take it out of your pocket brings me
to point number two. And point number two
is that you just simply always have it with you. This can be a huge
deal in terms of how likely you are
to film today, because there doesn't need to be any big amounts of preparation
or planning involved. Your phone is with you always. You don't need to think
about charging it. You don't need to
think about putting it in your back because you will
always have it with you. Point number three
is that phones have a really impressive
image quality, especially in the
last couple of years. And not only for its size, but even in comparison to much, much, much more
expensive cameras, it even went so far that under ideal conditions really
make great images with a phone that do not
need to hide from a real comparison with the
footage off an actual camera, sometimes even a cinema camera. And number four is
simply the ease of use. You do not need to learn how
to use your phone anymore, because everybody
knows that already. Just think about for
a second what is needed to get a video
camera running. You need to have
extra batteries. You need to think about lenses. You need to have
a bigger tripod. Perhaps you need to have
an external monitor. You connect your microphones, maybe with a chunky XLR
cable and so forth. There's a lot that goes, or at least potentially goes
into a setup like this. Now obviously since
we do videos anyway, we need the same general
elements on a phone as well. But either they are already
internally there, like e.g. the battery or if not, then they're just
much smaller anyway, and much easier to put
together in general, it is much easier to set up a fully functional cameras setup with a phone compared
to with the camera. Now, like I already mentioned things that we'll
need for our camera, but I don't need for smartphone
or lenses, batteries, XLR cables, big tripods, SD cards, HDMI cables. There's just a lot
of things that can be added to a camera
setup like this. Number five is that
there are a lot of functions within a
phone that cameras, even modern cameras,
might not even have. E.g. you can upload your
footage directly from your phone into the Cloud or put it onto your
MacBook with AirDrop. For those of you
who have iPhones, there's amazing
stabilization and many of the phone cameras, or at least in the camera
apps that you can use. And you will learn more
about apps in a class later. And you can even add things like teleprompter functionality without even needing
anything else. But just your phone. Number six is simply, you already have it. There is no need to
spend loads of money for cool camera if you don't want
to or if you can afford it, you just use your
phone that you have already and you're good to go. Now, all of those
reasons are just to say filming with your smartphone has become a valid option for anyone who just wants to make creative videos for YouTube, even marketing videos
for your own business. And if it wasn't just for the look of it, that
it would look weird. You could probably even make professional videos
just with your phone. But since it does
look a little bit weird to come up with a
phone when people pay you for making a video
for real client work, uh, cameras necessary,
I would say. But for anything else,
you can really get the job done without
any problems. And all that being said, let's move on to the next lesson.
4. How to Film Yourself on a Phone: How to film yourself on a phone. One big problem when filming yourself with your phone is that the better camera
to shoot with is on the outside of the phone,
on the back of the phone. But here's the problem. The screen that you need
to monitor the image on at least one you're
filming yourself is on the front of the phone. So no matter how you
turn it and twist it, It's not possible to film
yourself with a better camera. And at the same time
see what you're filming on the
screen of the phone. At least not without any help. Now at this point, we could just set the shot and the
way that we believe it will fit and then
go back and forth until we found a framing
that looks great. But let's be honest
with each other, that is super time-consuming and it's not a smooth
way of making videos. And you're probably not
going to want to make any more videos
after the third one because it's so annoying. So how can we handle
this problem? Well, I have to say the most
obvious way is probably just to stick with the front-facing
selfie camera and forsake the better image quality of the camera on the back is definitely the easier route to just use the
front-facing camera. However, there are
tools for this purpose specifically because
we're obviously not the first ones to
notice the problem. There are mirrors specifically made to help out
with this issue. Now, I think they're
technically made for DSLR cameras are
just real cameras in general that don't
have a flip out screen, but there was really no reason not to use them for your
smartphones as well, since they don't have
flip out screens either, the only thing to look out
for is that those mirrors are usually attached to a
so-called cold shoe mount. Now that is the little
slight and mount on top of most cameras that
you probably might have seen. But as you can see,
my phone doesn't have one of these and
yours probably neither. Now the question is, how
can we use it anyway? Well, you can purchase a phone cage like this one to
hold your mirror on top and even have more space for different accessories
like microphones if you want doing it this way, you can film yourself in an easy way with your
phone cameras on the back. And I do want to say, of
course you can achieve the same by just
putting any mirror behind your phone and put it in the right angle
that you can see it while you sit in
front of the phone. But as you can
imagine, that can be a really wonky solution. But it's definitely possible. I do want to mention
it because I don't want you to feel
like you need to buy yet another accessory every
single time to make it work. Now, quick recap
for this lesson. There's a problem with
filming yourself with your phone when you want
to use the better camera, because it's just not
possible to check the shot and also film yourself with
the camera at the same time. So there's a beautiful
solution that we can use, which are those mirrors that can attach to our phone with
the help of a cage, and that's the way
we can handle this. Now if you have any further
questions for this lesson, drop it below in the
comments and I will make sure to get back to
you as soon as I can.
5. Camera Apps: In this lesson, I want to
talk about camera apps. And the first thing
to ask ourselves is, do we even need a camera app, or is it just unnecessary extras that we can really
also live without? And the answer is, of course, you could live without. You can make videos
with just nothing else but the internal camera
app on your phone. And they will, generally
speaking, look good. So you might ask
yourself at this point, why are there even camera
apps out there to begin with? Well, the answer is
something that you really want to pay attention
to because it is necessary for lots of the following things I will
teach you in this class, you see some of the most common beginner mistakes are really due to the limitations of the smartphones
internal camera app. Okay. Did you understand this? Because one of the crucial
things for good results, of course, is to have the
right camera settings. And at this point, if
you don't know anything about camera settings,
don't worry, I will explain it in
a later lesson in the most beginner friendly way that anybody could
really understand it. But just so you can
hear the terms already, we are talking about camera
settings like shutter speed, ISO, white balance,
and some others. And the problem is that most of those so crucial
camera settings for a high-quality video
can not even be changed in the standard
camera app of many fonts, which is actually kind of crazy. But we have to remember
those phones are made for everyday people, not for filmmaking, people
that really want to have the perfect manual
control over everything. But the point is that they can only be changed
with the help of a special camera app that extends the functionality of
the standard smartphone app. I know there's some phones, there are some phones that offer this manual control
already out of the box, but at least with my iPhone and I think many other phones, this limitation is
still the case. But that being said, this is not the only reason why I
believe that a camera app can be really helpful for any video creator
that uses the phone. So let's take a look at one
specific camera app that I like very much and
recommend as well, to show you some of the ways in which camera apps makes sense. And the app is
called filmic pro. Now this is not a free app. You will have to pay
for access to this app. And I want to just say a
quick disclaimer beforehand. I'm not in any way
affiliated with filmic pro. I just really like this app. I think that's the
overall best camera app of the ones that
I've tested myself. But I will go into
more detail why and a few other alternatives
later on in this class. So let's take a look
at the interface. We can see a lot of
buttons and options. The first thing is like I said, that you can now change all the important
camera settings, like white balance,
shutter speed, ISO, and so forth, that we will take a longer look at in the
lesson on camera settings. The next thing is
that the app gives me even more helpful tools and information about the
image I am recording. This might seem unimportant
to you right now, but as soon as you try to get consistently good results and care about things
like exposure levels and those kinds of things. Many of those tools will prove Super helpful to
you to check focus. Like I said, measure exposure to check the audio
levels and much more. There are really a lot of things that we can see on
the screen now. Now the most important thing
for me personally to use are the waveforms to
see quickly when anything is over
or underexposed. And the audio
meters that tell me if my audio levels are okay. Now there is a
specific reason why filmic pro is my favorite
camera app over some of the other apps that are
actually even cheaper and have basically the same functionality
like the Moment app, which is also really amazing and I would
recommend it as well. The main difference for me is basically just one
single setting that filmic pro offers that
the other ones that are checked out did not
have to that extent. And that's setting is a really big strength of filmic pro. And that is the stabilization
the camera app offers without the help of any Gimbels with a technique that
I had not seen before, but more on that
also in the lesson on stabilizers and Gimbels. Alright, so let's do a
quick recap of this lesson. You have learned
that you can make videos without any
special camera apps, just with your smartphone
right out of the pocket. But if you do want to
get the best out of your smartphone in terms of
image quality and so forth, then a camera app
definitely makes sense. I have shared my personal
favorite filmic pro with you and already outlined a few of
the features that we will cover more thoroughly
in the coming lessons. Now as always in this class, if there's any questions so far, feel free to drop them
in the comments below, and I will get back to
you as soon as I can.
6. White Balance: Camera settings,
one, white balance. In the last two lessons, we talked about how powerful and helpful a specialty
camera app can be. One of the main reasons why
a camera episode crucial for smartphone videography
is the ability to change the camera settings. Now, let me walk you through those settings and why they are important and how you can actually change them
in the app filmic pro. And first, let's take a look at the single most
important setting that is probably responsible for most amateur looking
videos out there. And that is white balance. Now, sometimes white balance can be a little bit confusing, but I want to try to explain it to you in the most simple way. White balance
basically regulates the color in your image or
the colors in your image. If the setting is correct, then your image
will probably look the way it's supposed to look. The colors will look the
way you want them to look. The most cases that will
result in white things, e.g. really being white in the image. And that is also why it's
called white balance. And the goal with white balance, at least in principle, is to get an image that
resembles real life, that resembles the shot as you've seen it when
you make the shot, real life and the colors in
your video should match. Now if you check
the camera settings in your phone or on your camera, also, white balance is
measured in Kelvin. Now this is also the measurement
for color temperature. And don't worry, it's not
gonna get too technical. But that is a clue
for us because correct white balance
in 99% of the cases, the color temperature of
your main light source, your key light if you will. So for instance, if it's a typical video light
like I'm using right now, this will be at 5,600 Kelvin. If it's a tungsten
colored light, it will be at 3,200 Kelvin. Got it. And if not, if there's any more questions on
this specific topic, just again, drop me a
question and I would love to answer you specifically. Now, the problem with smartphone
camera apps is that they often only allow the use
of auto white balance. I'm talking about the
internal camera apps, not filmic pro or
anti like that. And that means the
phone determines what a good white balance is
for better or for worse. And another problem is that
it also keeps adjusting the white balance continuously During the clip as
you are filming. And that is a real problem in
terms of color correction. Or even if you don't do
any color correction, then in terms of the
continuity of your luck, because the colors will keep changing in your frame all the time depending on what's exactly in front of the
camera and the camera thinks, Oh, now a different white
balance might be the right one, now a different
one and so forth. You get the idea. And to solve that problem, we need our phone to give us the authority to change
the white balance. Okay, so let's say the
proper white balance for this shot would be 5,600 Kelvin, which is also the color
temperature of my key light here, but it is now at 3,200 Kelvin, then this is what
it would look like. So I go to my phone, I change it to 56 600 Kelvin. And this is what the
shot now looks like. And so we end up
with a shot that looks basically the way
it's supposed to look. And by the way,
if you would like a beginners class on all of those fundamentals
of videography for really any cameras,
including your smartphone. Then check out the link
in the description that brings you to the class
that already held well over 10,000 students on Skillshare to improve
their videos. So finishing up this lesson, let's recap what we learned. In this lesson, I taught
you what white balance is and why we need to
get the setting right. I also told you
that white balance and 99% of cases just means match your white balance to the color temperature of
your key light source. Finally, I refer you to
my additional classrooms Kosher for more depth
of information, especially on topics
like white balance. Now if you have any questions, I'm happy to answer you in the comments and I'll see
you in the next lesson.
7. Frame Rate: Camera settings to frame rate. In this lesson, we will
talk about frame rate. My favorite way to explain
frame rate is this German, we call this DOM and Kino. And really I find this so
fascinating and it's so perfectly illustrates
what videos actually are. They are also called motion
pictures because they are, in fact nothing else
but pictures in motion, single frames that
follow each other at a specific rate that
makes our brain think that it was
continuous motion. And I do have to say a truly
shows the creative genius of our Creator who truly made
us wonderful in that way. And this rate that
I was referring to, that is the frame rate. And you can see this frame
rate setting often on your phone settings when you
change the resolution, e.g. 1080, 2410, 3010, 8060 or 21, 60, 60, and so forth. Those are the frame rates. The second number
is the frame rate. And traditionally in
movie production, the frame rate that
is most commonly used as 24 frames per second. Nowadays, you can also see a
lot of 30 frames per second. Now at the end of
the day, this is really mostly a style question. There's no right or
wrong answer to this. Both works fine. And sometimes I even prefer the 30 frames per second
because of its look. E.g. this class right now is being filmed in 30
frames per second. It looks a bit more sharp, in my opinion, a
little bit more fast, a bit more real to life, whereas 24 frames per second. It looks maybe a
bit more cinematic and come and this
setting, like I said, it's totally up to you for the longest time and so far
professional productions, I will definitely use
24 frames per second. Just one little
tip on top of it. If you have a low
light situation, 24 frames per second, we'll give you a little
bit of more light in your camera without getting
into too much detail. But in those cases, film 24. Now one thing to mention
is that frame rate becomes important as soon as we want to start filming anything
in slow motion. Because the best way to do that, to film something
in slow motions, to film the section that you want to turn
into slow motion in a higher frame rate than what you actually want
as a final result. And then just slow down
the video until it is back at 24 or 30
frames per second, which results then in
a slow motion image. Now, I don't want to
go into much detail on how to do that technically, but just know that
for slow motion, you have to film in
higher frame rates, like 60 or 120
frames per second. So here's the recap
and the take-away. You have learned that
for normal shots, I recommend that you film in 24 or 30 frames per second depending on your
personal preference. If there's no good reason to not stick with this classic
way of doing it. And then you learn that if
you want to use slow motion, you should always shoot
a higher frame rate, like 60 FPS or 120 FPS. Any questions? Let me know in the comments and let's move on to shutter speed.
8. Shutter Speed: Camera settings
three, shutter speed. Shutter speed is
together with ISO, one of the two main
settings that influences the brightness of your
picture on your smartphone. And actually not just
on the smartphone, but also on the smartphone. It's the same with cameras. And just like with
white balance, if you leave it by itself
with a standard camera app, your phone usually will try to make the
decisions for you, which is cool for people
who don't want to make great looking videos for just some holiday
videos or something. But for us we need the control to make the right decisions. So what is the right
decision in terms of shutter speed and
what does it even mean? So, shutter speed influences the motion blur of your image and also the
brightness of your image. Those are the two effects of
changing the shutter speed. It's easiest to just
show you the difference. Here's a clip with proper
shutter speed as it would be used in cinema productions
or really anything common. The shutter speed here
was one 50th of a second. You can see in the clip that
everything looks smooth and we can see a fair
bit of motion blur. And if we stop the frame, we can see the motion
blur very, very clearly. It's always those two things that you need to
keep in mind that change Motion Blur
and the brightness. A clip with high shutter
speed on the other hand, leads to a video
that is very fast and stays sharp and there's
almost no motion blur. There's also the reason
why 30 frames per second as a frame
rate will lead to more sharpness because you
always have to bump also the shutter speed to match it, but we'll get to that later. But another thing is
that this image will be much darker than the image
with a lower shutter speed. Now you do have a lot
of background knowledge now, but practically speaking, the shutter speed is fairly
easy to set actually, because it should be, if possible, always one
over double the frame rate because that just creates
the right balance between motion blur and the frames
per second in one shot. And in short, it just leads to a very natural looking image. So if you don't want to bother spending more time
learning about this, just set it at double
the frame rate and you'll always be good. So here's the ideal scenario. And the ideal scenario, you have full control
over your lighting, which is very, very important. If you want to have control
over those settings as well. And you can therefore make
the settings that create the best possible image
quality instead of having to compensate for non-ideal
lighting conditions. In that case, your
frame rate is at 24 frames per second
or 30 respectively. And your shutter
speed is double that. So it's either 1/48 or at
least most cameras over 1/50 or 1/60 if you film
in 30 frames per second. And the problem that especially when filming
outside with daylight, will occur, that there's
literally too much light. So in order to get an
image that looks good, you have to raise
your shutter speed to a very high level and
your image will suffer from it because there
won't be any motion blur which is so necessary for
natural looking image. And it will look a bit
choppy if you will. Now, at this point, you
could start using something called ND filters
that are essentially, you can think of
them like sunglasses for your camera that decrease the light that comes through the
lens onto the sensor. And I've linked some of those in the class
description down below and the gearbox if
you want to check them out. But for now, let's recap this lesson and see what
we have to keep in mind. Shutter speed should
be if possible, always double the frame rate. And if that's not
possible because of your lighting situation, you can crank it up. But just know that your image
will lose a bit of quality. And if you don't want
that loss of quality, you will have to either control the light that you expose, your image width or you have to use ND filters if you e.g. film outdoors, which are
sunglasses for cameras. If there's any questions
for this topic, then please feel free to
drop them in the comments. And as always, I'll get back
to them as soon as I can.
9. ISO: Camera settings for ISO. Iso is most easily described as the light sensitivity
of your camera sensor. Now, if you bump up your
ISO to higher setting, the image becomes brighter. And if you lowered, it becomes
darker. It's very simple. But like the previous settings, the ISO setting has more
than just one effect. It's not just regulating
the brightness. A high ISO setting comes
with a price of image noise, which looks something like this. Now, just bear in mind, this is really able to
completely mess up your image. And especially with smartphones, those kinds of things
will be difficult or even impossible to fix
in the editing later on, the only way to avoid high ISO, It's either to let the
image be darker or of course to bring in more light because that's actually
what the sensor needs. If you have to bump
up your ISO too much, it needs more light. And like I said, this is
really one thing we're especially smartphone
cameras are very weak. They have such small
sensors that having enough light is really
important to get good results. And low-light situations
are usually problematic. And you should
really keep that in mind because that's
one of those things. That is the reason that
often smartphone footage doesn't look as good as it could be if it had enough light. So low ISO therefore has less overall brightness
and also less image noise. So the image becomes more clean. And in the ideal world, you really want to keep your
ISO as low as possible, which is going to give you
just the best possible image. So all that being said, here's a quick recap of this very simple but
impactful setting of ISO. You have learned that ISO is the light sensitivity
of your camera sensor. A high value means
more brightness and a low value means
a darker image. High ISO has the ugly side
effect of image noise, which basically makes the image
unusable if it's too bad. And you learn the principle, the lower the ISO,
the better the image. Any questions, you know
where to put them. See you in the next lesson.
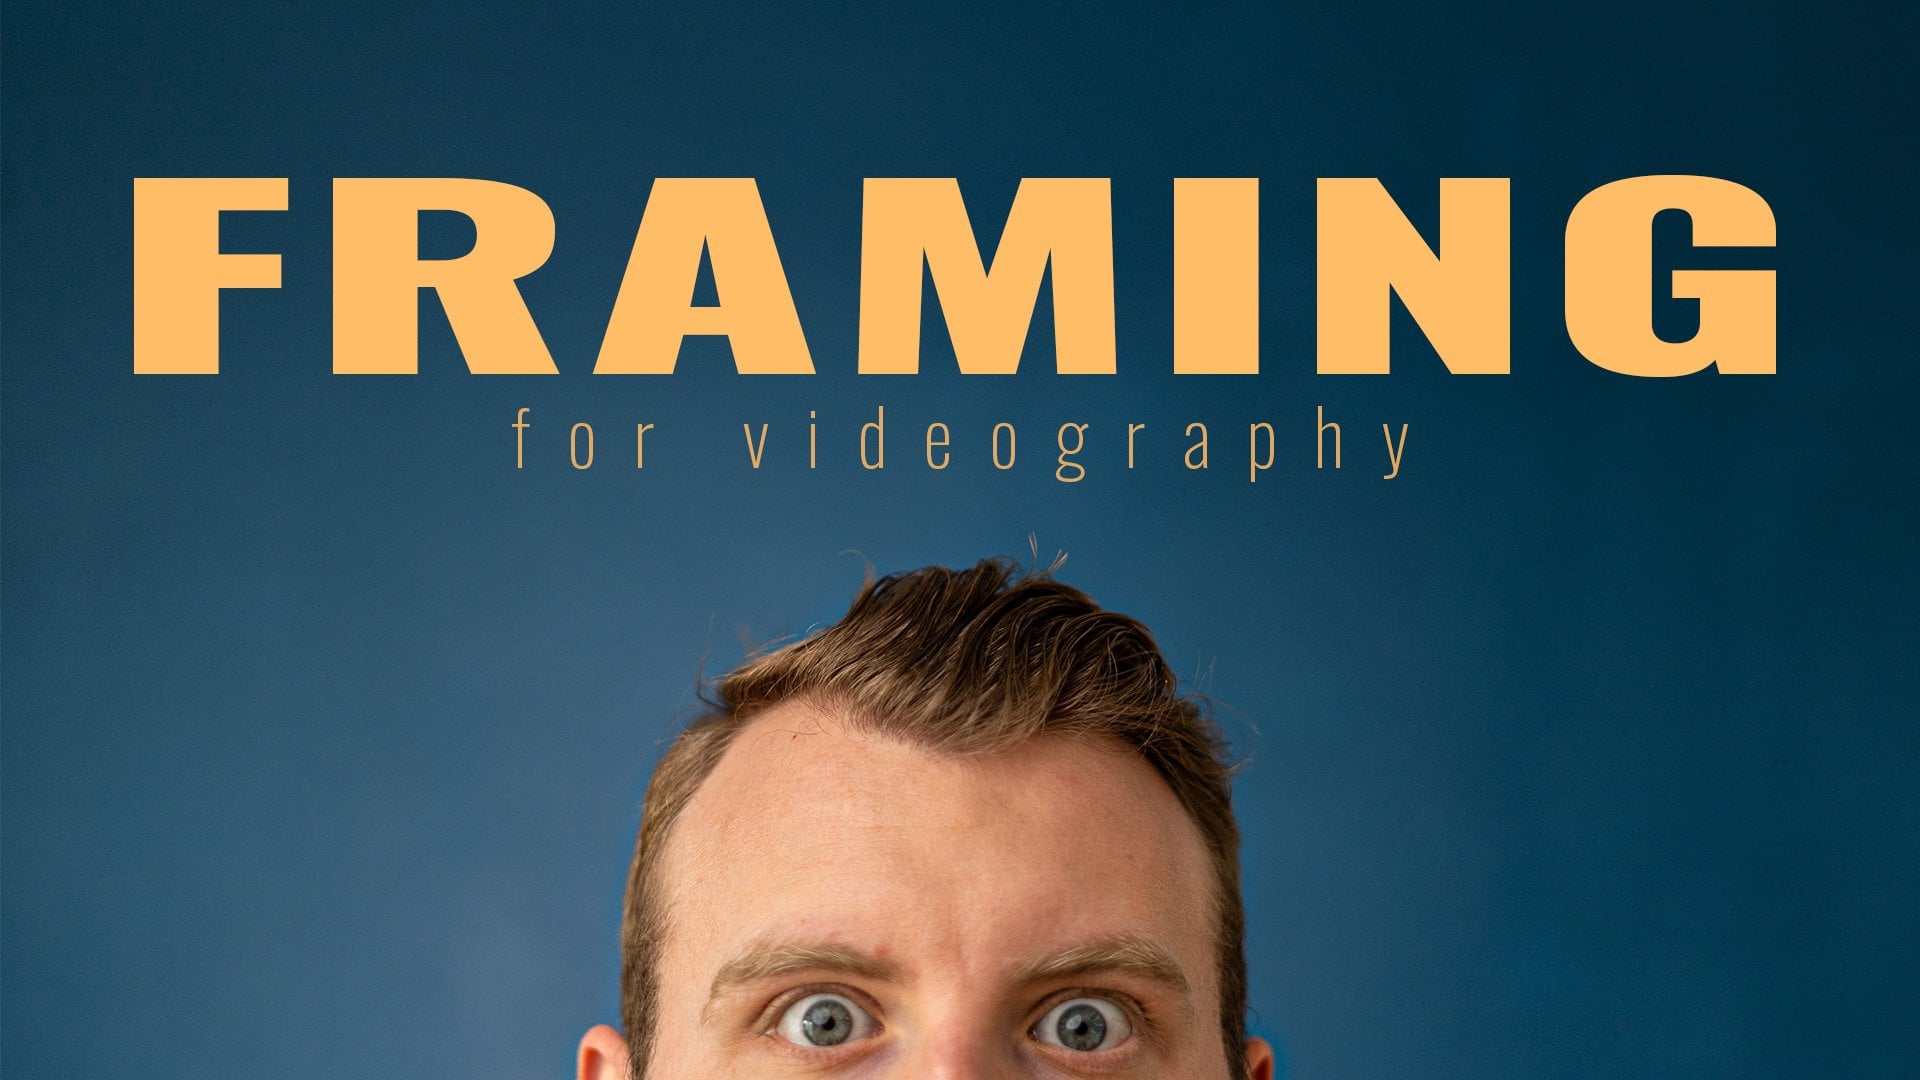
10. Where do I put the camera?: Now that we have our
camera settings in place, there is still one big question. Whereas the camera, actually, when we make our video
on where's the subject. So how do they relate to each other and how do
we frame the shot? Different camera angles have a big impact on the end result. Now whether you film yourself some cool B-roll of
a green pasture, some cinematic coffee making, like everybody else on YouTube. There's the right angle
for the right time. So let's go through some of the most effective
framing techniques and some rules to make sure
your video looks nice. First off, the rule of thirds. Now the rule of thirds is
super easy and also amazing. Just imagine your
camera screen being divided into nine
segments, just like this. Now just position
your subject of interest on any of those
four cross sections. And you will have a very
pleasing looking image. For humans. In particular, you
should align one of those two upper points with
the eyes of the subjects. And you have an almost
safe bet for nice shot, especially when you have
Interview shots where the person does not
look into the camera. This works really well. They're centered subject now, this is exactly
what the name says. Just sent to your subject
exactly in the middle, and this will always work. It's not the most creative
thing in the world, but it's definitely
a classic way of doing things and it's
classic for a reason. This works really well when a person is speaking
directly into the camera, just like I'm doing right now. Headroom. Headroom is one of the
most common reasons. Videos don't look as
professional as they should. Headroom is the amount
of space between the end of the frame and
the top of your head. If it's too much space up there, the person looks kind of small in the frame and unimportant. It's like if I was going
to look like this, then that's too much headroom. On the other hand, if
I would sit like this, then this is clearly not
enough headroom because part of my head is chopped off and it also doesn't look good. So you really have to find the right balance
and what you want is the right amount of headroom and how much
is the right amount? Well, there's a bit of judgment involved here on your part. But one rule, you can go buy
us to have one hand's width of space above your
head until the frame. And that's just a,
just a rule of thumb. It's not always gonna
be perfect like this, but just also use your feeling. Look at the image and
think about if it looks good or something is off.
If something is off. And in regards of headroom, then you can just experiment
and put a little bit more, a little bit less until you find a frame that you're happy with. Now the next thing
to consider is the height of the camera itself. So none of the, not the
way you frame the shot, but the height of
the camera itself. And it's really important to get the right because
how high your cameras stands in relation to the
subject also has a big effect. Just look at the
differences between those three shots here, where the camera is very low, where it's centered on a level, then it's much higher
than the subject. Can you see the differences now for normal talking head shots, I recommend shooting on a level like I'm doing
right now again, because this gives you
the most neutral shot. But if you're recording some
B-roll for a video, e.g. some supportive shots of some element of what you're talking about
now on the screen. Some close-up of cooking
food or things like that. It's gonna be worth
experimenting with different camera angles, especially when you're filming with your phone in your hand. It's very easy to just stay on a level or chest level
the way you hold it. And we never think of
going lower or higher to explore what it might look like from up
there or down there. I'll also just some simple, basic principles to go by and I'm sure they will help
you make better images. So quick recap. We use the
rule of thirds to position our subject in the
right position depending on what kind
of shock we want to do. We learned about the possibility of centering our subject, especially for talking heads
like this one right now, where you talk into the camera,
That's a great solution. And we learned about headroom and the importance of
having the right amount of space between the end of the frame and the
top of your head, so it doesn't look weird. And finally, we
also learned about camera height and learn about the differences that
it can have and the effect that it can
have on your final video. If your camera's positioned
high or low or on a level. And so if there's any more
questions regarding framing, please let me know
in the comments and I'll see you in
the next lesson.
11. Simple but Great Video Lighting: Alright, now it's time to touch
on the topic of lighting. And to be clear, this
is not going to be an extreme session on video
lighting, but instead, what I wanna do
is equip you with one really simple and really effective
lighting setup that you can adapt to your needs
that is easy to execute. And then you can execute with less than $100 worth
of lighting gear. Let me introduce you to
three-point lighting. So here's how it works. You have, as the name suggests, three points that we want
to cover in this setup. Element number one, the
first and main point is the so-called key light is the light that illuminates
your subject and does most of the
exposing of the image. The first slide
is the key light. It is the main and
big light source that illuminates the subject. In this case, as I
told you in the class, it is slightly off to the
right and slightly off above, as you can see in
the wider frame. Usually it is also
the biggest light in the setup for this slide
to really look great. There are a few things
we want to look out for. The first thing is
we want soft light. Now, soft light
just means that it doesn't create any harsh
shadows on your face, but instead there is
a softness to adjust. Like right now, this we
achieved by several factors. Number one, the bigger
the light source, the softer it is and big, especially in relation to the subject that
you are filming. Second, the more
diffusion there is, the softer the light will be. Third, the closer the light
sources to your subject, the softer the light will be. And that again, that again
relates to the size of the light in comparison
to your subject. So the closer you
bring it, of course, the bigger it will
be in relation or total beginners or those who really have the smallest budget, I recommend at least those
cheap soft boxes that I mentioned in the introduction that you can grab online for, but I don't know, 50 to
$80 for a pair of two. Those soft boxes have a
fair bit of diffusion, but they're also fairly small and they are not
that bright as well. And usually you
cannot even change the brightness of them. So you're stuck with
one brightness. But again, if you
have to make it work, those will work and
they will give you an okay light that is definitely better than not using anything. A higher level would be to use a COP light as it's
called, like e.g. the Goldilocks as L6 w in combination with a
detachable softbox. This is what I'm
using right now. Again, all of those things
are linked down below. You don't have to write
them down right now. But soft boxes can even get much bigger in size
and in diffusion. But that's the key light. Now we want to
position our key light not directly in front
of our subject, which might be the first thing
you intuitively would do. But a slight angle to the
site at something like 45 degrees and slightly
from the top as well, also about 45 degrees. I call this the 45 degrees rule. That creates a
lighting on our face that looks something
like this right now. And you can see here in the
White frame how I positioned it about 45 degrees
to the right. About 45 degrees up. It's shining down on
me and it creates this really nice and
flattering look with the shadow fall off to
the side of the face. It's flattering to the face
and it creates a bit of shade just in the
right spots over here. And that looks really good for the key light element
number two, the film. The second point of our
three-point lighting is the fill. Now Phil has to jump to fill in the shadow side
of the subject across the one on the opposite
side of the key light. And we use the fill to dial in the balance we want to
have in terms of contrast, if it's supposed to be
really dramatic with a high contrast or rather
a more evenly lit chart, the fill can be a light, but it doesn't have
to be a light. It can also be just a reflector, bounces back some of the
key light right here, coming to the bounce,
and then right back onto the subject to fill
in a bit of the shape. But you can also use the fill to create even more contrast, which then would be
called negative fill. We can do this by putting up the black side of one of those 5.1 reflectors instead of the white side or
the silver side. Now, lighting in
general is all about balance and ratios in
terms of contrast, especially by putting the black negative
fill on one side, we achieved basically
the same effect of higher contrast as
if we didn't use the fill and just made the
key light more bright. Does that make any sense to you? I don't want to go too deep into this topic because it can
get really complicated. But it's also at
the same time very fascinating to think
about lighting that way. Now in regards to fill, it's not really essential to the kinds of looks
that I usually use. And really anyone online
would need in most cases, it adds more options
for finer adjustments. That is true. But
right now, e.g. I. Don't use any
specific fill at all. On the other hand, it would be correct to think about fill in the way that we really always
have some kind of fulfil. The question is just what
is the effect that is being created if we don't use
anything deliberately, but the wall right next to the subject might be
a dark blue wall. It will function similarly
to a black negative fill. If it was white instead, the light would bounce off of it and really fill in the shapes. So you have to also think of your environment as
you fill in a way. So just be aware
of your scenario and create the
look you want with explicit fill that you decide or just by using and leaving
the room as it is. The third element of
three-point lighting is the backlight or hair light
or rim light or kicker. All of those different
terms are the same, referring to the same
light depending on where exactly it points at or
where it's positioned. But the general idea is to have a light shining
against your back. Sometimes it is pointed at
the whole body from the back, sometimes just the shoulders and the head for me right now. And sometimes it's literally just at the tip of your hair, which is what we call
it the hairline. And this can have
some cool effects. One is the separation from the background by having
this light edge around it, your subject really pops out of the background much better
as if you didn't use it. And especially in the
case of hair light, it just creates a really
professional looking, cool look. Elements 4.5, the background
light and the ambient light. Two more quick
things that are not technically part of the
three-point lighting setup, but are nonetheless
important and powerful. First off, the ambient light. Now, not always this
you're recording situation in a way that the
general room brightness, if you will, is bright enough
for what you wanna do. And it might almost
look like your subject. This is the only lit thing in the room that is otherwise
dark and that can look cool. Of course, if you want that, but only if you really
want that look, other than because if not, that you really should
always calculate some lights to brighten
up the room in general, this can also be done
through daylight, or it can be done
by pointing one of those soft boxes just
right up to the ceiling, which will usually brighten up the whole room with
some ambiance, especially if you have white
walls and white ceilings. With that in mind, you
can now figure out the light that looks
good by balancing it with the key light
and just adding enough ambiance for the
room so that it looks good. The second thing is
the background light. As you can see right now,
I especially like using colorful lights to put some accents of color
into the background. This can be done in any
color and in any style. I have specifically
about those for this purpose only and I
cannot recommend them enough. I have them again down below in the gearbox if you do
want to check them out, they have proven extremely versatile and useful
for myself personally. I also find that in combination
with a great backdrop, which is what you're
looking at right now. This is a great backdrop. You can use these
lines to create any kind of color in your
background of the video, in the background of your
video, it's pretty useful. And of course it doesn't
look the same as if this was actually
painted in blue, but still the effect
is pretty remarkable. Now, this concludes the
lesson on lighting. This setup can be adjusted
to your specific needs with small changes like the exact positioning of the
different lights. And so to recap quickly, we have the headlight, which is the main light to
eliminate your subject. A great, big soft light. We have the field which
can managed the shade and manage the general level
of contrast in your shot. And you have the rim
light, the backlight, the hair light whenever
you want to call it. But it gives us
amazing looking edge to your head or to
your shoulders, to the whole site right
across from the headlight. Now, if you have
any more questions, please let me know
in the comments. I will get back to you
as soon as possible.
12. Recoding High Quality Audio: This class is mainly on the visual part of recording your videos with
your smartphone. But the thing is, it
would just not be faithful to the assignment
to teach you videography, also on the smartphone, and not have audio
play a role as well. Because the truth
is, audio plays a really big role for a
good video experience. And I really want to
make it clear to you that you should not
underestimate this and think you can get away without actually using a
microphone or just getting away with the
internal microphone off your phone or camera, you will need a microphone. Now thankfully, those
microphones can be fairly affordable
and very capable. So let's take a look
at a few options and also how to use them. Type one, the shotgun mic. So one thing beforehand, every section about the different microphones
is recorded with the type of mic that I'm actually talking about
in that section. Now, unfortunately,
I literally broke my go-to budget
shotgun microphone, which is the Techstar SGC
600, which I still recommend. But instead of it
because it's broken, I record this audio with my Rode MDG4 plus now this is
also a shotgun microphone. It captures the audio that is in front of it and it's
fairly directional. That means it picks up
what is in the direction it points towards and
not so much around it. Now, typically a shotgun
microphone like this is not in the hand of the subject the
way I'm doing it right now. But instead it's either
sitting right on top of the camera in the
cold shoe mount. Again, not typically for a shotgun microphone
like this one, but the smaller ones,
like the SGC 600, orders on a boom pole, making it possible
that it's actually much closer to the
subjects mouth, which leads to better
audio quality. So I'm gonna put it back
onto my boom pole right now. I have a second camera angle, so you can see how that looks. So let's see how that works. So the goal with the
shotgun microphone is always that it's as
close as possible to the subjects math or to the area where
the sound comes from. Now, this chart you can see that is actually fairly close. It's not directly pointing
towards my mouth, but rather the upper
chest area which is where also especially the
deep sounds are coming from. As you can see in the frame, it's very close to my face, but in the frame of the
video I'm recording, it's not visible yet and that's exactly what you want
it to be roughly. Now there are different types of shotgun microphones and you can find the list for a few
budget friendly options. Again, link below in the
gearbox, I like I said, recommend the text or SGC 600, which is only $30, but it really sounds pretty
decent considering the price. And here's how I would use it, especially with the smartphone. Now option one is
to, like I said, mounted on the top of a so-called cold
shoe mount cameras have those cultural moments, usually phones do not. So to do that, you will have to purchase
a type of phone cage that comes with additional
mounting points for gear, including a culture mount that you can use to
position your microphone. Now, it can totally makes sense
to get one of those cages because it also protects
your phone and it has other benefits if
you record videos, but I just wanted to mention
it because in order to use your shotgun
microphone like that, that way you need extra gear. You cannot just put it into your phone or anything
and then have it. The reason I would not
do it this way for my specific kind
of videos that I do is because the microphone, in that case is always too far away from the subject
that most likely the audio quality is
not going to be amazing because the camera is not usually right in front of
the face of the subject. Sometimes or often you're
a little bit away. And so the microphone, because it's attached to the cameras, also a fair bit of way. And that's where
that comes from. Now the other way is what
I'm doing right now, which is to use a boom pole. But with this setup,
you also will need additional gear to
get it going because you need some kind
of stand that you can have to attach
the boom pole. You need the actual boom pole, which is basically just like a long light stick to which
you can attach microphone. Then you need like a boom
pole holder for your stand, for a microphone stand. And then of course, you need
to have a fairly long cable. If e.g. you sit at a desk, the whole thing is much
easier because then you just need one of
those microphone arms. But again, I want to
share that there's a bit of a setup
involved than this. But once you get it going with your setup, you are good to go. Now here are the pros of shotgun microphones,
especially on camera. Shotgun mics are very flexible. You can capture all
kinds of sounds by literally just pointing the mic or the
camera with a mike attached at the sound source. And you will have
decent audio quality in many situations, especially when you
can get close enough. The other thing is they
are also very easy to use. There's not much thought
but microphone placement or any other thing
because at the end of the day it's
attached to the phone. So you cannot place it in
a specific way anyway, if you choose to
use it that way. Now with the boom pole. And third, like the
Techstar, SGC 600, they are generally
fairly affordable if your goal is decent
audio quality. Now, here are some cons
to the whole thing. The audio quality
is never gonna be as good as it could be because the microphone is
too far away from the source and the
perfect world, the microphone should
be, like I said, like a hand away from the mouth. And that is obviously not
possible if it's mounted close to or on the camera
itself or on the phone itself. And so you will
start having issues like a lot of reverb if that is a problem
that you're filming location might have anyway, in other Khan, at least for those of you who want
to film by phone. There's no direct
way to use it with your phone without having
to purchase a phone case with the culture mount
and an adapter to be able to use this type of
microphone with the smartphone. Anyway, this is a very easily solvable
problem and there are even special
microphones that are especially small
to fit on phones, but it will increase the
cost of your overall setup. An overall conclusion
that on-camera a shotgun microphone is
a really good option. And I do recommend that
you get one because it's just so often very useful, generally good for
filming yourself, but also very helpful, especially when you record
some kind of B-roll way. Don't want to use a
lavalier microphone to get e.g. sound for B-roll. Now, considering the
low-price and high-value, get out of it, this is
a recommendation okay. Type to the lavalier microphone. What you are hearing
right now is the audio captured with this lavalier
microphone right here. This is the road smart left
plus how does it sound? Lavalier microphones are really amazing and I'm a
big fan of them. They are very different from shotgun microphones and their style and
the way they work. And they really offer their
own kind of flexibility. Now they're really tiny
and they often have a long cable that connects
them to the recording device. In this case, I'm using it
with the road wireless go. So it goes directly into
my camera over there. Wireless without any
cable connecting, but you don't need to
have the wireless option. You can just plug it
directly into your phone. I also have a long
extension cable to really pass long distances and still put it directly
into my phone. And that's really a good
option, that really works well. But especially if you
use the wireless option, you get amazing amounts of flexibility because your
subject can effectively move wherever once and
you will continue to have good audio even if the subject
is walking, moving away. Now the wireless option
that I just showed you and recommend is
also in the gearbox. There's the wireless
goes system that is really so easy to use and offers exactly the right
amount of flexibility. But like I said, the cable
version works just as fine. Now here are the
overall pros and cons of using level your microphones. So the left Mikes gives
you a nice sound, even if your subject is moving,
that is very important. None of the other
microphone types offers you that you don't have a sound guy with
a boom pole running after your subject because
if that's not the case, then with every other, Mikey
would just lose the sound. The other cool thing about it is that those microphones always pretty much automatically have the same distance to where
the audio comes from. So I'm speaking, even if I move slightly to the left or
slightly to the right, in a moment where a
shotgun microphone could already start losing a little bit of the
sound because I'm not directly speaking
into it anymore. The laugh mic is positioned in a way that it really
catches all the sound. No matter which
direction I speak, it might get a little
bit more loud if somebody's pointing down with their heads towards
the microphone. But that's not going to
happen all that much. And so that's a great thing in terms of flexibility again. Now the next benefit is
again, the ease of use. It's actually even easier
than the shotgun microphone. You just plug it into the
camera or your phone, clip it onto your shirt, your color, or any
other good position, and you can even tape
it onto your clothes from the inside if
you don't want to be visible and
you're good to go. And one good way to
place it, by the way, is with a piece of tape on
the inside of your T-shirt. The one to, one thing
to remember though, when you do that is to always
monitor your audio levels, at least test here them to make sure that there's no scratching sounds because that
could happen when the mike touches clothing
or anything else. So just listen to your audio. Move a little bit
in the way that you will probably
move and you will get a feeling for if there is any scratching sounds or not. Another cool thing
about level ears is that they are extremely small and therefore they're easy to use with
different devices. There is no need to
attach them any way. You can attach them
directly at the subject. So that makes anything like
a boom pole, unnecessary. Microphone stands. You don't need anything. That's pretty cool. And lastly, one big pro
is that especially in rooms with a lot of
reverb and echo, when an on-camera and far away shotgun mike
would struggle. A laugh Mike, by
its proximity to the subject can cut
out at least part of the surrounding
ambient a bit more than the shotgun mic
that is very far away. Now, there are also a few cans negative points
in regards to laugh mikes. If you use the cable version, you might have to deal
with the inflexibility of being cabled
up to the camera. Now, obviously, if you have the six meter extension cable
that I recommend to you, That should not be a
problem most of the time. But even with that,
you will have to always unclip the
mic if you want to stand up and grab a
glass of water or a cup of coffee or
use the bathroom. And also it will be
very difficult to film anything that is moving or move with the camera yourself when it's cabled up to the mic. And point number two, which is more something
to keep in mind rather than a real
argument against laughs, which is that you always need to be careful that the
microphone doesn't record unwanted scratches and noises that often happen
when closed or skin, or jackets or shirts or
something rub against the microphone
since it's directly attached to them and you
are constantly moving, there's always the risk that some of your audio
could be messed up. Now, to be completely
honest in reality, if you do a good job
clipping into your shirt or color or position of choice, having an eye on that and really focusing on
your first second, then it doesn't usually
turn into a problem. In my experience, it is still something you do
want to keep in mind. Always check before you hit
record. Is the audio good? Does it sound weird
if I move a little bit and I personally e.g. I don't mind having a
visible in the frame. That's okay for me. Some people don't like
that, which is also fine. Just try out the
way it works for you and you will be good to go. Now, in conclusion,
for the left Mike, I have to speak out another
clear recommendation, probably even more than
for the shotgun mic, because if you really
start out making videos, let's say talking head
videos for YouTube or for online classes or
those types of things where there are videos are
focused on a person talking. I really think that's
the first Mac you should get because it just makes
your life so much easier. I have made the
experience that a lot of beginners especially, but also professionals
really enjoyed the simplicity of a
lavalier microphone. You don't need to
start worrying about the distance between
Mike and subject. You don't need to adjust
the microphone placement. Later on with the boom pole and the light stands and all
those kind of things. You can just clip it on, make sure it's turned on. It doesn't scratch
against clothes, and you are good to go. Also, the fact that
you can turn this into a wireless option is just
really, really helpful. You can just easily upgrade
your system without having unnecessary
purchases in between. So you can just buy the mike now connected directly
to your smartphone. And then if you are ready to go, you have saved up
for the next step, then you can just purchase
the wireless option. Now, you know my recommendation
on wireless options, I recommend the road wireless
goal, which is what I know. I know also that the DJ, I'm Mike is really good. So check out those
down below and the gearbox and also all
the microphones that are recommended
that I mentioned in the video are also
linked down below, including all the
kinds of cables or adapters that you
might need to make it work for your smartphone.
13. Important Note!: If you're watching
this video, that means you have
finished the class. And I do want to say, thank you, thank you for putting so much of your time into this class
and really trusting meat that you can actually
learn something that is worth spending
the time on it. So I hope that you actually
had this experience. I hope that you learned
something. I hope that you liked the way I teach. If that's the case, then
I would be incredibly grateful for a five-star
review here on Skillshare. Because the more of those I get, the more Scotia will
show those classes to other students who hopefully can benefit from those as well. And also please feel
free to get in touch. I really like responding
to people and get some kind of
interaction with you guys. Because sometimes it can feel
like I'm teaching a camera. But it's always nice to
remember that there's actual people on the
other end of this. So feel free to reach
out if you have any kind of complaints or any
suggestions, any feedback. I'm curious about everything and I'll get back to
everything as well. So thank you again,
god bless you richly. And SEO in the next class.
 John D., Freelance Videographer and Creator