Transcripts
1. Class Introduction: Aside from being a
cheaper alternative to mannequins and models flat
lay photos of clothes have become extremely popular
especially on social media. Whether it's for your product,
your client's product, or your daily outfit, this class will help you create fabulous flat lay
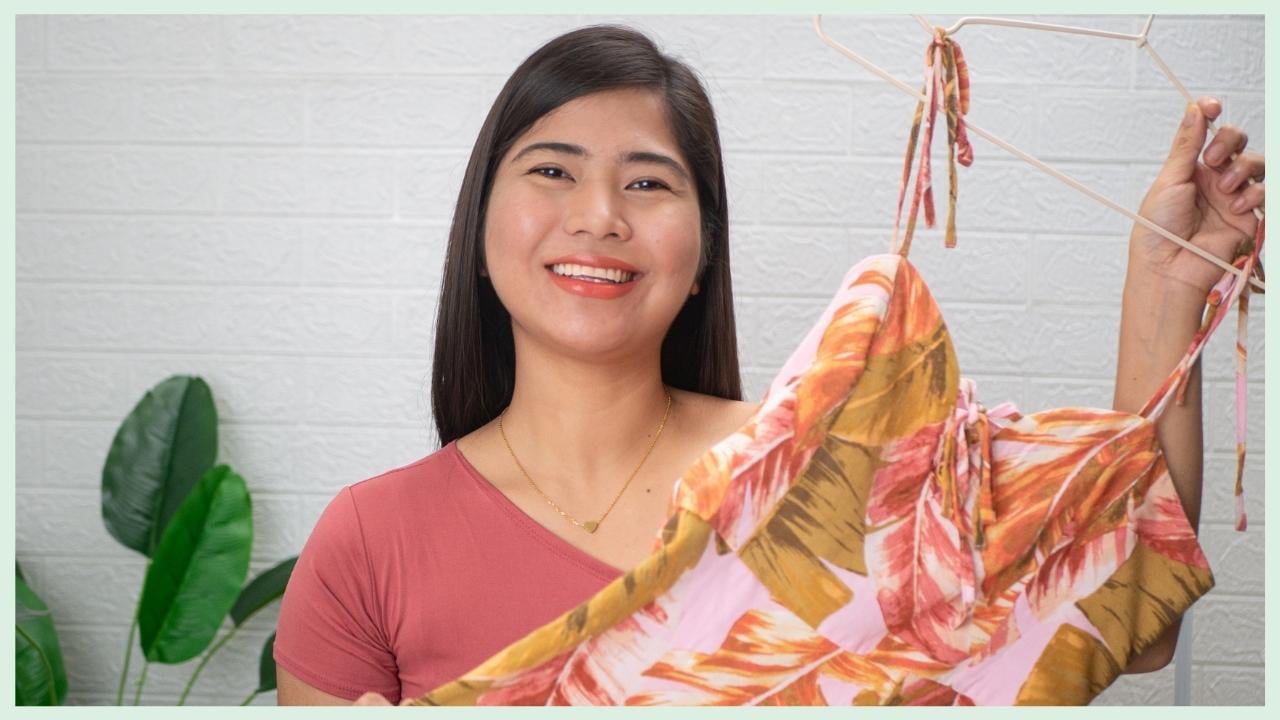
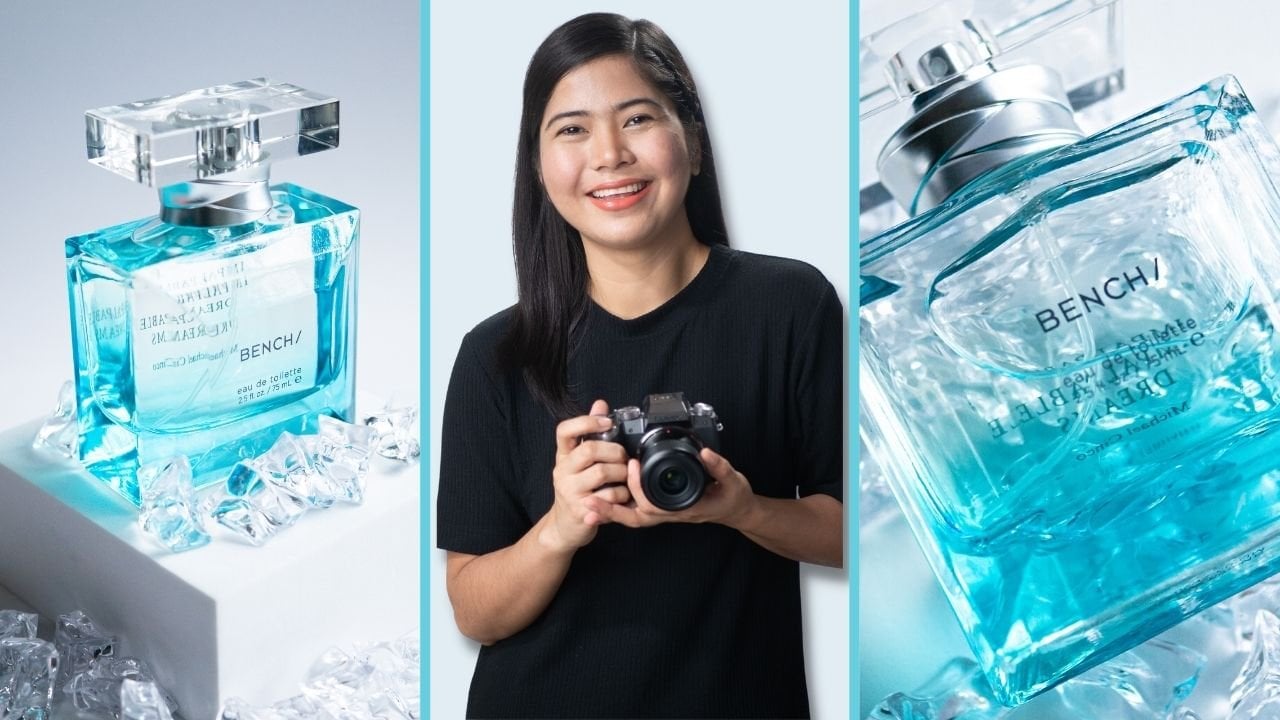
photos of clothes. Hi! My name is Rose. I'm a food and
product photographer. I started taking photos of
different subjects back in 2013 and turned it into a
business four years ago. One of my inspirations
for creating classes is the fact that I'm
completely self-taught. I'm convinced that when
you really want to learn something,
there are no limits. In my classes I share all the techniques I've learned from years of photographing, food and products for
local businesses. For this class I
will share with you my entire process of making
flat lays for clothes. We will start with
planning and preparations, then I will show you how I
will set up my scene as well as how I will choose props to
tell different stories, then you will see me compose and style my scene then I will end the class with a
quick editing demo for that fabulous final look. You don't need a fancy camera or expensive gear to participate
in the class project. You will just need
clothes to photograph, a simple non-distracting
background, props that you may
already have at home, a light source, and a camera to take photos. This could be your smartphone, DSLR, or a mirrorless camera. If you follow along with me
you will have at least one flat lay photo of your clothes
by the end of this class, plus lots of ideas for your
future flat lay photo shoot. Now if you're ready, let's get started. [MUSIC]
2. Class Project: First of all, welcome and
thank you for choosing this class to learn more about creating flat lays for clothes. Now, for the class project, I will be making different
flat lays photos of this dress to convey different stories or
different messages. All throughout the
class, I will be sharing my workflow and the reason
behind every decision, so you will be guided
as you create your very own flat lay photo or
photos of clothes. The main things that
you will need to make flat lays are clothes, This could be your
existing ones, so you can practice. This could be clothes from your clothing
business or clothes from a sponsor or a client. Next, a background, This could be anything plain or non-distracting because you will be styling the clothes
and props on top of it. Of course, you need a
camera to take photos. Any type of camera will
do because for me, lighting is more
important because it helps create a
balanced photo. With that said, you
will be needing a light source to properly
expose your whole scene. This could be light
from a big window, a door, or artificial lighting. Finally, you will need
props that you will add to your scene to
help tell a story. These could be things that
you already have at home like books, mugs, bags, footwear, accessories, artificial or dried
leaves and flowers, etc. Optional materials
are light modifiers like reflectors and diffusers, and an editing app
because I will be editing the photos I took
at the end of the class. You have the option to watch the whole class then
do your class project, or do it with me while
watching the class. I think the second
one will be more fun, but you're the boss here, so do whatever you
think is best for you. Once you're done
with the project, please share your work in the class project gallery so we can all see it and
give it some love. In the next lesson, we will kick off
with why flat lay is one of the best ways to
photograph clothes. See you!
3. Why Flat Lays?: [MUSIC] If you are selling
clothes or you just want to share your cute
outfit for the day, flat lay is one of the
best ways to do it because we humans love
beauty and order. Getting those pretty
images you've always wanted for your
feed to get more followers or more customers for your
business means having to pay attention to the
aesthetic of your content. That is where
flat lay comes in. By intentionally
arranging things on a flat surface and
artistically staging it, you can create a beautiful
layout of your clothes. This works not just for clothes, but absolutely anything and
everything under the sun. Aside from being aesthetic, a stunning well
planned flat lay of clothes can also help
in telling a story. You can use it to suggest
what other items like bags and shoes go well with
that dress or that shirt. But my favorite reason
for loving flat lays is the fact that you can
do it almost anywhere, anytime with minimal materials. This is helpful if you have a clothing business
and you don't want to invest on models and professional
photographers right away. Flat lays can get you started in beautifully presenting your
product to your customers. But before we get into creating
our very own flat lay, let me just share
some fun history 101. Did you know that there's
another term for flat lay, and it was first used
and discovered in 1987 by Andrew Kromelow, a janitor at Frank Gehry's
furniture fabrication shop. At that time, Gehry was
designing chairs for Knoll. Knoll is a company known for Florence Knoll's
angular furniture. Andrew Kromelow, the janitor, would arrange any displace tools at right angles
on all surfaces, and called this
routine "knolling". The result was an organized
surface that allow the user to see all
the objects at once. American artist and sculptor Tom Sachs who also spent
time in Gehry's shop, picked up on this
"knolling" habit and turned it into an aesthetic
with informal guidelines. He used the mantra, always be knolling in his own studio
and in his work, and even made this studio
manual that explained how to knoll to his
employees in 2009. Basically, flat lays are items that are photographed from above and arranged so that the viewers can see
everything at once, inviting the eye to wander to each singular piece while also admiring the
aesthetic as a whole. [MUSIC] In the next video, we will officially start our creation process with
planning. See you there.
4. Planning and Prepping: These are the flat lay
photos I was able to create, as a project for this class. It would be cool
to tell you that I just gathered these clothes, arranged the props on the spot, took photos, and winged it. What really happened
was me looking for inspiration for hours, and looking for props like
it's a scavenger hunt. The point is, making a
beautiful and scroll-stopping flat lay of clothes
require a bit of planning and preparations. If you're just going to
mindlessly throw items together in your scene without
much thought or planning, the result will likely be
unstructured and chaotic, which is the opposite of
what we are trying to achieve with our flat lays. My very first step when preparing
for a photo shoot is to write down my purpose and
things that I will need. I also like making rough
sketches of my composition. I take my time thinking
about what I want to achieve with the photos
I am about to create. For me, planning is like
beginning with an end in mind. If you want to show a pretty photo of your
outfit to your followers, then think of the
background as well as the props that can
help you achieve that. Check out Pinterest and
Instagram for ideas. I personally have
a Pinterest board for every photo shoot, so I have a place where I
dump all my inspirations. The same thing goes
if you are making flat lays for your business. Collect photos that
you relate to, look out for photos
that are similar to your brand's color palette, your brand message, and theme. You don't necessarily have
to copy those photos. You can use them to get your
creative juices flowing, so you don't have to
start from scratch. Once you have decided what
look you want to create, start prepping the
things that you will need to achieve that look. For these flat lays, my plan was to create
photos that can be used for social media marketing. I created different styles and shot in different orientations. In the following lessons, I will show you how I will bring my ideas to life. See you!
5. Setting Up: Let's start with
the light source. I can only do most of my
photo shoots at night, that is why I am using my
artificial continuous light. I usually shoot other
products using this height, but since I will be shooting
flat lays on the floor, I need to adjust
my light stand and position my artificial
light really low. Natural light from
the sun is also a great source of
light because it can give that
true-to-life color, so you can definitely
maximize that. You can shoot beside
a window or a door. Just make sure to place
your light source at the site of the product
or the subject. It could be nine o'clock, 12 o'clock, or three o'clock. Avoid shooting with
the light in front of the clothes or this
subject because it can result in your shadow
being captured in the photo. I would like to add that your
light is better diffused, so you will get softer
light and shadows. This is an example of a hard light setup and
a soft light setup. For me, soft light
looks more flattering for products,
especially clothes. You can achieve a soft
look by placing any type of diffusion between your
light source and the subject. Or if you're using
natural light shoot in a spot where there is
indirect sunlight. Next is your background. This is important because it creates a setting and a context. For clothes, matte
white backgrounds are best to help make the clothes
the star of the scene. But, of course, you can
explore other colors and style as long as it contributes to the story you
are trying to tell. For my flat lay, I am using our fleece blanket
as a background. I am using this side because it has less texture and detail, so it is less distracting. I will just lay it flat on the floor and make
sure that there are no creases and folds that
can distract from our scene. A top tip for a background is to check the color of the
surface you are covering, make sure that it is neutral and won't affect the
color of your background. If your flooring or
surface has a vivid color, you can add another layer of neutral-colored paper or fabric. I am done with the
light and background. Next, my favorite part, choosing props and
color palette.
6. Choosing Props and Color Palette: We already have our light
and background setup. Next, here are the props that I chose to
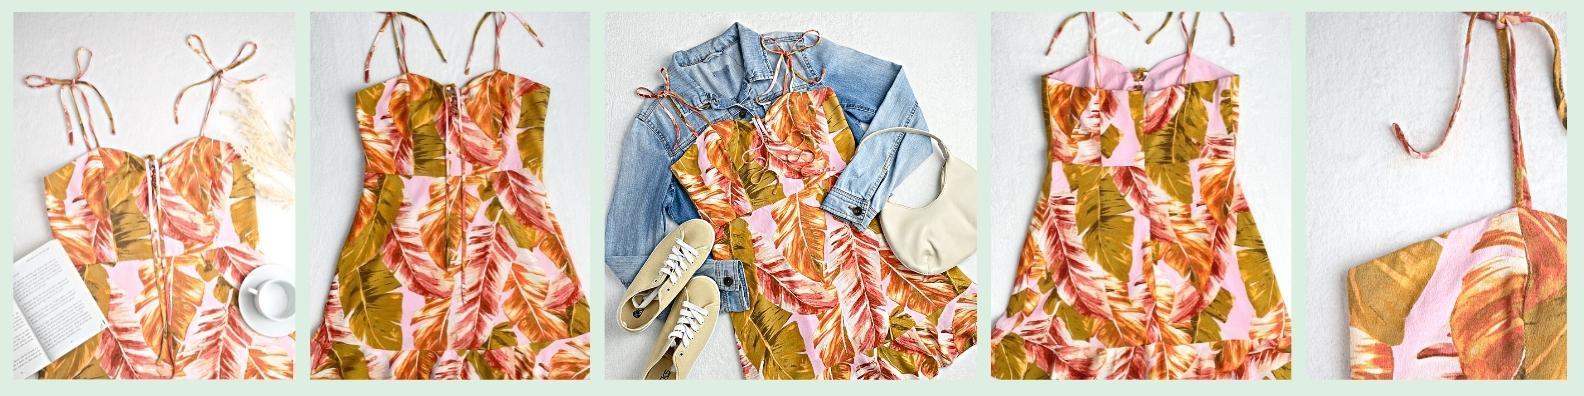
support the dress. To show you what
I mean with being intentional and telling a story, I will be styling two scenes. First is to convey
a message that this dress can be
used for lounging. I will be using this coffee mug, this book, this artificial pampas to add to that
living room vibe. For the second scene, my message is that
this dress can also be used as a
cute casual wear. I got this old jacket of mine, this cute bag, and
these footwear to support that
"on the go" look. If you will notice, the colors of these
props are mostly neutral because our dress here has this
interesting design. For me, it looks busy already I want it to be the focus, so I need to be careful in
choosing everything else, including the background
and color palette. That's a top tip right there. You have to plan
out what colors you want to show in your
flat lay photos. What do you want
your audience to feel when they see your photos? You can use colors to
evoke a certain emotion. A tool that I love
using for making these decisions is
the color wheel. You can get started
by maximizing the complementary and
analogous color scheme. Complementary are colors
opposite each other in the color wheel
and analogous are colors that sit next to each
other on the color wheel. If you want to dig deep
into color theory, I have a composition
class that has a whole lesson dedicated
to that topic so feel free to check that out. Our goal in choosing props and color palette is to
capture the attention of our target audience and express visually exactly what
we are trying to say. For example, if you're launching
clothes for the summer, you may want to
portray a feeling of warmth, happiness and fun. You can use colors
and props that hint sunshine and vacation like
sunglasses and sun hats. If it's sleep wear, then you may want to
portray a feeling of calmness and relaxation in your photos by using props and colors that evoke
similar emotions. That's the importance
of carefully choosing and adding
props to your flat lays. In the next lesson, we will finally be styling
our scene. See you there.
7. Styling and Shooting: The next step is to
start our scene by arranging the props together
with the main subject, which is the dress. My strategy with styling is to start simple and
build up from there. I do this with most of the
products I photograph. I start with just the product, then slowly add props. I will be doing the same
thing with the dress. I discovered that when I start with all the
props in the beginning, it can get overwhelming, and it's like I am
working backwards, trying to figure out
which prop to remove. Before I start taking
photos of the dress, just a quick note that I ironed this dress to make
it more presentable. If the clothes
you're photographing allows for you to
wash it and iron it I strongly recommend it for that cleaner and
presentable look. Folds and creases
don't look attractive unless it's intentional or
contributes to the story. Now, let's start
taking pictures. For e-commerce, it
is best to show the front and back
side of the clothes. Just make sure to
arrange it so it's flat and there are no
distracting folds or dirt. For our dress knots here, I have two ways to tie it. One is just a
simple double knot. [MUSIC] The second one is
a more exciting bow knot. [MUSIC] Once I am done with the front and back, I also like taking pictures of important details like the
fabric material and design. Just a tip for detail shots. You might want to use
the telephoto lens if you're using an iPhone
or a smartphone, and a higher millimeter lens, if you're using a DSLR
or mirror-less camera. I wanted to create a bright and airy look for my flat lay, and I notice that the shadows created by our side light
are quite dark. I will be using
the white side of this multi-purpose
board as a reflector. Notice how it fills in the shadows and makes the
whole scene lighter when I'm happy with the
product only shots, I can now add the
props one by one. How do we arrange the props
and compose our scene? I don't want to
overwhelm you with composition rules in this class. I will just show a couple
and stick with the basics. Our goal is to create
balance within the shot while making our subject the
star in the photograph. We can do this by mixing
different sized objects and colors on both sides
of the image frame. When arranging
elements in my scene, I create an imaginary
line in the middle of my frame and use that as
a reference for balance. I also noticed in
my photos that I like following the rule
of odds where I use odd numbers of props as well as the triangle composition
when it comes to arranging elements
in my scene. I also position props
in a way that they are just peaking and not
showing the whole thing so they won't compete
with the subject. These are just suggestions
based on my experience, but you can definitely explore, experiment and find your style. It's really all about finding that arrangement which
you think will look good. Don't be pressured to fill in all the negative space
with unnecessary props. You can maximize
those empty spaces in-between to give viewers
eyes a place to rest. Another tip for
styling is layering. This is a perfect way to add dimension in depth
to your flat lay, especially if you feel that the photo is looking
a bit too flat. You can achieve this
by simply adding a multi-dimensional
object to the frame, whether it be a book, artificial plants are
literally stacking. Adding dimension will make
your photograph standout. That is it for our first set, so here's our simple shots
best for e-commerce. Here's our first
styled flat lay. My decision to put
a book, coffee mug, and pampas in my scene
here is not random. From all the props that
I was able to gather These are the items that I
think can best contribute to my message of the dress
being suitable for lounging. Now, let's see what happens
when we change the props. For our second look, I wanted to create a cute
casual on the go look so I have this jacket, this bag, and these shoes. Remember layering? Instead of laying the
jacket separately, I can use it to make
layers and add dimension. Let's try this way first Flat lay is mostly creating
an organized mess. This is what I'm
trying to do here. Remember, the goal is
to create balance. Since I have the
jacket on this side, it looks heavy on the right. Let me add props on the
left to balance it out. It looks nice for me as a whole, but I feel like doing another one that shows
more of the dress. I feel that there was a lot of jacket space in my
first try here. I will use the jacket as
base layer this time, then the dress and the
rest of the props. Now that's better. I am seeing more of
the dress this time. My problem now is it does not look as interesting
as the first one. I feel that our props here, especially the jacket
are a bit disconnected. Let me connect it literally. [MUSIC] That's better. I now have a feeling that
they all belong together. I also see interests
and movement, which is what I was
trying to achieve with our casual on the go look, now for other technical part, I use both my iPhone and mirror-less camera to show
you that you can create clean and professional
looking photos with whatever camera
you are using, as long as you will focus on other elements like lighting, background, props, and styling, that's the best part
with flat lays. Since it's flat and
you're shooting overhead, you don't have to worry about complicated
camera settings. Your main goal is that your
photo is properly exposed, it's not too dark where
there are a lot of shadows and it's not too bright where you see a
lot of highlights. You want it right
in the sweet spot. I do have a couple
of tips though. Whatever camera you are using, make sure that your
image looks flat. Make sure that
you're not tilting forward because it looks
awkward and imbalanced. You can however, tilt
a little backward just in case you can't
make a perfect flat image. You may also consider getting a tripod with an
adjustable central column. Apart from allowing
you to shoot overhead, it can greatly help
in keeping camera shakes away, producing a clear, sharp image. If you're
shooting handheld, I recommend using a chair
or a stool if you can't get the right shot or if your feet keeps
getting in the way, just make sure to hold
your camera still, focus on the subject and aim to get a flat and sharp image. In the next lesson, I will show you a
quick editing demo to properly crop our photos
correct minor mistakes, and make adjustments for a more polished
look. See you there.
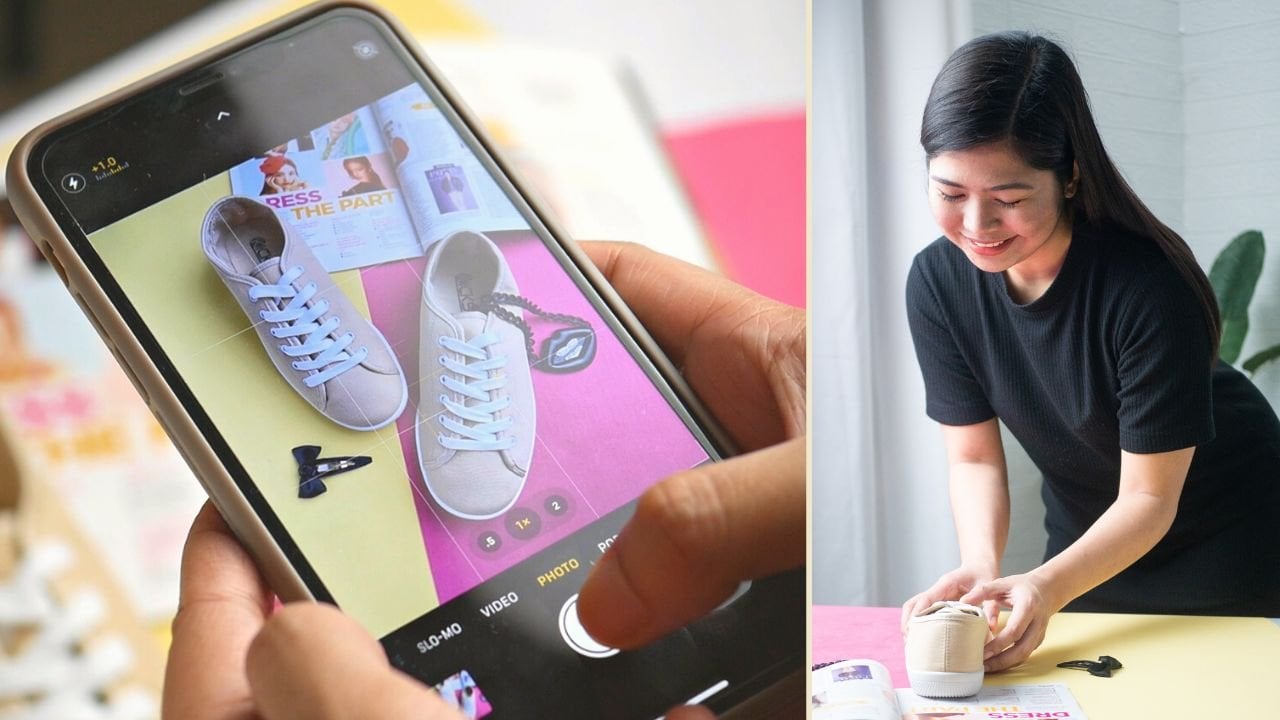
8. Quick Editing: Welcome back. Now, I will be showing you
my quick editing workflow. Here's one of the photos
I took using the iPhone. You can use any editing app to polish your flat lay photo. But for this demo, I will be using Adobe
Lightroom for mobile. This is a free app
that you can download from the App Store
or the Play Store. My very first step is
to adjust the crop, for this set of photos I wanted to create an Instagram reel, so I will be cropping it using
the 9 by 16 aspect ratio, just adjusting the box to make sure our composition
is balanced. Just a tip that you can maximize
the crop tool to polish your composition and remove
the clutter in your photo. Next is the exposure, which is under the Light
tab here in Lightroom. I wanted a light and airy look. I will be increasing
the exposure, not too much because then
it will look overexposed. To add to the light
and airy look, I will be increasing the
highlights and the whites. Then just a little bit
of blacks and shadows. Next is the color. I notice that my photo
is on the warm side, so I will be adjusting the color temperature to the left to make it
look more neutral. Not too cool, not too
warm, but neutral. I also want to add a bit of
vibrance to add more color, but not too much. After that, I just
want to add a bit of clarity to really
make the colors pop. Finally, if you see
any distortion, you can try toggling the enable lens corrections
to try and correct that. Here's our before and after. When I am happy with my edits, I can just copy the settings
using this button and paste it to the rest of the photos to speed
up my workflow. Here's the final result, I use the photos to
make an Instagram reel. For the other photos, I use the same editing workflow. The only difference is the crop, so it's customized
for Instagram, Carousel, and Facebook. My top tip for editing is to
make it simple and subtle. I highly recommend editing
because this is your chance to fine tune your
photos properly, crop and correct minor mistakes. My only caution is not
to overdo it because it can end up looking awkward
and far from the real thing. Our goal is to make our flatly photos
appealing and inviting. In the next lesson, I will be sharing my final
tips. See you there.
9. Final Tips: [MUSIC] You made it. Congratulations on finishing this class on how to make flat lays for clothes. Just a quick recap. The first step is to
plan and prepare, gather inspiration, and
put your ideas on paper. Next step is to
set up your scene, starting with lighting
and background. Next is to prep your props and the clothes that you
will be photographing. After everything is all ready, the next step is to style
your scene to hint or convey the message you want
to tell your target audience. You can start with the basics
like following balance, layering, and color harmony. Your angles and
orientation will depend on where the photos will
be shared or uploaded. Landscape for a spacious look, which is best for our
websites and covers. Portrait for social
media, stories and reels. Once you're happy
with your shots, apply basic editing for a more beautiful
and polished photo. Now, for my final three tips, first is don't be
discouraged if you don't get the shot that
you want the first time. We get better through
deliberate practice, so review your shot
and troubleshoot. It may help to ask
yourself these questions. What needs changing? Is it the light? Is
it the composition? Does it look awkward
and imbalanced? Is it the props? Are the colors distracting, or are they too
big for the scene? Or is it just the camera angle? Maybe your shot just
needs to look straighter. Next step is about styling
and presenting the clothes. If you have done all
the styles and you have shown your audience
how the clothes looked, and you want to
show fresh content, you may want to add a flat lay showing how it
looks when folded. I personally read an entire book on how to fold clothes
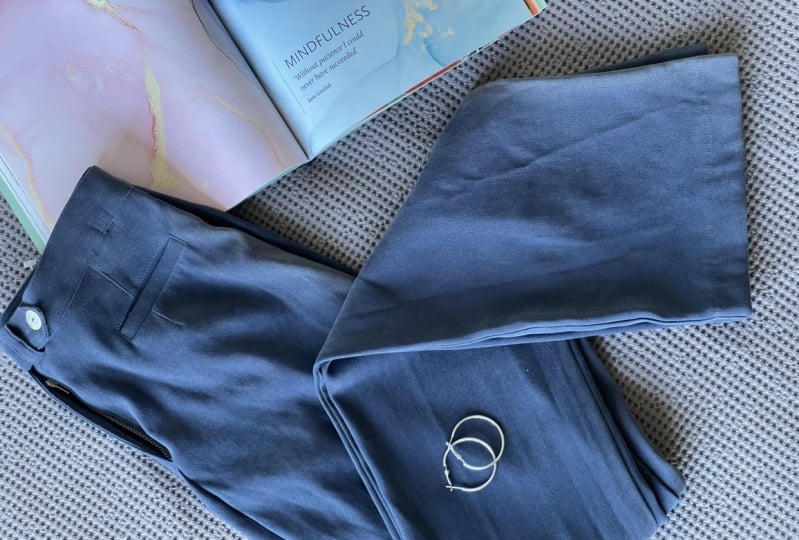
just to nail this. My top tip is to fold
the clothes to form a square or rectangle for
that clean symmetric look. Lastly, when in doubt, remove anything that you feel does not add to your story, and make sure that everything
in your frame has purpose. When it comes to
photography and styling, less can be more. That is it for this class. I hope you had fun and
had lots of "aha" moments. If you want to dig deep
and cultivate your skill on product photography,
composition, and lighting, check out my teacher profile for our classes dedicated
to those topics. You can also follow me
here on Skillshare, so you will be the
first to know when I publish classes like this. [MUSIC] I am super
excited to see how you will put what you've
learned into practice. Don't forget to share your work in the class
project gallery, so we can see it and
give it some love. plus you can inspire your fellow students to
share their work too. Thank you so much for sticking
around and choosing me and this class to learn more about creating flat lays
for clothes. I am rooting for you, and I wish you all the best. See you soon. Bye.