Transcripts
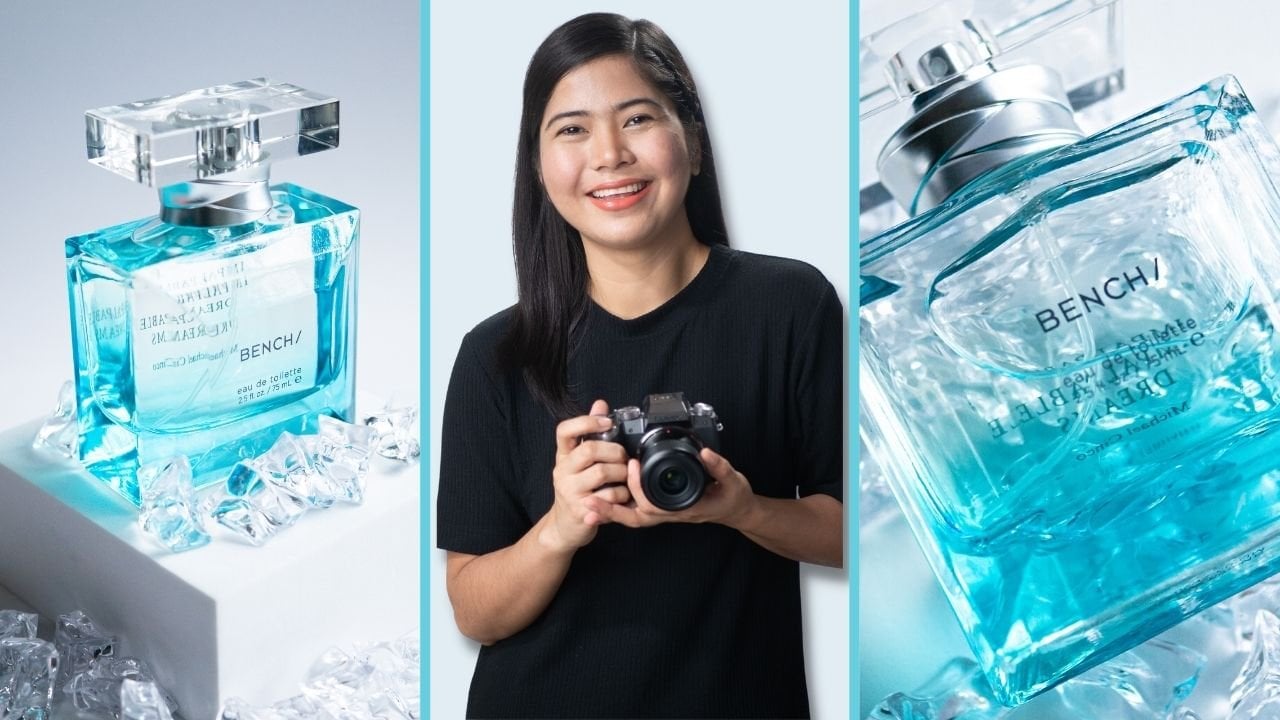
1. Class Introduction: Hello and welcome. My name is Rose. I am a food end
product photographer, videographer, and a
Skillshare top teacher. Photography started as a
hobby for me and my husband. But after a few years, we turned it into a business. We started out as event
photographers and videographers, but because of the pandemic, all of our gigs got canceled. That is when we transitioned to food and product photography. Our clients will just send
their products through our house and we will put the graph it to our
heart's content. Our mission went from
capturing moments in a lifetime to helping
small businesses and online sellers
increased sales and online presence through Scroll
stopping product photos. Apart from my obsession with
the prompts and composition, a tool that really helped in my product photography is the
effective use of lighting, and that's what I have
for you in this class. I will be sharing the basics of lighting and
how you can set up your scene to create different
looks, effects, and mood. We will kick off with white. Lighting is important
in product photography. Then we will quickly go over different elements
that influence the appearance of light, like call it temperature, light direction, quality of lighting, and light modifiers. I will also share tips and
how to find the spot in your space with the
best natural lighting, as well as when to use
artificial lighting. I will end the class
with four demos. The first two demos, I will be using natural
light to create a light and airy and a dark and
dramatic scene. Then for the last two demos, I will be using artificial
light to create a bright and warm as well as a
soft and cool look. This class is perfect for
small business owners and online sellers who want to DIY
their product photo shoot. This is also for
beginners who want to master lighting in
product photography. And absolutely
anyone who wants to learn something new
and life-changing. You can also use
either your DSLR, mirrorless, or smartphone
camera to join this class. Basic photography skills is a
plus but not a requirement. If you're ready to
unpack and explore lighting and product
photography, Let's get started.
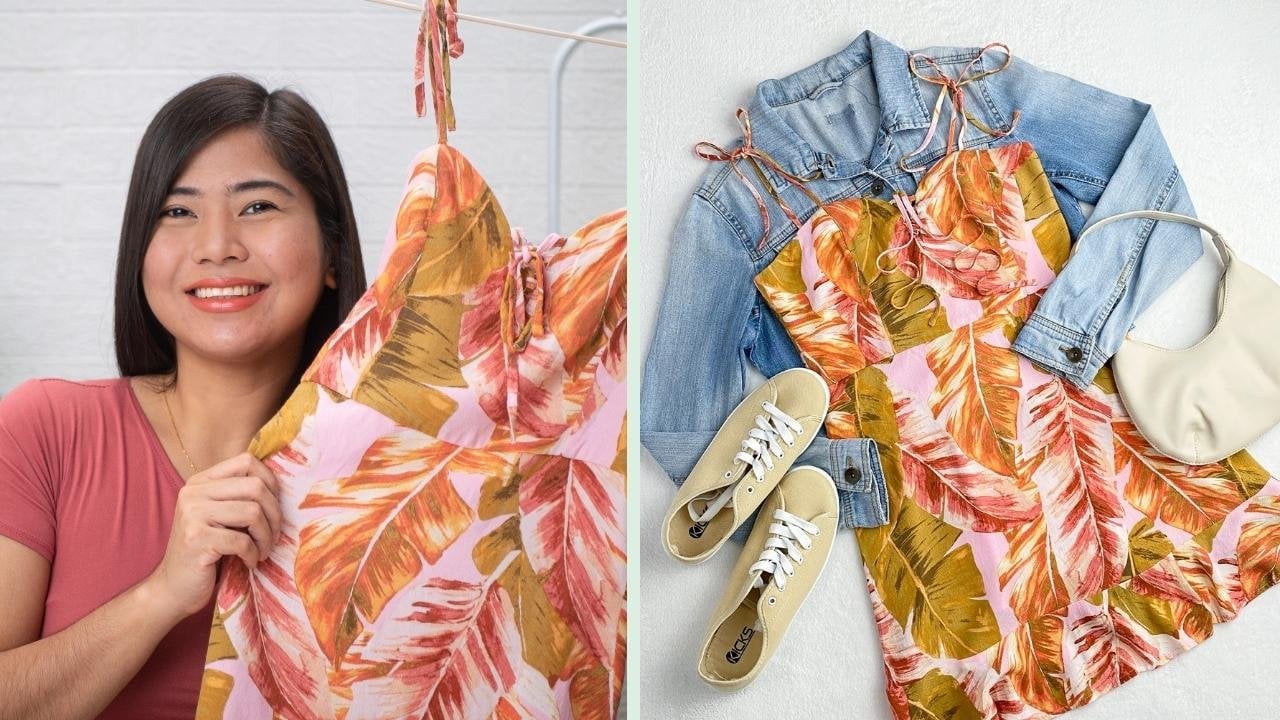
2. Class Project: First of all, thank you and big congrats for
taking this class. You are one step closer
to learning more about lighting in your DIY
product photography. Now, to accelerate
that learning and help you develop
your newfound skill, Here's your class project. You just need to create either a light and airy
look at dark and traumatic, a bright and sunny, or a soft and cool
look in your image. You can do this by manipulating the look of light in your setup. Don't worry, That's exactly what we will be learning
in this class. You will be needing any type of light source to let your setup. It could be light from the sun is literally door or window. It could be artificial
light from labs, ring light, stroke,
or studio LED lights. Next, you need a flat surface
to set up your background. Then a background. It could be a poster,
paper, fabrics, any type of plane or non-distracting background
for your scene. Of course, you need your
camera to take photos. It could be your smartphone, your DSLR, or mirrorless camera. Finally, you need a product to photograph optional
materials or prompts, reflectors, diffusers,
and a tripod. All throughout the class, I will show you
different light setups to create different looks. You just need to choose
one and recreate it. Adding new or unique touch and your product or
your client's product. Once you're done, you can make basic edits and retouching and uploaded in the class
project gallery so we can see it and
give it some love. In the next lesson, we will officially start
the class with white. Lighting is important
in product photography.
3. Why Lighting Is Important: When I was just starting out, I never really gave so
much weight to lighting. I thought that composition
and creative use of props is the key to
scroll stopping photos. It took me lots of practice, a bit regretful client
photo shoots and tons of mistakes to discover that
lighting is equally important. Well, actually it is the
most important because light is the beating
heart of every image. It's the highlights and shadows that makes
an image stand out. The difference
between a flat image and an image with
a form texture. And they mentioned is sliding. When we photograph products, we have a vision that we
want to put the life right? It can be a light
and airy image. It could be an image of the product showing
lots of texture. It could be an image where
we mimic the summer sun. It could be an image
that suggest coolness. Whatever it is, lighting has a huge impact on whether we can achieve our
ambitions or not. It doesn't matter where you
are doing your photo shoot. Whether it's in a
corner of your house, your office, or a rented studio. If you know what influences
the look of light, it can take some of the
pressure off and will help you create satisfying for
those in any environment, there is more delighting than
just exposing your subject. Different lighting
techniques can help you tell a story and evoke an emotion. Believe it or not, lighting can make your
product look more desirable. E.g. the easiest way to
show off texture and details in any subject is
with light and shadows. The play with light and shadows
is what forms an image. Looking at these photos
and manipulating the light change the
appearance of the shadows too. This is very important
in product photography. Our goal is to
create photos that can easily connect
our target audience. The human brain processes images 60,000 times faster than text. So it is crucial that we create straightforward in
highly visual content. So instead of telling
your audience that your product is great
for the summer, how about suggesting it by mimicking the light
on a summer day. Instead of telling your
audience that this product has a cool scent or
great for winter. How about delivering the
same message but creating a cool and airy image
using light and diffusion. Those are just some examples, but I hope you are
more convinced that lighting is very important in product photography
and it plays a crucial role in
composing your images. But before we go
into different ways, you can let your setup, let us go through
lighting basics and the elements that influence
the appearance of life. Starting with the
quality of light.
4. Quality of Light: Let's talk about the quality of life when shooting product. For those, You can
either be using hard, soft or mixed lighting. Let's start with hard lighting. When talking about natural
light or light from the sun. Hard light is the light of a sunny day heating
your window directly. Hard light can help create powerful and
contrast the images. It adds energy and catches your viewers eye with
something unexpected. Nothing is between the light
source and your subjects, so it looks punchy,
intense and dramatic. Now to achieve this using
artificial lighting, what I normally do is just
remove these diffuser from my softbox and let me LED light directly
touch the subject. If you want to create a hard light effect
using natural light, you can simply place your
setup near a door or window with the direct sunlight to create something like this. For me, hard light
is fun to work with, but can be a little challenging. Hard light is intense
so it can expose even the tiniest imperfection in your setup or your product. So just a tip there to
carefully style your scene, check your product,
and review your shot so you can make
changes if necessary. Next is soft lighting. Soft lighting is what you get on an overcast day when the
clouds are blocking the sun. That's exactly what
happened here. I always just photographing this cute shopping cart
with direct sunlight. And the next minute
clouds block the sun, giving me this effect,
like hard light. The transition between highlights
and shadows is subtle. With soft lighting. Soft light is gentle and
gives that feeling of calm. This type of flight reps
delicately around the subject, smoothing and even services, which can look flattering
and product photography. To achieve this using
artificial lighting, I have a softbox with
double diffusion. And here's the effect. If you are using natural
light from the sun, you can place a white curtain, baking sheets or white bed
sheet or anything white and sin to diffuse light and turn hard
light to soft light. There is no right or
wrong way to do this. It will always
depend on the story or message that
you want to tell. If you want a sense
of energy, fun, and vibrant, hard light
can help you with that. On the other hand, soft light can help in creating
a whole new welcoming, calm, and gentle atmosphere. Finally, mixed lighting
is when natural light, your room light and
other artificial light is being captured
in your scene. This is something that you
should avoid in your images because it can the white
balance of your camera. White balance refers
to the process of removing or neutralizing
color cast in your images. This is easy if you are using just one source to
light your scene. But if you have
multiple light sources, that is when it can get tricky. Using mixed lighting
adds shadows with different directions
as well as making your overall image unpleasant. To avoid this altogether, make sure that you're using just a single light source
to light your scene. If it's natural light, make sure to turn off the room lights and
close other windows. If you're using
artificial light, makes sure that you turn off other artificial
lights in the room. You can either choose from
soft light or hard light, but never mixed lighting. In the next lesson, we will move on to the different effects of
different directions. So I'll see you there.
5. Directions of Light: Let's talk about light
directions and how it can affect the overall look
of your product photos. My personal experience with
online shopping is that I am constantly drawn to products that show details and texture. That is why I try my best to incorporate it in my very
own product photography. I want my photos to convey a sense of what it
may feel like to touch and run my hand over
the subject I photographed. If I am successful, the viewers perception
of the image will also trigger their
tactile perception, leaving them with a sense
of touching the subject to. This is because I made a
two-dimensional image look three-dimensional may creating form and
capturing texture. Lighting and its direction
is key to conveying this. So let's start with
front lighting. This is when light is
coming from the front. This is tricky to work with because you can
end up getting in the way between the light
source and the subject. But when done right, it could also create
unexpected images. Show you how I will
use front lighting. Here's a photo I thought for
a local beauty products, I wanted to create a
summer look in this photo. So that is why I
thought of using artificial hard light in
front of the subject. It's as if the sun is up
and bright in the sky. My goal here is to
make it look punchy, but I didn't want
harsh shadows on the side to show
you what I mean. This is how it looks like
when I positioned the light at the side of the product
or the subject, it's fine. But for this photo, I wanted the shadows, the back, creating this effect. Just a word of caution that this light reaction
requires a bit of patience and practice because you can end up with
unwanted shadows. And if you're using
soft lighting, it looks a bit flat, which leads me to the next and most commonly
used the light direction. This side lighting. This is when you position your light source at the
side of the product. It could be in the three
o'clock or nine o'clock. This set-up creates a
dramatic side shadows. This is best in emphasizing
form and texture. The shadows that gets trapped in the nooks and crannies of these products are caused
by my side lighting. The light and shadows you see
here are all intentional. Side lighting is
perfect for adding balanced contrast and
creating tonal depth. This is my most used in
favourite light direction and my most recommended when
photographing product photos. Just a couple of tips
when using side lighting. First is to be careful in arranging elements
in your scene. Avoid putting large prompts are objects near
the light source because it can test a big shadow on your
scene or your subject. Next step is to use
reflectors if you feel that your site
shadows are too dramatic. More of that later. Finally, the last direction
is the backlight. This is when you light your
subject from the back. So your main light
source is behind the subject and you are
shooting towards the light. Just like front
and side lighting, this light direction can add a particular effect on
your product photos. E.g. these glass spaces are photographed with light at the back, creating this effect. Backlighting can give your
product a sparkle and glow by casting the shadows
forward toward the viewer, showing off a bit more
texture on the front. Backlighting also helps
in visual weight. Since shadows are darker tones, they are best near the
bottom of the frame. If you want an
in-depth class about visual weight and composition
in product photography, I have another class
dedicated to that topic, so make sure to check that out. Going back to backlighting, if you notice that the
top part of your scene looks blown out or overexposed. You can use a foam board or illustration board or anything thick and sturdy to block
the light like this. Finally, if you see
that the front of your C needs a bit
of brightness, you can use reflectors, the bounce light back
to your subject. And those are the
main light directions I use in my photography. You can experiment
and find out more. My top tip is to move your
camera, move yourself, moves your light if
it's artificial, and find the best
setup to bring out the best characteristics
of your product. In the next lesson, we will move on to
the color of light. See you there.
6. Color of Light: Did you know that the color
temperature of the light you choose can help set the
mood to your scene. And when I say temperature, I don't mean heap color
temperature is a way to describe the light appearance provided by your light source. Is it warm? Is it cool or is
it in the middle? Now that we are really going
in-depth about lighting, you'll learn that every type of light has a different color. This has to do with the color
temperature of the light, which is measured in Kelvin. Understanding the temperature
scale will help you choose the best color of
light for your scene, e.g. these are photos of
the same product, but because I use different prompts and
color temperatures, it also alters our perception and the overall mood
of the photograph. The first one looks crisp, invigorating and
refreshing because of the cool light temperature. The second photo looks warm, cozy and inviting because
of the warm white color, warmer colored light
has a lower K value. Well, cooler colored light
has a higher k value. So how do you know which color temperature
is best for your product? The annoying answer
is, it depends. E.g. for me, if I want a simple minimalist photo of our product on a plain
white background, I stick with neutral. I want white to look white. I don't want it to cool or
I don't want it to yellow. I want my white to look white. There are different
ways you can do this. First is setting the white
balance on your camera. Again, white balance
refers to the process of removing or neutralizing
color cast In your images. If you are using a DSLR
or mirrorless camera, you can just go to your
white balance settings and choose which
lighting you are using and see if
it will give you a neutral white if it's
not working for you, you can also manually
set the Kelvin scale to whichever you
think is balanced. If you're using a
smartphone camera or if you don't
have this option, or if you failed to get the correct color
temperature while shooting. You can also edit it in
post-processing, e.g. in Adobe Lightroom,
I have options here to make the white neutral, cool or warm by moving the temperature slider
under white balance. Naturally we want our photos
to show neutral whites. So when do we use the cool
and warm temperatures? I'd say this is more applicable
for styled products. First is if you want to
represent the weather, let's say you will
be photographing your products for a
summer collection, then you might want to try
the warmer color temperature. On the other hand, if you want to represent a
cool weather in your photos, then you might want to try the cool or the bluish
light temperature. Another way to maximize color temperature
is if you want to create an atmosphere in
your scene or your setup, warmer light radiates comfort
and positive energy while cool images feel
slower and half a calming effect that makes
us feel reflective. Think about how the
morning Summer Sun makes you feel versus
the winter afternoons. You can ring the same
mood and vibe into your photograph just
by experimenting with prompts and controlling
color temperature. In the next lesson, we will talk about
light modifiers. See you there.
7. Light Modifiers: Just a quick recap. So far we have learned
about the quality of light, the different effects
of flight directions, and the color
temperature of flight. These are intangible
tools you can use to manipulate the appearance
of light in your scene. Now, let's talk about
light modifiers. The tangible tools you can use to effectively
like your setup. These are like shapers, diffusers, reflectors,
and absorbers. Let's start with diffuser
is diffusion is a method of filtering hard light through a semi-transparent material
to create softer light. Users are used to obtain punchy highlights
and shadows when you want the create evenly balanced
and calm inducing light. Diffusers, soft and
light by scattering it over an area larger
than the source light. They can be soft
boxes like this. White curtains or anything white and thin
that you can place between the light source and the subject to
disperse the light. So if you want a soft and balanced feel
on your product photos, then diffusers will
be your best friend. Next are reflectors. Remember my examples from
light directions earlier, I kept saying the use of
reflectors to lighten up dark areas cost by side
and back lighting. You can use some
reflectors to bounce light from your light source
back to your subject. You might have heard the
photography term for this technique which is fill out because it fills in
shadow areas with a light that's a bit less intense
than the main light, which is referred
to as key light. If you have seen demos
from my other classes, I use reflectors or a fill light a lot to create a
bright and balancing. If ever, you find yourself in a situation where you want to lessen the shadow on a
particular area on your scene. You can use different type of
reflectors to bounce light, soften shadows, or redirect light reflectors could
be white folders. Whiteboards, mirrors are absolutely anything
to help you balance life. They also come in
different sizes depending on the effect that you
want for your scene. Then next tool and opposite
the reflectors are absorbers. These are black
reflectors that deepen the dark areas of the composition by
filtering reflections. If light from your main light
source is the key light, and light from your
reflector is phyllite. That technique of
absorbing light is known as negative fill. Any type of dark surface
can be used to reduce the light that is reflected
back onto the scene. This technique will help
to emphasize shadows and add contrast and
energy to your images. This is extra
helpful if you have bright colored walls
in your space. Later in the demo
you will see me use black foam boards to absorb light and create
a negative fill. The last light modifiers
are light shapers. They come in different
forms and sizes, but the main goal is to control the size and direction of light. E.g. these are called barn
doors and they are a form of flight shaper that
create an effect like light coming through a
partially open doorway. This honeycomb grid is
another example and its main use is to keep light focused in a more
specific direction. I use it a lot because I have a huge softbox and
it scatters light. So to control it, I use this grid, observe the effect
and the appearance of light with and
without the grid. My final example for light
shapers are blocking tools. You can use this
to minimize light, to block light and to highlight a specific area in your scene. E.g. if I want my subject to be well lit and be the focus, and I want my background to
be dark and being the shadow, then I can use this
blackout curtain to block some of the light. And use this beam of light to draw more attention
to my subject, which is the product. A blocking tool can
be anything solid or absolutely anything
that you can put in between your subject
and your light source. And that's the best part
about these light modifiers. You can use some
materials that you may already have at home or items that are easily accessible from the
nearest bookstore. If you are just starting out, I suggest that you
start small and simple. Once you have mastered lighting, then upgrading your gear
will be more worth it. And since we are talking about inexpensive
lighting tools, in the next lesson, we will talk about
natural Liping. See you there.
8. Natural Lighting: So let's talk about the best and the most accessible
form of lighting that we can use to
create product photos. Natural lighting. I must admit I use my favorite artificial
continuous light in most of my product photo
shoots because it is manageable and it looks
the same anytime of day, natural light is the opposite. Natural life is unpredictable. I live in the mountains and
the weather here is crazy. Today it can be
bright and sunny. Then the next day it could be raining and the sun is
nowhere to be found. The appearance of natural light can vary on different
times of day two. Here are photos of
the same product photographed at
different times of day. Natural life is unpredictable and challenging to
work with at first. But if you will
really take time to study and master working
with natural light, you can take photos in
different corners of your home or office
anytime of day floss. It's free and can
really create a beautiful true to life images. Here are two things you
need to look for when finding the best natural
light in your home or office. First is the size. Your natural light source could be from a window or a door. These two sources
could differ in size. Looking at these examples, you'll see that the size of the light source can
give different effects. Next is the distance. If you place your subject
near the light source, it will create short
shadows while placing your subject farther than the light source can
give longer shadows. Any different effects. When you are looking
for the best spot to set up your DIY home studio, assess and observe
the appearance of light in different locations. You can even run
your product all over the house from a window, the window to find the
most flattering light. Another thing to consider in order to find the best source of natural light in your house is the image you
want the create. The, you want a bright and
airy look with soft shadows. Then you will need to
find a spot in your house with abundant but
indirect lighting. If you want a contrast, the energetic hard light effect, then you need to find
a spot in your house where you can get
they rip sunlight. If you want just a strip
of natural light to create a dark and mysterious image than a small window
is more than enough. Plan and decide what
kind of image you want. The creep tried to photograph your products in
different thesis in your house to see which spot can give the effect
you are going for. You can even try photographing at different times of day to really get used to NBN
master of natural lighting. Our goal is to
maximize the best, most accessible and
most affordable source of lighting for
our product photos, what if working with natural
light is not possible? What if you can only do
your Photoshop's at night? That is when you can maximize
artificial lighting, which we will discuss
in the next lesson. So I'll see you there.
9. Artificial Lighting: Just like natural light, artificial light has its
strengths and benefits to. First is its availability. Natural light is no
doubt beautiful, but you can only utilize
it during the day. Unfortunately, for
me, there are times when my photo shoot can
last for more than 8 h. So I need help from artificial lighting
when the sun has set. Artificial light is also
helpful if you can find a spot in your house with
decent natural lighting. Artificial light
comes in many forms. It could be a lamp light, a continuous LED light, a ring light, a strobe light, or a studio light. Just like natural lighting, your choice of artificial
light will depend on your product and the
images you want to create. If you are photographing
small products than a lab or a
ring light may be sufficient if you
are photographing bigger items or if
you need a stronger, brighter light than getting a more professional LED or strobe light may be
the best for you. If you have plans of doing stop motions or videos
for our products, then getting a continuous
slide like the one I am using, maybe beneficial for
you in the long run. If you're already using
artificial light, then you just need to
apply the tools that we have discussed from
the previous lesson to manipulate the
appearance of life and create the image that
you have envisioned. In the next lessons, we will get our hands
dirty and I will be putting everything we've
talked about to practice. So I'll see you there.
10. Demo: Light and Airy Light Set Up: Welcome to the most exciting
part of this class. For the first demo, I will be maximizing
natural lighting and different lighting
tools to create a light and airy look
for this product. So this is the best spot
in the house where I can get sufficient
lighting for my setup. So it is currently around
one in the afternoon. The sun is somehow in this direction and my
windows facing west, so I am getting
indirect lighting. So first I will be
setting up my table here, and then my backdrops, and then my very
minimalist setup. And then I will
assess if i will be needing to use a diffuser, but you will see
me do all of it. So first is that they will. Then I'm going to set
up my backdrop here. I will be using this, the span to hold my other background. I want to create a
seamless backdrop. So when I do it like this, It's not occupying
the whole table, so I need another
piece of poster paper. By the way, this is
just a poster paper that I got from a bookstore. So here's my backdrop. Now for the prompts, since we want a
light and airy feel, I chose these white foam
blocks that I got online. I will just style it
very simple like this. And of course, our product. Now before we start shooting, I will be turning off all the light on this rule
or the artificial lighting. So here's what it looks like. So here's with the
mixed lighting. As you can see, there
are shadows from different directions
and observe what happens as sweet turn off the artificial
light one-by-one. So that's the reason
why when you're doing product photography
and you're using it either natural light
and artificial light. Make sure that you're only
using one light source. So next, as you can see, there's a lot of dark
shadows here on this area. So let's add a reflector to
brighten up the shadows. This is how we can use Phillip. So we are filling in the
shadows and here's the result. So I have two reflectors, so I have this tall
one in this short one. And since my setup
here is a ball, that's why I'm gonna be
using this reflector, but as you can see, you can use reflectors of
different shapes and sizes. Alright, so let me
just take photos from different angles and
different directions. All right, let me check
what happens if I add diffusion to our life
because right now, although we are getting
indirect lighting, I don't have anything between
the window and my subject, so let me just check
what happens if I add this thin curtain
and let me take a picture that looks good, actually that looks
soft and nice. Let me also take some photos
using my iPhone 11 Pro Max. From there you can
see that we can use minimal resources or materials to create
professional-looking product photos. As you can see, we use light from the sun from this window. We use these cheap
poster papers. And we use these prompts and these illustration boards
for our reflectors. And we were able to
create these images. The next demo to
apply what we've learned about shaping
and absorbing light. I will be photographing
the same product, but this time I will be creating a dark
and dramatic luck. See you there.
11. Demo: Dark and Dramatic Light Setup: For our next demo, it will be the opposite of the first image that we created are the first
images that we created. For this look, I will be limiting the light
and I will use light blockers and absorbers to achieve the look
that I have in mind. So first, I will be replacing our backdrop from
white to black. At the perforating dark
and dramatic images is to use dark colored
prompts and backgrounds. I will be using a
lot of props here, except for this acrylic sheet reflection
board for the light. I want my background
to be in the shadow, so I will be using my blackout curtain here
to block the light. So as you can see, as we turn off the lights, it's going to control
the light coming in or it's going to
block some of it. Next, I will be using this side of the
illustration board, so I use the white side
through reflect light. Now, I will be using
the black side to absorb light and to
make it more dramatic, the only thing that
I want to be really exposed in my image
is the subject. So let's see how I
can do that with my blackout curtain
and my absorbers here. Let's get started. So first I'm just controlling the light here by blocking it. So this is a blackout curtains. So as you can see, I'm only
getting this beam of light, which for me is very sufficient. Let me just fix my
background here. So again, I'm using my
P stands for create a sweep because our
subject is really tall. And since I want the background
to be in the shadow, as you can see, our background is not getting a lot of light. I'm happy with that. And of course, our acrylic
sheet reflection board, and then our product. Now I'll be using this
absorber to absorb light and to deepen the shadows. And let me just take
some test shot. I'm actually very happy with it. So let me just take
some more photos from different distance and angles. You can see our background
is very shadowy, it's very dark, but
then you can still see our product that is because
of the beam of light. So you can use lighting
creatively like that. You can play with the
shadows and the beams of light if you want to
create dramatic images. I think I'm done, but
before I clean up here, let me just take some more
photos using my iPhone. So this is another
way that you can draw your viewers eyes
to the product, but you seeing beams of light to put focus on your subject. This is also a creative way, but add drama and
contrast your images. In the next demo, we will be exploring color temperatures
and light directions. So I'll see you there.
12. Demo: Bright and Warm Light Setup: For this demo, I will be photographing
different products. So first are these crunches
and this cute wall hanging. So I will be photographing
these products using, right, as well as warm and a
soft in cool light setup. We will be exploring color, temperature, and
light directions. This time, I will be
using artificial light. So I can show you
different ways. You can like you're seeing the same thing with our
natural lighting demo. I have my table here. I have my backdrop, which I will show you as
we set up our scene here. I have prompts, so I have these palm leaves to give
us that summer vibe, as well as this wooden
coasters to add to that warm and cozy and inviting Look. We also have this coffee mug
and saucer and these books. You'll see how I can
use all of this to create an atmosphere
for our products. We already have our table
set up here, right? So next is our backdrop
or background. I got this dual sided
backdrop online. So if you want to
get the same thing, you can just search for
dual sided backdrop on your local online
shopping platform. So I will be photographing flatly or a bit of
75 degrees angle. So this is sufficient. I won't be using my D
stand to make a sweep. I think this is enough, but what I'll do is
move it this way. So this line here
will be diagonal. Then our props, coasters, and our products or product. So I will be photographing the pink ones for the
bright and sunny look. I think that's good. So I will be turning on
our artificial light. Let me do that now. Okay, for you to
really see the effect, I will need to turn off
the studio LED light. That's lighting nice
so you can all see me since we already
have this turned on, I'll be just asking
my husband to turn off the studio light. Alright, so this is the effect. Let me just make
it a bit brighter. K, as you can see, it looks really warm. Just to let you know too, that this layer is our LED light or our spotlight that we
normally use for weddings. It has two settings. It can give you a cool,
actually three settings. It can give you cool,
neutral, and warm. So right now we're getting a really warm color temperature. Now watch what happens if I change it to the pool settings. So as you can see, this is the cool setting for
this artificial life. But of course we don't
want that for this set up. So we're going to return it
without a warm settings. Alright, so let's take some
photos and let's see if we can achieve the right
and summer vibe. I actually love it. So this is the effect
of backlighting. You can see the
shadows or towards us. Let me just take some close-up. And let me also show you
how it looks like using my mirror less camera with
a 60 millimeter macro lens. So for our wall hanging, I will be using this side of this board for our background. And for our light setup here, I will be Chez moving our table. So we will be getting
side lighting. Since I wanted a warm look. I have two books here. I chose the one
with a warmer phage or it's a bit of yellowish
page versus this one. It looks bluish white. I will use it later in
the soft and cool look. Just doing a little
styling here to make it aesthetic
and predict the, now for our wall hanging, this is how it looks like. So I can see that our
halite is a bit hard rule. This is hard light. I am not using any diffuser. It's fine, but I feel
that the shadows are really dark and punchy. And I wanted to create
a more relaxed, comforting, warm
look for this setup. So I will be getting a diffuser to diffuse the light and
break those shadows. Not really break the shadows, but soften the shadows. Sorry. This is just
a thin curtain that's laying around
in the house. So as you can see, as we put this diffuser,
here's the effect. It's dispersing the light and giving us a different
atmosphere. The shadows are now
software as you can see. I'm still not satisfied with
how the shadows look like. So I'll be using a reflector. That's perfect for me. So let me take some photos. Now. Let me just take
a few more photos using my mirror less camera. And that is it for our
bright and warm look. As you can see, just using hard lighting, changing the position
of our subject can alter and add a different
look to our images. You've seen me use this diffuse
or to disperse the light, this reflector to theme
the shadows and give us a different feel
and make this scene or make arsine a
bit more inviting. In the next demo, I will be utilizing a
different artificial light to give us a soft and
cool look. See you there.
13. Demo: Soft and Cool Light Setup: Welcome back. For this demo, I will be
creating a soft and cool look. I will be photographing
the same set of products to really show
emphasis on color, temperature, and its effects
to your overall image. This time, I will be photographing blue
color, It's cheese. And I have other prompts
to add to our scene. So let's start with
this screen cheese for our background. I changed it to this side. So earlier in the
warm and bright, I used this side. So this time I'll be using
this side of this board. Next, I'll be using
colored papers to add interests in layer
to our setup here. So these are just
normal colored paper that I got from the bookstore. It's actually really thin. I made a mistake. I should have gotten
the thicker ones. Yeah, this is really thin, but you can definitely check
out other colored vapors, textured ones that you can
use in your background. So next, I'll be setting
up first crunches here. And I'll be adding this. Artificial eyes are fake ice. To really add to that. Cool. Look. Sorry, I forgot to mention
that for our light setup, I am using our studio light. So this is a Goldilocks S, L, E, W. This is what I'm using to light my setup when
I'm doing my classes. I'm doing videos, product
videos with videos. So it's a bit big
for a normal set up. The reason being is because I'm using it
for different purposes. So that's why I got the big one. Of course, if you
are photographing screen cheese or small products, you can definitely get
a smaller softbox. You can get the same
light, LED light, but you can get a
smaller softbox and smaller diffusion
for your set up, just letting you know
my whole setup here. And the reason why it's
diffuse is because of my double diffusion that I showed in the previous lessons. So that is why my
shadows are really soft. And you're not getting a
lot of punchy highlights. So that is it for
our light setup. Sorry about that. Now let's take some pictures. So I'm using my iPhone and
I'm using the telephoto lens. Actually, I forgot
our reflector. As you can see, we're
getting dark shadows on this area since we are
using side lighting, that is why I need my
reflectors or reflector. Okay. Let's take photos. I will be adding just one
more prop doors seem KIA. Actually A1 add one
more color paper. Right? That's perfect. I love it. I love the shapes and patterns if we were able to
create with this set up. So you can definitely do the same thing in your
product photography. You can play around with your
background, your prompts, your setup to create or add more interests to
your overall scene. Now for the wall hanging, you saw the warm look earlier. Right? Now, I will be creating a different scene for
our soft in cool look. I will be starting
with our table here. Since we're photographing
a wall hanging product, I will be maximizing
my wall here. Just a note that this
looks a bit tidy because this is a DIY foam
break that I got online. Our wall is really
boring and gray. So just a tip there will be photographing wall
hanging brought out so you can invest in different
backgrounds that you can DIY. Later on you will see me
use a re-usable hook, which I will be using to
how our wall hanging. So let me just set up
my scene here first. So let's start with our wall hanging product
in our transparent hook. So this won't be
seen in the photo. So I just needed something to hold our whole wall hanging. Okay. So I am trying to
create a wall seen here. Why this low? Because this is the only part of my wall here with
less imperfection. So that's why I chose this area. Just in case you're curious. Next for our area here, I'll be just getting
another prop. Later at the end, you will understand what I'm doing here. I'm happy to show you
my behind the scenes. And since we are photographing
a wall hanging product, that is why I really wanted to make a wall scene
so we can suggest our target customers
what they can do or how does our product look
like when hanged on a wall? Okay, that's good. So I will be using the coffee
mug and the book again. But this time I got
this other book because of the
color of the pages. The earlier book looks
warm or creamy white. So this one looks bluish. Almost the same, same prompts, but observe what will
happen when we take photos. Now for our lighting, I wanted to move our
life a bit more closer because I am seeing
longer shadows here. So it doesn't really
look soft to me because our shadows
are too visible. So let me just move
our light source closer to our setup here. Now, let's take some photos. I'm just taking photos
from different distance. So this is a closer look
at our product here. I'm actually very
happy with how it turned out it actually
exceeded my expectation. From there, you've
seen how you can create a soft and cool look. So I just want to see
how it looks like when I photograph it using my mirrorless
with macro lens camera, I just wanted to add as well that the light that
I'm using doesn't have that setting where I
can set it to cool and warm. So I am getting a pretty much neutral light so I can make adjustments
on my camera. So I just wanted to show
you how I can do that. So here's what it looks like. So it looks a bit
new truck to me. So if you want to adjust the temperature or the color
temperature of your photos, you can go to your white balance and then you can
choose settings here. So this is warm, so
we don't want that. This is too cool. So I don't want that either. So what you can do is you can manually adjust
your Kelvin here, your Kelvin number
or Kelvin scale. Okay, So this is warm. I want it a bit cooler. So 4,600 Kelvin. I think this looks
cool enough to me. Okay, So from there you can
see that if you don't have the ability to change your color temperature
using your light source. What you can do instead is change the settings
on your camera. Now, what if you don't
have that option to change the color temperature
on your camera, e.g. on my phone, I already have
a photo of my product here, again to change the
color temperature of my light source
and on my camera. So what you can do
instead is change your temperature using an
editing app on your phone. So let me just show you
this is how it looks like. This is our original
photo earlier. So observe what happens when I move that temperature
slider to the left. So as you can see,
it's getting cooler. This one looks a bit IC. So I think this one is enough
for our soft and cool look. So from there you can see that there are
different ways that you can manipulate your light
source, your, your prompt. And most of all, if in case something goes
wrong in your photo shoot, you can also try and revive
or edited in post-processing. And so that is it for our soft and cool look
for those shoots. And that is it for our demos. You have seen different ways that you can manipulate light, whether it's natural
and artificial. You have seen how
you can maximize basic materials and turn
them into light modifiers. You can choose at least one
light setup that you can incorporate in your
product photography. But if you want to try
all for even better, if you found some of the
lessons until fast-paced, don't hesitate to
replay and take notes. But the best way to really learn it is by putting
it into practice. So make sure to schedule
or commit to even just an hour to do
your class project. I hope you had a lot of aha
moments from this class and I can't wait to see how you will put it all into practice.
14. Final Thoughts: Congratulations on
finishing this class. I'd like to end with an
inspiration I got from one of my favorite
photographers, they are Lupus. She said that the magic
of photography happens the minute you stop
taking pictures of your subject and start
taking pictures of light, there is no one
perfect setup because there is no single
lighting situation and no single way to portray a subject big of the lighting setups you've
seen in this class. Just as inspiration, explore
and find your own life. Thank you so much for sticking around and
choosing knee in this class to learn more about lighting and product
photography. I hope that this
class is not the end, but the beginning of an exciting creative
journey for you. They'll flip the day or week pass by without
getting your hands dirty and applying at least
one learning from this class. And please don't keep
that photo for yourself. Share your work and
your experience in the class project gallery so
we can see it and give it some love if you want
to learn more about photographing your
products using an iPhone. I have a whole class
dedicated to that topic plus other classes or other topics to really level up your
product photography. I hope you had fun and find this glass valuable,
but either way, please leave a review
so you can help me and your fellow students in deciding if this is
the class for them, I am super excited
to see how you will make the most of what
you've learned today. I am rooting for you and
I wish you all the best. See you soon. Bye.