Transcripts
1. Intro: What if your favorite
Procreate illustrations didn't just sit in your gallery, but became beautifully printed greeting cards you could hold, gift, or even sell? If you've ever created a
design you're proud of, but weren't sure what to do with next, this class is for you. In this short class, I want to show you
how you can take your digital
lettering designs and turn them into real
printed greeting cards. Whether you want to
sell your creations, give them to your friends or
just see your work in print, I'll walk you through an easy
way to make that happen. The cards we'll be making
are based on the designs created in my Fun With
Puns lettering series, where we make lettering
designs from scratch, but feel free to start
with your own design that you want to bring
to life. Let's jump in.
2. Preparing your Design for Printing: We're going to start
with preparing our design for printing first. What I want to show you
is how you can take a lettering piece you've
made and turn it into a fun, small greeting card
design in the form of a little chalkboard instead
of a standard greeting card. Printing your designs as greeting cards is
such a great way to show off your designs. Preparing your art for print, whether it's a poster, greeting card, stickers or
surface design products, is a really important skill
to have as a designer. I try to usually print my
designs whenever I can. It's a really fun way to not just feel proud
of your work, but also to show what the
final product can become. So even though this
particular short class is about greeting cards, I hope that this inspires
you to also create prints, postcards, stickers, and more. Learning about the
process of printing and how to export and properly prepare your files for printing is a really
important skill to have if you want to
sell your work online. For example, on Etsy or Society6. When I started selling greeting cards, especially in person, it was a bit of trial and error to get the final product right, but it teaches you
so much about how to organize your work and keep the final product
in mind once it's printed. To get started, firstly, pick a lettering design that
you would like to print, something that is
not too complicated, as we're going to print on
a small size, and secondly, make sure to download
the template for Procreate in the projects
and resources tab. This template that we're
going to use is for an A4 size paper that's about 8x11 inches, that's going to turn into a mini
greeting card, so the quarter of that size. Here you can see the template
that we're going to use, and we're going to
place our illustration inside of this template first. This is going to look maybe
a bit abstract for now, but it will make
much more sense once our design is printed,
cut, and folded. So let's go to your file
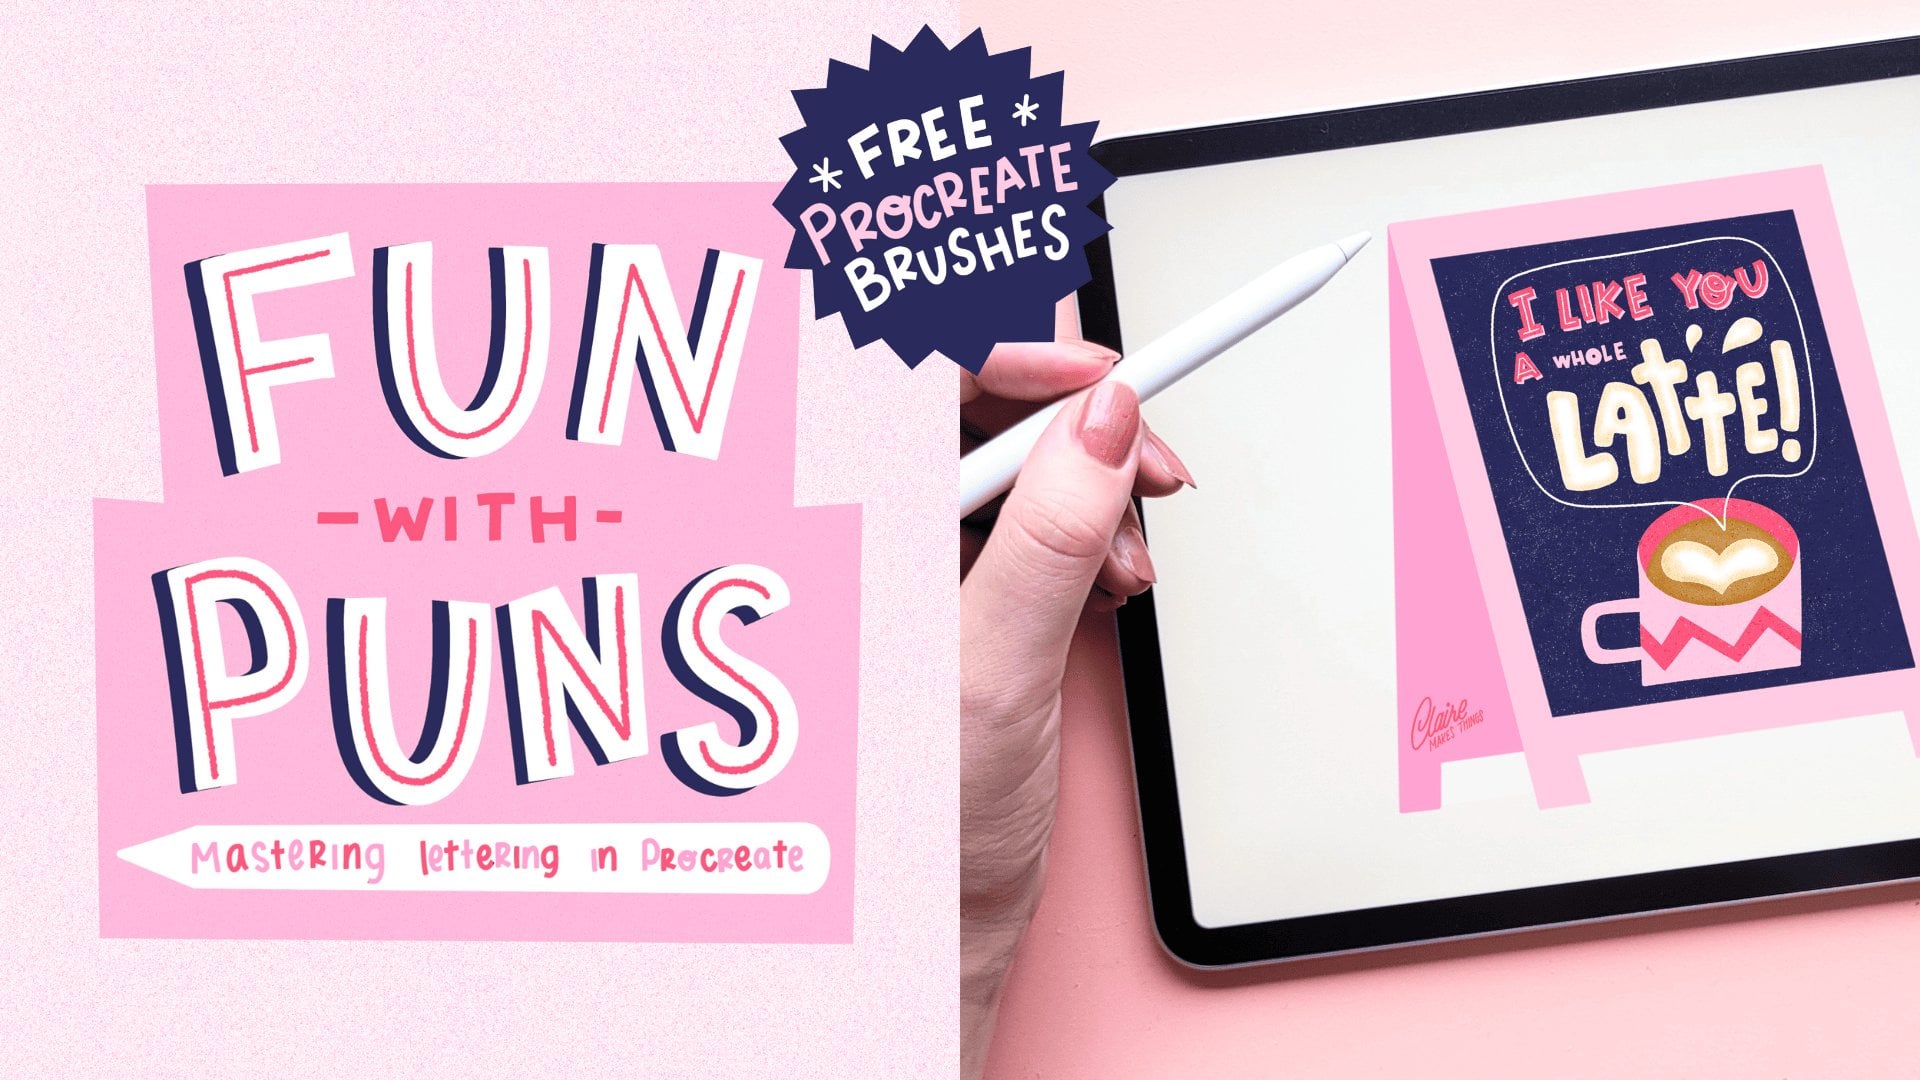
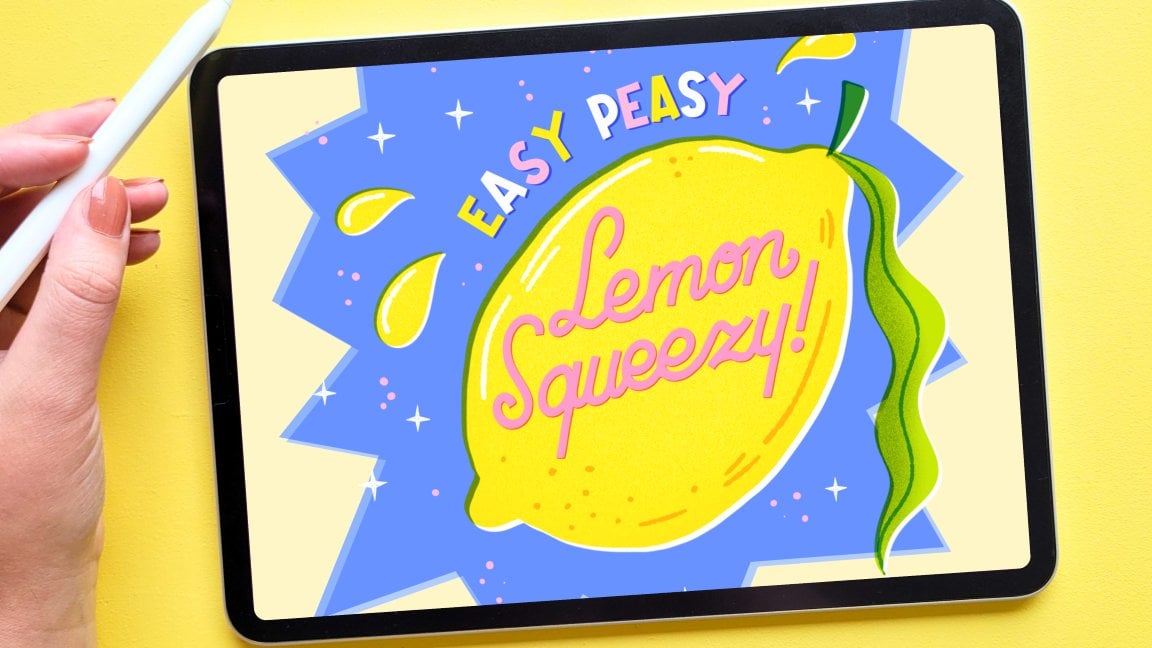
that you would like to printl This little design
I created in one of the Fun With Puns
lettering classes. Instead of using this
existing chalkboard design, I'm going to go to the
original lettering design and only select those layers,
including the background. Then go to the wrench icon
and tap on Copy Canvas. We're not going to
work in this design, we're simply going to copy the entire illustration and then paste it into our template. I'm going to make
it smaller with the transform tool and
then place it underneath our lines layer / template layer so that you can still see where
it needs to be placed. We're going to place it at
the bottom right corner, then I'm cutting away some of this background
that we don't need. Then, I'm using the
distort tool to make the design slightly angled. You might be wondering
why we're making this a little bit more
angled or diagonal, but when we fold the card, you'll see that this will
look a bit more dynamic instead of being just a
straight greeting card design. It looks a bit more fun
when it's displayed. I'm placing this in the middle with still a little bit
of space around it, and that will be our frame. As you can see, I've
saved the greeting card, the line layer as a reference. That means that if you now
want to fill in that shape, you can simply do
that on a new layer. I'm selecting pink
for this and I fill up that shape, but
in a new layer. Next up on the other side, flip your canvas and
then on the back, you can add your signature. We've got a bit of space left
here on this canvas so you can add a second design
in exactly the same way, or you can simply duplicate your design so that
you can print two. In the layers, you can see that you've got two extra layers, they're called texture
overlay 1 and 2. I've added these
to basically give your greeting card just a little bit more of a grainy
texture on top. This texture will look really
nice once it's printed. You've got a bit of
a grainy texture and you can see that
when you zoom in. Now that the front and back
layers of our cards are done, we also want to create an inside of our
greeting card design. You can simply leave
this in white, but we have the option
to add a color there. Instead of actually following
that exact same shape, you can simply add a new layer and then fill that entire layer with a color of your choice. That way you don't have to worry about lining the design
up when you're printing the front and the back of
your paper. And that's it. Now we're ready to
export our design. For printing, I like to use a PDF and then you can
choose best quality. Another option is to export it as a PNG, that works as well. In the next lesson, I'm going to give you just
a few more tips for printing and I'm
going to show you how to cut and fold your final
greeting card design.
3. Printing Tips & Finishing Up: Specifically for printing, there are a couple of
things to keep in mind. What really sets greeting cards apart is the paper that
you use for printing. You want to use something that is a lot thicker
than regular paper. So a type of card stock
would be perfect. Learning about different
types of paper will really help you in
the printing process. If you are printing at home, make sure to set the
printer settings to the highest quality possible
for the best results. And in general, printing from home is great for
testing your designs, doing test prints, and for
printing in smaller batches. For the little chalkboard
greeting cards, I went to a local printer
to do a few prints of this. If I wanted to do, let's say, a really big batch of these
to be able to sell it, for example, I would probably do a test print at home
and cut and fold it, so I have a little prototype to
show the printer as well. And if you're going
to a local printer, make sure to ask them for
their paper recommendations. They might have
different options for greeting card designs. And by the way, if you're printing your designs in
your local print shop, you might be able to ask
them to cut everything. If you're going to use
an online print service, make sure to check
the guidelines to make sure that your
file is set up correctly. There will be a
couple of things to keep in mind like
the resolution, make sure that it is at
a minimum of 300dpi. Perhaps your design needs a bleed, that is the edge around your
greeting card that they have to keep in mind for
cutting, and the color mode. Most printers work with
RGB at this point, but some might still work
with a CMYK color profile. When you set up your
file in procreate, you can find those
options there too. And also make sure that your canvas size matches
the card dimensions. And for selling your
cards online in a print-on-demand store like
Society6 or Printful, make sure to check
the requirements there for selling cards as well. Keep in mind that
they usually have a standard size for a
greeting card and you can't really make
special shapes like the chalkboard design that
we're making, for example. I sell a selection of greeting
card designs on Thortful, which is an online
greeting card shop and they actually provide a greeting card
template so that you have the correct settings
in your Procreate file. Make sure to check
what requirements they have and if they have
a template ready to use. And lastly, for greeting cards, make sure that you
always keep in mind that there's a
front and a backside, and then you even have
an inside as well that you can design yourself
or do something with. If you're selling
the cards yourself, you have a bit more
creativity here, and then I would
definitely suggest to add your signature or a
little QR code on the back. From experience selling
greeting cards over the years, locally and in my webshop, people really like to see the personal touch of a greeting card design
and they like to see a little signature or
something to show that somebody actually made this,
so a bit of a personal touch. Now that your
designs are printed, let's finish them up. For cutting and folding, what I like to use
is a cutting mat, a ruler, a utility knife,
and some scissors. I'm just cutting
along those lines with a utility knife and then the legs of the chalkboard;
I do that with scissors. For the fold in the middle,
you should see a very, faint line where
you can fold your card. And if you don't
have a specific tool for this, like a bone folder, you can simply use a ruler
or maybe the dull side of a knife and they use that
to create a neat fold. Lastly, if you're cutting
these cards yourself, the edges might be
a little sharp, so I just like to push them down with a ruler,
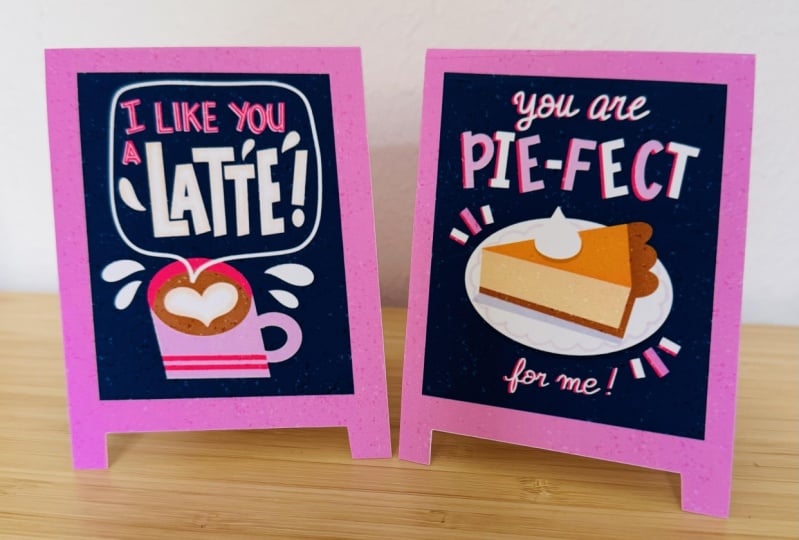
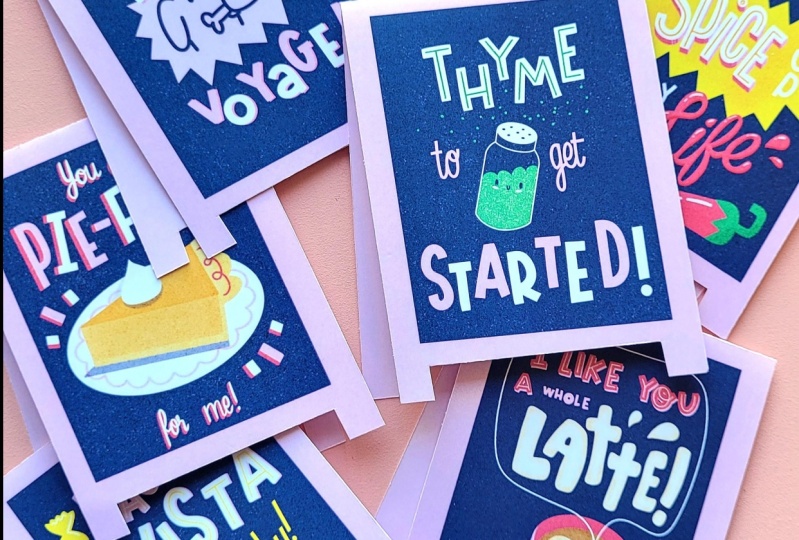
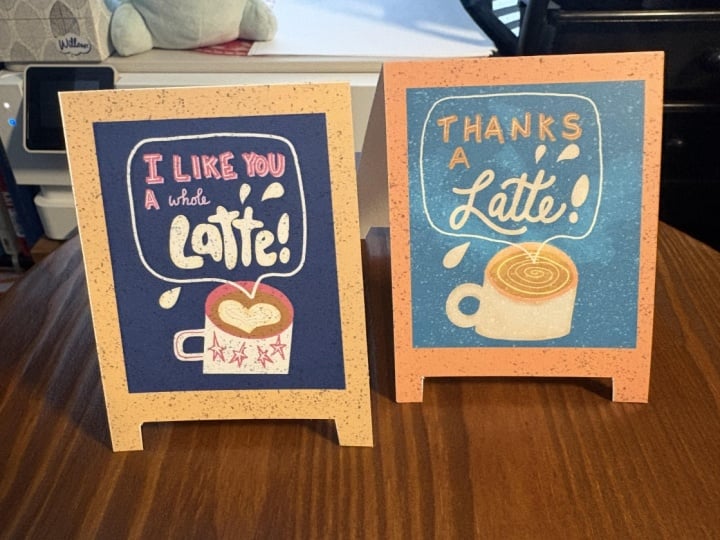
and that's it. And this is the result. I hope that this gave you
some ideas for bringing your designs to life and take them out of the
Procreate gallery. These cards would
make for a fun gift and a really unique way to show off your lettering pieces. If you print your cards, I would love to see the result. So make sure to share
a photo or a sketch, whatever you have in
the project gallery. Even if you're not able
to get something printed, you can share your sketches, your template or simply place
your design in a mockup. If you want to create this chalkboard
design from scratch, check out my 'Fun With Puns'
lettering series. Don't forget to
leave me a review, and I would also love to hear your suggestions on other
topics we should cover. You can leave your suggestions
and any questions that you have in the review section
or in the discussions tab. If you want to stay up
to date on new classes, Procreate brushes, drawing
tips and more, subscribe to my
newsletter below. Thank you for watching
and see you soon.
 Claire Makes Things, Illustrator | Lettering Artist