Transcripts
1. Introduction: [MUSIC] Hello, I'm Nick. I'm an artist and illustrator. In this class, we'll be making
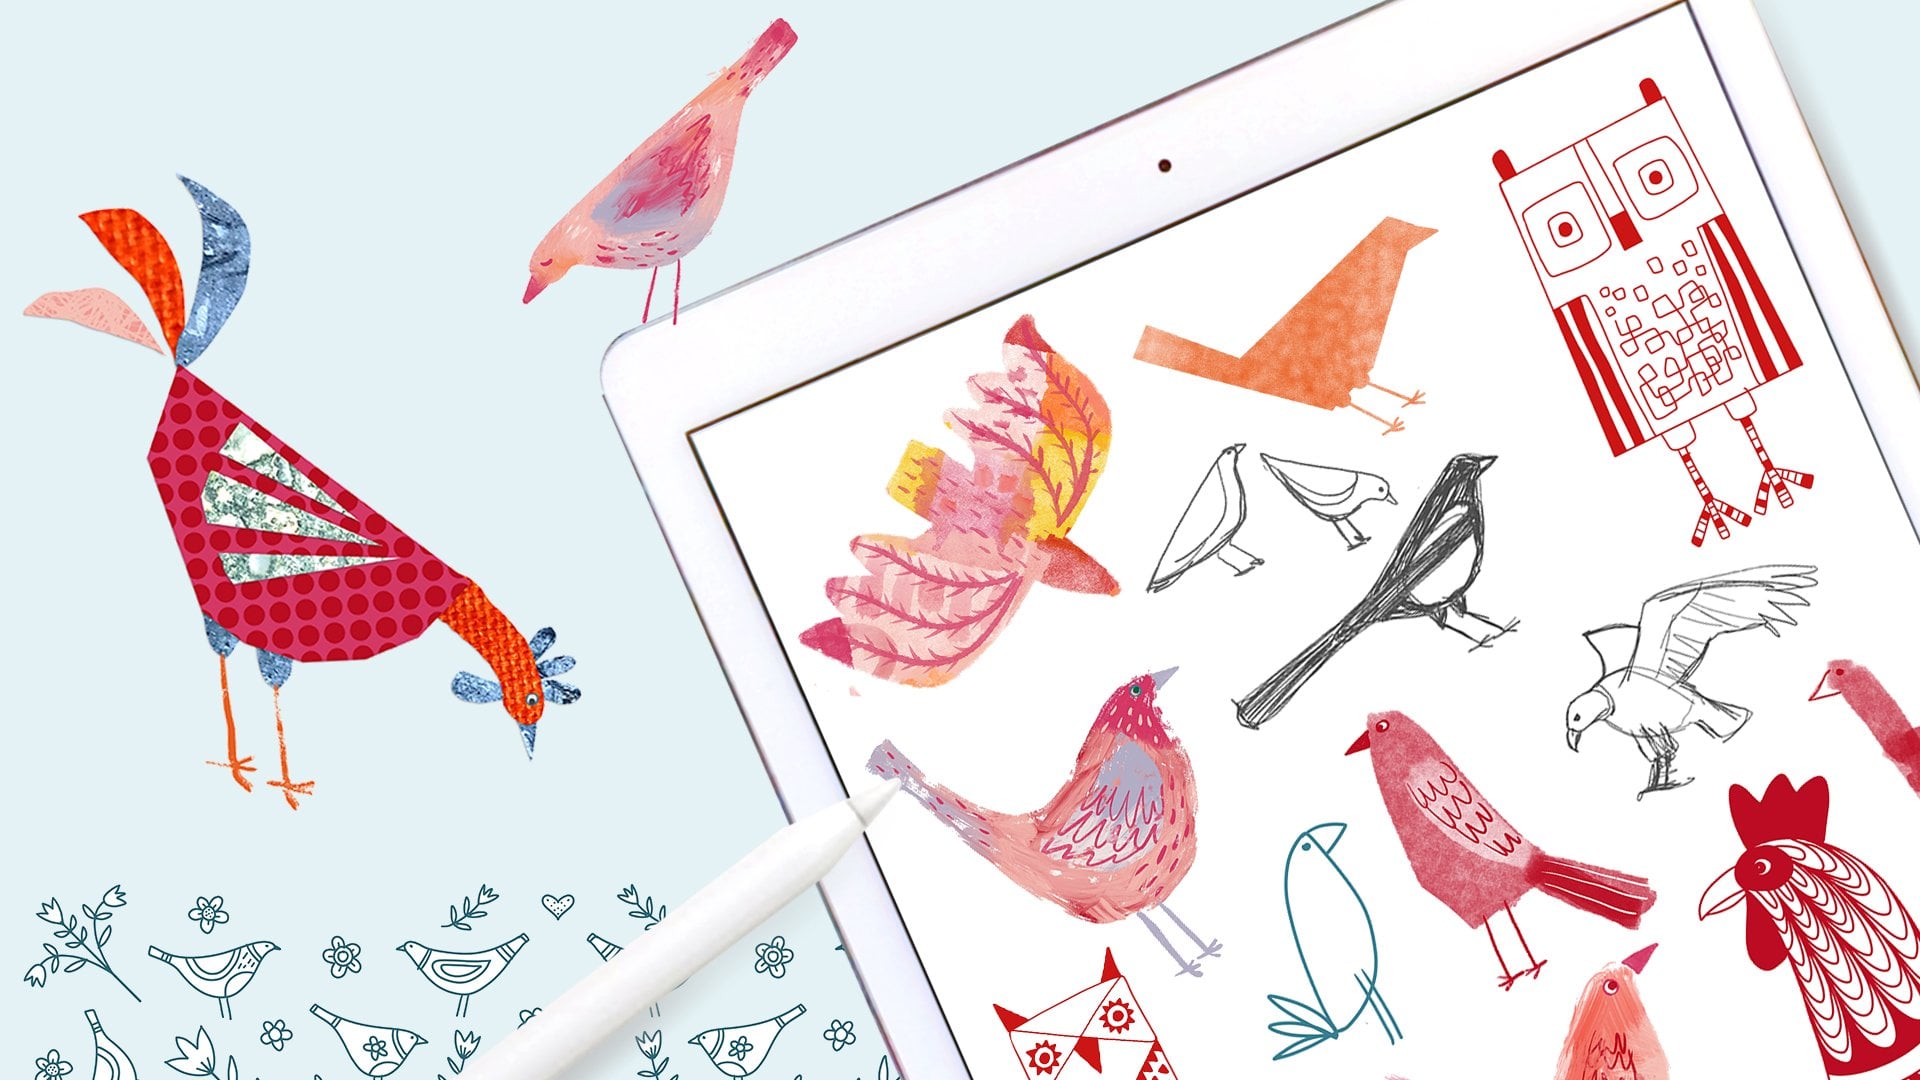
a digital sketchbook in Procreate on the theme of butterflies,
bugs, and beasties. It's a great way to
relax, have fun, and explore different
ways of using Procreate with 10 daily
bite-sized projects to inspire and enjoy. We'll be taking a close
look at bugs and at the same time we'll
be trying out plenty of Procreate's features. Keeping a daily sketchbook
has so many benefits, whether you create art for
a living or just for fun. Sketchbook experiments
help you to enjoy trying out new things
without any pressure, discover new ways of working,
fine design inspiration. Relax and concentrate
on being in the moment. It's a great way to [inaudible]. Give your creativity workout, and generate ideas which can take you off in a
whole new direction. We'll be using the
same theme and color palette
throughout the class, which means you can
jump straight into each project without
having to make those decisions every time,
so no procrastinating. I'll be sharing plenty of
procreate tips with you too and give you ideas on how to take your
sketches further. Anyway, enough of that. Let's get started.
2. Setting Up: [MUSIC] We'll start by
setting up our sketchbook. I'm going to make
a new canvas by tapping on the plus on the
top right of the screen. Then tap the little icon at the top right to make
a custom canvas. I'm choosing pixels and I'll make mine 5,000 pixels square. I also look at 300 DPI. This tells me I'm going to have 17 layers, which is plenty. This varies depending
on your iPad model. Choose any size you like but make sure you have plenty
of layers to play with. Now I'm ready, I'm going
to tap on "Create". I'm going to go back
into the gallery. On that new canvas, I'm going to swipe towards
the left and tap "Duplicate". On the top right,
I'll tap "Select", tap on both the new
canvases and tap "Stack". This is going to
group them together. Tap the top-right
cross to de-select, then tap on the "Stack". This is now our sketchbook. We're going to need 10
pages for this class. I'm just going to swipe across and duplicate until
I have 10 of them. Of course, you can
add more at anytime. Tap on the word "Stack" to
go back to the gallery. You can rename your stack
by tapping on the name. Now to sort out a color palette, there are lots of different ways of creating color palettes, and I've got into a lot more
detail in my other classes. You can use any method you
like but for this class, I'm going to keep it simple and stick with one of the
standard palettes, which comes with Procreate. I'm using the Ascend palette, but the only thing that is
lacking is some pale colors. I'm going to choose one of
the pinks and then go to the classic color
picker and select the circle over towards the
left for a lighter version. I'll just take it up a
bit too until it looks right and then I'll tap on an
empty square in the palate. I think that's a bit too light, so I'll move it a bit and pop the new
one into my palette. Then if I tap and hold
on the first color chip, I can delete that swatch. I'm going to do the
same with the blue. Now my palette has
a mix of dark, mid-tones, and pale
colors, so that's perfect. You can detach the
palette to keep it open and you can move it around the screen to a
suitable position. Now we're ready to get going. [MUSIC]
3. Insect Sketches: [MUSIC] In this exercise, we're going to get
more familiar and up close and personal with bugs. There are all sorts of
types of bugs and beasties, such as spiders,
which by the way, I'm not very keen on
so I won't be drawing, centipedes, worms,
snails and more. I'm going to start
delving in specifically at insects and give you a very simplified bit of insect anatomy just to get a
sense of what bits go where. Quick disclaimer,
I'm not a biologist. Insects are all very different, but they do share
some basic anatomy. They have a head
with compound eyes, and also some very simple eyes, pair of antenna, some some
weird buggy mouth parts. They have this main
part of the body, which is called the thorax, and at the back is the abdomen. All the main bits are
attached to the thorax, which has three sections. If the bug has one or
two pairs of wings, they're attached to the
second and third section. The six legs all come
out in the thorax too, one pair in each bit. I'm going to really
simplify the legs into three main most obvious sections although there are
really five or six, including the bits where
they attached to the thorax. The abdomen is divided
into varying number of sections and there are a pair
of breathing holes in each. Hopefully, this
will make it easier to interpret what
you're looking at. With other kinds of
bugs and beasties, I encourage you to do a bit of research to better
understand the structures. Now we need to use and copyright-free
reference pictures to sketch from and draw lots
and lots of different bugs. Always work from nature and not from other artist's
Illustrations. Pick a simple pen or
pencil to draw with. I'm going to use the
procreate pencil, draw a variety of
different bugs in different positions
and draw lots of them. The more you draw,
the better you'll get and the easy
you will find it. Add more layers
when you need to. Remember that these sketches
don't need to be beautiful. They're really just
working diagrams and that's to help you get
familiar with your subject. Don't try to draw them
in a particular style. That can come later. You can draw any bugs you like, but if you want to
follow along with all the bugs I'm
using in this class, you will need butterflies, moths, beetles, stag beetle, snails, praying
mantis, and bumblebees. While you're drawing, think
about the main shapes. Is the body rounded or
pointy?All the obvious segments. Are there any bits poking
out to the back-end, or the eyes big or small
compared to the head? Or shape and length
of the antenna. Or shape of the
wings, if it has any. How many legs are there? Are they short or long? Are they chunky and spindly? Are they hairy or
spiky or smooth? What patterns and
colors can you see? Either make written
notes by the sketch or you can use a bit of
color to refer back to. This is useful even if your final art used
completely different colors. When you're done, please post your sketches in the project
section of the class. Don't forget to like and leave encouraging comments on
other people's projects. It's really fast and fun to work through the
class together. [MUSIC]
4. Bug Mandala: [MUSIC] We are going to use the Procreate
symmetry feature to draw a Bug Mandala. Let's set that up by tapping on the spanner or wrench
for the Actions menu. Then Canvas, then switch
on the Drawing Guide, and then tap "Edit
Drawing Guide". Tap on "Symmetry" to the right, and then Options,
then choose Radial. As an alternative, you could try rotational symmetry which will rotate whatever you draw
instead of reflecting it. I will have Assisted Drawing
on and I'll tap "Done" at the top-right making sure not to accidentally tap on the thin
color strip beneath it. I've done this so many
times and it makes the drawing guides white so you can't see them on
a white canvas. I need some time with
brush and of course, you can use any brush for this. I'm in the calligraphy
section and I'm using the monoline brush because I want to make it even smoother. So I'll make a copy to change by sliding the brush towards the left and tapping
"Duplicate". Tap the new brush to
go into the editor, and on the left,
choose Stabilization. At the moment, it has
the streamline on. Think I'll just take
that up a little bit more to about 75 percent. Stabilization setting is
on zero at the moment. If I take it all the way up, it's quite odd, a bit like
dragging a road behind you. A little bit is nice for a really smooth
drawing experience. So I'll try around 10 percent. You can clear the drawing pad
with a three fingers scrub. I'll stick with that
and I'll tap "Done" at the top right to
exit the editor. I have a few versions
of this brush. I'll disconnect the palettes
and pop it to one side. Where you draw is going
to make a difference. If I draw every one of the horizontal or
vertical line sections, it repeats on all four of them. The same thing happens
with the diagonals too. If I draw in-between the lines, I'm going to end up
with eight versions. A three-finger scrub to clear the canvas so that
we can get going. Start with his body, and then I'll drop in
the color to fill it. Add a head. Add some stag
beetle antler things, some buggy eyes,
and then some legs. That's drawing my
main bugs and then I'll come back and
decorate them later. It's a bit weird drawing
on the line of reflection, but it does get easier
after a short while. [MUSIC] Let's fill in the gaps. If you draw a rough oval and then leave your pencil
down at the end, Procreate will snap it
into a perfect ellipse. At the top in the middle,
the edit shape comes up. You can tap on it to
adjust the shape, the size, and the position. Once you tap on another
tool, for example, the color chip, your shape is committed and it can't be
edited like that anymore. It's up to you whether
you want to use this or whether you want
to just work freehand. Now I'm just going
to go in and fill in any holes with
more little bugs. Remember to zoom out
regularly to check the balance and how the
colors are working together. [MUSIC] Now I've got all my bugs drawn, I'm going to decorate them. I'll just add another layer, tap on the layer
and turn on Drawing Assist so that it
still uses symmetry. Tap on the layer again and
switch on Clipping Mask, which means that whatever
I draw will only show where there are
pixels on the layer below. So if I scribble here, it only shows on
top of the bugs. If I take the Clipping Mask off, you can see what I really drew. I use this all the time. It's so handy. Now I'm going to decorate my bugs and
you can use lines, stripes, dots, shapes, flowers, leaves, anything
you like for this. It's quite meditative
and relaxing, isn't it? [MUSIC] I think I'm done. These have the advantage
of not being perfect tile. I couldn't resist
doing another one with some flowers
scattered in-between. You can take this
further by using different brushes
and different bugs. A line drawing with
white lines on a dark background
would be great. Please post your Bug Mandala in the project
section of the class. [MUSIC]
5. Liquid Moths: [MUSIC] In this exercise, we are going to
make liquid moths. Obviously we're not
actually going to liquidize moth so
that would be nasty. We're going to use
the liquify tools, which is much less
messy and more fun. To start with, I'm
going to go into the spanner wrench settings, I'm going to go to Canvas. I'm going to toggle the
Drawing Guide to on. Let me just choose
edit drawing guide. Tap on Symmetry. As we saw in the last exercise, there are other options,
but we're going to just stick to vertical for this. Tap down on the right to exit. Now, I'm going to slightly
modify a brush to use. In the calligraphy section, I really like the brush pen, but it varies the opacity of the stroke depending
on how hard you press. For this, I really want
it to be fully opaque. So I'm going to make a copy of the original brush to play with by swiping towards the left
and choosing Duplicate. You can see there's little
procreate swish mark on the brush preview
to indicate it's not the original
procreate brush. Tap on it to go into
the brush editor. You can see the variation
really well here. If I draw with my finger, it remains a uniform
size and opacity. So this tells me that it's the Apple pencil settings
that I need to change. I'm happy with the
size variation and the opacity variation
is already on none. So all I need to do is take
the flow down to zero, which in this case
is in the middle. Perfect. I still have
the size variation, but the stroke is fully opaque. Just to be organized, I'm going to rename
this brush by going into About this brush. I'm going to use
nic mode to remind myself it's the one that
has been modified by me. Then I'll tap Done
to exit and save. Time to draw them off. I'm going to start
with his body. Just drawing on
the central line. This pen is so
lovely and smooth. Let's give him
some cute antenna. That will do for
now. I might come back and decorate
his body later. To add a new layer, I'll tap on the layer and
choose Drawing Assist. We need to remember
to do this on each new layer if we want it. Draw a wing shape, making sure that the ends meet
up and fill it with color. Add another layer and switch
on the drawing assist. In a different color, draw the lower wings
and fill them. Drag that layer
between the other two. To access the liquefy tools, tap on the adjustments
one and tap on Liquify. There are so many options here. I'm going to start
with the push brush. I don't want it too big, around 30 percent is fine. I've got the pressure
on Macs and I'm going to have the
distortion on and on. I can use this to
push the pixels around as if it's
thick liquid paint. So I'm going to give these
wings the scalloped edge. You can use the adjust slider
to turn it down a bit. You can also use the
reconstruct brush to be more precise and to put
back particular areas. You can use the reset to get rid of what
you've done here. Of course, there's always
the two finger tap to undo and a three-finger redo. Once you exit from
the liquefying mode, your changes are committed. Tap any of the tools
in the top bar to exit and let's use the liquefy tool to
decorate his wings. I'll start with the top rings. I'll add a new layer with the
drawing assist toggled on. I'm drawing some stripes and I'll tap on the
layer and turn on the clipping mask so that stripe certainly show where there's paint
on the layer below. Let's go back into liquify. Now I can use the push brush like before to distort
these stripes. Now let's try with the
distortion turn light up. That's much more
disruptive and organic. This time let's
try the crystals. This has quite a subtle effect, which you can see best
if I zoom right in. The other thing I can
try here is to have the distortion to max
for a chunkier look, it reminds me of when you
blow on ink with the straw. It's easy to affect
your existing marks, but you can choose
the reconstructs on a really small size
to put them back. Now I'm going to add
in a bit more detail. I'm going to go over
that with the crystals. [MUSIC] Let's move on to
the lower wings. I'm going to do the same again by making a new
layer above them, attending on the drawing
assist and clipping mask. Uninstall lots of stripes
so we can try small things. Twirl right and let's
make it bigger. I does what it says and twirl
left, does the opposite. It's interesting, but I'm going not to
do that right now. Pinch sucks in the
surrounding pixels. [MUSIC] Expand pushes the
pixels away from it. I'm going to go over that with the crystals to get a
bit rough of finish, a bit more detail. I'll finish by adding
some detail to his body with a new layer. I'm not going to use
the drawing assist this time because I think that the free hand will work better on
this small area. I will make it a clipping mask there popping a few stripes. Then in the liquify, I'll use the push brush. I hope you enjoyed that bit. Please post your beautiful
moths in the project section. [MUSIC]
6. Stag Beetle Engraving: [MUSIC] In this exercise, we're going to make an inked
bug in an engraved style. Traditional etchings
and engravings use lots of line work with parallel lines and crosshatching for contouring and shading. It's very effective,
and it's fun to try. We'll keep it simple, but do have a look at some etched and engraved
illustrations. They can be so beautifully
intricate and detailed. Look at how the shading and contouring is done
to get some ideas. I'm going to try a
few different strokes to make a sampler. We'll start by tweaking a
couple of Procreate brushes. For the shading, I'm going to
get to the Inking section. Slide the thylacine brush towards the left and
tap "Duplicate". Just want to make this brush smoother by tapping
on "Stabilization". I'm going to take the streamline
up to about 40 percent. You can either use the
slider or you can tap where it says "None"
and type in 40. I'll do the same with
the stabilization. This is going to take the
wobbliness out of our strokes, so I'm just going to nip
into the about this brush and rename it so that I know
I've modified it and how. Let's do the same thing with the monoline brush in
the Calligraphy section. It's already got
lots of streamline, so I'm going to take this
stabilization up to 40. I'll rename that one as well. Let's play with the size, and when I'm happy with it, I'll tap on the plus to
pop a little marker in. You can make up to four
markers per brush, and when you change the size, it'll snap to your chosen
size if you're close to it. If you hold down your stroke
at the end, you can edit it. If it's almost straight, it's not properly straight. If it's curved, it'll smooth out your curve and give you
the option to alter it. Try some different
shading options to see what looks good. If you tap and hold the eraser, it will erase with
your selected brush so you can knock
back your shading. It's great for
adding highlights. If you want to get
the same effect but less destructively, you can work on a new layer
and use the brush in white. You can then use
the same brush to raise and soften
those highlights. A couple more brushes I like for this are the sticks in
the drawing section. It's much messier and inkier and would be
good as an eraser. For more responsive line work, I really like the
Baskerville brush in the Inking section. It's got lovely tapered ends and really helps give
that engraved look. I love it for contour
lines and control shading. Do spend a moment experimenting
and getting a feel for what looks right.
We're ready to go. Choose any bug you
like for this project, but it should look
fairly realistic. I going to bring
in my sketch with a stag beetle to work on top of. This part of a
larger page of bugs, I just zoomed in and
took a screenshot, which I then cropped and
sent to my camera roll. In the Spanner Actions
menu under Add, choose, "Insert a photo", and drag out the
corners to resize. You can freehand. But I'm going to
save a little bit of time by using symmetry. In the Actions menu
and the Canvas, which on the drawing guide. Choose "Edit Drawing
Guide", tap on "Symmetry". I want to turn
vertical and top down. I need to move him a bit using the adjustments arrows so that he sits on that middle line, tap the arrow again to deselect, add new layer to draw on, tap on the layer and tap "Assisted" to switch
on the symmetry. Choose one side of
your bug to draw over, and I'm going to use
the smooth monoline in black for the outline. You can draw on whichever
side you prefer, and you can change over
where it suits you. Typhus and legs. Now I'll either delete or hide the sketch layer,
whichever you prefer. On a new layer, I'm going
to add some inky texture. I'm going to try out a few
different types of shading. If I was making finished art, I would be more consistent, but the idea of a sketchbook
is to try things out. I'm using the Thylacine
to draw in a wobbly line. I'll press and hold and tap "Edit Shape" to
move it into place. I'll be erasing the
extra bits in a minute. You could use masks or selections to constrain
these strokes. But I want to keep it simple. I'm using the Baskerville
to raise the unwanted bits. The harder you press
on this brush, the thicker the stroke. I'm going to put each
bit of shading on its own layer so I
can erase it easily. I think I'll do the same thing, but in the other
direction and slightly curving the lines to
follow the contours. Bit more erasing. For his head, I think I'll use small random crosshatching. Switching off the layer below makes erasing easier to see. I'm adding a new layer at
the top for the highlights. I'm using the
Thylacine in white. I need to imagine that
the light is coming in from the top-left
above my bug. I'm adding some strokes, where light would
be the brightest. You can soften the highlights a bit with the
eraser if you want. Just keep going back and
forth until you're happy. I need to put another layer in, beneath that one for some
shading in the darker parts. Still using the Thylacine, I'm adding some cross strokes. Then erasing with the
Baskerville as before. I'm going to use the Thylacine
to erase this middle bit. Because I still want to
leave a bit of shadow from the thorax onto
the wing cases. The head's really
easy to shape by just making the crosshatching denser. Just need to clean that up. Let's move on and on, another layer will
do his antlers. I'm just going to pop down to the outline layer
and add a couple of lines in the
Baskerville brush. Back to the top layer, and I'm going to
turn on the assist. Using the Thylacine brush, I'm following the curve and
I'm holding my pen down at the end of the
stroke to adjust that curve by moving
the blue dots. Tap on the brush to commit, a bit more erasing here. Now I'll switch off the drawing
assist to do the shading. I'm going to duplicate the layer and switch off the lower one, so if it doesn't go well, we can get back to this point. I'm going to use the
Baskerville as an eraser, to bite into these lines
and create highlights. I'm following the contours, and I'm going to erase
a highlight along these edges and add
a bit more hatching. I'm not using white here, because it would go
over the outline. But you could if you prefer, and just pull the outline
layer to the top of the stack. There are always a lot of
ways to do the same thing. Now I'm using the black
with the Baskerville to add some hatching lines to the
shadows on the other side. I need to do the left
side, in a similar way, but remember in a direction of the light [MUSIC]. It's enough the leg details. I'll just add some contour
shading and aline here. Then back to the Thylacine
for the upper legs. Baskerville lines
for the mid bits, last shading contour lines. I'm leaving some unfilled bits from these little
solid lower legs, and I'm using the Baskerville as an eraser to add some
stippled texture. Just a few more
details to finish off. You can take this further by
adding shadow underneath, for a more 3D look. You could try adding
a watercolor wash to the back to make it look like a color plate in an old book illustration,
that would be fun. Please put your finished bug
into the project section. [MUSIC]
7. Glitchy Butterfly: [MUSIC] This exercise combines observational drawing with a fun procreate feature
to add interest. We're going to make
a multi-colored texture first which will end up giving color to the
lines in a bug line drawing. Starting with the
hard brush from the airbrushing section
but any big brush will do. Make sure to use bright
and dark colors, not too pale so that it
will show up well against the white canvas and make sure
you cover the entire page. It doesn't have to
be a masterpiece and mine definitely isn't. Now let's go to
the adjustments at the top and choose glitch. Just drag your pencil or your finger from left to right
to add a glitchy effect. I don't want this one but I'll have it play and see
what it'll be like. I'm going to use the wave. I've taken mine all
the way across to 100 percent for a
nice wavy look. You can play with
the amplitude and the frequency until
you like what you see. Then tap on the brush to exit. Now I'm going to add a new layer and drag it beneath
the glitch layer. Then tap back on
the glitch later, select it, tap again and
choose clipping mask. It's vanished because there's nothing on my new layer
which it's clipped to. Since I draw with any
brush or any color, the glitch layer will
show above these pixels. I'm going to use my
favorite monoline brush in the calligraphy section. I'm going to make
life easier and turn the symmetry on by
going to the settings, canvas, drawing guide, edit drawing guide, and
choose symmetry. Its automatically picked
vertical symmetry but if not it's in the
options at the bottom here. Tap Done when you're ready. Use a dark color to draw with. I'm drawing straight from a reference photo
which I took of a poor sad butterfly
pinned in a display case. It's a bit wonky so
I'll quickly fix that. You can see what's going
on when I'm zoomed in with the glitchy
layer showing. It's not easy to see here but
I'll be filling in more of the butterfly and it'll show up better with more solid parts. I'm going to drop
in some color here. I'm going to clean up
the really messy bits as I go by tapping and holding on the eraser to
use the same brush to erase. Look closely at your
butterfly or bug. You don't have to
follow it absolutely but it will guide
you for the pattern. Now I've got the
main structure done, it's just a case of
filling in the details. [MUSIC] I'm going to drop in
the color to fill. Then I can tap to continue
filling with re-color at the top and just move the cross hairs to the
bits I want to fill. Now I can just tap to
fill the other bits in. [MUSIC] Let's sulties the body. Butterfly has a cool pattern
on his back and he is done. You can explore further by playing with the
different glitch effects or you could try
using light colors for the black or dark
background layer. Please add your glitchy
back to the projects. [MUSIC]
8. Psychedelic Snail: [MUSIC] This one is
just a bit of fun. We're going to make a color
changing snail GIF or GIF. I'm using a smaller canvas than this one as it's really simple. I find 1,920 pixels square works really well
for GIF animations. I'll tap "Create" when I'm done. To draw the snail, I'm using the darkest
color in my palette. In inking brushes, I'm
using the ink bleed. It's not important, just use whatever
brush you like. Draw the outline of your snail or any other bug if you prefer. I want to move him
to the middle, so I'll tap the
"Transform" arrow and drag him over a bit. Tap again to de-select. I need to fill him with color. Time to start turning
him into a GIF. The spanner or wrench settings
in the Canvas section, toggle on the Animation Assist. Bar appears along the bottom. There's a little thumbnail
square of our snail. Whichever frame you're working on has the blue line under it. If I tap on the frame thumbnail
there's options pop up. Tap "Duplicate". I'll make five copies
to keep it simple. Now I've got five frames which
are all exactly the same. You can scroll through them
in the thumbnail view. Tap on the first frame and
then let's add some detail. I'm going to use the
pale pink to draw some texture on his body. Then I'll use a
dark pink to draw some stripes on his shell
following the spiral shape. By redrawing these
bits for each frame, we're going to get
a fun dynamic look. That's the first frame done. The next one, we're
going to change the color of the
snail by tapping on the "Adjustments" wand and choosing Hue,
Saturation, Brightness. Move the hue slider along
until he changes color. Tap on the wand again to exit. I'll use a different color
to draw in his stripes. The same pale pink for the
shiny texture on his bod. I like to have
some bits changing color and some bits
staying the same, a bit like the lines too. Now if you scroll back
through the thumbnails, you can see how this is working. I'll repeat the process on the other three layers by
using the adjustments. One to pick hue saturation
and brightness, and changing the hue, then adding its texture in the same pale pink and
stripes in another color. When you're done, press play on the left
of the animation. See how it looks. Whoa, that's a bit fast. I'll tap the
settings and slow it down by having less
frames per second. Because of the way we change the color using the hue option, it will also slightly shift
the background color too. To avoid this, I'm
going to turn off the background layer
before I export by going into the Layers
and tapping what's there by the lowest background
color layer to switch it off. Go to the Main Menu settings. In the Share section, choose "Animated GIF" to
preview it and export. Here's our psychedelic
snail GIPHY. If you choose Web Ready here, you'll get a smaller file. Tap on "Export"
when you're ready. Please upload your GIF to the Project section by going
into the Project workspace, add image and choose your GIF. If it's too big
and it won't load, just post a still image instead. You can take this
further by adding movement from one
frame to the next. Or maybe roll his eyes or move his eyes stalks
or his mouth. There are so many
things you can do with simple animations and I do
have a whole class about this. See you in the next exercise. [MUSIC]
9. Fuzzy Bumble Bee: [MUSIC] I found a
great fuzzy brush, that inspired this exercise. Thought it would be fun to
draw a bumblebee with it. I'm going to start by mapping
out where might be will go. Any brush will do for this, as it's a sketch layer which
I'm going to turn off later. Using the monoline, and it will hold to make an ellipse and another
for the abdomen, which I'll just
add it's a bit in the legs and the wings. They have some little wings too. That's the sketch layer done. I'm going to make it paler, by tapping the end on the layer and sliding the opacity
to roughly 50 percent. Alternatively, you could just
sketch in a lighter color, add a fresh layer to work on. I'll start with the eyes and I'm using the
monoline brush. If you're following along, put the eyes on a separate
layer from the legs. I didn't when I made the videos, so I had to fix it later. For his legs, I want a
more painterly look. So I'm using the
[inaudible] brush in the drawing section because
it has such a lovely texture. This bee is going
to be quite loosely painted so I'm not
being too precious. As far as the color
palette goes, one doesn't have any bee colors. So I'm going with paste and
using just black and yellow, you can stick to your
color palette if you prefer a more
interesting bee. I'll add in a new
layer for his body, and the brush I'm
going to use is in the organic section and
it's called salt grass. It looks like this, is obviously meant to be grass, but it's just
fabulously fuzzy for our bee is got a lovely
dimensional quality. So starting with the black, I'll draw in the V-shape, and then with an orange
yellow, the yellow bits. Don't worry about
the eyes for now. Adding the stripes
wherever you want them. Mine has a little yellow bot. Now I'm going to get the
eyes from the layer below. I'll tap and hold on the
layer visibility box to isolate that layer. Then tap on the s shape
selection tool at the top and use free hands
to draw around the eyes. I could have put them
on a separate layer to start with, but never mind. Hopefully you took my advice and you can just
drag the eye layer. I'm going to swipe down with
three fingers and then tap, Cut and Paste to put the
selection on a new layer, which I'll drive to the top. I'll make the other
layers visible. I'm going back to the leg
layer and I'm going to draw in his feelers using
the monoline brush. I'm going to add a layer on top of the body for the wings. I'm using the monoline
pen to draw in one side. I'll just zoom in and
clean that up a bit. I'll Just switch off
the sketch layer now as we don't need it. Then I'll tap on the
background color and change it to a light
color for my palette, this pale blue so that the
wings will show up better. The wings to be translucent. So tap on the wing layer. Tap again and switch
on reference. This means I can add a
new layer directly above it and fill that
area with white. To tap on the end of the layer and take the opacity
down to about halfway. I'll tap again on that
layer and tap Merge Down. To use the monoline pen
to decorate the wings, I'm not going to
use a clipping mask or the alpha lock
because either way my black pen will look more transparent on top of the
transparent white of the wings. So I'm just going to draw old-style freehand
into the wings. You can make them realistic
or you can fill them with patterns or flowers
or anything you like. It's baseline very
loosely on reality. [MUSIC]. So when you're happy
with the wings, slide the winglet to the
left and duplicate it. Tap on the adjustments
arrow to select all the contents
of the layer and then tap on Flip Horizontal. Make sure the snapping is on, which is on the lower left. Then slide the wiggles
over to the other side. Tap on the last pallet
to de-select and then pinch the tubing layers
together two minutes. I'm just going to add a dose of white tweaks for a bit of shine. [inaudible] never
work with animals. I'm just going to use the
[inaudible] gloss brush as an eraser just to slim him down a bit and take a
little off his behind. Please add your fuzzy bee to the project section
of the class. [MUSIC].
10. Doodle Bugs: [MUSIC] In this exercise, we're going to make
some simple bugs shapes and then decorate
them with doodles. I'm using the smooth
out monoline brush in the calligraphy section and a darker color for my palette. I'll start with a
rough oval shape. Then I hold my pen
down at the end so the procreate snaps it
into a perfect ellipse. I'll tap on edit shape at the
top and straighten it up. I want it roughly
in the middle and big enough so that
I'll be able to fit six of them on my Canvas while having plenty of room
to decorate them later. I'll fill it with
color. That's happened. Hold on the eraser to get
the same brush to erase. I'll section of his head. You can hold at the end of
the eraser stroke as well to adjust it in the same way
as you can with a brush. I'll add in some buggy eyes and I'll separate
the wind cases. If you hold at the end of a
line, it's snapped straight. You can put a finger
on the canvas at the same time to make it
a perfect vertical line. Going back to the
monoline brush, I'm going to give him some fillers and then
some simple legs. Now I'll tap on the
adjustments arrow. I've got the snapping on, which is great for
lining things up. I'm going to move my bug until
he snaps to the mid line. Time to make more bugs. I'll go into the layers, slide the bug layer to the
left and duplicate it. Go back into the
adjustments tool and tap on flip vertical. Then move this one over. Snapping makes it really easy. Now I'll duplicate this
one and do the same again, the adjustment
arrow, and just move them across until
it looks right. When all three look like
they're in the right place. I'll go to the layers and I'll merge them together
by pinching them. Now I'll duplicate
that layer and tap on the adjustments arrow and drag the bugs down and
then flip vertical. I'll merge those
two layers as well, either by pinching
them together or tapping the top one and
choosing merge down. Now we're left with a single
layer with six bugs on, and everything in purple
is on this layer. Now I'll add a new layer. And although if I draw in white, it won't show over
the background. I might want to use these bugs later on a t-shirt or something, so I'm going to tap
on the layer and make it a clipping mask to confine
my doodles to the bugs. I'm going to draw it in white. You can use any color
or color combinations. Either use the monoline brush or change things up a bit
and use something else. This one is separate
from the inking section, which is a lovely flowing
pressure sensitive brush. Don't normally use
that kind of brush for this exercise so it's more of a challenge
which is more enjoyable. We're just going to relax
and doodle in these bugs. It's meditative, it's relaxing, just enjoy being in the moment and see where your
pen takes you. Try not to use your go
to doodles and patterns. We all have our favorites. I would normally use lots
of loops and scallop, so I'm not going
to do that here. I'm not using symmetry. I'm just going to go for
a more organic look. You can still erase on this
layer if it goes a bit wrong. Try some more geometric shapes. You can try some
different marks. Make it as fancy and detailed
or as simple as you like. Try using the form of the
beetle or to section bits off. Just play and just
enjoy yourself. Might look a bit
rough and ready, but I've enjoyed
making something less controlled and tight than usual. It isn't really important to get out of your artistic
comfort zone. [MUSIC] I'm going to make
another version by turning off the visibility
of the one I've just done, add a layer and making it
a clipping mask again. This time I'll use
the monoline pen. I'm going to speed
this up for you. You can add multiple layers
using different brushes, colors, and
combinations of blocks. [MUSIC] When you're done, please add your doodle bugs to the project section
of the class. [MUSIC]
11. Experimental Butterflies: [MUSIC] I really love playing with all the
procreate brushes, and this exercise is a fun
way to try out lots of new brushes and see what you can do with them and how
they work together. Start with the last layer, which you can use
to make notes of which brushes you
use as you go along. Some Some be too big
to work easily with, so pick an easy-to-find
pen or pencil for this. Having your notes on one layer means you can hide
it if you want to, but still be able to
refer to it later too. Will make another layer
and use an opaque pen. I'm using, of course, the monoline pen and
the calligraphy section to draw some butterfly wing
shapes in a light color. Keep them simple, don't worry about whether they're
wonky or not, just think of it as part
of their character. I'm going to drop in the color
to fill the first shape. Then at the top, tap
''Continue'' filling with re-color and tap to fill
all the other butterflies. This is now the base layer
for our butterflies. Add a new layer and tap
on the layer and choose clipping mask so
that anything we paint will only show up on
top of the butterflies. We're only going to use
two colors for the wings, so pick one light and one much darker for
a good contrast. Work your way through
the procreate brushes, trying them out swapping
between your two colors. Some will blend with
the existing paint on the same layer
and others won't. I'm not going to tell
you what brushes to use because the point
is to experiment. Don't think too hard about this, just play and enjoy yourself. You can add more
clipping mask layers and as long as you stack
them on top of each other, they will clip to
the same base layer. Here's your notes
lead to detail, the brushes you use
as you go along. You'll find some lovely
combinations and effects which you'd be able to incorporate
into your future artwork. Don't forget you
can change the size and opacity of your
brushes as well. It's giving you even
more options [MUSIC] When you're happy
with the wings, add a new unclick
layer at the top, and in another color added
body for each butterfly. I love the freshener brush in the drawing section for this. Then use a thin
pen or pencil for the antenna and you're done. Lots of lovely butterflies
and some new brushes and brush combinations to use
in your future paintings. Please add your butterflies with or without your brush notes to the project section
of the class [MUSIC]
12. Praying Mantis: [MUSIC] For this exercise, we're going to draw
a praying mantis. If you haven't sketched them yet or if you've just done one, stop the video now and
draw a page full of them so that you get to
know what goes where. I've been sketching a
few praying mantises, or maybe it's manti,
I don't know. I need an entomologist
to let me know. All you see is this chap. But first I want to
flip him around. I'll go to the adjustments
there at the top and tap on Flip Horizontal. I'll go to the Settings, I'll choose Share, and JPEG. I'll tap on Copy. I'll come out to the gallery, tap on the Plus at
the top right for a New Canvas and as my sketch is the size
that I want to use, I'm going to tap
on the Clipboard. That's pretty on his own Canvas. In the layers, tap on the N
and take the opacity down, which I find makes it easier
to draw over a sketch. I'm going to lock this layer by dragging it towards the
left and tapping Lock. In this way I won't
be painting on the sketch layer by mistake. I'll start on a new layer. Even know praying mantises
are generally green, I'm sticking to my palette. I'm working from front-to-back
except for his eyes. I'm going to use the
ink bleed pen from the inking section to draw a rounded triangle for his head. Then I'll fill that. I haven't really left enough
room for his antenna, so I'll just bend them a
bit, artistic lessons. I'll put his eyes
on a new layer. Their eyes really made me laugh. They're so big and buggy
with tiny little pupils. New layers always get added
above the selected layer. I'll tap on the sketch
layer and add another. Make sure you close
your shapes so that you can fill them, don't leave gaps. On the next layer down, I'm going to draw in the
legs that are closer to me. I'm tracing it with my sketch, but you can modify as
you go if you need to. These back legs are a bit
weird because they're both under and over
the wing case. I'm going to modify
that in a minute. Next, there's the
wing cover layer. You can see what I mean
here about the legs. I'm just going to go back
to the leg layer and erase those extra bits. Time for the main body. I need to make sure it's a
closed shape to fill it. [MUSIC] Now, I'll adjust the leg at the back. Now, I'll turn off
the sketch layer and Alpha Lock all the layers. This way I can only draw over
the existing painted areas. Starting on his head, I'm putting a darker ring around his eyes for a bit
more contrast. Because I think it
makes him look cuter. I'm going to put a
stripe on his nose too, which isn't realistic
but I like it. I'm going to work my way
down the layers and that's some textures and patterns
in contrast in colors. All I'm doing here is drawing onto the existing
layer each time, just keeping things simple. Experiment with some
different brushes for both simple and easy
collage textured effect. You can paint, you can stamp, and you can draw in
some textures too. Please add your praying mantis
to the project section. [MUSIC]
13. Final Thoughts: [MUSIC] I hope you had fun with these
sketchbook projects. We've tried all
different ways of drawing bugs and of
using procreate. I hope you continue to find a few minutes every
day to explore and try new things and see where your sketchbook
adventure takes you. It's enjoyable, relaxing, and it can spark your imagination. I'm really excited to
see your projects. I do look at all of them and if you'd like some
feedback, do just ask. Please also feel free to post on Instagram with the hashtag
nicsquirrellskillshare, for a chance to be featured
in my Instagram stories. Follow me here on
Skillshare to be kept up to date with new classes
and discussions. If you enjoyed the class, please leave me a review, especially if it's a nice one. see sketching and bye for now. [MUSIC]
 Nic Squirrell, Artist and illustrator