Transcripts
1. Introduction: Hello, I'm Nic. I'm an artist and illustrator. I license my designs
on all sorts of products which sell
all around the world. I always take a few minutes each day to work
on my sketchbook, whether it's a paper
one or digital. It's a great way
to relax, explore, and try out new things
without any pressure. Sometimes these sketches lead to new designs or
methods of working, sometimes they spark ideas and take me off in a
different direction, and sometimes they're just a
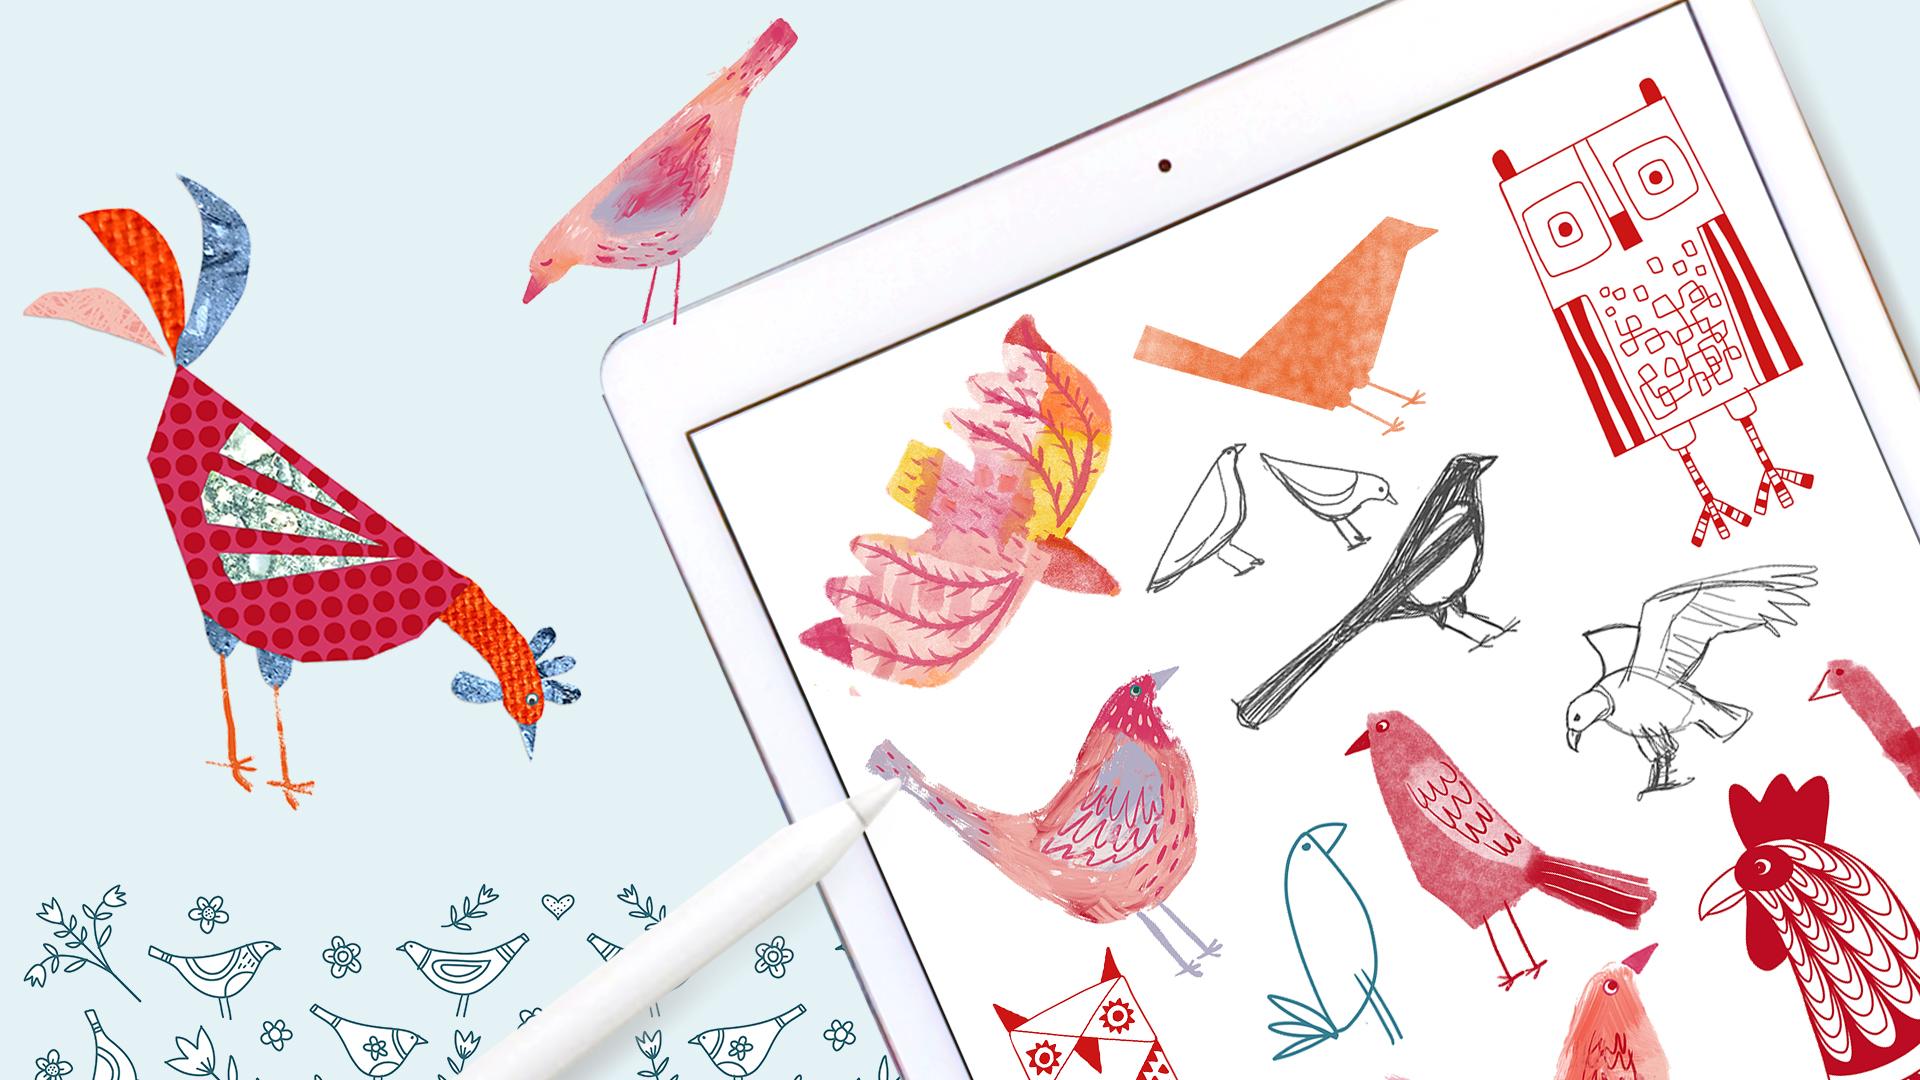
calming and meditative way to enjoy being in the moment. In this class, we'll
be using Procreate to make a digital sketchbook
on the theme of birds. There are 10 fun
bite-sized exercises which will jumpstart
your creativity, encourage you to experiment and explore different ways
of using Procreate, and help you build
a pressure-free, stress-busting
daily art practice. There'll be lots of
tips and tricks as always and suggestions on how to take your
sketches further. If you're brand
new to Procreate, you might like to take
my other class first, which is called iPad
Art: Create a Monster, An Introduction to Procreate. There's a link in the about
section of the class. Anyway, enough of that, I'm sure you're
keen to get going, so let's get started.
2. Setting Up: [MUSIC] Let's start by getting our sketch
books setup and ready. I'm in portrait and I'm going to start by pressing the
plus at the top right. Tap on the little file
symbol for a new canvas, choose whatever size
you prefer to work in. I'm going for 6,000
pixels square because that's the size which
works well for what I do, and I always work at 300 DPI. On this particular iPad, I can see that I will have
10 layers to work with, which is plenty for
most of the projects. This will vary depending
on your iPad model, so just use a size that
works well for you. Tap "Create" at the
top when you're done, my new canvas has
opened ready to go. I'll go back out
to the gallery by tapping on the top left corner. If I slide my finger left
across my new canvas, I can tap "Duplicate". I'm going to tap and hold the
second one and drag it on top of the first until it
turns blue and then release. This made me a little stack, so I'm going to
tap it to open it. In here, I can just carry on duplicating to make a whole
sketch book of pages. I'm going to start
with a few and I'll make more pages
as I go along. Working this way means that when you're in your
sketchbook stack, you'll be able to
see all your pages together as a complete
piece of art, and each page will have its own full count of
layers to work on. I'm going to tap on the top
left arrow to go back to the gallery and then I'll tap
on the stack to rename it. We are going to be using the same color palette
throughout the sketchbook. This doesn't mean you can't
change your mind if you decide you hate those colors
or want to add in some more. But doing it this way means
again that you don't have to make new color decisions
every single day, so you won't be able to use color choices to procrastinate. There are lots of ways of
making a color palette, do what works for you. Tap on the color chip
at the top right, I'm in the palettes view. Tap the plus at the
top and you have choices which are
create a new palette, this gives you an
empty palette to fill manually either by using one of the palette choices along the bottom in which
case you pick a color. Once it shows at the top, you can tap on a blank square in your palette to have
the color appear there. You can also bring in a
photo to pick manually from by going to the spanner or
wrench for the settings. Tap Add, Insert a Photo. Tap the one you want and then pull out the corners if you
need to make it bigger. Then you can press and hold for the color picker and then tap on an empty square
to add your color. If you tap and hold the swatch, you can delete it. The three dots menu
on the palette lets you Share, Duplicate, or Delete the whole palette, and you can rename it by tapping
on untitled on the left. The other ways of making
palettes are more automatic. New from camera
means that you can use your camera to
find a color palette. Here's my paint covered table, and there are two options
to toggle between. Visual means it's picking colors in front of
the palette grid. Alternatively you can use index which takes colors
from the whole screen. You can move around to get the best palette and
when you're done, tap the circle to take a picture which then magically
appears as a palette. New from file means you
could, for example, use one of your existing
artworks to have Procreate automatically
pick the colors from. Again your new palette just
appears there at the top. Lastly, new from
photos means you can pick from your camera roll and have the same thing happen. Use whichever method you like to create your color palette, and make sure that you have
some lights, some mid tones, some darks, some brights, and also some neutrals. I'll see you in
the next exercise where we're going to
be starting to sketch.
3. Sketch Birds From Nature: Open up your first
sketch book page and you can use any pen or
pencil you like for this. I use the Narinder Pencil
in the sketching section. Find copyright-free
reference photos or work from real birds, or photographs
that you've taken. Work from nature not for
other people's illustrations. Sketch a few different birds. Find some fat little
garden birds, some larger birds of prey, some seabirds, domestic birds, storks, owls, and so on. In other words, a variety
of different birds. This sketch is not
meant to be pretty. They're not meant to reflect
your personal style either. They're just working diagrams to get to know your
subject better. Make a lot of drawings. Some will be good and
some will be less good. Some you might develop
further and some you won't. Use small layers if
you run out of room. You can add written notes and color notes too if you want to. Start by looking at the
main shapes, the body, the head, the beak, the wings, the
legs, and the tail. Note how these
variants shape and proportion in different species. For example, a little
spiral will be very different from a seagull. Draw your birds in
different positions too. Look how the feathers lie on
the wings and on the body. What angles are the legs at? What shape of the feet? Draw any parts of the birds
which look particularly interesting and look at the
colors and patterns too. The main thing is that by
doing these initial sketches, you're getting a real
feeling for your subject. We're looking closely at
all the shapes and details. This will improve them
on your memory and make things really
flow in your artwork. When you finished, I'd really love you to
post your sketches in the project section of the class as your
first deliverable. It might feel scary to put
them out there, but be brave. Posting your sketches
and liking and encouraging others
makes it all more fun. It's great to have a bit of
a community feel going on. I always look at the projects
and I love seeing what you do. Enough of that. You should now have a page to two of really interesting birds which you can refer back to if you want to for the
rest of the project.
4. Birds From Scribbles: [MUSIC] This exercise is about looking at things
a little differently, which is always great
for creativity. We're going to be starting
with a scribble and finding a little flock of
birds hiding in there. I'm going to start with
a midturned color. I'm using the Procreate
pencil for this. Loosely scribble some
loops and circles. Don't try to control it. You can even do this
without looking or get someone else to scribble for you for a more random result. When you're done, go to the layers palette and tap on your layer to
bring up the menu. Choose alpha lock or you can use two fingers to swipe the
layer towards the right, which actually does
the same thing. Now, you can't draw anywhere on the layer which doesn't
already have marks, which makes it easier
to realize when you're accidentally drawing
on the wrong layer. Tap on the plus for a new
layer for the sketches. I'll choose a different color, something dark to show
up against the scribble. I'm going to the inking section and choose this studio pen, although it doesn't matter, use whichever pen you prefer. I've got my size on around 10. Let's try that. I want it thicker than the scribbled
lines to make it easy to see. That looks fine,
and it depends on your brush and your canvas size as to what works best here. Tap again on my brush to
bring up the settings. I'm going to tweak this
brush a little bit. The stabilization
section under streamline at the moment I've got
is around 40 percent. Streamline will smooth
out your strokes. If it's really high, it will change the
shape of your line. I'm going to put that
about halfway so it's smooth but not too weird. Stabilization is
fairly new when I've recorded this class and it's a bit different
to streamline. I'll put this at
about 50 percent too. You can see it drags the
lineup behind the pen. Reminds me a little bit of writing with a tube
of cake icing. I like it for drawing
really smooth curves, but maybe you'll hate it. Give it a try and
see what you think. I'll leave everything
else and I'll tap "Done". Now, I'm going to take a
moment to see if I can find some birds lurking
amongst the scribbles. This one really jumps out at me. It looks a lot like the
birds I usually draw. Let's give him some legs. You might like to
draw in some of the other lines too for detail. Feel free to add in or leave out anything you like,
you're in charge. I can see a chubby
little bird here. Then very a simple bird shape. Why not looking slightly
a bit realistic, but part of the fun is that
we all see different birds. Even if we were to start with
exactly the same scribble, we'd all find something
different. Here's another. Actually, he already
has a good tail. I feel like he
needs a crest too. The more you look the
more birds you find. This one looks
like a wing to me. I'm going to go a bit of
piece with the lines here. Now, I want to turn the scribble around so that I see
different birds. I'll go to the layers and tap the scribble layer to select it. Then I'll tap on the
transform arrow at the top. That'll select the whole letter. Then I'll tap, "Rotate
45 Degrees" twice. Go back and select
the drawing layer which deselects
the transform tab. You can either keep on
adding to this layer or you can hide it and add a
new layer if you prefer. Let's try a different shape. I don't want them
all same. A goose. I'll turn the
scribble layer again. I can see a chicken
in the corner, but I need to move one of the
other birds out of the way. I'll tap on the Selection
tool and choose freehand, then draw around that bird. Tap the transform arrow, then drag him somewhere else. Tap the brush tool to
deselect. Here's my hen. The tail's a bit short
but I've run out of room. Here's a stalk. Needs longer legs. Some wading bird. Maybe a swallow. I'll turn it again, and it's getting a bit
crowded on the canvas, so I'll start a new layer
and I'll hide the original. I can see a sideways one here. I'll turn him around in the same way as we
turned the scribble. [MUSIC] Let's see what I have. You can long press on the visibility box on a
layer to view it by itself. I hope you had fun
with this one. Please post your squib birdies in the project section too.
5. Loose Inky Birds: [MUSIC] In this exercise, we're going to use some
squishy painterly brushes to get a loose and smudgy look. The idea is to try different
ways of using the brushes. Also if you're like me
and tend to paint in a very controlled way or use
vectors a lot of the time, painting loosely is
a great way to get out of your comfort
zone and have fun. I'll show you the
brushes I'm using. If you make a quick dab on
your Canvas of each one, they'll show up in your
recent section at the top. That's a handy way to keep
them together temporarily. You can remove
unwanted brushes from your recent list if
you want to without deleting them by sliding them towards the left
and choosing clear. You can also pin brushes here
if you use them all time. In the inking section,
I'm using mercury, which is a lovely pressure sensitive, slightly
smudged line. I also like inka, which is much more textured, and tinderbox, which has
a finer smoother line but still has plenty of
liveliness and variation. As always, you can use any
brushes which work for you. Let's take a peek and here they all are in the
recent category. In the painting section, I'm using oil paint old
brush and dry brush. I'm going to slide that
testlet to the left and clear it because it's the
first layer in this one. It won't let me delete it, but clearing it does
the same thing. I'm going to start
with a mid tone and I'm using the oil paint, which of course I
could have also picked from the recent section. I'll start by laying
down a bird shape. It's a little bit choppy
so I'm going to long press the eraser to use the
current brush as an eraser. I'll just refine the
shape a little bit. Now I'll go to the layer
and I'll choose Alpha lock. I can see it's locked because the checkerboard background
is showing in the thumbnail. Now if I choose contrasting color and draw across my image, it only sticks to
the existing paint. It preserves that lovely
translucent painting texture. I'll undo that with
a two finger tap. I'm going to pick
a different color and use the same brush to layer it in a bit
and smoosh it about. I'm getting extra texture from this new application of paint. I'll add some more
paint to his tail to make a new layer and I'll use the
tinderbox to draw a beak. Take down the size for
his legs and put an eye. Birds have a dark
ring around the eyes. Obviously I'm not going
for a realistic look here. My birds always end up heading towards cute, but never mind. I'll pop in another layer
and add a bit of detail, keeping it loose and
keeping it messy. I'm going to use the
same brushes to add some smudgy texture by tapping the smudge tool
and go into recent. I'm using the dry brush and just lightly pressing over some
parts of the drawing. Keep it light and just
smudge a few areas. You can really overdo this. I'll do the same thing
on his legs too. That's bird 1 done. If you'd like, you can
make notes next to him to remind you of the brushes
and techniques you use, which is a really useful
thing to look back on. I'm going to group
these layers together. I've got one layer selected and I'm going to ever slightly slide the others towards the right so that
they turn light blue. Then I'll tap group. I can name the
group by tapping on the new group and then tap
again and choose rename. Let's start a new
layer for bird 2. This one is just
going to be ink, so use whichever you like. I'm using the tinderbox to draw in a really
simple bird shape and pop in a few loose details. It's a bit like using
a brush pen, I guess. I'm going to try the
old brush for smudging this time and on a very
small size setting. Just go very lightly over the lines to scuff
them up a bit. I'll make it bigger and
just dab over this bit. Try different sizes and
pressures as well as dabbing or stroking with the smudge brush just to see what
effects you get. I'm going to go back
to the dry brush for smudged ink look. Now I'm going to use
the same dry brush, but that's a brush instead
of a smudge to add some color and a teeny
bit of shadow under him. Moving onto bird 3, let's start with the inka. I'm drawing the bird outline and then coloring him
in roughly leaving gaps for the Canvas
to show through. Alpha lock the layer to
preserve that texture. It's time to add in some color. Using the oil paint, I'm going to smoosh it around. I love the way this
mixes up the textures. Now I'm going to add this
grayish blue and a deeper pink. I'm adding a new layer for his wing and I'll do that in the same way using
the inka brush. I'll Alpha lock the layer and pop in some color
with the oil paint. Now another layer
for the details, and I'm using the tinderbox. I like the contrast between the very rough painter
and the smoother ink. I'm back on the Alpha
locked wing layer and I'll ink in some feathers. On the lower layer,
I'm just adding a few marks back to the wing layer
and I'm smudging very lightly using
the dry brush. Because the layer is still
has the Alpha lock up, the smudges stay within
the paint confines. He's done, so I'm going
to group his layers too. For the fourth bird,
I'm using the mercury. I'll add a new layer
to draw the outline. There's less texture than
the others we've used, but it still has a pleasing, fuzzy edge to it. I'll grab the color
chip and I'll drag it into my bird to fill. You can see a faint
white line around the fill because I'm
using a textured brush. I'll undo that and try again but this time I'll
keep my pen on the iPad. At the top of the screen you can see the color drop threshold. If I move the pen
towards the right, it raises the threshold so that the white
edge disappears. When it looks okay, I'll lift the pen off. I'll Alpha lock that layer again and I'll use the dry
brush to paint some color, it's quite subtle, really. It's much too neat right now so I'm going to
take the Alpha lock off and I'm going to use the smudge tool with the dry brush to lightly
roughen up the edges. Then I'll tap and hold
the eraser to use the same brush to scrape
back into the paint. Then I'll add a bit more
smudge and I'm going to keep adding and removing
paint until it looks good. Then I'll Alpha lock
again and I could add more color or maybe I'll
just leave it for now. I'll add a new
layer and I'll use the oil paint for a wing shape. I'll Alpha lock and add some pink to this
very textured bit. I'm just loving how
those colors mix. A little bit of orange. I'll put some on that
base layer too, I think. Time for the top layer and I'll use the mercury taking down the size and slightly cheating with a closed
eye, but why not? It's a really easy way to cute eyes if you're less
confident with open ones. I'll draw in some marks and have a quick
smudge with the inka. I'm just dabbing it on. I think he's done so I'll
group the layers together. I'll add a new layer. Oops, it looks like I've
reached the layer limit. If you think you might need
to edit the layers later, you can either just start
a new Canvas or you can duplicate this one from the gallery and carry
on working on one copy. I'm going to tap on the bird
1 group and choose flatten. Now I've got enough room
to add a new layer. For this bird, I'm going to
do it all on this layer, more like real life painting. You can go in the middle here. I'm using the oil
paint for loose shape. I like using these
brushes big because it stops you being too tight
and precious with it. I'm not Alpha locking
this time after all, Alpha lock doesn't exist
in a paper sketchbook. I'll blob in a bit more paint, this brush is huge. Now, his wing time still on
that same unlocked layer. I'm using the mercury
for the detail. Maybe we should do a
more realistic eye for this little chap. I need a lighter color for a tiny dot to give it a
little shine for his eye, which always makes it look more realistic and adding
some feathers. I think we are done. You can continue to explore different ways of
combining the layers, the brushes, the erasers,
and the smudges. It's a great way to get
know a small flat brushes and to push the boundaries of
what you can do with them. Please post your
painty inky birds in the project section.
6. Birds and Symmetry: This one is very relaxing. We're going to play with
this symmetry feature in Procreate to make some
folk-style birds. I'm just going to use
simple linework for this, but of course, you could do
a version in full color. Let's start by going into the spanner wrench settings menu and in the canvas section, turn on the Drawing Guide, then tap Edit Drawing Guide, tap on Symmetry then Options. These are all fun to try. But for now, I'm going
with the radial with assisted drawing toggled
on top down at the top. I'm going for a really
smooth line outlook. I don't want the fine
line, the pen effect. I'm going to use
the monoline pen in the calligraphy section. So I want to draw in one
segment here will be reflected horizontally,
vertically and diagonally. Then you can see how
smooth this pen is. I'm going for a
bit of a folk art look so I'm going to
add in some flowers. Where I'm drawing along
the lines I can get a better finish
by holding my pen down at the end of the stroke so that Procreate
snaps it straight. Then at the top here there's
the option to edit shape. You can move it a little to make it look better if you want to. I'm going to continue
adding detail here. It's just like doodling really, but the symmetry makes
it look really fancy. [MUSIC] Using the symmetry settings like this means you end
up with a tile, which should make a really
good repeating pattern. You could do all sorts
of versions of this. Try the different
symmetry settings and there's a rotational
symmetry option too. You could try more
realistic style or even more painterly. So many possibilities. If you enjoyed this exercise
and want to find out more about drawing
assist features, I'm go into to a lot
of detail in my class, iPad Art: Create Line Art and Coloring
Pages in Procreate. There's a link in
the about section. Please post your
symmetrical bird designs in the project section.
7. Bird Collage: [MUSIC] In this exercise, we're going to use digital
collage techniques to make some chickens. Feel free to use other
birds if you prefer. Start by looking
around your house, garden or local area for some cool textures
to photograph. This is the fabric of my city, the concrete on my driveway, and the side of my watering cap. Three is fine for this project. You can adjust the photos in your favorite editor if you'd
like before you use them. I'm going to need more
layers for this one, I'll start with a
smaller canvas. We need to bring the
photos into Procreate by tapping on the spanner or
wrench icon for the settings, and choose Add, Insert a photo. I did this a bit later, but you might like to resize
your texture to cover the canvas by pulling the
corner nodes out at this point. Don't normally like to
make things bigger, as they lose quality, but this is just a sketchbook
piece so it won't matter. I'll do the same again for
my other two textures. Each one automatically
imports on its own layer. Let's look at my color palette and just see how these fit in. This orange works well, which is actually one of
the reasons I used it. This concrete
doesn't really work. It's not a good
color for chickens. I'm going to choose
this green and drag the color circle onto
the image to fill it. But I'm leaving my pen on the
iPad surface so that I can slide left or right to change the fill threshold
until it works. This last one is
quite blue as it is, and I think it looks fine, but I'll show you another easy
way to alter your colors. Tap on the Adjustments
at the top and choose Hue,
Saturation, Brightness. Play with these until you get something you're happy with. I'd like two more
collage papers, so let's make those
using Procreate brushes. I'm going to add a new layer. I've got orange, green, and blue so far. I think a red and a pale
pink could be good. There would be nice
chickeny colors. For the red one maybe
I'll make it red on pink. I'll choose the pink first, tap on the Layer and choose Fill layer to flood
it with pink. Then I'll pick the
darker red and I'm going to find
a brush to use. Anything will work here, whether you'd rather
choose something really painty or a more graphic
brush, it's your choice. I'm going to try their decimals
from the texture section, which will give me
a polka dot effect. That's cool. One more layer
and I'll fill it again. Then I'm going to use
the polygons brush in the abstract section. If I hold my pen down on the little visibility
squared in the layers, it will only show
us that layer so we can see each of the
papers in turn. Do the same again to make all the original layers visible. I'm going to bring in
my chicken sketches. Although you can work for
your hand if you prefer. Tap the spanner settings and
insert a photo as before. Drag the corner nodes to resize and reposition
where you want her. I'm going to flip
this one too using the Flip Horizontal at
the bottom of the screen. I doodled this on
some scrappy paper while I was on the phone to
the car insurance people, so they're not at all fancy. I'm going to drag those hands up to the top of
the layer stack. This first one, looks too small. I'll tap on the transform arrow and drag the corners to resize. Then tap the arrow
again when I'm done. I'm going to merge those
two sketch layers by tapping on the top layer
and choosing Merge Down. Not sure why that hit my layers, but no matter, I'll make
a new layer for later. I wanted to start with
the chickens body. Tap on the Selection tool
and choose Freehand. With this tool, you can either
draw a freehand or you can tap for a straight line
from one point to the next, which gives you a
nice collage effect. If it goes wrong, you can use the two finger tap to
undo that last bit. You don't have to
keep your pen on the canvas the whole time. I'm back at the start point. You can't see it very well here, but the chickens body shape
is selected and see-through. The rest of the canvas has a diagonal stripe
pattern over it to indicate that
it isn't selected. Now I'll tap on the layer I want and then swipe downwards on the canvas with three fingers to bring up the Copy
and Paste menu. Then I'll tap on Cut and Paste. It always pastes above
the selected layer, so I'm going to drag
it up above my sketch. Let's do this again
for the other chicken. I'm using the Freehand selection finishing where I started, tap on the layer I want to use, three fingers swipe
to cut and paste. Of course you could copy
and paste if you prefer, and don't want to chop
bits out of your papers. Keep your shapes a bit wonky. Holding pen further back
helps to keep it looser. [MUSIC] Nearly done. I'll switch
off the sketch and the paper layers and
add in a bit of detail. Let's find something
from the inking section. Maybe the inker with a bit of texture to
draw in the legs, and now a more solid
pen for the eyes. This one happens to have a
circle in the perfect place. That's pretty much done, but adding a tiny
bit of shadow to the collage pieces makes
them look a bit more 3D. It takes a bit longer. I'll show you how to do it if you want to. Start with this orange
chicken's body. Select the layer, slide it towards the left and duplicate. Then select the lower layer, tap on it again,
tap on Alpha Lock. Choose a mid gray
color for the shadow, which I happen to have selected already from drawing the eyes. Tap on the layer again
and choose Fill Layer and you can see it's
now the shadow color. Then tap again and take
off the Alpha Lock, otherwise they won't be able
to add any extra pixels. Tap the Adjustments
wand and choose the Gaussian don't know how to pronounce that,
the Gaussian Blur. It says at the top
slide to adjust. I'm going to slide just a little bit to give
it some shadow. That's made the
underlayer a bit fuzzy. It'll look more realistic if we move it a little
bit so that it looks more like a shadow where the light is coming
from one direction. I'm going to assume the light is coming from the top right. To do this tap on
the transform arrow, and then just tap three or four times in
direction you want the shadow to shift and then tap the
arrow again to deselect. It's very solid looking, so I'm just going to tap on
the N on that layer and slide the Opacity down to about halfway or whatever
looks good to you. Then I'm going to merge
the layer with its shadow. Obviously don't do this
if you have plenty of layers and you might
want to change it later. I'll just do one more here
with you to just to recap. Select the layer you
want, duplicate it, tap the lowest layer
and Alpha Lock, use Fill Layer, then remove the Alpha Lock. Use the Gaussian Blur, transform and tap three times in the direction that
you want the shadow to go. Lower the Opacity, then merge the two layers. I won't make you watch me do every single layer because
it's a little bit tedious. Back in a moe. Here are
my finished chickens. There are loads of
possibilities with this. For example, you can paint
your own real papers to use, and that means you can combine real art materials with
your digital collage. You could use writing
as collage paper, either handwritten or typed, it would be quite
fun to use words relating to chickens,
for example. You could try adding more ink or paint the details of
your finished collage, I'm sure you can think
of some more ideas too. Don't forget to post your
collage in the project section.
8. Bird Stamp Brush: [MUSIC] In this exercise, we're going to make
a bird stamp brush. Use an opaque brush and any bright color to
draw a bird shape. I'm going to use the Ink Bleed because I like the
textured edge. I've left my pen on the screen a little bit
longer than normal, and Procreate has turned
them into a poly-line shape, which I actually like. If your bird doesn't
work as a poly-line, it doesn't matter at all. Any bird shape is fine, and you can undo the poly-line with a two-finger tap as usual. I'm just going to modify
him a little and add his beak and legs and
these little bloomers, I'm not really sure
what they're called. Drop in the color
to fill the shape, adjusting the fill threshold
to avoid white edges. Then make a new layer and select pure black and
a textured brush. I'm using the Quoll brush
in the Artistic section because it has a
really nice texture and it's also translucent. Cover up your bird
with black texture. Now we need to fill the bird with white so it
wouldn't show through. In the Color Picker, choose pure white, tap the bird layer to select it and drag the color over
to fill the shape. Even though you can't see it, here it is in layer thumbnail. Tap on the texture layer
and choose Clipping Mask. Now the texture only shows where there are white pixels
on the under layer. Go to the Spanner settings and in the Add section
choose "Copy canvas". Now go to the Brush Library, and in this section, you
want your brush to live, tap "Plus" for a new brush. Go to the Shape and tap "Edit", "Import", "Paste", and there's our bird. Tap on him with two
fingers to invert because that's how
Procreate brushes work, and then tap "Done", tap the "Stroke path"
and take the spacing up, which will prevent you
accidentally stamping more than once,
making it blurry. The "Apple pencil"
section change the pressure opacity to none if you want each stamp
to be equally opaque, or you can leave
it if you prefer some variation depending
on how hard you press. Go to "Properties" and
under Brush behavior, take the max size all the way
up to max and tap "Done". Hide the original layers and
add a new one to draw on. Pick a color and
try out your stamp. You can take this
further by trying other brush textures when making your stamp for
different effects. You could make a
few different birds stamp brushes to use together. You can add pen or paint
details on top of your stamps. If you'd like to know more
about making brushes, do have a look at my class, iPad art making and using watercolor brushes in Procreate. Don't forget to pop
your stamp bird design into the project section too.
9. Line Art Doodle Birds: [MUSIC] In this exercise, we're going to use line art and I'm going to base
this on the rooster. Of course, as always, you can choose your own bird. This one is very relaxing and meditative once you have
your initial shape drawn. Mine did take quite a long time, but yours can be as simple
or as complex as you like. I'm going to start by
drawing the bird outline and then we're going to fill it
in with patterns and doodles. You can use black
for your lines. I decided to use red because it's a bit more
rooster-ish, I think. I'm using the monoline brush in the calligraphy section
because of its smoothness, which makes it beautiful
for line work. At this point, you can bring in a sketch to work on
top if you prefer. I'm just going to
go straight in. His body is like an
angled semicircle. Then I'll pop in his head, which is much thicker
towards the neck. He's got a magnificent tail. This is where his wings will be. He needs his comb and whatever this
wobbly chin thing is, maybe is it a wattle? Then here's chunky little legs. This is a bit rough, but
I can refine it with the eraser and get rid of
any bits I don't want. Or, of course, I
could just draw over the top and use
this like a sketch. I'm not being too precious. But, of course, if it's too messy, it's
going to annoy me. He needs his little
chicken pantaloons. I do need to look up some
chicken anatomy, don't I? If you're a chickenologist, please forgive me
for my ignorance. I'll pop in his eye, and make I'll his
beak a better shape. Then just a little bit
of tidying up to do. I'll make a new layer
to work on for now, and I'll alpha lock
the original layer so that I don't
accidentally draw over it. Using this extra layer
makes any erasing easier to do without
affecting your outline. Now, it's just a
case of filling in different areas with
patterns and doodles. You can divide some areas into smaller areas where
it makes sense. You could use feather shapes and patterns or just
different marks, dots, circles, geometric
patterns, anything you can think of really,
combine marks together. You could also fill him with
flowers or with leaf shapes. Think about the
main shape you're filling in and whether
you want your pattern to relate to the direction
and the contours or not. In some places, I think he would look good
with some solid areas. I'm coloring these bits in, but there's an easier
way to do this. I need to make sure I've
erased any bits that I want to around the
outline layer. I must erase layer
together before filling. Then I'll take the alpha lock
off and drop in some color. You can either
just keep dropping the color in or else you can tap at the top where it says continue filling with re-color, then you get this
little crosshair. Wherever the crosshair is, is where it'll fill. If it's not in the right place, you can just move it over, and then you just need to tap anywhere that you want
to fill with that color. You can use whichever method you're going to find easiest. You could if you wanted to
then add some white lines over these red areas too,
so many possibilities. If you'd like to know more
about line art in Procreate, you might enjoy my class, iPad art create line art and
coloring pages in Procreate. Again, the link is in
the about section. Add your line art to
the project section.
10. Abstract Birds with Clipping Masks: [MUSIC] In this exercise, we're going to paint an abstract background and
then use it to make birds. First of all, let's look
at the color palettes because we're going to be using a lot of colors in this one. In the palettes view at the top, there's a choice of
compact or cards. Cards looks really pretty, but it takes up more room, so I'm going to
stick to compact. I'm just going to drag the palette onto the
screen to keep it in view. If you were to choose
cards now you'd have to scroll a long way down
to find all your colors. I want a nice texture and
I'd like the colors to show through each other
for a translucent look, so maybe something like the coal brush in the
artistic section I think. I'm going to cover the canvas in paint using different
shades of pinks, reds, oranges, and yellows to make the
various shapes and marks. Colors layer together really
nicely with this brush. The harder you press, the
more opaque the paint is. I want to cover up all
the whites and I want to break up some of the
bigger areas of color too. [MUSIC] That's not the most gorgeous abstract painting
I've ever seen, but it's just fine for this. I'm going to duplicate
this layer twice. Because it's translucent, it looks brighter every time as the layers below
show through. I didn't do this at the time, but I did realize later I should've made one
more layer here, so do make four and
just switch off the visibility of the lowest
one and ignore it for now. I'm going to switch
off the visibility of all the layers and then I'll
make a new layer to work on. I want to draw a bird
shape on this layer and a textured outline
would be nice, something like the Pandani
in the inking section. Draw a bird's shape and strike the color chip over to fill it adjusting the threshold, if needed, by
dragging the pencil left or right before
lifting it off the screen. You can see that the fill is solid and opaque
compared to the outline. I'll just draw over the
junction where the film meets the outline to make it
less of a stark change. This wouldn't happen with
the more opaque brush, but I really love
these scruffy edges. Now I want the bird
to be white so that the red one shows through
the translucent paint layer. Tap on the layer and
turn on the Alpha Lock. In the color palette, go to the classic color
picker square and drag the picker all the way to the top left for pure white. Tap on the layer again
and choose "Fill layer". The bird's vanished against
the white background, but you can see him in
the layer thumbnail. I need three birds, so I'm going to
slide the layer to the left and tap
"Duplicate" and repeat. Drag each bird layer
under a texture layer, leaving your lowest
texture layer hidden, the one that I wish I had
but right now I don't. But you have because you're doing what I say and
not what I'm doing. Turn off the visibility of all the layers
except the top two. Now select the top texture
layer and tap on it, and then choose "Clipping Mask". The thumbnail shifts slightly to the right and a little arrow appears to the
left of it to show it's clipped to the layer below. Even though the rest of the
text just still exists, it only shows where there are pixels on the layer below
it, the bird layer. I can leave it exactly as
it is or else I can move the bird around to
find an area that I like by selecting
the bird layer, tapping the transform arrow, and then I can move him around. When I find a bit I like, I can tap the arrow again
to deselect or actually tapping on any of the tools in the top toolbar
will also deselect. I'm going to group the
bird and paint layer together by swiping
the texture layer slightly to the
right until it turns pale blue, and choosing Group. I can collapse the
group by tapping on the arrow to the right of
where it says New group. Switch off the visibility
of that bird and switch on the next
paint layer and bird. Then repeat exactly
what we did again. Select the paint layer, tap on the layer to
make a clipping mask, select the bird layer, tap on transform arrow, and move the bird
to a good place. You can use the green handle
to rotate the bird too. The yellow one rotates
the selection, so don't use that
for this project. Don't let him go
off the edge though because that bit will
get chopped off. Group those two and move on to the next texture layer and bird and repeat all the steps again. Now we have three groups plus you have your extra paint
layer at the bottom. Make all the groups visible. I'm going to select this
middle group and move it because the whole group selected the paint layer will move
with the bird this time. I'm going to move
each bird into place. We could leave it at that or
we can do some other things. Let's work on this top group. Tap the arrow to expand it
to show the group layers. You can modify your
paint layer by adding more paint
or marks to it, either on the
existing paint layer or on a new one just above it. You can use the same brush or you can try a different one. I'm going to add some white
ink details on a new layer just above the paint layer and still keep it in the group. I'm going to clip it to
the bird layer as well. If you make a stack of
layers and clip them all, they all clip to the layer
below the lowest one. I'm going to use the Pandani
brush again for this because it's slightly translucent
and pressure sensitive. It looks a bit like you're using gouache or inks
used with a brush. [MUSIC] You could try doing this with a different color too
for a different look. Something else you could try involves that other paint layer, which I was naughty and
failed to make earlier. I've made another one and I'm going to use it to put some
details in the background. I need another layer, but I've reached my limit of 10, so I need to flatten
one of my groups. As it's a sketchbook,
it won't matter, but if you want to be
able to edit later, you could go out
into the gallery and duplicate the whole canvas
and just work on one of them. To flatten the group
either with it showing the component
layers or not, just tap on the group
and choose "Flatten". If your layers are showing, you get extra options. I need to add a new layer and drag it to
the bottom of the stack. Make the paint layer
visible and make a clipping mask to clip it to
the empty layer beneath it, which basically makes it invisible until we draw
on that lowest layer. I'm going to use the white and the Pandani brush to
add in some marks. Everything I draw now we will pick up what's on
that paint layer. I'll keep it simple, but you can make this as detailed and interesting
as you like. It'd be fun if you put
all doodles in there. There are so many ways
that you can take this and I can't wait
to see what you do. As always, please post
your beautiful birds or even your less than perfect
birds in the project section.
11. Birds From Blobs: [MUSIC] This is another
exercise in imagination. We're going to put down
some random dabs of paint, and we can discover
birds in them. I want a big messy brush, so I'm using the pencil brush
in the artistic section. The lots of other brushes
would work just as well. I'm only using one
color for this, but again, feel free to
use more if you prefer. Start by adding a few messy
marks and dabs to the canvas. If you find yourself
being too controlled, either ask someone else to make the marks or you could
make them and then turn your canvas upside down to give you a more random result. Add a new layer to work on. I'm going to use
the dry ink from the inking section
for the detail. When you look at your marks
do you see if you can see any shapes there
which would work as a bird or even
as part of one. We're just using these
blobs as a starter. You might find it
useful to look back at your original bird
sketches to help you. I'll start with the bird, which is most obvious to me. I'm drawing in the beak and his eye with a dot in
white for the eye shine. With pencil I'm adding a tail. I'll use white to
paint in his wings. I'll define his head
and then I'll pop in some ink legs and a few details. Just keep it loose and fun. I'm going to be shape his tummy because he's looking
a bit too skinny. I'll put each burden
at certain layer. I think I'm going to
alter this one a bit. It's not cheating because
there are no rules. I'm working between my
two brushes and the red versus the white and not back and add in color and details. To make life easier,
you can toggle between your two latest colors by
long pressing color chip. Also don't forget to use the recent section
for your brushes. He's definitely looking a
bit more crow like now. He just needs some cool blue and a bit more
color on his wings. Let's move on to this one. I think he looks a
bit more comical, like maybe a parrot
or a budget bigger. Birds are getting
less realistic. This one looks like
a goose to me. It's the angle really. Give him a goose shape
beak and some sturdy legs. I have to admit I'm not
hugely inspired by this one. I'm going to go and
look at my sketches to find something that's
a similar angle. Any of these ones that
I'm circling would work. I think I'm going to
aim for a seagull. So I'm going to chop
a bit off just to get the shape to get you started. Do that by just knocking
it back in white. You need a typical
seagull beak shape, it's a little bit
curved at the end. I'm going to just mix things up a bit and give him orange legs. Tail needs a tail. I think his beak
can be orange too. This one's a little bit
more obvious to me. I'm just going to
shave a little bit off the edge here to
give him a tummy. I'm just knocking that
back with the white. Then just pop in some
details. Little beak. Can you tell I love
black birds and crows? Then I'll just finish him off. Not in the sinister way. This is a simple exercise, but it's again about using your imagination and about
seeing things differently. Don't forget to add your
blobby birds to your project.
12. Birds Using Shapes: [MUSIC] For this page, we're going to be using
simple shapes to make birds. Owls are great for this
and they're fun to draw. I'm using the monoline pen in the calligraphy section and
I'm going to draw it in red. No reason, just feel like it. I'm going to start by using ovals and circles to
draw the first owl. You can do this freehand. But if you draw an oval
which is really wonky, you can hold your pen
down at the end and the Edit Shape option comes
up at the top of the screen. Tap on it and you can
change the shape, you can move it, rotate
it, and resize it. I need to leave enough room on this page for my other owls, so I'll just tweak it a bit
while keeping him quite fat and I'll pop them up here. When you tap away you
commit the shape. I'm doing the same again
for circles for his eyes. Because I drew a shape which was almost round rather
than an ellipse, this time the Edit
Shape has the option of making it into
a perfect circle. Let's draw the other
eye and a beak, which looks like a funny nose. I'll draw in the rest of the
eyes and fill in the pupils. I mean [inaudible]
that sounded funny, he's only got two
eyes obviously. He looks absolutely shocked. I'm going to do some
ovals for his wings, and then I'll use
the same brush in a bigger size to raise the
lines under the wings. He needs his little owl bloomers and needs
some ear tufts. The legs are definitely more challenging to do with ovals. Now, I'm going to fill in his front with some
oval feather shapes. You can use any pattern
which involves round shapes. I want to do some freehand
loopy scribbles on his wings. Probably the simplest
thing to do here is to drop white into the
wings and fill them. Then put the Alpha lock on with a quick slide to the
right on the layer, so that way it can only draw on the existing red
and white areas. Then when I draw in
the loops in red, they won't go into
the unfilled areas. Now, I'll take the Alpha lock off so that I won't
forget later. His eyes are
definitely too scary, so I'm going to use the S-shaped selection
tool at the top. With this on freehand, I'm going to draw around
the first eye and then tap the transform arrow and drag in the corners to make
the eye a bit smaller. I'll repeat this
for the other eye. Time for a rectangular owl. I'm going to use the same
brush on a new layer, just one layer per owl. I'm drawing a rough
rectangle and holding my pen down at the end for
a rough rectangular shape. I don't want it too
perfect, so this will do. I'm adding a long
rectangle for the beak, and some big square eyes. Let's move this one over using the selection tool
like we did before. Square eyes now, but I think I'll give
him round pupils. Now, some ear tufts and
some squarish wings, and then pop in some legs, and it's time to
add the details. This beak looks too long, so let's alter that. Maybe a squarish
scribble this time. This looks very retro
1970s, I like him. One more layer, and this
time we can use triangles. I think will start
with his eyes. I'm going to add circles, because I don't want
them to look like a complete weirdo with
terrifying triangle pupils. Triangles are perfect for his beak and his
little owls ears. I haven't actually
left enough room, so I'm going to use
the transform arrow and I'm going to move him up. Time for his wings
and then his legs. Some triangular details,
whatever you like, just keep it pointy. We have three owls and I'm just going to
tweak them a little to finish off and fill some of
the shapes with solid color. You could take this further with other shapes and other birds, or try adding color. Now you've finished your
tenth sketch book page, post your owls to the project section [MUSIC].
13. Final Thoughts: I hope you've enjoyed this sketchbook project
as much as I have. We've tried all
different ways of drawing birds and
of using Procreate. We've used plenty of
different methods of finding ideas and inspiration. I hope you'll continue to find a few minutes every
day to play and explore and see where your sketchbook
adventure takes you. It's always time well spent. I'm so excited to
see your projects. I do look at all of them, and if you'd like some
feedback, just ask. Please also feel free to
post on Instagram with the #nicsquirrellskillshare
for a chance to be featured in my
Instagram stories. Follow me here on
Skillshare to be kept up to date with new classes
and discussions. I like your sketching
and bye for now.
 Nic Squirrell, Artist and illustrator