Procreate Selection Tool Made Easy: Select, Move, Copy & Color Faster | Iva Mikles | Skillshare

Playback Speed


1.0x


  • 0.5x
  • 0.75x
  • 1x (Normal)
  • 1.25x
  • 1.5x
  • 1.75x
  • 2x

Procreate Selection Tool Made Easy: Select, Move, Copy & Color Faster

teacher avatar Iva Mikles, Illustrator | Top Teacher | Art Side of Life

Watch this class and thousands more

Get unlimited access to every class
Taught by industry leaders & working professionals
Topics include illustration, design, photography, and more

Watch this class and thousands more

Get unlimited access to every class
Taught by industry leaders & working professionals
Topics include illustration, design, photography, and more

Lessons in This Class

    • 1.

      Introduction

      0:48

    • 2.

      Moving Multiple Layers Without Cropping

      1:04

    • 3.

      Freehand vs. Polygonal Selections

      1:14

    • 4.

      Quick Layer Selection Shortcut

      1:15

    • 5.

      Selecting Multiple Objects at Once

      0:35

    • 6.

      Adding, Removing & Saving Selections

      1:27

    • 7.

      Cut, Copy & Paste Shortcuts

      1:06

    • 8.

      Copying Objects Across Multiple Layers

      1:12

    • 9.

      Using Automatic Selection

      1:14

    • 10.

      Quick Color Blocking with the Lasso Tool

      2:38

    • 11.

      Customizing Selection Mask Visibility

      1:02

    • 12.

      Outro

      0:46

  • --
  • Beginner level
  • Intermediate level
  • Advanced level
  • All levels

Community Generated

The level is determined by a majority opinion of students who have reviewed this class. The teacher's recommendation is shown until at least 5 student responses are collected.

48

Students

1

Project

About This Class

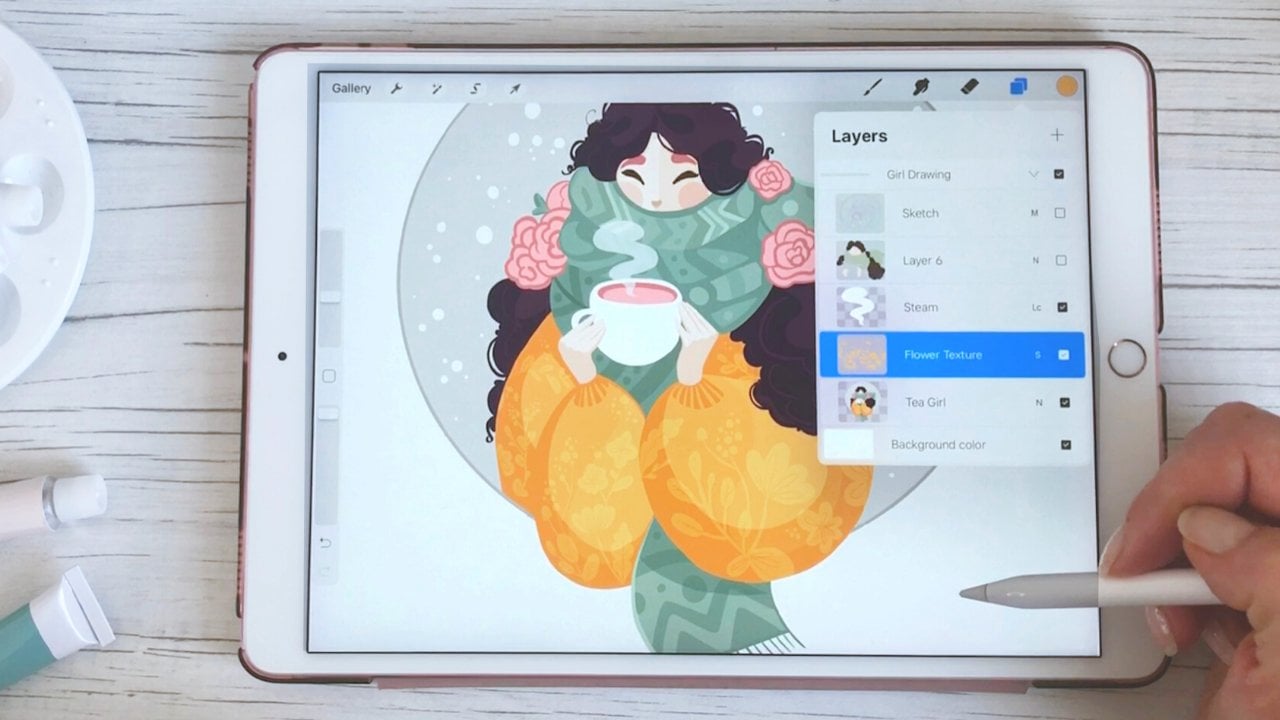
Learn how to make the most of the Procreate Selection Tool with practical tips, shortcuts, and gestures that will help you speed up your creative process and make editing your artwork much easier!

In this class, I'll walk you through the different selection modes and show you how I use them in my everyday illustration workflow. You'll learn how to select and move individual objects across multiple layers, duplicate elements, save and reload selections, and organize your artwork without accidentally affecting other parts of your illustration.

We'll also explore some of my favorite creative techniques, including using the Freehand Selection (Lasso) Tool to quickly block in colors, create clean shapes, soften edges, and experiment with different compositions.

Along the way, I'll share useful Procreate gestures and shortcuts that aren't always obvious, but can save you plenty of time when drawing and painting.

By the end of this class, you'll know how to:

  • Use Freehand, Automatic, Rectangle, and Ellipse selection modes.

  • Select, move, duplicate, and separate objects across layers.

  • Add to, remove from, invert, save, and reload selections.

  • Use Color Fill and Feather to create shapes and block in colors quickly.

  • Copy and paste elements without accidentally including the background.

  • Customize selection visibility and use shortcuts to speed up your workflow.

Whether you're just getting started with Procreate or have been using it for a while, you'll discover practical ways to work more efficiently and have more flexibility when creating your illustrations.

Meet Your Teacher

Teacher Profile Image

Iva Mikles

Illustrator | Top Teacher | Art Side of Life

Top Teacher

I am super happy that you are here! :)

I am Iva (rhymes with "viva"), and I'm a full-time illustrator, teacher, and nature enthusiast.

I love illustration in all its forms and my goal is to bring you to a world full of happiness, color, and wonder in the form of fun and helpful classes.

I'd love for you to have fun while learning, so I always aim for a fun, positive, actionable, and inspiring creative experience with all my classes.

I love when you share you had many "AHA" moments, learned valuable time-saving tips, gained confidence in your skills, and that it is much easier for you to illustrate what you imagine and you are very proud of your finished work.

I want to help you on your art journey with what I learned along the way by ... See full profile

Level: All Levels

Class Ratings

Expectations Met?
    Exceeded!
  • 0%
  • Yes
  • 0%
  • Somewhat
  • 0%
  • Not really
  • 0%

Why Join Skillshare?

Take award-winning Skillshare Original Classes

Each class has short lessons, hands-on projects

Your membership supports Skillshare teachers

Learn From Anywhere

Take classes on the go with the Skillshare app. Stream or download to watch on the plane, the subway, or wherever you learn best.

Transcripts

1. Introduction: Hello, everyone, and welcome to a new class. In this class, we will talk about Selection tool, and I will share with you various tips, gestures and shortcuts to help you work faster and make editing easier. I will show you how to move and copy objects, work with multiple layers, and new selections to quickly add colors and shapes to your illustrations. For your class project, create a simple illustration using some of these techniques to practice what you have learned and shared it in the project section. I also prepared the free che cheat with all the tips and shortcuts along with my free procreate brush set. And you can find the link in the description. Alright, let's start. 2. Moving Multiple Layers Without Cropping: Selections play a crucial role in Procreate, but not all of them are found in the selection menu, which is represented by the squiggly a icon, and I'm going to show you some cool tricks. But first, let's go over how this document is structured. So when you open the layers menu, I have some fix in the foreground, fix and leaves on one layer, fix in the background details and some splatters. You might already know when you select all the layers by swiping to the right and you go to the move tool, you can move everything together, which is on these layers. Don't forget when you move the layers outside of the canvas and you exit the move tool. Now when you go back, everything is cropped. So be aware of this feature. If you are not yet, I will go back, and don't worry, it will not get cropped if you are still moving and you don't exit the move tool. 3. Freehand vs. Polygonal Selections: What if you only want to move a specific fig and its details around? First, make sure you select the correct layers that you want to move. So I want to move this fig and this rainbow. So that one is on this layer and on this layer. Alright, I will select these two layers, and then I will go to the Selection tool. Now, I will zoom in a little bit so you can see it better. And there are two ways how you can use the freehand selection tool from this menu. First option is just to draw this loose squiggly line around the area that you want to select, to confirm and close the selection, tap on this gray dot. Now I will go back and the other way is to tap multiple times around the area that you want to select. And depending on your design, this polygonal selection with straight lines between each tap is often much faster method to select the object. Once you made your selection, switch to the move tool, and now you can move your objects around the canvas freely. While everything else stays in place. 4. Quick Layer Selection Shortcut: Now, let's exit the selection here. And let's say I want to add more of these white dots on this fig. So there is a quick way to do that. So I will find the layer with this fig, which is this one, and then you can either tap on the layer and choose Select. Or there is also a fun shortcut, and there is tapping and holding on the layer with two fingers, and that will create the selection with everything, what you have on that layer. Now I can take a brush, and I can easily paint only within the shape because only the area of the fig is selected. It will not allow me to draw outside of the object. And if you don't see your selection tool anymore, you can tap and hold, and the pop up menu will show again. Right now, we were drawing within the selection, but you can also invert the selection, and now I can draw behind the fig if I want to add maybe a different leaf or something outside of the selected area and the fig stays unaffected. 5. Selecting Multiple Objects at Once: So here, what I want to show you is that you can select multiple areas at once. For example, if I want to select this one and this FIC together, I need to make sure that I have the correct layer selected. Then I can go to Selection Tool and I can draw a selection around the fix that I want to use by just drawing around the selected area and then always closing the selection. Now, if I will go to the move tool, I can move only these two objects. 6. Adding, Removing & Saving Selections: If I tap and hold on the Selection tool, the menu is reloaded. And as you can see here, the option is always predefined. That means that every time I draw a new selection, it will add to my selection. But I can also remove from the selection. As I showed you, right now, we have these two selected. So if I tap on remove, I can draw around this fig again. And it's deselected, that means only this one is going to move when we use the move tool. And as I showed you, if I exit my selection, I can always reload the selection by tapping and holding, and it will show me the last selection that I worked with. What is also great is when you go back to the gallery, and then open the same file again and tap and hold on the selection. The same selection will load again, so you'll not lose the selection. Other way how you can save the selection is by tapping on save and load. And here, by tapping the plus sign, you can save the selection. Maybe you do more selections. Every time you go back to save and load, you can go and load the selection that you saved before. 7. Cut, Copy & Paste Shortcuts: Now, if I go back to the layers, you can see that I have more of these figs on one layer. What you can also do is to use the selection tool to cut the objects by swiping down, and then you can cut, and it will remove the object from your layers and from your file. I will go back and I want to show you another way how I often use Selection tool. And that is to duplicate or copy the object. So you can duplicate the object, and now with the move tool, you have another fig which you can use somewhere in your design. So you can copy the object very quickly and easily. What I also like to do is to swipe down again, to activate this menu, and the faster way is to use cut and paste. And this will add this part of the design on its own separate layer. And that way, you can move the objects much faster and easier and organize your layers even better. 8. Copying Objects Across Multiple Layers: What if I want to select only this leaf and this fig? Now, by selecting these two layers, so I will draw the selection there. And here I want to show you another useful function, which is copy all, and this copies everything visible within the selected area across all the layer. So now if I swipe down, I can also move this menu if it is in the way. And if I select copy all, I then paste it on a new layer. But now when I want to move it, it's also moving with the background. So I don't want that. In order to avoid it, I need to have the selection without the background activated. So after I deactivated the background layers, I can now swipe down. I can copy all, which will copy everything on the selected layers. Now I can create a new layer and I can paste it on the new layer. And now I can move the copy freely, and it's also separated on a different layer. 9. Using Automatic Selection: There is also Automatic Selection mode here on the left side of the menu, but I don't use it that often because it's less precise than I would like, and it works by tapping and dragging to the right and Procreate selects the area based on the color similarity. A selection threshold bar will appear on the top of the menu showing you how much is being selected. If dragging too far, it starts to include many other objects as well as the transparent area. And I can also make multiple selections in this automatic mode. You can just tap on the other object, and the selection threshold will be similar to your previous selection. And the other selection modes include rectangle or ellipse selection modes. And by tapping on clear, I deselect the areas. When I switch back to free hand Selection tool and I'm making a selection, I can also tap with two fingers and go just one step in the selection, which is very useful tool if I make a mistake. So I can always go back before I close the selection. 10. Quick Color Blocking with the Lasso Tool: And this tip is all about using the Lasso tool to color areas quickly in procreate. The so the selection tool in procreate is a great way to fill areas with color quickly and efficiently. So let me show you how to do it. I'll just zoom in here so we can create some leaves or abstractions of leaves. To access the Lasso tool or selection tool, just tape on the quickly icon here. From the bottom menu, make sure that you have a freehand selection or free hand mode selected for manual selection. Then you can just draw different shapes or one shape that you like. And make sure that it's fully closed before you drop the color in. Now, you can just drag and drop the color into your selection. If you want softer edges, rather than this type of look, go back and before dragging and dropping the color into your selection, go to the feather option. And adjust the feather amount maybe to 4%, and then you can drag and drop the color. And you can play around with the amount of feather or softness of your edges. And let me show you another way how you can speed up the process of coloring with the selection tool. So let's tap again on the Lasso tool to create a new selection with the free hand option mode, select it again. Tap here on the color field. Now I can draw different shapes. And every time I close the selection, it's automatically filled with color. And this speeds up the process a lot, as you can imagine. I really like this option when I want to quickly color block areas, especially with architecture, also with nature or just quickly testing things. So like this, you can use the selection tool to quickly color block the areas, and you can also set it up to quick menu. So you can set up the selection tool or you can set it up to color fill as well in your menu. All right. As you can see, this method is perfect for blocking in the colors, creating flat illustrations, or just quickly refining your artwork. 11. Customizing Selection Mask Visibility: M one last thing that I want to show you here is when you reload your selection that we worked with before, which was the leaf and the fig, and you are not sure if the selection is how you want to have it because you don't see it well. You can always go back to the wrench icon, then go to preferences, and you can adjust the mask visibility. And here, as you can see, it's getting much darker and much more visible. And when you slide to the left, you can really reduce the mask visibility. And for some people, this is definitely more preferred way because it disturbs you less from a drawing experience, and for others, they prefer to have it more visible to make sure that the selections are how they want to have it. Alright, I will set it back to around 30%, which is my preferred way. And now I will exit the selection by just stepping on the selection tool. 12. Outro: So that's it. Don't forget to grab your free cheek sheet and brushes. Please share your drawings and illustrations. Also the work in progress, if you want, in the project section. If you want to expand on the knowledge you learned in this class, you can watch my other classes about characters and also about colors called color palette and Color and light master class. And if you would like me to share your projects on Instagram, please tag me in the Instagram stories in the post and post description, so I can help you and your art to be discovered by more people. So thank you so much for watching and see you next time. Bye.