Transcripts
1. Introduction: We also want to illustrate beautiful flowers and
greenery with many details, but you don't want to
spend days doing it, then this class is for you. You will learn a fun and easy way to create
Procreate brushes that will help you to illustrate beautiful flowers
for your artwork. Hi, I'm Iva Mikles, an illustrator and designer
based in Central Europe. A decade ago, I decided to build
my creative career. Since then, I've built
my business online, working with awesome clients
and amazing projects, which allowed me to
explore the world and get to know people,
cultures, and location. I believe that we are all creative in infinite
numbers of ways. I made it my mission to teach
you everything I know to contribute in a small way to waking up your creative genius, so you are able to pick up a new hobby, express
yourself artistically, and if you take the leap, make it your lifestyle so you can spend more time
doing what you love. In this class, you will
learn how to easily create a fan brush and
apply to fun project, designing artwork with
beautiful wisteria flowers, and you will also discover
ideas on how to use this brush in many creative
ways in your illustrations. Basic Procreate
knowledge is helpful, but not necessary
for this class, as I will guide you through it. Without further ado, let's start and see you in the class.
2. Project: [MUSIC] As a project
for this class, we will be creating a firm
leafy brush with which you can add flowers and greenery to your illustrations
quite quickly. We will focus on making the brush and how you
can creatively use it in your illustration
instead of going into details about the sketch
and compositions. If you are just beginning
or you need a refresher, please watch my class
about compositions first. You will find it in
my Pinterest profile. To keep things simple
yet interesting, I'm thinking of a composition with wisteria flowers hanging above the door in front of
you and on our eyes level. You can of course create different and more
complex scenes with wisterias hanging in all
kinds of environments. When you want to make it
easier for you in terms of perspective and distortion
in perspective, think of, and if you won't find the reference in front of you, which is always easier. Try to combine different
references into one illustration to avoid copying someone else's
photo composition. Or better yet, use your
own photos and memories. Before you look for references, try to imagine and write down your first ideas for
the illustration. In this way, you will find more relevant photo references to make your illustration more unique and then write
down a few words and objects you'd like to see in your illustration or
you want to draw, and then you can
implement them in your final wisteria
illustration. You can search for references in many places nowadays:
in the books, on YouTube, Google,
or Pinterest. And yes, many of us love to
use Pinterest for references. But I still like real-life references combined
with my imagination. But I don't always have the luxury to travel
to locations, to take pictures and actually have the
real life references. Let's go to Google Images now, and let's search for the doors and wisterias for
our references. While scrolling through
the references, try to sketch first ideas. I'm thinking about the UK and the gorgeous doors
I have seen there, especially in London when
the wisterias are blooming. There are so many beautiful
doors with wisterias. For your scene in front of you, you can also imagine a
window with wisteria, maybe with closed or
open window shutters. For example, you can imagine
the window shatters, which are quite
colorful and have these attractive
Mediterranean color. When thinking about
Mediterranean, it can even be a window with
some cloths hanging below, maybe Greece or Spain. You can also look at different hanging
plant references for composition and
color inspiration, even though you want
to draw wisterias. Okay, and now when you have looked at some great references, Let's take a look
at what brushes on top of the one we create, we will use in this class. See you in the next video. [MUSIC]
3. Brushes: [MUSIC] Before I guide you through making
your leafy brush for your wisteria hanging plant, I will show you which
other brush I will be using in this class for
the design of the brush. In addition to this, I will share tips
on other brushes, which I currently like. You can buy and play
around with many brushes, but there are like many brushes that come with Procreate, both for sketching and coloring. When you open the brush library, I like the HB pencil, which has lovely
pencil like texture. Besides sketching, I also
use this brush for coloring. It has a nice texture when
you tilt the pencil too, almost like a real pencil. [MUSIC] The 6B pencil brush is very similar and lovely
for sketching and coloring. [MUSIC] Another one I love for sketching
and details is this one. [MUSIC] Let's look at another one, which is this one. Doesn't it to have
a lovely texture? [MUSIC] I love this brush for its texture when sketching and coloring the final
artwork as well. Here Here the last one
I want to show you. This is at the moment my
go-to brush when sketching. I like how buttery it feels and it has a
chalky look to it. I actually created my
own similar brush for coloring with bigger brush
tip size and similar texture. [MUSIC] Here are a few tips
about the line drawing and smoothness
of the line. Straight lines
often come in handy if you want to draw
architectural elements, which we are doing in this class in addition to the wisterias. I like the look of the
hand-drawn line, and therefore, I often hand-draw the boxes, even though you can get
help from Procreate or the ruler when you're
sketching on the paper. The more you practice, the straighter you
can draw the lines in this freestyle hand-drawn look without rulers or
other app help. But if you prefer
more straight lines, but you are not comfortable
with drawing them yet, hold the pencil after
finishing drawing the line. This will automatically
straighten the line. After that, you can also adjust the angle by tapping
on top of the screen. Maybe you are already aware of this feature from some
of my other classes. But I think reminders
are always lovely. In addition to this feature, you can use the streamline
setting on the brushes. Now you have more options to make your brush
strokes more smooth. The streamline
option is now under Stabilization tab in the
newer Procreate version. Now you can even see the live
preview of the brush when adjusting and even draw and test the brush on
the right side here. Try adjusting each slider to see if you like the
behavior of the brush. For example, moving the slider on amount in
streamline on the top, together with the amount slider under the stabilization
in the second one. The motion filtering will remove even more bumps along the way. For example, if you
have unsteady hand, motion filtering will remove these unwanted bumps and edges. The programs are often changing and updating
so sometimes is enough to click around to find the similar settings
in the same place. In the next lesson, we will start creating our
unique leafy brush design. But before we do so, try to spend 10-15 minutes
sketching your scene with hanging wisterias using my tips from the project lesson. See you in the next video. [MUSIC]
4. Creating the Brush: After you've created
a lovely sketch for your scene with
hanging wisteria, let's create the brush design, which will make your life
very easy when drawing beautiful wisteria flowers
quickly and easily. In this lesson, we will draw
the brush shape and design, and in the next
one we will adjust the settings so the brush
will behave how we want. To prepare the canvas in
the procreate gallery, tap on the plus sign on the
top right corner to create a new canvas where we will
draw the design of the brush. You can notice the folder with the plus sign is on the top
of the new canvas list. Then rename the canvas by clicking on the
top of the screen. To access the keyboard, tap on the icon at the
bottom of the screen. I will name this
canvas, Wisteria Brush. But you can call it
another name you like, so you can easily find it later
in your list of canvases. Next, we'll set up the size in the dimension
step of the canvas. Type on the width
and set it to 3,000 pixels for both the
width and the height. You can see the numbers
changing on top of the screen, and keep the DPI
resolution on 300. Then click "Done". and let's start drawing
and designing the brush. Select any dark color
to draw with so you can see whether you are
drawing on the white canvas. We will change the
color lighter. Take one of the brushes and
it should be opaque brush. The texture is not necessary
because you will not see it as much when the
brush is small later on. But if the brush tip size is big when drawing
later with the brush, some texture is actually nice. I suggest trying
any of the brushes I showed you in the
brushes lesson, or some of the opaque
brushes from this folder. To draw the brush design, I will make the brush tip size
bigger and select the grid as a help for me to create
the brush stem more straight. To select the grid, go to canvas setting and
tap and "Edit the Drawing Guide," and I will set
the color to pink. It's more subtle
and actually nice. Then edges the grid
size to your liking. When you are happy, tap "Done." Now we're ready to draw the stem for the
brush and the leaves. Taste the size of the
brush of this first line. This will determine
the thickness of the stem on your hanging plants. When looking at this, I don't want it to be too thick. But if you like the thicker
stems on the plant, you can draw a
thicker line here. For our design, draw the line
for the stem vertically. This is important
for the settings we will choose and adjust later. Then draw two lines
for the base of the leaves along the
stem pointing downwards. I'm choosing a more geometric
look for the leaves, but you can draw them more
verbally or other shape and you will gain more
organic look to your plant. Be as creative as you want here. To have more breathing room
or a negative space here, when drawing the wisteria, keep the leaves further
apart and at the size. If you want more bushy
and overgrown leaves on the wisteria, make the leaves
bigger and closer together at these design stage. To do this, the best is
to draw them bigger from the start but here I can just select the leaves
and resize them. To avoid fuzzy and blurry edges, I need to redraw the
edges of these leaves. When you are happy
with the shape and design of your stem with leaves, hide the background
layer because we will be using PNG for the brush setting. Then recolor the design by
dragging the white color and dropping it on top of this design before
saving the PNG. We need these change for the next lesson
where we will set up the brush because
the brush engine read's white as solid or opaque, and black as transparent. You might be thinking "What"? But don't worry, this is more straight forward
when you see it. To save, go to "Export"
and select "PNG." Then save the PNG as
an image on your iPad. The PNG image should be now the latest image in your recent album in
your camera roll. We are done with this
part and we can go to set up our brush
in the next lesson. See you in the next video.
5. Brush Settings: [MUSIC] Now, after you created
and saved the PNG image, we will use it to set
up our wisteria brush. In the new canvas, tap on the Brush icon. As you can see, there are many folders that
come with Procreate. There are also some folders I created to organize
myself better. There is also a recent
brush folder, which is, as you might guess, are the brushes
you used recently. This feature is quite handy. When you scroll through
the brush library folders, you will see the
plus sign on top. Tap on the plus sign so we can create the new
brush folder for the wisteria brush and any future wisteria brushes
you might want to create. Then I will rename this
folder to Wisteria. Afterwards, to
create a new brush, tap on the plus
sign on the right. Then go to the tab called Shape, and then on the top you
will see the button called "Edit" next to the shape
source and tap here. The shape editor
will open for you. Tap on the "Import" button and select the Import
photo option on the top. The window with your image
gallery will pop up and the one on the top left should be the image
you saved last. It looks quite empty
because it's white PNG with transparent
background displayed on white. I know it's a little bit
hard to tell if it is the correct image you
want, but it should be. Now type on it and you will see it right after it was imported, if it is [LAUGHTER]
actually correct image. Now, you should see
your brush preview in the shape editor in white
with black background. Don't worry, even though
it looks white now, the brush will not be
white when drawing. I found this strange when I
saw it first time and I was thinking it should be direct on light for the look I want. Well, basically white in the brush image is opaque
and black is transparent. In this brush design preview, the white in the brush image is opaque and the black
is transparent because the brush
engine reads white as solid and black as transparent. Now you can see what I mentioned
in the previous lesson. Tap "Done" and let's
adjust the settings. You can tap and draw to test the brush behavior
here on the right, on the drawing pad. Then you can test to draw with the brush, which
is super-helpful. As you can imagine, I don't want the brush to behave and look like
this when drawing, because I don't see the
leaves when drawing. To change this, go to the stroke path and find
spacing adjustment. Now, when I try the brush
spacing at around 45 percent, it starts to look how I want. Yay. [LAUGHTER] Test all
the different spacings to see how close the
leaves are when drawing, depending on the
stem and position of the leaves you drew
in your brush design. It doesn't have to be exactly 45 percent
as I set it up here. Just move this slider
here and see what spacing you like
with your design. Next, we want to have
the leaves follow our hand movement to look
more organic when drawing. Go to Shape and set the
rotation to maximum. Now you should see Follow
stroke written there. As you can see, this
changed the look because we created the brush design vertically from
the top to bottom. We need to also
adjust the angle. Here, I will set it up
to minus 90 degrees. Again, this is influenced by the direction you drew
the brush design. For example, if you
drew it horizontally, we would need to set it
here to 180 degrees. Well, enough of the math. Let's test the brush again on the right if it
behaves how we want. If you want to test
it more times, you can also clear
the drawing pad on the top to have more space
to draw and test again. I think it looks good overall. But I don't like that it's transparent with
low brush pressure. I want the brush to be fully opaque all the
time when drawing. To change this, go to Apple Pencil tab and
adjust the opacity slider. [MUSIC] This is much better. Another thing to adjust is
that I want the brush to be variable in size when
drawing on the big canvas. I don't want that
limit to be too small. I go to the Properties tab and increase the maximum
size of the brush. This will help me when drawing on the
bigger canvas sizes. Then let's test the brush
look and feel again. [MUSIC] I quite like it now, but after adjusting
the brush size, I also need to alter the spacing so the brush looks
connected and fluid. Here again, edges
to your liking. [MUSIC] As a last thing, you can name your brush too. Go to About the brush tab at the bottom and when
you are happy, you can tap "Done." [MUSIC] Now you have your new brush
in the new brush folder. Isn't it cool? This was a lot of math and
lot of settings. Let's test it out and hope everything works great
so we can start drawing. Because you never know
with software and updates, there can be always glitches
and unexplained errors. That happens to me so often. [LAUGHTER] Anyway, let's
test it out and have a look. Well, [LAUGHTER] as you can see, the brush doesn't look
like how it was in the preview and in
the drawing pad. Well, don't worry. When something strange
like this happens, I always go back to setting
and try different things. This particle thing looks like
the brush is not following the movements or it's not aligned with the canvas
screen orientation. Let's check the settings. First I'm checking the
screen orientation in the Properties tab. I will disable it and
see if that helps. That did the trick.
Awesome, yay. [LAUGHTER] If there are
super strange errors, you are not sure where they came from or why did it happen, you can always contact
Procreate app support. Now try drawing with the brush. Try tilting the pencil, as well as drawing straight. Also try drawing with
the curve movements. [MUSIC] Nice. Although I will do one
more small adjustment, I will go back to adjust the spacing and
decrease the gaps, [MUSIC] so that the leaves are closer together and
the brush looks more well, [LAUGHTER] leafy, and overall lush when we do
more brushstrokes. Great. I love it and
I hope you do too. In the next lesson, we will practice
using the new brush. See you in the next video. [MUSIC]
6. Brush Practice: What is remarkable about our new brush is
that it will follow our hand movement and it will look natural like
hanging flowers. In addition to this, the amount of leaves you
can add quite quickly, brings lovely details
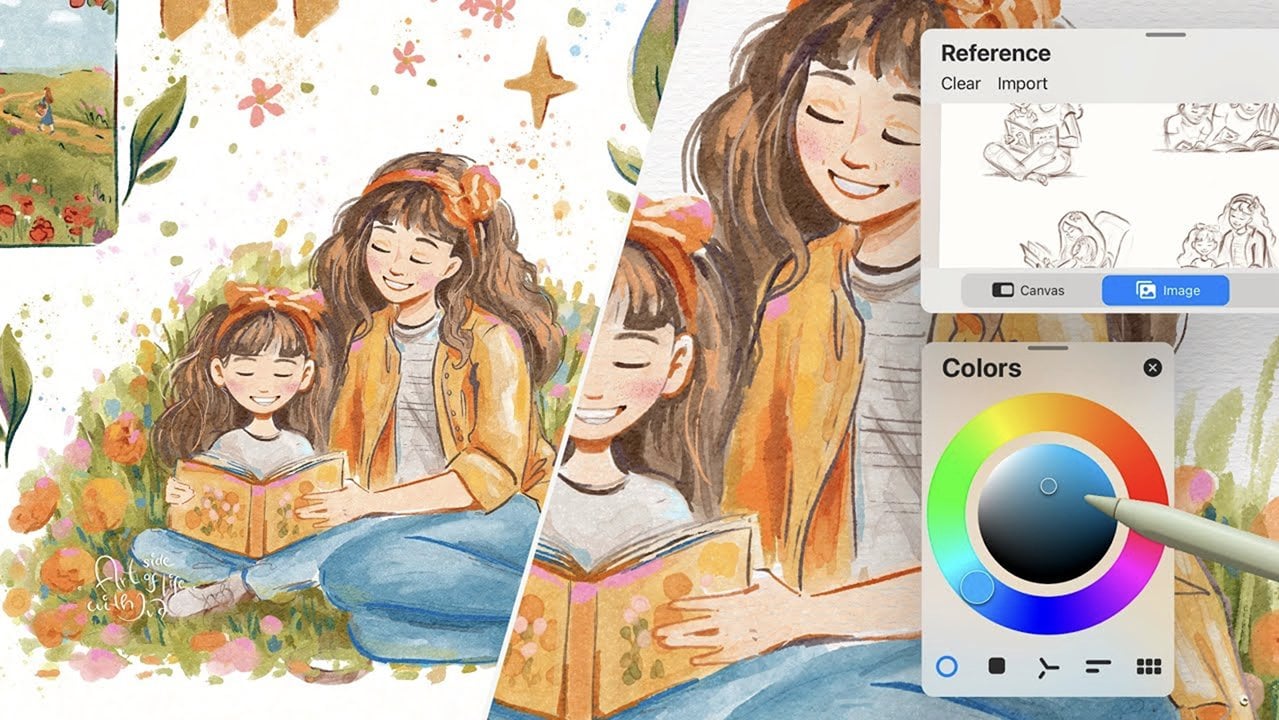
to your illustrations. Let's create some wisterias. I will open the references from my iPad gallery and if you are not familiar
with Procreate, swipe up from the bottom
of the screen and select the Gallery and drag
it to the side of the screen. As you can notice
on this reference, wisteria has a lovely
small green leaves with flowers hanging
in front of them. To create the sense of volume, I will start with
the green leaves and darker green color. You will see how I choose the colors more in
the next lessons. For now, try to focus more on the brush flow and length of the brush strokes
and brush tip size. For a more natural look, try to use your forearm
and smooth movements. You can try quick and
fast movements too. Also, try to vary the
length of the strokes. For the waterfall-like look
we see in the reference, draw, shorter strokes on the side and longer
in the middle. Plants tend to be bushier in the place where
they are growing from, so you can add more strokes at the top where the wisteria
is starting to grow. After drawing with darker green, select a lighter green
tone and draw more strokes on the top. For variety, make the
brush smaller and choose even lighter green and draw
more strokes on the top. How cool and quick is that? Anyone thinking about
the green tones, you can choose any
green you like. I'm using warmer green
tones closer to yellow. To have more flexibility
in adjustments, you can create each green
color on a separate layer. To do that, you can
create new layer and select a lighter green tone
and draw on this layer. To select lighter green, I will drag the color
slider to the left and up, as you can see on
the color wheel. Then again, you can draw the flowers on a
separate layer too. Here, I will choose purple and draw the flowers on
top of the greens. First with a darker
shade of purple, and then with a lighter shade
of purple as the next step. When creating the flowers, try to bring variety
in size too. For example, one area with flowers can be longer
and one shorter. Another area is wider
another one is more narrow. As you can see, I am
choosing purples which are closer to more blue tone
spectrum on the color wheel. But of course, choose a
purple you like the most. Select different hue or different value
you like the most. To make the flowers
more integrated, you can add a few
green leaves on the separate layer on top
of the purple flowers. I suggest to try out more versions of the
wisteria shapes, sizes, and colors to
try to find your style. Maybe you will like more
curved brush strokes and more narrow and longer overall green base for the
wisteria flowers. Perhaps you will
enjoy the variety of small and big leaves
combined together. Also, you can use the bigger brush tip
size to make the leaves, and then use the
smaller brush tip size to create the wisteria flowers. It's all up to you. You can also consider
the green base. On the left, we have wider green base compared to the longer base on the right, using the longer brush strokes. It's all up to you how much
you play with the brush sizes and curves in your
brush strokes when drawing. Maybe you like more
purple and more flowers and less leaves and
less greenery around. Basically, you will have more
flowers and less leaves. In the next lesson, we will create even
more depth and sense of space for
our wisterias. See you in the next video.
7. Sense of Space: To add more realism and sense of depth as well as interesting visual variety
in your illustration, you can add budan branches, below the wisteria
leaves and flowers. Because bringing a
variety of shapes helps to add more visual
interest to your art. When looking at the references, notice that some wisterias have an apparent budan branches. When you notice
the shape of them, they're all curved
and fancy-looking. If you like the look, you can add the branches
to your wisterias. To create the branches, you will draw curved lines
with a variety of thickness. After you create the
lines for the branches, add a lighter shade along the branches to create
a wooden texture. As you can see, I'm using quiet pale
brown shades and then adding an even lighter
brown shade on top of this. When you are happy
with the shape and the color of your branches, you can freestyle the brushstrokes
when adding wisterias. By starting adding
the leaves first, going from darker
to lighter greens. Then add purple tones as
flowers on top of it. Play as much as you want. Using shorter strokes, longer strokes, curved
ones, straight ones. As I often say, "The more you practice, the easier it gets." Okay, now let's put it all
together in the next lesson. See you in the next video.
8. Coloring: Now, we'll set up a new canvas for the scene you want to
illustrate as a project. I'm using 3000 pixels
by 3000 pixels, which is an okay
setting when you want to post on Instagram,
for example. I'm leaving 300 DPI, which gives me 112 layers
as you can see here, which is more than enough for this illustration and
the resolution I want. Depending on the type of
your iPad and its RAM, you may have a different
amount of layers available. Then import a sketch
you created in the lesson two on
the canvas as PNG. If you haven't done so yet, now would be the
best time to do so. I can wait. You can
pause the video. If you have the sketch, which is not exactly
3000 by 3000 ratio, I can adjust the canvas
to feed the sketch, because I don't have the
specific restriction for this canvas ratio compared
to client project. Always consider where you want
to use your illustration. Like with some of the
traditional paintings, I will start with the
background and add layers in the
foreground, one by one. After the background color, we'll add color to the background
elements in the scene, like the walls and the
door before adding all the beautiful leaves and the wisteria flowers on
the separate layers. The more layers you have, the easier it is to adjust the content of
these layers later. We are using the
line art as a guide. We will keep it on
top of the layers, and we will set this layer to
the multiply blending mode. If you plan to draw
something in dark colors, it is actually helpful
to draw the sketch in white and set the layer
to screen blending mode. But in our case, we will keep it in
multiply blending mode. For the background color, I will use a subtle
blue-gray tone. Then I will create another
layer for the fence and the pillars on the wall
and choose white color. This should stand enough
from the background color. I will reduce the opacity of the sketch to see
better if I like the look and erase parts of the white in the fence
which I don't need. I'm planning to use complimentary color
palette combination in this illustration. Afterward, I will add a yellow color for the door on a
separate layer. I was inspired by one of the reference photos
I found online. It stood out from the
references because I like the contrast of the complementary
color combinations. As you may already know, complementary to
purple are yellow, orange, and green tones. It works great in
this illustration, as you know, because of the
wisteria leaves and flowers. The yellow, though,
will contrasts nicely with the
purple-blue tones of the wisteria flowers in the green terms of
the wisteria leaves. To add more detail
and visual interest, you can draw a few simple lines on the door in
darker yellow tones. Like in the previous lessons, I will create a few branches on a separate layer before
adding leaves and flowers. I think this looks
good and now let's add the wisteria leaves as we practiced in the
previous lessons. Building up from darker green leaves before adding the lighter
green leaves on top. Afterward, choose the
purple tones you like, either closer to
the blue tones or closer to the pink,
red, warmer tones. As you can see, I'm
using the purple tones closer to the blue
spectrum and drawing the wisteria flowers
from darker purple in the background to the lighter purple
in the foreground. If you keep the flowers and
greens on a separate layer, you can add and remove parts and do the adjustments as
you like also later on. We have a beautiful
hanging wisteria leaves and flowers in no time. How cool is that? I'm starting to love this brush. Anyway, how cool is that? By the way, there is more
you can do with this brush. In the next lesson, I will show you two more ideas about how you can
use this brush. See you in the next video.
9. Details: In this lesson, I will add more details to the
illustration and show you more ideas on how you can use the brush
you just created. Before we do that, on a separate layer, there are simple bushes in
three green color tones. I'm using the same green
tones that are used for the wisteria leaves to keep
the illustration consistent. Darker green value,
mid-green value, and light green value. The greens are in warmer
hues on the color wheel, meaning they're closer to the
yellow on the outer wheel. [MUSIC] Now on a separate layer, we will create leaf details
with your new brush, which is such a quick
way to add details. Select your new brush and tap on the edges of
the green bushes in the foreground [MUSIC]. To have these details noticeable
in your illustration, paint darker leaves on
the lighter background. By just tapping around with
our new brush in this area, you add lots of
details quite quickly. How cool is that? I love adding
details like these. I hope you do, because it's very quick
and easy and adds so much visual interest
in our illustration. As I said, here is another idea and use
for your new brush. You might be thinking,
more leaves? Actually, no,
because we can make pretty cool flowers that are different from our
hanging wisterias. Make another layer for
our new flowers and choose another color for
the flowers to stand out. Try to choose a different
color than purple. Now, I'm choosing a warm pink hue [MUSIC]. With a smaller brush tip size, tap a few times
in the same spot. You can also try more
curved brush strokes around the same spot to create
a base for the flowers. How cool is that already now? [MUSIC] To make these blobs of colors
look more like flowers, let's add highlights
and shadows. With the same wisteria brush, choose the darker value and
then the lighter value of the same pink you used for the base and add
a random shades, but don't cover these
whole pink base. Add lighter values,
just on the top, and darker values somewhere
around the middle. You can vary the sizes of
these flowers too and tada, you have added new flowers and basically new flower designs quickly and easily
with the same brush. I really like the
brushes which you can use for a different purpose and it adds so much to the
illustration very quickly. In the end, you can
add more details and colors to your
illustration as you like. Now taking the simple brush which I used for
sketching before, and I showed you in the lesson about the brushes
you can choose, I'm adding more details to the illustration [MUSIC]. First, I'm adding more contrast
with a darker blue and adding a few more
subtle details on the walls and on the fence too. Keeping in mind, I want to
have some negative space in the composition to keep
the composition balanced. To practice how to work
with contrast, details, negative space, and
composition balance, please watch my
composition class, which you will find in my picture profile [MUSIC]. I am already quite happy with
this illustration because the wisterias are giving such a nice feel to
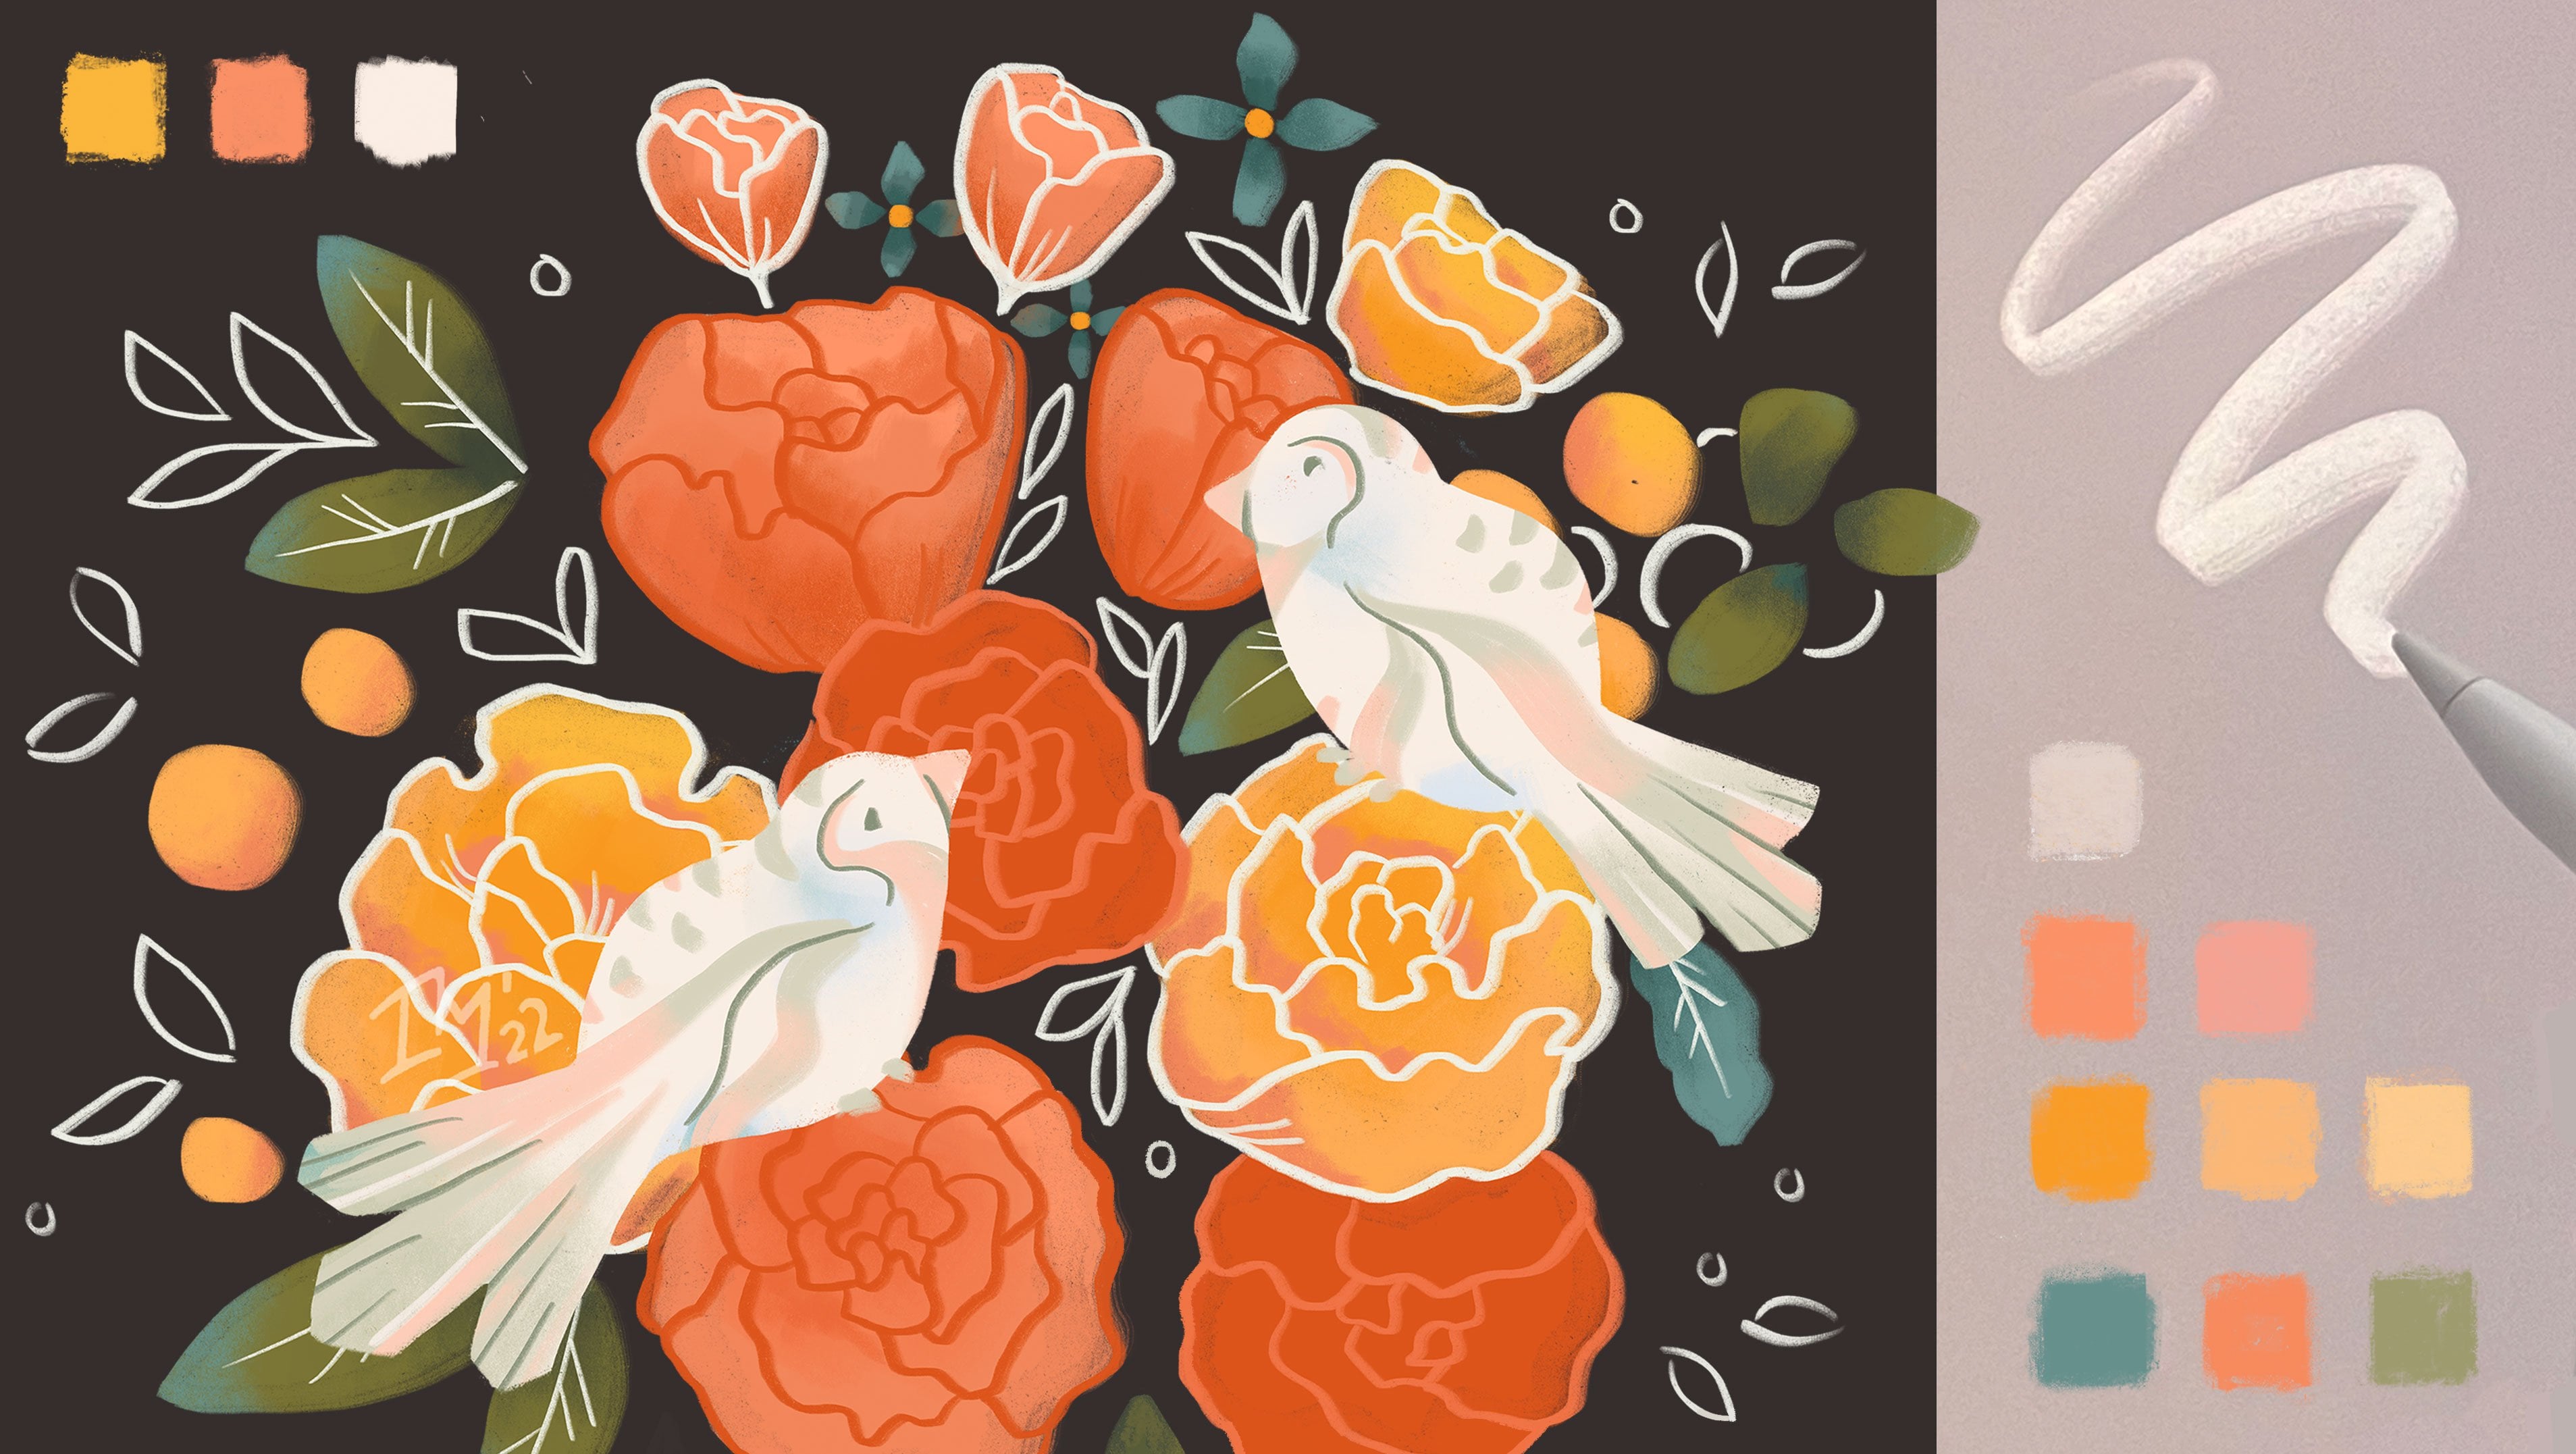
the whole scene. But at the end, I decided to add two small pink birds to add extra cuteness
to my illustration. Because you can almost
imagine them singing to add the spring feeling when the wisteria are softly
moving in the breeze. You can imagine this walking
around the streets in London because they have lots of beautiful
doors with wisteria, in the spring when you are
lucky with the weather. Now I feel like I want to be in the illustration and maybe
that happens to you too. When you see or make
an illustration, you want to visit the place. I like the idea of traveling through art [MUSIC]. We are done. I hope you love your illustration and I can't wait to see your versions. Please, don't forget to upload your project in
the project section. If you share them on Instagram, tag me with art
side of life so I can see them and share
them with others too.
10. How did it go?: How did it go? I hope you had a lot of fun creating your own
wisteria brush. You now feel more
confident Illustrating greenery and the
flowers in your scenes. To recap, if you want to expand the knowledge you
learned in this class, you can watch my
other classes about composition,
perspective, and colors. To find them, visit my
pictures profile and don't forget to share your class project in
the project section, because I can't wait to see
all of your awesome artworks. If you would like
me to also share your illustrations on Instagram, please tag me when posting, so I can help you and your art to be discovered
by more people. If you like the class, please leave a review
because, first of all, I learn a lot from your
constructive feedback and second, you will also help other
students to discover the class and you may contribute to
their artistic journey too. If you have friends
or family members who would love to create their
own Procreate brushes, please share this
class with them. If you have any questions
or suggestions, please leave a comment in the discussion section and
I would love to help out. Thank you again
so much for being here and see you
in my next class.
 Iva Mikles, Illustrator | Top Teacher | Art Side of Life