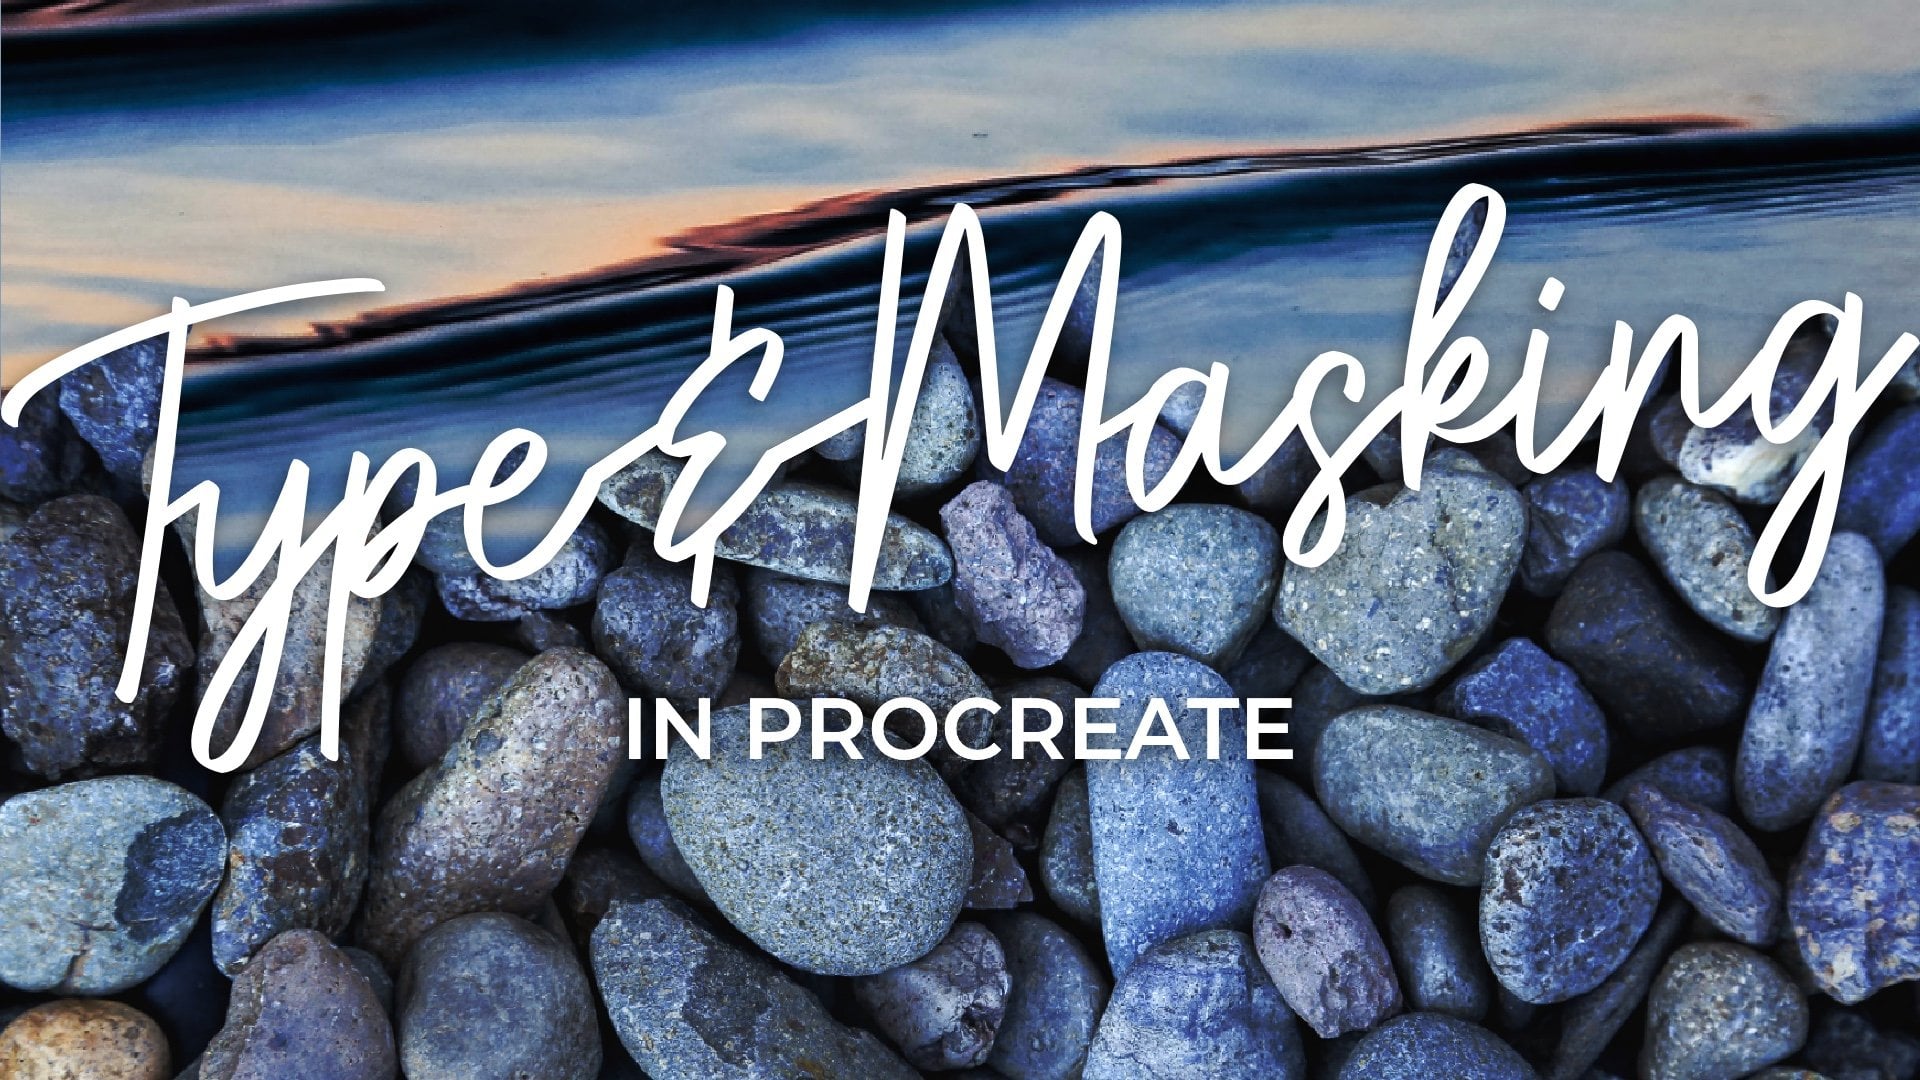
Transcripts
1. Hello & Welcome! : Hi, I'm Kelley Bren Burke. I've been self-employed
as an artist since 2013. I love creating digital art
with the Procreate app. And I'm going to tell
you a little story about when I began creating
digital art in Procreate. It was 2015. I kept seeing these
gorgeous images intertwined with words. And I really wanted to
learn how to do that. So I did what I always do. I googled. My dear Google told me that Layer
Masks were the answer. I found some YouTube
tutorials on masking in Procreate.
Awesome, right? Except my experience was
not so awesome this time. I love learning from
YouTube tutorials. I've even created Procreate
tutorials on YouTube. But for this topic, teachers breezed
through Layer Masks like it was the simplest
thing in the world. I'm a self-taught artist, but I could not wrap my
mind around Layer Masks. Clipping Masks were
pretty straightforward, but Layer Masks? I
could not get it. Eventually, I figured it out. And then after some
time, I forgot. Rinse and repeat the
whole process over years. I created this
class so you'll be able to understand
masking in Procreate. This class focuses on just one thing,
masking in Procreate. For the class project, I'll walk you through
intertwining gorgeous flowers and leaves with a single letter
and then a single number. By the end of this class, you'll understand
masking and how to intertwine images with texts. Since we're using digital
florals and text in Procreate, creatives
of all levels will be able to participate. No drawing skills are
needed for this class. I'll use my iPad, the Procreate app
in my Apple Pencil, but any compatible
stylus will do. But wait, there's more! You'll receive the best
digital flowers and leaves I could find, a list of
suggested free fonts, and some beautiful
background textures. Ready to explore
masking in Procreate? Let's get started!
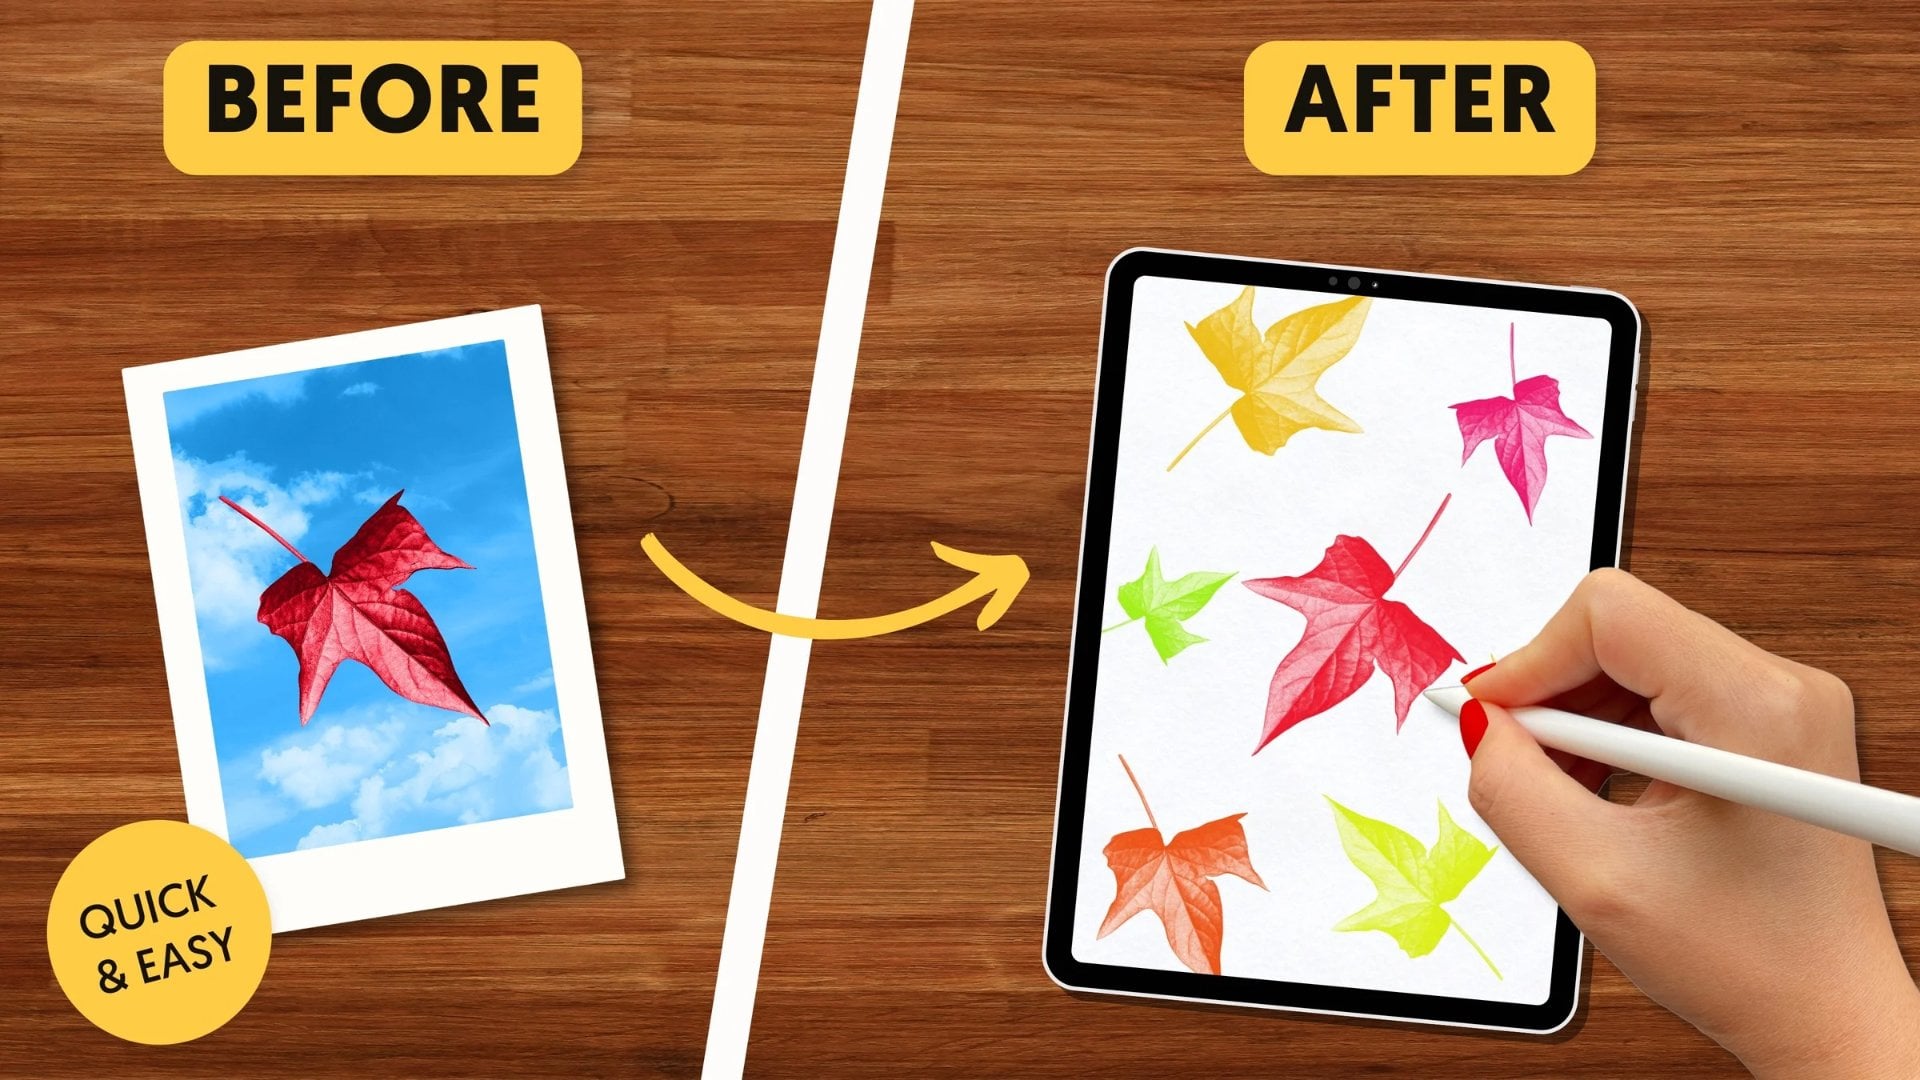
2. Class Project & Resources: For the class project
we'll intertwine beautiful flowers and leaves
with a single letter, a single number or both. The class project is
intentionally simple so you can focus on the
basics of Layer Masking. But first, we'll
browse free fonts on Google and choose a
font for your project. Then we'll explore Clipping
Masks in Procreate. That's a quick lesson. It's about five minutes. We'll spend the rest of
the class on Layer Masks. I'll walk you
through every step I take while we intertwine florals with first a
letter, and then a number, I have class assets
to support you, including a variety of
background textures, a list of suggested free fonts, and the best digital
florals I've found there from Catherine
at Avalon Rose Designs. She's generously providing
some gorgeous flowers and leaves for us. I also created a step-by-step
guide to Layer Masks. There's just three steps
for using Layer Masks. The trick is that you have
to use the three steps in the right order every time.
To access these goodies, tap the Project and Resources
tab from your browser. I can't wait to see
what you create. Please share your
project on Skillshare. Upload your project by clicking on the Project and
Resources tab. If you have any questions, I've got you! Click on the
Discussions tab on Skillshare. I'll respond to every question. So download the class resources, and I will see you
in the next lesson.
3. Fonts in Procreate: Welcome back. In the last lesson, we covered our class project
and our class resources. In this lesson,
we're going to talk about using fonts in Procreate. Procreate comes with
a variety of fonts. And I'm going to show
you a great resource for some free fonts, that is Google Fonts. So let's go to our web browser and we
can type in Google Fonts. I'm going to bring it up. And you can see there are lots and lots of
different fonts here. I don't know how many, but there seems to be like an
endless font of fonts here. Sorry/not sorry for the pun. For this project we're
gonna be dealing with individual capital letters. So I am just going
to type that here so we can see what it looks like. And we're also going to
be using some numbers. So here is our a, b, c, and 1,2,3. And we have
a lot of fonts. What we can do is we
can narrow this search. We can do that by going
to different categories, serif, sans serif,
handwriting, etc. But for our purposes
we just want kind of a chunky font because we're
doing the intertwining. And if you're intertwining
something with a thin font, it won't be as obvious. So we're gonna go
to font properties. We're going to tap thickness, move that all the
way to the right. We're going to see only
the thickest fonts here. For this project, I'm gonna do a more classic
looking chunky font. So these aren't really
doing it for me. I do really like
this Erica one font. It has a retro feel and I've downloaded it before by
tapping Download Family. I like it a lot. It just doesn't
have a lot of space for the intertwining part here. So I don't like it
for this application, but it is a cool font. And we want to see more
fonts that are chunky. So what we're gonna
do is we're gonna go back to this thickness and just bring this arrow a little
bit towards the left. So we can see more chunky fonts. There's a font right
here called Railway. I liked that a lot. I like Montserrat. Either
of those would work. I actually have a list of some suggested fonts that is within the Class
Project area. So here are some suggested
free Google Fonts. And then there are Procreate default fonts that depend
on what your iOS is. So let's just bring up Yeseva One here. I'm going to search it. And it's not popping up because
it is on this thickness. Here is, you see Yeseva One. It's a really cool font. I like it a lot. But some fonts have what they would call a
larger family here. So there'd be options, perhaps for a bolder
one or an italic one, but this one just
has that one kind. So we're going to
tap Download Family. And we are going to say yes, we do want to download it. It's a zip file. It goes right up here
into our Downloads. And if we tap it, we can look in our
downloads for it. And it'll be a zip file. And to unzip it, you'll want an unzipping App. I use iZip Pro. It'll ask me if I want
to unzip the files. I say yes, I tap
on this again and it will tell me that format
is not supported in iZip. So I want to open
it in Procreate. And just like that, it
will be in Procreate. Let me grab a white and I will just show you a little bit
more about fonts in Procreate. So I go to Wrench > Add Text. And the font I'm
on right now is Futura. That's one
that I recommended for this and it is a
default Procreate font. So I have the Futura font. I am just going to type my name here and I can go to Edit Text. I want to tap on
it and Select All. When those blue lines
around it, it's selected. And from there I can do a
number of different things. I'm on Futura. I think this is Bold. I can do a Condensed,
Extra Bold, a Bold and Medium Italic. I'm just going to stick
with the Bold here. You can see it better. I'm going to make the size bigger by dragging this - because this
textbox is too small. It brought the "y"
to the bottom. I'll show you how to fix that. If you're within Edit Text, you can grab these blue lines and just stretch it out there. So once again, if I hit Edit
Text and it's all selected, we can do other things with it. We can make it all caps. We can center it. We can have it left justified, we can have it right justified. We can make it
bigger or smaller. We can change the font to a specific size by
writing in this box. It's currently 93.2 points. Let's say I want it to be
97 points for some reason. You can just write that in
there and it'll change. There are some options here. For our purposes, I'm just going to talk about Tracking and Leading because those are the most
helpful things. Tracking, if you move it
in a positive direction, it will make the
letters spread out. If you do it in a
negative direction, it will condense the letters. For our purposes, for this class, we probably want the letters
a little bit further apart. If we were doing more
than one letter - I do recommend that you start out just with a single letter - But if you are doing a word, you might want some space
so things could intertwine. Now we're gonna look at Leading, which is the space
between the words. So again, if we put it
in a positive direction, it increases the size
between the words. And if we put it in a
negative direction, it condenses the space
between the words. I am rarely going in a negative direction
for either of them, but they could be handy for
different applications. That is fonts in Procreate.
I'm using Futura. If I wanted to edit it
to a different font, I'm going to hit Select
All and go back to AAA. I have a number of
different fonts here. Some of them I've downloaded, like the Yeseva One font, and some of them are
default with Procreate. So there is a quick overview
of fonts in Procreate. In the next lesson we are going to talk about Clipping Masks. I will see you in
the next lesson.
4. Clipping Masks in Procreate : Welcome back. In the last lesson, we talked about fonts. In this lesson, we are going to talk about Clipping Masks. So to do that, I'm just going to start
by drawing a circle. I am going to use the Monoline, which is a default
Procreate brush in the Calligraphy set. So here is the Calligraphy set, here's the Monoline brush. It's a good all-purpose brush. I am going to make
a white circle. On top of this blue, I have a new layer. I can just draw a rough
circle and I can tap Edit Shape and make
it a perfect circle. I can grab the white and
make it an all-white circle. To create a Clipping Mask, you add a layer above
the white circle. And then you tap Clipping
Mask right here. Then you'll see this arrow showing that this layer is
clipped to this circle. What that means is
that anything we draw on this Clipping
Mask layer is only going to apply to the pixels on this layer since
it's clipped. So I'll show you what I mean. I'm drawing all over and it's only drawing on
the white circle. If I undid the clipping mask, you would be able to see
that I drew all over. But if I hit Clipping Mask, it's only applied
to that circle. So that is helpful because it is a non-destructive way
of editing your work. And what that means is you can still go back
and change things. You can turn this
layer on and off. You could change the color
by Alpha Locking it. You can do a lot of
different things. You can tap on this Arrow
and move it around. You can make it smaller. You can make it bigger. You get it, You can do all sorts
of things here. You can actually have
as many Clipping Masks as you would like. You would do that
just by going to this layer and hit New Layer. And any new layer that
you add in between, the clipped layer and the circle, Procreate's going to assume that you want
a Clipping Mask. So you could also - if you wanted to - add yellow
polka dots to it as well. So now we have our white
circle or yellow polka dots. You can move the masks around so the yellow polka dots could
be on top of the blue lines. You can change the colors. Again. I really
liked that orange. So I'm going to
change this back. And it's all non-destructive. You know, on Procreate probably that you can undo things with a Two-Finger Tap and redo them
with the Three-Finger Tap. And you can do that at anytime. But with this, you can
back out of the canvas, come back to it later and you can still edit
whatever you want. You can get rid of the lines, you can get rid of
the polka dots. I think you get it. You can also add an image onto
the Clipping Mask. I'm going to grab a
recent file here. And here are some more
flowers by Avalon Rose, I'm not recommending
that you do all this, but you can have all
these different layers. So that is Clipping Masks
and then if you undo them, then you can see everything
and you can redo them. By tapping Clipping Mask. You can get a similar effect
through an Alpha Lock, but that is a
destructive way to edit. And I will show you what I mean. So I'm going to
delete these guys. We have our circle. If we Alpha Lock it, it will do something similar. So we have the orange, we have the polka dots. We can draw right on top of our white circle and have those dots that are
only applied to there. And that's with an Alpha Lock. And when you Alpha
Lock it you get this little checkerboard
thing below there. But the thing with this is, let's say now I want
yellow circles. I can't do that as easily. I mean, it could
try color drop it. I could pick up this white
and make it white again by filling the layer and then doing yellow dots on top of it. But it's destructive. If I back out of the canvas
and bring it back up again, I can't do my two
finger tap to undo. It's just the way it is. Whereas before we could easily delete or change the colors
of the clipping masks. So Alpha Lock is helpful
if you're limited on layers and you know
exactly what colors you want, I almost never use
it just because the Clipping Mask is
a non-destructive way and I prefer to use that. So that is how you
would use Alpha Lock. Again. I could make this color,
this circle all yellow. And it's Alpha Locked. And I could grab a
different color, loving this orange today. And it's Alpha Locked
and I can just draw more orange dots on top of it. Or I could add texture
or whatever I wanted, but that is destructive. So that was an overview
of Clipping Masks and Alpha Lock in Procreate. In the next lesson, we are going to talk about Layer Masks, which is another
non-destructive way of editing. I will see you in
the next lesson.
5. Layer Masks in Procreate: Welcome back. In the last lesson,
we talked about Alpha Lock and Clipping Masks. In this lesson we're going
to talk about Layer Masks. What I'm going to do here is
add some text as an example. I'm just going to do the letter K. I'm going to
make it really big. I will change the font
to Abril Fat Face. And I actually want
my K to be white. So I'm going to
tap on that layer, hit Edit Text, and then
grab a white instead. So there we have our
letter K. What I'm gonna do here is rasterize it just so it becomes the
pixels on the page. I already have the steps
for a Layer Mask written. So I'm gonna have
them at the top of the page here the whole time as a reminder of what the specific steps
are for a Layer Mask. A lot of things with Procreate, you can do them different
ways and it can be kinda forgiving. Layer Masks, you have to go in
exactly the right order to get the effect you want. And I will show you what I mean. So we have our
letter K and we're going to add something
else on top of that, I am going to find a
flower or leaves, and I'm going to
bring them in here. I am going to put the
leaves like this. And so right now the leaves
are in front of the K and we want to do an
intertwined look. So we are going to
use a Layer Mask. To do a Layer Mask, we are going to follow
these steps up here. We're going to tap on the
top layer and hit Mask. And then we get this
white layer above it. And then we're going to the K, which we want to interact
with the leaves, and we're going to hit Select. And then we're gonna go
back to our Layer Mask. And because our Layer
Mask is all white, you can see that the leaves are on top
of the k and that's it. If we wanted to make
it look different, we would grab a pure black, which if you look
at the Value part, it says a bunch of zeros. I think it's six zeros. And a pure white is six f's. So I'm gonna go
back to my black, I have my Monoline and
I am going to go back to my Layer Mask and I'm
going to draw on there. When I hit Select, we got all of these
diagonal lines, which hopefully you
can see if I zoom in. The diagonal lines are
everywhere that the K and the leaves are not since that's what
we're working with. So let's say I want
to make it look like this leaf is going
behind the letter K. I'm on the Layer Mask and I'm just drawing in black
and it's giving the illusion there that the
leaf is underneath the K. And let's say we also wanted to do that with this.
The whole stem. We just keep drawing
with black right here. Let's say we wanted to bring
back one of the leaves. We changed our mind. We can choose white again. Make sure we're still
on the Layer Mask and just bring it back
by drawing here. We can bring back just
this part or all of it. So that is a Layer Mask. I'm going to be a little bit repetitive in this
lesson because it took me a while to wrap
my head around Layer Masks. So I'm just going to keep going over it in different
ways in this lesson, I'm going to go back
to this Layer Mask. Let's say I didn't hit Select, I'm on the Layer Mask, I have my black. And what it's doing here is it's concealing everything because
I haven't selected the K. So that is a common mistake
that K is not selected. I can undo it. And I went back
to the selection. So we're going to follow
these exact steps again. We tap on the layer and
hit Mask, tap on the K, hit Select, Grab a pure black, which I have right here. It's hex code is all
zeros, so we're good. And I go back to my Layer Mask. And now I'm going to
just make it look like some of these leaves are
behind this part of the K. Instead. There it is, we have an intertwined look that's opposite of the
way it was before. Let me bring something
else up just so we can get another look
at how this works. I'm going to grab
a different kind of leaf or flowers or whatever. And I am going to arrange
that in front of the K. And we're going to follow
these steps up here. We're going to tap this
layer and hit Mask, tap on this K, and hit Select. We get the diagonal
lines that are everywhere except for
the leaf and the K. We go back to the
Layer Mask layer. We have black and a Monoline. And we start drawing
in black where we want the leaves to
be behind the letter. So here we go. Let's make this look like it's
below, by drawing in black. I don't like that. So I could either
two finger tap to undo or because it's a
non-destructive way, I can just grab my pure white and just color this back in. Let's Instead grab
our black again. If we just press on this color, it brings us to our last color
were still on the Monoline. Let's say we want
this to go behind, tap on this Arrow and
undo the selection. And there we have our mask. So when we drew the
black on there, it made the leaves
look like they were going behind the letter K. I'm gonna do this one
more time so you can get it. If you have this, you can move on to
the next lesson. But just like I said, it's, it was hard for me to wrap my mind around it
when I learned it. So I am just going to go
over it one more time. I will see you in
the next lesson.
6. More Layer Mask Practice : I will do a number this time. I'll do Eight, I'll change the font. Let's do Abril Fat Face. So here we have an Eight. I'm going to actually
edit it to be white. And I'm just gonna go
ahead and rasterize that because we don't
need to edit it anymore. We will add some flowers again. I'm going to insert
these pink flowers. And that will give us
some good opportunity for intertwining. I'm going to move these
words to the bottom, so we can see them. Okay. So we're going to
follow these steps. We are going to tap on
this layer and hit Mask. When we do that, we get a white Layer
Mask above the flowers. The next one, is we go to the layer we want the
flowers to interact with, which is the Eight, and we hit Select. And there we get the
diagonal lines on everything except for the
pink flowers and the Eight. We go back to our Layer m\Mask
and we have a pure black now, and we have a Monoline, and let's just start
playing on the Layer Mask. So if I draw a black here, we'll make it look
like that part is behind the Eight here. It will make it look like
another part is behind. I could have this go under, but then we run into
troubles with that one. So I don't want to do that. So I'll just grab a white
and bring that back. Or I can go to my Layer
Mask and hit Clear. So all the flower is back again. Let me flip the flowers around, have it be a different way. So we have our layer mask and then we go to the
Eight and hit Select. We navigate back to
the Layer Mask layer. We press on the white to
turn it to a pure black. I'm on the Layer Mask
with my Monoline. Let's say I want to make it look like this
part is going under. Let me see if that
worked out. Didn't really. I think I'm also going
to do it on here. Let me just keep going
and see what happens. There is some experimentation
with this because you don't know exactly how you
want it to look. So you can just play around with this non-destructive
way of working. I'm going to tap this
arrow to unselect things. So now we have part of it
behind and part of it in front. And I'm just going to
try one more thing. I'm going to clear
this layer mask and go through these
steps just one more time. So we have a Layer
Mask, we hit Select. We have a Monoline. And I'm just going to put
something else under there. I am going to put I'm not, see I'm drawing on the Eight, not the Layer Mask. It's very easy to
make these mistakes. It's pretty easy to fix it. I'm going to have
that go underneath. I'm going to have
this go underneath. Except I'm going to have
this part go underneath, but not that up there for more
of an overlapping effect. It's hard to see where
these beginning to end. So I'm just going to
leave it like that. I'm going to tap this arrow
and that looks really cool. I like that. There we have our
intertwined Eight will be working with Layer Masks through the rest of the class. So you'll have plenty
of opportunity to see more Layer Masks
in action as we go. Again, I'll also give you
a handout with the steps for Layer Masks and then some common mistakes
that you could make. The next lesson we are
going to choose a letter, and we're going to do multiple intertwined flowers
and leaves with that letter. I will see you in
the next lesson.
7. Intertwine Florals With a Letter: Welcome back. In the last lesson, we practiced masking
in Procreate. Next, we're going to
turn that practice in a more practical application. We are going to
intertwine flowers and leaves with a single letter. Let's get started. I have already created
a 10 by 10 Canvas. That's what I'm going to use. You can use any size
that you'd like. But to create a
10 by 10 Canvas, you hit Plus > New Canvas, and Procreate will
default to pixels, but we want inches and
we can just do 10, and 10. And if we wanted to
name this canvas, we could name it 10
by 10 inches, and 300 DPI, which is an excellent
print quality. And then we would hit Create. And then we would have a
new ten by ten Canvas. But since I've
already prepped that, I will just go ahead
and delete this by swiping to the left
and hitting Delete. So here is my ten by ten canvas that I have already prepped. I'm going to go to Wrench > Add > and Add Text. Edit the text by
tapping on Edit Text. And I am just going to delete the word Text and put
it in the letter S. You can use any font you'd like. Yeseva One is
a free Google Font, and there are some
other suggested fonts. In an earlier
lesson. I'm on my S, I'm going to hit Edit Text, tap on this S and
hit Select All. And to edit that S, I am going to tap on this
Aa to get this menu up. And because I'm doing
a series of letters, I want the letters
all the same size. So for my purpose, I'm
gonna do 475 points. And I can just write
in this little box. And there we have a 475 point S. And a lot of times if I'm
doing a project like this, I will rename this layer, Yeseva One, 475. And that just helps
me keep organized. Like when I revisit it later, I'll know exactly what font
it wasn't exactly what size. So we have our S and what I'm
going to do is center it. I'm going to tap on this Arrow and I have Uniform
selected and Snapping, so I can just move this around. So that is a good start. And what I'm gonna
do is bring back the directions that
we used earlier. I'm going to add
those to a new layer above that we can
toggle on and off. Now that we have our
reminders up at the top, Let's start adding flowers. I have already imported
some flowers for this. They are from a bundle by
Avalon Rose called Spellbound. And Catherine from
Spellbound gifted us with some flowers
for you to use, and they are in the Class
Project and Resources area. I have my flowers here and
I'm just going to Duplicate them and start bringing
them to the top here. I like to duplicate things. So then I have the other one still available unedited at the bottom. So now that they're up here,
I'm going to turn them off. So I usually start with a leaf or a large element that I'm gonna be wanting
to intertwine. If you think of a bouquet, the leaves are usually
in the back and the flowers are
front and center. So we have this pretty stem and I'm going to make it
just a little bit smaller. I tapped on the Selection
Arrow and it's on Uniform. And what I'm looking for,
there are things that can intertwine and
interact with the S. And to help us with that, we can go to Warp
and Advanced Mesh. And then we can pull on
any of these blue nodes. So there's plenty of
opportunities here for the leaves to
go under or over. And just in general, intertwine. I liked the way that
looks so I'm going to tap on that Arrow and hit Done. I think I might bring this leaf up actually
a little tiny bit. I'm still on warp. I going to go back to
Uniform because I liked the size it is right now. I know I don't want this
long stalk at the bottom, so I'm just going to grab
my Monoline as an Eraser. Just erase away the
bits that I don't want. I'm going to start this by intertwining this leaf and
then seeing where we're at. Once again, this is a
non-destructive way of editing so we can easily
undo what we wanted to do. So I'm following these
directions up here. I'm tapping on the leaf
layer and I'm tapping Mask. And I want it to
interact with this S. So I'm going to hit Select. And I'm going to get these
diagonal lines right here. And I want to navigate
to a pure black. The hex code is six zeros, and I have my Monoline brush. You can use a number of
different brushes for this, but the Monoline is a
good all-purpose brush. What I need to do now is go back the white layer
with my black mono line. And then I can start
interacting with the leaves and the letter
and see what I like here. When you're doing this, you're only erasing
where the leaves and the S are interacting
here. Nowhere else. If we didn't like
it, we could always navigate back to a pure white and just undo
whatever we did. We still have the
selection going. We go back to the Layer Mask. And if we wanted to say, bring this leaf back by
itself or this one, then we can bring
it back easily. And that's what I mean by non-destructive. So, we need to deselect this. So we go back to this
arrow and de-select it. And I'm going to
add a flower here. So I'm gonna go to the
Selection, I'm on Uniform, I'm going to make
it a little bit smaller and I'm
going to look for opportunities to
intertwine here, what I might want to do
is tuck it under here. It's easy to forget
that we want this to still be a legible S, right? So we want to keep that
in mind the whole time. Here I've added a couple of
cute little floral branches. Even if they weren't
two different branches, we can make them
look very different. For example, let me turn off one and we'll only be
working with this one. So I'm going to tap
on this Arrow and I'm gonna make it a
little bit smaller. And we're going to practice
putting it over here. And let's say we wanted to reuse that and we wanted
it to look different. I can move it over here and we can tap on this Arrow
and we Flip Horizontal, that automatically
looks different. We can make it look smaller, and then we can also warp it
by making it look curved. You just want to be mindful
that you're not warping it. So it looks really weird. So it's pretty good at retaining
integrity of the object. But it's best if you
only do it a little bit. I'm going to two finger
tap to undo that, go back to warp and then
just curve this subtly. And then we have another
one that is different. I'm turning that one on and
I'm gonna go to this arrow, make it a little
bit smaller again. So what we're gonna be
doing is we're going to have all of these
below this flower. So I'm gonna bring this up and it's looking
pretty busy now, I think I might tuck some of these branches below the
S that might look nice. I'm going to start by
tucking this one right here under the S. And I'm going to want to erase
these stems too at the bottom. But not quite yet,
not until I'm done. This one looks good as it is. I think this little branch, I'm gonna make a
little bit smaller. If I grab this green nodule, I can rotate it 15
degrees each time. But if I want a more
subtle rotation, I can grab this
yellow nodule and just kinda put it
where I want it. I think that looks pretty good. Actually, it looks a little
bit busy right now, but I don't think it will once we do a little bit
of intertwining. So let's do that. I might bring this
part under the S. Let me show you what I mean. So, I'm on the wrong flower. I'm on this flower. I'm going to follow
these steps right here. I'm going to tap on this
layer and hit Mask. I'm going to go to the S,
that it's interacting with, and I'm going to hit Select. I get my diagonal lines. I have a pure black, which is a hex
code of all zeros. I have my Monoline and
I'm going to tuck these. What am I doing wrong? I have white, that's my problem. That's the thing
about masking is like a lot of things
can go wrong. So if I'm on my layer and
I'm drawing with white, I'm just adding
white to the white, which is just the same thing. So instead I'm gonna grab
my black and my Monoline and going to make sure
I'm on my Layer Mask. And I'm just going to
tuck this under here. I'm going to have
this part I think on top because the leaves
are on the bottom. I think that looks
good right now. So I'm just going to unselect
that by hitting the Arrow, these stems are
really bugging me, so I'm just going to erase them. I'm not sure which one I'm on, but you can just do
trial and error here. Sometimes I like to
have a little stem sticking out and
sometimes I don't, It's just a matter
of preference. I'm going to group these
layers together so we can move them down a little
bit so they're not interacting with our
directions up here. So I'm going to swipe to the right and I'm
going to tap Group. And now we have our S and all of our flowers and
I'm just going to bring it down a little bit. Next, let's go to
this pretty flower. We're going to follow
the steps again. Up here. We'll tap on
the flower layer and hit Mask and we want it
to interact with the S. So we're going to hit Select. We're going to navigate back to the layer mask with our
black and our Monoline. And I'm going to experiment
with just tucking part of this leaf under here. And I'm going to leave
this little leaf up there. Or I could, I definitely want
to leave that right here. That part is visually
tucked under. I hit the arrow to unselect, I'm going to turn off
our directions here. I think that looks good. We have intertwining. It's legible. I think it's pretty clearly an S, and I think that
is really pretty. If I wanted to say
that I would go to Wrench > Share > JPEG and then I would save it to my camera
roll by hitting Save Image. Now that we have intertwined flowers and leaves
with a single letter, we're gonna go on
to our next lesson, which is intertwining flowers and leaves with a single number. I will see you in
the next lesson.
8. Intertwine Florals With a Number: Welcome back. In
the last lesson, we intertwined flowers and
leaves with a single letter. In this lesson, we're
going to continue our masking practice by intertwining flowers and
leaves with a number. So let's get started. I'm going to use the same
canvas that I used before. I've renamed this group "S", and I'm going to tuck it
underneath my teal texture here. For this one, I'm going to do a number, and I'm
going to do 6. So I'm going to grab
my white again. I'm gonna go to Wench I am going to Add Text. I am going to delete the
texts and just type in 6. And now I need to re-select
that by selecting all. I'm going to tap on this Aa and
go back to the keyboard. And then I'm going
to write in 475, again for the font. And that didn't
change and that's because I didn't
have it selected. I thought I did, but I didn't. So select all > Aa. And then we have 475 here. If I write it in
there, There we go. Now we have a number that's
the exact same size as our letter S. I'm going to bring back
our directions here, and I am going to
center our 6. I have some more flowers down here that I've
already imported. To import a flower, you would just go
Wrench > Insert a File. And you would have
already saved these to your files or camera roll, and then you would
just hit Insert. And we can't see it because
it's underneath this teal, but there it is above it. So I'm just going to
tuck this underneath until we decide what
we're gonna do. I'm going to start
by duplicating these leaves because they're nice and curvy and I think they would interact
well with the 6. I'm going to use our
warping trick to give us more opportunities
for intertwining. So I'm on the leaves, I go to the Selection and
it's on Uniform, which is a nice default
place for that to stay. But I'm gonna go to
Warp and Advanced Mesh. And I'm just going to
start moving this around. Being mindful not to distort the appearance
of it too much. It's just kind of
curving around the 6. I think that looks good. I'm going to grab the Eraser, the Monoline eraser,
and just get rid of part of the stem here. I might want a little
bit of it sticking out. I'm not sure. So I'll just leave that there. And now that we have that, let's bring up these
little yellow flowers. I wish I knew the name of all
these flowers, but I don't. Great! Now I'm just going
to group these together to be organized. So Swipe to the Right > Group, and I'm going to
rename this group Six. So we've labeled our group. I'm going to bring our
two stalks up to the top. I think what I'm
going to want here is some of these
yellow flowers to be totally behind the 6
and some to be on top. So we don't necessarily have
to have things intertwined to give it that intertwined
look. Simply by tucking, Let's say, this guy underneath. So we have our second
yellow flower. I'm going to tap that
Arrow and I'm going to start with Uniform
by making it smaller. Just going to grab one
of those blue nodules and make it a
little bit smaller. And then I'm gonna go back
to Warp > Advanced Mesh and just play with how it might interact with this
set of leaves. And then we have
these leaves that are behind here and
they're kinda hidden. So I'm going to grab this Arrow. And first I'm gonna
go to Uniform. I'm just going to
have them tucked behind those leaves there. And on top of that I'm going to bring a pretty orange flower. And that's going to
be on the very top. And I'm going to
make that smaller. And I'm going to tuck one of these little petals
underneath here. I like this flower because, for example, I could tuck this part
underneath there and still have the other
ones overlapped. I think I might want
that a little bit smaller because remember one of the important parts is
making sure that this is still legible as a number. It's not totally
legible right now, but we haven't begun
our intertwining yet. I'm going to start that
with our leaves here. I am going to follow
our steps right here. So I'm going to
tap on the leaves. I'm going to hit Mask. I'm going to tap on the
6 and hit Select. We get our diagonal lines. And instead of
white, I want black. And I want my Monoline, it's right there, and I go back to my Layer Mask. And I'm going to start
tucking things under. I'm not sure exactly which
route I want to take, but let's just start by
tucking some of this under because we are going to have more yellow
flowers on top of here. I think that looks
good to start. So I'm going to tap my
Arrow and unselect that. I'm going to tap on this group and just bring
it down a little bit. So it's separate from
this text up here. That looks pretty good. I'm going to bring back
this other yellow flower and this orange flower
and see how that looks. I think what I want to do is to warp it a little bit more. So I'm on the Arrow,
I'm on the Warp, I'm on Advanced Mesh,
and I'm just gonna kinda curve it a little bit more. I think that looks nice. I have my stems down here, which I'll erase later, but I'm not gonna
do that quite yet. Now I'm gonna go to
this orange flower and I am going to hit Mask, following the steps up here, go back to my 6, hit Select. I'm on black, Monoline, and I go back to my orange layer and I'm going to try to just see what it looks
like to just tuck this one single leaf under here. And we'll see if that
makes sense visually. I'm not sure it does, but
let me unselect that. Eh, no it doesn't. So, no worries because
this is non-destructive. I'm going to clear my mask and
I'll go back to all white. Let me try flipping
this flower around. So I'm gonna go back to Uniform. I'm going to Flip
Horizontal, and I'm going to twirl this flower around and
this might be what we need. I think that might give us a better opportunity
for intertwining. And what I'm going to do
is I'm going to first turn off this layer and just erase these stems because
they're bugging me. So, I brought back my
orange flower and let's tilt that a little bit and see what it would look like with just this one
petal tucked under the 6. I'm gonna go back to Warp again and Advanced Mesh and just pull this leaf out a little bit. So there's a little bit more
like intertwined action, so you'll be able to see
more of it behind the 6. So let's follow our steps. We have a Layer Mask. We're gonna go to this 6, which we're interacting with and we're going to hit Select. And we are going to use our black Monoline and see if we can visually, like,
tuck this petal. Clearly, I'm not
a botanist here, but I really do love flowers. You don't have to
be really precise with this until we start getting close to interacting with another petal that we might
want to leave on top. So that's where I'm getting
a little bit more precise. And I think that
looks pretty good. So I'm going to tap Unselect. I'm going to bring
this back to Uniform because that's just how
I'm used to seeing it. You know, I think
that looks good. What I don't like here is the stem continuing
to stick out. So let's do more masking
with this layer. It's this, these leaves. So I already have a Layer
Mask and then I go to my 6 and hit Select. And I'm just going to visually
tuck that stem underneath. I'm going to erase the rest of this stem because they
don't, whoops! I'm on, Now I'm drawing in
black rather than erasing on this stem. Okay, So that looks done-ish. I think I like it. I might want to go back to this orange flower and select
it, and go to Warp again and just pull out the
leaves a little bit more. So there's just a little
bit more intertwining. So, let's turn off our directions here and
see how that looks. You know what I'm
when I warped it, I messed up something here. So let's just clear this Layer Mask and
go back to Select. We have our black Monoline. And then once again, I'm just tucking this
back under here. I'll make my monoline smaller. Once I get closer to this leaf. I think that looks nice. Reminder, I would love
to see what you create. So, please remember to
share your projects. You're a single
letter or a number, or if you were very ambitious, a word, in the class
project area. And I love to see them and I comment on everyone.
I love to share. Students worked on social media, on Instagram as well. So if you want me to
tag you on Instagram, add your Instagram handle,
and I will do that. I also have a really quick
bonus lesson for you up next. It's a way that you
can use masking to show off your work
on social media. I will see you in
the next lesson.
9. Bonus! Social Media Masking Tricks: Welcome back. You have probably seen
these tricks being used by other artists on social media and you wondered how to do it. And I am going to show you
these are really quick and easy and they can be used for
a variety of pieces of art, not just intertwined one. So let's get started. What I'm going to do
is I'm going to use this 6 as an example. And what I'm gonna do
first is I'm going to duplicate this by swiping left on the canvas and
hitting Duplicate. And I need a flattened
piece of art, which means I'm not using all
of these different layers. And the reason I made
a copy is because I always want to retain the original piece with
the layers in case I wanted to go back and
tweak them later. But for our purposes, we are just going to be deleting
what we don't need here. We don't need those directions. We don't need this
six at the bottom. And we don't need these
extra flowers here. And I am just going to tap on
this group and hit Flatten. And that flattened
this whole group. And what I can do to
further flatten it is pinch these two together. So now our work is on one layer, which is what we
need for this trick. It is a masking trick. So I'm gonna go to
mask on this layer. And here we have our white mask. Because the mask is white, it reveals everything below it. But if we took a
pure black, six zeros for a hex code and
hit Fill Layer, then we have this
blank screen here. But as we know, white reveals. If we grab a pure white
up here and we could grab a Monoline, make it larger. What we can do is magically bring our piece back
in two different ways. The first trick is the easiest, and we're going to
take our pure white, drag the white to the
middle of the screen. We can hold it here and then
it's filling the layer. So then it automatically
pops up there. So that's a fun way
to reveal your work. And another way to do
it would be to fill this Layer Mask with black again to conceal
the whole thing. And this is the one you
may see more often. You would grab that white again, you would grab a large
brush like a monoline, and you would just start revealing what's
underneath here. Because our Monoline
isn't huge here. It's kind of taking
away from the drama of it because I'm
scribbling this in here. So let's do something. Let's make our monoline bigger. So I'm going to
grab a Monoline. And you can just do this with a regular Procreate Moonline, that we've been using
the whole time. I'm gonna duplicate it and
I'm gonna go to Properties. And right now the brush
maximum size is 44%. I'm going to bring that all
the way up and hit Done. So now we have a
chunkier mono line. So again, that was
just Properties and playing with the size. And as I play with the size
here you can see it changes. And so now we have a larger brush and we have our layer
mask that's in black. And let's see how that works. See this works a lot better. And you can reveal your
work just like that. Once again, you can do that
with any canvas in Procreate, all you need is for
it to be flattened, which means it's on one layer. So I hope that was helpful. If you like these
tricks and you're sharing it on social media, please tag me @kelleybrenburke
so I can see it. Big Congratulations to you. You have almost
finished this class. All we have left is just our final thoughts and that'll just take
a minute or two. I will see you in
the next lesson.
10. Congratulations!: Congratulations, you
have finished the class! Masking is a really
useful tool in Procreate and I hope I
demystified it for you. I can't wait to see
what you create! Upload your intertwined letter
or a number in the class, projects and resources
area on Skillshare. I'll give feedback
to every project. If you share your class
project on Instagram. Tag me @kelleybrenburke, and Catherine from
Avalon Rose Design. She created the gorgeous
digital florals for your project. If you have questions, I've got you click on
the Discussions tab. I'll respond to every question. Thanks for spending
time with me. I published new skill,
share classes often. So click Follow on Skillshare
to hear about the next one. I hope to see you soon.
 Kelley Bren Burke, Artist & Educator