Procreate Magic - Remove Paper Backgrounds From Digital Watercolors | Disha Sharma | Skillshare

Playback Speed


1.0x


  • 0.5x
  • 0.75x
  • 1x (Normal)
  • 1.25x
  • 1.5x
  • 1.75x
  • 2x

Procreate Magic - Remove Paper Backgrounds From Digital Watercolors

teacher avatar Disha Sharma, Artist & Illustrator

Watch this class and thousands more

Get unlimited access to every class
Taught by industry leaders & working professionals
Topics include illustration, design, photography, and more

Watch this class and thousands more

Get unlimited access to every class
Taught by industry leaders & working professionals
Topics include illustration, design, photography, and more

Lessons in This Class

    • 1.

      Introduction

      0:48

    • 2.

      Remove Background

      6:59

  • --
  • Beginner level
  • Intermediate level
  • Advanced level
  • All levels

Community Generated

The level is determined by a majority opinion of students who have reviewed this class. The teacher's recommendation is shown until at least 5 student responses are collected.

225

Students

7

Projects

About This Class

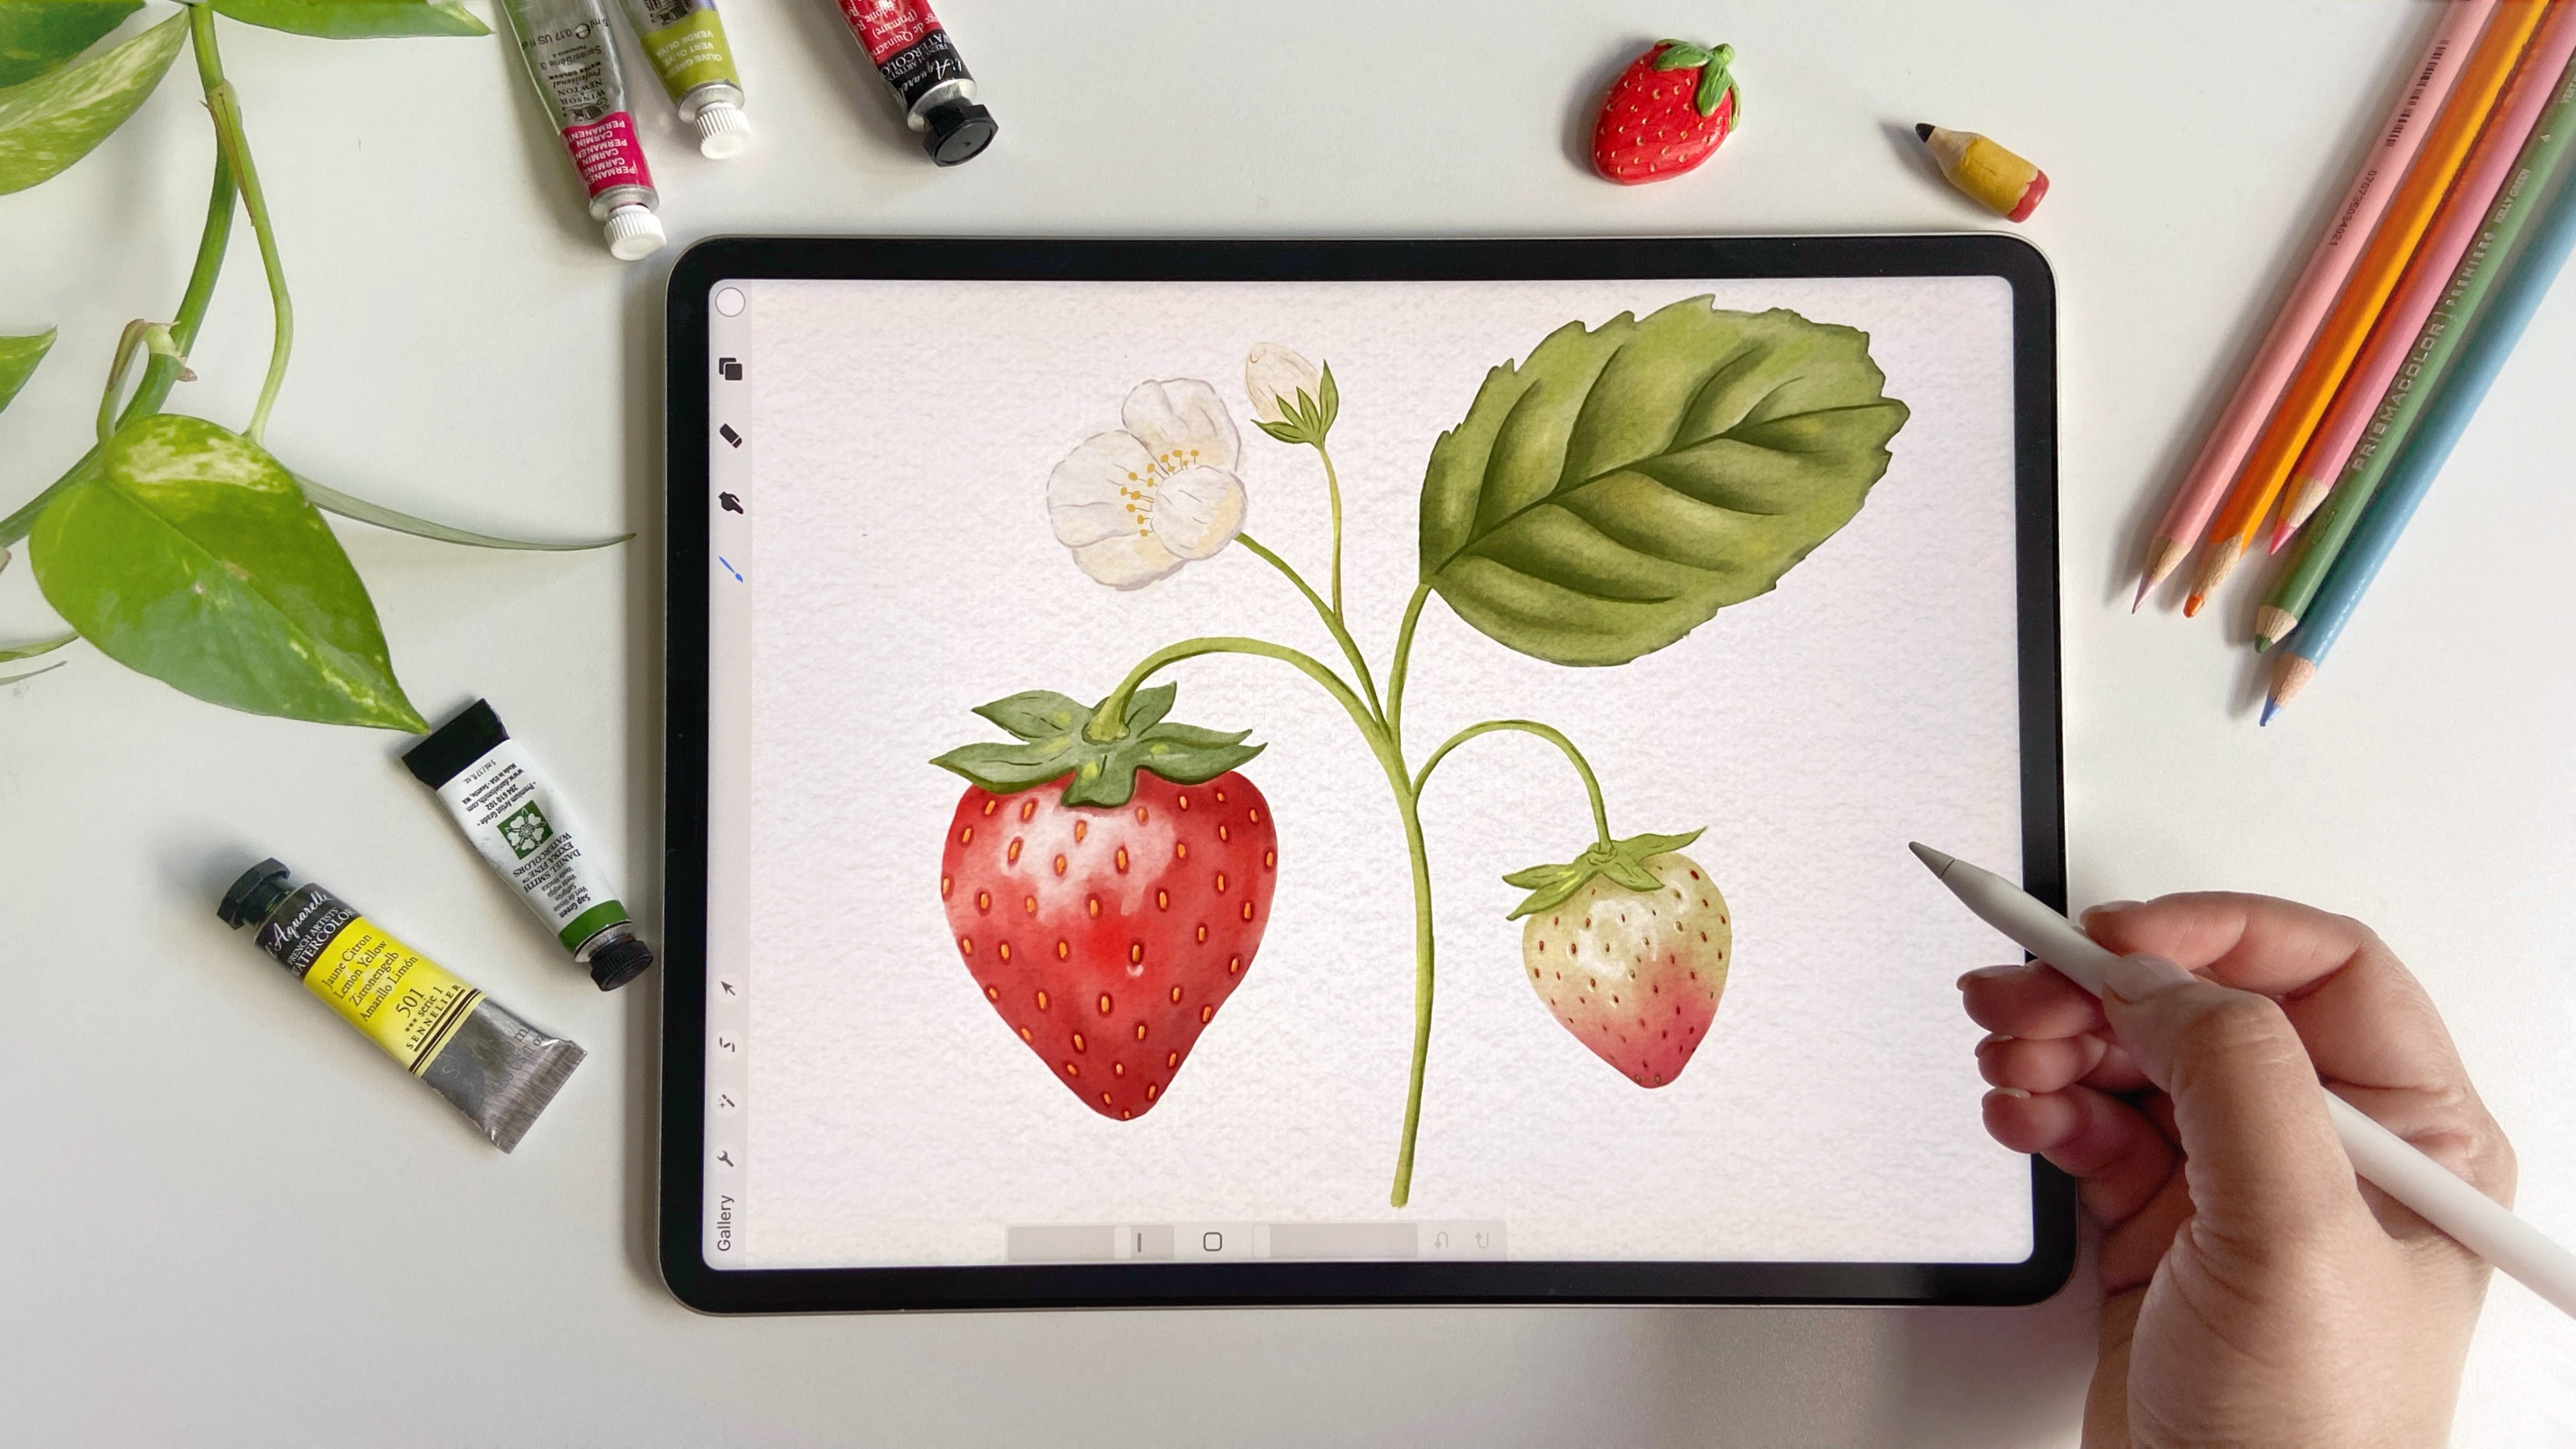
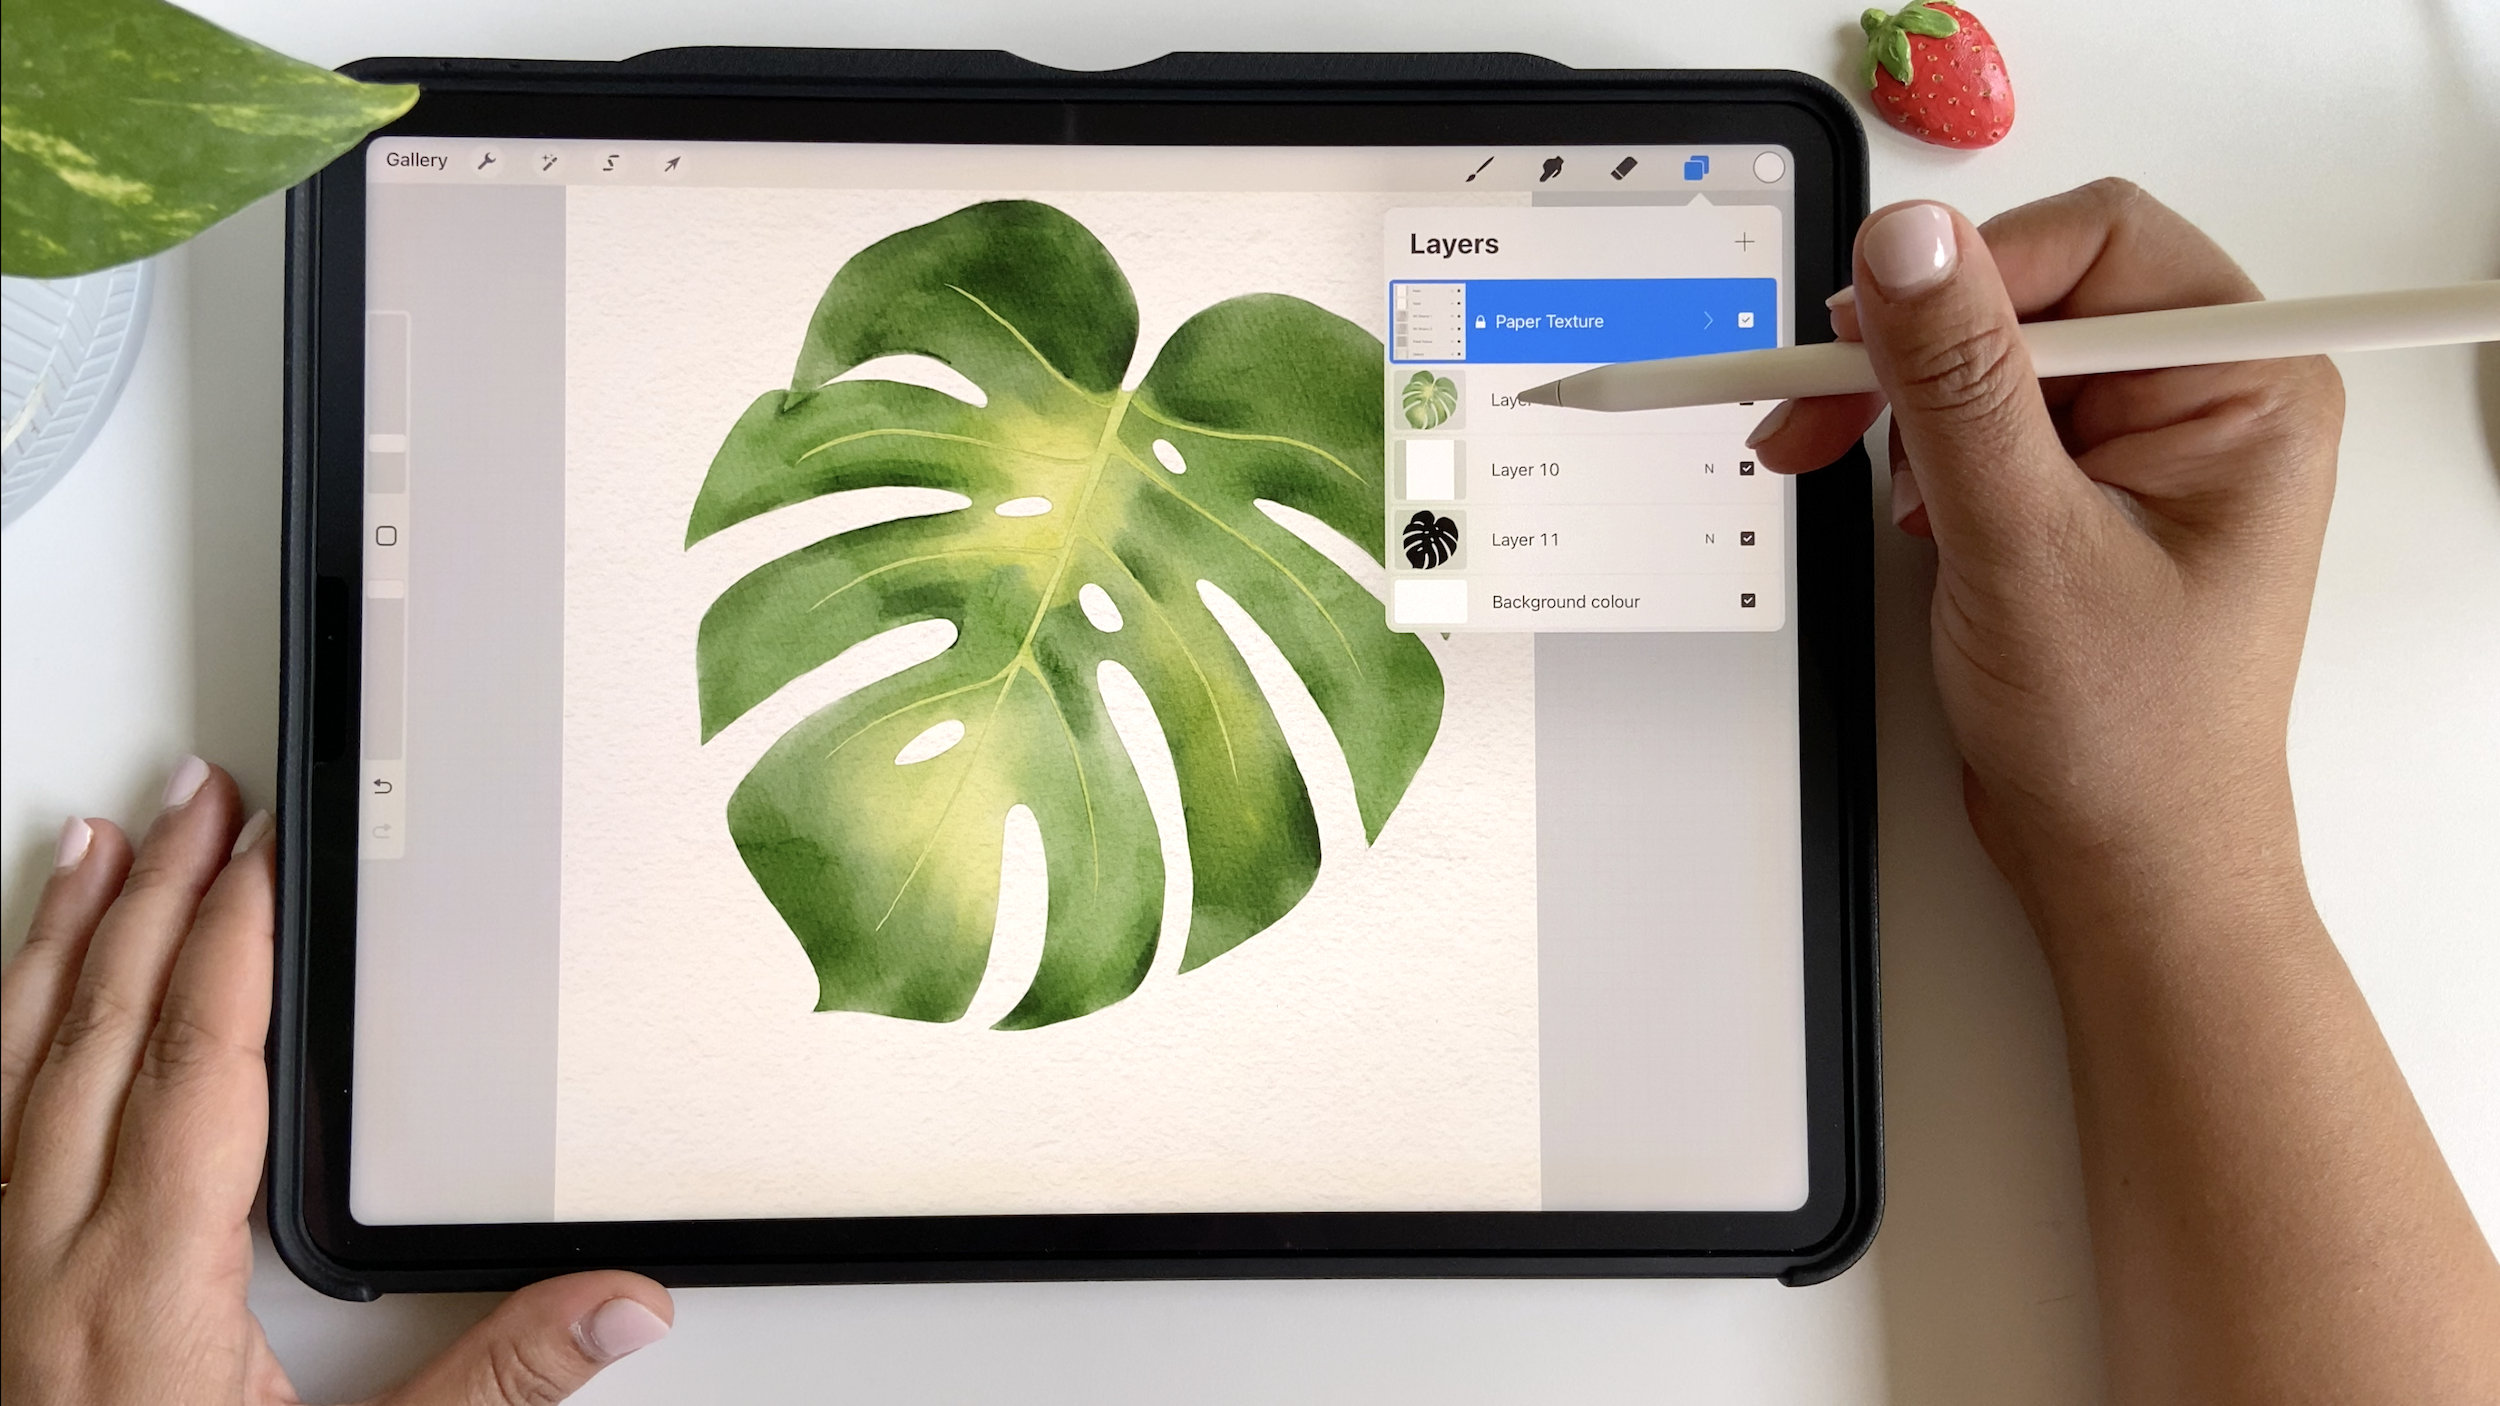
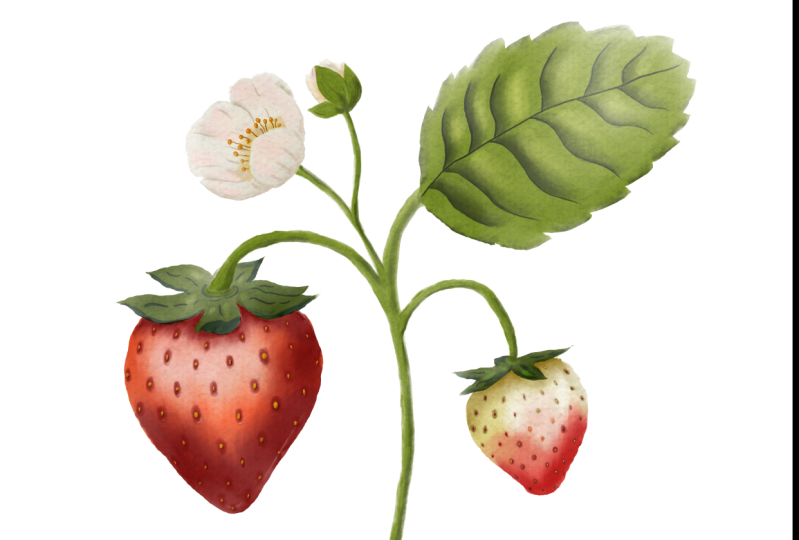
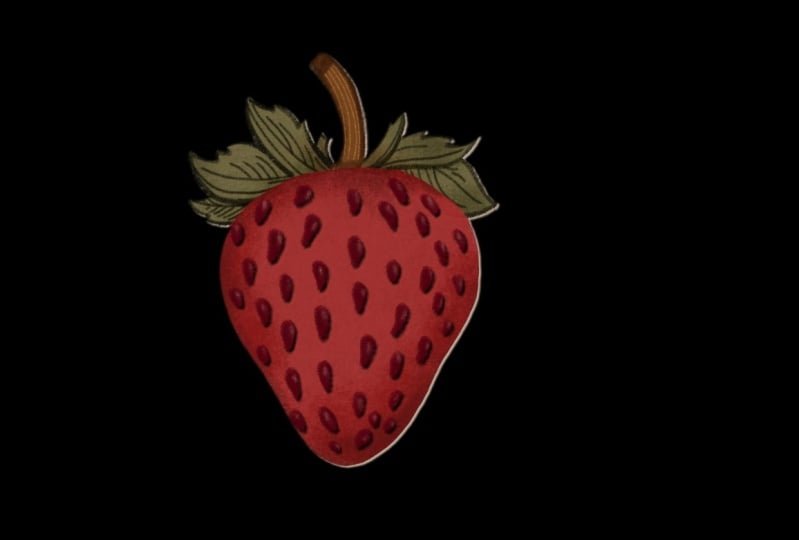
Are you looking to enhance your Digital Watercolor Art by removing unwanted paper backgrounds while keeping that beautiful texture intact? In this short class, you'll discover the secrets to effortlessly achieving professional-quality results in Procreate.

Building on the techniques from my previous class, Watercolor Botanicals in Procreate, we will dive deeper into advanced methods for cleaning up your artwork. You'll learn step-by-step how to precisely remove paper backgrounds and export your creations as high-quality PNG files, perfect for showcasing online or in your digital portfolio.

WHAT YOU'LL LEARN:


- The best tools and techniques in Procreate for removing paper backgrounds.
- How to maintain and enhance the watercolor texture in your artwork.
- Tips and tricks for seamless PNG exports, ensuring your art looks stunning on any platform.

Whether you're a budding illustrator or an experienced artist, this class will equip you with the skills to take your digital watercolor paintings to the next level. Join me in transforming your creative process and making your art stand out!

Meet Your Teacher

Teacher Profile Image

Disha Sharma

Artist & Illustrator

Teacher

Hello and welcome!

I'm Disha--a commercial illustrator and artist specializing in realistic watercolor food illustrations, loose floral paintings, botanical art and digital illustration in Procreate. My work blends the beauty of traditional media with the flexibility of digital tools, creating art that's both vibrant and full of life.

I collaborate with magazines, creative agencies, and brands on editorial illustrations, surface pattern designs, and product packaging. My art has been featured in Shoutout LA, Uppercase Magazine, and Gravy Magazine.

? Polara Studio

JOIN my FREE Art Forest Community in Skool! ? Inside you'll find:

Live Painting Sessions Project ideas & watercolor lessons FREE Tutorials

Click here to join us! See full profile

Level: All Levels

Class Ratings

Expectations Met?
    Exceeded!
  • 0%
  • Yes
  • 0%
  • Somewhat
  • 0%
  • Not really
  • 0%

Why Join Skillshare?

Take award-winning Skillshare Original Classes

Each class has short lessons, hands-on projects

Your membership supports Skillshare teachers

Learn From Anywhere

Take classes on the go with the Skillshare app. Stream or download to watch on the plane, the subway, or wherever you learn best.

Transcripts

1. Introduction: That we can paint watercolor art and procreate. But have you ever wondered how can we clean up the extra background without losing the paper texture from your digital art? Hi, guys. Welcome to this short class, which is kind of a follow up to my previous class, Mastering watercolors in Procreate, in which we learned how to paint realistic watercolor botanicals in procreate. And now we are going to go a little step further and learn how to separate out our artwork from that watercolor background without losing that texture. The technique that we are going to use is very simple and very quick. And in a few minutes, you'll be able to export your artwork as PNG files and use in any kind of a project, whether they are clip arts or surface patterns or greeting cards, Sky's the limit. So what are we waiting for? Let's get to it. 2. Remove Background: So I'll just give you a demo of how I'm going to remove the background, this extra paper from our artwork. Now, just keep in mind whenever we paint with traditional medium. What happens is we paint in layers, but eventually, everything is on one single layer. And when we scan it, we don't lose the paper texture when we're going to remove the extra paper from our artwork. But when we work on procreate or maybe aerobe photoshop or any other tool, we work in different layers, and this stays in different layers as such. So we have everything on separate layers right now. Our artwork is on a separate layer, and our paper texture is on another layer. If I turn off the paper texture, you can see that it looks very different than what we expected. If I want it as a PNG, I want to retain that paper texture in my artwork. There is one way that you can do is you can use the free hand selection tool and just mark down the boundaries of your artwork. Then using that selection, you can cut the paper texture. But although this is not a bad approach, but honestly speaking, it works fine in case of a very simple artwork like a circle or any simple shapes. But if you're going to work on something very complex, something like patterns or any artwork, which has a lot of elements and twists and turns, then it's going to be a very painful process. I'm going to show you a quicker way of doing it. Before I do anything, I'm just going to go to the gallery and we'll create a duplicate of my artwork by swiping left. Just make sure that you always create a backup before you make any such changes to your artwork, just to have a backup in case. There we have it. I'm going to just open this extra piece of my artwork. Now you can see that this one doesn't have a lot of layers, but it's not always the case. If you have taken my previous class in which we painted strawberries, we had multiple layers. Let me just give you a quick look of that. So we worked on this project in our other class, and you can see that we have so many layers. So whenever we are doing the clean up, just make sure that you merge all the painting layers in one layer and then start working on it. Now I'm going to go to the Monstera piece again, and we'll just remove the extra layers. We have a little bit of paint on this one, and I also want to keep the sketch as it is. I'm just going to pinch them together to bring them on one single layer. And once that is done, I'm going to duplicate this layer and hide the top one. Now, the idea here is to create a silhouette of our artworks. Silhouette is just like a shadow or a flat shape of our artwork. No matter what kind of artwork it is, but we need to create that so that we can make this selection quickly. And for that, we'll go to adjustment panel. And pick huge saturation and brightness. From here, we can either reduce the brightness to zero or increase it to the max. It works both ways. We just need the flat shape of our artwork. Let's see what happens if we increase the brightness. You can see that it becomes completely white. If you reduce the brightness, it's just going to become black. If I hide other layers, we can see that there are some white spots in it. We just want it to be completely flat. We don't want any variations or any transparency. To avoid that, just duplicate this layer again. And let's merge it down. I think we'll do it once more, and there we have a flat mastera leaf shape. I think we can do it once more and pinch them together. I also see some extra beds over here and there, so I'm just going to grab an eraser and remove those. We can remove these pencil marks because they are not looking very good. A I think I'm going to fill this gap with just black. Using an inking pen. I'll just fill those gaps, cleaning up the edges wherever I see these imperfections or anything like that. Now we have a black silhouette just as we want it to be. Now let's go to our layers and unhide all of them. The next step is to create one more layer on top of this silhouette layer, and I'm going to pick a white color and just fill this layer with white like this. The next step is to merge this paper texture, our painting and this white layer together. To do that, I'm just going to unlock this texture group and we'll merge these layers. Just make sure that we're merging the paper, the painting layer, and the white layer, not the silhouette one. We have everything on one single layer. Now we need to make the selection using this silhuette. For that, what you need to do is just tap on this thumbnail, and you will say this option, select. Now what happens here is when we pick the select, it has actually selected the silhouette shape. And now we want to invert the selection. For that, just tap on invert here, and now our selection is inverted. It's just that we have made the selection outside the lease. Now going back to our painting layer, what I'm going to do is swipe down with three fingers. And use cut. Here, you can see that we have removed that background and to see it clearly, let's hide these layers. And you can see that the paper texture is intact. Now, if you want to share it, you can go to the wrench tool and share it as a PNG. And I'm just going to save it. And if you want to have a look, let's see that we have our PNG right here. So this is how we can clean up our digital watercolor paintings in Procreate. And that's all for now. I hope you found it useful and I cannot wait to see what you may. Thank you for joining this class.