Transcripts
1. What This Class Is About: Drawing in procreate
is a lot of fun. But do you sometimes wish
you had a better workflow? Especially when you have
to deliver on time? Join the PNG pizza party
in procreate to get a fresh perspective on your illustration
workflow on the ipad. In this class, you will learn an easy and effective
way to draw a cohesive set of
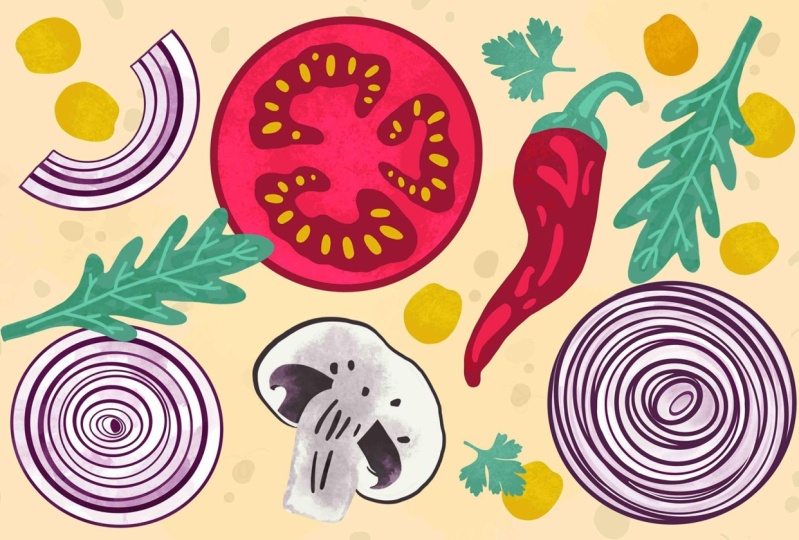
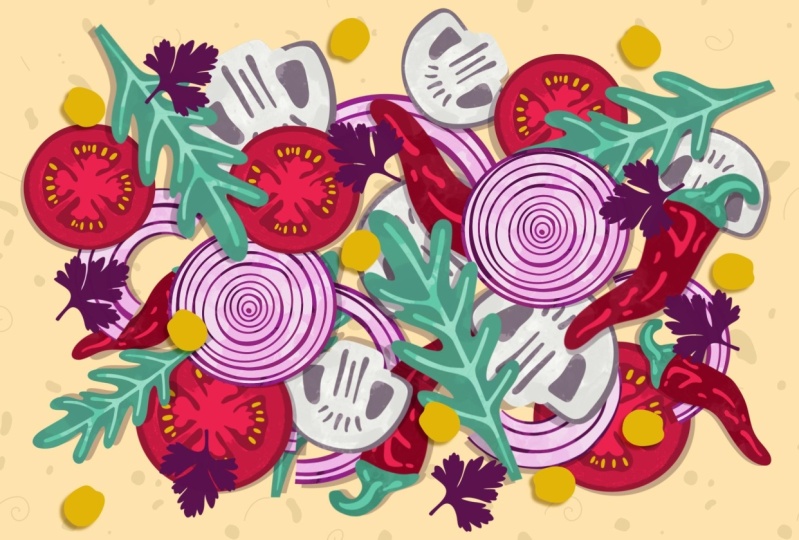
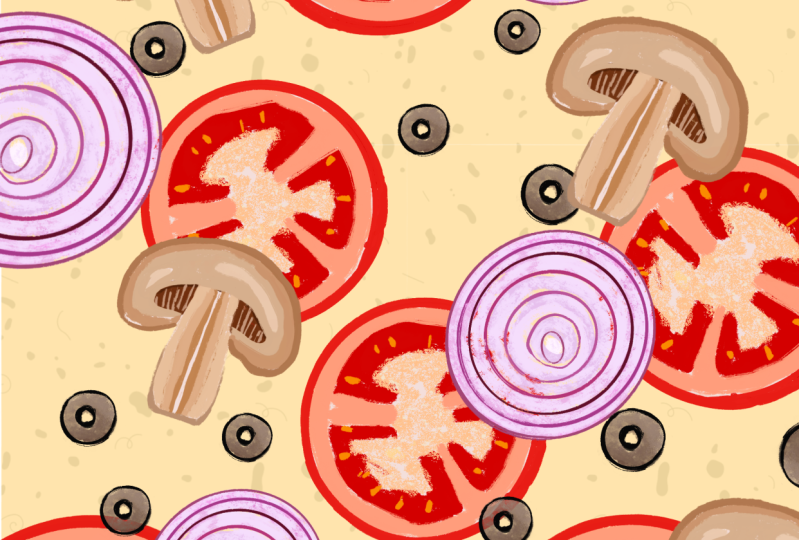
illustrations in procreate on one single canvas. The stars are mushrooms, tomatoes, and your
favorite veggies. You will also learn
how to export and save your hand drawn
illustrations so you can use them in
any design project without having to worry
about the expiry date. By the end of the class, you will know how to
streamline your workflow with a fundamental tool
Im procreate pages. You will also have
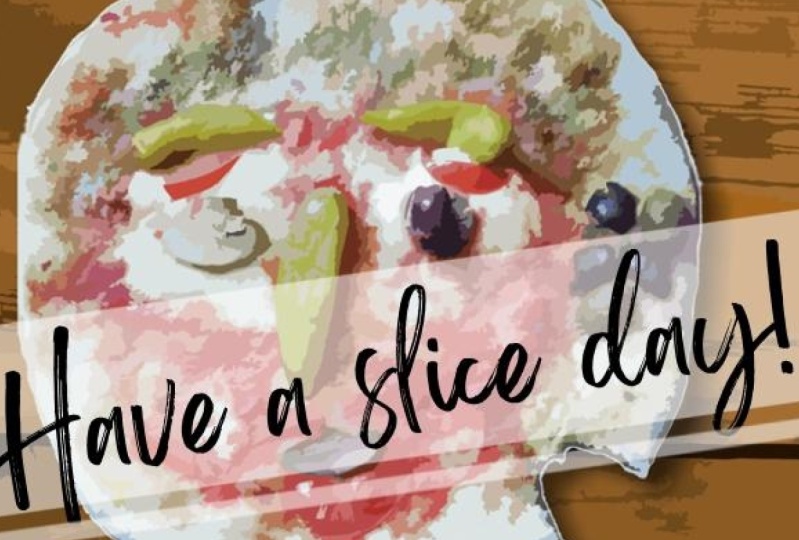
your first library of PNG's that you can use on as many pizza slices as you want or in a fancy pattern
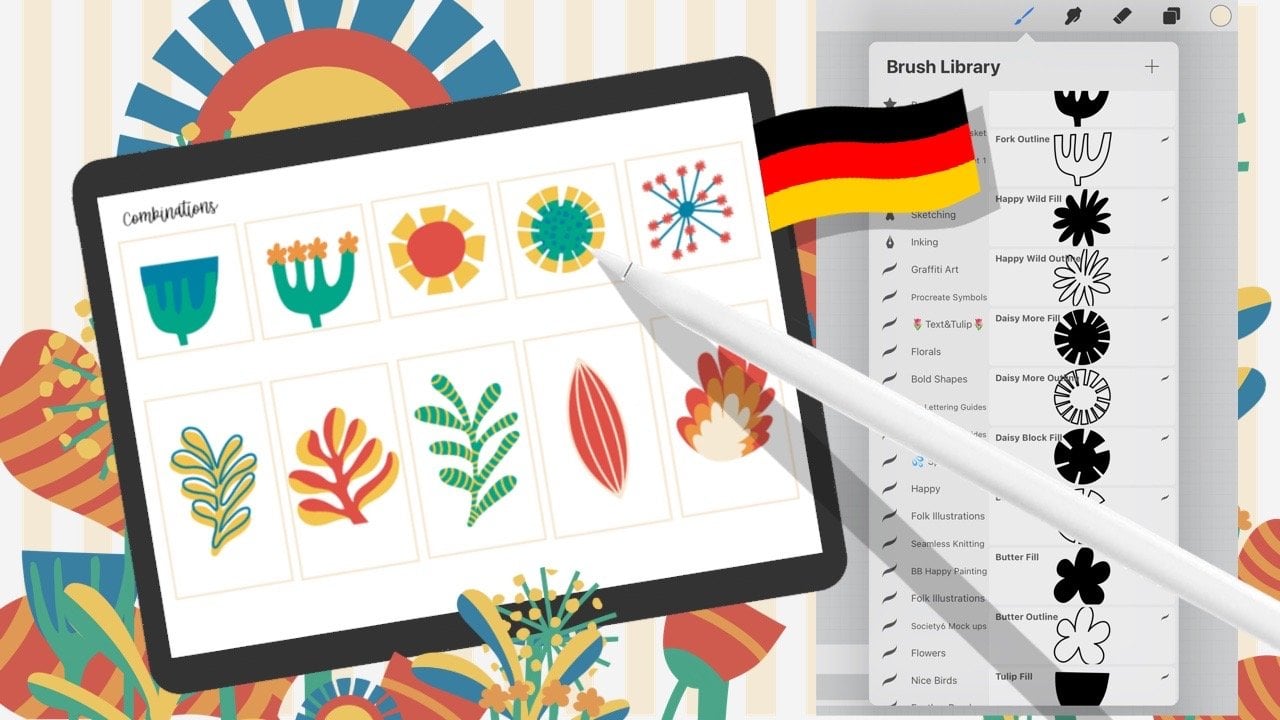
or on a greeting card. My name is Eureka and I'm a
digital artist from Germany. I love using procreate, especially the page
assist to create sets of hand drawn images that I can use easily and flexible
in multiple designs. Whether it's for personal
projects or for client work. I also use this workflow to create my illustration
elements for Canva, like the ones you see in the
video slides for this class. Now in this class, I will guide you through my entire workflow. You will learn how to set up your canvas and enable pagesyst. You will practice
your drawing skills with simple veggie
illustrations. Although this seems super easy, it will help you focus on the craft side of the class such as smooth lines and
very clean shapes. We will then export our illustrations on
transparent background. In one go to create
your pizza PNG library. In no time to make
this set truly yours, you will have time to create
your favorite vegetable too. In the grand finale, we will all come
together to make a pizza with our
illustrated vegetables. Grab your digital pizza
dough and all the resources I provide for you on the project and resources
page on Skillshare. As soon as your slice
is hot and ready, shared with your classmates and deliver it to the
world on Instagram. With hashtag pizza pens, we can create a never
ending Ina pizza. And this is just
one of many ways, maybe you're just
getting started with procreate dreams and
feeling more confident drawing with procreate
a library of hand drawn elements like
this is a true treasure. Just drag and drop them into
procreate dreams and have more room explore all the
great animation features. If you are an
intermediate student with a basic understanding of Procreate is for you to bring your ipad
and Procreate app. This is going to be full of
fun knowledge and veggies. Let's turn this dough into a pizza and streamline your
workflow in Procreate. I can't wait to
see you in class.
2. Your Tools: Hi there. It's so great
to have you in class. Don't worry, you won't need to order a pizza to get started. You will need your
ipad and the Stylus. I use the ipad Pro
and the Apple Pen. Second generation. Of course, we need
the Procreate app. Procreate is available on the app store To make the
most out of this class, you will find resources
on skill share while I keep on staging to have the
studio nice for the class. Head over to projects
and resources. Under download
resources, you will find four files download
on each of them. Firstly, your worksheet. This will help you
with your sketching, and you can also see the colors and stamps we will use in class. Next, the color swatch. It opens automatically in
procreate after you download it and you will find it at the very bottom of
your palette gallery. My tip for keeping
it handy is to tap the three dots and
set it to default. From now on, it's always
available no matter if you are in value
harmony, classic, or disc. Your third resource is
a stem set for a Z, extra topping on
your final pizza. Once downloaded, these also
open directly in procreate, a new brush set is always placed at the top
of your brush library. Feel free to use parsley
and corn kernel in any of your projects Now do
we get everything? No, we have one more goody. The digital pizza dough
comes as a J peck. When you open it in procreate, you will be delighted to
see that it is designed as a repeating pattern that works fabulously for as many
pizza slices as you want. This will be the
starting point for our pizza PNG class project, or better set the
PNG pizza party. Let's have a final check to make sure we have
all the tools we need for the class,
everything in place. Then hop to the next lesson
where I will tell you all the details about your
very yummy class project.
3. Your Project: In our project, we will put your hard work in pages,
this to the test. We will use your
hand drawn PNG's for the very first time in our
fantastic pizza party. All you have to do then is to post your unique pizza slice. In the project
section like this, Feel free to deliver your signature pizza also
to the world of Instagram. So we can have an
amazing collection of unique pizza slices from all the different places in the world where you
watch my class. I know that your students are watching all over the world. Why not pause the video for
a quick second and say hi? In the discussions,
tell us where you're from and what
your favorite veggie is. Of course, you can
add a photo to, maybe you love
tomatoes or tomatoes. I can't wait to read what
your favorite veggie is now. Everyone back amazing. Well, this was an excellent
warm up time to get started and set up your
canvas with pagesist.
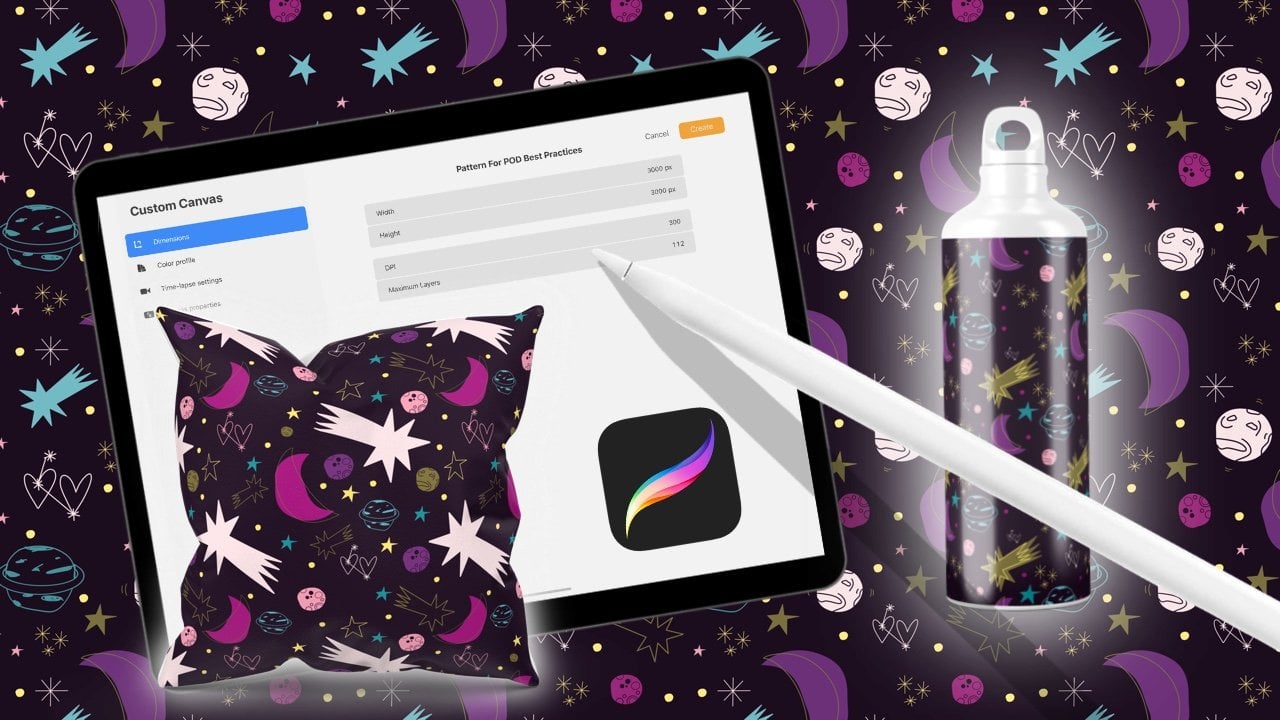
4. Set Up Your Canvas With Page Assist: All right, let's
set up our canvas. Tap on the plus in the
top right hand corner. And now tap this black rectangle to open custom canvas menu. We want to turn this tomato into a simple illustration
with only a few details. 2000 by 2000 pixel is fine. Our drawings will
be just elements, they can still be part of a much larger composition later. 300 DPI is fine and our color mode is RGB.
Are you ready then? Tap done. Right at the start, we will set up our
canvas in a way that can structure our entire
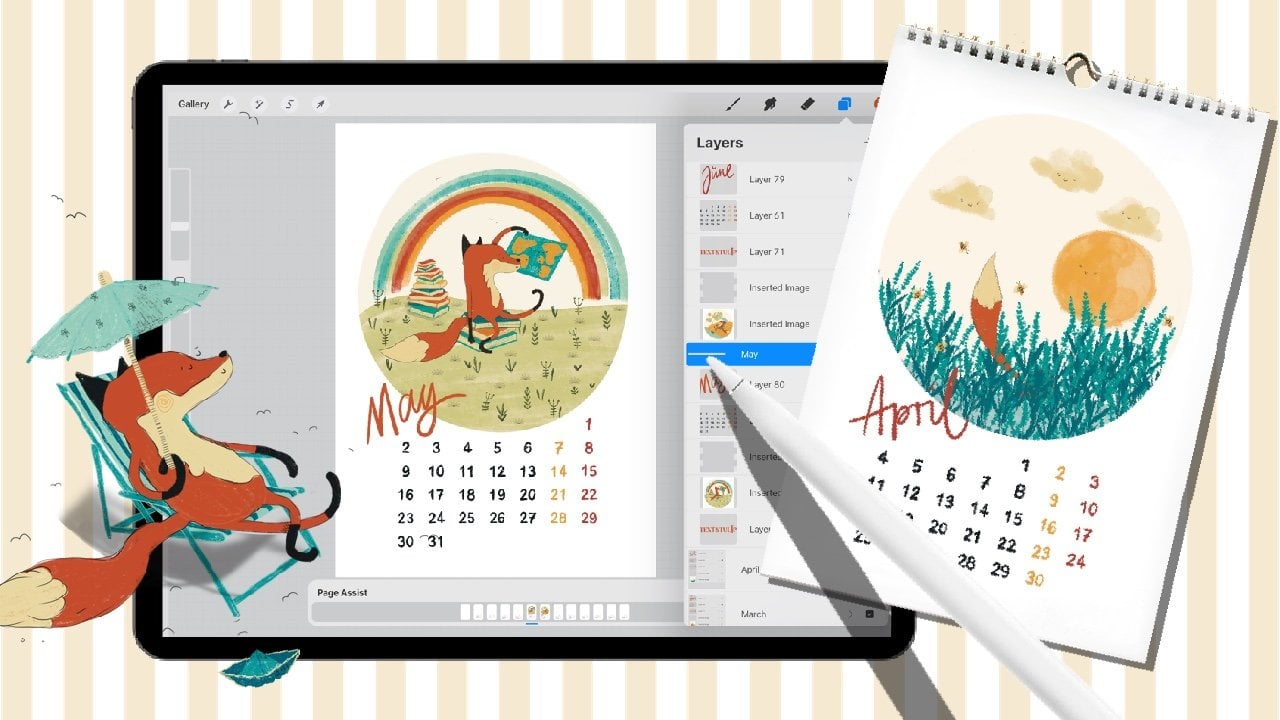
workflow with pagesyst. Go to the Action
menu, Tap on Canvas. The third option is pages
cyst. Let's toggle this on. You will see that
there's automatically a timeline at the bottom that
shows your active pages. You can add another page
here and it will appear as a thumbnail in your timeline,
in your layers menu. Each page is a layer
or a layer group. Now let's bring our
first star to the party, our digital dome tap, add and select ad
photo or Add file, depending on where you
have saved your resources. In our layers menu, it shows up in the second
layer we created. Procreate also
organizes new layers. On top, your first layer is the one on the far
left of your time line. To work on our vegetables, we want to separate the
tomatoes from the onions, each of them will get a
page with a few layers. All we have to do is select
the layers and tap group. When you move your layers, make sure they stay
inside your group. See how mine just slipped
out and became a new page. This group in total will
build our standard page. One of the standard elements
will be our pizza dough. So we call it that. The above will be our
first sketch layer. We will need more layers for
each step of our workflow. Tap the plus in the layers menu. To create a new layer, you should not see any
changes in the timeline. We still have one page. But when you tap on the bar of the layer group and
create a new layer, you create a new page. Are we good? Are you
still doing okay? Great. You can delete this one and go back
to our standard page. The next part of our workflow
is the refined sketch. We are going to
create one last layer for our illustrations. Got lost at any point. Just go back a few
seconds in the video. The wonderful thing is now, once we have created
a standard page, we can create a copy to have
as many pages as we like. With the same structure, we can collapse the layers
menu and just hit Duplicate. This way, each delicious
veggie element of our pizza will have its own
page with its own layers. Let's put this to the
test in the next lesson, where we will go
through all the steps together and illustrate
this beautiful mushroom.
5. Let’s Draw: Mushrooms: Let's start with our
first pizza veggie. Our first step is to sketch. I take the darkest color
from our color swatch. The brush I'm using is the six pen from the
procreate sketching set. There is a Pinterest board
I created for you and you can find the link on the
projects and resources page. The board is filled
with beautiful images that you can use for
inspiration or reference. If you want to keep it open
while using procreate, just tap the three dots
and then tap, slide over. Now, open procreate and move it to where
you like it best. Let's see if we can find a
great picture of a mushroom. Oh, this is great. Do
you got one you like? Okay, now open the layers menu and go to the first
group to sketch. When you start your sketches begin with simple
geometric shapes. The cap of a mushroom is
usually a umbrella like shape, which is essentially
just half a circle. The shape of the stem, no matter how long or short, can be broken down
into a rectangle. The parts of the gills are more like a quarter of a circle. There are stripes inside
the stem. Do you see that? If you know the perfect
expression for this, please leave a comment. Now let's move on to
the refined sketch, and I will use some of the decoration for a
little live demonstration. Look again at the structure and the funny parts
where the gills of the mushroom are almost hidden. I'm going to keep
all that in mind, but I'm not going to turn it
into an overly rich sketch. Quite the opposite. Let
me show you what I mean. I keep the six pencil, but this time I work
with much more pressure, trying to capture the shape
in almost one stroke. Now it's more about
eliminating redundant lines. Yes, again, I'm capturing the folds in the mushroom stamp, but this time with
very quick lines. In the first sketch, I define the shapes
with small strokes. Now I try not to
overthink my lines too much and just leave room
for small adjustments. Okay, how far are you? I want you to work
at your own pace. Now press pause and take as much time as you
need to refine your sketch. This slide will remain
for a couple of seconds. When you're ready,
press play or back. Fantastic. Now let's
start drawing. I like to have the
refined sketch layer on top of my illustration layer, and we use the opacity
to make it less visible. It's also a good idea to
hide this sketch layer. Now let's start with the
general shape of the mushroom. You can work with
any color you like. I'm using this washed out
wipe and if you tap twice in the area you see pure
white from procreate. Now it's time for another
brush and I switch to the monoline brush from
procreates calligraphy set. Now this is my
favorite exercise. Draw the shape in a single line. Okay, done. You can easily fill
it with color drop. There is usually an annoying dip at the start and end points. Take your time to touch
up things like that. The lines you draw now
should be so neat that you will want to use your
shape over and over again. Okay, Feel free to rotate
your canvas or zoom in and out when you draw the line. You can work free hand. However, you can also use procreate to help you
draw with quick shape, draw your curve and leave the apple pencil on the
screen for a brief moment. Quick shape reacts automatically and creates a balanced arc. You can drag the arc
even further if you have not lifted the
pen yet. Okay, great. Now let's take a closer look
at everything beautiful. Create a new separate layer for the dark areas
of the mushroom. Pick your color. We are ready to go to avoid the messy transitions where the beginning and the end
of the line meet. I gently draw the line
back into the shape, Otherwise it would
look like this. Again, it's the
same with erasing. I rarely erase point
by point stats topic. I tend to make broad and soft strokes even
with the eraser brush. Now back to drawing here you can see again how I let the lines flow
into each other. Like this. Here you can see once again, the trouble it would
cause if you didn't pay attention to it like this. Okay, we don't want that. Of course, you can
erase such areas, but you can also touch them
up by drawing over them. One more, let's move on to
this stem of our mushroom. You will notice the more
lines you draw neatly, the easier it becomes. Give your hand some
time to warm up. Of course, you can always
adjust the size of your brush to find the size
that works best for you. And one last part of our stem. One final color drop. Maybe a few touch
ups here and there. Okay, and we are good. The only thing we
are still missing is the coloring of the
cap of the mushroom. See this part. Now I'm going to show you a very
simple way to do this. However, we need a
new layer for this. Even we used the
same dark color, because this layer is below the white color layer
of the mushroom. I draw a generous arc. I wait for a quick shape
to balance the shape. And then I connect the start and the end points
with a loose line. Now I fill everything
with color drop. I use now the transform tool. But first turn off snapping to move the shape in
small, gentle steps. Now I work with the eraser tool in the same clean
way I drew before. It's up to you to
refine your outline now until you're happy
with the result. So remember, these illustrations should last you a long time. You decide how accurate
you want them to be, okay? Yeah, like this. Okay. Again, work at
your very own pace. Now, press pause. When you're done, hit play. I'll be waiting for you here. And then we can take the
very last step together. Now, our final step. Clean up. What a cleanup. Yes, we have a
very tidy kitchen, but what this is really
about is our final result. All of our pizza
vegetables are exported as PNG's with a
transparent background. This means that every
little pixel crump we haven't erased is visible. And that would be very annoying. In order to be able
to see every arrow, it's best to choose a
high contrast background, and sure enough, there's
already a little spec. Let's get rid of it. If you still want to
improve some outlines, this might be your last
chance to refine some parts. In my opinion, this edge
here is not quite right. I want to soften that. Okay, like this. Once again, we check all the lines
and transitions. This work simply
demands accuracy, which honestly helps
me to slow down and recharge my batteries
throughout a creative process. Okay, that's good.
Switch between the layers so you can
re check everything. Yes, it does take time. Actually, this is me
behind the scenes, still touching up the outline. Look how dry the Arugula
has gotten by now? No. Okay. Once again. Okay, that's it, bravo. We have worked really hard now. Let's name the layer group and call it as it
is, it's a mushroom. One last thing before we go, let's set the stage for our
next pizza star, our tomato. Just duplicate the
standard page with a swipe to the left
and we're done. Fantastic. In our
pages timeline, we have now already three pages. That's a very good start. Let's move forward and see
you in the next lesson.
6. Let’s Draw: Tomatoes: And on to the next
vegetable, the tomato. But as much as I like
them on my pizza, they simply don't belong
sliced anywhere near my ipad. Let's use our worksheet
from the resources instead. Here we have a totally tomato saucery
sketch to work with. Now open the second group in the Layer menu and
click on Sketch. Now we import the
image into this layer. To do this, go to the Action menu and
select Import Photo. If you have saved it
to your photo gallery, you can easily zoom in with two fingers until it only shows this
sketch of the tomato. Great, I don't want the pieces of the chili pepper and the onion to be visible. For this, I click on
the selection tool. I use the freehand tool
and circle loosely around the tomato swipe
down with three fingers. Four, copy paste Menu. Tap, copy, paste. Only The selection is now
copied to a new layer. Align the sketch in the middle. Now to finish our pizza
preparation on time, You can skip the
sketching phase for once, and you can also delete refined sketch and
start with drawing. First of course,
we choose a color. This tomato here has a
rather squeaky color. In the studio light,
I better stick with the darkest red from our color swatch for
the skin of the tomato. For the brush, let's
go straight back to the procreate calligraphy set
and use the monoline brush. I reduce the visibility
of the sketch layer. And I'm ready now we'll start
with a very simple circle. If I hold my finger
on the canvas, procreate automatically
balance it with quick shape. As you can see, I'm
using drawing support, but I'm not using a
perfect circle or the symmetry tool to
keep it a bit more, let's say natural or
it's more whimsical. And one more touch up here. Okay, but that's all right. Now the inside of the tomato needs its
own layer, of course. But I want to show you another quick trick for easy working. First I choose my color. Now I duplicate the
original circle. I set it to alpha lock with
a simple swipe to the right. Now tap fill layer and it
is in this beautiful color. Now I can use the
transformation tool to scale this circle a little smaller and align it in the middle of the
original shape, PZ. Now we move the sketch
layer back to the top of the group with a
sketch underneath. It should be now
very easy to draw the shape inside the
tomato in one stroke. I'll choose the dark
red color Again, our brush is still the
monoline brush from the caligraphy set ready. Okay, here we go. I would like to have
my drawing layer at the top. Here we go. Let's see how warmed up
our drawing hand is. Now try to draw in one go. All right, let's do this. Perfect. This transition has unfortunately got a hard edge. It's best to touch
it up right away Again, I work in
long, soft strokes. Turn the canvas before you
start the next element, and zoom in as far as you
feel comfortable drawing. Are you able to draw in one go? Great. Now the last shape. All right, finishing
line, Fantastic. Now, and then check how
your canvas is aligned. Have a look at the
pages. Time line below. And rotate the canvas back until none of your
vegetables are upside down. See the little mushroom? Okay, now he's
happy on his foot. Perfect. If you still need some time to draw this part of the tomato, now is a good time to hit pause, press, play as soon
as you're ready. What is still missing are the small seeds
inside the tomato. I will draw them in this
light, golden, yellow. And don't forget to create a new layer for each new color. We can't see the
sketch right now. Let's go back to
the layer menu and reduce the visibility
of this layer. Here are the lines of my sketow. Check again that you are on
a new layer. Okay, great. We might have enough time to complete tasks, that's great. But sometimes a little
time pressure can boost your efficiency and
also your productivity. So sometimes a
deadline is great. I now have a timer
running to show you how long I actually need
for the tomato sets. I have to admit that
just the presence of the stopwatch makes me
feel a bit uncomfortable. One author put it so well and said deadlines have
a forcing function. I really like that, and I
think so does a stopwatch too. Now draw along with me. At the same time, the sketch serves as a guide. You're free to decide the
size and shape of your seats. Make sure you work neatly, even if the clock
is running fast. To avoid spending extra time
on corrections like this, you can do that, right? Okay. You will see that practice is key. So the next round
of tomato seeds, okay, we are nearly there. And you will see you're getting better with every set you draw. Like this. Fantastic. Make sure that
your lines meet neatly. Fantastic. Whoop exactly 2
minutes and 30 seconds, okay? One little more, okay? Now there are still
some seats missing, but no time pressure
at all for this part. Press again and draw
at your own pace. I will see you
again in a moment. You can also leave
a note here in the video about how long
it took you in total. Now for the fourth step, we turn off the sketch.
It's clean up time. I could find some
softer lines here. I think this part, but again, we need the background color
with strong contrast. Don't forget to
look at each layer carefully before moving
on to the next lesson. I'll see you there and it
will be a breeze, I promise. Hopefully, your eyes
won't get watery though, because we are going
to chop the onion.
7. Let’s Draw: Onions: Before we move on, we have
to copy our standard page. Great. Now we can get started
with our third vegetable. This is the simplest
of all, The onion. Have a look, it's just rings. In this lesson, I
want to show you a few other great
procreate kitchen tips. We skip sketching, but we will do all the steps in our
last veggie session, no escape then that's the
great thing about pages. You keep the general
thread in your workflow, but you can adjust the pages
to your liking at any time. Now first I draw a circle. I close the line and hold two fingers on the
canvas for quick shape, it's so easy to create
a perfect circle. Next the lines that
are inside the onion, we need a new layer for these. I use this really sick
dark purple as a color. This will be now quick
shapes, finest hour. Draw circles or ellipses at
the start and the end point. Touch and hold your pencil on the canvas for
a moment longer. In a snap, your lines
will be balanced, but you won't have a
rigid perfect circle, which is a very good
thing to have, right? You can see that the
rings in our original have also such a
beautiful, slight drift. Stay focused that your
matching points look smoothly. Quick shape doesn't do that
for you yet. There it is. You don't have to draw it again. You can touch up
those imperfections with a really fine brush tip. I hope your eyes aren't watering
yet. Are you all right? Are you good? Great. Then
let's draw the last rings. Perfectly great. Or not okay to finger tap, to undo, but now. Okay, great. To give the rings a
little more character, I draw a few final lines. Okay. For consistency, you can remember the different brush thicknesses here on the slider. They appear as marker
points that you can easily jump to
by pressing on them. Now work independently and draw the inner
lines as you wish. Look, for example,
this has two eyes and sometimes shows thicker and
sometimes thinner areas. Press pause and press play
again. Once you're ready, you're right on time to draw the skin of
the onion with me. Choose a fairly wide brush size. Now draw the final outer circle. Now again. Okay, a
bit closer And done. Perfect. You know what's coming? Yes. Now it's time to
clean the vegetables. Zoom in closely. Now you can see
that the parts of the light color still
extend beyond the skin. What does the onion say? It shows me a fine, dark purple. Let's do it. This
should be easy now, like this, but with
a contrasting color. You can see the light areas that need to be
erased much easier. Let's turn the contrasting
background on. Great, this is one part to
erase those light areas, but also look carefully at
the inner lines to make sure there are no half finished
lines. Let's see. Yeah, like this one. Okay. You know what to do,
I think. All right. So now it's time to find your own pace and
clean everything. I will see you for another great kitchen trick in a second. Here is the great kitchen trick, but first we have
to name the group. Okay, that is easy. Now let's duplicate this group, and I will tell you
why in a second. We do not want to have just big slices of onions
on the pizza, right? But also half of it like this and nice little onion rings
like these guys. Okay? But we do not touch the
ipad with dirty fingers. Clean your hands first, right? Of course, we are not
redrawing the rings, We are chopping the onion in half as we do in the kitchen. Tap on the selection
and free hand should be selected at the bottom
of the selection tool bar. Now draw the dashed line
diagonally and on the outside, back to the starting point. Now tap safe and load. Now tap the plus. Now you can apply the exact
selection to all your layers. We still have to
click Copy Paste, and see half of the purple rings are now
copied to a new layer. Now we repeat the same process with the light color
part of the onion. Press selection and press
save load, press, copy paste. And we have the exact same half of the onion in a new layer. Excellent, We chopped
the onion but digitally. Fantastic. Jump back in the
video if it went too fast. Lastly, I would like to
have a slim half ring. We don't need this part. You can see here in
our live model that the inside of the onion
always ends in white. That might be good
to keep in mind. First, I duplicate
the half onion. You can delete the whole onion, now we already have it. And switch to your
layers with the lines. Make your work as
easy as possible. Turn off any colors
that irritate you and adjust the size
of your eraser as you go. Fabulous. You know what to do. It's time to work at
your own pace Again, press pause and hit
Play once you're ready. Okay, the last part, and another life check. Now let's focus on
this fine white edge. Take the eraser and simply
create a nice curve. And you can also adjust this arc because also the eraser
can work with quick shape. Great, now let's erase this big chunk and also the
little crumbs. Fantastic. Now let's check again that everything is completely
neat and clean. Yes, even our layer menu could do with a
little housekeeping. Switch on the background. You can already see
the first onion bits. Everything else looks great. Let's get our pizza dough
Back on the screen. Housekeeping. Last part, we have to name
the layer groups. Half onion, okay, and slim onion.
That should be it. Of course, your onion pieces can have any size and can
come in any shape. You could also just
have drawn a ring. Or only this part here, don't they look like brothers. We, I'll see you again
in our last pizza, vegetable session where each of us will draw their
favorite vege. I promise we keep the workflow of our
standard page this time. No skipping.
8. Let’s Draw: Your Favourite: Okay. We still have one
standard page left. Now, I want you to tap
on the layer group. Tap, rename and write your
favorite vegetable here. The one that should under no circumstances be
missed on your pizza. I'm not showing you mine. Write yours first, Okay? Okay. That won't work. Come on. Let's do it all together
at the same time. My favorite vegetable is
Roccola or Rocket or Arugula. I don't know how you call
it, which one is yours. I give you a moment. In the meantime, I'll
arrange some Roccola around my digital kitchen and everything should
be nice and neatly. Yes, you know the
most beautiful one right next to me.
For inspiration. You see, actually I'm not a Pinterest girl
about this lesson, we will now paint
along with each other, and this time we will follow the steps of our standard page. Exactly. First, the loose
sketch, you draw yours. I draw mine. I start first
with a small framework, which are those lighter
and firmer parts of my Racola leaf. This one, the uneven, funny, curved parts
of the leaf are then centered around it. Okay. And also on the other side, completely asymmetrical, please? Yes. That's how I like it. In the refined sketch,
or as you know, the minimal version
of my sketch, I draw a very confident outline. Again, this also helps
me to familiarize myself a little more with the
overall shape. Let's do it. 123 in one go, please. Okay, and the other side, great. Okay, well, do they
look alike? Just a bit. Also, the middle
section of the leaf, this was still missing. Okay. Just straight lines. How far along are you
with your vegetables? Okay, I'm doing the
color part now. Starting with the
darker shade of the green to keep my
style consistent, I make sure once again that I have my monoline brush set on. Great. Here we go. At first, the outline, I'm very curious to see which
vegetable you are drawing. If you need some more time
to finish your coloring, press pause now and press
play again when you're done. Oh, this was fast. You're already back. I've now
chosen the lighter green. Now I'm adding one branch after the other with a slide curve. Oh, I think I better switch
off the sketch layer. This will give me a better
idea of the flow of my leaves. Okay? And the last two ones, have a look here
at the transition from the center line
to the branches. Okay. I let the lines get
a little thicker, everything looks
a little bit more organic and gets
its very own flow. Of course, you can give your
vegetables your own touch. Did any of you
actually draw garlic? No good pizza should
be without it. I'm about to read what you've written in
the discussions in which parts of the world you draw and what veggies you like. This is going to
be a great party. I need to do a little
bit more here. Great. Okay, last
step, clean up. Of course, you can
see all the lines of the light green very well
on the beautiful purple. This makes it easy
to do the touch ups. I leave some lines a bit unusual that it doesn't
look too even fantastic. Now this looks super finished. Now, very important, if you're working
with color drop, check whether all the
fillings have been successful or whether small imperfections
still need to be repaired. Okay, fantastic. Super. We're finished. Let's switch all the other layers back on. Even our pizza dough. The nice thing about Pagesyst is that you can now go through your entire collection without having to switch to the
gallery back and forth. Look again to see if
they all fit together. They look gorgeous. The next
step is to add some texture. That's when you really
appreciate pagesst.
9. Add Texture and Blending Modes: Let's put the finishing
touches to our vegetables. But before we make any
changes to our pizza jams, let's play it safe and
make a copy of the canvas. First, let's name
your original layer. And of course you are free
to decide how are you ready? Okay, swipe left over the thumbnail of your canvas
and select duplicate. We do not want to get confused, let's add texture to the
name of the copied canvas. Our gallery still
looks lean and nice. Fantastic. Now let's
choose our brush. I want my texture to
have something bold. And there are some
super cool ones in the artistic brush library from Procreate Hearts is exactly
what I'm looking for. It's incredibly
pressure sensitive. If I apply more
pressure to my pen, the texture almost explodes.
This is super cool. If you go over the
same area twice, it creates an overlay. To get started, we also need to prepare the
layer menu a little. Create a new layer above the one you want to
add your texture to. Now, switch on clipping mask. Now the texture is
only applied to the area of the layer where
you have drawn something. You can see it here quite well. Try now how the
pressure sensitivity of the pen can work for you. Start with the darkest
area with strong pressure and release the pressure slightly as you move
the pen upwards. This looks pretty good,
but we can go one step further and experiment
with blending modes. You can see all
blending modes when you tap on the next to
the layer name. The blending modes affect your current layer in interaction
with the layer below. There are 25 different
ones in total. All five above normal have
more of a darkening effect. Now the great thing
is that you can see the effects immediately in
real time in your artwork. If you are familiar
with Photoshop, you probably recognize
some of the modes. Okay, let's go further down. And now we see the options
that tend to lighten, but overlay, for example, both lightens and darkens
an image at the same time. To increase the contrast, just browse through the options and decide on your favorite. Let's see, I think
it will be hard. Light for me, looks great. Now you can soften the effect by changing the
degree of opacity. I'm going with 60% You can now add a texture and blend effect to each
solid color layer. First, create a new layer, switch on clipping mask
and you're ready to go. Don't be shy about trying out
lighter and darker areas. This tends to add
more visual interest, even it looks now. Maybe sometimes a bit messy, but if you soften the effect
with the opacity slider, it will look great, I promise. A bit more. Okay, now let's look through the
blending modes again. At this point, I'm
completely intuitive. If something catches my eye, I stick for it now. Now I reduce the
effect a little. Make it a bit softer. Great. Now get familiar with the blend modes
at your own pace, press pause now, continue
once you're ready. When you work on your texture, keep in mind that you can
always go back and forth within your pages and see if your
results still fit together. For the sake of
keeping this short, I want to show you just a few tricks when working with texture
and blend modes. One tip. Don't be too
strict with your texture. Use different brushes to
create different effects. For example, here on
the tomato seeds, I now use the monoline
brush at the top right. In the coloring, you
can see that I've chosen ultra, ultra dark purple. Now I'm going to
add some framings. My blend mode, again, is hard mix quite a boat result, but I reduce the opacity to 20% The lines I draw now can extend inside and overlap
in different ways. This is again something
that takes time. Try to work neatly as you go. You can also draw them in a way as if they were
forming in high light. Right? Again, here
are my choices. I have selected hard
mix as a blending mode, and now you can see
it at full opacity. In the final design, I have reduced your
Pacity to 20% This way it blends in nicely with the tomato without
standing out too much. Take a moment to
work on your design, and then I'll see you
again for one last tip. That will save you some time for the last tip, let's get some help
from the onion. I've already applied a
texture to this one, to this layer, but for
our smaller elements, let's tweak the process a bit. We flatten the layer group
in one layer with a pinch. Now, continue as usual, create a new layer, activate clipping mask and
start with your texture. I choose color burn and
hearts as my brush again. Now we just need to apply our
texture with loose strokes. Now jump to the next one. And this is really
easy in pages, this slim onion ring, squeeze the layers together, create a new layer, add clipping mask and
select the blend mode. I go with color burn and
60% and we are ready to go. You see this now applies
to the whole slim ring. Fantastic. There is of course
only one element left. Your favorite vegetable. For me, it's the arugula or rocula. I can't wait to see what your textured
vegetable looks like. Hit pause and I will see you
once again when you're done. Finished.
Congratulations to you. You've worked really hard. Let's take a tour
through our collection. Again, I see I have the
mushroom two times and this is so cool and pagesist that I can immediately see the
comparison in one canvas. This one can go and the
other one can stay. Now it's time to turn our precious pieces
into a special library. In the next lesson, we will turn our vegetables into
ever green PNGs.
10. How to Export and Why: This part might be not
the most glamorous. But I'll take you
behind the scenes of my ipad right into the
organization of my files. When I create an acid, the elements of each canvas
get one separate folder. These three folders above
should serve as examples to show you what you need to pay attention to before you export. The files are named in the
same way as your canvas. Mine are all called
Insert Image, which is really not very useful. Pay attention to that.
Of course you have the option of changing
everything here later. So rename the pretty
flower Yes. Into Hibiscus. Now in the full image preview, you can see whether an
image is saved as in PNG. If so, the background
will change from white to black because the
background is transparent. The second thing you
should pay attention to, I will show you in
my feast folder. In hindsight, of course, I could have named
the files better, but right now, it's about the alignment of your
drawings on the canvas. The orange and the papaya. They all look quite good, but as always, it's
about the peanut. This one, it's quite
far to the left and has unnecessary
amount of negative space. This is very well aligned. Now let's take a quick
detour to procreate. You tap on the little
arrow and make sure that snapping
is switched on. Now you have the guidelines that you can use to
center your drawing. Move it a little more. Great, now it's
perfectly aligned. Another way is to crop
the canvas to fit. However, there's a catch. See this apple in the
peanut collection book? And let's remember that one. Now back to the peanut
and in the action menu, you can go under canvas
to crop and resize. In the Crop Resize editor, I can use the handles to reduce the size of
the canvas so that the peanut hardly has any free
space around it. Perfect. Except now the apple
looks like this. And do the melon
and the avocado. The canvas has now been changed
equally for all of them. You can undo this by tapping on the canvas
with two fingers. Then all the fruits will have
the same amount of space. Again, last tip for your
preparations for that, let's enter the pizza PNG folder that I used to design the class. In this list, you will see
all the vegetable twice. This is because I've saved each one with and
without shadow. Shadows and highlights are not a great idea because they
restrict your upcoming designs. It's better to add such
extras in your final image. Now, you've seen so many PNGs, and I've said it so many times, but why is it our preferred
file format you can save your drawings are the
action menu and then tap Share and choose
from this long list. The most common format is J Pac. You can see above, it
has a file size of 173 kilobyte. Back
to our canvas. Now we go to PNG. In the safe options, you can already see in the preview that the
file is slightly larger. That's because here are the
images we have just exported. The J pec immediately stands out because of its
white background. Even if you've chosen a transparent background
in your canvas, your Jpeg will automatically
be compressed with white. Jpeg is very universal and can be easily
shared with others. But the smaller file
size also means that not all the information of
your image is preserved. There's a slight
loss of quality. A PNG on the other has transparent background
and this is great for overlays,
logos, and graphics. The file is slightly larger, but the quality of your image
is completely preserved. That is exactly what we
want for our vegetables. Let's export it as a PNG
and put the knowledge we've just gained into practice
back to our canvas. Firstly, of course, we check the file name Pizza PNG
elements with texture. Great, do you have that too? That will be the name of
your exported elements. Next, we need a transparent
background to do this. Go to the layer menu
and make sure that the check mark for
background is switched off. Now we need to switch
off the visibility of the pizza dough in
each of our elements. You don't have to delete it
or give it to your neighbors. Just tick off the
visibility in the box. Now a little tip on the side. Pagesyst also offers the option of setting the very
first layer as a default background for all pages just to make things a little bit
easier for the next time. You want to use the same
self drawn background for all elements, the pages, this timeline, all elements must
now have a gray, meaning a transparent
background. When exporting, you
have two options. Firstly, a single element. To do this, go to Share in the Action menu and select PNG. In the first selection
Share image, you can see above that one
element is now shared. I'm now exporting
it to my files. As you can remember,
it is best to create a new folder for a set
right at the beginning. I now call mine pizza
NG class elements. Then I know that these are the ones we've just
made together. Tap Safe. Great. Now that would be quite tedious to
export every single one. Now here is your shortcut. Go to the Action
menu under Share. Here is also Share Layers. This will represent each
page in Page Assist. Now select PNG files
if you export. Now you will see here above that all six images are shared. I go to save two files. Again, luckily the right
folder opens again, tab save. Everything is now saved. Let's have a look at the folder again here and tap on
pizza PNG class elements. This is exactly what
we're looking for. You see all elements are here with one single save action. The one that was at
the top of your layers is your first PNG and the
bottom one is the last. We have to tomato
twice, but that's okay. Another little preparation for our party to make sure we can get to
our elements quickly. I like to save them on my camera role for the
time of the project. To do this, I go to save files, again, under shared layers. I now tap on save images. Now they are saved
to my camera role. But that is just a
personal preference, because if I now have
my pizza dough and go to add and add photos
in the action menu, I can easily select my PNG's. But all of this is part
of our final pizza party. Let's start your project there. And finally, turn this dough
into a delicious pizza. It's going to be great after all the hard work.
See you there.
11. Party Time - Create Your Pizza: Okay, it's party time. You've mastered all
the milestones. Congratulations and hooray. Now pat yourself on the back for all the
hard work you've put in. Now it's time to create our final pizza slice
for the project. You can see our gallery
is nice and sharp and everything is also
nicely decorated here in the studio
for our pizza party. Let's do it. The first thing we do is to create a new canvas, our pizza to to
speak tap the plus. And this time it is
twice the size of an Instagram post
2160 by 2160 pixels. We stick to 300 DPI and
the color profile is RGB. Next we want to get our
digital pizza dough. Wherever you've saved it, you can now import it using a Mine is in my photo gallery. The great thing
about this dough is that it is a magic repeat dough. It is infinitely expandable. This means you can also use
it as a pattern background. Let me show you how nicely
they stick together. I copy the original four times, and then I move each pizza tile diagonally into one
of the four corners. Now this means that you
could also take a multiple of this tile and create
an even larger pizza. If you don't know
exactly how to do this, then take a look at my
class pattern design in procreate three plus one key settings for
print on demand. Now let's briefly check the transitions with a
very dark background. Now we could see if
there are any gaps, but this looks fantastic. But back to our original
tile for our project, it's great if you just stick to this size of the
original dough. Then we can put all the
projects from all the students, or rather let's say
all the pizza slices that are made next
to each other. That would be fantastic.
Thank you for that. Let's get started.
First, let's create an efficient workspace just
like in a good kitchen. Let's name our layer dough. Okay, next we need
our ingredients. If you have saved
them in a folder, then go to Add and add files. Here's our folder
from earlier pizza, P and G class elements. Unfortunately,
procreate doesn't allow you to import them all at once. You have to add each one individually to the
canvas like this. Because of that, I
also like to use the photo gallery because I
can quickly access it again. I can only select
one, but that's okay. But no matter where you
have saved your elements, now is the time to add
each one to your canvas. Okay, and Mushroom. Right now we can build a group
with all elements we have. But don't move the elements
on the canvas just yet. I'll tell you why in a moment. What we are missing
from our list. Let's see, the
whole onion slice. It's like doing the
son plus ahead and preparing all the veggie
slices in layers. In the next step, we make sure there's enough
of everything. But first we create a group. We give this group a great name. I couldn't think of something
else than all stars, but you do yours. Now you can copy this
group as often as you like or whenever you run out
of ingredients important, always copy from this group
to keep the original quality. Now let's switch off the
visibility of the lower groups. These are the first
vegetables we start with. Here's the second request about the project when
topping your pizza. Now please make
sure that none of your vegetables hang like
this over the edge of the pizza to avoid any strange transitions between our various pizza
slices Later on, please work nicely on the dough. Can I hear a chef? Chef? Chef? Okay, thank you. Okay, back to our layer group. The next tip before
you move your veggies, tap on the transition and change within the
transition options. This little blue globe
from nearest to bicubic. This helps to keep your
veggies nice and sharp. Next tip, if your layer group is active as a unit,
it will be blue. And now you can
shrink all elements at once to focus on one element, you can switch off the
visibility of the others. Okay, now the mushroom is left. Change the position or
rotate it as you like. However I recommend. You don't make too
many changes to one element so that
this mushroom, for example, always remains pretty and doesn't
become blurry. It is best to move
all elements that you already use to the
top of your layers. This will give you
a better overview. I can now easily move
the mushrooms again. If you now arrange your
vegetables on the pizza, the hierarchy of the
layer determines the order in which your
vegetables are stacked. Have a look at the tomato here. It's now in second place
and just below a mushroom. Now I move it down one layer, and it can be under
the onion like this. That's a bit easier compared
to a real pizza, isn't it? Now I can scale the
tomatoes again, but I don't change
everything too much so that the
quality remains. Or look, I have mini
tomatoes, that's so nice. Now, press pause one
last time if you like, so that you can prepare your
pizza at your own pace. The topping is something
we will do together. Yes, this is my little
slice of pizza. Finally, our topping, the
stem set from the resources, should be at the top
of your brush library. Now let's start with the corn. I use the light golden yellow. The brush size is 12. Now you can spread your corn kernels
loosely over your pizza. Ah, one crucial thing. Do we have a separate layer? No, we need to
create a new layer, but a two finger tap
will undo everything. Then we'll create a new
layer just for our topping. Zoom in a little
on your canvas and start again if you
rotate your canvas. While doing this,
the corn kernels will point in
different directions, which looks really nice. If you also want to have
some corn in between, create a new layer further down. Now there, here
however you like. I also want to encourage you to be a little bit bolder
with the colors. If you sprinkle
parsley on your pizza, it doesn't necessarily
have to be green. It can also be in a
beautiful, dark purple. That might be a bit big. Okay. I prefer 16 then. Just have a little parsley
party if you like. Maybe you have also
drawn olive rings which should be now on the top of your pizza. Do it as you like. I'm ready. Are you too? Then let's save it as a J
pack to our camera role. Fantastic, export. Successful Hooray. Now let's upload it to
the project section.
12. Submit Your Project: Finale. We are now on the projects and resources
page of Skill Share. Do you see submit project
on the right? Tap on it. First, upload your hot and fresh pizza slice as
your cover image. It will appear as a thumbnail
in the project gallery. Imagine how great the
gallery will look when you all upload
your pizza slices. I can't wait to see that. Also give your project a title. Your cover image will also be the first image on
your project page. No need to edit again, but you can share your
single P and G stars. There's also plenty
of space to share some procreate kitchen secrets
you gained along the way. Enter some text to make the class even easier
to find on skill share. When you're ready, scroll all
the way up and hit Publish. Congratulations, you made it and you've earned your official
certificate for the class. It shows your name and the class you mastered and the
party continues. We are all getting together on Instagram for a big pizza party. So upload your super
tasty digital pizza slice and use the hashtag pizza, PNGs. Also me at Text and tulip, so I don't miss out at
any delicious pieces. This is going to be great. Finally we meet for a little summary and a
big round of applause.
13. Wrap-up and Next Steps: Everything delivered on time. Congratulations to
you once again, a big round of applause for all your diligence
and hard work. Let's wrap it up and have a close look at
everything you learned. You've mastered
three milestones. First, how to set up your
canvas and enable pagesist. You now understand the basic
of setting up your canvas correctly from physical
size to DPI to color mode. You've also learned how pagesist works and how to set up
a clear structure for your illustration
workflow within a standard page number two. You've practiced
your drawing skills with simple food illustrations. You used your set up to draw four cohesive veggie
illustrations. And learned how to
pay attention to detail to create
smooth, clean lines. We also add a texture
and explore procreates, blend modes to add
more visual interest. In the last step, you
learned how to export your illustrations and
create a library or assets. Now you know to avoid the three most common
mistakes before exporting. And learn different
ways of how and where to export to best
suit your workflow. Finally, we put all to the
test in our PNG pizza party. I can't wait to see your
slices in the project gallery. So why not go there and see what your
classmates have done? If you haven't created your
project yet, then do it now. If you still have questions, the discussion is always the right place to ask.
I'm happy to help. Please one more
favor skillshare and especially me as a teacher love to know how you like the class. Please put the pizza aside for a second and leave a review. Your feedback is one of the most important keys to helping new students
discover this class. It's really easy to do. I hope to see you in one of my other classes I teach
here on skill share. There are two more
classes with Page Assist, where we create a set
of design stamps. And in the other we create a calendar which always
makes a great gift. So let's have fun in procreate. And if you happen
to speak German, there are also a whole bunch of beginner classes in Deutsch. Now enjoy your pizza, and don't forget to share slice. I can't wait to see
your fabulous work. Everything closed,
delivered on time, great. It was such a pleasure
with you, choose.
 Ulrike Text&Tulip, Digital Art in Procreate