Transcripts
1. Welcome - Introduction to the Class: You can create a
universe of patterns in Procreate that you will
love to see on products. But are they going to be
fit for Print on Demand? In this class, we will take
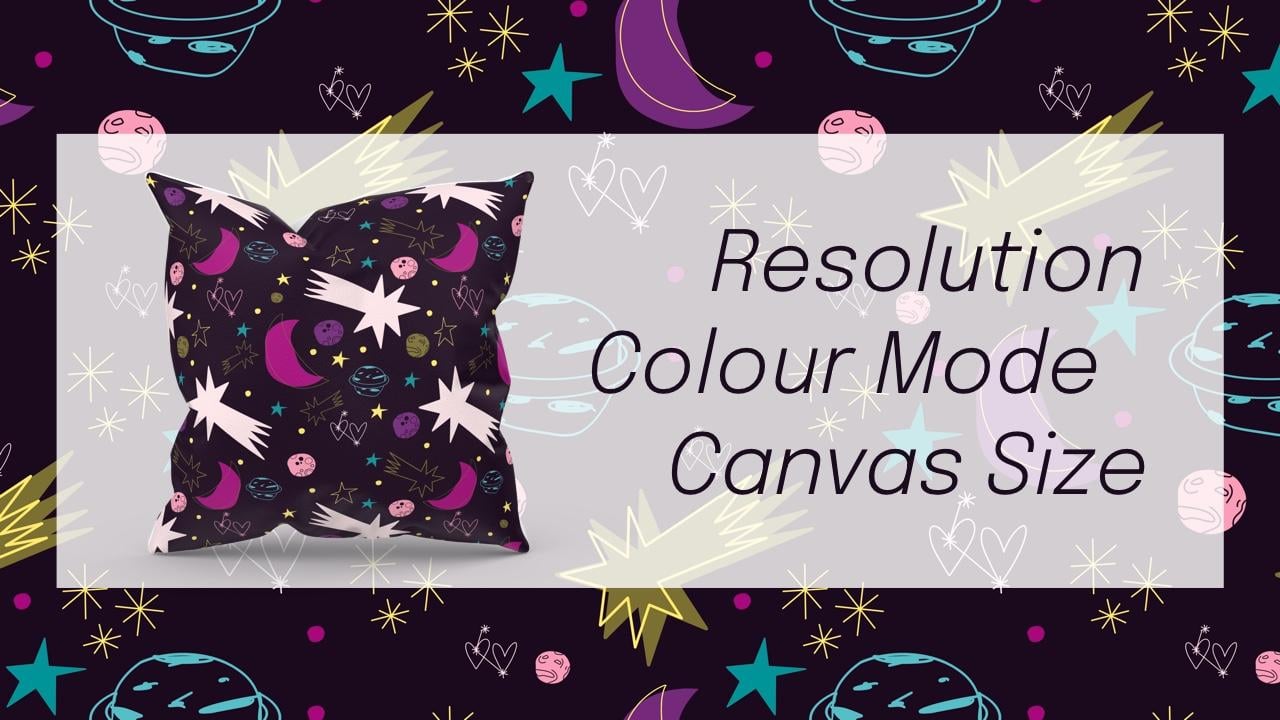
a close look at Resolution, hello Mode, and canvas size. Understanding these fundamentals
and the limitations of Procreate is key to all of your Print on
Demand adventures. By the end of the class, you will have a clear
guidelines on how to prepare your canvas
for Print on Demand and how to enlarge
your pattern to different sizes without losing quality and without using Affinity Designer or
Adobe Illustrator. Hi, my name is Erica
from Text&Tulip. I'm a digital artist and
illustrator based in Germany. And I love creating
Fun and bold patterns in Procreate and bringing
them to society. Six, okay, I love
especially socks. But Print on Demand
can come in many, many forms and even more sizes that I personally
can't stop to explore. Using Procreate has
really opened the door for me to play with
size and color. It is also my everyday
tool for creating mural designs for Creative
network here in Germany. This can be, for example, a floral repeat or a huge collage of handwritten
words and illustrations. Usually anything that strikes at the heart of the company. Creating this class
was a special treat for me as it was a request
from one of my students who were struggling to enlarge her Procreate designs to make it suitable for Print
on Demand products. So in this class you will learn the three key settings for
Print on Demand in Procreate. First, Which resolution
will work best? Second, you will get an understanding of the
different color modes. And third, the best canvas
size for your initial tile. But I will also help you to understand how big
your canvas actually is in relation to the real pattern
elements of a wallpaper. To keep things interesting, I have created as stamp
universe for you to download. You can use this
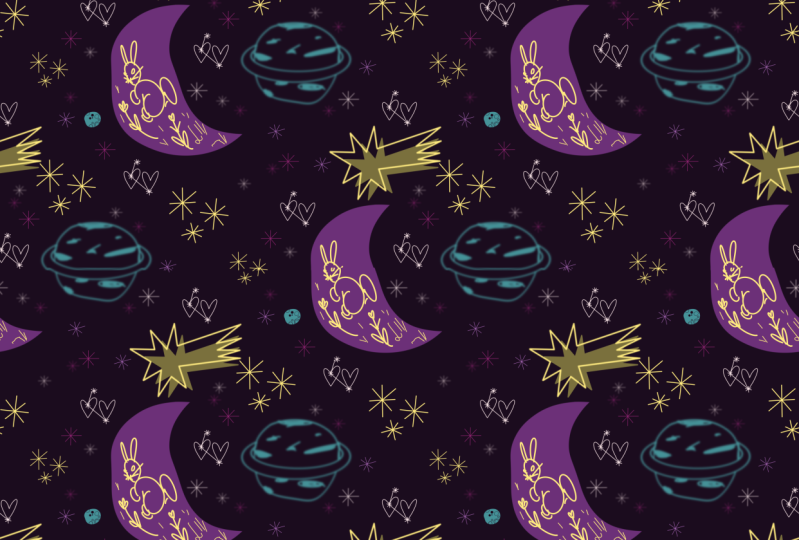
Procreate asset to create Your Pattern from outer space
with me in no time at all. We will then focus
on two ways to enlarge your initial tile
in a perfect repeat. And yes, there is a plus one. I will also tell
you which format in Procreate other than JPEG, guarantees the best quality
for sharing your design. This class is for
intermediate students. You should know the
basic features of Procreate and be familiar
with pattern design. By the end of the class, you will have your
repeat pattern in three different sizes. This could be especially
cool if you're taking your first steps
in print on-demand, especially at society six, we will have a little
sneak peek there. All you need to do as a project is to share
a screenshot of your Procreate gallery showing the patterns you
create it in class. So Bring your iPad and
the Procreate app. I can't wait to
see you in class. Oh, and don't forget
to bring a ruler. We'll be going on a pattern hunt to get a real feel for scale. This will be phon, see you
2. Tools, Resources and Your Project: For this class, you
will need your iPad, a stylus, and of course
the Procreate app. Also, grab a folding ruler for the part away from
our drawing tables. There are two resources I have provided for you to
download for this class. The Universe Stamp
Brushes is a Procreate asset full of fun
illustration stamps from outer space that you can
use for any project. And a colour swatch
for Procreate, if you want to use the same
colors as I do in class. By the end of the class, your gallery will contain three different canvas
sizes of your pattern. It's enough to take
a screenshot of your work as some of them may be too large in file size to share in the Project section
on Skillshare. Safe this picture to
your camera roll. Then head over to Skillshare and upload it to the
Project Gallery. No worries, we will
do all the steps together again in
the last lesson. Now, are you ready? Then let's begin.
3. First Key: Resolution: Print on Demand can
come in many forms. But at the beginning
of your journey, I strongly recommend you start
with the creative brief. There are three technical
pillars you need to focus on. Resolution, Colour
Mode, and Canvas Size. All three are set
in Procreate as the very first step when
you create a new canvas. To do this, click on the plus sign in the
top right-hand corner, and then click this
plus sign on the top of the canvas list and the
Canvas Editor will open. Of course, we will look at each pillar in a
separate lesson. Now, let's start
with resolution. 300 dpi is great for all printing methods to turn your pattern into a
physical product. But Spoonflower, for example, will accept your
designs at 150 DPI. Those settings
will also affect the amount of layers
you can work with. Dpi stands for dots per inch. Imagine you have a little
square that is 1" by 1" each side. DPI measures how many dots per square
will resemble your artwork. Let us zoom into one of
those squares at ten dpi. You can see how blurry
a dot turned out. 72 dpi in contrast gives
already more detail. It's great for all
digital artwork, for example, for social
media or your website. Contrast this with 300 DPI. With this resolution, you
can be sure that everything will be crisp and sharp when
it leaves the print house.
4. Second Key: Colour Mode: The color mode you choose will also depend on
your intended use. And you're printing house
you're working with. Head over to the color
profile to see your options. You can choose
between RGB and CMYK. Cmyk is used for
offset printing, like my small printer
cartridges here, the color is a mixture of cyan, magenta, yellow, and
key, which is black. Cmyk has a smaller
color space in RGB. I will show you its
limitations in a bit. Rgb is the right color space for digital printing offers over
60 million possible colors. Both Society six and Spoonflower
use digital printing. When you design an RGB, you can use the brightest
colors you want, like this. Here, you can see how the
same image looks in RGB mode. Note that you always define
d settings at the beginning. You cannot change
them in Procreate. Once you're working, you would need to create
a new canvas.
5. Third Key: Canvas Size: He is the heart of your design, the size of the canvas
for your initial tile. Most top pattern designers
recommend working on a canvas of 3,000
by 3,000 pixel. This is equivalent
to ten by 10 " or 25.4 centimeter by
25.4 centimeter. I will admit that when I have
the iPad in front of me, I sometimes have a hard time extracting how big
this actually is. So let's put the
iPad aside and have a look at an example of
a pattern in real life. This is do wallpaper
in my studio, which I bought in a DIY
store for very little money. And this is a piece
of paper sample of our canvas in 3,000
by 3,000 pixel. The second paper sample
is equivalent to 3,600 by 3,600 or 12 by 12 ". Let's take both samples
and compare them to the illustrated flowers
you see on the wallpaper. This is a good exercise
to get a feel for how big your heel elements
need to be in Procreate. Remember, Procreate
is pixel-based. You can scale your
artwork down at anytime. You can never scale it up
without losing quality. Now take a short
break and walk around your house or wherever
you're watching this class, look for patterns around you. Take a ruler and measure the
size of the main element. Look also at a smaller elements to see how they
relate to each other. You can take a photo
and make a note of the measurements to use as part of your notes
for the class. Now finally, let's have a
little summary before we actually design a pattern
and try out different sizes. We have a 3,000 by 3,000 canvas, 300 DPI, and RGB color mode. Tap on Create in the top right
corner to exit the editor. Fantastic. This is the canvas
for our first tile.
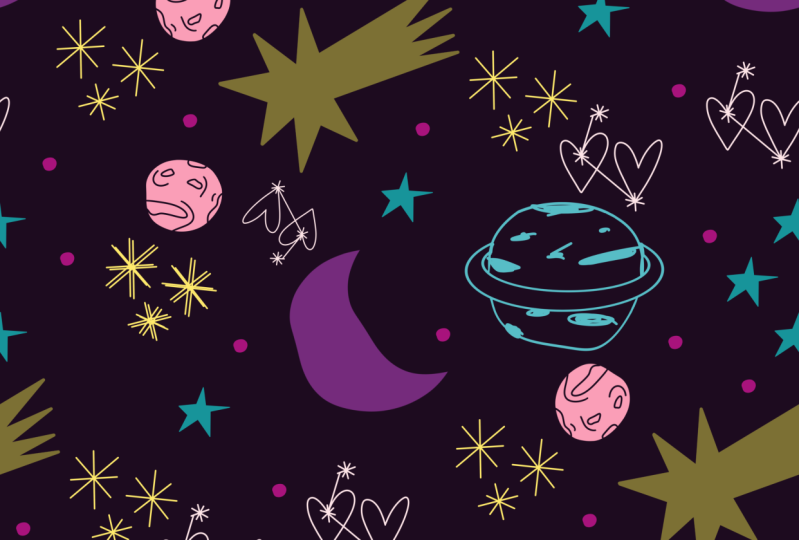
6. Create Your Universe Pattern (+1 More Key): Okay, we have set
the canvas size. Now check that you have
all the resources. If you'd like to create a
similar pattern to mine, you need the universe
colours and you need to have the universe stems at the
top of your brush library. There's something
special about them. This stamp I created for
my favorite zodiac sign, did Gemini, if you'd like to create your own
graphic stamps, check out this class of mine. Also, if you like to speed up your pattern-making
in Procreate, the next step is to set the background color to this
beautiful ultra dark purple. And I'm curious to see
what you will choose. Now go to the Actions menu
to get the drawing guide, tap canvas, tab
on Drawing Guide, and Edit Drawing Guide. Now the interface of the
drawing guide editor opens. Make sure that you
are on 2D grid. Try changing the
color of the grid to a tone that is easy to
see on your canvas. Now, check the thickness of your guides and their opacity. Now, let's increase the
size of your grid until your canvas preview is divided
into four equal squares. Use the green naught
at the top to rotate your grid until do diagonals
point all words the edges. Now reduce the grid
size to the point where a diamond outline or rotated
foursquare is visible again. Okay, Are you ready? Then tap on done to
confirm your choices. That's a great start. You can fill this space
anywhere you like. I will use the diamond guides to create a tossed organic pattern. Still repeats in diagonals, but the diamond guides
will also give you the opportunity to use
the diagonal flow. If you wrote precisely
to the guidelines. Few free to experiment
in all directions. So let's start with the first elements of
your Universe asset. I always begin with one or two hero elements
that are larger in size and then work my way down to smaller filler elements. And a bit larger. Of course, each element will have
its own layer to give me the chance to tweak them
until I liked the design. Now, it is a bit easier
to move the elements smoothly when
snapping is disabled. And now have FUN with
filling the space. Here's a special tip to break the consistent look of
your elements a bit. Create a loose
hand-drawn outline that sits a bit of the form. Take the mono line brush
and start to draw. Or at least try to have
the outline version of a shape within your stem
set and use them offset. And with a little
twist and turn, they look great together. Take your time and make it
as beautiful as you like. Are you ready? Then let us prepare our tile for the repeat First combined all
your design elements into a group and give it a name. You can use scribble or you can use the keyboard to
enter your name. I would just call it
original elements. Okay? Now Create a new layer. Then duplicate the group
you have just created. Tap the name of the group, and then tap flatten. Now all your elements
are on one layer. Fill the top empty layer
with any color you like. Then combine the elements
and the filled layer into one group with the layer containing the
elements on the top. Duplicate this group four times. Of course, it is best
to always duplicate the original layer
so that you do not lose quality
within your design. Last step, make sure snapping
is turned on. Okay, great. Then let the pattern
party begin. Move your first tile into
the top-left corner. There will be snapping at certain points to ensure
the correct alignment. We only need
one-quarter visible. So make sure that the
outer edge at the bottom right is exactly on
the center lines, both horizontally
and vertically. The moment your
guidelines to and yellow, you're right in the
middle of your canvas. And that is what we need. Continue with the next group and move it to the
top right corner. Pay attention to
the center lines to ensure a perfect repeat. Do the same with a third tile. And move this one to
the bottom left corner. The last one to the
bottom right corner. Okay, fabulous. Now we delete a flat
fill layer in each of our tiles so that only
our elements are visible. That looks great already. So let's make sure we
have a perfect repeat. First, we squeeze all corner
elements into one layer. Now go to the Actions menu, tap, Add in the top, and then select Copy Canvas. Open the menu again
and select Paste. Now you have a new layer with the exact copy of what is
visible on your canvas. We need this exactly
four times 123. And number four. Now we move each layer into
a corner of the canvas, but this time we minimize
it proportionally, tab on the blue corner node
and drag it diagonally towards the edge of your canvas until our yellow lines appear. Now, do the same with a second and also with
the third tile. Last but not least,
our foursquare. It helps to zoom in close or
have a contrasting color in the background to really see if your tiles are
perfectly aligned. So let's see. There
is a mistake. I would suggest, tap
with two fingers on your canvas to undo
and start again. Okay, let's try yellow lines
and now zoom in again. Okay, this looks lovely. Now to save layers, combine all four of them
into a single tile. Like this. Fabulous. But let's go back to our original
tile and save it. Go back to the Actions
menu and tap on P&G. P&g or higher in quality than
JPEGS and will ensure you have the best quality possible
for your print on demands. Gorgeous. Now, let's get our
repeat on a larger canvas.
7. Enlarge Your Pattern Using Crop and Resize: Before we make any changes
to the size of our canvas, Let's play it safe
and make a copy. Go to the gallery. Swipe left on the thumbnail of yard work and tap Duplicate. Don't forget to give it a name. This will help you
organize your files, especially when you
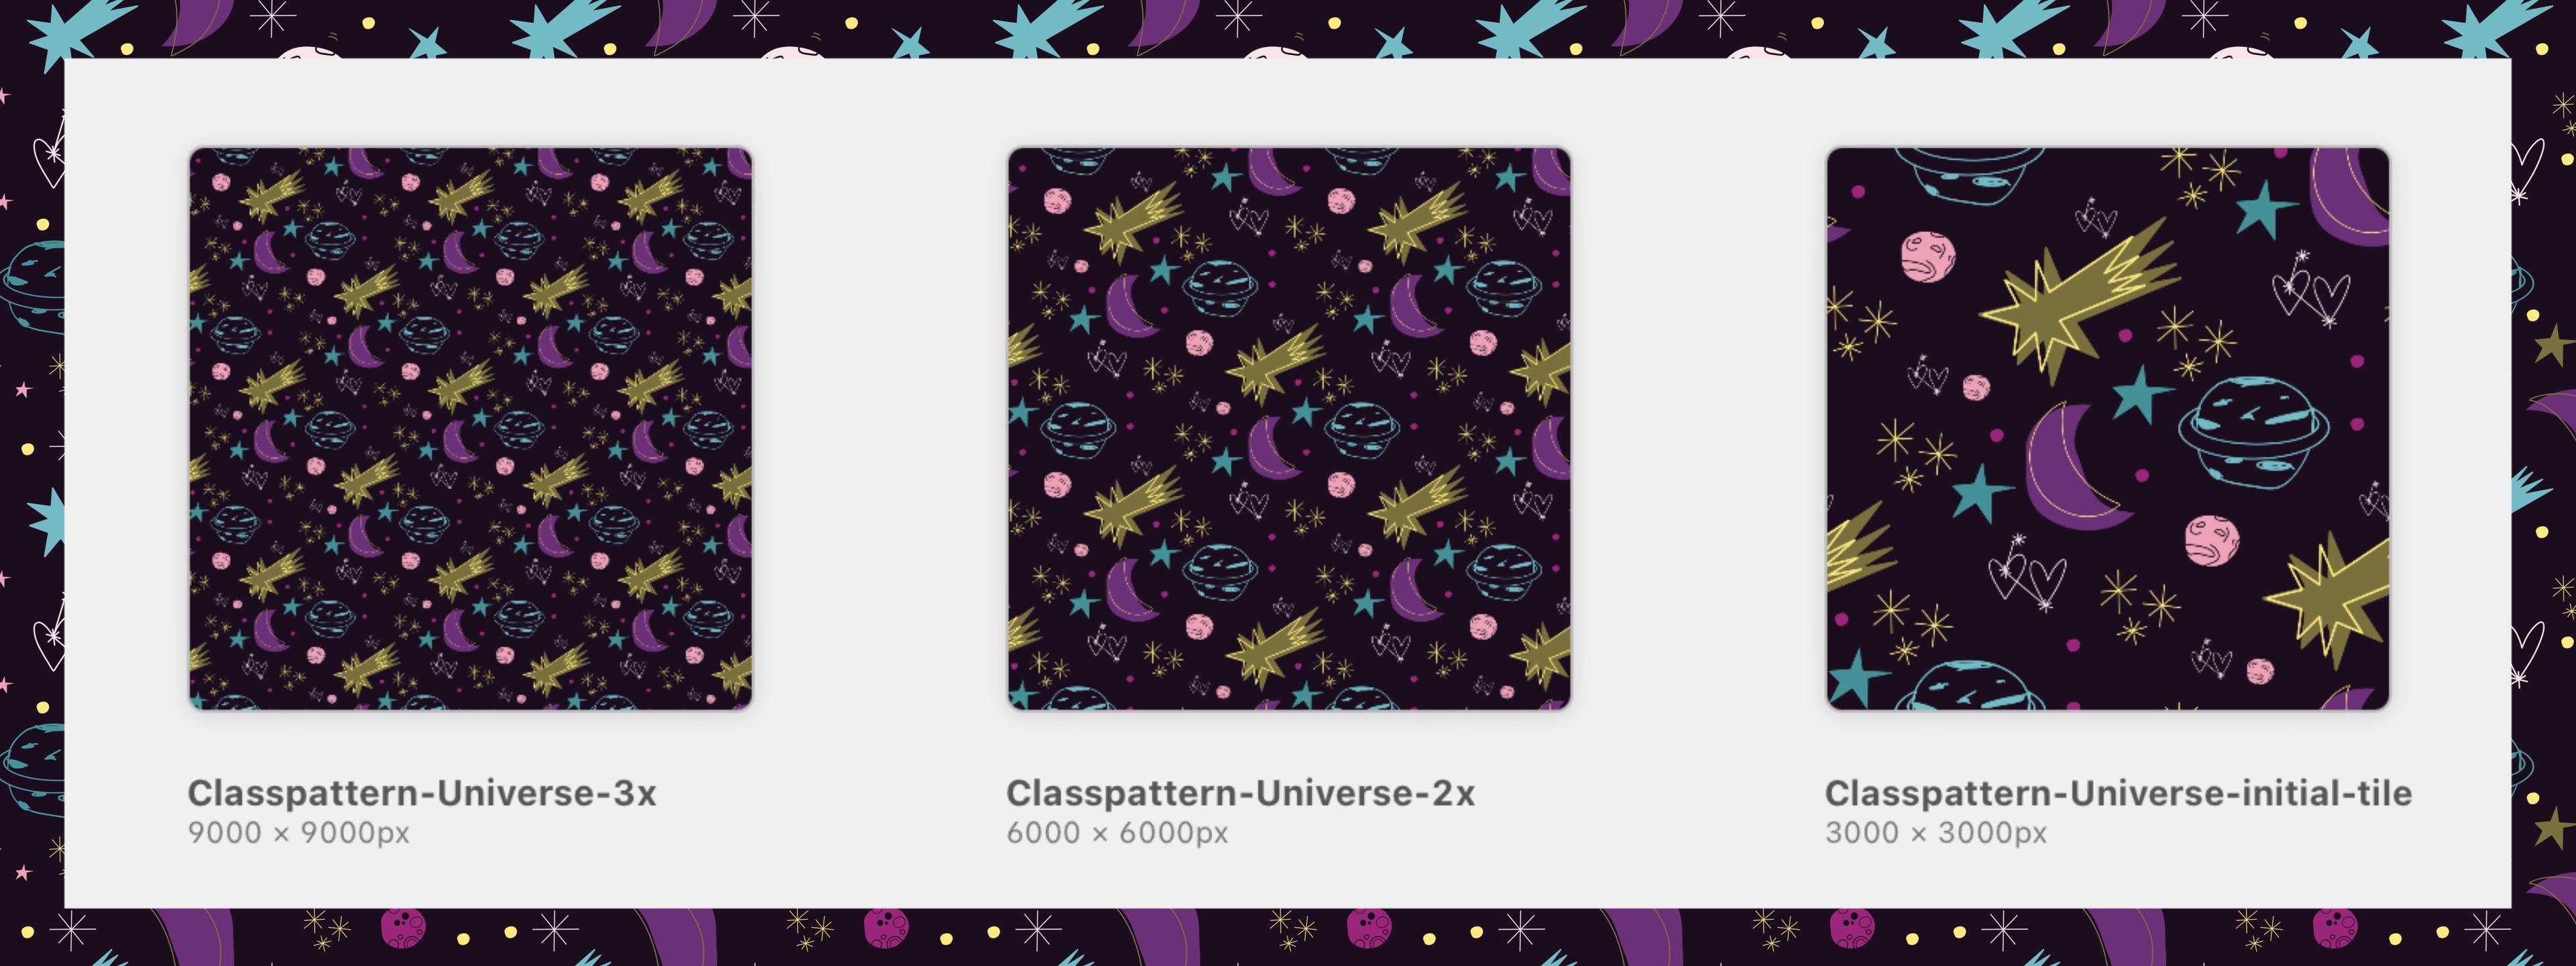
export your artwork. Or initial tile is
3,000 by 3,000. But Society six
recommends a common size of 6,500 by 6,500 pixel. Here's the first way to
enlarge your canvas, tab on Canvas and
select Crop and Resize. Now, go to Settings. For a good fit of our template. We use a multiple of our
original canvas size. Depending on a
capacity of your iPad, you can go from 6,000
or 9,000 up to 12,000. Do not take resemble. It will enlarge the artwork of your canvas to 50
dimensions we just entered. Tap Done to return
to your artwork. Working with a multiple of your original tile makes
the next step very easy. This square will be the reference for the
size of the Repeat. Use Alpha Lock and
tap Fill Layer. Combine the layers with the pattern elements into a separate layer and group them. This will look familiar now, but this time, when you
duplicate the layer, always work with
the original group, which is at the bottom
of the Layer menu. Okay? Have you got four? Okay, then make sure
snapping is turned on. Now, drag each group into
one-quarter of your canvas, make sure that they
are perfectly aligned. The yellow center
guidelines will help you. Let's zoom in. Looks wonderful. You know, now we delete
their flat field layers. Let's turn off the Drawing Guide to enjoy it without
the guidelines. Great. How easy was that? Now we have 6,000. 6,000. Repeat again. I will save this
image as a PNG to retain the quality of the
image without any losses. But with all these abstract
numbers and sizes, Let's put it to the test
and open societies six. I really enjoy
bringing my artwork to society six, of course, I love their wide
range of products, especially with really
bold and colorful designs. Let me show you your Print on Demand options with an
artwork of 3,000 by 3,000, you can see a few are enabled, but most of them require a fire source that
is larger in size. For comparison, Let's upload our thick thousand by thick
thousand sample design. Now, the range, it
looks much wider. For those items that require less than the image
size you've uploaded. You can use the
product editor to adjust the path that
will be printed. Let's give it a try. Let's see. We take the little
notebook. At the top. You will see the briefing including the
minimum dimensions. Now you can adjust, then tap Save to confirm your
changes. It looks great. And if you want to create
a custom size canvas, go to help dot society six.com. There's a list with
all dimensions and some templates
for their products. In our example, there are
still a few products left if he would just provide a larger file source
of our pattern. Let me prepare this with
you in the next lesson.
8. Enlarge Your Pattern Using a New Canvas: Okay, We've come a long way
and this is our work so far. We have to pattern
at a scale of thick thousand and our first
tile at a scale of 3,000. For the next larger variation, we will work with a new
canvas tab on the plus sign. And in my canvas gallery, you'll see that I've already
set up two prototypes, but let's do it together again. This time, we are going
to go really big, but we're still working with a multiple of the original tile. So 3,000 by four. Let's try 12,000
by 12,000 pixel. But we will still keep 300 DPI. Know my iPad is
running out of layers. Then let's try three
times our original tile. So this would be 9,000 by 9,000. And we will watch closely
how many layers they are. Eight. This will work great if we
manage our layer smartly. Check again Which
colour profile is set. Do you remember the settings
required for society six? Yes, we need an RGB
profile. Tab Create. Once you're ready. Now, this is our
canvas and let me show you how easy it is to
fill this big space. Go to the Actions menu
and tap at tab Add file. Now I can choose
from any folder. I want to go with a crisp
and sharp PNG of my pattern. Yes, I take this Procreate will automatically center
it on your canvas. Let me show you what happens if you just blow it
up to canvas size, tab, Fit to Canvas. Okay, and now zoom in on the
details of your elements. It will just start to blur. Let's delete it and go
back to the Actions menu. Tap on Insert File and
select the PNG you like. Now I will make sure that snapping function
is switched on. And first, let's move the
first square to the top left. Duplicate this
layer, and move it precisely under
the first square. Check that there is no
arrow in the repeat. Fantastic. Make a second copy of the first square and move
this to the bottom-left. Remember, now we need to save layers to fill
this large canvas. So first check that
all the junction points off your
Repeat, look perfect. Yes, they do. And now squeeze all three
layers into one layer. Fantastic. Now make a copy of this row and place it next to the first vertical
row of your pattern. Of course, check that the
pattern is perfectly aligned. Nope, so tap with two fingers to undo the movement and
let's do it again. Okay. Let's check super
last but not least, copy the first row again
and move it to the right. Okay. Let's check. Okay, this is a fantastic look. You can leave it like this
or reduce the layers. Again. Let me save this image
also to our PNG folder. Do not forget to give it a name. I put the name of my brand, Text&Tulip within the name of the file to give a keyword
that refers to me. Once the file is
uploaded, are you ready? Okay, then confirm at the end. If you like, smaller elements
and Repeat more often. Duplicate your type four times. Of course, always the original. To avoid confusion, name the first time I just
call it original. This time, I will set the guidelines again
for additional help, but it is totally optional. So let's see, it always takes time to set
the right color. Also increase the opacity and
the thickness of my guides. What's next? Exactly
minimize all four tires proportionally and move each one to a quarter of the canvas. At this smaller scale, you can see how nicely the
diamond repeat has turned out. Now, double-check that
all the connections are perfect and adjust if necessary. Okay, let's do it again. Now. Zoom in closely
and see and check. Brilliant. You made a 9,000 by 9,000 pattern
congratulation. So let's get your hard work
ready for your project. Go to the gallery and
you will see the pattern you created in class in
three different sizes. Take a screenshot and
crop it in a way that we can still see the canvas size
underneath the canvas name. Safe this to your camera roll, and we will use it shortly
in our final lesson.
9. Wrap Up and Create Your Project: Here are the main
takeaways of this class. If you aim for a pattern that
serves any Print on Demand, 300 DPI will work rate. Depending on your
printing house, you will choose RGB for digital printing and CMYK
for offset printing. For your initial tile, a 3,000 by 3,000 canvas
is a great start. Remember, you can always crop and resize your
canvas or continue with a custom size canvas that meets your Print on
Demand requirements. Last but not least,
choose PNG or JPEG to retain the full
quality of your image. This is the Skillshare
project page tab Create to get started, first, upload your cover image. This will appear
as a thumbnail of your project in the
class project gallery. Note that this is limited
to a five size of eight MB. Next, give it a title. And finally, Upload your screenshot in the
project description. Please write a little something about how you tackle
the assignment. At the bottom, you
can add some tags to make it easier for
other students to find the class on Skillshare when
you're ready to publish, to earn your certificate
from Skillshare. If you like the class, please do me a little
favor and leave a review. It means the world
to me and it will also have other students
to find the class. Have you tried? Discussions
are great way to get to know your fellow students and it is your place to ask me
questions about the Class. Of course, I'm happy to help. Also feel free to visit my profile to get to
know me a bit better. And of course, to check out
all the classes I teach, you can find all sorts
of FUN things to do in Procreate from mandala
as to animation, to create unique assets for
your next pattern design. If you speak German, they are a bunch of great
beginner classes to make your first Creative
steps in Procreate easy. Hope to see you soon
in one of my classes. Click Follow to do not miss any new ones are tips and
tricks I share along the way. Choose
 Ulrike Text&Tulip, Digital Art in Procreate