Transcripts
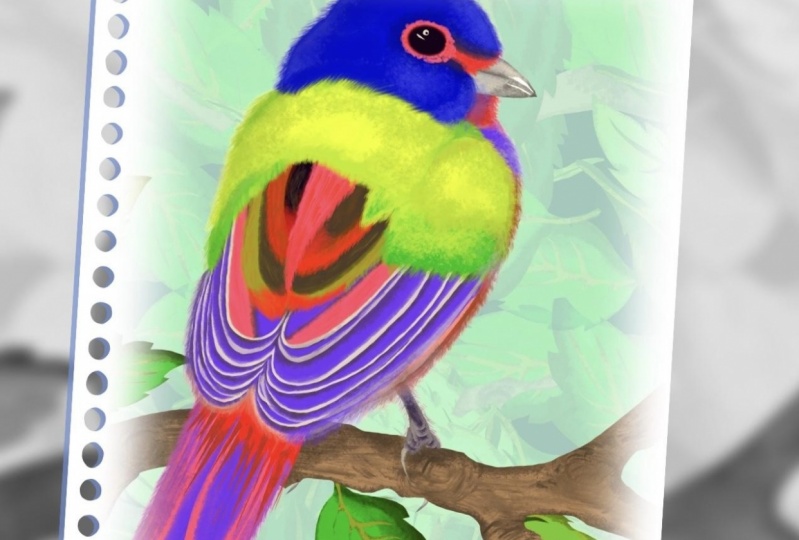
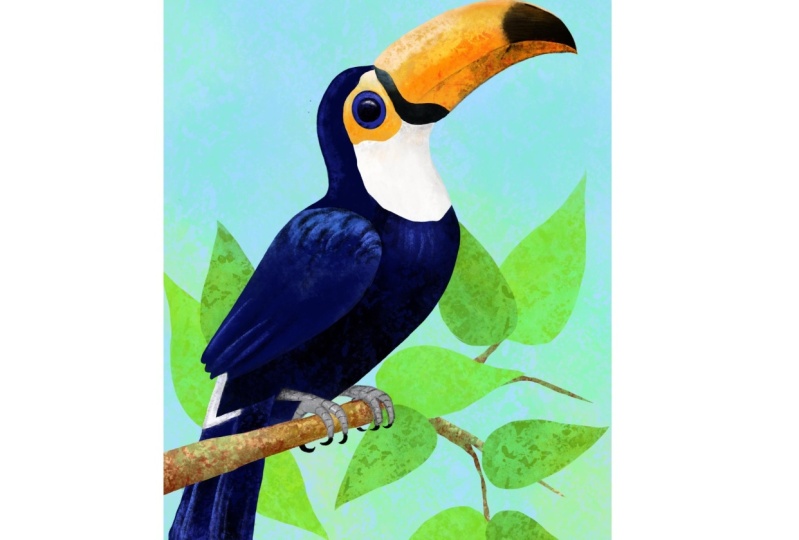
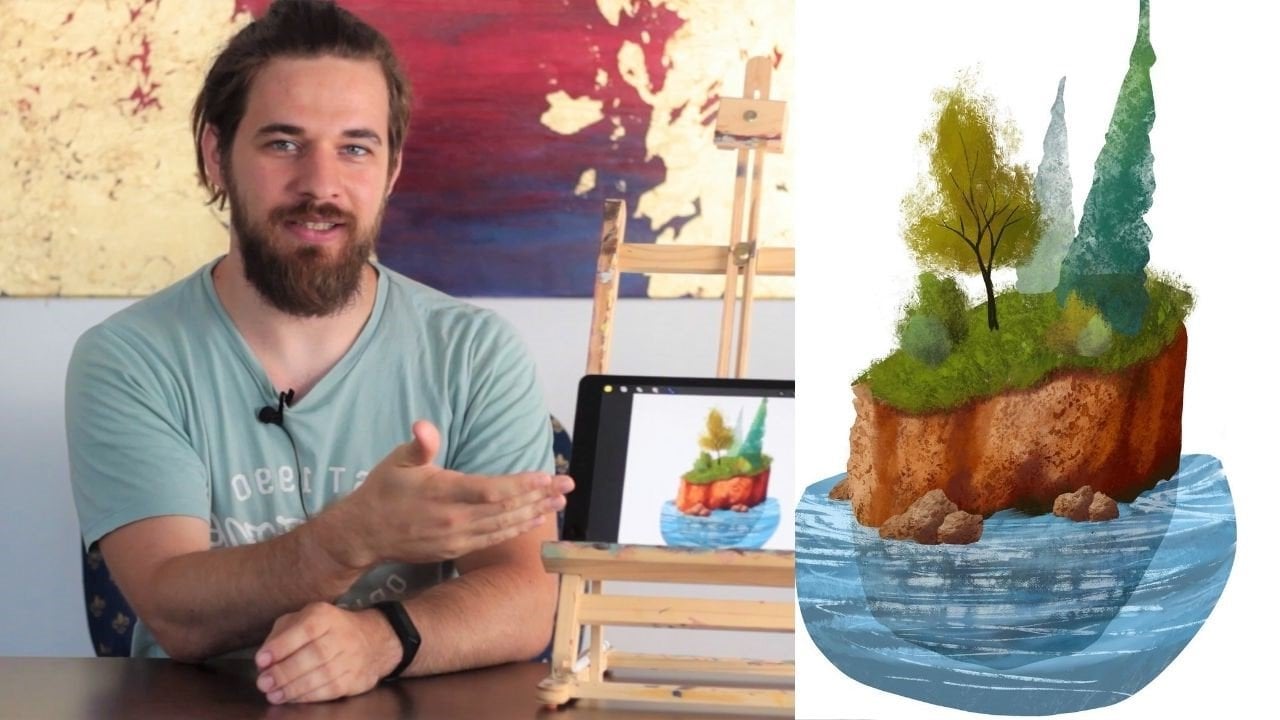
1. Welcome: Hi, my name is George, and in today's course you will learn how to paint this beautiful to con, for this illustration, you will need the Apple pencil, the Procreate app, and of course, an iPad. As a bonus, you will find the full illustration and of course, the color palette used to create this wonderful colorful bird. This course is perfect for beginners, intermediate, and who knows, maybe even masters of Procreate. In this course, you will learn everything you need to know about drawing this beautiful bird. You will find easy step-by-step encouragement all along the way in order to create a wonderful artwork with all of that being said. Welcome to the course.
2. Color pallete: For this beautiful to count, you will need 6 thousand by 4 thousand pixel portrait canvas. And just like that. And you will find in the project resources the color palette. And if you want to create it, you can do so by adding a new color palette, renaming it to the two Khan. Yep. Just like that. Very colorful bird. Like that going back to Hughes, starting to create wonderful green. Increasing the saturation of bluish-green may be a more intense, just like that. Now, decreasing the lightness, making it darker. Now yellower, and brighter. Just like that, three beautiful colors have been created going into the oranges. Just over here. A beautiful bright orange underneath the green. Going a little bit darker and towards the red, you'll find your next color. And even darker, still. One status done, you can go towards the purple, a very bright and beautiful purple. Let's move it to the left. Once that is done, we can do a darker one for the rights. And of course, very vibrant pink on the left. Super beautiful nine colors. And the next one will be a beautiful bright pinkish orange. Just like that. And a brighter color still going darker for a black on the end. And just like that, the color palette is finished.
3. Drawing is easy: Okay, and now going in for the drawing, selecting the black, going and naming the first layer to drawing. Clicking on the drawing, and then going into the brush, selecting, inking and syrup. The first shape will be kind of a teardrop going to the side, just curving. So first you can start with a curve going down, bend it around and come over, and then make the end of the teardrop. This will be the beak. Just like that, a curve, very long one. And the beacon for the under part of the beak. Just a line coming a little bit on an angle and then two humps. Just like that, super easy to make. Okay, we can turn this around the rotated quite a bit and make it a bigger, as well as going into the wrap tool to round things out and make them quite nicer. Once this is done. You can go ahead and work a little bit more on the connections of the two shapes. And then for the head of the bird, you can see it's a beautiful oval that it's quite squished. A beautiful round shape that is a little bit squished going and increasing the connections. You can go and create an S shaped. And then at the top you can create a beautiful eye using an oval. And then clicking on Edit Shape then and make it quite circular, but not exactly perfectly circular. Once that is done, you already have the beak, the direction of the body as well as that had for the rest of the body. It's a simple squished down. Oval. Can sort of see it. It has big or side. Onto the right. Just some beautiful hips of the two count. And then selecting and using the wrap tool just to make that beautiful shape a little bit more organic. It connects back into the S, as you can see. And then this is how it looks quite smaller than it has started. It's a quite small body of the two con, okay? Going in and accentuating that shape and connecting the S back, resolving the connection in between the body and the neck on the left side. Okay? Once that is done, we can make a selection of all the shape and make it a little bit smaller so the tail will fit nicely. Going back to the brush, the tail is quite simple. It's a rounded triangle, just like that, and it has a small little shape like a teardrop in the middle. You can start to see it just over there. Okay. A metal teardrop erasing some of the body just to make it feel like it's part of a bigger shape. And for the leg that is showing very, very small, rounded triangle. And of course it needs to sit on something. So making a few lines, two of them for a branch and the branch should be a little bit bigger on the left side. And as it goes to the right side, it is smaller and smaller, becoming thinner, as well as an offshoot. Just to give it a little bit of beautiful variety, erasing a little bit of the lines. He can be as free as possible with the drawing since will not show in the end. Going and refining those edges and shapes of the two con, just to make it look and connect better. Okay? Making some small shape under the eye. And then the last two S's of the wings on to the left of the body. And there you go. The drawing is done. Perfect.
4. Beak the topside: Going and creating beautiful new layer, calling it color. A new layer has been created going to the S shape to just on the left and clicking on free hand. You can start to go and draw around the beak, just the top side. And once that is done, you can click on the little circle and a selection is made. Going on to the color, selecting the orange on the left, going on the brushes, going to painting, and selecting under the brush called wash, making it quite big and filling in the beautiful beak with this perfectly looking orange. Once that is done, you can go into the pink and add some at the top of the beak. Going into some more orange and some red. And with the touch ups, just going with the brush stuff lake, you can start to create quite a big brush and start layering in this beautiful orangey, looking red at the bottom of the beak and near the top, going back to the orange and creating a new more light color and even, an even lighter. If you downloaded the color palette, you'll already have these beautiful colors. Going and selecting the gouache brush once again and creating a beautiful highlight with a smaller wash brush at the edge of the beak. Perfect. Going also around and curving it at the end. Onto the pink, going with with a darker purple and starting to add just the tiniest amount at the bottom of the pink. Going back to touch ups and DOF leg. And creating a little bit more purple around that bottom. Pink, going a little bit into the orange. Selecting the orange once again, just to give that nice crispy edge, a little bit of this orange. Okay. Very, very bright orange towards the yellow. Okay. And adding it to the middle of the shape, just like that. Once that is done, you already have it on the palate. And with the red just touching up the small end of the beak, as well as with some orange back again with some deeper shade of red. And going in at the bottom just to create a little bit of shadow. And there you go, the shape is quite round and beautiful, colorful and texture. Looking back at it to see if it needs something more, maybe a little bit of this perfectly looking pink, purplish pink. It's a little bit darker. Okay, going back into the lighter one, just to add more textures still. And there you go, the step is done.
5. Beak the bottom side: Okay, For this step, you will need to click on the Selection S and undo the selection by clicking once again and create a beautiful elongated teardrop shape just on top of the beautiful already created shape. And then click on the brush and fill it in with the greens, keeping the darker green at the bottom to give some sense of shadow. As you can see, quite dark at the bottom and lighter at the top, going into some yellow. Back, into some greens would a smaller brush just to create a highlight effect. Going back and making a new selection, clicking on the S, and then making a new selection around the drawing and barely touching and, or going over the last shape just to round it. Okay, starting with a new color, this time, a very nice blue teal. You will all ready find it on the color palette. Don't forget to click on the brush before painting. Okay? Just like that, going and making another darker color. Okay? You will already have this color on the palette and going with it on the end of the shape. And as you go down, you barely touch the iPad. So it creates a lighter version of the color. Okay, going back into the light and decreasing the flow in order to blend the two colors together. And now you can go into a perfectly beautiful orange, make the brush bigger, and just paint it over into the middle section of the shape. And then going into some pink at the end, just over there. Some more orange, increasing the flow just to make it a little bit more interesting. Okay. Going a little bit into the teal, as well as adding some beautiful purple at the bottom just to indicate some sort of shape, a rounded shape, some more purple onto the end. And then moving the shape with the arrow tool a little bit over the other shape. Once that is done, we can create a beautiful green color. And go back and create this beautiful color onto the end. Just go back and undo an order to create that shape. Make it quite dark on the right side and move it once again over the shape of the beak is done completely and it looks awesome. Let's go into the next step.
6. The head of the Toucan: Okay, a Ford. This step, going back to the selection tool. And before starting to draw with the selection tool, you need to click on the S and just going around the beak and going down until the end and coming back around the eye and the top. This will be the for the underbelly of the con with the yellow and the dove lake brush just fill it in the worry if it doesn't meet the beak. Taking some lighter color and drawing on top of that beautiful color and uneven, lighter colors still. Going back with the yellow to create some more textures. And with the lighter color in the middle, very fast and loose. And at the end you can go into the more pink version of this color. Okay? Once that is done, you can click on the arrow tool and move the shape a little bit over the beak using the wrap tool. This will make the shape a little bit more organic as well. Once that is done, you can click on the S to undo the selection and move on to the next selection. Going on to the S, and starting to create the beautiful shape just around over the eye. Starting from the top and going over the shape and down, you can move. And then going over and leaving a little bit of space for the wings. Just going in between the lines. Going back again, going over, trying to find the right shape, okay, and curving back around to the end near the beak. Perfect. And of course, this will be quite blue. Let's make that beautiful blue, very dark. And you will find it on a color palette just over there. And with the dove Lake going and continuing to dark and that shape very nice and beautiful. Okay. Make it very dark. Indeed. Going even darker, you'll find the color right next to the outer blue and focus a little bit more on the right side of the shape. Going back to the outer color, making it a little bit lighter. Just so you can add a nice rim highlight on the left side. Perfect. Once that is done, you can go and move the beautiful shape with the wrap tool. Just make it a little bit rounder, round the head and just going over the outer yellow shell shape on the right. Just playing around to make it quite nice. Okay. And just like that, you can go into the eraser, move the drawing up and erase on the color layer. You can use the eraser with the inking brush called Syrup. And you erase the eye just so you know where it is. You've positioned the eye going back, withdrawing under the color layer, and there you go. Another beautiful step.
7. The toucan tail: Okay, For this step, of course, back with the selection tool this time on the tail. First, you can click on the S2 and make a selection around the tail, just the underside of the tail, going back and leaving some space for that small little eye drop over there. And after that, you can go and do a pass-through with the brush, just with this beautiful blue. And going in with a darker one just over on the right side, in the middle of the shape. Okay. And then adding some more color on the sides. Going into the Arrow tool and making the shape a little bit more curved at the bottom and also overlapping it with the shape above. Just like that. Just a tiny bit of overlapping making it longer onto the left side. Just to play around with the dynamics of the shape. Erasing can be very good way to refine the shape as well. Okay? After that, making a new selection just as a beautiful pickled shape in the middle. And then going over it with some of this lighter blue in order to create a beautiful fetter. Going to a lighter color, just to put it at the end and on the right. Okay. Once that is done, you can go into a darker shade and accentuate that top side, going back to the S. And this time undoing the selection just to brush over with some blue, just a tiny bit to make it part of the beautiful tail, making another feather just right next to the one you just drew and going in straight for some lighter blue just over there. Super nice and beautiful. As you can see. You can also go in and add some dark at the top going in with the lighter shade. Okay. And even lighter. Just like that, just so it can be seen on top of the other already created fetter. Once that is done, you can start to add another one. Just on the right of the first one, just next to it actually. And going towards the same point, going into the brush, of course. And in what, a lighter blue over top. Perfect. Once that is done, you can go into a darker one to see how it looks and then accentuate just the bottom right with the highlight. You can also go in and add some of this blue over the top just to blend the fetters, the getter. And of course, going to a darker one just to add more textures. Once that is done, you can go on to the selection and put one in the middle, put another fetter just in the middle. Going to a lighter blue, select the brush with the dove lake and add just a little bit of color on top, going to the darker one to the darker blue and darker still to blend it all together. Okay, and a little bit of a highlight on top. Perfects. You can also go and create another one just here on the left side. Just so it feels like it has fetters all over the place. Not only in the middle of the shape, just one and an already started to look so much better. And there you go.
8. Toucan body: Hello day. And now going in and making a new Select tool by double-clicking on the S. And this time going in for the small teardrop just above the tail, this will be a very light gray. Once that is done, you can go into the more pink version, as well as add some blue. Just a touch with the flow. Very reduced. Okay, going and the selecting, the selection and making a very beautiful and nice wing shape or fish shaped wing. Just like that, going into the brush, selecting a darker shade of blue and increasing the flow to create the wing, he can start to see how beautiful it is. It has quite a tip. Once that is done, you can go into a lighter shade and start creating the textures over top. The dark blue, going back into the blue, just to create some more shadow at the bottom and on the left, clicking on the arrow tool and width the wrap tool, just changing the shape of the wing. Just like that, going back into a darker blue and then going into a darker blue still, just to accentuate the middle. With the wrap tool, you can make the beautiful wing just a little bit longer and a little bit bigger to overlap the top section as well as a little bit of the right section. Once that is done, you can go into the eraser, the selection and smooth out that occur, as well as make another beautiful selection just going down very long and has a tip on the bottom and a tip on the top, tip top. And a beautiful blue on the left hand side. Just like that. And a darker one in the middle. Once that is done, you can go in and go over the belly. Would another selection. Click on the S N to a beautiful selection starting from the tip of the beautiful fetter and going down and overlapping a little bit. And then start to create this beautiful shape with the darker blue, just like that. Getting IV and darker to give it some shadow onto the bottom side and the highlight onto the right. Moving that color just that, that, that higher, don't worry about the white that has been created. Does move the shape until it covers little bit more of the white. Okay. It seems like it just needs and not her beautiful shape just over there. And start with the brush would a lighter color and then a darker blue. Just like that. It will create just a beautiful effect. And blend the shapes a little bit together in some parts. Perfect Look at how beautiful it looks. All it needs is another selection for the leg. Just go around the drawing and around the bigger shape, and then go into the brush and paint a beautiful patch of color. Move it quiet a little bit to make it a little bit chunkier. And there you go. The leg is done as well. And so is this beautiful step. Let's go into the next one.
9. Eye of the Toucan : Okay. A Ford, the background color, you'll need the blue on the right side. And of course, once you selected, you can make it a little bit lighter. And going towards little bit more of a green color. Okay. Going back to the color layer, zooming in on the eye, going onto the selection. And you will find the circle going into the circle and drawing a beautiful circle. And then selecting the green on the left. Of course, and of course, the brush and create just this beautifully green color in the circle. Going in for a more yellow color that you can find already on the pellets. Decreasing the size of the brush and starting to make a beautiful curved line on the bottom and blending it in with the green. And that's the yellow, just like that. So you can see that they are the same color. Almost. Once that is done, you can go into a darker shade of green that you can find on the right-hand side. And with that darker green, you can just about make Edge a darker edge around the eye. It is a bit darker and thicker on the top. Just over there with the same brush, of course, the lake, the favorite of the pressures. Adding some more textures on the right side and going a bit more thick on the sides. As well as a little bit of this color around making a circle around where the iris will be. And with the lighter green, you can start to add just some textures on top of the darker green as well as on the yellow. Just making another circle inside. And going in with the black. Perfectly black, just checking. And with the brush selected, you can start to block in the pupil. Just like that with a 100 percent obesity. Perfect. D, looks gorgeous. All it needs is a little bit of positioning, going back to the selection and doing a circle around the eye. Don't worry if it doesn't cover perfectly the eye. And then going and moving, making the eye a little bit bigger just to cover the shape, just over there. Perfect. Once it covers it perfectly without being too big. Once that is done, we can go into the selection tool and make just using the free hand a beautiful highlight, just like this, going quite squarish into a light white that you can find right next to the yellow. And with the brush with the DOF leg, of course, you can start to work your way around making the ends corner right next to the pupil. The tiniest amount more white. Okay. And going in with the inking brush just to round that beautiful corner just a tiny bit and make a very dark outline around the pupil where the highlight is. Okay. Going in and making another beautiful small highlight on the bottom. And starting to brush in with the dove lake. Just a little bit of a texture. And leaving the outer side of the highlight a little bit more on touched. Once it's zoomed out, you can see the beautiful illustration. Almost complete it. And let's go into the next step.
10. Feather details: Hey, and now going into the brush, touch ups, n flowing hair, selecting and making a new layer just for the touch ups. With the flowing hair, selecting the yellow, you already have it, or you can pick it by just clicking with a finger. And then you can start to pencil out just some of this beautifully nice yellow for on top, just touching the blue. And then you can go and select the darker blue to go into the yellow, creating thus a beautiful fluffy fur. Going and trying not to touch and go over DI, and trying to bring up just a few more lightly colored hairs as well. Just like that. And you can also go a little bit into the orange, Look at how beautiful it looks. Moving down and going in. This time, a little bit more parallel to the blue. Okay. Going further, increasing the size, going into some lighter blue. Just so which shows through a little bit nicer covering that yellow bit that is sticking out. And once that is done, you can also add some hairs on top at the left-hand side edge of the bird. Just lightly go over into the background just to make it seem more fluffy. The edges of the bird give it this wonderfully nice look, as well as go into the dark and build up one or two fetters. When that is done, you can go into a darker yellow selecting and yellow and going into the right side to create that beautiful edge with some of this flowing hair brush technique. Brushing it over with some lighter textures. Once that is done, you can move up onto the beak, select the beautiful purple, and start brushing of way some hairs onto the beak. Decrease the flow as you move up just to create this sense of going a little bit lighter for the end of the beak, you can select a more reddish tone. And then if you want, you can also go and erase some of the hairs that are outside of the shape. For some of the sides where you have some holes, like over here you can add some of the local color with this brush. Zooming in on the orange bars, selecting a very light orange and increasing the size. Going with some hairs. Just a few strokes here and there. Likely touching, going with a darker one. Okay. A little bit of a lighter touch would help just to give this impression of more than one texture and one brush being used. Okay, going quit the blue and doing the same on that area as well. As you can see, it looks quite wonderful and beautiful. Okay, going with some more blue. Once that is done, you can select a beautiful blue. Make it quite light. Just over there, and start brushing some flowing hair on the right side. Just two or three beautiful brushes on the feather. Okay. And of course, onto the edge on the left as well as on to the neck. This can go a little bit outside if you want. So date adds to the fluffiness. Going around the eye as well. Don't go overboard with this flowing hair brush. Just add a few touches here and there and keep the brush quite big going on the right to add a little bit more of the highlight as well as on the left. And maybe highlighting a little bit of detail as well. Just a tiny bits. And look at how beautiful it looks just now. A few more minutes, and it is done.
11. Background last step Thank You: Ok, and for the last step, here it goes. Merge the two layers together, the one with the fluffiness and the one with color. And bring down another layer on the bottom just above the background. Start by using the selection tool and make a PE, beautifully shaped leaf. Just on the right side. Using the textured dove lake brush, start brushing a beautiful light feather with this wonderful greenish blue color. Adding another leaf just below it. And going into more green color just over here. Okay, you can start to see they're very simple to make. Once you've created two, it's enough to start duplicating them by flipping them horizontally and moving them just above the first two on and wrapping it around just to make some different shapes. Okay? Going into hue, saturation and brightness just to make them a little bit more different than the outer ones. Just so they don't blend together. Merge the two layers together by squeezing them down. And of course you can play around and move them, rotate them until they are in the right position. After that, you can go and duplicate them once again. Flip them horizontally, make them a little bit smaller, and move them on the left-hand side. Thus creating even more beautiful leaves. Okay? Once that is done, you can duplicate the lower layer once again and wrap it around, make it a little bit smaller. Just play around but the shapes making some different kinds of leaves. And once it's done, you can rotate it and move it to the bottom left corner and position it quite over there just nicely. Okay. You can go ahead and and duplicate it once again. Just over there. Make it smaller and plant another set of leaves just onto the background on the right side of the birth. And you can also make them a little bit different by erasing just a few of the leaves in order to create a different filling. Leaf. Cutting and making it smaller. Once again, squeeze all the layers and the leaves in the background are completed. Moving this a little bit lower and creating a beautiful selection just around going to the right, making this beautiful branch. And going back again, entering the canvas and making the branch just nicely ending the selection and going into light and beautiful color. Don't worry if it's behind the leaves. You can always bring the layer up, okay. Going into the Layers and bringing it over the leaf layer. Going into a darker color. And creating that beautiful darker texture as well as into some orange, making the beautiful brush just a tad bit bigger to create some highlight on top. Once you do that, you can go in and to another selection. Just to make the other beautiful branch going outside. The branch will go outside and meet the other one. Start with the lighter color and then go into the darker shade. Looks quite good. Just a little bit of highlight. You can zoom out, see what needs to be done. And of course, what it needs is a little bit of this color and deleting the drawing, of course, since it's not needed anymore with the beautiful DOF leg brush quite big and with a lower opacity, you can go a little bit over the background, over the leaves, just to give this a little bit of a texture. So it's not quite as boring. Going with some green and adding some textures at the bottom as well. And with a little bit of yellow. And, and of course, don't forget to add the leg. Just start with a simple line with the black and then go over what, a hook over the beautiful branch. It's going to be a simple lag. It doesn't really matter that much, but it needs to be there. And congratulations, the illustration is completely done. And you can now feel very, very proud about completing this course. Thank you so much for being part of this community. And if you are gracious enough, you can leave a review as well as post your beautiful creation and share it with the world. Thank you so much once again, and see you in the next course.
 George-Daniel Tudorache, Together we will create amazing things.