Transcripts
1. Procreate Dreams: How to Animate a Short Film: If you've always wanted to learn how to create your
own animations, but you thought that the process was too long and too complex. Well, this class will
show you not only how Procreate Dreams has completely changed the way
animation can be done, but it also allows you the
means and the tools to do anything animation
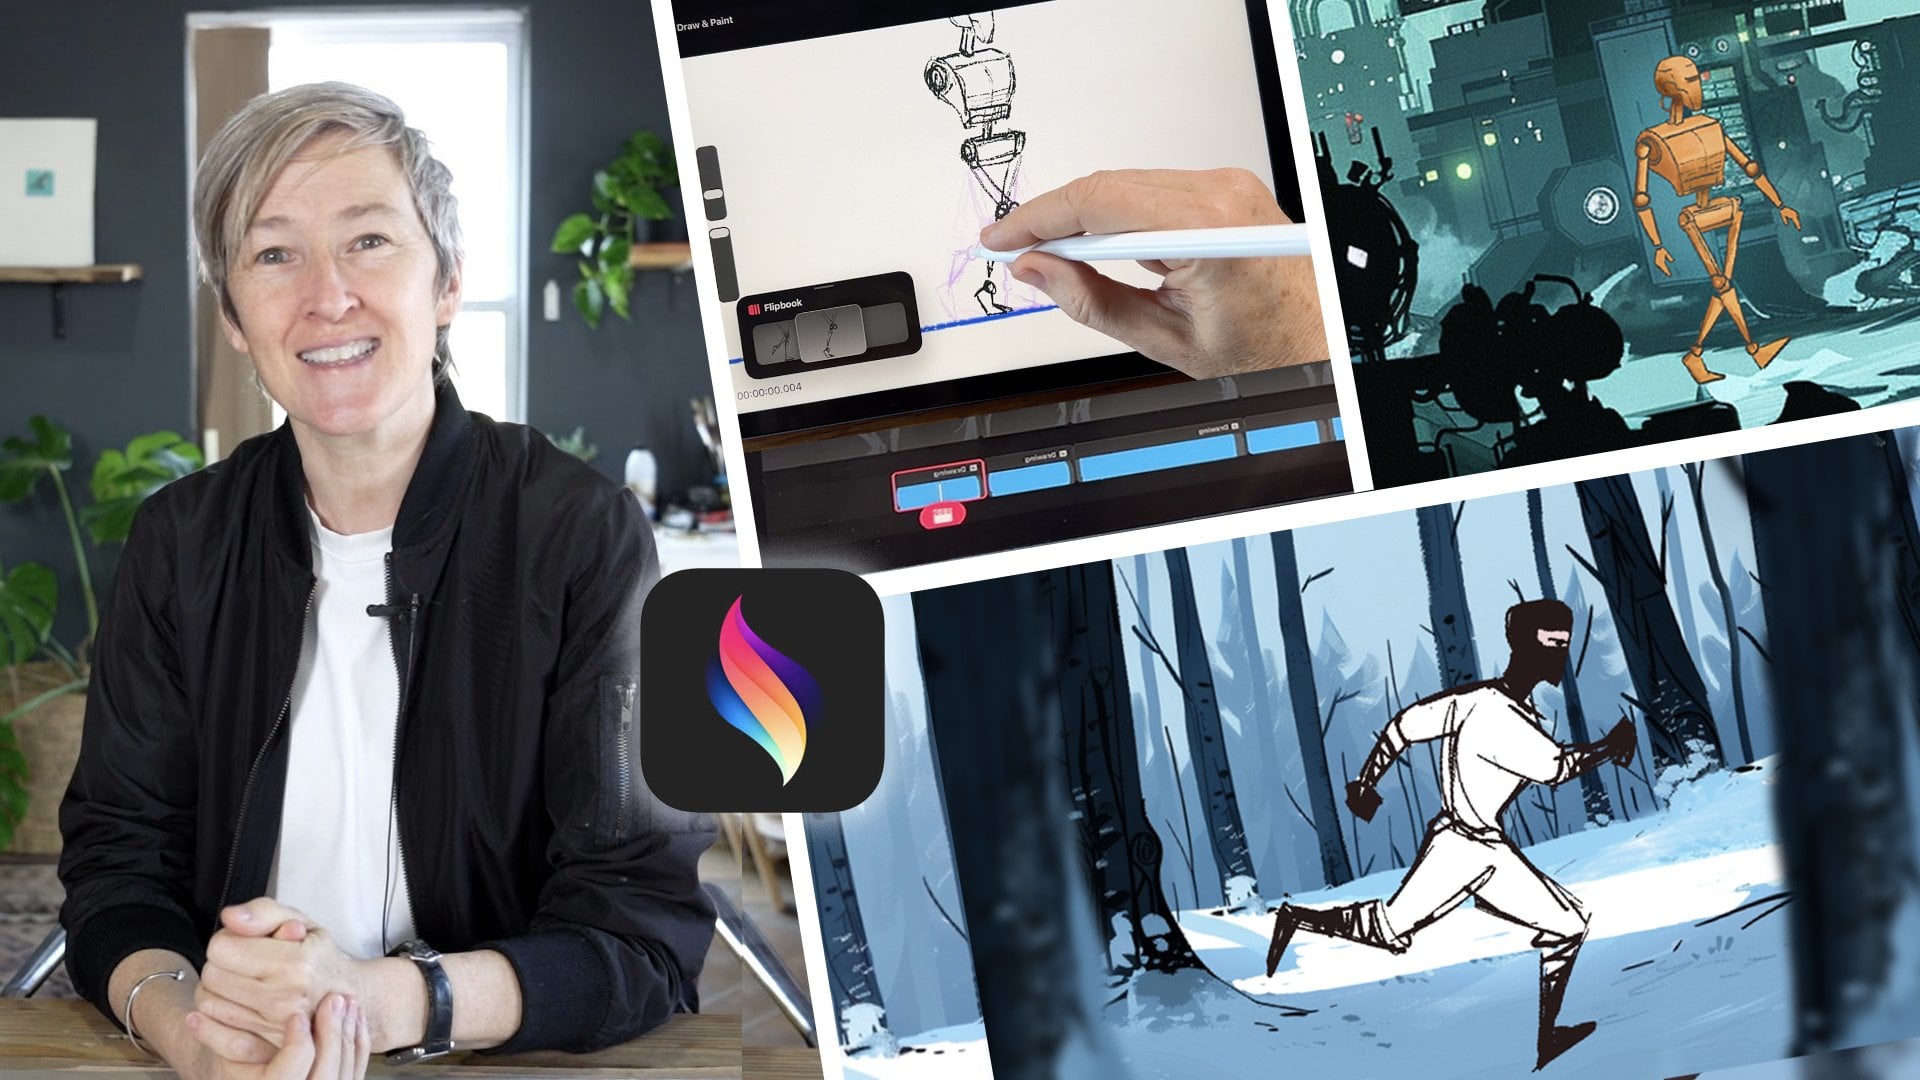
related in one app. Hi, my name is Shevorne. I'm an artist and an animator. I have over 15 years experience working in the
animation industry. And in this class, I'm going
to teach you how to use procreate dreams to fully bring your ideas to life through
the power of animation. I'm excited to share my
professional experience with you, to share tips and tricks that I've learned
in the industry. But most of all, to show
you how you can do all of your animation inside
one powerful app. This app breaks new ground by making hugely complex processes, incredibly simple, straightforward,
and even intuitive. It's built entirely
with you in mind. It puts animation in your hands. And really this is
the first time that an animation software offers easy access to the entire
production process. In this class, I've designed
a project that will not only teach you all of the features and tools of procreate dreams, but it's one that emulates the professional
production pipeline from start to finish. We're going to start out
with an idea concept, and we're going to
storyboard that idea. We're going to turn that
storyboard into an animatic. From there, we're going to design backgrounds
and characters. We'll then move into animation. And then finally, we'll
composite all of our pieces of the puzzle together and make a fully finished
animated sequence. Throughout this process,
you're going to learn the key features
of procreate dreams. You'll learn all
about the interface, the layout, the
stage, and timeline. I'll also show you the gestures that you need to use to navigate around this interface while also speeding up your workflow. From there, you'll learn the three main ways of
animating in procreate dreams. You're going to learn
all about Flip Book, where you get to
animate frame by frame as well as using
the onion skin feature. You'll also learn how to animate with key frames in the timeline. This will give you
the capability to animate looping
cycles with ease. Finally, we'll animate with the performing feature
in Procreate Dreams. A feature that literally records any action that
you perform on the stage. Along the way, you'll learn how to draw and paint in
Procreate dreams, you'll learn all about
key animation principles such as timing and spacing,
squash and stretch. And as well as that,
you will learn how to build out an
animation project according to a
blueprint that you can then apply to
any project at all, from a short sequence to
a fully animated film. So I hope you're ready to see your animation
dreams Come to life. And to start exploring
this app with me today, grab your ipad and meet
me in the next lesson.
2. Your Class Project and Your Class Challenge: In this lesson, I'm
going to explain to you your class project and
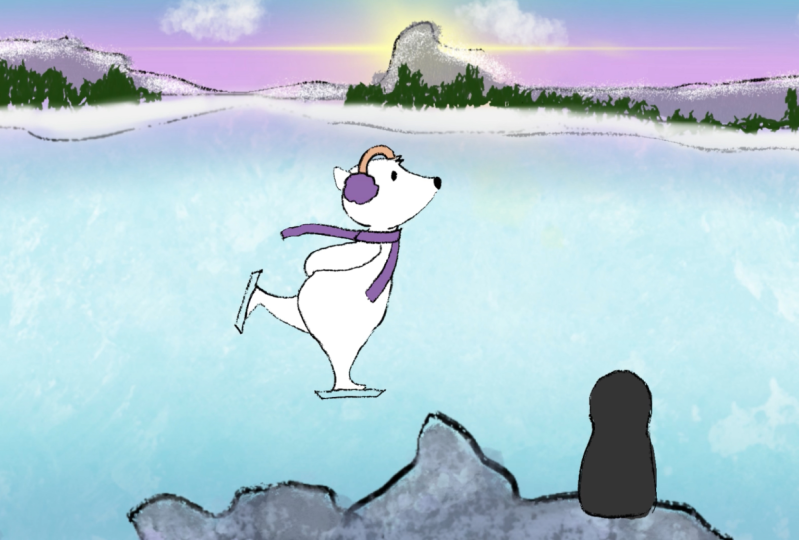
your class challenge. For this class, we're focusing
on a simple animation in an easy style that we
can layer and build up in order to create a
more fuller final piece. With that in mind,
I'm going to stick to two or three really
simple cycles. That will, again, the key to animation
is being able to re, use assets or pieces of animation to help you
build out a big project. Rather than having to
do everything over and over again. For
your class project. I want you to complete
one or two simple cycles following my demos and then composite them together
with a background into one final file using a couple of different
shots and camera angles. Your final film could have music and sound effects as well, and I'm going to show you
exactly how to do that. Now, this looks
really super simple, but there's actually a lot of complex parts to this animation. We've got a storyboard
and an animatic going on. We've got a
background that we'll actually paint from scratch
over and procreate. Plus we've got at least three animation cycles
that we can use. So if you can follow my process, then that will be amazing and you'll end up with a short
movie clip like this. But you certainly don't have to have all of this
in your project. Just a couple of shots with a background and a character
animated will be fantastic. But part of the goal
of this class is not only to teach you to build
an animated scene like this, but it's also to give
you the tools and the processes that
you can use to create your own animations
going forwards, even to animate an
entire short film. So what I've done is I've
built out the class project to emulate a proper professional
production pipeline. Starting from the storyboard and working
progressively through to the final phase of compositing and adding
sound effects in music. Okay, so that's
your class project. Now, I want to offer
you a class challenge. This is something I
haven't done before, but I thought it would
be a really good opportunity to do
it in this class. I want you to add
something new or something different
onto the class project. With that in mind, the
challenge is I want you to add a scarf onto the
character of the polar bear. Meaning that you'll
need to animate that scarf blowing behind
them in the skate cycle. Plus I'd also like to see if you can add one more camera
angle into the short. That is a camera angle that's different to the ones
that we've storyboarded. It could be a close up of the polar bear as
he skates through. It could be a close up of
his feet skating along. I'm totally leaving
it up to you. But just a short extra shot in there I think will be
really interesting to see. I think this challenge
will give you a great opportunity to
take this project one step further and to get you to think creatively
like an animator. So up next, in the next lesson, let's take a quick tour
of procreate dreams and get familiar with the software before we dive into the project.
3. Taking a Tour of Procreate Dreams: So in the next few lessons, I'm going to walk you
through the basics of procreate dreams and show you the main features that you'll need to know in
order to get started. If you really have a
good understanding of the interface and you know
how to use the gestures, you know how to use the
timeline and the tools. Then you can skip ahead and go straight to the
storyboard lesson. What I'm going to explain
now is how to get started, how to open up a document, how to adjust the properties, how to use the drawing
and painting tools, How to navigate your tracks and your content within
those tracks, and how to use the gestures. When you first open
up procreate dreams, you land in the theater. This is where you can
access all of your files. It's also where you
can delete files. You can group them together, duplicate them, or share them. I'm just going to go
ahead start a new file by hitting the plus
button right away. You can choose different
formats if you wanted to. You could scroll through
some of the templates, but I usually just opt for
the wide screen by default. But I just want to point out, you can also tap this
button here to set your project resolution to either HD or four
K. For this class, let's keep it on
HD because I think that's plenty big enough
for our purposes. Then I'll go ahead click empty, and straight away you're
into the animation space. This space is separated into the stage at the top and
the timeline at the bottom. The stage is where
you draw everything, and the timeline is where
you animate those drawings. If I click on this icon here, I'll access Drawing Mode, and you'll see that the
square on the stage, this is the stage. In other words, it's the
frame of your movie, and the space around
it is the backstage. And this is where
you can have assets, or characters, or elements, and have them
animate on and off, Just like in procreate
in drawing mode, you've got access to all
your colors up here, you've got different
brush sets over here. You've got the smudge
tool and the eraser tool. You also have layers in procreate dreams,
which is really nice. And I'll be using my layers a lot during the
lessons in this class. But just to quickly show you, if I add a new layer
above my drawing, if I can then tap and hold on that layer,
drag it underneath, and then maybe add a different
color underneath that, that allows for us
to be able to build up more complexity
in our drawings. And we use that drawing then as a single asset to animate. If you click off of
the draw button, then you're back
into the timeline. Now there are a few buttons
here that are very important. The theater icon will bring
you back out to your theater. Don't worry about having
to save your files. Procreate Dreams automatically
saves as you work. If you click on that and
go back to the theater, you can easily jump back
in exactly where you were. If you tap on the movie
title of your document. Here's where you can pull
up the properties and set different properties for your stage or timeline
and things like that. Make sure that your document is set to 24 frames per second. The only thing you
might want to change is the duration of your animation. You just need to click
on the time code there and you can choose
whatever duration you want. The only other thing
that I changed in my document to mention
is that I toggled off enabled painting with
finger and that just means that my file is only going to recognize painting
with the apple pencil. I found that a lot
easier to work with in case my hand
touches the screen, it's not going to create a mark. If you click on the time code, there are a couple of options
here that you can access. One is you can change
the color of your stage, which becomes very
useful when you're animating, particularly
with lines. And you can also
access onion skin. Now, onion skin is a tool that's really
important for animators. And we'll be using this a lot throughout the
lessons in this class. But just as you know,
that's where you can find it on that
time code over there. On the time line itself, you will have all of your
content and your tracks. The content is where you add key frames so that you
can move your drawings that are on the stage when you're working with
content on the timeline. You can drag it around. If you click on this
time line edit button, this is where you can grab multiple content and tracks
and group them together, allowing you to add further animation on
top of your groups. Once we start
animating our project, all of these tools and these functions will
become very clear. And you'll learn much
more about them in the application and the
ing of each of them. Really, this becomes very
intuitive very quickly. Speaking of working intuitively, in the next lesson,
I'm going to show you the gestures,
appropriate dreams. When you're ready,
join me there.
4. The Gestures in Procreate Dreams: When they say that
Procreate dreams puts animation in your hands, that's more than
just a description. This app was built and
designed for touch. The intuitive nature of the gestures is one of its
most powerful features. In this essen, I'm
going to explain all of those gestures so that you
know how to work with them. The pan pan is using two
fingers to tap and hold, and you can pan the stage. Or you can pan along
your time line to zoom, you can to zoom in. And you can pinch on the
timeline to zoom in as well. Now to undo, you can
just tap two fingers, and that will undo
the previous action. Or you can use three
fingers to redo. You can redo the action that
you just undid. All right. Timeline gestures use three
fingers and you can scroll up to make your timeline bigger so you can see your
content more clearly. Or you can use three fingers to scroll down and collapse all of your content tracks if you wanted to get a bird's eye
view of your timeline. You can also use three
fingers horizontally to make your time line to zoom into a specific time
on your timeline. Or to zoom out and get, as I said, the whole
timeline visible. Lastly, on the stage, you can use your
fingers to rotate, especially this is very useful
if you're in draw mode. You can really turn and angle your canvas and get the exact angle that
you want for drawing. Now if you were watching your animation and you wanted
to see it play out fully, really nice thing
to do is to use four fingers and tap on the screen to bring
it into full screen. Once you're in full screen mode, if you tap the play button is down at the bottom
so you can hit that play or you can use your
finger to scrub through. And then when you
want to get out of time line or out of
full screen mode, use four fingers again. Tap on the screen,
and you're back in. You're back in there, okay. Those are the main gestures. Now if you wanted to
explore this a lot further, basically, I would say just
dive in, start experimenting, and get used to this way of very intuitively and
gesturally working your way around the workspace. You can also check
out Procreates Help. Center at
Help.procreate.com There's a fantastic handbook there that goes through the
entire interface, all of the gestures
and the tools. Like I said, as we move
forward in this project, we're going to be learning
all of these hands on. We'll get to know them very
well when you're ready. I'll see you in the next lesson.
5. Creating a Storyboard: In this lesson, we're
starting pre production. We've got our concept.
My concept is this polar bear and
penguin ice skating. So what I'm going
to do is start to storyboard out the frames or the panels that
I have in my head. I'm not going to make it too complicated,
but I do want to, before I do anything else, just jot down those
visual ideas. Jumping into procreate dreams. The first thing I'm going to
do is make a new document. The frames per second is
set at 24 for the duration. I'm going to change this
up and go with something like 24 seconds just to
make it long enough. Okay, I'm going to tap
on draw mode and I'll choose a color and a simple sketching brush,
just to start out. Now I know that for my
first shot in the sequence, I want to have a nice
wide opening shot, just so that I can establish the scene and establish
where we are. I want to be able to show
the landscape basically, and let the audience know where exactly all this action
is taking place. I'm giving myself as
much space as I can. I've got mountains
in the background and also some rocks and
things in the foreground. This foreground is going to really give us that depth
and that sense of space. You'll see that as soon
as I've made a drawing on the stage that has created a
frame down in the timeline, that's essentially the
frame that's going to represent my first
camera shot, basically. Then to do the second shot, I'm just going to simply
come down to the time line. Then I'm going to
copy that first frame by tapping and holding
on that frame. Choose copy, and then I'll
paste it right beside it. Now I've got two frames with essentially the same drawing, but I'm going to change
up this drawing slightly. In this frame, I'm going
to have the polar bear, so this is where the
character skates on screen and we get our first
glimpse of him in this shot. Okay, great. I'm
going to continue in the same way for
my third shot though. I'm now going to
change it up slightly and this is the
shot where I want the camera to start panning along beside the polar
bear as he skates. I'm just going to go ahead in the timeline and
start drawing again. And you'll see that
the onion skin shows me exactly what
my previous shot was. I'm more or less copying
this, redrawing it, because I want to indicate on the storyboard that this is going to be the camera pan, the polar bear is in the middle. And we're going to animate this guy skating on
the spot if you like. So we're going to do a skate cycle where he's on the spot. And what's going to happen is, is that the background will be panning
along and it'll give the impression or it'll give the effect that
we're moving with him. Then I'll go ahead
to the next frame. Start drawing again, and that frame is created
in the timeline. And this is where I
want the character of the penguin to be introduced. The penguin is going to be
sitting on one of these rocks. As the rocks pan along
in front of the camera, he will come into
view and we'll see him looking at this
podo bear skating past. Now directly after that, the most obvious thing
to do is to actually show the reaction
shot of the Penguin. Now what I'm going to do
is just in draw mode, you can see there's a
little handle at the top of the lower half of the screen. I'm going to pull that up
and go into flip book. From here I can just do
my close up drawing. I'm going to keep a rock
here in the foreground and draw the character of the penguin sitting on the rock. We want to get the
penguin's face and see him doing
like a double take or very surprised at what he's actually looking at
out there on the ice. The next shot after, after the camera pan is going to be a close
up of the Penguin. Okay, so that's my
little Penguin. And he's like looking on, in amazement at
what's happening. If I come out of flip book, you can see that's
the next frame. Let's go ahead in
the timeline and continue drawing in this frame. What's going to happen
or what I want to happen in the animation, is I want the penguin
to jump off the rock and go off onto the ice
and join the polar bear. In this shot, he's
going to be jumping up. Then finally my last
shot is going to be the Penguin joining the
Polar Bear on the ice. For that shot, or at
least for the storyboard. I just need to
actually go back and copy this drawing right here
because it's the exact, pretty much, nearly
the same background. I'm just going to erase
out the parts that I don't want of that frame.
There you go. Now I can go back to flip
book a bit closer and draw my two characters in this last final shot.
Skating off together. That's essentially my entire storyboard with this
animated sequence. Really simple, really easy. I think the way that
it's crafted is going to make life very easy
for us to animate. Because it's
essentially one scene, one background, but there's a nice tempo of different shots. The very last thing that I
want to do before moving on is actually time
out the storyboard. Because this is not going
to be any use to us. It's nice to get the ideas down, but we really do
need to know how long each of these shots
are in terms of time, so that we can plan
our animation. Right now, each of these panels, or each of the frames in the
timeline is just one frame, which is essentially
one 24th of a second. So I'm going to hit
time line edit. I'm going to drag
through all of these. If you double tap, you can
zoom in really, really close. You can see there every
frame is just one frame. I'm going to tap and hold on
the edge of my first frame, then I'm going to put
my finger down onto the track and just drag
that first frame out. When I do that,
every other frame gets dragged out to
the exact same time. Now I've got a little
bit more space within each of these panels. Okay, that's great. But now I'm going to
start to think about each shot in terms of how
many seconds I want it. For example, I think I'd like my first panel here to
be maybe a second long, so I can drag that out by simply tapping on
that single frame. Make sure you don't
select everything, just tap the edge of
that single frame, hold down with your
other finger and drag it out. That's great. My second shot where the poly war comes in could probably be about
the same length. I'll just do the same again. Tap on the edge there, drag it out maybe to the three
second mark for the pan. I definitely want the pan to last for a few
seconds. I'll zoom in. This is my second half
of that camera pan, and I'm going to drag that
one out to round about there. Then we see the Penguin. Let's give that maybe a
second and then he jumps off. That could probably be
about 2 seconds, let's say. Then the final shot, we definitely want to
read the final shot. We want to be able to give
that a good bit of time, maybe let's make that
something like 4 seconds. But either way, this is all
quite a subjective process. It really is up to
you if you want to have this be very fast
paced and snappy, or if you want to maybe give it a bit more
time and space. But if I play it back
now, polar bear comes in, camera pans along,
penguin reacts, jumps down, Penguin and
polar bear skate off. I think that timing
feels very nice to me, It feels very good.
I'm happy with that. I might make some minor
tweaks here and there, maybe that shot needs to
be a tiny bit longer. But overall, I
think that's great. I'm happy with that.
I'm going to move on to the next phase
of the project.
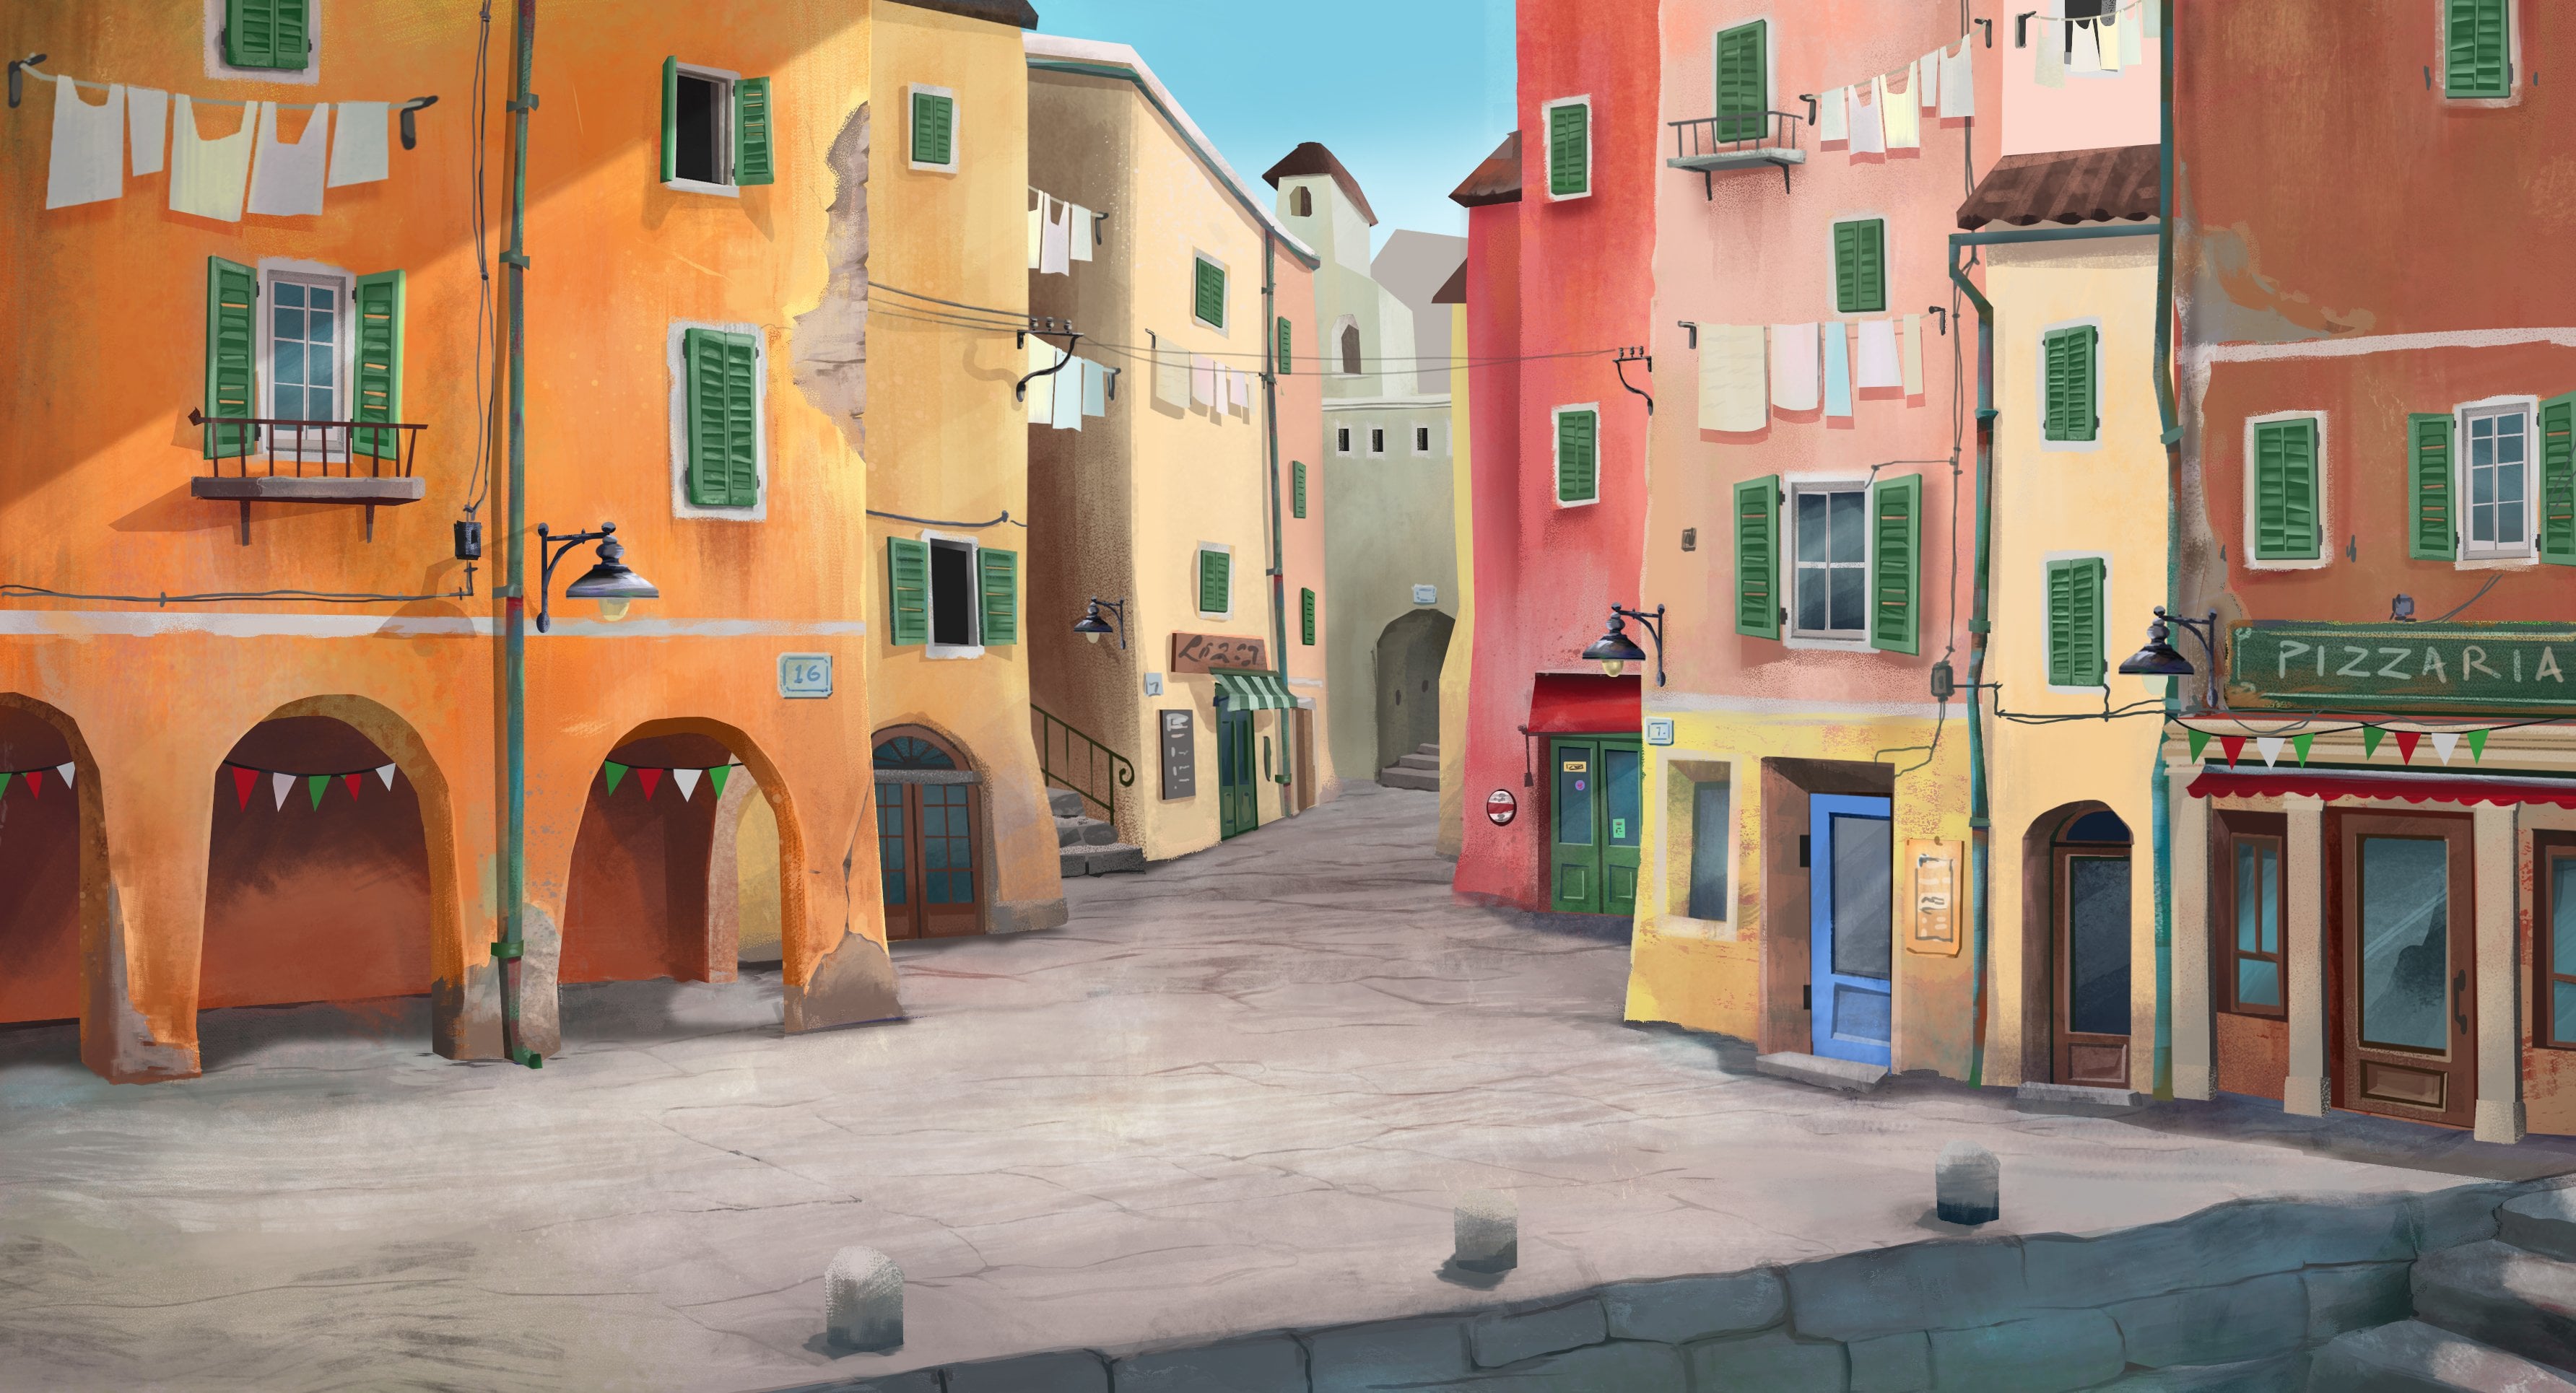
6. Painting the Backgrounds: In this lesson,
I'm going to paint up the background
for the animation. Now I'm going to do this in
procreate and then I'm going to import the layers of the painting over to
Procreate Dreams. Because I want you to see
that process as well. It's really nice the
way the two apps complement each other and
it's seamless to integrate. Now, you don't have to create
a background from scratch. In this class, you're
more than welcome to use my painting and simply focus on animating
your characters. That's perfectly
fine. If you like. I'll leave the file for you to download in the Projects
and Resources tab. But I did want to include this as part of the class so that you get to know and understand the full process altogether. I'm over inmprocreate
what I'm going to do, I've started with a very
wide canvas because I know that in my mind
I'm going to need extra elements at the sides to allow for camera moves
when I'm doing the long pan. But I'm just laying
down some lines to give me an idea
of my framing. For example, these lines here indicate my main
frame or my main stage. The way I approach background design for
animation is very simple. Just start out with as rough
a drawing as you like. Really just this
is about sketching your ideas out in a
thumbnail fashion. For me, I know in
this animation, I want to have a nice wide
scene of the landscape. In other words, I want
to have space where the characters are
going to skate in the center of the shot. That basically means sketching
out far away hills or mountains and sketching out some rocks and things
in the foreground. Now as I go, I'm going to be
naming my layers as well. That's really
important for later on down the road because when you start to import your
layers into procreate dreams, you want to be able to know exactly what layers
you're dealing with. My sketch is really
as simple as that. Now I'm going to start
painting it and adding color for that process. Again, start simple and
work in detail slowly. Just put down areas of color. I'm going to put
down some color for the ice and another
layer for the, putting down some
color for the sky. Now with that in place, you can then start to build
up textures and build shading and values and all of that to give more
detail to your background. I'm just using the
selection tool and choosing rectangle and drawing out a box really and then filling
that rectangle with color. Remember that the whole idea
for this background and for backgrounds in general in animation is that you want
to stay simple and clear. Background art for animation is not like a detailed
illustration. It's a backdrop to the action, to the animation
that's taking place. If background painting
is not your strong suit, it's fine to go with
what is most simple. You don't have to
overthink it or do very complex
illustration here. We just want something
that is going to be a nice backdrop. I'm painting the sky and just choosing texture
brushes to build up some interesting
tones and colors and blending that
in along the ice. I'm also going to just
add some texture, colors and tones. It's
very experimental. I'm really working
things out as I go. Sometimes when you're
creating a painting without reference material
like I'm doing here, it can take a while to find the right approach
in your painting. I'm just experimenting
with brushes. I'm seeing what works and just working
through it like that. You don't have to have
a very specific plan in mind and you can change
things up if you need to. The most important
thing that I'm trying to keep at top of mind is that I want to create a sense of depth and space
in the painting. Something like the mountains
in the background. I want to keep them very vague. Don't give them too much detail, because you want to give the impression that
they're really far away. Less detail the better. Just all I'm focusing
on is giving it a little bit of
shadow and a little bit of highlight to that local color or base color that I've chosen. That's all it needs
really to give the impression of
far away mountains. To draw the rocks
in the foreground. I'm going to use
the selection tool. And draw it shapes and then
just add a flat color. And then again go over it
with texture brushes to build up a nice,
interesting surface area. I know I want rocks
in the foreground, but I also want rocks that are going to be
used in the camera pan. This is something important
to think about when it comes to planning
out your animation. I know that I want the
camera to move along. What I'm doing here is
making two layers of rocks. That way I have enough rocks to be able to
make that camera pan work. Finally, in the background, I'll give a vague impression of a tree line simply to add interest and to add contrast
into the composition. And to do that, I'm just
using a rough brush, making some dark
marks like that, and then adding a little bit of white to give the
impression of snow. I think this is coming together. I love the composition here and I think this
is going to give me exactly what I need for the animation
that I have in mind. It's going to give me
that sense of space. And it's also going to give
me the opportunity to do that camera pan because I've
made this shot wide enough. I've added in enough
background elements. As I said before, the beauty of the sequence that we'll be
animating in this class is that the way it's
boarded out and the way it's planned so
far we can simply re, use this one background for all of the shots
within the project. That's amazing. In
the next lesson, I'll show you how to add this
file into Procreate Dreams.
7. Adding Background Art to the Timeline: Now we're going to add the background art to the timeline. And we're going to
match it up with the storyboard panels and
add our camera moves. What I'm going to do first
in Procreate Dreams is select everything on my timeline with the Timeline Edit tool. And I'm going to convert
this to a group. That way all of my story war
panels are in one group. That means that I can now click the playhead on this group. And I can choose
Filter And apply an opacity filter to open up the two apps
at the same time. Look for these three dots
at the top of the screen. There they are,
Choose split few, and pull up procreate. Then I'm going to start to drag the layers of my
background in one by one. It's important then just to import all of the layers
in the right order. I want the sky to be
at the very bottom. Then I'm going to move up
through the layers that way so that at the very top of the layers inside
approcreate dreams, the very top layer is the
layer with the rocks, they're all in my
procreate dreams document. What I'll do now is just tidy
up the layers a little bit, then group everything
together into one group. And drag it over to
underneath the storyboard, because I want to be able to see my storyboard on top
of the background. The background comes in a
lot bigger than the stage. What I'll do is
just scale it down. And you can at this point, if you want to arrange the
layers a little bit, you can. Okay. I've matched my background up to scene one and that's my establishing shot with the
polar bear skating in shot. The next scene over or the
next shot really is the pan. What I do is I find a cut in the storyboard,
which is right there. Then you can tap and hold on
the group and duplicate it. Now I've got the background
for my second shot, but this one is
going to be moving, it's going to be my pan. I'm going to start
with the mountains. I will turn off the storyboard
group by just checking off that little tick on the group itself with the mountains
track selected, drag the artwork over. Then come down to the start of the track and click
on Moving Scale. And then go up to the
end of the track. And tap it again. And move the mountains
over slightly. I don't know if
you notice there's also a slight tempo
to the movement. It starts slow, speeds
up, and it ends slow. What I want is a nice
constant, even speed. Click on the keyframe track in between your two keyframes
that you've just created. And click Set all easings to
linear that one layer done. We're going to now
repeat that process for the foreground elements, for the little bit of
snow that I've got, and for the rocks on
this piece of snow. I'm just going to put a
moving scale and slide that over on the rocks. I need to animate these rocks
coming in from off screen. I've got layers on
both of these tracks. I'm going to add key
frames and go to the end. Move them along
slightly and make sure that the second layer
or the second layer of rocks gets moved and
comes into view fully because this is the rock where the penguin character
will be sitting. All right, that is our pan done and it's
looking pretty good. It's very nice, smooth
and even motion. Okay, the next shot that
we have is this close up. For this a shot in animation, you don't actually need a
background in animation terms. This is called a color card
because it's a close up. You can get away with just having a color behind
the character. What I'll do is
just literally grab the sky from my
previous copy pasted here and scale it
down so it fits. Then I'm going to go back
over and grab that rock as well and paste that on
a track above The sky. Looks good, but what
I think I might do is quickly jump into mode. I will pull up my timeline or pull up my flip book
just to get full screen. And I just want to
finish off painting some color along the bottom
just to fill it out. There we go. So you can see
how one of the mindsets, if you like, of an animator, is to think about how you
can re use elements or re, use parts of your project over again instead of redoing
things all the time. Okay, for the last shot, again, I'll just copy the
background from the first opening scene
pasted in here. That is it. We've got all of our
shots composited, matching up our storyboard. Exactly. We've even got our animated camera
pan in this document. All right, in the next lesson, we'll start to animate
our characters.
8. Polar Bear Rough Animation: So in this session,
we're going to start our first animation cycle. So the way I approach
it is I like to work out my animation
in a separate file so that I don't mess up my
master file that has my storyboard and my background
already worked out in it. So I'm going to animate
my proto bear in a separate file and then
bring that in to, you know, the final animation file for my first animation is
a very simple skate cycle. What we're going to do is
first of all, draw very, very rough to work out the
main poses of the cycle. Then we're going to go back and add in the in between that we need in order to flesh out
the action or the motion. Then finally, we'll
do a clean up pass where we tidy up the
linework and we add color. This first pose is going
to be the first key pose, really, of the podo bear
standing on one leg. I'm just drawing very,
very rough this pose where he's standing with his
legs straight back out. And that's my main key pose. Now that I have that drawing, what I'm going to do is the
same pose for the other leg. So I'm going to add
a new frame and I'm going to redraw the
exact same pose, but this time I'm
going to switch legs and remember that this
is going to be a cycle, meaning that we're going to have the animation loop on looping. So he's going to be skating on the spot and that'll
give us a lot of flexibility to move
the actual animation around and it will look
like he's skating past. Okay, now I've got
two main poses, but there's also a third main
pose in a cycle like this. And that is the middle pose
where both of his legs are on the ice and he's crouched down in essentially
a squashed pose. He comes down and then he skates it out again
onto the other leg. I'm going to go back
to my first drawing. I'm going to click
this Add button. And I'm going to add a new
frame in between here. Because I have onion
skin turned on, I can see exactly where
I'm going to draw and how I need to draw
that crouched pose. One really good tip
is to make sure that all of the parts of your
drawing are following arcs. Sometimes I draw
an arc like this just to help guide me
to know where things should be or what path
they're traveling on between one pose and another. And then I simply erase that
guideline out afterwards. Okay, so that's our third pose. This is three essential
key poses that describe this action on the
skating action, if you like. Now, all I need to do is
add a few more drawings in. I want to add in some in between between each
of these main poses. And those in betweens
are going to smooth out the action and make it look a lot more fluid and
a lot more flowing. I'm going to go back
to my first drawing. I want two in between here. Between the first drawing and the crouched middle drawing. Now for this leg, I'm
going to draw him. He's coming into
this crouched pose. I want his leg to be dragging
downwards a little bit from that position into
the crouched pose. Something like that. Here's where in between, it's really useful
to use onion skin. That's great. Okay, now
I'm going to do one more. So that looks like he's
slowing down as he comes in and his back leg will
be coming down like this. What I'm doing is
I'm trying to make, I'm drawing it in between what I see is
the purple drawing, which is the previous, and the yellow drawing which
is the subsequent frame. Those are my guides. I in between literally in
between all of those lines. Now I've got my main pose. I've got two in between. I've got this
crouched down pose, and I've got my third key pose. I just need to add two
more drawings between the crouched down pose
and this last key pose, so that it's the same on either side of this
middle crouched pose. Okay, those are all my drawings and that's pretty
good, simple enough. But I'm going to need to draw the second leg
swing if you like. Basically, it's the same process for him skating on back
onto that other leg. What I'll do is I'll just
copy this crouch pose because this is definitely going to
be the exact same drawing. It's not going to change when he goes from one
leg to the other. I'm going to paste it
here in the timeline. This will give me the
drawing that I need to reference in order to make
my in betweens on this side. Okay, so I just need to do
my last two in betweens, but I need to reference the first frame because
remember this is a cycle. We want the animation
to wind up back on that first frame so that
it loops continuously. So just copy that
first frame over and now you know exactly
where your in betweens need to go
between the crouch down and that final frame. Now the last step is
that I'm going to select all of my drawings
using the timeline edit tool. And then I'm going to
double tap to get right down to see where you can see
everything frame by frame. Because I want each
of my drawings to be at least two frames in length. Simply to start off with, I want each drawing to
be on two frames. I'm going to grab, tap, and hold on the edge of this
first frame and drag it out. All right? So that's okay. Okay. This standing pose here is
going to be held because this is obviously where he's skating along nice and freely, and his leg is back like that. Just tap and hold on the edge of that and drag it out
should be long enough. I think there you have a really lovely, smooth and even
looking animation. Yeah, it was really
only about eight frames on each leg that
we have to draw. That's perfect, but it works.
It's really, really nice. In the next esson, I'll
show you how to clean up your rough animation
and add color.
9. Polar Bear Clean Up Animation: In animation terms, the
clean up process refers to when animators literally
clean up their animation. You always want to work out your animation in
a very rough way. And then go back in
and refine things and give it a nice clean
line and add color. In this lesson, we're
going to do our clean up. Okay, this is my
rough animation. Everything's working.
I'm going to use the time line edit tool to select everything
and make a group. And then I'll make a new track
above this so I can start the cleanup on the group. I'm going to add an
opacity filter again, basically just
hitting the playhead, choosing opacity and lower it down so that the track is
a little bit faded out. Then on this track, I'm going
to start drawing again now. I still want my animation to have that very
hand drawn look. I'm not going to be too
precise about my line work. I'm going to keep it
a little bit rough and hand drawn because I
personally like that style. I'm going to just really follow the drawing
underneath closely. Just aim to redraw
everything with less lines. Something like this will work well then once I've got the line work done,
I'll add the color. The way I'll do this is
I'll actually go up to the layer stack here in draw mode and add
a new layer there. Drag it underneath my line work. And add my color there
so that the line stays on top. Okay. Now, because my
polar bear is white, it's going to be a
little bit tricky to paint him up against
the white background. So I'm just going to add a swatch of color underneath
all of my layers, all of my tracks
in the timeline. And just a simple blue color
so I can see what I'm doing. Because we're doing frame by
frame, hand drawn animation. It is inevitable that things
will shift and change. That's just part of what I think is a nice look and feel
to this animation. But the one thing that
I definitely don't want to change too
much is the head, because that's the thing that
people will be looking at. If that changes, it
becomes really obvious. I'm going to animate
everything on two tracks. I'm going to keep
the head the same and just copy it for
each frame on one track. And then I'll draw to the body of the polar
bear on a track. Underneath essentially
all my animation is going to be on two tracks, the head track and the body
and legs on the other track. Because all we're doing now is simply re drawing
each frame by frame. We don't need to worry too much about moving
things separately, we're just literally tracing
over the rough drawings underneath and each frame, but just keeping the body
and the head separate. That way the polar
bear will look nice and consistent throughout
all of our animation. Just copying the head
over to the next frame, fit it in, you can zoom in, you can match it up
to the rough drawing and then move back
down to the next track and trace over the body
and legs for each pose. All of this process is
really just tracing. We've done our animation
actually in the rough pass. This pass now should
be as simple and as straightforward as
just tracing and copying. Now if it feels
like a lot of work, just keep in mind it's actually
only a handful of frames. Once you get into it, you fly through this clean up
phase really quickly. Just make sure that your process is very
nice and orderly. Make sure that you're making
two layers for your drawing, one for the line work,
one for the color. And make sure that you've got two tracks in your timeline. One for the head, which you'll
copy from pose to pose, and the other for the
body and the legs. You can see that I'm
making very small, slight adjustments on
my animation here. I'm not following the
rough drawings exactly. I'm using the rough
drawings as a guide. That's up to you. You can make those little slight
revisions as you work. Okay. Another thing
you'll notice is that the onion skin feature works for whatever
track you're on. If you are on the head track, you're not going to
see the onion skin for the body and vice versa. Okay, great. So now
I've done everything. I've grouped my entire animation into a folder and
I'm going to copy and paste that
group over just to extend the duration out. And play it back. There you go. That's really quite a lovely, smooth and even
Skate. I love this. I think this is
working really well. When you're ready, I'll see
you in the next lesson.
10. Penguin Blink and Jump: In this lesson, I'm going to animate our Penguin character. This is going to be a
very simple animation in this scene that
we're going to work on. It's literally just an
eye blink and a jump. I've got a new document and I've pasted my storyboard
panel in here. For reference, what I'm going to do is just
add a new track, then pull up the
flip book and start. But don't forget to add
an opacity keyframe to the storyboard just to bring
that down a little bit. Makes it life a lot easier. The only thing I
want to point out here is that what
I want to do is put the eyes on a new
track in my timeline. I'm adding a new track here on this track is where I'm
going to draw the eyes. Now, it might seem a
bit complicated to put the eyes on a separate
layer, but for me, I find this is the best way
to keep things organized, as well as the fact that
we want the blink to happen without having to change anything else
in our drawing. I don't want to have to
redraw the entire Penguin and when I'm doing the eye
blink for that reason, it's just really easy
to keep your eyes separate and just
change them up. When it comes to making
them blink, basically so great, I've got the
penguin body done. I will drag that out, and then drag the eyes as
well over about here now, I'm thinking that I want to have 22 eye blinks before
he jumps off the rock. I want one at about,
say, Frame 17. This is where I'll
do the first blink. Okay? I'm going to pull up
flip book and start to draw. Because my eyes are
on their own track, I can easily see the onion skin. That's another thing to note. If you have the eyes on the
same track as the character, you might not be able to see
the onion skin so easily. The way we're going
to do this blink is a standard formula
for eye blinks. It literally, it's
going to be going from an open eye like this. Then we want to have the eyelid come down about one
third shot like this. What happens here as well? The pupils will
move up slightly, then we'll go to a
two thirds shut, and then we'll go to completely
shut for two frames. Then on the open side, when the eye is opening again, we only need one frame where the eye is about
two thirds open. That there is the
standard formula for a regular cartoony eye blink fairly easy
and straightforward. Now if you can't see your
onion skin very well, then just go in and
what you can do is adjust the color of
your onion skins. Or adjust the
opacity so that you can see the pupil and the
eye bit more clearly. Then just start to
redraw according to those poses that
I just explained. This is the one third shut pose. Then I'll go ahead and
do two thirds shut like that with just a small
bit of the eye white showing. Then finally, the
eye shut completely, which we will hold
for a second frame. Then to finish it off, all I actually need to do is copy that previous
one third shut, copy that frame,
paste it over here. And then again, copy
the eyes wide open. That's your blink. So what you can do then is use the timeline edit tool
to select these frames. This is your eye blink. Group them and then copy that group and just paste it
further down the timeline. Copy your open eyes
and extend that track out and extend
the body track. Now if you play it back, you should have a really nice simple couple of eye
blinks like this. Perfect. Okay, that's done,
very simple animation. But I think it captures his disbelief at this
polar bear that's skating. Next, I want to animate
him jumping off the rock. Again, I'm going to do
that frame by frame. From this set of position, I will draw him going
up and then down and jumping when he is
jumping off the rock. Just keep in mind that he's
coming forwards in space. When he jumps off, he's
coming towards us. I want him to get a bit
bigger as he comes forward. Okay, those are all
of my rough poses. I'll group them, go through
the exact same process again as I did previously and
redraw this for animation. Again, I'm keeping
the eyes here on a separate track because it's just easier to see
them in the onion skin. If they were on the same
track as the penguin body, it would be harder to see them. The one thing that
you want to make sure is that something like the eyes is going to be moving in a nice
smooth and clean. If the eyes are anyway off, that'll really stand out. Okay. Now I do want to point
out a couple of things here. I'm aware that as
I'm doing this, my colors are slightly off, but that's okay,
because you could even treat this as
another rough pass. And then once all of the
animation is tied down properly, then you can go back in and really tidy things up.
And that's what I'll do. I'll make sure all my colors
are matching up afterwards. The other thing that I
wanted to point out is that in the scene when the
penguin is jumping towards us, make sure that you do make him slightly bigger as he
comes towards the camera. Don't have the body be
the exact same in volume. You want to kind of give that impression that
he's coming closer. So just keep that in mind when you're doing
your animation. Okay, so then finally we'll play our animation back if you think, you know that you
need to add a couple of in betweens at maybe at the start of the jump or at the end you can go
ahead and do that, but that's really it. I think that's perfect.
And believe it or not, we just have one more scene to animate and that is
our Penguin skating. So when you're ready, I'll
see you in the next lesson.
11. Penguin Skate Cycle: We've just got one more piece of animation to do and that is
our Penguin skate cycle. This is going to be
really easy because it's a very simple, very
stylized character. We'll fly through
this, I'm going to open up a new
document and I'll hop straight in
and start roughing out some thumbnails
for the animation. As I said, because this
character design is so simple, it's going to be very easy. I am going to have a main
pose that will be like this. Let's say his leg that's
back is facing us. That's the front leg. Let's say that's going back. Then the other pose
that I want to draw, the other key, or extreme pose, is going to be the opposite leg. Exactly the same as when we
animated the polar bear. But maybe a bit simpler to draw. It's just two poses. We want a pose in the middle, that'll be our squashed pose. Or the pose where both
feet are on the ice, right? So then I'm
going to go back to my first pose and I
want to add in two in betweens to get us from that extreme pose to the
squashed middle pose. And then from the middle pose, I want to add two in betweens. That will take us from there
to that next extreme pose. To complete the cycle, I need to do the same thing on the other side or for the
other swing of the leg. For that, I can copy these
drawings over simply, and that completes the cycle. That's because this
character is so simple. The legs are basically just like these lines and the
body is just one shape. It's perfect. It's really easy and very, very
straightforward. Okay, next up,
I'll select all of the frames and I'll
make sure that each frame is at
least two frames long by just tap and hold on the right edge
of the very first frame. Place your finger
onto the timeline and drag that out to
frame number two. So now I know each frame, each drawing I should
say is two frames long. Okay, So that's a very
nice and zippy skate. But what I will do, I think, is just extend out
both of my key poses. Give them a bit of a hold and just make that a
little bit longer. Give the pause on those frames. Tap and hold again. Place your finger onto the track and drag the
edge of that frame out and that's perfect. Okay, that's a
lovely little skate. I think I'm happy
enough with that. What I'll do is go ahead and
clean it up and add color. If you want to, you can copy your Penguin from
the last animation. And color pick from the body, and color pick from
the beak and things like that to make sure
that you stay on model. Now it's simply a
matter of following the rough animation and painting
this up frame by frame. Because this animation
is so simple, there's no need to put elements on different tracks
or anything like that. The only reason that I'm using another layer in
my drawing is to indicate that one leg is behind the penguin body and
one leg is in the front. But you don't have to do that. If you don't want to, it's not going to be that noticeable. If you really want to, you could have something
like the beak, Have that on a separate track in your timeline instead of having
to redraw it every time. If you feel that the shape
changes a bit too much, that's something that
you could look at. If you wanted to
keep it consistent, I would recommend doing
that on a separate track. But for me, not too
fussy about that, I think keeping everything on one track is just keeping
it very, very simple. Okay. So that's all done. I think that looks
really good to me. I'm very happy with that. What I'll do is
select everything, select all the
frames, group them, and then duplicate
that group simply to extend the
animation out a bit. Believe it or not, that's our character
animation completed. We've now done our storyboard. We've painted a background. We've even composited
the background into our storyboard file and
added camera moves. We've animated a
polar bear skating, and we've animated our Penguin. All of the animation is to
now be brought back into that main master file and move
into the composite phase. When you're ready, I'll see
you in the next lesson.
12. Compositing the Animation: Now we are actually
in post production. Believe it or not, we have
successfully achieved full animation design
and storyboard, and now we just simply need to composite or compile all
of our scene together. I will hop back into my original master file
that has my backgrounds in. If I scrub through this file, you'll see that this is what we originally built
up with our shots. Everything's in order. We've got our camera pan and now I'm going to go and pick
up my animation files. I've got my first animation, which is the Polar Bear skating. I simply will copy that
group out of this file, then go back into my scene
and paste it in here. At the beginning, this I want to match up
with my first shot. That's perfect, that's in place. I'm going to bring the
playhead to the front and just scale them down here. Create a key frame off screen and then go to
the end of the group, create another boovid
scale key frame. And then I can drag
him in like that. Perfect, he skates
on. That's great. All right, the next
scene is the pan. So I'll copy and
paste the Polar Bear. Place them in the middle.
Then I'm going to hold down on the key frame track and
just delete those keyframes. Because in this shot, the camera is paneling, so we want the animation
to be in one spot. Get rid of those moving
scale keyframes, drag the character into the middle and just scale
them up a little bit. Then I will copy the
group again, really, to make sure that we
have enough animation for the duration of this shot. Okay, great. And just make sure to trim the
animation to the cut. To the cut of the scene. Okay, so just make sure to trim the animation
to the cut of the scene. Just drag the edge
of that group to where you see that red line
that indicates your cut. Perfect. Okay, our
next shot then is the penguin close up
getting that reaction shot. I will grab that animation out of the animation
file and bring it in here and paste it onto the timeline just
after the polar bear. If you do need to scale up or scale down your
animation, that's fine. You can go ahead and do that. And then grab the
potter bear again. So copy and copy
the previous group, paste it here twice so that
I have enough animation. Then I will tap on
the time line edit, select both of those, and group them again, because I want to create key frames for this entire
chunk of animation. If you like, I will go ahead and set a key frame
at the beginning, move and scale, and
then one at the end and have the Polo bear skate
right the way through. Then lastly, go grab my Penguin animation and
paste that into the file, adjust it and scale
it down as needed. Then it's totally up to you. You can play around
with the timing of how these two
characters move. You want the polar bear to skate through all the way first, and then the penguin tries
to catch up with him. Or maybe you want
both of them skating in at the same time.
That's totally up to you. Another very cool thing that
you can do is you could even have them skate off
and then flip them. What you could do is click on these three dots here and
then choose flip horizontal. Now you can have them
skating back on again. Maybe they skate
off and then they turn around and they
skate back on screen, and then they move off
into the distance. Okay, there's one final
shot that I need to finish because I skipped over it to get all of the
other animation in. But this is very, very easy. It's the very last
thing I'll do. I'm going to swing back to the camera pan in the
beginning and I'm going to add in a
very simple drawing of the penguin, all right? Because I wanted him
to be sitting on the rock as the
camera pans along. The reason I wanted to
do this separately is just to show you like
a handy way to do something if you need to add in something on animation
that's already moving. For example, like this, I
want to add the penguin. The way that I solve this is it would be very tricky to try and match up the movement
or the motion of the pan, but what you can do
is just simply go into the actual rock itself, go into that, go into draw mode, and then add a new layer in
your drawing of the rock. And put a guide on
the rock so that you know where you want
the Penguin to be. Then I'm going to place my
Penguin in the right position. Key, frame him out, make sure it all matches up. Make sure that he is in the right place at the
beginning and the end. Then I'll go back into
the rock drawing, go back up to my layers
and delete that guide. Okay, and that's
it, that's perfect. Our animation is complete. Well, nearly There's one last final thing
that I want to show you, and that is how to add sound effects and music
to your animation. So when you're ready, I'll
see you in the next lesson.
13. Adding Sound and Using the Performing Feature: Now I'm going to
add sound effects and music to this file. Whenever you add any sound to anything that
moves on screen, it immediately gives it life and believability When I'm
animating something, I always like to have the sound underneath all of
my content layers. That just keeps everything nice and ordered
in your timeline. So I've left the sound
effect I'm going to use and the music track for you to access over in the Projects
and Resources tab. So go ahead and download
that onto your device, then once you have
it on your ipad, go over to the plus button
and choose Add Files. The first file that
I'll bring in is the sound of skates on ice. Click open and there you
see it on my timeline. Okay. Just like any
other piece of content, you can drag it around and
move it about if you need to. If I play it back, it's a little bit out of
sync, but that's okay. As I said, you can just
move it around and match it up to the
frames that you want. Exactly. You can also edit it right here
and Procreate Dreams. You can copy and paste
and cut the content like that because he's not
on screen in this shot. I'm going to leave
Skate Sound out, but then I'll place it in
here again. And at the end now I also have some
music coming in. Skate Sound isn't going to
be quite so overbearing, but let's go ahead
and add in the music. You can actually
see the web form on the track and that makes it so much easier to
know where to place it. I'm going to drag it
off to the side so that the music starts as soon
as the scene opens. Let's play it back, so that's good. But we do want the sound
to fade out at the end. Again, inside procreate
dreams, that's so easy. You just go to the end. And you can even trim the music track if you need to to the length
that you want. But roundabout here,
I'll just tap on the playhead and you can see it has the option to
adjust the levels. My first key frame here for the levels is
going to be at 100. Then I'll go to the end, and then I'll drag
it down to zero. Okay, now the final piece that I want to add onto this
animation is I want to use the performing feature
in Procreate Dreams and adjust that final shot where the penguin and the
polar bear skate off. It's so much fun to use
performing in procreate dreams. You can literally simply drag your elements around and it
will animate them for you. Let's go ahead and do that. What I'm going to do is turn off the sound timeline by
just checking off the, on the layers of the audio. Just by taking that tick off
that will mute those tracks. Then I'll come up
to my final scene, which is here in this group. So I'll just open that group up. I have them already skating
from one side to the other. You can leave those key
frames as they are. Tap on the performing
button and it'll turn red. And you'll see up on the
corner there it says ready. Now, as soon as I touch
my pencil to the screen, whatever action or motion
that I do on screen will be recorded and
animated in real time. I'm going to use
the scale function and I'm going to scale the polar bear up a little bit and scale him
down as he goes out. And that'll give the effect
of him coming towards us. Turn that off and play. That's really nice. That's a
lovely natural fluid motion which gives it just
that natural feel. I'll turn that layer off and I'll do the same
with the Penguin. Back up to the Penguin.
Go to the start. Turn on performing,
everything's ready. I'll do the same
for the Penguin. This is such an intuitive and remarkable way of animating. It seems like it would
hardly be possible to do it, but for some reason, somehow procreate is able to record what your pencil does on the screen and
turn it into key frames. All right, so that's
our animation. Fully finished, fully animated, and even post produced with
sound and sound effects. So it's a really simple scene, but it has all of the components of a proper animated short film. And the process that we've
gone through to get here mirrors something that you would do in an actual
animation studio.
14. Conclusion and Wrap Up: Well, congratulations on getting
to the end of the class. The project now is complete
and the only final, final thing that I did, which you certainly
don't have to do this, but I added some clouds. It's not essential to
have in your project. I just thought it might be a nice way to open
up on the scene. All I did was really simply use a few very large brush strokes, and I applied scale animation onto them to give the effect
that they're scaling up. All in all. Here's
our final clip, Now it's over to you. I really hope that
you've learned a lot in this class
and that you've had as much fun as I did in creating this very
simple animated short. More importantly, I hope that you've seen the power
of procreate dreams. And that you've realized
the potential that it can hold for you to be able to really easily create your own animations
without having to jump across different
software or different apps. Finally, I really hope
that you've learnt easy, straightforward and
simple way to build out complex animation
projects by just breaking them down into stages and taking each stage
one step at a time. Don't forget Re using
assets and Re using animation cycles is the way to cut your project
work load down. Also my last tip is don't
forget sound effects. Supercharge your animation
sound effect will make anything that you've
animated seem even more impactful and more real. Before I sign off, I just want to point you
in the direction of some additional resources and
classes that you can take. First up, definitely
go and check out Procreate Dreams
online that go to Procreate.com
forward slash Dreams right here under
the support tab. They have tons of really
useful articles and tutorials. Also, don't forget to explore more classes here
on skill share. There are so many great
classes on offer. You can browse
through here and find classes to expand
out your skill set. It's just left for me to say, thank you so much for
spending time with me today. I really hope that
you've learned a lot. I hope that you post
your project up in the Project and
Resources tab and I'll be there and
I'll be able to give you feedback and answer any
questions that you have.
 Siobhan Twomey, Artist, Illustrator, Instructor